Energy 124 - Battery charger GYS - Free user manual and instructions
Find the device manual for free Energy 124 GYS in PDF.

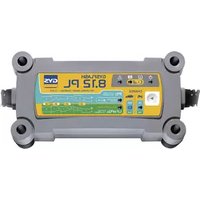
| Product type | Lead-acid battery charger |
| Brand | GYS |
| Model | Energy 124 |
| Charging voltage | 12 V |
| Charging current | 3 A |
| Recommended battery capacity | 10 Ah to 45 Ah |
| Mains power supply | 230 V ~ 50/60 Hz |
| Compatible battery type | Lead-acid battery with liquid electrolyte |
| Battery tester function | Yes (built-in voltmeter) |
| Reverse polarity protection | Yes (by fuse) |
| Overcurrent protection | Yes (front fuse) |
| Thermal protection | Yes (thermostat, cooling time approx. 15 min) |
| Fuse | Automotive, rating indicated on the device |
| Electrical class | II |
| Use | Indoor only |
| Maintenance | Dusting with a blower, cleaning with a dry cloth |
| Disposal | Selective collection (do not dispose of in household waste) |
| Warranty | 2 years (parts and labor) |
| Included accessories | Insulated charging clamps (red and black) |
| Maximum operating temperature | 50 °C |
| Standards | Compliant with European, EAC, British, Moroccan directives |
Frequently Asked Questions - Energy 124 GYS
User questions about Energy 124 GYS
0 question about this device. Answer the ones you know or ask your own.
Ask a new question about this device
Download the instructions for your Battery charger in PDF format for free! Find your manual Energy 124 - GYS and take your electronic device back in hand. On this page are published all the documents necessary for the use of your device. Energy 124 by GYS.
USER MANUAL Energy 124 GYS
FR 2-7/43-44
EN 8-13/43-44
DE 14-19 / 43-44
ES 20-25/43-44
RU 26-30 / 43-44
NL 31-36 / 43-44
IT 37-42/43-44
Energy 124 / 126
ANOMALIES, CAUSES, REMÉDES
This manual includes guidelines on the operation of your device and the precautions to follow for your own safety. Ensure it is read carefully before first use and keep it handy for future reference. These instructions should be read and understood before anyone operates the product. Any modifications or maintenance that are not specified in the manual should not be undertaken. The manufacturer is not liable for any injury or damage due to noncompliance with the instruction manual. In case of problems or uncertainties, please consult a qualified person that is able to handle the device correctly. This device should only be used for charging within the limits indicated on the device and in the manual. The safety instructions must be followed. In case of improper or unsafe use, the manufacturer cannot be held responsible.

Device suitable for indoor use only. Do not expose to rain or excessive moisture.
This device may be used by children from age 8 and by persons with reduced physical, sensory or mental capabilities or lack of experience and knowledge, provided that they are under supervision or have been told how to use the device safely and are aware of the potential risks. Children must not use the device as a plaything. Cleaning and servicing tasks may not be carried out by children unless they are supervised.
Do not use for charging non-rechargeable batteries.
Do not operate the device with a damaged power supply cord or a damaged mains plug.
Never charge a frozen or damaged battery.
Do not cover the device
Do not place the device near a fire or subject to heater or longterm temperatures exceeding 50^ C
Do not obstruct the cooling vents. Refer to the installation section before operating the machine.
Risk of explosion and fire!
A battery being charged can emit explosive gas.
- During the charge, the battery must be placed in a well ventilated area.
- Avoid flames and sparks. Do not smoke.
- Protect the electrical contacts of the battery against short-circuiting.


Acid projection hazard!
- Wear safety goggles and protective gloves
If your eyes or skin come into contact with battery acid, rinse the affected part of the body with plenty of water and seek immediate medical assistance.
Connection / disconnection:
- Disconnect the power supply before connecting/disconnecting the device to/from the battery.
-
The terminal of the battery that is not connected to the car frame must be connected first. The other connection must be made on the car frame, far from the battery and the fuel line. The battery charger must be connected to the power supply network.
-
After the charging process, disconnect the battery charger from the power supply network and remove the connector from the car frame and then the connector from the battery, in this order.

Connection:
Class II device.
- This machine is fuse-protected.

Maintenance:
- If the power supply cable is damaged, it must be replaced by the manufacturer, its service agent or an equally qualified person.
- Service should be performed by a qualified person.
-
Warning! Always remove the power plug from the wall socket before carrying out any work on the device.
-
If the internal fuse is blown, it must be replaced by the manufacturer, its after-sales service or an equally qualified person.
- Regularly take off the cover and remove dust with an air gun. Take the opportunity to have a qualified person check the electrical connections with an insulated tool.
- Under no circumstances should solvents or other aggressive cleaning agents be used.
- Clean the device's surfaces with a soft, dry cloth.
Réglementation :
C E
The device complies with European Directive.
The certificate of compliance is available on our website.
EAC
- EAC conformity mark (Eurasian Economic Commission)
UK CA
Equipment in compliance with British requirements. The British Declaration of Conformity is available on our website (see home page).

Equipment in conformity with Moroccan standards.
- The declaration C_ (CMIM) of conformity is available on our website (see cover page).

Mise au rebut :
- This product should be disposed of at an appropriate recycling facility. Do not dispose of in domestic waste.
GENERAL DESCRIPTION
The chargers ENERGY 124 and 126 are designed to charge lead acid batteries with liquid electrolyte, nominal voltage from 12V (6 elements of 2V ), and with capacity according to the following table:
| Current Minimum | Maximum | ||
| ENERGY 124 3A | DC 10 Ah 45 Ah | ||
| ENERGY 126 4A | DC 15 Ah 60 Ah |
OPERATING MODE WITH TESTER FUNCTION
When it is not connected to the mains supply, this charger is a battery tester. It lets you know the state of the battery. The integrated voltmeter informs you:
- <12.3V : battery to be charged
- between 12.3 and 12.6V : middle charge
12.6V : charged
CONNECTION IN CHARGER FUNCTION
Preliminary precautions
- For indoor use, with good ventilation.
- Remove the battery caps if there is, and check the level of liquid. If it is not correct, filled up with distilled water. Clean well the battery terminals.
- Check if the battery capacity and voltage are compatible with your charger.
Connection and disconnection
- Disconnect from the battery all electronic system during the charge (Do not charge the battery when it is connected to the vehicle as it may damage the vehicle's on-board electronics).
-
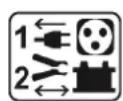
Connect the clamps (+ red, - black) to + and - battery terminals, making sure you get a good electric contact, respecting the following order.
-
Connect first the battery terminal not connected to the chassis of the vehicle.
- Then connect the other connection to the chassis remote from the battery and any fuel line.
- At last, plug in your charger to 230V50 / 60Hz mains supply.
After charging, disconnected the battery charger from supply mains. Then remove the chassis connection and the battery connection, in this order.
Control of the charge process
- You should observe a variation of the voltage indicated by the voltmeter. When this voltage is over 14,8 volts, the battery has reached its full charge state. The charge must then be stopped.
- Do not connect the charger more than 24 hours on a battery.
PROTECTIONS
Your product has been developed with a maximum of protections:
- The clamps of the battery are isolated.
- The polarity reversal will not cause danger. The protection is insured by an automotive fuse, which must be changed in case of polarity error. Respect the rating of the fuse, which is indicated on the charger.
- Your charger is protected against over current that can occur with faulty batteries or false use of the product.
Thermal protection: the transformer of the product is protected by a thermal switch (cooling: about 1 / 4 h).
SULPHATED BATTERIES - START - POWER SUPPLY
If your battery is sulfated, the indicator of the voltmeter goes directly up to the maximum. In that case, you can try to recover the battery by letting the charger connected for several hours (24 hours maximum).
- Do not leave your charger plugged on your car when you start it. It can break the fuse.
- Do not use your charger like an auxiliary power supply. It is forbidden to pull up current from the battery when the battery is connected to the charger.
TROUBLESHOOTING
| Symptoms Causes Remedies | ||
| The machine's voltmeter does not fluctuate. | No mains voltage Check that the power cord is plugged to a 230V 50/60Hz socket. Check the power supply network. | |
| Clamps in short circuit or polarity reversal. | Remove the clamps. Check that the fuses have not melted and that the circuit breaker is not tripped | |
| Blown fuse Replace the fuse by a new one. | ||
| The charger is properly connected but it does not charge the battery | Blown fuse Replace the fuse by a new one. | |
| Bad clamp connections. Clean the terminals and the clamps. Check the state of the cables and clamps. | ||
| Following intensive use, your device has entered thermal protection mode. | Wait 1/4h so the device can cool down. | |
| The fuse blows every time it is replaced | Polarity reversal Connect the + clamp to the battery's (+) and the + clamp to the battery's (-). | |
| Starting the vehicle Do not perform any starts when the charger is connected. | ||
| Current overconsumption on the battery | Do not draw any of the battery's current during the charge | |
WARRANTY
The warranty covers faulty workmanship for 2 years from the date of purchase (parts and labour).
The warranty does not cover:
- Transit damage.
Normal wear of parts (eg.: cables, clamps, etc.). - Damages due to misuse (power supply error, dropping of equipment, disassembling).
- Environment related failures (pollution, rust, dust).
In case of failure, return the unit to your distributor together with:
- The proof of purchase (receipt etc ...)
- A description of the fault reported
HnkOrda He 3apJxaiTe NOBpeXdEHHbI NJI 3aMep3sI aKKymyIaTOp.
He nokpbBaIte annapaT.
He yctaHaBnBaTb aPnapat PdOM C nCTOuHnKOM TeIpa I He NODBePraTb BbICOKm TeMpePaTypaM (Bblwe 50^ ) B TeueHnn DInTeJbHoro nepnoDa.
He nepekepbiaTe BeHTnlaZIOHHbIe OTBepCTna.
PpeBapnteHbIe Mepbl npedoctoPOXHOCTN
PaBotaTe B KpbITOM, XopoIIO npOBeTpIBaEMOM NOMEueHIN IIN CNEuaJIbHO O6OpyDoBaHHOM NOMEueHIN.
OTBnHTnte npo6kn aKKymyIaTopa (ecn TaKOBbIe HMeIOCTc) n y6eINTEc, YTO yPOBeHb KNDKOCtN (3JIeKTPoJIITa) DOCTaTOHyB. B npOTNBOM clyuae, do6abTe DCNTINlnpoBaHHO BObl. TuaTeNbHO ONUCTNe 3aXkMbI IN KJIeMMbl aKKymyIaTopa.
- Поберп Te YTO EmKocTb (В Amпep Yacax) И Наряжен (В Вьл Tax) AkkMyIЯTopa COBmecTnMbI C 3aprHbIM yCTpoIcTBOM.
IopKJIIOUeHne I OTKJIIOUeHne
- OtcoeHnHTe OT aKKyMylTopa BCE 3JeKtpoHHbIe yCTpoiCTBa BO BpeM 3apJKn (He 3apJkaTb AKB, ecIn OHa NODKNUeHa K ABTomO6nIO, T.K. cyueCTByET PnCK NOBpeKdEHHa 6OpTOBn 3JeKtpoHKn).
-
PóndcoeHNHe 3aKIMbI (+ KpachbI N - YepHbI) K KJIeMMaM + n - aKKyMyJrTopa, o6ecnueHB xopoWNI KOHTAKT n co6JIouJa cIeDyUoIIN nopAdoK:
-
PódcoeHNHtE cnePbA KIeMMy, KOToPA He coeINHeHa C WAccn ABTomObNJIA.
3aTeM IOdcoeINHHe KIeMMy Ha IaCCn, B MeCTe, HaxoJzIMcra KaK MoXHO daJIbWe OT aKKMyJrTopa N OT KaKnx II60 Tpy6OpOBODB ropUcero.
B nocneHIOO oupeb, noKIOUHTe 3apAHOe ycTPOIcTB0 K cTeBOMy nTaHIO 230 B 50/60 T.
- После зарядкг OTКлIOчITE зарДHoe yCTpoIcTBO OT CEtN, 3aTeM OTKJIIOчITE coeINHeHne C wAccn N, HakoHcL, coeINHeHne c aKKMyJrTOpOM. ImeHNo B 3Tom nopAKe.
Ha30p3a npoeccom 3apdkn
Bbl DOnKbI co6IIOaTb Kone6aHHe HnprXeHn, yka3aHHoe B0lbTMetpom. Korda 3TO HnprXeHne npeBbIaET 14.8 BoIbT, akkMyIaTOp dOcTnHnprXeHn noJIHO 3apJKn. B 3OT Momet HxKHO npeKpaTtB 3apJky.
He octabIaIe annapaT noikIIOUeHNbIM K aKKyMylrTopy 6oJIee 24 acOB.
3AUHTbI
3TOT annapat pa3pa60TaH c MaKcImaJbHbIMn 3aunTAMN :
- ⅠЗолиpopованные захимы заюк.
- INHbepnnaonpaHcTne He onaHa. 3aunTa oecneheHa aBtOMo6nIbHbIM nlaBKM npdeoxpAHTeJe, KOtOpbHnado 3aMeHNb B cIyuae Own6Kn. Co6nOdaIte KaII6p npdeoxpAHTeJIy, yKa3aHHb Ha annapate.
- Annapat 3auiuieh npotnb CBepxtoka, KOtOpb MoKet NOBtbcra n3-3a dekeTHoro aKKyMylrTopa nn HnnpabnIbHOrO o6paueHn.
- Tepmo3aunTa: TpaHcfoopMaTOp aannapaTa 3aunuien C nOMObTo TepMopeNe (oxnaKeHne: npImepHo 1/4 yaca).
CylbΦATNPOBAHHbIE AKKYMЛrTOPbl, 3AnyCK, NITAHNE
- Ecnn aKKymyIaTOp cyIbfoAtnpoBaH, cTePknA BoJbMeTpca pa3y Je noDnHmEtCdo MaKcMyma. B 3ToM cnUyae Bbl MoKeTe NOnbItaTbC4 OUnCTntB erO, OCTaBnB 3apAHOe yCTpoNCTBO nOKnIOueHHbIM K aKKymyIaTOpY B TeueHne HeCKoJIbKnx YacOB (MaKcMym 24 Yaca).
- Hikorda He octabnIte annapat nodkloueHHbIM K aBtOMo6nIO BO BpeM 3anycka. 3To MoKeT nCnOpTnTB npedoxpaHnteIb.
He nCnoIb3yIte 3apAIDHO yCTPOIcTBO B KaueCTBe BCNIOMORAteBHO NITAHNO. COBepHHeHO 3aIpeueHO notpe6JIaTB TOK OT aKKMyIaTopa KOrda 3apAIDHO yCTPOIcTBO NOIKNIOUeHO.
HENCNPABHOCTN, INX PIPNUHbI UYCTPAHEHNE
| HenschpabnHOCTN PrinuHbI UcTpaHene | ||
| Стrelka Вольtmetpa annapaTa He OTKLOHЯETc | Het NaPraJGeHnB B cTeN. Y6eDInTeCb | чTo StHyp BkLIOUeH B po3eTky 230B 50/60Гц. ПрOBepbTe ΕлeKTpOcTeB. |
| ЗжIMbI 3akOpOeHbI nII INHBercnI PОlaRHoCTn. | ОТсоeДиНe 3axIMbI. ПрOBepbTe, He paCπλaВιnIcsb Ll ПλaВКe IprEdoXpaHnteIи ChTo IprEpbIBaTeIb BdAblen. | |
| ПерEROpel пλaВКн IprEdoXpaHnteIb | ЗameHNTe пλaВКн IprEdoXpaHnteIb. | |
| AnnapaT npaВильноюпоклIoуЧeн, Ho 3apYd Ha AKБ He 3apЯЖaETc | ПерEROpel пλaВКн IprEdoXpaHnteIb | ЗамeHNTe пλaВКн IprEdoXpaHnteIb. |
| ПлoxoI KOtAKT Na 3axIMax IprOuIc | СтHTe KIeEMMbI AKБ и 3axIMbI. ПрOBepbTe coSTOЯHne Ka6eJIe N 3axIMOB. | |
| В apnapaTe BkLIOUHJaSCb TepMO3aUHTa N3-3a ИNTeHcNBIHOrO INcNoIb3OBAHЯ. | ДаΙte apnapaTy OCTbIHyTb B TeueHne 1/4 уca. | |
| ПpeOxpaHnteIb Neperopaet kajdsI pa3 поLE зameHbI | ИнВерCSI ПОlaRHoCTn ПОдCoeДиHIT | e 3axIM + K ПОЛIOcy + aKKyMylЯTopa N 3axIM - K ПОЛIOcy - aKKyMylЯTopa |
| ЗanucK abTomobиЯ He 3abOdIte ab | Tomobиь C ПОдcoeДиHeHHbIM K HeMy 3apYdHbIM UcTpoiCTBOM. | |
| Сberxnotpe6JIeHne TOK ha aKKymyJIaTope | He IncnoJb3ObATb TOK AKБ BO ВрмЯ ee 3apYdKn | |
TAPAHTR
TapaHTn paCnpocTppaHReTc H NaIO6o3aBODCKO DeΦeKT Nn 6paK B TeueHne 2x Jnt C DaTbI NOKyTNuN3dEInr (3anYactn n pa6oay cna).
TapaHTnHe paCnPoCTpaHЯETcHa:
- JIO6bIe NOnOMKn, BbI3BaHHbIe TpaHCnOpTnpOBkoN.
- HopmaIbHbI n3Hoc DeTanei (Hanpimep : ka6eJI, 3axIMbI n T.D.).
CnyuHnepaBnIbHOro nONoB3OBaHn(oun6ka nTahnna,paHeHpe,pa36Opka).
Cnyuany BbIXoJa n3 cTPOy n3-3a OkpykaIoJe cpebl (3aqrpaHHeNe Bo3dyxa, Koppo3n, nbIb).
PnBbIXoJe n3 cTpo, o6paNTecb B nyHKT NOKyKnAnnapaTa C npdeBraHHeHem CneDyoUxN DOKymENTOB:
- DOKyMeHT, NOBtBepKdAIOUIN NOKyNk (c DaToN): Kaccobbl Yek, INHBOIC....
-ONHcHHe NIOJOMKn.
BELANGRIJKE VEILIGHEIDSINSTRUCTIES