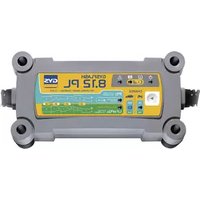
Gysflash S 1.12 PL - Battery charger GYS - Free user manual and instructions
Find the device manual for free Gysflash S 1.12 PL GYS in PDF.
| Product Type | Automatic Battery Charger |
| Brand | GYS |
| Model | Gysflash S 1.12 PL |
| Supply Voltage | 100-127 VAC, 50-60 Hz |
| Charging Current | 1 A |
| Compatible Battery Types | Lead 12 V (2-32 Ah, maintenance up to 100 Ah); Lithium LFP 12 V (0.5-20 Ah, maintenance up to 50 Ah) |
| Charging Modes | Lead (14.4 V), Cold/AGM option (14.7 V), Lithium (14.4 V) |
| Charging Cycles | 7 steps for lead, 8 steps for lithium |
| Protections | Reverse polarity, short circuit, spark-free, temperature sensor, double insulation |
| Maintenance Charge Function | Yes, with maintenance every 10 days in lithium mode |
| Indicator Lights | Status LEDs (charge, OK, fault) |
| Operating Temperature | Up to 60 °C (thermal protection beyond) |
| Electrical Class | II (double insulation) |
| Standards | EU, EAC, British, Moroccan (CMIM) |
| Warranty | 2 years (parts and labor) |
| Maintenance | Unplug before cleaning; dry cloth; damaged cable replaced by a professional |
| Supplied Accessories | Clamps, terminals, cigarette lighter adapter (ref. 029439) optional |
Frequently Asked Questions - Gysflash S 1.12 PL GYS
User questions about Gysflash S 1.12 PL GYS
0 question about this device. Answer the ones you know or ask your own.
Ask a new question about this device
Download the instructions for your Battery charger in PDF format for free! Find your manual Gysflash S 1.12 PL - GYS and take your electronic device back in hand. On this page are published all the documents necessary for the use of your device. Gysflash S 1.12 PL by GYS.
USER MANUAL Gysflash S 1.12 PL GYS
ANOMALIES, CAUSES, REMÉDES
CONDITIONS DE GARANTIE
This manual contains safety and operating instructions, to be followed for your safety. Please read it carefully before using the device for the first time and keep it for future reference. Read and understand the following safety instructions before use. Any modification or updates that are not specified in the instruction's manual should not be undertaken. The manufacturer is not liable for any injury or damage due to non-compliance with the instructions featured in this manual. If there is any issue or uncertainty, please consult a qualified individual to operate the equipment correctly. This machine should only be used for charging operations specified within the limits indicated on the machine and in the instruction manual. The operator must observe the safety precautions. In case of improper or unsafe use, the manufacturer cannot be held liable.
This unit can be used by children aged 8 or over and by people with reduced physical, sensory or mental capabilities or lack of experience or knowledge, if they are properly monitored or if instructions for using the equipment have safely been read and risks made aware of. Children must not play with the product. Cleaning and maintenance should not be performed by an unsupervised child.
Do not use to charge domestic batteries or non rechargeable batteries.
Do not operate the device with a damaged power supply cord or a damaged mains plug.
Do not use the device if the charging cable appears to be damaged or assembled incorrectly in order to avoid any risk of short circuiting the battery.
Never use on a frozen or damaged battery.
Do not cover the device
Do not place the device near a fire or subject it to heat or to longterm temperatures exceeding 60^
The operating mode of the automatic charger and the restrictions applicable to its use are explained later in this manual.


Fire and explosion risks!
A battery can emit explosive gases when on charge.
-
During the charge, the battery must be placed in a well ventilated area.
-
Avoid flames and sparks. Do not smoke near the device.

Do not leave a charging battery unattended for a long time.
Connection / disconnection :
-
Ensure that the charger's power supply is disconnected before connecting or disconnecting to the battery terminals.
-
Always ensure the Red clamp is connected to the «+» battery terminal first. If it is necessary to connect the black clamp to the vehicle chassis, make sure it is a safe distance from the battery and the fuel/exhaust pipe. The charger must be connected to the mains.
- After charging, disconnect the charger from the mains, then disconnect the negative clamp from the car body and then disconnect the positive clamp from the battery, in this order.

Connection :
Class II device
- The connection to the power supply must be carried out in compliance with national standards.
Maintenance :

- If the power cable is damaged, it must be replaced by the manufacturer, its after sales or by an equally qualified person to prevent any accidents.
- Service should be performed by a qualified person
- Warning! Always remove the power plug from the wall socket before carrying out any work on the device.

Regulations :
- The Machine is compliant with European directives.
- The declaration of conformity is available on our website.

- EAEC Conformity marking (Eurasian Economic Community).
- Equipment in compliance with British requirements. The British Declaration of Conformity is available on our website (see home page).
- Equipment in conformity with Moroccan standards.
- The declaration C_ (CMIM) of conformity is available on our website (see cover page).

Waste management :

- This product should be disposed of at an appropriate recycling facility. Do not throw away in a household bin.


Do not operate on 230V - risk of explosion!
GENERAL DESCRIPTION
The Gysflash S 1.12 PL is designed to charge lead-acid batteries (Gel, AGM, Liquid, ...) and lithium of the Lithium Iron Phosphate (LFP / LiFePO4). commonly used for motorcycles, water scooters and many other small vehicles.
This charger is suited for the charge of:
- Lead-acid batteries 12 V (6 elements in series of 2V) from 2 Ah to 32 Ah, and up to 100 Ah for charge support.
- The charge 12V LFP batteries (4 cells in series of 3V) from 0.5 Ah to 20 Ah, and up to 50 Ah for charge support.
STARTUP
- Connect the charger to the battery using the proper accessory (clamps, lugs, etc...).
- Plug the charger to the mains (single phase 100-127 Vac 50-60 Hz).
- Select the mode by pressing the button. After roughly five seconds, the charge starts automatically.
- During the charge, the device indicates the charge progress. When indicator OK blinks, the battery is ready to start the vehicle. Once indicator OK stays on, the battery is fully charged.
- The charge can be interrupted at any time by unplugging the mains plug or pressing the button.
- After the charge, disconnect the charger from the mains, then disconnect the clamps from the battery.
CHARGE MODES
- Modes and Options description :

Lead CHARGE mode (14.4 V/1 A):
Mode for charging 12 V lead-acid batteries from 2 Ah to 32 Ah and up to 100 Ah for charge support. Automatic seven step charge cycle.

COLD/AGM option (14.7 V/1 A):
Option to change the charging voltage to 14.7V for battery charging in cold weather (less than 5^ ) or for some AGM batteries or batteries with plugs.

Lithium CHARGE mode (14.4 V/1 A) :
Mode for charging 12V lithium batteries from 0.5 Ah to 20 Ah and up to 50 Ah for charge retention. Automatic charging cycle in eight steps.

Some Lithium batteries incorporate a UVP protection (Under Voltage Protection) which disconnect the battery in case of deep discharge. This protection prevents the charger from detecting the battery. In order for the Gysflash S 1.12 PL to be able to charge the battery, it is necessary to deactivate the UVP protection. To do this, select the Lithium charging mode and press the button for 10 seconds. The charger will then deactivate the UVP protection and automatically start charging.
- Load curve Lead:
The Gysflash S 1.12 PL uses an advanced 7-step lead charging curve that guarantees the optimal performance of your lead battery.

Step 1: Analysis
Analyses the battery state (charge level, polarity inversion, wrong battery...)
Step 5 : Charge (1 A)
Maximum current fast charge to reach an 80% charge level.
Step 2:Recovery (0.5 A)
Recovering damaged elements due to a prolonged deep discharge.
Step 6: Absorption (14.4 V or 14.7 V with GM option)
Constant voltage charging to bring the charge level to 100% .
Step3:Test
Sulfated battery test
Step 7: Floating charge (13.6 V)
Maintains battery charge level at its maximum.
Step 4: Desulfation (15.8 V)
Battery desulfation algorithm.
Lithium charging curve :
The Gysflash S 1.12 PL uses an advanced 8-step Lithium charging curve that guarantees the optimal performance of your LFP battery.

Step 1: Analysis
Analyses the battery state (charge level, polarity inversion, wrong battery...)
Step 5: Test
Charge conservation test.
Step 2:Recovery (0.2 A)
Recovery algorithm following a deep discharge.
Step 6 : Supplement
Reduce current charge to reach 100% charge level.
Step 3 : Charge (1 A)
Fast charging at maximum current allowing to reach 90% of the charge level.
Step ⑦ : Equalization / balancing (14.4 V)
Balancing the battery cells
Step 4: Absorption (13.8 V)
Constant voltage charging to bring the charge level to 98% .
Step 8: Floating charge (13.8 V)
Maintain the battery charge level at its maximum with maintenance charging every 10 days.
| Estimated charge time | Lead-acid | Lithium | ||||||
| Battery capacity | 2 Ah | 10 Ah | 20 Ah | 32 Ah | 1 Ah (3 Ah EqPb*) | 5 Ah (15 Ah EqPb*) | 10 Ah (30 Ah EqPb*) | 20 Ah (60 Ah EqPb*) |
| Charging time 0% >> 90% | 2 h | 9 h | 18 h | 29 h | 1 h 30 | 4 h 30 | 8 h 30 | 16 h |
*Lead battery equivalent: A lithium battery has better starting performance (CCA) than a lead battery. This is why some lithium battery manufacturers indicate the battery lead equivalent (EqPb) corresponding to the capacity of a lead-acid battery with the same starting performance. For instance, a LFP battery of 10 Ah will have the same starting performance as a lead-acid battery of around 30 Ah.

If the motorcycle is equipped with a 12 V socket, the Gysflash S 1.12 PL is able to charge the battery via this socket with the CAN-BUS system, without having to switch on the instrument panel. In this setup, connect the cigarette lighter adapter (ref. 029439) on the charger and the 12 V socket of the motorcycle and then follow the «Start-up» procedure detailed above. In certain cases, it is possible that the charge will only start 2 minutes after performing the connections.
- Protections :

The Gysflash S 1.12 PL has a set of devices to protect it against short circuits and polarity reversal. It has an anti-spark feature which prevents sparks whilst connecting the device to the battery. This charger has double insulation and is safe to use with the battery in situ as it will protect the vehicle's on-board electronics.
The Gysflash S 1.12 PL is equipped with an integrated temperature sensor that allows it to adapt its charging current according to the ambient temperature in order to avoid any overheating of the internal electronics.
TROUBLESHOOTING, CAUSES, SOLUTIONS
| Troubleshooting Causes Solutions | ||
| 1 | The indicator blinks rapidly. | ·Polarity reversal ·Battery voltage is too high ·Clamps in short-circuit |
| 2 | The indicator blinks slowly. | Battery out of order or very low voltage. Change the battery. |
| 3 | The indicator is on. | Failure during charging, battery not recoverable. Change the battery and press to restart a charge. |
| 4 | Indicator stays on even after pressing button. | Thermal protection Ambient temperature is too high (>60°C), cool the room and let the charger cool down. |
| 5 | Indicator flashes. | Charger in sleep mode. Press button or connect a battery to the charger to exit sleep mode. |
| 6 | Indicator stays on. | Charge interrupted by pressing Press again to restart the charge. |
WARRANTY
The warranty covers faulty workmanship for 2 years from the date of purchase (parts and labour).
The warranty does not cover:
- Transit damage.
Normal wear of parts (eg.: cables, clamps, etc.). - Damages due to misuse (power supply error, dropping of equipment, disassembling).
- Environment related failures (pollution, rust, dust).
In case of failure, return the unit to your distributor together with:
- The proof of purchase (receipt etc ...)
- A description of the fault reported
Modo destinado a la energia de las potencias y el summitimiento de la Energia. Cuestiones: 1. How many units of energy are required to generate the power in each unit? 2. What is the total energy required to generate the power in all units? 3. What is the total energy required to generate the power in all units?

Opacion FRIO/AGM (14.7 V/1 A) :
Equalizing Battery System
1
<1s
Max 5 min
Max 30 h
Max 20 h
3 min
Max 10 h
Max 2 h
No limit
Opção COLD/AGM (14.7 V/1 A):
Filiale / Subsidiary
Unit 3
Great Central Way
CV21 3XH - Rugby - Warwickshire
United Kingdom
www.gys-welding.com +44 1926 338 609 uk@gys.fr