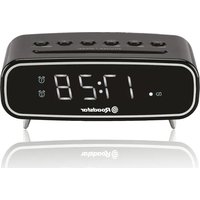
CLR725BTBK - Alarm clock radio ROADSTAR - Free user manual and instructions
Find the device manual for free CLR725BTBK ROADSTAR in PDF.

| Brand | Roadstar |
| Model | CLR725BTBK |
| Product type | Clock radio |
| Power supply | 230 V ~ 50 Hz |
| Backup battery | CR2025 3 V (not included) |
| Main functions | FM radio, Bluetooth, 2 alarms, timer, snooze, hands-free function |
| Number of radio presets | 30 stations |
| Antenna | Wire |
| Brightness adjustment | Yes, via SNOOZE/DIMMER button |
| Mounting | Under cabinet (base thickness 16-20 mm) |
| Included accessories | 4 screws, 4 spacers, 1 drilling template |
| Cleaning | Disconnect, do not immerse in water |
| Safety | Do not open the case, risk of electric shock |
| Repairability | No user-serviceable parts |
| Warranty | Compliant with directive 99/44/EC |
Frequently Asked Questions - CLR725BTBK ROADSTAR
User questions about CLR725BTBK ROADSTAR
0 question about this device. Answer the ones you know or ask your own.
Ask a new question about this device
Download the instructions for your Alarm clock radio in PDF format for free! Find your manual CLR725BTBK - ROADSTAR and take your electronic device back in hand. On this page are published all the documents necessary for the use of your device. CLR725BTBK by ROADSTAR.
USER MANUAL CLR725BTBK ROADSTAR
Roadstar Management SA, via Passeggiata 7 CH 6883 Novazzano (Switzerland)
INDEX
English Page 1
Deutsch Seite 9
Francais Page 17
Italiano Pagina 25
MOUNTING INSTRUCTIONS
For the installation the cupboard must fulfil the following conditions:
- Thickness of the cupboard floor between 16 mm and 20 mm.
- The wall mounting of the cupboard must be stable and anchored firmly in the wall with at least 2 screws.
- Important! Do not install the device above a cooker!
- When installing the device it must be ensured that there is a power socket within reach.
- The mains socket must be within easy reach, so that the plug can be quickly removed in an emergency.
- Important! Do not connect the device to the mains power supply until after installation!
- The device cannot be installed under cupboards under which there is a lighting strip.
- For mounting, you may need the following supplies: A drill with 6 mm drill bit, pilot drill or nail, Allen key, tape measure, adhesive tape, scissors, safety goggles.
Supplied Mounting Accessories
- 4 Screws
- 4 Spacers
- 1 Drilling template
CAUTION:
- Please adhere to the dimensions stated in the installation instructions.
- You should use only the installation accessories supplied.
- Tape the template firmly down to the shelf with ahesive tape. With the help of a gimlet or nail pierce the crosses at the attachment points and use it to mark the holes.
- Remove the template and drill the holes into the wall cupboard.
- Insert the spacer into the holes provided on the device.
NOTE:
- Sufficient ventilation is only guaranteed with a spacer.
- Countersink the screws into the holes in the cupboard.
• Using the 4 screws and the spacers, attach the kitchen - radio to the bottom of the cupboard.
- Tighten the screws hand-tight with an Allen wrench.
- CAUTION:
- Use an Allen wrench and not an electric screwdriver.
Make sure that the device is adequately ventilated!
If applicable, remove the protective film from the display.
Power Supply
Please ensure that the mains voltage corresponds to the information on the type plate. Plug the power plug into a properly installed socket.
Inserting the Power Reserve Battery
(Battery not included in scope of delivery)
During a power outage, or when the power plug is pulled from the socket, the clock time and the alarm times will be lost. To prevent this, insert a power reserve battery as follows.
- Open the battery compartment on the bottom. Turn the battery compartment lid in the direction “OPEN”.
- Insert a button cell battery of the type CR 2025 3 V. Ensure the correct
3
English
polarity (see battery compartment lid)!
- Close the battery compartment again
WARNING:
The batteries shall not be exposed to excessive heat such as sunshine, fire or the like. Danger of explosion!
CAUTION:
- Batteries may leak out and lose battery acid. If the device is not used for a longer period of time, remove the battery.
- Batteries do not belong in the household waste. Dispose of spent batteries at the designated collection points or at the dealer.
SWITCH THE DEVICE ON/OFF
Turn on the device by pressing the POWER/FUNC button. [10]
- To turn off the device, keep the POWER/FUNC button pressed for about 3 seconds.
NOTE:
After about 20 minutes without signal, or if the signal is too low, the device will switch to Standby automatically.
- When the device is turned off, you can switch between radio and Bluetooth mode by pressing the POWER/FUNC. Button repeatedly. [10]
SETTING OF THE CLOCK (24H)
- Hold down the TIME SET/COOK TIMER button (14) for approx. 3 seconds. The notification "24H" will appear in the display. Select the time format with the SKIP+/SKIP- buttons (7/8).
NOTE:
- “PM” will show in the display in the afternoon with the 12-hour indication.
- Press the TIME SET/COOK TIMER button to confirm.
- The hour setting will blink in the display.
- Adjust the setting with the SKIP+/SKIP- buttons (7/8).
- Press the TIME SET/COOK TIMER button for confirmation.
- The minute indicator will flash on the display.
- Adjust the setting with the SKIP+/SKIP- buttons (7/8).
- Save the time setting by pressing the TIME SET/COOK TIMER button again.
VOLUME ADJUSTING
Use the VOL+/VOL- buttons (9) to adjust the volume.
DISPLAY BRIGHTNESS
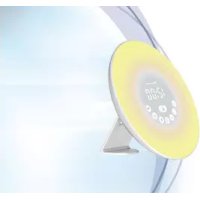
You can use the SNOOZE/DIMMER button (15) to adjust the brightness of the display and of the light strip beneath the operating keys.
- Use the POWER/FUNC button (10) to select the radio mode.
- Tune the desired stations with the SKIP+ (7) and SKIP- (8) buttons. When holding down either of the buttons, the device will start scanning until the next radio station is found. The display will show the respective frequency.
- If there is interference on the received station, try to improve the reception by rotating, winding or unwinding the wire antenna.
Presetting Radio Stations
The device can preset up to 30 radio stations. To preset a station, follow the steps below:
- Search for a station as described in "Scanning stations".
- Press the ANSWER/PROG/AMS button (6). The display will show PROGRAM and the respective preset location will begin to flash.
- Use the PRE.+/ALARM 2 (12) and PRE.-/ALARM 1 (13) buttons to choose the preset location for the corresponding station.
- Press the ANSWER/PROG/AMS button again. The station will be preset. The PROGRAM indicator and the preset location will disappear.
Recalling Preset Radio Stations
Use the PRE+/ALARM 2 (12) and PRE-/ALARM 1 (13) buttons to select the memory locations.
Automatic station scan
Important! Any previously stored radio stations will be overwritten.
When holding down the ANSWER/PROG/AMS button (6) for approx. 3 seconds, the device will start the automatic station scan searching the entire frequency range automatically for stations. The stations found will be stored
on the preset locations 1-30 in ascending order.
NOTE:
The order cannot be changed once set.
BLUETOOTH FUNCTION
Logging on Devices (Pairing)
Before you listen to music via the unit, you must pair the devices.
- Ensure, that the Bluetooth function is activated in your player (e.g. mobile phone). For this, refer to the operation manual of your player.
- Press the POWER/FUNC button (10) repeatedly, until "bt" is shown on the display. The BT indicator light (5) blinks. This signalizes that the device is in pairing mode.
- Choose the Bluetooth menu in your player and register the device in your player. For this, refer to the operation manual of your player. The device "CLR-725BT" will show in your player as a selection.
NOTE:
Only one playback device may be connected to the device at one time. If the device is already connected to another playback device, then the device will not appear in the BT selection menu.
Now enter the password "0000" in your player, depending on the device manufacturers, model, and software version.
If the pairing was done successfully, a beeping sound can be heard and the BT indicator light will be lit. For the further procedure, please refer to the user manual of the playback unit. If possible, adjust the volume of the external unit to a comfortable level.
Description of the Operating Buttons for Bluetooth
ANSWER/PROG/AMS (6)
You can pause and continue music playback. Press again to continue play-back. If a phone call is received during music playback, you can use this button to receive the call.
SETTING THE ALARM TIME (24H) (IN STANDBY MODE)
You can set up to two alarms. As follows:
- Hold down the ALARM1 or the ALARM2 button (13/12) for approx. 3 seconds. "ALARM 1" or "ALARM 2" will blink in the display and the alarm signal is shown.
- You can now perform the settings for the alarm signal, the hours, and the minutes by pressing the SKIP+ (7) and SKIP- (8) buttons successively. With regard to the alarm, you can choose between buzzer (BELL) and radio (FN).
BELL: Upon reaching the alarm time, a buzzer will sound. The volume will increase slowly.
FN: Upon reaching the alarm time, the last preset radio station will sound. The volume will increase slowly.
- Confirm each entry with the ALARM1 or ALARM2 button.
Snooze Function
The automatic alarm can be switched off using the SNOOZE/DIMMER button (15) for approx. 9 minutes.
Switch Off the Buzzer In order to switch off the alarm until the following day please press the POWER/FUNC button.
NOTE:
If you have been awakened by radio, the volume will be set to the last set volume after pressing the POWER/FUNC button.
Press the POWER/FUNC button again to shut off the alarm until the next day.
Disabling the Alarm
To disable the alarm completely, choose standby mode and press the ALARM 1 or ALARM 2 button (13/12).
Delayed Shut-Off
You can use the function for delayed power-off with radio operation. The unit is switched off automatically when the selected time is reached.
- Select the time after which the unit is switched off by repeatedly pressing the SLEEP button (11). The following selections can be made: 120, 110, 100, 90, 80, 70, 60, 50, 40, 30, 20 and 10 minutes. OFF = function is disabled.
TIMER FUNCTION
You can use this function, for example, to keep an overview of a specific cooking time. You can select between 180 to 10 minutes in steps of 10. The shortest time available to you is 5 minutes.
- Press the TIME SET/COOK TIMER button (14) repeatedly.
7
English
“C” and the set time will appear in the display, starting with “C 180”.
- As soon as the set time has elapsed, a signal tone will sound. Press any key to turn off the signal tone.
NOTE:
In order to stop the function ahead of time, press the TIME SET/COOK TIMER button until "OFF" is shown in the display.
TECNICAL SPECIFICATIONS
Power Supply: AC 230V \~ 50Hz.
Radio Frequency Coverage
FM: 87.5 - 108 MHz.
Speaker
Output Power: 1 Watt RMS.
General
BT Maximum radiated Power: < 4 dBm (2.5 mW).
Specifications and design are subject to possible modifications without notice due to improvement.

The exclamation point within the triangle is a warning sign alerting the user of important instructions accompanying the product.

The lightening flash with arrowhead symbol within the triangle is a warning sign alerting the user of “dangerous voltage” inside the unit.
To reduce the risk of electric shock, do not remove the cover. No user serviceable parts inside the unit. Refer all servicing to qualified personnel.
230v\~
This unit operates on 230V \~ 50Hz. If the unit is not used for a long period of time, remove the plug from the AC mains.

Ensure all connections are properly made before operating the unit.

This unit must not be exposed to moisture or rain.

This unit should be positioned so that it is properly ventilated. Avoid placing it, for example, close to curtains, on the carpet or in a built-in installation such as a bookcase.
Do not expose this unit to direct sunlight or heat radiating sources.

CORRECT DISPOSAL OF THIS PRODUCT (Waste Electrical & Electronic Equipment)
This marking shown on the product or its literature, indicates that it should not be disposed with other household wastes at the end of its working life. To prevent possible harm to the environment or human health from uncontrolled waste disposal, please separate this from other types of wastes and recycle it responsibly to promote the sustainable reuse of material resources. Household users should contact the retailer where they purchased this product, or their local government office, for details of where and how they can take this item for environmentally safe recycling. Business users should contact their supplier and check the terms and conditions of the purchase contract. This product should not be mixed with other commercial wastes for disposal.
UBERSICHT DER BEDIENELEMENTE
- ABSTANDSHALTER FÜR UNTERBAU-MONTAGE
- SCHRAUBE ZUR UNTERBAU-MONTAGE
- LCD DISPLAY
- MIC (MIKROFON)
- BT KONTROLLLEUCHTE
- ANSWER/PROG./AMS TASTE (GESPRÄCH ANNEHMEN/RADIOSENDER SPEICHERN/RADIOSENDER AUTOMATISCH ABSPEICHERN)
- SKIP+ TASTE
- SKIP- TASTE
- VOL+/VOL- TASTEN (LAUTSTÄRKE)
- POWER/FUNC. TASTE (EIN-/BETRIEBSBEREITSCHAFT / FUNKTION-SMODUS)
- SLEEP TASTE (EINSCHLAFTIMER)
- PRE.+/ALARM 2 TASTE
- PRE.-/ALARM 1 TASTE
- TIME SET/COOK TIMER TASTE (ZEITEINSTELLUNG/KURZZEITWECKER)
- SNOOZE/DIMMER TASTE (SCHLUMMER/DISPLAY-BELEUCHTUNG)
- BATTERIE BACKUP
- ACHSADAPTER
- FM ANTENNE
MONTAGEANLEITUNG
ACHTUNG:
BT Maximum radiated Power: 2.5 mW (4dBm).
natural_image
Simple line drawing of a trash bin with diagonal lines crossing it, no text or symbols present.COMMENT ÉLIMINER CE PRODUIT
natural_image
Simple line drawing of a trash bin with diagonal lines crossing it, no text or symbols present.natural_image
Simple line drawing of a trash bin with diagonal lines crossing it, no text or symbols present.CORRECTE AFVALVERWERKING VAN HET PRODUCT (elektrisch en elektronisch afval)
natural_image
Simple line drawing of a trash bin with two crossed lines and a black bar below (no text or symbols)natural_image
Simple line drawing of a trash bin with diagonal lines crossing it, no text or symbols present.text_image
Roadstar®INTERNATIONAL WARRANTY - INTERNATIONALE GARANTIE GARANTIE INTERNATIONALE - GARANZIA INTERNAZIONALE GARANTIA INTERNACIONAL - GARANTIA INTERNACIONAL ΔΙΕΘΝΗΣ ΕΓΓΥΗΣΗ
natural_image
Abstract geometric logo design with stylized 'R' letters and circular elements (no text or symbols)
Is a registered Trademark of Roadstar S.A. - Switzerland. All rights reserved.
FRANÇAIS
Conditions Générales de Garantie Roadstar
Roadstar Warranty Terms and Conditions
Roadstar- by means of its sales organisation, representative or distributor-guarantees its products against manufacturing defects in material and/or workmanship throughout the period warranty. Should the product fail to work or shows manufacturing defect within the warranty period,
Roadstar- by means of its sales organisation, representative or distributor - will take the necessary actions to restore the perfect functioning of the product. To repair or to replace is at discretion of Roadstar or it's representative or distributor.
The warranty period is in accordance with directive 99/44/CE of the European Union. For all non EU members, please refer to the local law of each country. This warranty does not cover normal wear and tear of the product and/or its parts, any damage, failure, or loss caused by accident, misuse, and any other failure not directly related to a defect of the product.
This warranty does not void consumer's rights in accordance with EU Directive99/44/CE. For further information please visit the website www.roadstar.com, or write to aftersales@roadstar.com.
DEUTSCH
Allgemeine "Roadstar" Garantiebedingungen
Hereby, Roadstar Management SA declares that the radio equipment type CLR-725BT/BK is in compliance with Directive 2014/53/EU. The full text of the EU declaration of conformity is available at the following internet address: http://roadstar.com/images/ce/CLR-725BT_BK.pdf or by scanning the following QR Code.
text_image
QR code image containing encoded data, no visible human-readable textVER.1
25.06.2020
Roadstar Management SA, via Passeggiata 7 CH 6883 Novazzano (Switzerland)