
82002 - Air Conditioning KORONA - Free user manual and instructions
Find the device manual for free 82002 KORONA in PDF.
| Product type | Portable air conditioner |
| Brand | Korona |
| Model | 82002 |
| Cooling power | 12000 BTU (3.5 kW) |
| Heating power | 10000 BTU (2.9 kW) |
| Power supply voltage | 220-240 V ~ 50 Hz |
| Power consumption (cooling) | 1345 W |
| Power consumption (heating) | 1391 W |
| Refrigerant | R290 (215 g) |
| Airflow | 350 m³/h |
| Protection class | IP24 |
| Functions | Cooling, heating, ventilation, dehumidification, night mode, timer |
| Remote control | Yes (AAA batteries not included) |
| Water tank | Internal capacity, manual or continuous drainage |
| Filter | Cleaning every 2 weeks, annual replacement |
| Safety | Requires room >11 m², safety distance 50 cm |
| Warranty | 2 years |
Frequently Asked Questions - 82002 KORONA
User questions about 82002 KORONA
0 question about this device. Answer the ones you know or ask your own.
Ask a new question about this device
Download the instructions for your Air Conditioning in PDF format for free! Find your manual 82002 - KORONA and take your electronic device back in hand. On this page are published all the documents necessary for the use of your device. 82002 by KORONA.
USER MANUAL 82002 KORONA
natural_image
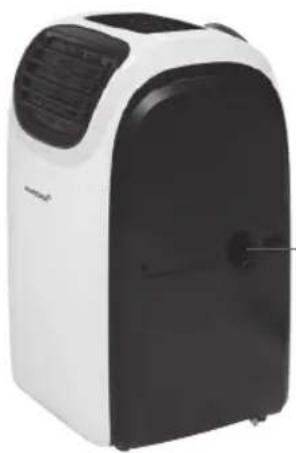
White and black industrial air conditioner unit with visible vented grille and front panel (no text or symbols on body)C€
KORONA electric GmbH, Sundern/Germany
www.korona-electric.de
Bedienungsanleitung
natural_image
Technical illustration of a pipe fitting and a rectangular component with internal markings (no text or symbols)natural_image
Medical or laboratory equipment setup with a curved tube, a spherical object, and stacked papers (no visible text or symbols)Klimasegel
natural_image
Exterior view of a white and black industrial air conditioner unit (no visible text or symbols)Luftaustritt
natural_image
White and black portable air conditioner unit (no visible text or symbols)Drainageschlauch
Bedienfeld

natural_image
Diagram of a device with two downward arrows and bidirectional arrows, no text or symbols present
natural_image
Diagram of a door with double-headed arrows indicating movement or force (no text or symbols)natural_image
Technical line drawing of two air purifiers with ventilation ducts, shown from front and side views (no text or symbols)natural_image
Black-and-white photo of a window with large windows overlooking a residential area, showing a curved pipe extending into the window (no text or symbols visible)INSTALLATION DES ABLUFTSCHLAUCHES

natural_image
Two identical line drawings of an air conditioner unit, labeled ① and ②, showing front and side views without any text or symbols.natural_image
Diagram showing a roof structure with airflow direction and three different air purifiers (no text or symbols)natural_image
Three industrial air purifiers with heat exchangers, shown from different angles (no text or labels visible)natural_image
Line drawings of a portable air purifier and its side arm device (no text or symbols)natural_image
Diagram showing a vehicle interior with a grid structure and a side view of the interior (no text or symbols)LAGERUNG
Read these instructions carefully before assembling and/or operating the appliance. Keep these instructions including receipt and, if possible, the box with the internal packing. When passing on the appliance to a third party, make sure to include these instructions for use.
INTENDED USE
This appliance is intended for household use only and not for commercial, industrial or outdoor use. Other use not recommended may cause fire, electric shock or injury.
Safety:
This symbol identifies hazards which may cause injuries!
This symbol identifies electric shock hazards!
This symbol identifies tips and information.
IMPORTANT
This portable air conditioner must always be stored and transported in an upright position. In case of doubt, let the unit rest for at least 24 hours before using it.
natural_image
Three black-and-white icons: an open book, an open book with an 'i' symbol, and an open book with a wrench (no text or symbols present)REFRIGERANT
The refrigerant used in this mobile air conditioner is R290. The refrigerant used is less than 1 kg and is in a closed refrigerant circuit.
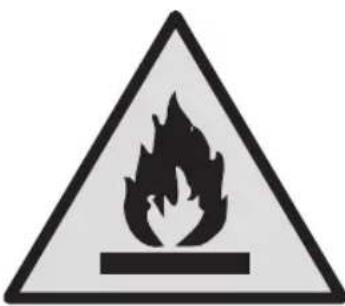
Caution, risk of fire! R290
Any person who is involved with working on or breaking into a refrigerant circuit should hold a current valid certificate from an industry-accredited assessment authority, which authorizes their competence to handle refrigerants safely in accordance with an industry recognized assessment specification.
Any repairs you need, contact the nearest authorized Service Centre and strictly follow manufacturer's instruction only.

WARNING:
- Appliance shall be installed, operated and stored in a room with a floor area larger than 11m^2 .
- Do not use means to accelerate the defrosting process or to clean, other than those recommended by the manufacturer.
- The appliance shall be stored in a room without continuously operating ignition sources (for example: open flames, an operating gas appliance or an operating electric heater).
• Do not pierce or burn. - Be aware that refrigerants do not have any odour.
General Safety Instructions
- Manufacturer takes no responsibility for any damage caused by incorrect use.
- Incorrect or improper use can damage the appliance and cause injuries to the user.
- Before connecting this appliance to the mains, make sure your local voltage matches the technical data of the appliance. Otherwise the appliance may overheat and get damaged.
Caution! Danger of electric shock!
- Never put the appliance, cord or plug into water or any other liquid.
- Do not use the appliance near a sink or wash basin.
- Do not use the appliance with wet hands.
- Do not use the appliance outdoors.
An electric appliance is not a toy!
- Never leave the appliance unattended during use.
- This appliance can be used by children aged from 8 years and above and persons with reduced physical, sensory or mental capabilities or lack of experience and knowledge if they have been given supervision or instruction concerning the use of the appliance in a safe way and understand the hazards involved. Children shall not play with the appliance. Cleaning and user maintenance shall not be made by children unless they are older than 8 and supervised.
- Keep the appliance and its cord out of reach of children less than 8 years.
-
Always unplug your appliance when it is not in use, and before cleaning.
-
Always pull the plug – not the cord.
- Keep the appliance and the cord well away from any hot surfaces to avoid any damage to the appliance.
- Do not run cord under carpeting. Make sure the cord may not inadvertently be pulled or cause anyone to trip when in use.
- Do not allow the cord to hang over sharp edges.
- Do not bend the cord or wind it round the appliance.
Do not use the appliance,
- if the cord is damaged.
- in case of malfunction.
-
if the appliance was dropped or is damaged otherwise. Have it checked and, if necessary, repaired by a qualified person/Customer Service. Never attempt to make any modifications to or repair the appliance yourself.
-
Only use accessories evaluated for use with this appliance.
- Never attempt to drive any objects into the appliance.
- Never attempt to open the housing yourself!
- The appliance is not intended to be operated by means of an external timer or separate remote-control system.
Special Safety Instructions
Warning! To avoid the possibility of injury/damage to the appliance, electric shock and risk of burns.
- Only use the appliance for its intended purpose and as described in this manual.
- The air conditioner is only suitable for indoor use and is not suitable for other applications.
- Appliance shall be installed, operated and stored in a room with a floor area larger than 11m².
- Do not operate your air conditioner in an extremely humid or wet environment, e.g. bathroom or laundry room.
- If you have any questions regarding the electrical installation, follow the instructions of the manufacturer, and if necessary, ask a professional electrician to install it.
- Place the appliance on an even, dry and stable surface and make sure to adhere to a safety distance of 50 cm around and above the appliance.
- Never place or operate the unit where it could be subject to:
- Heat sources such as radiators, heat registers, open flames, stoves or other products that produce heat
- Direct sunlight
- Excessive dust
- Mechanical vibration or shock
- Lack of ventilation
- Uneven surfaces, to avoid the tipping of the appliance during use
- Only operate the appliance with a filter in place
- Never cover the ventilation slots and make sure that the appliance is kept in a well ventilated place.
- Do not place any heat sources and magnetic objects near or on top of the appliance and make sure that the surrounding environment shall be dry and free of damp.
- Do not place any objects filled with water on top of the appliance, e.g. vases etc.
- Do not use insecticide sprays or other flammable substances near the appliance.
- Do not apply any pressure on the air inlet grid when adjusting the windflow.
SCOPE OF DELIVERY
1 Portable Air Conditioner
1 Exhaust Hose
1 Exhaust Hose Adapter for the window
1 Window Kit + screws
1 Remote control (use 2 x AAA batteries, not included)
1 Drainage hose
1 Window Saill

The batteries for the remote control are not included in the scope of delivery!
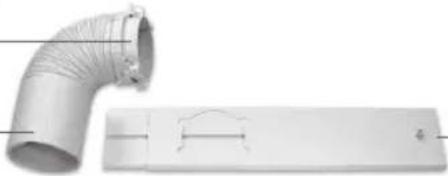
PRODUCT DESCRIPTION
Exhaust hose adapter for the window ____
Exhaust hose.
natural_image
Exterior view of a pipe fitting and a rectangular panel with internal markings (no text or symbols)Window Kit with Screws Set
Drainage Hose
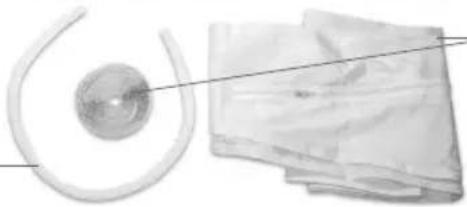
natural_image
Medical or laboratory equipment setup with a spherical device and two bundles of papers (no visible text or symbols)-Window Sail
Exhaust Hose Connection
Control Panel
Filter
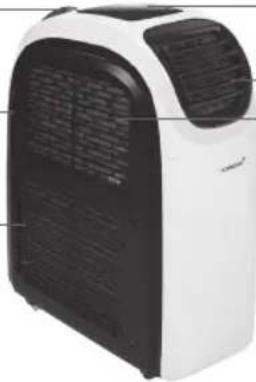
natural_image
Exterior view of a white and black industrial air purifier unit (no visible text or symbols)-Air Outlet
-Air Inlet for Cold Air
Air Inlet for Hot Air
natural_image
White and black portable air conditioner unit with ventilation grille (no visible text or symbols)Drainage Hole
Control Panel
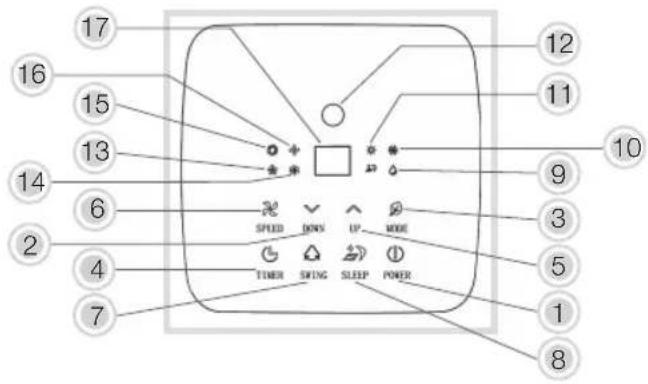
- Ⓧ Power (On/Off)
-
▼Temperature - DOWN
-
Operation Mode
-
Timer
-
▲Temperature + UP
To switch between °C (Celsius) and °F (Fahrenheit) press both the temperature and keys.

-
SPEED
-
Swing
-
Sleep
Indication lights operation modes
-
Dehumidification
-
Cooling
-
Heating
-
Signal receiver remote control
Indication light ventilation speeds
(will switch between low / medium /high automatically, depending on the ambient set temperature)
-
Low
-
LED-display
REMOTE CONTROL
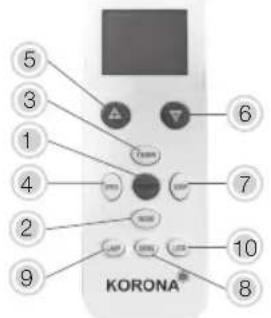
- POWER (ON/OFF)
Press the button to turn on or off the appliance.
- MODE button
Switch between cooling, fan, dehumidifying and heating.
- ✕ TIMER
Press the button to set the timing value.
- SPEED
Press the button to select high, medium, low and auto mode wind speed output.
- ▲TEMP+UP
Press the button to increase temperature and timing set value.
- ▼TEMP- DOWN
Press the button to reduce temperature and timing set value.
- SLEEP
Press the button to turn on the sleep mode.
- SWING button
Press the button to change the air flow direction.
- LAMP button
Press the button to switch ON/OFF the backlight of display on the unit
- Lock button
Long Press the button to lock / unlock the setting
- Make sure the distance between the appliance and the remote control is not more than 6 metres.
- Aim the remote control at the appliance and make sure that the angle is less than 30 degrees.
BEFORE FIRST USE
- Remove all packaging material and check whether the appliance is complete and that all accessories are included.
• Fully unwind the power cord. - Let the appliance rest for 24 hrs in upright position.

If any items are damaged or missing, contact your dealer or customer service.

Warning: Plastic bags are a danger to toddlers and babies, therefore keep them away void suffocation.
INSTALLATION
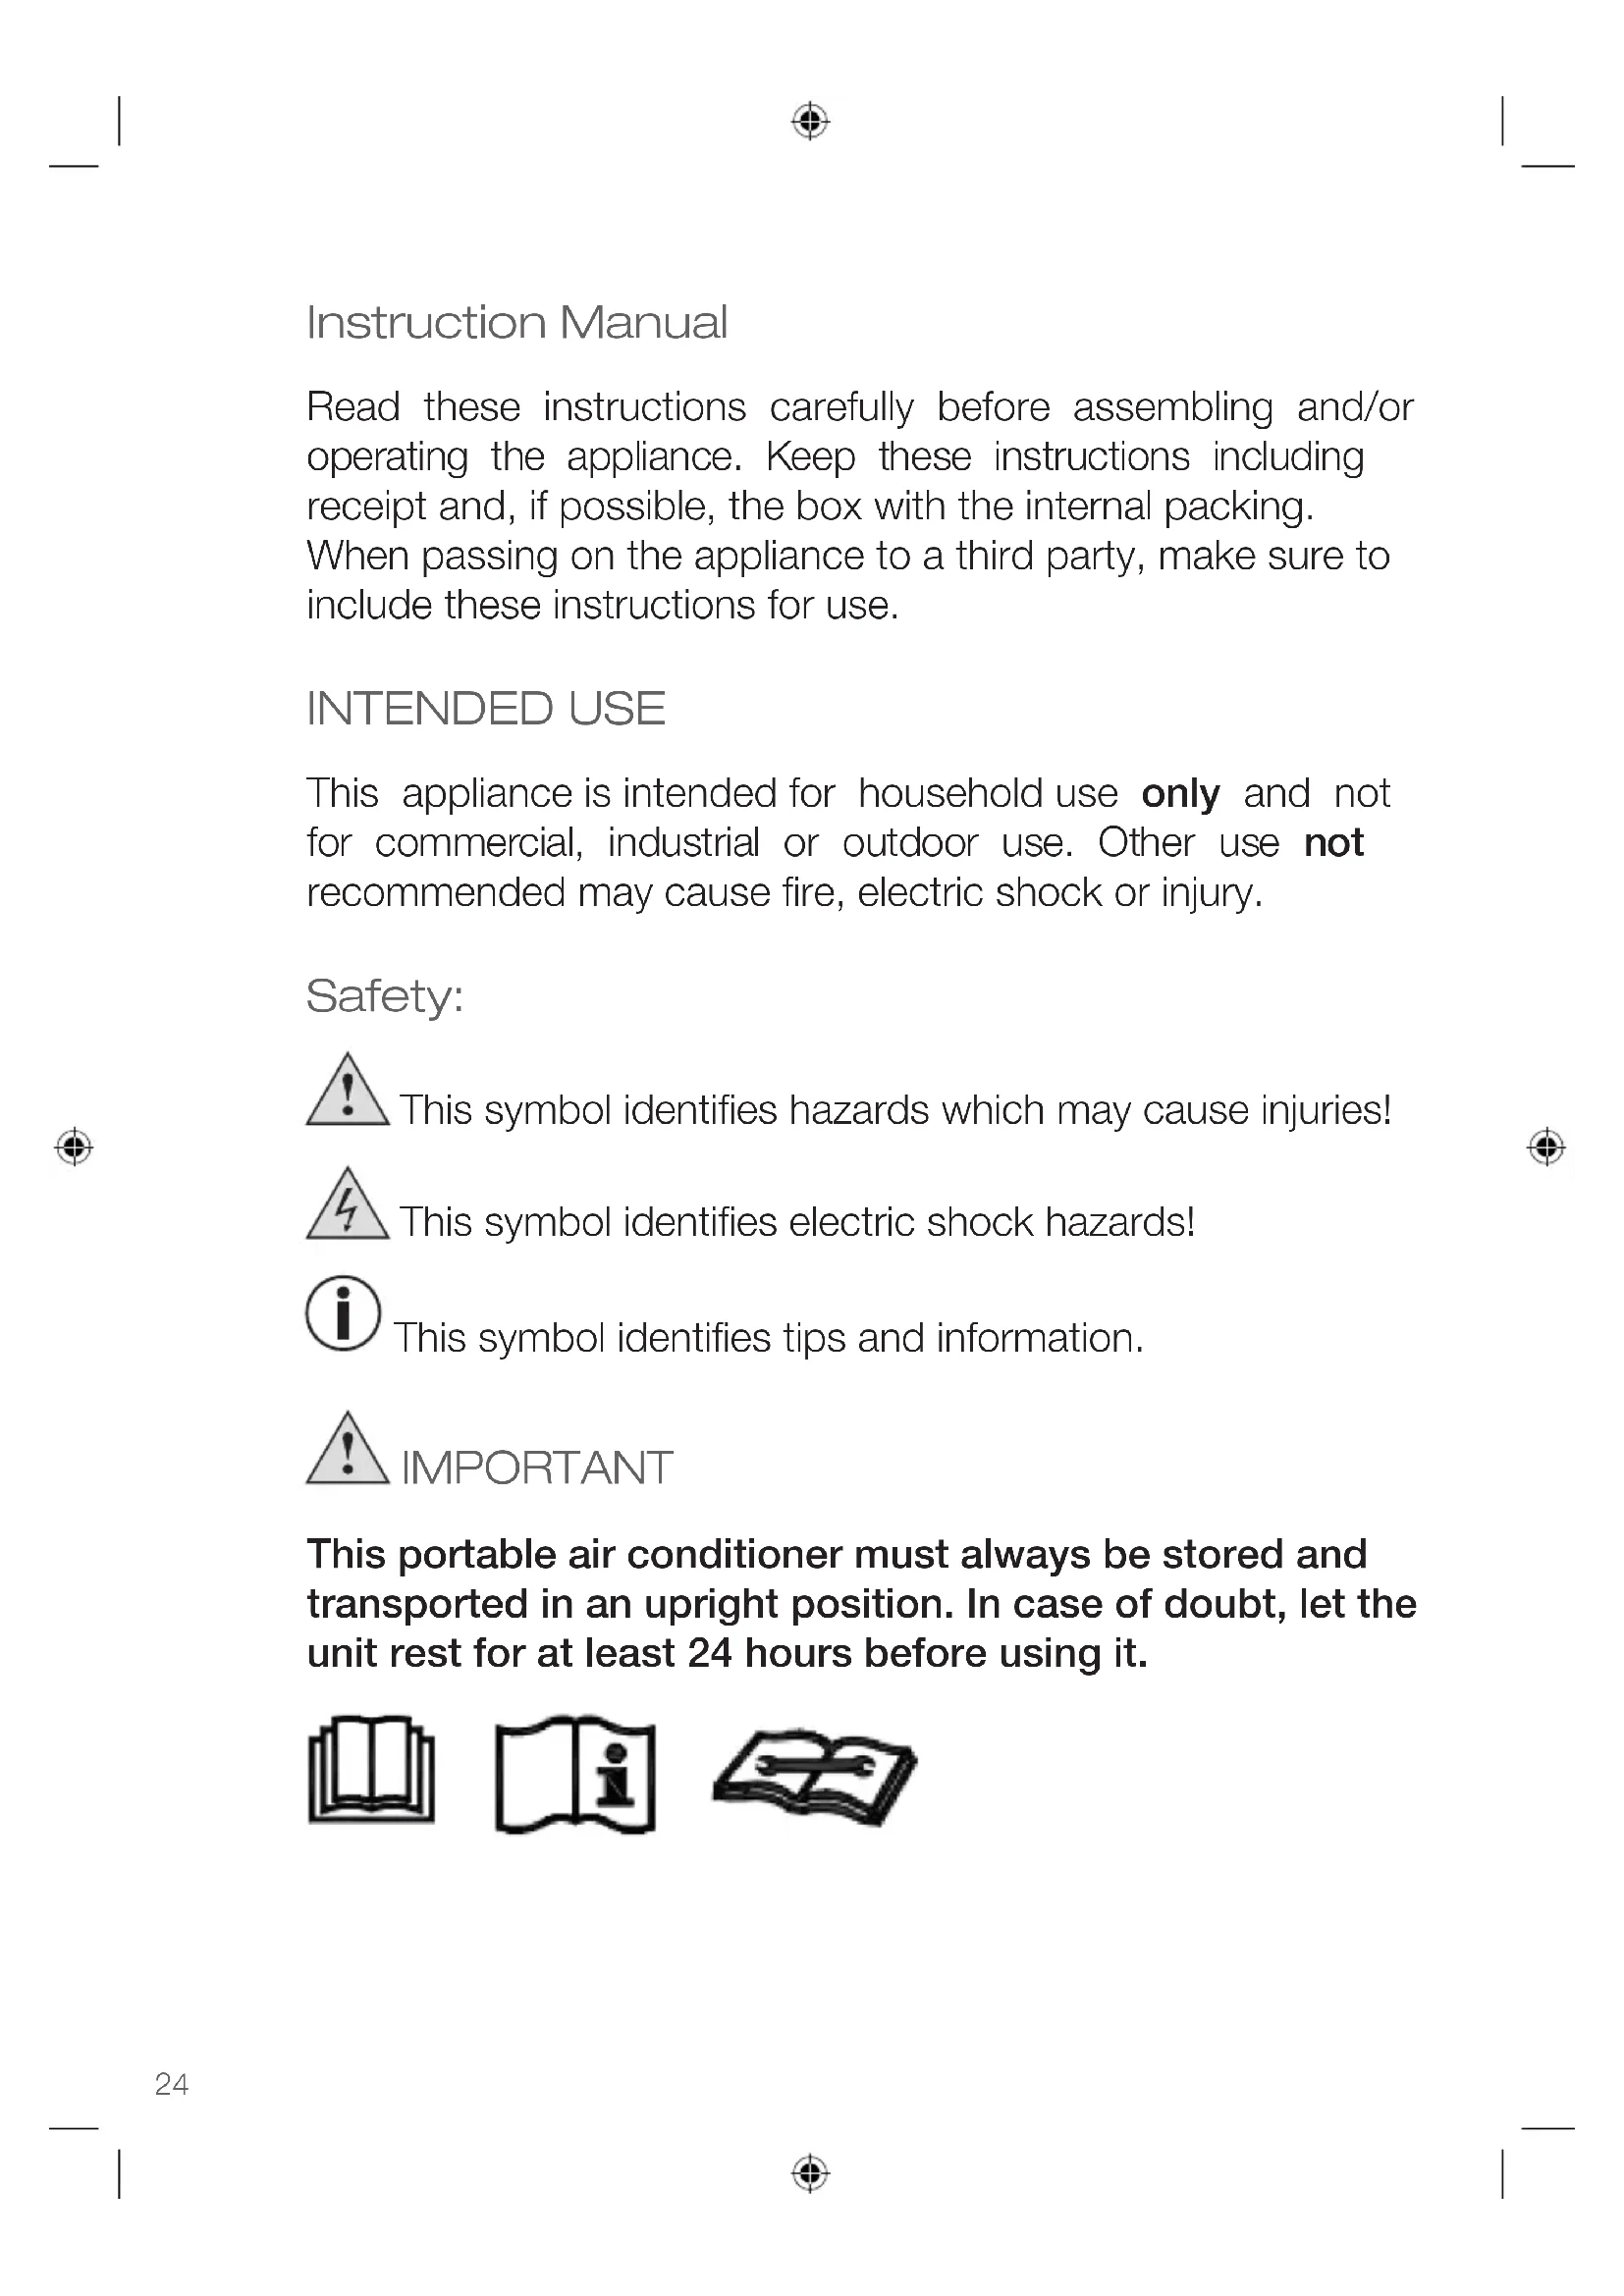
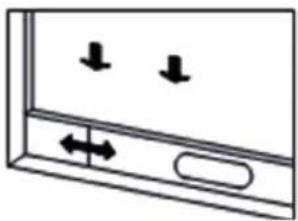
INSTALLATION OF THE WINDOW KIT (sliding window)
- Take the window kit and pull the inner part outside until the hole in the outer part is visible.
- Put the T-bolt from the screw set through the hole
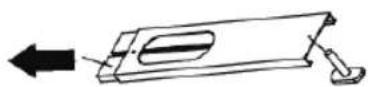
- Push the parts of the window slide set back together, making sure the T-part of the T-bolt slides into the slit of the inner part of the windowslide set lengthwise.
Screw the butterfly nut from the screw set loosely onto the T-bolt.
The window kit can be installed horizontally or vertically.
natural_image
Simple line drawing of a door with two downward arrows and an arrow pointing left (no text or symbols)
natural_image
Diagram of a door with double-headed arrows indicating movement or force, no text or symbols present- Slide the window half open, and place the window kit in the frame.
- Extend the window slide set so the full width of the frame is being covered.
- Fasten the butterfly nut to fix the window slide set.
natural_image
Line drawing of two different air purifiers with ventilation ducts, shown from front and side views (no text or symbols)For all other types of windows, use the included window sail, instructions of use are included.
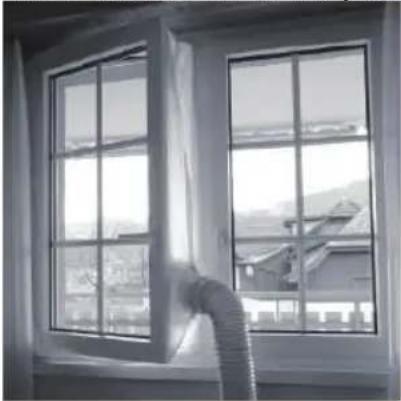
Installation instruction for Window sail
The window sail is fixed by velcro tape to the window frame and window case. The exhaust hose can then easily be fixed to the sail to ensure the hot air is channeled to the outside.
- Unpack the window sail and remove all Velcro tape from packing.
- Open the window and clean the area where you like to attach the Velcro tape to from dust, grease.
- Double check your selected position of Velcro tape still enables you to open and close the window properly
- Attach the Velcro tape to the window frame and the window case.
- Attach the window sail to the Velcro tape accordingly.
- Open the zipper to insert the exhaust hose. Make sure it is properly fixed.
Your window sail is now ready to use.
natural_image
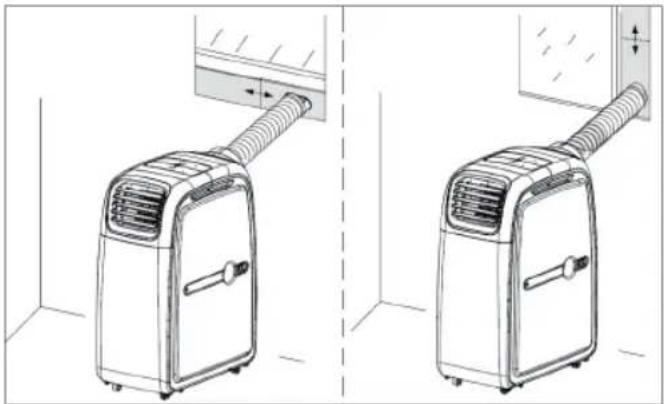
Black-and-white photo of a window with large windows and a pipe inserted, overlooking a residential area (no text or symbols visible)INSTALLATION OF EXHAUST HOSE

Warning: This appliance should only be connected to a properly installed wall socket (ed) and should not be operated by any means of an external timer or separate remote-ol system.
- Place the appliance on an even, dry and stable surface and close to a properly installed wall socket.

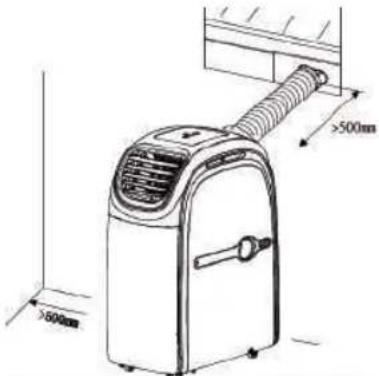
Adhere to a safety distance of at least 50 cm above and around the appliance.
- Place the appliance close to a window and properly installed wall socket.
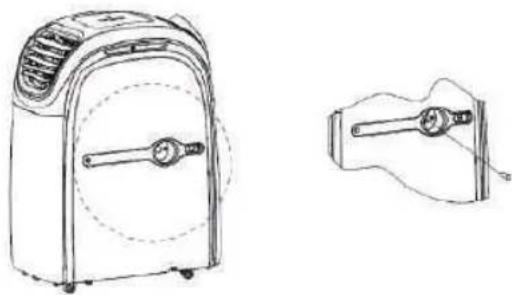
- Extend the ends of the exhaust hose and attach the window hose adapter at one end and screw in the other end of the exhaust hose to the appliance cover directly.
- Extend the exhaust hose to its maximum and connect the air condition adapter to the appliance and lead the window adapter through the whole of the window kit respectively through the hole of the window sail (see window sail instructions)

natural_image
Line drawing of an air conditioner unit with a coiled tube and ventilation grille (no text or symbols)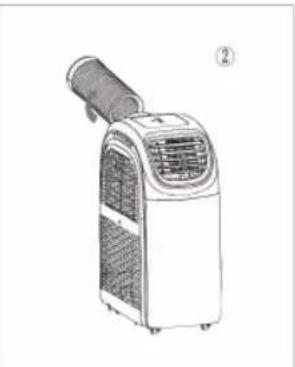
natural_image
Line drawing of an air conditioner unit with a coiled hose and ventilation grille (no text or symbols)- Turn the exhaust hose in the direction of the arrow (pic 1) and connect it to the device.
- Turn the exhaust hose in the direction of the arrow (pic 2) to disconnect it.

ATTENTION: To prevent breaking of the exhaust hose, it can only be twisted or deformed certain limit. The maximal length of the exhaust hose is 150 cm. Do not use extensions or exhaust hoses; this can cause serious malfunctions.
• To prevent overheating, the outlet of the device must not be blocked.
OPERATION
Your Portable Air Conditioner 82002 can be installed inside and outside – please strictly adhere to the user manual!
ATTENTION: When moving the appliance, only do so in an upright position.
The appliance can be operated via the control panel or the remote control.
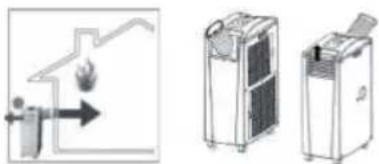
INDOOR AND OUTDOOR HEATING AND COOLING
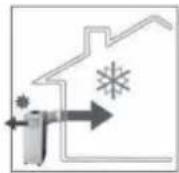
For indoor cooling the appliance is positioned inside the room
Connect the exhaust hose and the air outlet grid to the appliance as displayed in the illustration and as explained in the user manual.
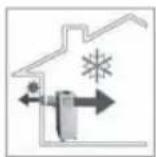
The warm extracted air must be emitted from the room via the exhaust hose. This can be executed e.g. via a tilted window, a door or a wall aperture. Make sure that no outside air can enter the room.
Choose the cooling mode and set the desired temperature (17-30 °C / 62 \~ 86 °F) The appliance should only be used in an ambient temperature of maximum 35 °C.
Note: At an ambient temperature of over 35^ C, the appliance may not operate.
For outdoor cooling the appliance is positioned outside.
For outdoor cooling, the air hose connection and air outlet grid need to be exchanged
Connect the exhaust hose and the air outlet grid to the appliance as displayed in the illustration.
To avoid overheating and to increase efficiency of the air conditioner, position the appliance if possible in the shade or/and a covered and cool area.
Note: At an ambient temperature of over 35^ C, the appliance may not operate. If this happens, we recommend to use the appliance indoors with an ambient temperature of less than 35^ C.
Choose the cooling mode and set the desired temperature (17-30 °C / 62 \~ 86 °F)
Cool air is led into the room via the exhaust hose. This can be executed e.g. via a tilted window, a door or wall aperture. Make sure that no hot air can enter the room from outside.

We recommend that the drainage hose for condensation water is connected.
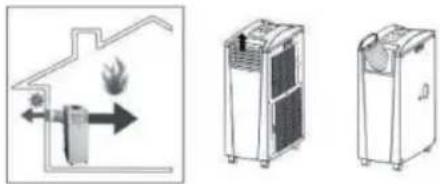
For indoor heating the appliance is positioned inside the room.
Connect the exhaust hose and the air outlet grid to the appliance as displayed in the illustration and as explained in the user manual.
natural_image
Three technical illustrations of household appliances: a fire hydrant, a portable air conditioner unit, and a portable air conditioner unit (no text or symbols present)The cold extracted air must be emitted from the room via the exhaust hose. This can be executed e.g. via a tilted window, a door or a wall aperture. Make sure that no outside air can enter the room.
Choose the heating mode and set the desired temperature 15-25 °C / 59 \~ 77 °F
For outdoor heating the appliance is positioned outside.

For outdoor heating, the air hose connection and air outlet grid need to be changed.
Outdoor operation is ideal for the transition period when temperatures do not fall below 7^ C. Should the temperature fall below 7^ C, we only recommend indoor operation!
Connect the exhaust hose and the air outlet grid to the appliance as displayed in the illustration.
natural_image
Illustration of three different industrial devices: a fire extinguisher, a portable air conditioner unit, and a gas stove (no text or symbols present)Choose the heating mode and set the desired temperature 15-25 °C / 59 \~ 77 °F
Warm air is led into the room via the exhaust hose. This can be executed e.g. via a tilted window, a door or wall aperture. Make sure that no cold air can enter the room from outside.
TURNING THE APPLIANCE ON / OFF
- Connect the appliance to a properly installed wall socket and make sure your local voltage matches the technical data of the appliance.
- Push the Power button and the appliance operates in the last used mode.
- If you use the appliance for the first time, it is in the cooling mode. The indicator light of the chosen mode lights up by moving the slats of the air outlet respectively You can easily turn or move the appliance with the sturdy castor wheels to direct the airstream into the room.
- Turn off the appliance by pushing the Power button.
- After use, disconnect the appliance from the mains.
By pressing the Mode key, your portable air conditioner can switch between the following operation modes: Cooling, Fan, Dehumidifying and Heating.
COOLING MODE
Press the Mode button once or repeatedly until the respective indicator light (cooling).
The appliance is now functioning as an air conditioner
Use the UP and DOWN button to increase or decrease the temperature. The temperature setting ranges from 17-30 °C / 62 \~ 86 °F which will be indicated on the display.
Press the Speed button to switch between the desired speed level (low, medium or high) of exhaust air. The respective indicator light lights up.
HEATING MODE
Press the Mode button once or repeatedly until the respective indicator light (heating) lights up. The appliance is now functioning as a heater
Use the UP and DOWN button to increase or decrease the temperature. The temperature setting ranges from 15 - 25 °C / 59 - 77 °F which will be indicated on the LED display.
Press the Speed button to switch between the desired speed level (low, medium and high) of exhaust air. The respective indicator light lights up.

To switch between Celsius and Fahrenheit in cooling or heating mode press both the
temperature - and + keys on the remote control or up and down on the control panel.
FAN MODE
Press the Mode button once or repeatedly until the respective indicator light (fan) lights up.
Press the Speed button to switch between the desired speed level (low, medium, high or auto fan mode) of exhaust air. The respective indicator light lights up.

The wind speed (ventilation level) cannot be adjusted in Heating, Dehumidification and
Sleep mode. The wind speed is automatically set to low.
DEHUMIDIFYING MODE (DH)
Press the Mode button once or repeatedly until the respective indicator light (dh) lights up.
In this mode, the appliance operates in the lowest speed and will start to remove excess moisture from the air.

ATTENTION:
The appliance is fitted with an internal water collection tank. Once this container has reached its capacity the appliance stops functioning and the indicator light “water full” lights up on the control panel.
If you wish to continue using the appliance, the water container needs to be emptied.
Please follow the steps under CLEANING AND CARE – Emptying the Water Tank.
SLEEPING MODE
The device has a sleep function. If you turn on this function, the device will operate in its most silent and energy saving mode.
Attention: the sleep function only works in the "COOL" mode.
-
Press the Sleep button to turn on the sleep function. The device switches to the lowest and most energy saving mode.
-
Press the Sleep button again to turn off the sleep function.
TIMER MODE
On hot respectively cold days, the timer mode enables you to arrive home and find a nice and cooled down room.
AUTOMATIC TURN ON TIME
When in Off (stand-by) mode:
Press the Timer button and the display starts blinking.
Use the UP or Down button to select the desired switch on time. The time setting ranges from 1 to 24 hours.
Once the switch on time is set, the display stops blinking.
If needed, press the Timer button again to adjust the switch-on time.
To switch off the timer function, simply press the Power button again.
AUTOMATIC TURN OFF TIME
When in Power On mode:
Press the Timer button and the display starts blinking.
Use the UP or Down button to select the desired switch off time. The time setting ranges from 1 to 24 hours.
Once the switch of time is set, the display stops blinking.
Press the Timer button again to change the switch off time if desired.
To switch off the Timer function, simply press the Power button again.
The indicator lights up when timer is set.
CLEANING AND CARE
Clean the air conditioner and filters regularly to maximize performance and efficiency, and to prolong the appliance's life.
Before cleaning, always switch off the appliance and disconnect it from the mains.
Never immerse the appliance in water. Danger! Electric Shock!
- Clean the appliance using a soft damp cloth.

Never use alcohol, gasoline, and/or any other aggressive cleaning agents/hard objects may damage the appliance exterior. Never spray water directly onto the unit.
To remove dust between the vents, use a soft brush or carefully use the vacuum cleaner.
EMPTYING THE WATER TANK
The device has an internal water collection tank. Once, the capacity of the water tank is reached, the appliance stops operating. The code „E3“ will be shown on the LED display.
In order to empty the water tank, turn off the appliance and disconnect it from the mains.
- To drain the water from the appliance, remove the plug from the drainage hole and properly attach the drainage hose to the drainage hole. Make sure that the end of the hose is placed into a proper water collection container, e.g. bucket or bigger.
natural_image
Line drawings of a portable air purifier and its side arm device (no text or symbols)CONTINUOUS DRAINAGE
Continuous Drainage can only be used if the appliance is set to Dehumidifying (Dehum) Mode!
Follow the steps as described under “Emptying the Water Tank” and make sure that the end of the hose is placed into a proper (big enough) water collection container (bucket or bigger).

Make sure that the drainage hose is properly attached and not distorted or bended.
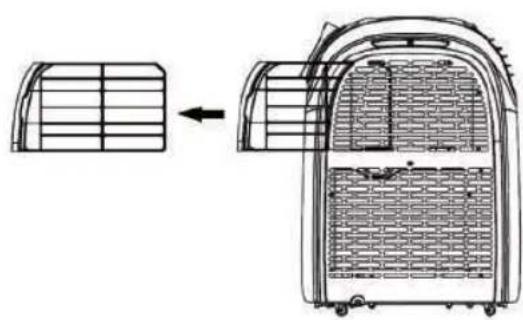
Cleaning the Filter
For an optimal result, clean the filter every two weeks, and replace it at least 1x per year, or more often is necessary.
The filter should also be cleaned before storing it for a longer period of time or after it hadn't been used over a prolonged period of time.
- Switch off the appliance and disconnect it from the mains.
- Loosen the screw with a cross-head screwdriver to remove the filter from the back of the appliance.
- Rinse the filter with lukewarm water, or if necessary, let it soak for a while in soapy water and rinse again to get rid of any cleaning residue.

Before reattaching the filter make sure that it is properly dry otherwise this may cause an ic shock or injury to the user due to water entering the appliance.
natural_image
Diagram showing a vehicle interior with grid layout and structural change, no text or symbols presentSTORAGE
Keep the appliance away from children and store it in a clean and dry place.
If you are not going to use the appliance for an extended period of time:
- Switch off the unit and disconnect it from the mains.
- Drain the water from the water tank and operate the appliance in fan mode for a few hours to thoroughly dry any moisture left on the coils inside the unit.
- Clean the filters.
- Remove the exhaust hose and adapters and
Keep the appliance away from children and store it in a clean and dry place.
PROBLEM SOLVING
| Troubles Possible | Causes Suggested Remedies | |
| 1. UNIT DOES NOT START WHEN PRESSING POWER BUTTON | - Water full indicator lamp blinks, and water tank is full | Dump the water out of the |
| - Room temperature is higher than the setting temperature. (Electric heating mode) | water tank. | |
| - Room temperature is lower than the setting temperature. (Cooling mode) | Reset the temperature | |
| 2. Not cool enough - The doors | ors or windows are not closed. | Make sure all the windows and doors are closed. |
| - There are heat sources inside the room. | Remove the heat sources if possible | |
| - Exhaust air hose is not connected or blocked. | Connect or clean the exhaust air hose. | |
| - Temperature setting is too high. | Reset the temperature | |
| - Air inlet is blocked. Clean the air inlet. | ||
| 3. Auto Power-Off in heating mode | - Heating protection, when the temperature at the air outlet exceeds 70°C, the unit will power off automatically. | Restart the unit at enough lower room temperature. |
| 4. Noisy | - The ground is not level or not flat enough. | Place the unit on a flat, level ground if possible |
| - The sound comes from the flowing of the refrigerant inside the air conditioner. | It is normal. | |
| 5. E1 Code | Room temperature sensor failed | Replace room temperature sensor (the unit can also work without replacement.) |
| 6. E2 Code | Evaporator coil sensor failed | Replace evaporator coil sensor. |
| 7. E3 Code | Water tank full | Please empty the water tank. |
Disposal Instructions

Waste electrical devices marked with this sign must not be disposed of with your household waste, but are to be collected separately. Therefore, please return this device at the end of its life cycle to special collection points for disposal or your local dealer.
Your Portable Air Conditioner 82002 is packed in a retail box. Such boxes are recyclable waste, i.e. they are reusable or recyclable.
Disposal Instruction For Batteries
Standard and rechargeable batteries should not be thrown into regular household waste. As a consumer, you are legally obliged to return used batteries for proper disposal. You can hand in your used batteries at public collection points in your district or sales outlets where batteries of this type are sold.

Note: The codes below are printed on batteries containing harmful substances:

Pb = Battery contains lead
Cd = Battery contains cadmium
Hg = Battery contains mercury
TECHNICAL DATA
Voltage: 220-240V\~50Hz
Rated input power: 1345W (Cooling) / 1391W (Heating)
Cooling Capacity: 12000BTU (3.5kW)
Heating Capacity: 10000BTU (2.9kW)
Permissible Excessive operating pressure: Suction 1.0Mpa / Discharge 2.6Mpa
Max Allowable Pressure: 3.2Mpa
Air Flow: 350m^3/h
Refrigerant: R290 / 215g
Protection class:
Protection level: IP24
CE
Guarantee:
This product is guaranteed against defects in materials and workmanship for a period of 2 years.
This guarantee is not valid:
- if the appliance has not been used in accordance to the instructions
• for damages due to wear and tear (batteries, etc.)
• for damages known by customer at time of purchase
• for damages caused by owner
This guarantee does not affect your statutory right, nor any legal right you may have as a customer under applicable national legislation governing the purchase of goods.
In order to assert his/her right in a guarantee case during the guaranteed period, the customer must provide evidence of the date of purchase (receipt).
The guarantee is to be asserted against
KORONA electric GmbH, Sundern/Germany.
Telephone Hotline: +49 2933 90284-80
Mail: service@korona-electric.de
web: www.korona-electric.de
within 2 years after the date of purchase. In case of guarantee the customer is given the right to get the appliance repaired at our own or at an authorized shop. Further rights (due to guarantee case) are not given to the customer.
Handleiding
natural_image
Three black-and-white icons: stacked open book, open with 'i' and a wrench, and open with a wrench (no text or symbols)KOELMIDDEL
natural_image
Technical illustration of a pipe elbow joint with a separate flat plate and a curved cutout (no text or symbols)natural_image
Medical or laboratory equipment setup with a circular component and two stacked sheets of tissue (no visible text or symbols)Raamzeil
natural_image
Exterior view of a white and black industrial air purifier unit (no visible text or symbols)-Luchtuitlaat
natural_image
White and black portable air conditioner unit (no visible text or symbols)Afvoergat
Bedieningspaneel

natural_image
Diagram of a device with two downward arrows and bidirectional arrows indicating movement (no text or symbols)
natural_image
Diagram of a door with double-headed arrows indicating movement or force (no text or symbols)natural_image
Technical line drawing of two air purifiers with ventilation ducts, shown from front and side views (no text or symbols)natural_image
Black-and-white photo of a window with large windows overlooking a residential area, showing a pipe extending into the window (no text or symbols visible)INSTALLATIE VAN DE UITLAATSLANG

natural_image
Line drawing of an air conditioner unit with dimension annotations (no text or symbols on the device itself)natural_image
Two identical line drawings of an air conditioner unit, labeled ① and ②, showing front and side views without any text or symbols.natural_image
Three technical illustrations of household air purifiers with heat transfer arrows, no text or symbols present.natural_image
Three technical illustrations showing a fire extinguisher, a gas stove, and a portable air conditioner unit (no text or symbols present)natural_image
Line drawing of a portable air conditioner unit with handle and wheels (no text or symbols)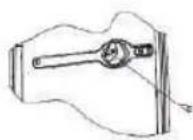
CONTINUE AFVOER
natural_image
Diagram showing a vehicle interior with a grid-patterned roof and an open rear panel, no text or symbols present.OPSLAG
natural_image
Three black-and-white line drawings: an open book, an open book with an information icon, and an open book with a wrench (no text or symbols)RÉFRIGÉRANT
- Bouton SWING (Oscillation)
natural_image
Diagram of a device with two downward arrows and bidirectional arrows, no text or symbols present
natural_image
Diagram of a door with double-headed arrows indicating movement or force, no text or symbols presentnatural_image
Technical line drawing of two air purifiers with ventilation ducts, shown from front and side views (no text or symbols)natural_image
Black-and-white photo of a window with large windows overlooking a distant cityscape, no visible text or symbols.INSTALLATION DU TUYAU DE SORTIE D'AIR

natural_image
Line drawing of an air conditioner unit with dimension annotations (no text or symbols on the device itself)natural_image
Two identical line drawings of an air conditioner unit, labeled ① and ②, showing front and side views without any text or symbols.natural_image
Diagram showing a roof structure with airflow direction and three separate views of a water heater (no text or symbols)natural_image
Three industrial air purifiers with heat exchanger and cooling unit (no text or symbols visible)natural_image
Three technical illustrations showing a fire extinguisher, a cabinet with doors, and a portable air conditioner unit (no text or symbols present)natural_image
Line drawings of a portable air purifier and its internal components (no text or symbols)ÉVACUATION CONTINUE
natural_image
Diagram showing a vehicle interior with grid layout and directional arrow (no text or symbols)ENTREPOSAGE
natural_image
Three black-and-white line drawings: an open book, an open book with an information icon, and an open book with a wrench (no text or symbols)REFRIGERANTE
natural_image
Exterior view of a white and black portable air conditioner unit (no visible text or symbols)Scarico dell'aria
natural_image
White and black portable air conditioner unit (no visible text or symbols)Foro di drenaggio
natural_image
Simple line drawing of a door with two downward arrows and an arrow pointing left (no text or symbols)
natural_image
Diagram of a door with double-headed arrows indicating movement or force, no text or symbols presentnatural_image
Technical line drawing of two air purifiers with ventilation ducts, shown from front and side views (no text or symbols)natural_image
Black-and-white photo of a window with large windows and a pipe extending into the left pan, overlooking a distant house (no text or symbols visible)INSTALLAZIONE DEL TUBO DI SCARICO

natural_image
Line drawing of an air conditioner unit with a spool and ventilation grille (no text or symbols)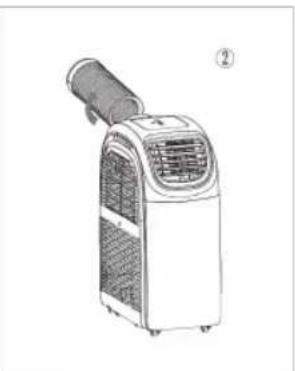
natural_image
Line drawing of an air conditioner unit with a handle and ventilation grille (no text or symbols)natural_image
Three technical illustrations of household air purifiers with heat transfer arrows, no text or symbols present.natural_image
Three technical diagrams showing a device with airflow and a separate storage unit (no text or symbols present)ACCENSIONE PROGRAMMATA
natural_image
Line drawing of a portable air purifier with handle and side view (no text or symbols)DRENAGGIO CONTINUO
natural_image
Diagram showing a structural change from a grid-patterned panel to a rectangular container with internal compartments (no text or symbols)STOCCAGGIO
natural_image
Three black-and-white line drawings: an open book, an open book with an information icon, and an open book with a wrench (no text or symbols)REFRIGERANTE
natural_image
Simple line drawing of a door with two downward arrows and a double-headed arrow inside (no text or symbols)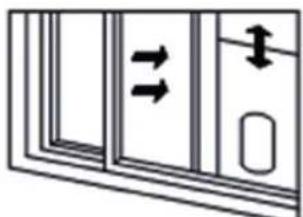
natural_image
Diagram of a door with double-headed arrows indicating flow or movement (no text or symbols)natural_image
Technical line drawing of two air purifiers with ventilation ducts, shown from front and side views (no text or symbols)natural_image
Black-and-white photo of a window with large windows overlooking a distant house, no visible text or symbolsnatural_image
Line drawing of an air conditioner unit with dimension annotations (no text or symbols on the device itself)natural_image
Two identical line drawings of an air conditioner unit, labeled ① and ②, showing front and side views without any text or symbols.natural_image
Line drawings of a portable air conditioner unit and its internal components (no text or symbols)DRENAJE CONTINUO
natural_image
Diagram showing a structural change from a grid-patterned panel to an open container with internal compartments (no text or symbols)ALMACENAMIENTO
natural_image
Simple line drawing of a device panel with two downward arrows and an arrow pointing left (no text or symbols)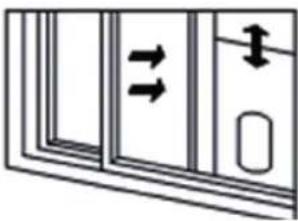
natural_image
Diagram of a door with double-headed arrows indicating movement or force, no text or symbols presentnatural_image
Technical line drawing of two air purifiers with ventilation ducts, shown from front and side views (no text or symbols)
natural_image
Black-and-white photo of a window with large windows and a pipe extending into the left pan, overlooking a distant house (no text or symbols visible)EGZOZ HORTUMUNUN MONTAJI

natural_image
Technical line drawing of an air conditioner unit with dimension annotations (no text or symbols on the device itself)natural_image
Line drawing of an air conditioner unit with a coiled tube and ventilation grille (no text or symbols)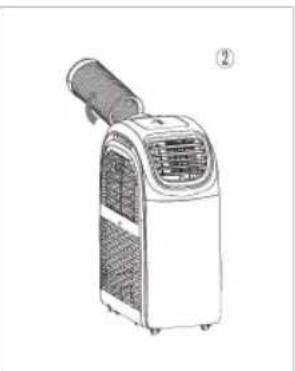
natural_image
Line drawing of an air conditioner unit with a handle and ventilation grille (no text or symbols)natural_image
Three technical illustrations of household appliances: a fire hydrant, a portable air conditioner unit, and a portable air conditioner unit (no text or symbols present)natural_image
Three-panel diagram showing a house interior with fire, a cabinet, and a gas stove (no text or symbols)natural_image
Line drawing of a portable air conditioner unit with a handle and control panel (no text or symbols)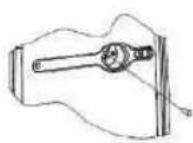
SÜREKLİ DRENAJ
natural_image
Diagram showing a structural change from a grid-patterned panel to an open container with internal compartments (no text or symbols)MUHAFAZA
natural_image
Three black-and-white line drawings: open book, open information icon, and open wrench (no text or symbols)CZYNNIK CZŁODNICZY
natural_image
Exterior view of a pipe elbow with a flat panel and a circular cutout (no text or symbols)natural_image
Medical or laboratory equipment setup with a coiled tube, a circular component, and a stack of papers (no visible text or symbols)Rękaw okienny
Wąż odpływowy-
natural_image
Exterior view of a white and black industrial air conditioner unit (no visible text or symbols)Panel sterowania
Wylot powietrza
natural_image
Exterior view of a white and black portable air conditioner unit (no visible text or symbols)Otwór drenażowy
Panel sterowania

natural_image
Simple line drawing of a door with two downward arrows and an arrow pointing left (no text or symbols)
natural_image
Diagram of a door with double-headed arrows indicating movement or force, no text or symbols presentnatural_image
Technical line drawing of two air purifiers with ventilation ducts, shown from front and side views (no text or symbols)natural_image
Black-and-white photo of a window with large windows and a pipe extending into the left, overlooking a distant house (no text or symbols visible)INSTALACJA WEŻA WYLOTOWEGO

natural_image
Line drawing of an air conditioner unit with a coiled tube and ventilation grille (no text or symbols)
natural_image
Line drawing of an air conditioner unit with a handle and ventilation grille (no text or symbols)natural_image
Three industrial air purifiers with heat exchangers, shown from different angles (no text or labels visible)natural_image
Illustration of a fire extinguisher and two household appliances (no text or symbols)natural_image
Line drawing of a portable air conditioner unit with a handle and control panel (no text or symbols)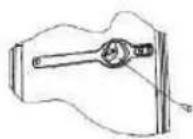
CIĄGŁY DRENAŻ
natural_image
Diagram showing a structural change from a grid-patterned panel to a multi-layered storage unit (no text or symbols)PRZECHOWYWANIE
ROZWIAZANIE PROBLEMÓW
natural_image
Three black-and-white line drawings of open books with icons: one open, one open with an information symbol, and one open with a wrench (no text or symbols present)CHLADIVO
natural_image
Technical illustration of a pipe fitting with a separate flat panel and a curved cutout (no text or symbols)natural_image
Medical or laboratory equipment setup with a spherical object and two stacked sheets of tissue (no visible text or symbols)Okenní plachta
Odpadní hadice
natural_image
Exterior view of a white and black portable air conditioner unit (no visible text or symbols)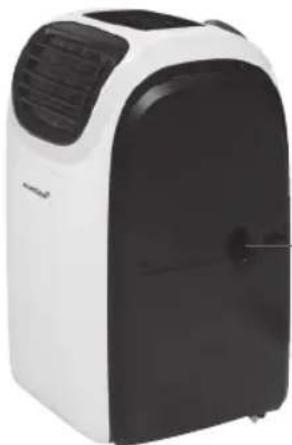
natural_image
Exterior view of a white and black portable air conditioner unit (no text or symbols visible)-Odvodňovací otvor
Panel ovládání

natural_image
Simple line drawing of a door with two downward arrows and an arrow pointing left (no text or symbols)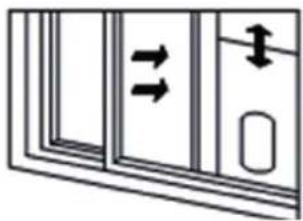
natural_image
Diagram of a door with double-headed arrows indicating movement or force, no text or symbols presentnatural_image
Technical line drawing of two air purifiers with ventilation ducts, shown from front and side views (no text or symbols)natural_image
Black-and-white photo of a window with large windows and a pipe extending into the corner, overlooking a distant house (no text or symbols visible)INSTALACE VÝFUKOVÉHO POTRUBÍ

natural_image
Line drawing of an air conditioner unit with a coiled hose and ventilation grille (no text or symbols)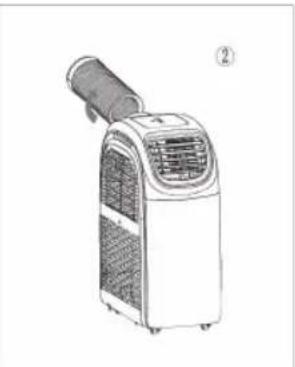
natural_image
Line drawing of an air conditioner unit with a handle and control panel (no text or symbols)natural_image
Three industrial air purifiers with cooling fans and heat exchanger, shown from different angles (no text or labels)natural_image
Three industrial equipment diagrams showing different configurations: a heating element, a cylindrical device with internal components, and two rectangular units (no text or symbols visible)natural_image
Line drawing of a portable air conditioner unit with handle and wheels (no text or symbols)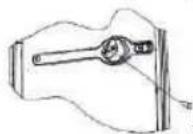
natural_image
Diagram showing a vehicle interior with structural grid and loading mechanism (no text or symbols)USKLADNĚNÍ
natural_image
Abstract geometric shape with curved and angular gray segments, no text or symbols presentRef: 82002/2020.01

- Bedienungsanleitung
- Bedienfeld
- INSTALLATION DES ABLUFTSCHLAUCHES
- LAGERUNG
- INTENDED USE
- Safety:
- REFRIGERANT
- Caution, risk of fire! R290
- WARNING:
- General Safety Instructions
- Caution! Danger of electric shock!
- An electric appliance is not a toy!
- Do not use the appliance,
- Special Safety Instructions
- Warning! To avoid the possibility of injury/damage to the appliance, electric shock and risk of burns.
- SCOPE OF DELIVERY
- PRODUCT DESCRIPTION
- Control Panel
- Indication lights operation modes
- Indication light ventilation speeds
- REMOTE CONTROL
- BEFORE FIRST USE
- INSTALLATION
- INSTALLATION OF THE WINDOW KIT (sliding window)
- INSTALLATION OF EXHAUST HOSE
- OPERATION
- TURNING THE APPLIANCE ON / OFF
- COOLING MODE
- HEATING MODE
- FAN MODE
- DEHUMIDIFYING MODE (DH)
- ATTENTION:
- SLEEPING MODE
- TIMER MODE
- AUTOMATIC TURN ON TIME
- AUTOMATIC TURN OFF TIME
- EMPTYING THE WATER TANK
- CONTINUOUS DRAINAGE
- Cleaning the Filter
- STORAGE
- Disposal Instruction For Batteries
- TECHNICAL DATA
- Guarantee:
- Handleiding
- KOELMIDDEL
- Bedieningspaneel
- INSTALLATIE VAN DE UITLAATSLANG
- CONTINUE AFVOER
- OPSLAG
- RÉFRIGÉRANT
- INSTALLATION DU TUYAU DE SORTIE D'AIR
- ÉVACUATION CONTINUE
- ENTREPOSAGE
- REFRIGERANTE
- INSTALLAZIONE DEL TUBO DI SCARICO
- ACCENSIONE PROGRAMMATA
- DRENAGGIO CONTINUO
- STOCCAGGIO
- DRENAJE CONTINUO
- ALMACENAMIENTO
- EGZOZ HORTUMUNUN MONTAJI
- SÜREKLİ DRENAJ
- MUHAFAZA
- CZYNNIK CZŁODNICZY
- Panel sterowania
- INSTALACJA WEŻA WYLOTOWEGO
- CIĄGŁY DRENAŻ
- PRZECHOWYWANIE
- CHLADIVO
- Panel ovládání
- INSTALACE VÝFUKOVÉHO POTRUBÍ
- USKLADNĚNÍ
Brand : KORONA
Model : 82002
Category : Air Conditioning