VERSO 12P - Speaker Ecler - Free user manual and instructions
Find the device manual for free VERSO 12P Ecler in PDF.

User questions about VERSO 12P Ecler
0 question about this device. Answer the ones you know or ask your own.
Ask a new question about this device
Download the instructions for your Speaker in PDF format for free! Find your manual VERSO 12P - Ecler and take your electronic device back in hand. On this page are published all the documents necessary for the use of your device. VERSO 12P by Ecler.
USER MANUAL VERSO 12P Ecler
9. APPLICATION AND MOUNTING EXAMPLE DIAGRAMS 35
All numbers subject to variation due to production tolerances. ECLER, S.A. reserves the right to make changes or improvements in manufacturing or design which may affect specifications.4
Congratulations. You are now the owner of the result of careful design and exquisite manufacture. Thank you for having chosen our powered loudspeaker cabinet VERSO P. In order to get the optimum operation and efficiency from this unit, it is VERY IMPORTANT - before you plug anything - to read this manual very carefully and bear in mind all considerations specified within it. We strongly recommend that its maintenance be carried out by our Authorised Technical services.
This equipment does not contain any parts that can be adjusted by the user. Do not use this appliance near water. Do not expose the equipment to splashes. Do not place receptacles containing water on them. Do not place the equipment near heat sources, spotlights or stoves. Use only the accessories specified by the manufacturer that are appropriate for each connection. Do not hang the equipment by its carry handles. To ensure effective protection against fire risks, replace the fuse by another of the same type as indicated on the unit cover. Keep these instructions and respect the warnings contained in them.
The VERSO 8P, 10P and 12P powered loudspeaker cabinet have been designed to cover a wide range of applications. From conference rooms, where considerable intelligibility is required, to outdoor applications such as marquees, mobile discos, meetings, presentations, etc. These are situations in which good sound projection is necessary, together with a high sound pressure level, reliability of operation and easy placement on stage. The VERSO P series is adapted to a wide range of applications in which simplicity of installation and use is an important requirement. All the models are made of high density plastic and protected by an acoustically transparent perforated grille at the front. All the models have an efficient Larsen high-frequency protection system (acoustic regeneration or coupling) and signal clipping. The connection plates are fitted with XLR3 connectors for the audio signal inputs and outputs.5
4. MODELS AND CHARACTERISTICS
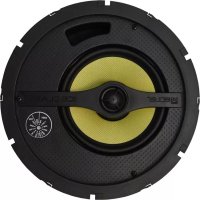
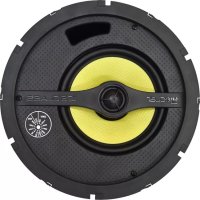
The VERSO P series is formed by thee models, all two-way and self-powered separately: VERSO 8P (200W RMS):
- Low-medium frequency: 8” bass speaker (woofer).
- High frequency: 34mm motor. VERSO 10P (300W RMS):
- Low-medium frequency: 10” bass speaker (woofer).
- High frequency: 34 mm motor. VERSO 12P (450W RMS):
- Low-medium frequency: 12” bass speaker (woofer).
- High frequency: 44 mm motor. Characteristics common to all three models:
- 3-band tone control at mixer output.
- Balanced "STACK OUT" output that enables the VERSO P to be connected to other self-amplifying units or conventional amplifiers.
- Active selectivity filter and slope of 24dB/oct for separating the two ways.
- Efficient protection system for reducing signal clipping, thereby protecting the speakers against occasional saturation. A red LED indicator marked “CLIP” warns the user when this is happening.6
Choose a site from where the audience area can be covered in which there are very few obstacles between audience and speaker. The higher the speaker is placed, the greater and better the audience coverage will be. Since this is a self-amplifying box, it requires direct connection to a power socket. This must be taken into consideration.
2. Connecting to the mains:
Read the WARNINGS paragraph in section 2. Check that the red switch is at “0”. Insert the network cable connector into the MAINS input and connect the pin to the other end of a network connection with an earth clamp.
3. Audio connections:
The VERSO 8P, 10P and 12P enable direct connection of two simultaneous sound sources through the respective balanced XLR3-type plugs. Each plug can be configured to receive LINE level signals (high level: MP3, CD, DVD players, keyboard, etc.) or dynamic microphones (low level). A MICRO/LINE button next to each input connector allows you to select the type of signal it will operate with: button pushed for LINE signals and not pushed for MICRO signals. Check that the selected position is the correct one. If connecting a self-amplifying box to a stereo mixing, select the LINE position and connect each mixer output channel at each side of the unit inputs. In this case, reproduction will be mono, the result of mixing the left and right channels delivered by the mixer. If you want to connect the unit to other self-amplifying boxes or amplifiers, first check that the levels of the initial box are correct and also check that it functions correctly when separated.
Check that both volume controls are at "MIN" and that the tone controls are in the central position. First of all turn on the signal generating source (MP3, CD, keyboard, DVD, etc.) Then put the on switch at “I”. This should light up immediately, in addition to the blue "ON" light, indicating that the amplifiers are correctly supplied with power. As soon as the inputs receive the signal, even with the volume adjusted to minimum in the unit, the green “SP” indicates should light up. Slowly turn the respective volume control until it reaches the required volume, NOT the maximum. If necessary, adjust the equalizer until you obtain the desired result. Then check the available reserve power by increasing the volume slowly, in all cases trying to prevent the red “CLIP” indicator from lighting up. If this should occur, reduce the level, as the internal amplifiers will continuously be saturated and the sound reproduced will be distorted.7
1. Location and installation:
The following general rules should be observed:
- Stand or hang the cabinets on or from solid, firm surfaces.
- There must be no obstacles between the acoustic box and the audience. High frequencies, unlike low ones, are extremely directive and any obstacle will cause an attenuation in its response.
- For large audience areas, the higher the boxes are placed, the better the propagation of the sound over the distance. To achieve this, use standardised tripods (with a stem 35 mm in diameter, such as the ECLER TRIPO1 model), which should be inserted into the casing specially provided for that purpose which is located on the inner side of the box.
- The VERSO 8P, 10P and 12P are also prepared for operation on the ground when laid flat (e.g., for use as a stage monitor), without the need to use any optional accessories.
- For wall mounting, an optional accessory is required: reference SR12 for the VERSO 12P model / reference SR8 for the VERSO 10P and 8P models. In this case, an additional safety cable should also be used (see details in section 9).
- If the boxes are hung, 6 anchoring points will be required: 3 nuts embedded on the top side and 3 more on the lower side, located under the rubber feet (see diagram in section 9).
- Do not hang the equipment by its carry handles.
2. Connecting to the mains:
The VERSO 8P, 10P and 12P models operate at a voltage of 115/230 V AC (selector switch on rear panel) and at 50-60Hz. Always ensure the mains selector switch is correctly positioned before starting up the unit: otherwise serious damage might be caused. Ensure that the mains cable is not mixed with the audio signal cables, thereby preventing interferences and buzzing. To protect the system from potential electrical overloads there is a T5A 250V 5x20 type mains fuse for model 12P, T3.5A 250V 5x20 for model 10P and T2.5A 250V 5x20 for model 8P. In the event of fusing, disconnect the appliance and replace it by another with identical characteristics. If the new fuse blows immediately, consult our Technical Service. ATTENTION: DO NOT SHORT-CIRCUIT THE PROTECTION CIRCUIT OR INSTALL A FUSE WITH A VALUE HIGHER THAN THE ORIGINAL ONE.
WARNING: The fuse must be replaced by a qualified technician.
3. Audio input connections:
These are of the balanced type and XLR3-type connectors, as indicated: Phase or direct signal (+) > Pin 2 Non-Phase or inverted signal (-) > Pin 3 Ground > Pin 1 Depending on the position in which the LINE /MICRO switch is set, the input will admit signals from one level or the other:8
Their sensitivity is –10dBV (316mV). CD, DAT, MP3, DVD Audio players, keyboards, tape recorders, synthesisers, etc. and the signal from audio mixers can be connected to this type of input. If the signal source is not the balanced type, care must be taken to ensure that terminals 1 and 3 are short-circuited, terminal 2 being the active signal. To adapt the output of this type of source, normally stereo, to the unit input (mono), the Ecler professional cable range can be used, which is designed specially for this purpose: CNX2RCAXLR2 (2xRCA to XLR), CNXRCAXLR2 (1xRCA to XLR) or CNXMJXLR2 (jack 3.5 mm to XLR). These connections contain a device for adding the L+R signals of a stereo source and converting them to mono.
5. Microphone Inputs:
The MICRO input is prepared for a nominal input level of -40dBV (10mV). The microphones must be dynamic, with low impedance (from 200 to 600 Ω) and mono. This type of microphone is usually balanced but in the rare case of having a NON-balanced microphone, terminals 1 and 3 must be short-circuited. To connect the microphones to these inputs, the ECLER professional cable range can be used, in the XLR/XLR format, with three optional lengths: 5, 10 and 20 metres: CNXXLRXLR5 / 10 / 20.
6. Audio output connection (STACK OUT):
This is balanced, and has a male XLR3 connector. Its nominal level is -10dBV (316 mV). This output can be used to connect the unit to another self-amplifying box or conventional external amplifier, mixer or even a recording device. It should be considered that this output is affected by the volume controls, so that in the event of having to connect various self-amplifying boxes, the last units may become saturated. Be very careful with the levels when using this output. Next to the connector there is a button to select the output signal between mix or from input 2
The blue “ON” light indicates that the power amplifiers are correctly supplied with power. Each of the inputs has an “SP” signal presence indicator. These indicators will light up when there is a signal in the inputs that is higher than -35 dBV, and are very useful for checking the level with which the external signal sources enter the unit. Lastly, the "CLIP" indicator warns you that the power amplifiers are saturated due to excess signal. To prevent distortion and prevent the speakers from becoming damaged, it is very important that this indicate is off while the unit remains in normal operation.
The VERSO 8P, 10P and 12P have an efficient 3-band tone control system, with a margin of action of –20 at +10dB in each one. The cut-off frequencies are 250Hz and 5.5kHz. For the best result, do not make drastic equalisations, and it is recommended not to exceed a level of ¾ in each band.9
7. OTHER CONSIDERATIONS
Ground loops: Ensure at all times that the signal sources reaching the unit and all the devices connected to its output do not have interconnected grounds, i.e., they should not be connected to ground through two or more different routes, since this could cause buzzing that would affect the sound reproduction quality. If cable shielding are connected to the chassis, they should be never interconnected, in order to avoid ground loops. Audio connections: As a general rule, try to ensure that the signal connections are as short as possible and use the best quality connectors and cables. Poor quality of the connections and/or cable used could lead to an important deterioration of the sound reproduction quality. The Ecler catalogue contains the necessary cabling references. Background noise: The use of active short-circuitry will product a more or less high level of background noise, depending on the configuration. The VERSO P series has been designed to reduce background noise level to a minimum. In all cases, it should be mentioned that the noise level obtained is directly dependent on the quality of all the elements connected in the installation, and the correct installation and use thereof. Cleaning: The front panel should not be cleaned with dissolvent or abrasive substances because silk-printing could be damaged. To clean it, use a soft cloth slightly wet with water and neutral liquid soap; dry it with a clean cloth. Be careful that water never gets into the unit through the holes of the front panel.10
4. Signal present indicator, SP
5. Input attenuator, VOL
6. Visual indication for power, ON
9. XLR output connector to other amplifiers,
9. APPLICATION AND MOUNTING EXAMPLE DIAGRAMS
Microphone Keyboard CD Deck Turntable
Line out XLR-3 PIN 3 = COLD PIN 1 = GND
VERSO8P VERSO10P VERSO12P System Active Crossover two way full range active cabinet Driver 1x8" Bass 1x10" Bass 1x12" Bass
1x34mm Treble 1x34mm Treble 1x44mm Treble
Signal present indicator -35dBV
Dimension (WxDxH mm/Pcs) 291x241x398mm 350x290x475mm 447x368x607mm38