WS 6449 - Weather Station TECHNOLINE - Free user manual and instructions
Find the device manual for free WS 6449 TECHNOLINE in PDF.

| Product type | Radio-controlled weather station |
| Brand | TECHNOLINE |
| Model | WS 6449 |
| Station power supply | AC adapter HX0180500150A2E or 2 AAA batteries (backup) |
| Outdoor sensor power supply | 2 AAA batteries |
| Radio frequency | 433 MHz |
| Time signal | DCF (radio-controlled reception) |
| Time zone | Adjustable from -12 to +12 hours |
| Time display | 12 or 24 hours |
| Calendar | Day/month, year 2000-2099 (default 2016) |
| Indoor temperature | Range -9.9°C to 50°C, accuracy ±1°C (0°C-50°C) |
| Outdoor temperature | Range -40°C to 60°C, accuracy ±1°C (0°C-50°C) |
| Indoor/outdoor humidity | 20% to 95% RH, accuracy ±5% RH |
| Weather forecast | 5 symbols: sunny, partly cloudy, cloudy, rainy, stormy |
| Alarm | With 10-minute snooze function |
| Backlight | White, continuous on adapter, 10 seconds on batteries |
| Pressure history | Last 12 hours in 6 intervals |
| Weekday languages | GER, FRE, ITA, DUT, SPA, DAN, ENG |
| Low battery indicator | Yes, for station and sensor |
| Max number of sensors | 3 (channels 1, 2, 3) |
| Maintenance | Clean with a dry cloth, avoid solvents |
| Safety | Indoor use, do not expose to water or fire |
Frequently Asked Questions - WS 6449 TECHNOLINE
User questions about WS 6449 TECHNOLINE
0 question about this device. Answer the ones you know or ask your own.
Ask a new question about this device
Download the instructions for your Weather Station in PDF format for free! Find your manual WS 6449 - TECHNOLINE and take your electronic device back in hand. On this page are published all the documents necessary for the use of your device. WS 6449 by TECHNOLINE.
USER MANUAL WS 6449 TECHNOLINE
text_image
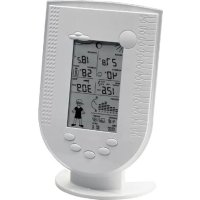
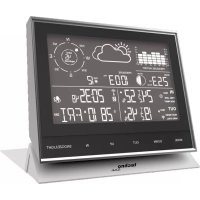
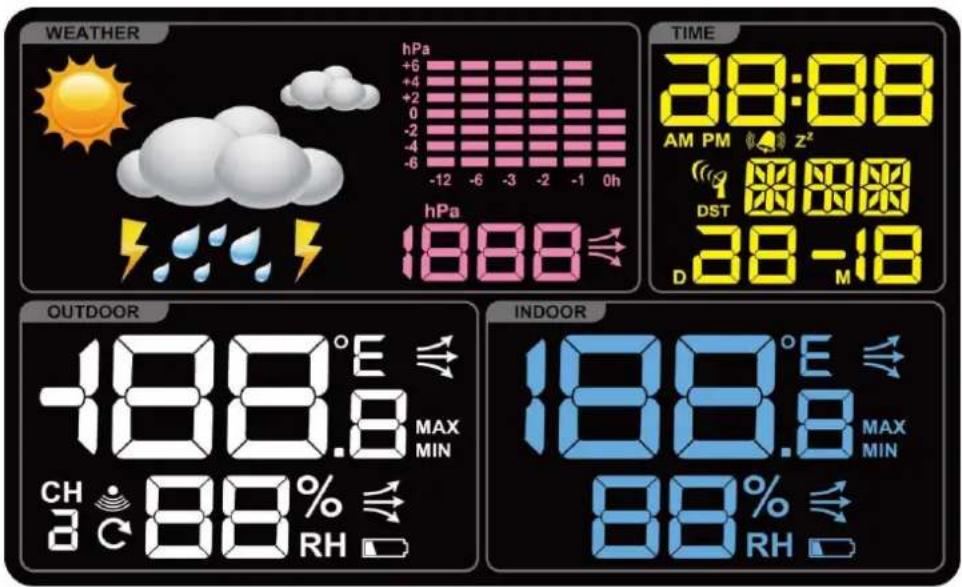
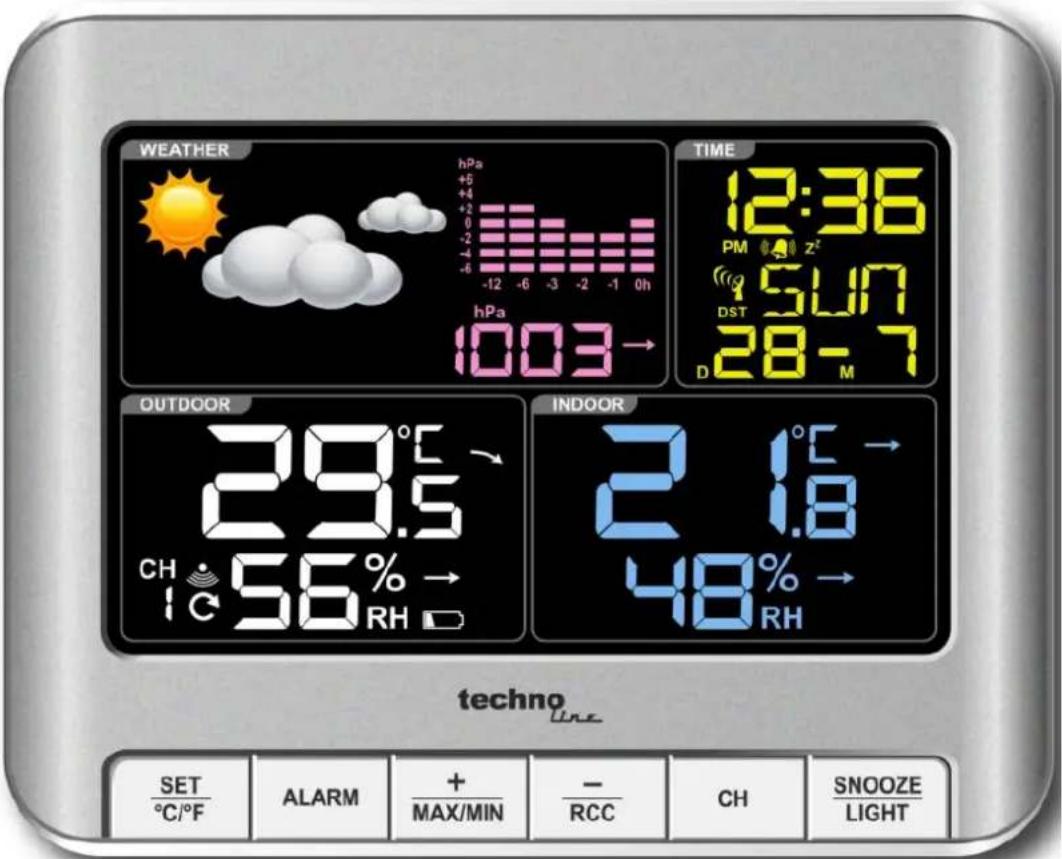
WEATHER hPa +5 +4 -2 0 -4 -6 -12 -6 -3 -2 -1 0h hPa 1003→ TIME 12:36 PM Z' 15UN DST 28-7 D M OUTDOOR 29.5° CH 56% → INDOOR 2.18° 48% → RH techno LINE SET °C/°F ALARM + MAX/MIN - RCC CH SNOOZE LIGHTEigenschaften:
text_image
SET °C/°F ALARM + MAX/MIN - RCC CH SNOOZE LIGHT
natural_image
Simple illustration of a bright sun with radiating rays against a black background (no text or symbols)
natural_image
Weather icon showing sun and clouds against black background (no text or symbols)
natural_image
Stylized white cloud shapes on black background (no text or symbols)
natural_image
Illustration of a cloud with raindrops falling (no text or symbols)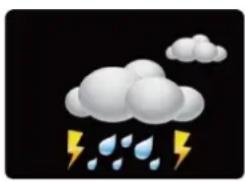
natural_image
Weather icon showing cloud with raindrops falling (no text or symbols)Hinweis:
• Calendar (Date/month,2000-2099 Default Year 2016)
- Indoor Temperature and Humidity
• Outdoor Temperature and Humidity
• 12/24 h time format selectable
• Alarm and snooze function
- Low battery icon
- Weather forecast: sunny, partly sunny, cloudy, rainy and stormy
• Maximum and minimum temperature/humidity
- Seven languages for week (GER, ITA, DUT, SPA, DAN, ENG, FRA)
• Time zone: -12/+12HR
• DCF Radio clock receiver function
- White backlight
Batteries:
Receiver : 2x AAA (only for back-up) / TX960-TH sensor: 2x AAA
LCD Display:
text_image
WEATHER hPa +6 +4 +2 0 -2 -4 -6 -12 -6 -3 -2 -1 0h hPa 888 TIME 38:88 AM PM Z² 1 DST 888 D 38 -18 OUTDOOR -188.8°E MAX MIN CH 88% RH INDOOR 188.8°E MAX MIN 88% RHQuick setup
- Keep your weather station and wireless outdoor transmitter next to each other.
- Make sure the Channel selector switch on sensor is at 1 position.
- Open the battery cover at the back of your wireless outdoor transmitter and insert 2 x AAA new alkaline batteries to the battery compartment. Replace the battery cover.
- Connect the included power supply with the socket on the backside of the weather station or alternatively you can use batteries: Open the battery cover at the back of your weather station and insert 2x AAA new alkaline batteries to the battery compartment. Replace the battery cover. Please note, without adapter and only batteries the backlight is always set off and you need to press the "SNOOZE/LIGHT" button to turn on backlight for 10 seconds.
- Make sure Channel 1 is displayed on the weather station. Your weather station will receive data signal from the outdoor transmitter in a few seconds.
- Place your outdoor transmitter in a dry and shaded area once the weather station receives the data of this sensor.
Power On:
• Display full segment for 2 second.
- The weather station searching starts wireless sensor via 433MHz.
- If the outdoor temperature is not displayed after 3 minutes, hold the "CH" button on the main unit to search for outdoor sensor. Then press the "TX" button on the sensor to send signal. If it still does not receive the outdoor temperature, remove the batteries from the transmitter and go back to step 1 of the set up
Sensor Reception

- Press and hold the CH/+ button for 3 seconds while viewing an empty channel to search for the sensor.
- The strength signal icon will flash until the sensor signal is received or for 3 minutes if no signal available.
Adding additional sensors
- Make sure Channel 2 or 3 is displayed on the weather station. Press the "CH" button to change channels on the weather station.
-
Make sure the Channel selector switch on the sensor is at 2 or 3 position
-
Once the Channel numbers on weather station and sensor are the same, proceed by opening the battery cover at the back of your wireless sensor and insert 2 x AAA new alkaline batteries to the battery compartment. Replace the battery cover.
- Your weather station will receive the data signal from the outdoor transmitter in a few seconds.
- Place your outdoor transmitter in a dry and shaded area once the weather station receives the data of this sensor.
Note:
- If the weather station is used with 2 or 3 transmitters, press "CH" button shortly to display Channel 1, Channel 2, Channel 3 or cyclic display.
- In cyclic display, the channel will be changed every 25 seconds in overview all channels in a short period of time
Deleting sensors / clearing channels
- Press and hold the "CH" button for 3 seconds to clear the current channel to re-register
Display / Keys Details:
There are six function buttons:

text_image
SET °C/°F ALARM + MAX/MIN - RCC CH SNOOZE LIGHT
DCF Reception icon with full signal strength will appear on screen if the reception of atomic time is successful.
- In normal display mode, press this “-/RCC” button to start/stop time searching (DCF).
- The tower icon will show solid when the station has received the DCF signal.
- No tower icon displayed. The station was unable to receive a signal at this time.
Reposition the station for better signal reception and wait an overnight.
automatically receive Hours: Daily 1:00,2:00,3:00,4:00,5:00 DCF automatically receive, at any time once received 3,4,5:00 no longer receive the same day
Only if the unit receives summer time, it will display the "DST" icon.
- If there is no signal or too much interference the receiver will only be on for 2 minutes.
- If the signal is good it may catch a signal in ABOUT 2-3 minutes.
- If the signal is marginal it will try to catch a signal for up to 10 minutes.
Manual Time Setting:
- Press and hold the "SET" button for 3 seconds in normal display mode to enter time setting mode.
- 12Hr or 24Hr will flash. Press the "+" or "-" button to select between the 12-hour or 24-hour time format. Press the "SET" button to confirm and continue.
- The time zone will flash on the display. Press the “+” or “-” button to set the desired time zone( setting range is 0\~ +12,0\~ -12). Press the “SET” button to confirm and continue.
- The hour will flash. Press the “+” or “-” button to select the hour. Press the “SET” button to confirm and continue.
- The minutes will flash. Press the “+” or “-” button to select the minutes. Press the “SET” button to confirm and continue.
-
The year will flash. Press the “+” or “-” button to select the year. Press the “SET” button to confirm and continue.
-
The month will flash. Press the “+” or “-” button to select the month. Press the “SET” button to confirm and continue.
- The date will flash. Press the “+” or “-” button to select the date. Press the “SET” button to confirm and continue. The day of the week will set automatically after YEAR, MONTH, DATE.
- The language will flash, the default is GER. Press the “+” or “-” button to select the desire language: GER, FRE, ITA, DUT, SPA, DAN, ENG. Press the “SET” button to confirm and continue.
| ENGLISH | GERMAN | FRENCH | ITALIAN | DUTCH | SPANISH | DANISH | |
| WEEK | ENG | GER | FRE | ITA | DUT | SPA | DAN |
| MON | MON | MON | LUN | LUN | MAA | LUN | MAN |
| TUE | TUE | DIE | MAR | MAR | DIN | MAR | TIR |
| WED | WED | MIT | MER | MER | WOE | MIE | ONS |
| THU | THU | DON | JEU | GIO | DON | JUE | TOR |
| FRI | FRI | FRE | VEN | VEN | VRI | VIE | FRE |
| SAT | SAT | SAM | SAM | SAB | ZAT | SAB | LOR |
| SUN | SUN | SON | DIM | DOM | ZON | DOM | SON |
- The value of air pressure will flash. Press the “+” or “-” button to enter the relative value of air pressure. The relative air pressure can be requested from a local meteorological service. Press the “SET” button to confirm and return to the normal display mode.
Note:
- If no buttons are pressed in a 20 seconds period, time setting mode will time out and return to normal display mode, reflecting whatever adjustments were made by user before timed out
- +/- buttons: Press once to adjust by 1 unit, hold for fast scroll adjustment
Activating and deactivating the alarm
- Press the "ALARM" button once to enter the alarm mode and "ALM" will be shown on the display.
- Press the “+” or “-” button to activate or deactivate the alarm. The alarm icon 📋 will be displayed permanently as long as the alarm is activated and the alarm icon will no longer be displayed as soon as the alarm is deactivated.
- Press the "ALARM" button once again to confirm and return to the normal display mode. "ALM" will no longer be shown on the display.
Alarm setting
- Press and hold the "ALARM" button for 3 seconds in normal display mode to enter alarm setting mode.
- The alarm hour will flash. Press the “+” or “-” button to select the alarm hour. Press the “ALARM” button to confirm and continue.
- The alarm minutes will flash. Press the “+” or “-” button to select the alarm minute. Press the “ALARM” button to confirm and return to the normal display mode.
Note:
- If no buttons are pressed in a 20 seconds period, alarm setting mode will time out and return to live display mode, reflecting whatever adjustments were made by user before timed out
- +/- buttons: Press once to adjust by 1 unit, hold for fast scroll adjustment
- When the alarm sounds, it continues for 2 minute and then shuts off completely.
Snooze function
- Press "SNOOZE/LIGHT" button and the white backlights activates for 10 seconds.
- When alarm sounds, press the "SNOOZE/LIGHT" button to trigger snooze for 10 minutes. The alarm icon flashes when the snooze feature is active.
Note:
- To stop alarm for one day, press any button but "SNOOZE/LIGHT" button, while in snooze mode. The alarm icon will stop flashing.
Backlight function
- With adapter, the display will always have backlight on.
- Without adapter, press the "SNOOZE/LIGHT" button to turn on backlight for 10 seconds.
MAX/MIN values:
- In normal display mode, press the “MIN/MAX” button to display maximum temperature/humidity. Press the “MIN/MAX” button once more to display minimum temperature/humidity.
- Press and hold the "MIN/MAX" button for 3 seconds in the corresponding interface to clear max or min temperature/humidity memory.
- After 5 seconds the display will return back to the normal display mode.
- The MIN/MAX values will also be automatically cleared at every midnight (0:00).
Barometer and bar and data of history for the past 12 hour of air pressure
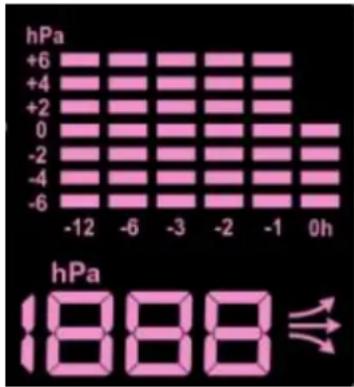
bar
| Time | hPa | |---|---| | -12 | +6 | | -6 | +4 | | -3 | +2 | | -2 | 0 | | -1 | -2 | | 0h | -4 | | 0h | -6 |• Air pressure history can be displayed in hPa, for the past 12 hours
- The bar graph indicates the air pressure history trend over the last 12 hours in 6 intervals: 0h, -1h, -2h, -3h, -6h, and -12h. The “0h” represents the current full hour air pressure recording. The columns represent the “hPa” (0, ±2, ±4, ±6) at a specific time. The “0” in the middle of this scale is equal to the current pressure and each change (±2, ±4, ±6) represents how high or low in “hPa” the past pressure was compared to the current pressure.
- For accurate barometric pressure trends, the weather station should
operate at the same altitude for recordings (i.e. it should not be moved from the ground to the second floor of the house). When the unit is moved to a new location, discard readings for the next 12 hours.
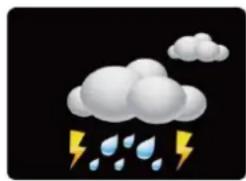
Weather forecast
5 Weather forecast symbols can be displayed: sunny, partly sunny, cloudy, rainy, stormy

natural_image
Simple illustration of a bright sun with radiating rays against a black background (no text or symbols)
natural_image
Weather icon showing sun and clouds against a black background (no text or symbols)
natural_image
Stylized white cloud against black background (no text or symbols)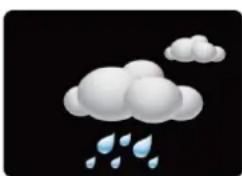
natural_image
Illustration of a cloud with raindrops falling (no text or symbols)
natural_image
Weather icon showing cloud with raindrops and lightning (no text or symbols)Note:
- The weather forecast is determined by temperature, humidity and air pressure. The forecast symbol may not match with the current weather.
Changing temperature unit
- Press the “°C/°F” button to choose temperature unit from °C or °F.
Low battery indicator
The weather station displays the low battery condition symbol to remind that the batteries of the weather station or the outdoor sensor need to be exchanged.
- Battery icon by indoor temperature-Change batteries in the clock.
- Battery icon by outdoor temperature-Change batteries in the sensor.
Hereby, Technotrade declares that the products WS 6449 and TX960-TH are in compliance with the essential requirements and other relevant provisions of Directive 2014/53/EU and ROHS 2011/65/EC. The original EU declaration of conformity may be found at: www.technoline.de/doc/4029665064499
Specifications
• Transmission frequency: 433 MHz
• Maximum transmission power: 8 dBm
• AC/DC Adapter: HX0180500150A2E
Indoor temperature:
- Operating temperature range = -9.9°C to 50°C (14°F to 122°F)
- Accuracy ± 1 degrees Celsius 0°C to 50°C (32°F to 122°F)
• Resolution = 0.1 degree Celsius - When above 50^ (122°F), the LCD will display HI
- When below- 9.9°C (14°F) the LCD will display LO
Indoor Humidity:
- Operating humidity range =20% RH to 95%
• Accuracy +/- 5% RH
• Resolution = 1 % RH
Outdoor temperature:
- Operating temperature range = -40°C to 60°C (-40°F to 140°F)
- Accuracy ± 1 degrees Celsius from 0°C to 50°C (32°F to 122°F)
• Accuracy ±1.5 degrees Celsius -40°C to 0°C (-40°F to 32°F) and 50°C to 60°C(122°F to 140°F)
• Resolution = 0.1 degree Celsius - When above 60^ (140° F), the LCD will display HI
- When below-40°C (-40°F), the LCD will display LO
Outdoor Humidity:
- Operating humidity range =20% RH to 95%
• Accuracy +/- 5% RH
• Resolution = 1 % RH
Default SETTING:
- Time:00:00
- Temperature: °C
- Weather Forecast Icons: partly sunny
• German week display
Environmental reception effects
The station obtains the accurate time with wireless technology. Same as all wireless devices, the reception is maybe affected by the following circumstances:
- long transmitting distance
• nearby mountains and valleys - near freeway, railway, airports, high voltage cable etc.
- near construction site
- among tall buildings
• inside concrete buildings - near electrical appliances (computers, TV's, etc) and metallic structures
• inside moving vehicles
Place the station at a location with optimal signal, i.e. close to a window and away from metal surfaces or electrical appliances.
Precautions
- This main unit is intended to be used only indoors.
- Do not subject the unit to excessive force or shock.
- Do not expose the unit to extreme temperatures, direct sunlight, dust or humidity.
- Do not immerse in water.
- Avoid contact with any corrosive materials.
- Do not dispose this unit in a fire as it may explode.
- Do not open the inner back case or tamper with any components of this unit.
Batteries safety warnings
- Use only alkaline batteries, not rechargeable batteries.
• Install batteries correctly by matching the polarities (+/-).
• Always replace a complete set of batteries. - Never mix used and new batteries.
- Remove exhausted batteries immediately.
- Remove batteries when not in use.
- Do not recharge and do not dispose of batteries in fire as the batteries may explode.
- Ensure batteries are stored away from metal objects as contact may cause a short circuit.
- Avoid exposing batteries to extreme temperature or humidity or direct sunlight.
- Keep all batteries out of reach from children. They are a choking hazard.
Use the product only for its intended purpose!
Consideration of duty according to the battery law
Old batteries do not belong to domestic waste because they could cause damages of health and environment. You can return used batteries free of charge to your dealer and collection points. As end-user you are committed by law to bring back needed batteries to distributors and other collecting points!
Consideration of duty according to the law of electrical devices
This symbol means that you must dispose of electrical devices separated from the General household waste when it reaches the end of its useful life. Take your unit to your local waste collection point or recycling centre. This applies to all countries of the European Union, and to other European countries with a separate waste collection system.
text_image
WEATHER hPa +5 +4 -2 -1 -6 -12 -6 -3 -2 -1 0h hPa 1003→ TIME 12:36 PM Z 5UN DST 28-7 OUTDOOR 29.5° CH 56% → RH INDOOR 2.18° 48% → RH techno LINE SET °C/°F ALARM + MAX/MIN - RCC CH SNOOZE LIGHTCaractéristiques :
natural_image
Simple illustration of a bright sun with radiating rays against a black background (no text or symbols)
natural_image
Weather icon showing sun and clouds against black background (no text or symbols)
natural_image
Simple 3D cloud illustration on black background (no text or symbols)
natural_image
Illustration of a cloud with raindrops falling (no text or symbols)
natural_image
Weather icon showing cloud with raindrops falling (no text or symbols)Remarque :
| SET ℃/℉ | ALARM | + MAX/MIN | - RCC | CH | SNOOZE LIGHT |

bar
| Time (h) | hPa | |---|---| | -12 | +6 | | -6 | +4 | | -3 | +2 | | -2 | 0 | | -1 | -2 | | 0 | -4 | | 0h | -6 | The image displays a grid of pink bars representing hPa values at specific time points. The bottom label 'hPa' is shown in the bottom right corner, indicating the height of the hPa value. An arrow symbol appears near the bottom center of the chart.natural_image
Simple illustration of a yellow sun with rays against a black background (no text or symbols)
natural_image
Weather icon showing sun and clouds against black background (no text or symbols)
natural_image
Abstract 3D cloud-like shapes on black background (no text or symbols)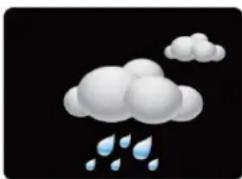
natural_image
Illustration of a cloud with raindrops falling (no text or symbols)
natural_image
Weather icon showing cloud with raindrops and lightning (no text or symbols)Nota:
text_image
SET °C/°F ALARM + MAX/MIN - RCC CH SNOOZE LIGHT
bar
| Time (h) | hPa | |---|---| | -12 | 0 | | -6 | 0 | | -3 | 0 | | -2 | 0 | | -1 | 0 | | 0h | 0 | | 0h | +6 | | 0h | +4 | | 0h | +2 | | 0h | 0 | | 0h | -2 | | 0h | -4 | | 0h | -6 | The image displays a grid of pink rectangular bars representing hPa values at specific time points. Below it is a stylized graphic symbol resembling a Wi-Fi or a lightning bolt. The text 'hPa' and '888' are displayed below the image.natural_image
Simple illustration of a bright sun with radiating rays against a black background (no text or symbols)
natural_image
Weather icon showing sun and clouds against black background (no text or symbols)
natural_image
Stylized white cloud against black background (no text or symbols)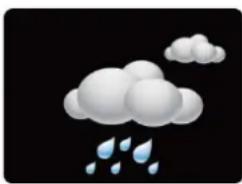
natural_image
Illustration of a cloud with raindrops falling (no text or symbols)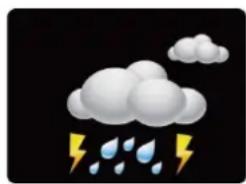
natural_image
Weather icon showing cloud, raindrops, and lightning (no text or symbols)Opmerking:
text_image
SET °C/°F ALARM + MAX/MIN - RCC CH SNOOZE LIGHT
natural_image
Simple illustration of a bright sun with rays against a black background (no text or symbols)
natural_image
Weather icon showing sun and clouds against black background (no text or symbols)
natural_image
Stylized white cloud shapes on black background (no text or symbols)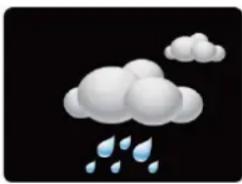
natural_image
Illustration of a cloud with raindrops falling (no text or symbols)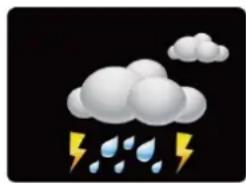
natural_image
Weather icon showing cloud with raindrops falling (no text or symbols)Nota:
text_image
SET °C/°F ALARM + MAX/MIN - RCC CH SNOOZE LIGHT
natural_image
Simple illustration of a yellow sun with rays against a black background (no text or symbols)
natural_image
Weather icon showing sun and clouds against black background (no text or symbols)
natural_image
Stylized white cloud shapes on black background (no text or symbols)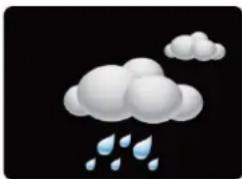
natural_image
Illustration of a cloud with raindrops falling (no text or symbols)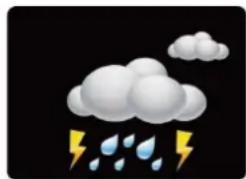
natural_image
Weather icon showing cloud with raindrops and lightning (no text or symbols)Poznámka:
text_image
SET °C/°F ALARM + MAX/MIN - RCC CH SNOOZE LIGHT
natural_image
Simple illustration of a bright sun with radiating rays against a black background (no text or symbols)
natural_image
Weather icon showing sun and clouds against a black background (no text or symbols)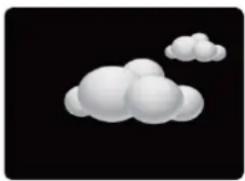
natural_image
Stylized white cloud shapes on black background (no text or symbols)
natural_image
Illustration of a cloud with raindrops falling (no text or symbols)