USER MANUAL CT550I THOMSON
BELGIQUE, customerservice@bigben-interactive.be
NEDERLAND, customerservice@bigben-interactive.nl
ESPANA, soporte@metronic.com
Tel.: 937132625
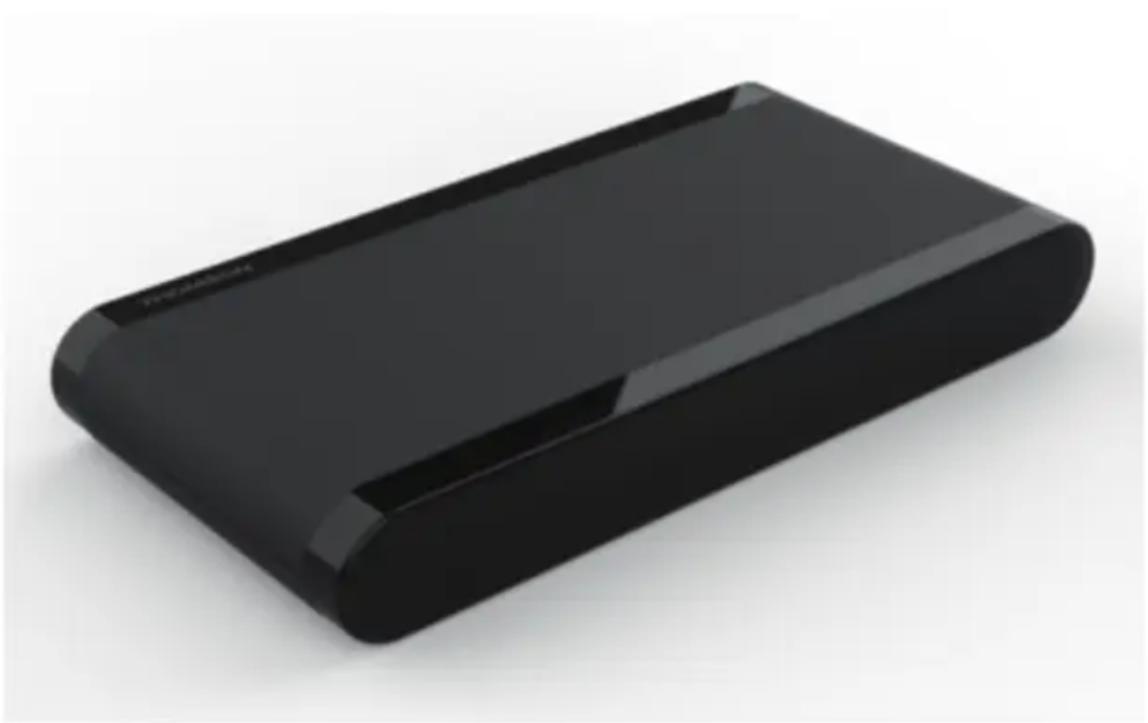
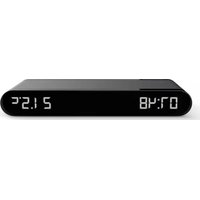
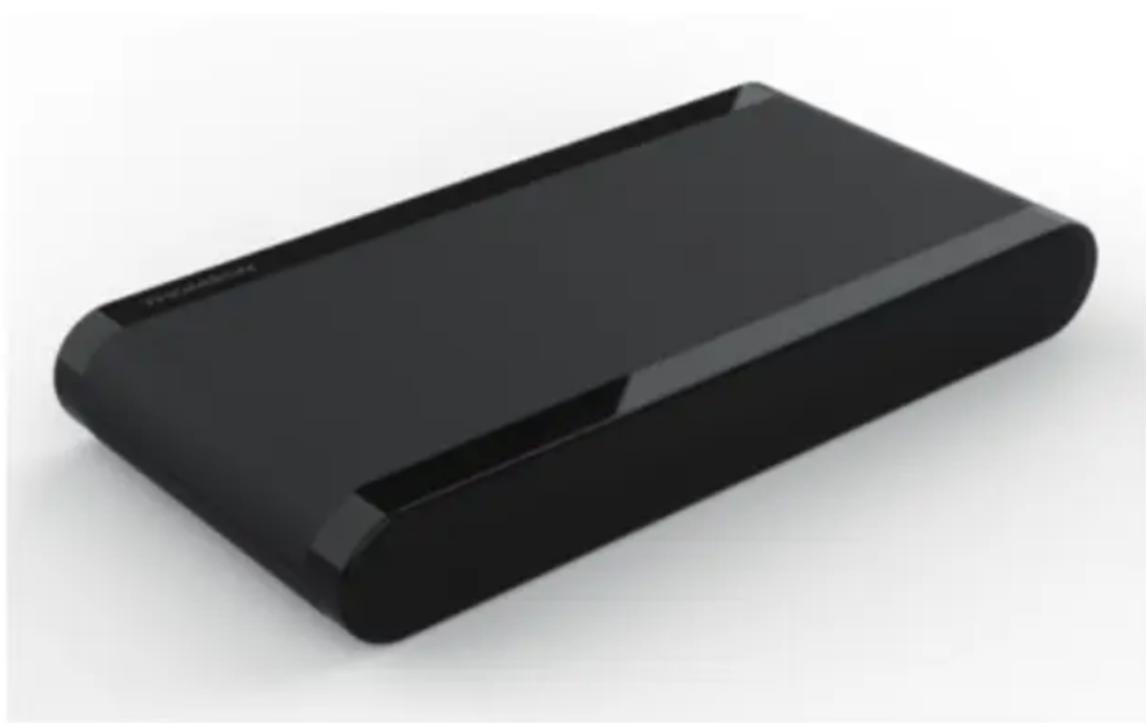
Charging Station Alarm
OPERATING INSTRUCTIONS
PLEASE READ THIS USER MANUAL CAREFULLY BEFORE OPERATING THIS UNIT AND RETAIN FOR FUTURE REFERENCE.
Getting started 12
Warnings and safety instructions 12
What is in the box 14
Description of the parts 15
Controls
Operation
Battery warning 18
Product specification 19
Technical specifications of the adapter 19
Care of the environment 19
Additional information 19
16 Declaration of conformity 19
16 Guarantee 20
Getting started
- Take the appliance out of the box.
- Remove all the packaging from the product.
- Place the packaging inside the box or dispose of it safely in compliance with the waste sorting instructions shown on the product packaging.
Warnings and safety instructions
You must read and understand all of the instructions before using this device. The guarantee will be invalidated in cases of damage caused by failure to follow the instructions.
- Never remote the housing unit from the device.
- Never place this device on top of other electrical equipment.
- Protect the power cable, so as to avoid it being walked over or trapped somewhere, particularly by the plugs, power sockets, and the device's power connection. Make sure that the power supply voltage corresponds to the voltage indicated on the information panel on the rear of the device. When you disconnect the device, always unplug the device from the power socket by pulling on the plug itself. Never pull on the cable. Make sure that you have secured all other connections before plugging in the plug.
-
Only use accessories recommended by the manufacturer.
-
Repairs must be carried out by qualified repair technicians. Repairs are necessary when the device has been damaged in any way, and particularly:
-
If the power cable is damaged;
- If liquid has been spilled onto the device or if objects have been inserted into it;
- If the device is exposed to rain or humidity;
- If the device isn't working normally;
-
If the device has fallen or been struck with something.
-
The serial number can be found on the underside of the device.
- Never obstruct the vent.
- Make sure that you leave sufficient space for ventilation. Position the device on a stable surface.
- This device must be used in a moderate climate, away from direct sunlight, flames, and heat, heating devices, cooking appliances, or any other device (including amps) which generate heat. Do not install this device close to a heat source.
- The batteries (battery block or inserted batteries) must not be exposed to excessive heat, such as sunlight, fire, etc.
- Always unplug the device before cleaning it. Do not lubricate any part of this device.
Clean it using a soft cloth. Do not use abrasive or aggressive cleaning products.
- Make sure that you can always easily access the power cable, the plug, and the adapter, so that you are able to unplug this device from the mains power socket.
- Do not use this device close to a water point. It must not be exposed to water drops or splashes. Do not use this device is a wet or humid environment.
- Unplug this device in the event of a storm, or if you don't plan on using it for a long period of time.
- This device can be used by children aged 8 years and older, and it can also be used by individuals with physical or sensory disabilities, learning difficulties, or without experience or knowledge of similar devices, under supervision or with instructions regarding the safe use of this device, as long as they understand the risks associated. Children must not play with this device or its power cable (risk of strangulation). Children must not clean or repair this device without supervision.
- This device must only be powered by a very low-voltage safety supply, corresponding to the instructions provided on the device.
- The battery must be removed from the device before disposing of it. The device must be unplugged from the power supply when you remove the battery.
- When it is in use, the device must be located at least 20~cm from human bodies.
- Choking risk: The small parts are not designed for children under the age of 3 years or individuals with tendencies to put objects in their mouths.
- This toy must only be connected to equipment with the following symbols:

- Do not use for purposes other than its intended purposes.
- This device is for domestic use only. It must not be used outdoors.
- It is not designed to operate with an external timer or a separate remote control system.
- Clean all of the removable accessories before the first use.
- The transformer must be regularly inspected to check that the power cable, plug, casing, and other parts are not damaged and, if they are damaged, it must not be used until it has been repaired.
- Incorrect use of the transformer risks causing electric shocks.
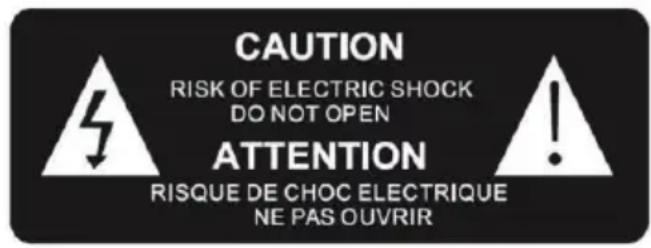
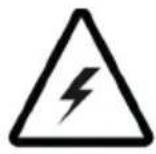

The symbol with a lightning bolt inside an equilateral triangle signals to users that there are hazardous, non-insulated electrical voltages inside the device, which are strong enough to pose a risk of electrocution.
The symbol with an exclamation mark inside a triangle indicates that there are important instructions regarding operation and maintenance (repairs) in the documentation accompanying the device.
| Class II material | |
| Direct current | |
| Alternating current | |
| For indoor use only | |
- Place the device in the desired location, and unwind the power cable. Insert the cable into the power socket and switch it on, if necessary.
- For ELECTRICAL EQUIPMENT, the socket must be located close to the equipment, and it must offer easy access.

Please take the following information into account: Only use the electrical power supply indicated below. Dongguan Kingdrive Industrial Co., Ltd. Model number: KDP-A3120200E
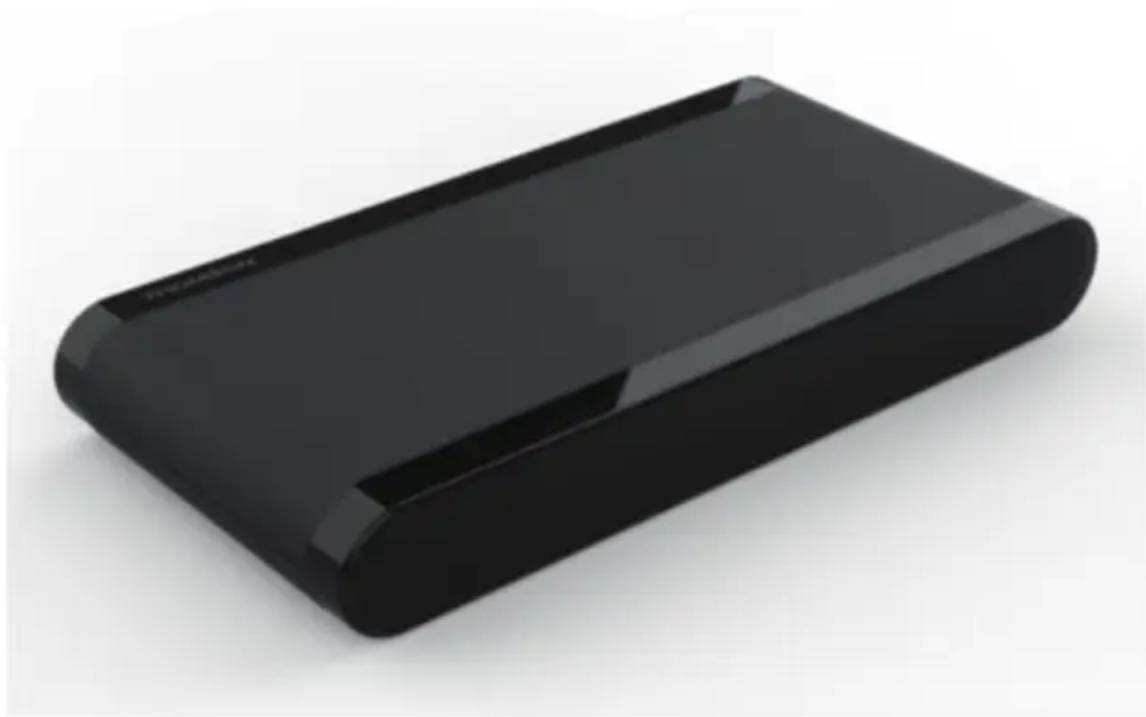
What is in the box
Check and identify the contents of your box:
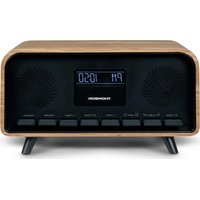
- Charging Station Alarm
- Mains power adapter
- USB-C to USB-A adapter (underneath)
- User Manual
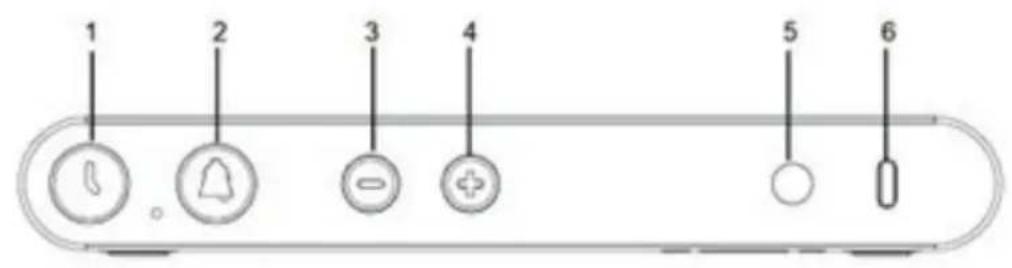
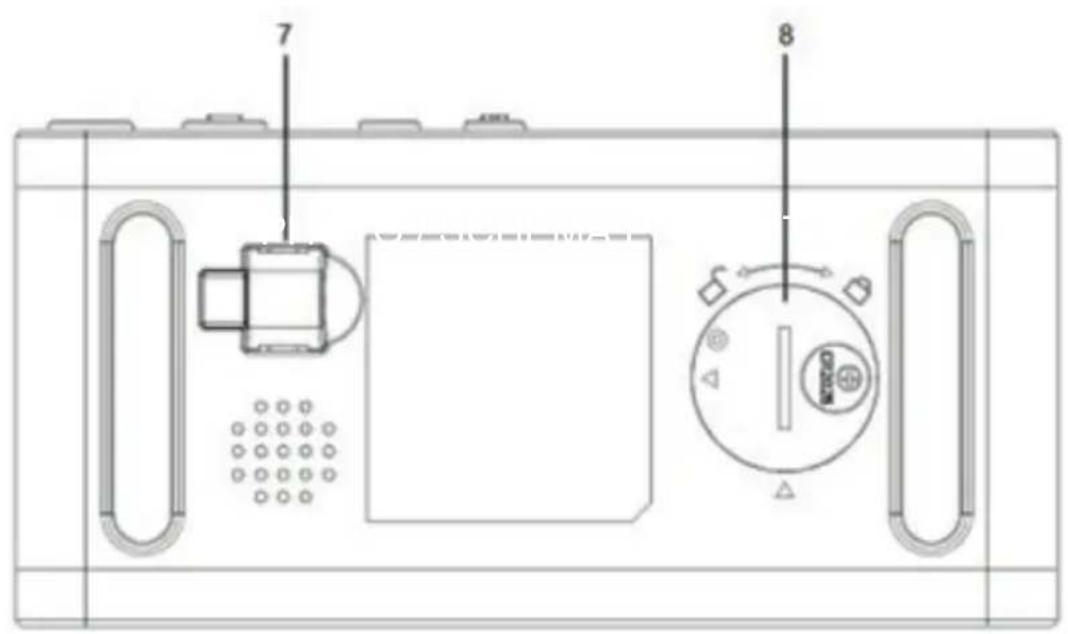
Controls
- Clock button
- Alarm button
3.-button
-
- Power input
- USB-C output
- USB-C to USB-A adapter
- Battery compartment (CR2025 batteries)
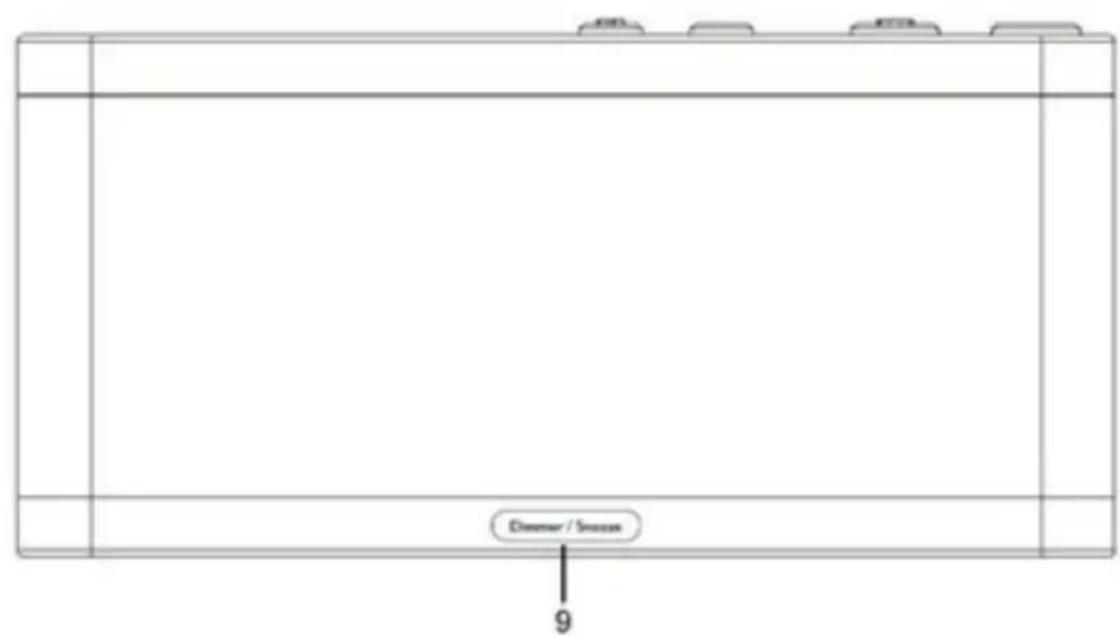
- Dimmer switch/Alarm repeat button
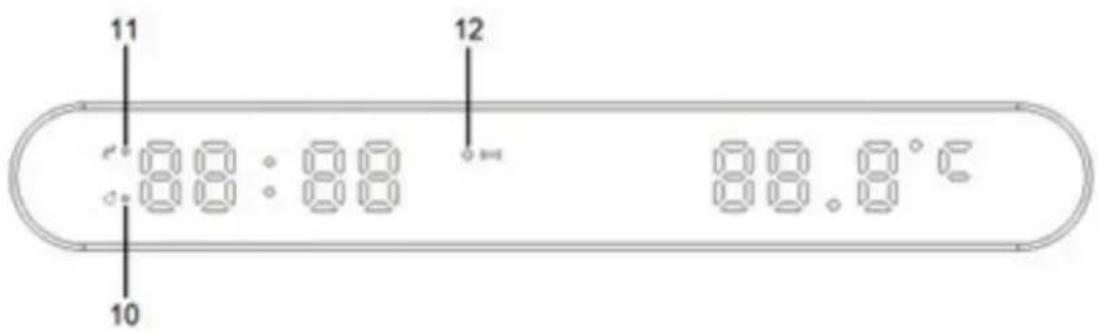
- Alarm light
- Alarm repeat light
- Wireless charging light (Red = off, Solid blue = charging, Flashing blue = error)
Operation
Plug the mains power plug into your wall socket.
Control functions
- Press and hold the clock button (1) for 2 seconds to set the time, and then press button (3) or (4) to change the hours.
Press the clock button (1) again to set the minutes, and then press button (3) or (4) to change the minutes.
Press the clock button to set the date, and then press button (3) or (4) to change the year.
Press the clock button (1) again to set the days, and then press button (3) or (4) to change the number of the day.
Press the clock button (1) again to change the month, and then press button (3) or (4) to change the number of the month.
Press the clock button to confirm the date and time set.
Briefly press the clock button (1) to switch from the time and temperature display to the date, press again or wait 8s to return to the time display.
- Press and hold button (2) to set the alarm, and then press button (3) or (4) to change the hours.
Press the alarm button again to set the minutes, and then press button (3) or (4) to change the minutes.
Press the alarm button again to confirm the alarm set. The alarm is then set, and the alarm light (10) will come on. Briefly press to activate the alarm, briefly press twice to deactivate it.
When you're not setting the time or the alarm, press button (3) or (4) to increase or decrease the alarm volume by one level.
There are 5 volume levels, from the quietest to the loudest. The lowest level is approximately 40 dB and the highest level is around 80 dB — with steps of 10 dB between each level.
The volume level is displayed on the screen. The alarm's sound slowly increases, reaching the set volume within 15 seconds.
- Press the dimmer switch/repeat button (9) to adjust the brightness of the clock display (20%, 100%, or off) in time mode. When the alarm sounds, press to snooze it for 9 minutes. The alarm will then sound again, 9 minutes later. The repeat light (11) will come on.
The alarm will sound for 3 minutes if it is not repeated or dismissed. Press the alarm button (2) to dismiss it when it sounds.
Note: The clock and alarm programmes have a back-up battery in the even of the power supply being cut off (e.g. After a power cut, etc.). If the programmes are not backed up, you'll need to replace the battery. See below.
Charging functions
- Place your mobile phone on top of the device, in the centre.
- The LED light (12) will illuminate in solid blue when the wireless charging is in progress. If nothing is charging, it will remain red.
- If a foreign metal object is detected in the charging zone, the LED light (12) will slowly flash blue, and the charging function will disable.
Note: Your phone must support wireless charging. Otherwise, the LED light will flash blue to signal an error.
USB-C charging function
- Charge another device using the USB-C port (6) located to the rear of the alarm.
- Use the adapter (7) if your charging cable has a USB-A plug.
Please note that the USB C port is designed to charge low power items such as smart watch or earbuds. Any other product may temporarily cause adverse effects.
Note: The USB-C output functions at 5 V/1 A (max.).
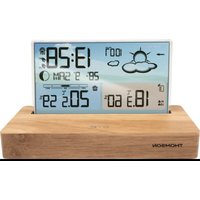
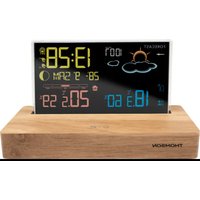
Interior temperature function
This device has an interior temperature function. The probe is integrated into the power cable. No action on your part is required. The temperature display is located to the right of your display.
Changing the back-up battery
- Remove the safety screw using a compatible screwdriver.
-
Using a tool, turn the cover of the battery compartment counter-clockwise, to align the two guide triangles. You'll feel slight resistance.
-
Remove the battery compartment cover and take out the used battery.
- Replace the battery with a new CR2025 battery.
- Replace the battery compartment cover and turn it clockwise to slot it back into place, and check that the hole is properly aligned with the screw thread.
- Screw the screw back in. You have completed the battery change.
Battery warning
This product contains one or more batteries.
Use batteries correctly to prevent any injury or fire caused by a leak, overheating, explosion, erosion or other damage.
Keep new and used batteries out of the reach of children or any vulnerable person. Stop using the product if the battery compartment does not close properly.
If the liquid from an alkaline battery comes into contact with the skin and/or eyes, rinse immediately with fresh water and consult a physician.
If an alkaline battery leaks, wipe up the liquid with a cloth and replace the battery with a new one.
Do not swallow the battery/ies. If swallowed, a battery can cause severe internal burns in 2 hours and can cause death. If batteries are swallowed, contact a poison centre immediately and consult a physician.
Use AA Ni-MH, alkaline or lithium batteries.
Do not charge these batteries. Charging non-rechargeable batteries causes gas and/or heat emissions that can cause explosions and/or fires.
Do not use different types of battery or a mixture or new and old batteries at the same time.
Insert the batteries according to the correct polarity (+ and -).
Do not put the same battery poles in contact with each other.
Remove dead batteries quickly. There is a risk of the battery exploding if this is not replaced correctly or if the appliance is not used for a period of time.
Replace the battery with an identical or equivalent model.
The batteries (or battery pack) must not be exposed to excessive heat, such as sunlight, fire, etc.
Do not heat batteries and do not dispose of them in fire or water.
Do not use metal pliers or metal objects such as the point of a pen or tweezers to remove batteries. Avoid deforming, crushing or piercing batteries.
Do not disassemble the batteries.
Cover the ends of the batteries with tape to prevent explosions and combustion when these need to be scrapped.
Be environmentally friendly when scrapping batteries
Do not dispose of batteries in ordinary household waste.
When disposing of batteries, be sure to follow local disposal regulations.

BATTERY WARNING
KEEP OUT OF REACH OF CHILDREN
Swallowing can lead to chemical burns, perforation of soft tissue, and death. Severe burns can occur within 2 hours of ingestion. Seek medical attention immediately.

Product specification
| Type Specifications | Type Specifications | | |
| Power voltage | DC 12 V-2 A | Total electrical consumption | 24 W |
| Wireless charging consumption | 15 W (max.) | USB-C charging consumption | 5 W (max.) |
| Dimensions 185 x 90 | x 26 mm | | |
Technical specifications of the adapter
Power supply:
Power supplied:
Cable length:
Mains power 100-240 V 50/60 Hz 0.8 A Max.
12V = 2A Max.
Approx. 1.0m
The device risks switching off in an environment with electrostatic discharge. The user must then recharge the battery and restart the device.
Care of the environment


Your product has been designed and manufactured using high-quality materials and components that can be recycled and reused.
Attention should be drawn to the environmental aspects of battery disposal.
When this crossed-out wheelie bin symbol is applied to a product, it means that the product is covered by European Directive 2002/96/EC. Please find out about the local separate collection system for electrical and electronic products. Please act according to your local rules and do not dispose of your old products in your household waste. By ensuring this product is disposed of correctly, you are also helping to prevent potentially negative consequences for the environment and human health.
- THOMSON is a trademark of Talisman Brands, Inc. used under licence by Bigben Interactive.
- This product is manufactured and sold under the responsibility of Bigben Interactive.
- THOMSON and the THOMSON logo are trademarks operated under licence by Bigben Interactive – for more information: www.thomson-brand.com.
- All other products, services, corporate names, trademarks, trade names, product names and logos referenced herein are the property of their respective owners.
- Bigben Interactive hereby declares that the CT550I type radio equipment is in compliance with Directive 2014/53/EU. The full text of the EU declaration of conformity is available at the following internet address: https://www/bigben-interactive.co.uk/support/
Guarantee
This product is guaranteed by Bigben for a period of 2 years from the date of purchase, except in countries of the European Economic Area, which offer a longer warranty period. We recommend that you keep your receipt for any claims. The warranty covers breakdowns due to defective material, a missing element or manufacturing defect. In this case, contact our technical support. For any problem with a defective product, contact your point of purchase with your receipt. The warranty does not cover problems of improper use.
Support
www/bigben-interactive.co.uk/support
support@bigben.fr
Made in China
Manufactured by BIGBEN INTERACTIVE SA
396, Rue de la Voyette
CRT2-FRETIN
CS 90414
59814 LESQUIN Cedex - France
www/bigben.eu

CE

Fabricant: Bigben Interactive FRANCE
- Rue de la Voyette, C.R.T. 2, Fretin,
CS90414-59814 Lesquin Cedex, France
BELGIQUE, customerservice@bigben-interactive.be
NEDERLAND, customerservice@bigben-interactive.nl
ESPANA, soporte@metronic.com
Tel.: 937132625
Dongguan Kingdrive Industrial Co., Ltd.
BELGIQUE, customerservice@bigben-interactive.be
NEDERLAND, customerservice@bigben-interactive.nl
ESPANA, soporte@metronic.com
Tel.: 937132625
Dongguan Kingdrive Industrial Co., Ltd.
Numero del modello: KDP-A3120200E
TENERE FUORI DALLA PORTATA DEI BAMBINI
BELGIQUE, customerservice@bigben-interactive.be
NEDERLAND, customerservice@bigben-interactive.nl
ESPANA, soporte@metronic.com
Tel.: 937132625
Dongguan Kingdrive Industrial Co., Ltd.
Número do Modelo: KDP-A3120200E
Conteudo da caixa
BELGIQUE, customerservice@bigben-interactive.be
NEDERLAND, customerservice@bigben-interactive.nl
ESPANA, soporte@metronic.com
Tel.: 937132625
ITALIA,technico@metronic.com
Tel.:0294943691
www/bigben.eu
BELGIQUE,customerservice@bigben-interactive.be
NEDERLAND, customerservice@bigben-interactive.nl
ESPANA, soporte@metronic.com
Tel.: 937132625
ITALIA,technico@metronic.com
Tel.: 029493691
www/bigben.eu
Wekker-oblader
GEBRUIKSHANDLEIDING
LEES DEZE HANDLEIDING AANDACHTIG DOOR ALVORENS DIT TOESTEL TE GEBRUKEN EN BEWAAR DEZE ZODAT U DEZE LATER KUNT RAADPLEGEN.
Starten 62 Productspecificatie 69
Dongguan Kingdrive Industrial Co., Ltd.
BELGIQUE, customerservice@bigben-interactive.be
NEDERLAND, customerservice@bigben-interactive.nl
ESPANA, soporte@metronic.com
Tel.: 937132625
ITALIA,technico@metronic.com
Tel.:0294943691
www/bigben.eu
Budzik z Ładowarka
INSTRUKCJA OBSŁUGI
BELGIQUE, customerservice@bigben-interactive.be
NEDERLAND, customerservice@bigben-interactive.nl
ESPANA, soporte@metronic.com
Tel.: 937132625