
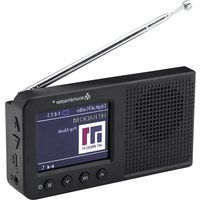
DAB750 - Radio Soundmaster - Free user manual and instructions
Find the device manual for free DAB750 Soundmaster in PDF.
| Product type | Digital DAB+/FM radio with Bluetooth |
| Brand | Soundmaster |
| Model | DAB750 |
| Power supply | Power adapter 100-240V~50/60Hz, 1A; DC input 9V=2A |
| Battery | Rechargeable lithium-ion 7.4V 2000mAh (type FST 18650) |
| Battery life | Approximately 3 to 5 hours at 50% volume |
| Output power | 10 Watts |
| FM frequency range | 87.5 MHz - 108 MHz |
| DAB+ frequency range | Band III (174-240 MHz) |
| Number of presets | 10 DAB / 10 FM |
| Bluetooth | Yes, A2DP version, range ~10 meters |
| Auxiliary input | 3.5 mm jack (cable not included) |
| Display | LCD screen with adjustable backlight |
| Antenna | Telescopic antenna |
| Additional functions | RDS, preset EQ, Sleep timer (10/20/30/90 min), Auto and manual search |
| Dimensions | Approximately 250 x 150 x 120 mm (estimate) |
| Weight | Approximately 1.2 kg (estimate) |
| Safety | Overvoltage protection, automatic shutdown (ERP2), detailed safety instructions |
| Maintenance | Clean with a dry cloth; do not use abrasive detergents |
| General information | Imported by Wörlein GmbH, Germany; Compliant with directive 2014/53/EU |
Frequently Asked Questions - DAB750 Soundmaster
User questions about DAB750 Soundmaster
0 question about this device. Answer the ones you know or ask your own.
Ask a new question about this device
Download the instructions for your Radio in PDF format for free! Find your manual DAB750 - Soundmaster and take your electronic device back in hand. On this page are published all the documents necessary for the use of your device. DAB750 by Soundmaster.
USER MANUAL DAB750 Soundmaster
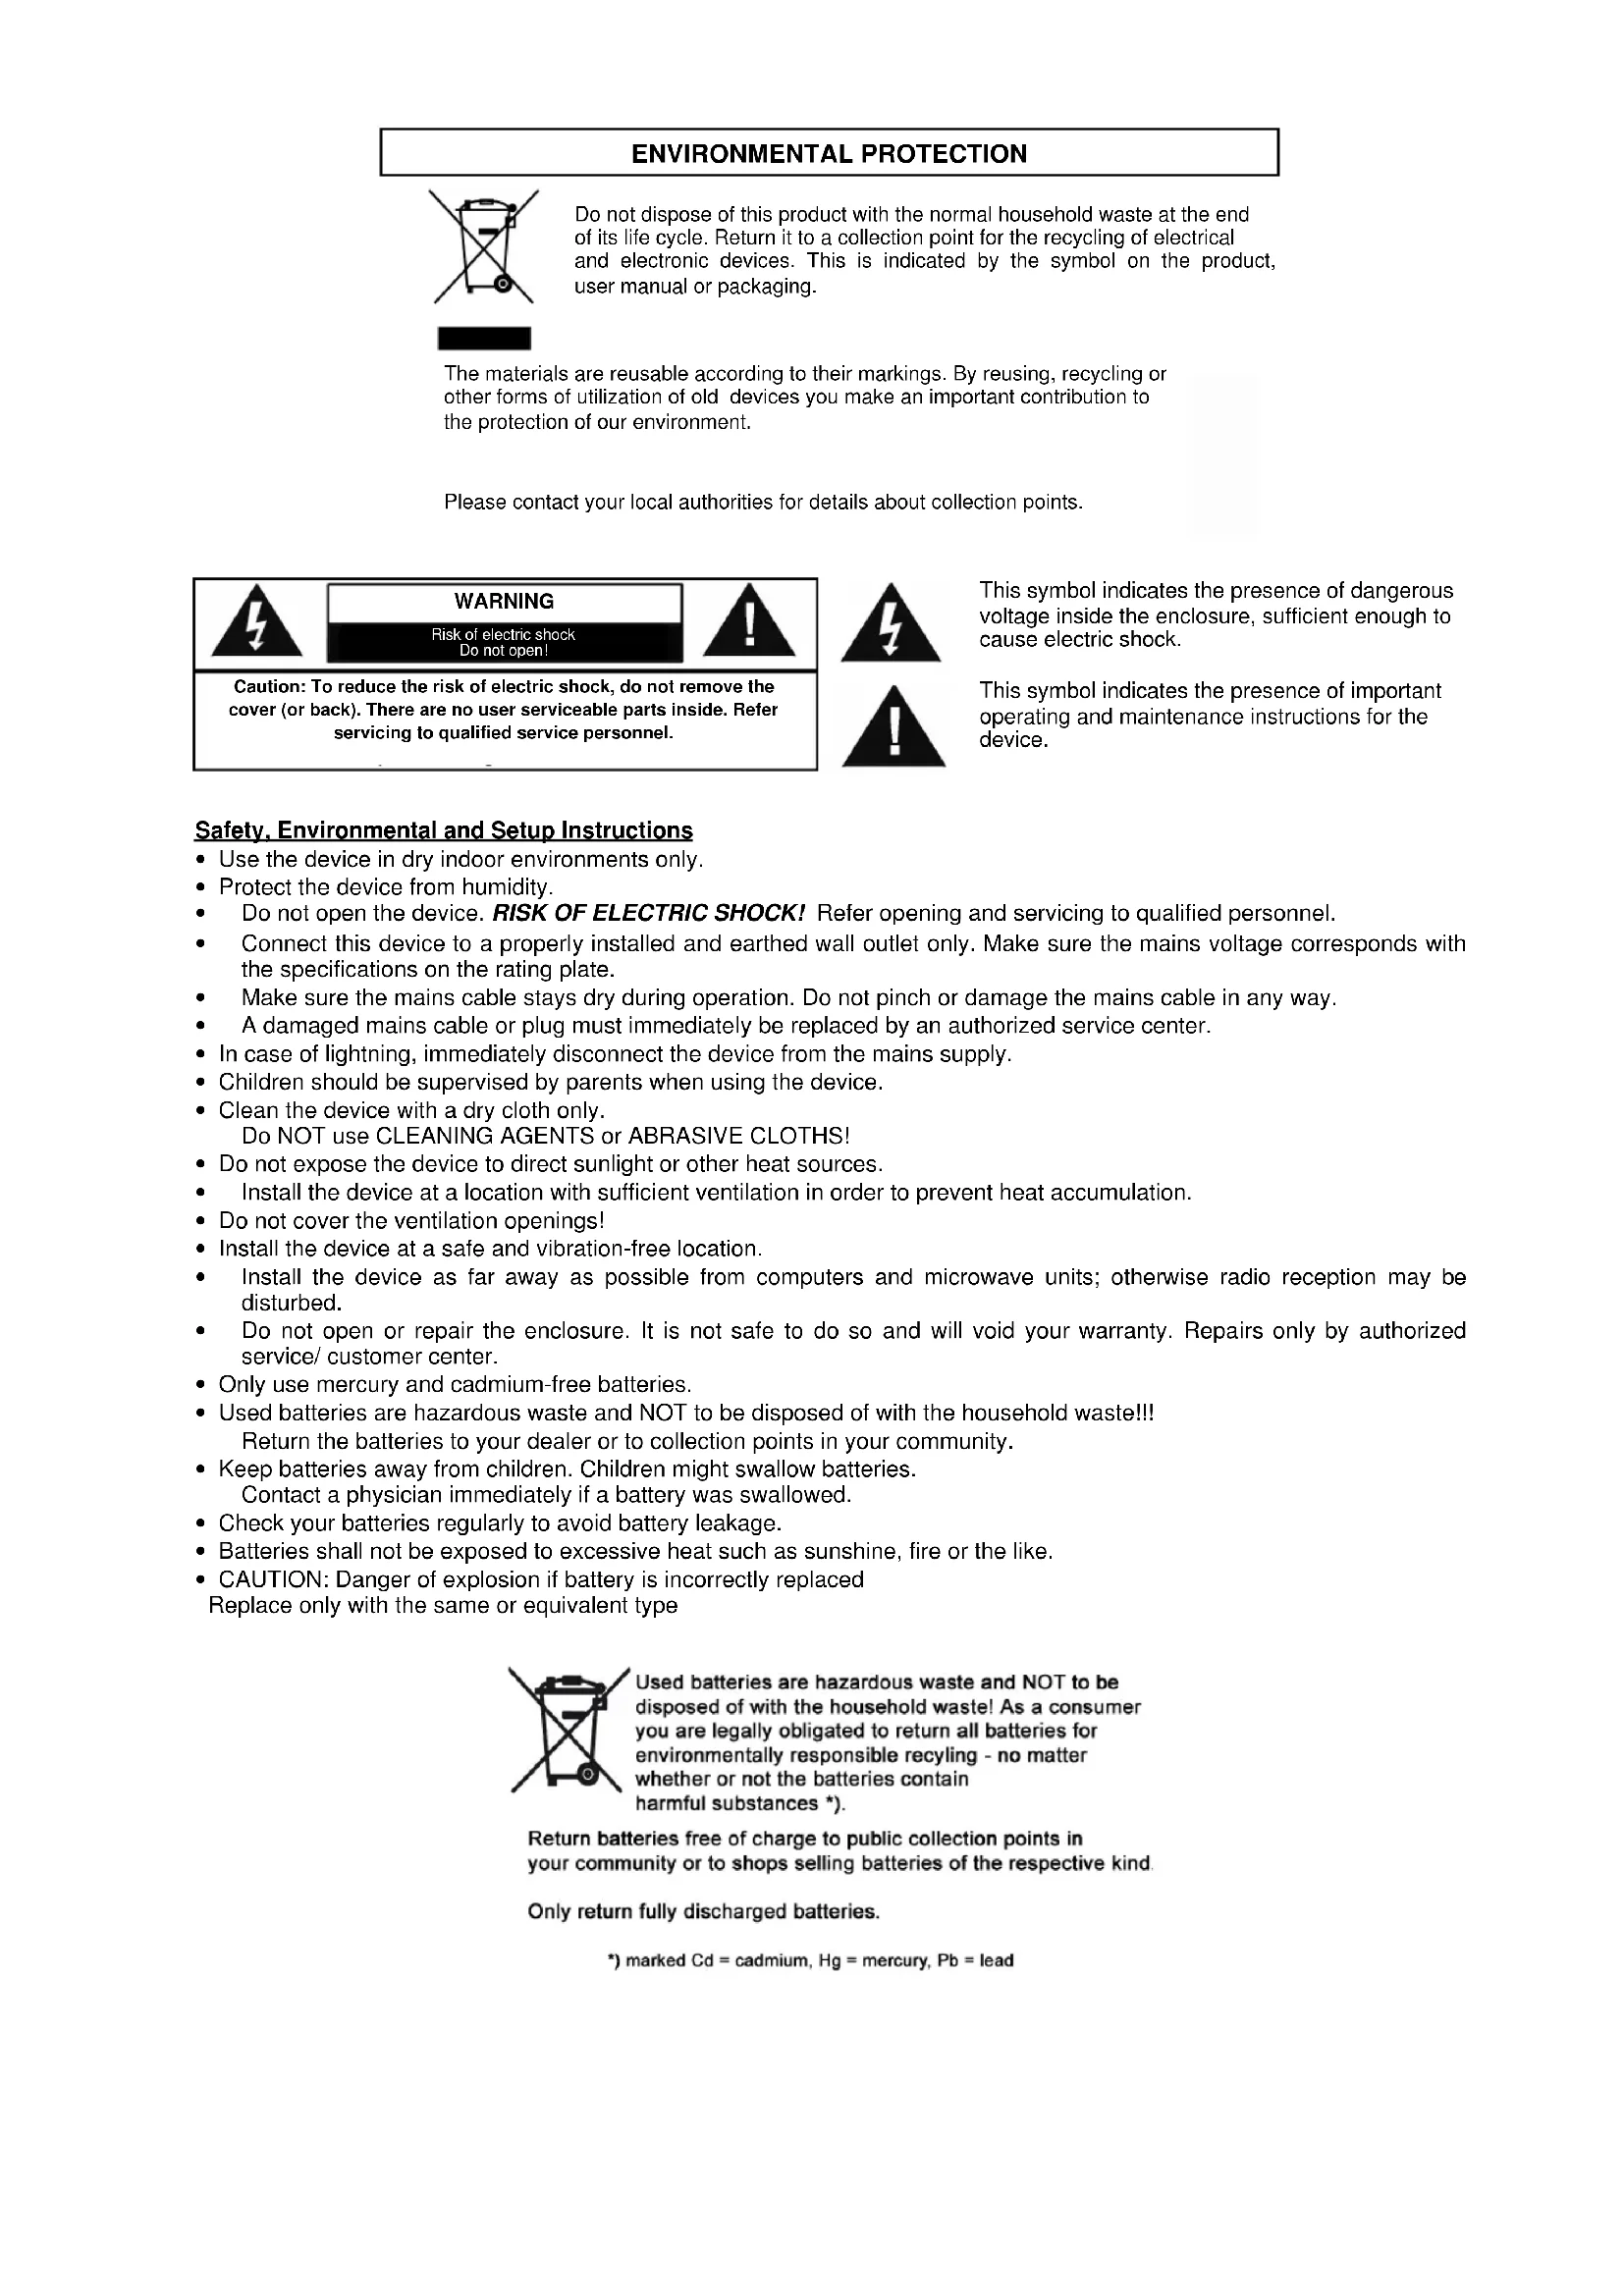
The materials are reusable according to their markings. By reusing, recycling or other forms of utilization of old devices you make an important contribution to the protection of our environment.
Please contact your local authorities for details about collection points.

WARNING
Risk of electric shock Do not open!

Caution: To reduce the risk of electric shock, do not remove the cover (or back). There are no user serviceable parts inside. Refer servicing to qualified service personnel.

This symbol indicates the presence of dangerous voltage inside the enclosure, sufficient enough to cause electric shock.

This symbol indicates the presence of important operating and maintenance instructions for the device.
Safety, Environmental and Setup Instructions
- Use the device in dry indoor environments only.
- Protect the device from humidity.
- Do not open the device. RISK OF ELECTRIC SHOCK! Refer opening and servicing to qualified personnel.
- Connect this device to a properly installed and earthed wall outlet only. Make sure the mains voltage corresponds with the specifications on the rating plate.
Make sure the mains cable stays dry during operation. Do not pinch or damage the mains cable in any way. - A damaged mains cable or plug must immediately be replaced by an authorized service center.
- In case of lightning, immediately disconnect the device from the mains supply.
- Children should be supervised by parents when using the device.
- Clean the device with a dry cloth only.
Do NOT use CLEANING AGENTS or ABRASIVE CLOTHS!
- Do not expose the device to direct sunlight or other heat sources.
Install the device at a location with sufficient ventilation in order to prevent heat accumulation. - Do not cover the ventilation openings!
- Install the device at a safe and vibration-free location.
- Install the device as far away as possible from computers and microwave units; otherwise radio reception may be disturbed.
- Do not open or repair the enclosure. It is not safe to do so and will void your warranty. Repairs only by authorized service/ customer center.
- Only use mercury and cadmium-free batteries.
- Used batteries are hazardous waste and NOT to be disposed of with the household waste!!
- Return the batteries to your dealer or to collection points in your community.
- Keep batteries away from children. Children might swallow batteries. Contact a physician immediately if a battery was swallowed.
- Check your batteries regularly to avoid battery leakage.
- Batteries shall not be exposed to excessive heat such as sunshine, fire or the like.
- CAUTION: Danger of explosion if battery is incorrectly replaced. Replace only with the same or equivalent type

Used batteries are hazardous waste and NOT to be disposed of with the household waste! As a consumer you are legally obligated to return all batteries for environmentally responsible recycling - no matter whether or not the batteries contain harmful substances *).
Return batteries free of charge to public collection points in your community or to shops selling batteries of the respective kind.
Only return fully discharged batteries.
*) marked Cd = cadmium, Hg = mercury, Pb = lead
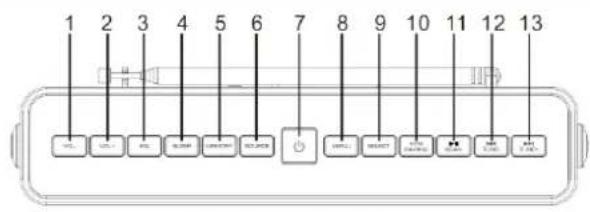
LOCATIONS OF CONTROLS
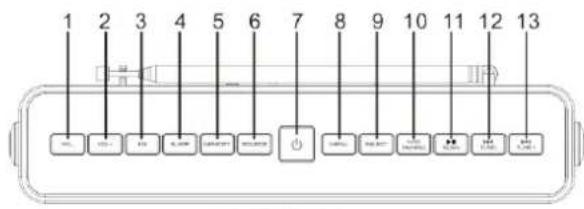
- VOL - button
- VOL + button
- EQ button
- SLEEP button
- MEMORY button
- SOURCE button
-
STANDBY button
-
MENU button
- SELECT button
- INFO/ PAIRING button
- /SCAN button
- TUNE - button
- TUNE + button
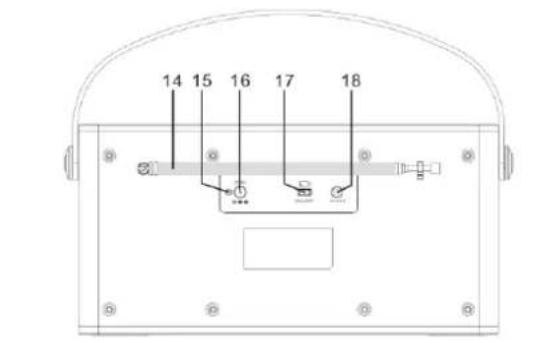
-
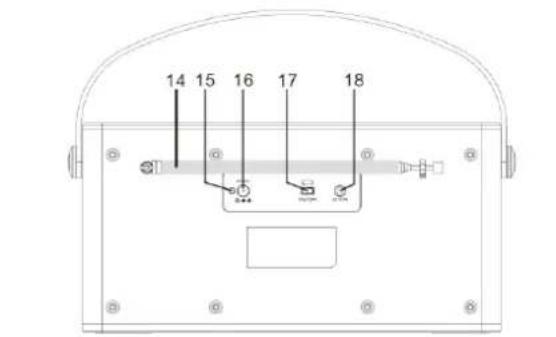
FM ANTENNA
-
CHARGING INDICATOR
- DC INPUT JACK
- ON/OFF SWITCH
- AUX-IN
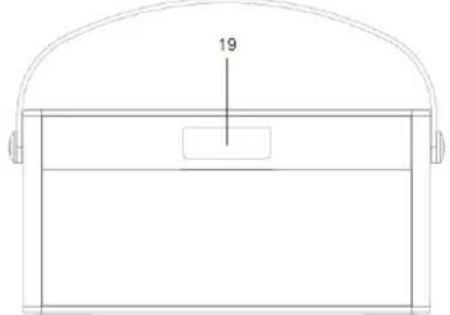
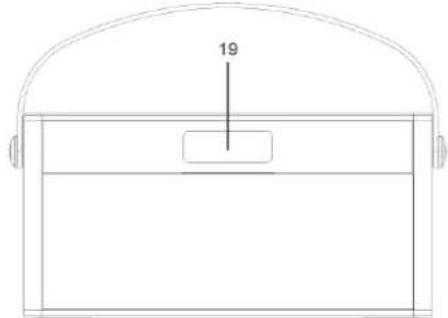
- Display
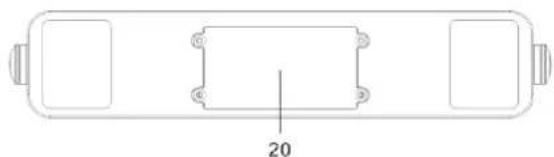
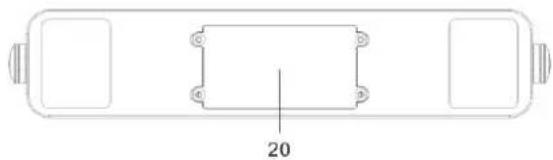
- Battery door
GETTING STARTED
DAB/FM ANTENNA
Before using your radio for DAB or FM reception, full extend the telescopic antenna which located at the back of unit. You may need to adjust the position of the telescopic antenna for maxing signal strength.
For the first time to start to use this radio, the unit will perform DAB full scanning.
Connect Power
You can use this radio player on AC power or built-in type battery power.
Battery Life (Approx. hours) 3-5 hours depends on volume level.
Caution:
Risk of product damage! Make sure that the power supply voltage corresponds to the voltage printed on the back or the underside of the product.
Risk of electric shock! When you unplug the AC adapter, always pull the plug from the socket. Never pull the cord.
Use only the AC adaptor specified by the manufacturer or sold with this unit.
Setting the clock
The clock on your radio is automatically set when first used from the time signal broadcast with DAB radio stations.
If a DAB station is not available, the clock may be set manually via the MENU system. (Please refer to CLOCK SET page).
Clock display will keep running if connected to AC or DC power.
Backlight
During Standby mode, press and hold the "MENU" button then press "TUNE +/-" to adjust the backlight level (Min. 0-10 Max.).
Power control
Using AC power
Connect the power adaptor to the DC 9V socket on the unit.
Slide the power switch to "ON" position then press the STANDBY button.
The display will light up and the unit will switch on.
To turn the unit in STANDBY mode:
Press the STANDBY button. The clock will continue to run whilst power switch at the ON position.
Using battery power
Charging the battery
Slide the power switch to "OFF" position.
Connect the power adaptor to the DC 9V socket to the unit, than the wall power socket.
The charging LED indicator will light up in RED color.
Slide the power switch to "ON" position then press the STANDBY button.
The display will light and the unit will switch on.
Press the STANDBY button To turn the unit in STANDBY mode:

ENERGY SAVING/ERP2 REGULATION
This device is equipped with an AUTOMATIC SWITCH OFF / STANDBY SYSTEM for energy-saving requirements. This is regulated by an EU-standard and is NOT A MALFUNCTION.
Adjust the volume
To adjust the volume from the top panel controls: Press the "VOL - / + " button to increase or decrease the volume level.
Select a preset EQ sound effect
During play, press "EQ" button repeatedly to select: [CLASSIC] [POP] [ROCK] [JAZZ] [Normal]
Clock setup
SET TIME/DATE: This main option enables the clock to be set manually if these is not available DAB transmission.
To set the time and data manually:
- In DAB or FM mode, press "MENU" button to access menu.
- Press "TUNE +/-" to scroll the menu options: [System] System [Clock Setup] Set the Clock setup to Manual (Defaulted at Radio) 3. Press "TUNE +/-" to set the clock 4.
- To select an option, press "SELECT" button
Language Set
- In DAB or FM mode, press "MENU" button to access menu.
- Press "TUNE +/-" to scroll the menu options: [Language set] and press "SELECT" button to enter option
- Press "TUNE +/-" button to select English / German and press "SELECT" to confirm.
Note: The default is German.
PLAY FROM BLUETOOTH-ENABLE DEVICE
Note: The effective operation range between the unit and your Bluetooth device is approximately 10 meters (30 feet). Any obstacle between the system and the device can reduce the operation range. Compatibility with all Bluetooth devices is not guaranteed.
- Press "SOURCE" button repeatedly to select BT
"BLUETOOTH" indicator is show on display and "pairing" is blinking.
On your device that supports A2DP, enable Bluetooth and search for Bluetooth devices 2. that can be paired (refer to the user manual of the device).
- Select 'DAB750SI' on your Bluetooth-enable device and if necessary input '0000' as the pairing password.
After successful pairing and connection, the 'BLUETOOTH PAIRED' text on display turns stable.
Play audio on the connected device. 4.
Audio streams from your Bluetooth-enable device to this unit, you can control the playback with the and buttons.
To disconnect the Bluetooth-enable device:
a. Deactivate Bluetooth on your device or
b. Move the device beyond the communication range
c. By pressing the "Pairing" button, your device is now ready for a new BT connection.
LISTEN TO DAB RADIO
- Press SOURCE button repeatedly to select DAB radio.
- [Tuning....] is displayed.
- Press SCAN button to start full scan.
- The unit stores all the DAB radio stations automatically and then broadcasts the first available station.
- The station list is memorized in the unit. Next time when you turn on the unit, the station scan does not take place.
- If no DAB station is found, [Not available] appears on display.
To tune to a station from the available station list:
In DAB mode, press TUNE+/- to navigate through the available DAB stations.
Store DAB radio stations automatically
Note: New stations and services will be added in the DAB broadcast. To make new DAB stations and services available, preform full scan regularly.
In DAB mode, press SCAN button, the unit scans all the available DAB radio stations and stored.
Select a preset DAB radio station (Preset Recall)
In DAB mode, to select any preset number; press MEMORY button.
Preset Recall<1:34BBQUS
Press TUNE +/- repeatedly then press SELECT to select the preset station.
Store DAB radio stations manually
Note: You can store a maximum of 10 preset DAB radio stations.
Tune to a DAB radio station. 1.
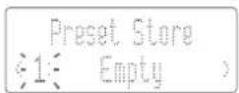
- Press and hold "MEMORY" button in 3 secs, then press "TUNE +/-" to select a preset number. Display show "1" and briefly.
Press "SELECT" to confirm. 3.
Repeat steps 1-3 to store other DAB stations. 4.
Show DAB information
During DAB radio broadcast, press "INFO" button repeatedly in addition to the station name you can scroll through the following information (if available):
Channel and frequency
Audio bit rate
Multiplex Name
Signal strength
Time/Date
Dynamic label segment (DLS)
Program type (Prg Type)
DABtuner setting
Full scan: press "SCAN" button to scan all the available DAB radio stations
Manual tune: Press and hold the "SELECT" button to perform manual tune.
Tune to a specific channel/frequency manually.
Use DAB menu
- In DAB mode, press "MENU" button to access the DAB menu
- Press "TUNE +/-" to scroll through the menu options:
[Full scan]: scan all the available DAB radio stations
[Manual tune]: tune to a specific channel/frequency manually and add it to the station list.
[DRC]: set to High/Low/ Off of compensation for the differences in the dynamic range between radio stations.
[Language set]: English / German
[System]:
Clock setup: Set time synchronization by radio or manual; set time and date.
SW version: know the software version of the unit.
Factory Reset: reset all the settings to factory default.
To select an option, press SELECT button. 3.
Repeats steps 2-3 if any sub-option is available under an option. 4.
Note: If no button is pressed within 15 seconds, the menu exits. This is not a mal-function.
LISTEN TO FM RADIO
- Press "SOURCE" button repeatedly to select FM radio.
- Press "SCAN" button to start auto scan or
- Press "TUNE +/-" button to tune to a radio station.
- Press and hold "TUNE +/-" button to tune to the next strongest radio station.
Mono/ Auto (Stereo) mode
Press "SELECT" button to select Audio mode to Mono or Auto (STEREO).
Store FM Radio stations manually.
You can store up to 10 of FM radio station
Tune to FM radio station. 1.
- Press and hold "MEMORY" button in 3 secs to activate programming mode.
- Display show "1" and briefly, press "TUNE +/-" repeatedly to select a preset number. Press "SELECT" to confirm 4.
Repeat steps 1-4 to store more FM stations. 5.
Select a preset FM radio station
In FM mode, to select any preset number; press "MEMORY".
Press "TUNE +/-" repeatedly then press "SELECT" to select the preset station.
Show RDS information
RDS (Radio Data System) is a service that allows FM stations to show additional information.
- Tune to a RDS station.
- Press "INFO" repeatedly to scroll through the following information (if available):
[Program Type]
[Radio text]
[Signal strength]
[Date/Time]
[Frequency]
[Stereo/Mono] - Audio mode. This option enables you to set the radio to receive FM stations in Auto mode (Mono/Stereo) or in Mono only.
AUX IN
- Press "SOURCE" button repeatedly to select AUX-IN.
- Connect your auxiliary device to the 3.5mm AUX IN socket on the back of the unit. An auxiliary device could be a MP3 player, a CD Walkman or a personal computer etc.
- Play your external device
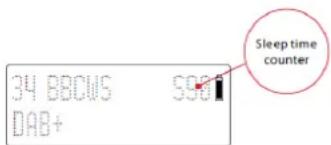
SLEEP FUNCTION
During DAB/ FM/ AUX-IN/ BT mode, press "SLEEP" button repeatedly to chosen the sleep time.
The sequences is OFF >10 > 20 > 30> 90 mins.

After that press "SELECT" button to confirm the sleep time, the LCD display will indicate the remaining sleep time.
The radio player stops playing after the chosen time has elapsed.
Troubleshooting
| PROBLEM | CAUSE / SOLUTION |
| No power | Slide the power switch to ON position. Ensure that the power plug is connected properly. Ensure that there is power at the AC Mains. Ensure that the batteries are fully charged. If a ' Battery ' icon is empty appears on the screen, please use the included 9V adaptor and charge the unit or use the AC power instead. |
| No sound | Adjust the volume Perform factory reset When the charging LED indicator is flashing, it takes 10-20 minutes for recharge. After the indicator goes steadily, the speaker sound will become normal. |
| No response from the unit | Slide the power switch to OFF position. Disconnect and reconnect the AC power plug, then turn on the unit again. |
| Poor DAB/FM reception | Make sure Antenna is fully extended. Electrical interference in your home can cause poor reception. Move the unit away from them (especially those with motors and transformers). |
TECHNICAL SPECIFICATIONS
General
Power requirements: AC Power 100-240V ~ 50/60Hz , 1A
DC input: 9V 2A


Rechargeable Li-ion Battery: FST 18650 - 7.4V 2000 mAh)
Power consumption: 35 W (operation)
Battery playback time: 3 - 5 hrs at 50% volume level.
Output Power: 10 Watt
Tuner
DAB: 174.928 - 239.200 MHz
FM Tuning range: 87.5 MHz to 108 MHz
Preset memory stations: DAB-10 / FM-10
Aux-in 3,5mm Aux-in jack, (cable not included)
Features and specifications are subject to change without prior notice.
IMPORTER
Wörlein GmbH
Tel.: +49 9103 71 67 0
Gewerbestasse 12
Fax.: +49 9103 71 67 12
D 90556 Cadolzburg
Email: service@woerlein.com
Germany
[CLASSIC] [POP] [ROCK] [JAZZ] [Normal]
Channel and frequency
Audio bit rate
Multiplex Name
Signal strength
Time/Date
Dynamic label segment (DLS)
Program type (Prg Type)
Channel and frequency
Audio bit rate
Multiplex Name
Signal strength
Time/Date
Dynamic label segment (DLS)
Program type (Prg Type)
Installingen DAB-afstemmer
Volledige scan: druk op de "SCAN"-knop om alle beschikbare DAB-radiozenders te scannen
Handmatig afstemmen: Houd de "SELECT"-knop ingedrukt om handmatig af te stemmen.
Stem handmatig af op een specifiek(e) kanaal/frequentie.
DAB-menu gebruiken
Channel and frequency
Audio bit rate
Multiplex Name
Signal strength
Time/Date
Dynamic label segment (DLS)
Program type (Prg Type)
[CLASSIC] [POP] [ROCK] [JAZZ] [Normal]
Klokkeoppsett
Channel and frequency
Audio bit rate
Multiplex Name
Signal strength
Time/Date
Dynamic label segment (DLS)
Program type (Prg Type)
*) markerade Cd = kadmium, Hg = kvicksilver, Pb = bly
PLACERING AV REGLAGE
- VOLYM-
- VOLYM+
- EQUALIZER
- INSOMNING
-
MINNE
-
VAL AV LJUDKÄLLA
-
STANDBY
-
MENY
- VAL
- INFO/PARKOPPLING
- OKNING
- STATIONSINSTÄLLNING
- STATIONSINSTÄLLNING+
-
FM-ANTENN
-
LADDNINGSINDIKATOR
- STROMINGANG
- PÄ/AV
- AUX-INGANG
-
Display
-
Batterilucka
KOMMA IGANG
DAB/FM-ANTENN
[CLASSIC] [POP] [ROCK] [JAZZ] [Normal]
Stalla klockan
Channel and frequency
Audio bit rate
Multiplex Name
Signal strength
Time/Date
Dynamic label segment (DLS)
Program type (Prg Type)
[CLASSIC] [POP] [ROCK] [JAZZ] [Normal]
Indstilling af ur
INDSTILLING AF TID/DATO: Denne indstilling aktiverer manuel indstilling af uret, hvis der/DD findes DAB-radiostationer.
Sádan indstilles tiden og datoen manuelt:
- In DAB- ell er FM-tilstand skal du trykke pa knappen "MENU" for at abne menuen.
- Tryk på knappen "TUNE +/-" for at rulle gennem menuvalgmulighederne:
[System]
System [Konfiguration at ur]
Indstil konfigurationen af uret til Manuel (er standard pa radioen) 3.
- Tryk på knappen "TUNE +/-" for at indstille uret
Channel and frequency
Audio bit rate
Multiplex Name
Signal strength
Time/Date
Dynamic label segment (DLS)
Program type (Prg Type)
Channel and frequency
Audio bit rate
Multiplex Name
Signal strength
Time/Date
Dynamic label segment (DLS)
Program type (Prg Type)
Nastaveni tunes DAB
D 90556 Cadolzburg, Germany
Tel: +49 9103 71 67 0
Fax: +49 9103 71 67 12
E-Mail: info@soundmaster.de
Internet: www.soundmaster.de
Hereby, Worlein GmbH declares that this device is in compliance with the essential requirements and other relevant provisions of Directive 2014/53/EU.
A copy of the declaration of conformity can be obtained from the above address.

- WARNING
- Safety, Environmental and Setup Instructions
- LOCATIONS OF CONTROLS
- GETTING STARTED
- DAB/FM ANTENNA
- Connect Power
- Caution:
- Setting the clock
- Backlight
- Power control
- Using AC power
- Using battery power
- ENERGY SAVING/ERP2 REGULATION
- Adjust the volume
- Select a preset EQ sound effect
- Clock setup
- Language Set
- PLAY FROM BLUETOOTH-ENABLE DEVICE
- LISTEN TO DAB RADIO
- Store DAB radio stations automatically
- Select a preset DAB radio station (Preset Recall)
- Store DAB radio stations manually
- Show DAB information
- DABtuner setting
- Use DAB menu
- LISTEN TO FM RADIO
- Mono/ Auto (Stereo) mode
- Store FM Radio stations manually.
- Select a preset FM radio station
- Show RDS information
- AUX IN
- SLEEP FUNCTION
- TECHNICAL SPECIFICATIONS
- General
- Tuner
- IMPORTER
- Installingen DAB-afstemmer
- DAB-menu gebruiken
- Klokkeoppsett
- PLACERING AV REGLAGE
- KOMMA IGANG
- DAB/FM-ANTENN
- Stalla klockan
- Indstilling af ur
- Nastaveni tunes DAB
Brand : Soundmaster
Model : DAB750
Category : Radio