Tectalk Worker 2 - Talkie Walkie ALBRECHT - Free user manual and instructions
Find the device manual for free Tectalk Worker 2 ALBRECHT in PDF.
| Brand | Albrecht |
| Model | Tectalk Worker 2 |
| Category | PMR446 two-way radio |
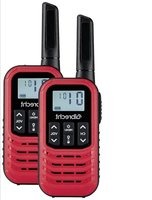
| Product type | Two-way talkie-walkie |
| Frequency range | 446.00625 - 446.19375 MHz |
| Number of channels | 16 PMR446 channels |
| Transmission power | 500 mW |
| Power supply | Rechargeable Li-ion battery 3.7 V DC |
| Battery life | Approximately 10-12 hours in normal use (estimate) |
| Charging time | Approximately 3 hours |
| Charge indicator | Red LED when charging, green when charged |
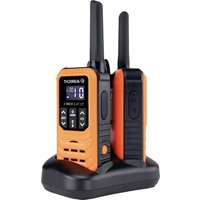
| Connectivity | Micro USB charging port, Kenwood jack for accessories |
| Main functions | PTT, VOX, auto lock, scan, monitor, busy channel lock, voice prompt, alarm, power save |
| CTCSS/DCS | 38 CTCSS tones, 83 DCS codes |
| Range | Up to 10 km in open area (theoretical, depends on conditions) |
| Dimensions (approx.) | Approximately 130 x 60 x 35 mm |
| Weight (approx.) | Approximately 200 g (with battery) |
| Water resistance | Not fully waterproof, protected by rubber cover |
| Operating temperature | -20°C to +50°C |
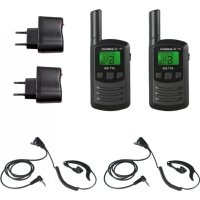
| Package contents (single kit) | 1 radio, 1 desktop charger with adapter, 1 battery pack, 1 belt clip, 1 cord |
| Warranty | 2 years |
| Technical support | +49 (0) 6103 9481 66, service@albrecht-midland.de |
Frequently Asked Questions - Tectalk Worker 2 ALBRECHT
User questions about Tectalk Worker 2 ALBRECHT
0 question about this device. Answer the ones you know or ask your own.
Ask a new question about this device
Download the instructions for your Talkie Walkie in PDF format for free! Find your manual Tectalk Worker 2 - ALBRECHT and take your electronic device back in hand. On this page are published all the documents necessary for the use of your device. Tectalk Worker 2 by ALBRECHT.
USER MANUAL Tectalk Worker 2 ALBRECHT
natural_image
Abstract maroon globe logo with swirling lines and arrows, no text or symbols present.ALBRECHT®
Tectalk Worker 2
PMR446 Funkgeräte

natural_image
Black ALBRECHT radio device with visible grille and speaker (no text or symbols on device body)Anleitung / Manual
Deutsch / English / Français / Italiano
natural_image
Black Albrecht radio device with three speakers (no visible text or symbols on body)
natural_image
Black circular device with a black cable and a power plug, no visible text or symbols

natural_image
Black Albrecht radio device with visible grille and antenna (no text or symbols on device body)
natural_image
Black circular device with a black cable and a power plug, no visible text or symbols
natural_image
Black handheld electronic device with coiled cable and connector (no visible text or symbols)


natural_image
Black rectangular battery pack with multiple charging slots and a power cord, no visible text or symbols
text_image
Tectalk Worker 2 ALBRECHT2er Koffer

text_image
ALBRECHT Worker 2 ALBRECHT4er Koffer
text_image
B C A H I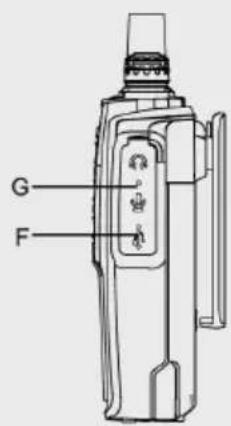
text_image
G F7.3. VOX (Voice Operated Transmission)
CTCSS (Continuous Tone Coded Squelch System) / DCS (Digital Coded Squelch)
natural_image
Abstract maroon globe logo with swirling lines and arrows, no text or symbols presentALBRECHT®
Tectalk Worker 2
PMR446 Radios

natural_image
Black Albrecht radio device with visible grille and antenna (no text or symbols on device body)Manual English
1. Content
- Content....12
- Delivery content single unit....12
- Delivery Content - Hard Case Sets 13
- Overview Radio 14
4.1. Controls 14 - Basic operations of the radio....15
5.1. Battery Charging....15
5.1.1. Low Battery Voltage Warning....15
5.2. Installing a headset / microphone....15
5.3. Selecting a Channel 15 - Transmission 16
6.1. Reception....16 - Optional functions by programming software 16
7.1. Squelch....16
7.2. Scan....16
7.3. VOX (Voice Operated Transmission)....16
7.4. Monitor....16
7.5. Alarm....17
7.6. Battery Saving 17
7.7. Busy Channel Lockout (BCL) 17
7.8.Time-Out-Timer....17
7.9. Voice Announcement....17
7.10. CTCSS/DCS 17 - Technical specification....18
- Safety instructions .... 19
- Trouble shooting....19
- Warranty and Recycling Information....20
- WEEE and Recycling 20
- Service Address And Technical Hotline (for units sold in Germany)....20
2. Delivery content single unit
Single Set
1 Tectalk Worker 2 radio
1 desktop charger incl. power adaptor
1 belt clip
1 lanyard
1 battery pack
1 carton box

natural_image
Black Albrecht radio device with visible grille and two side headers (no text or symbols on device body)
natural_image
Black circular device with a black cable and power plug, no visible text or symbols

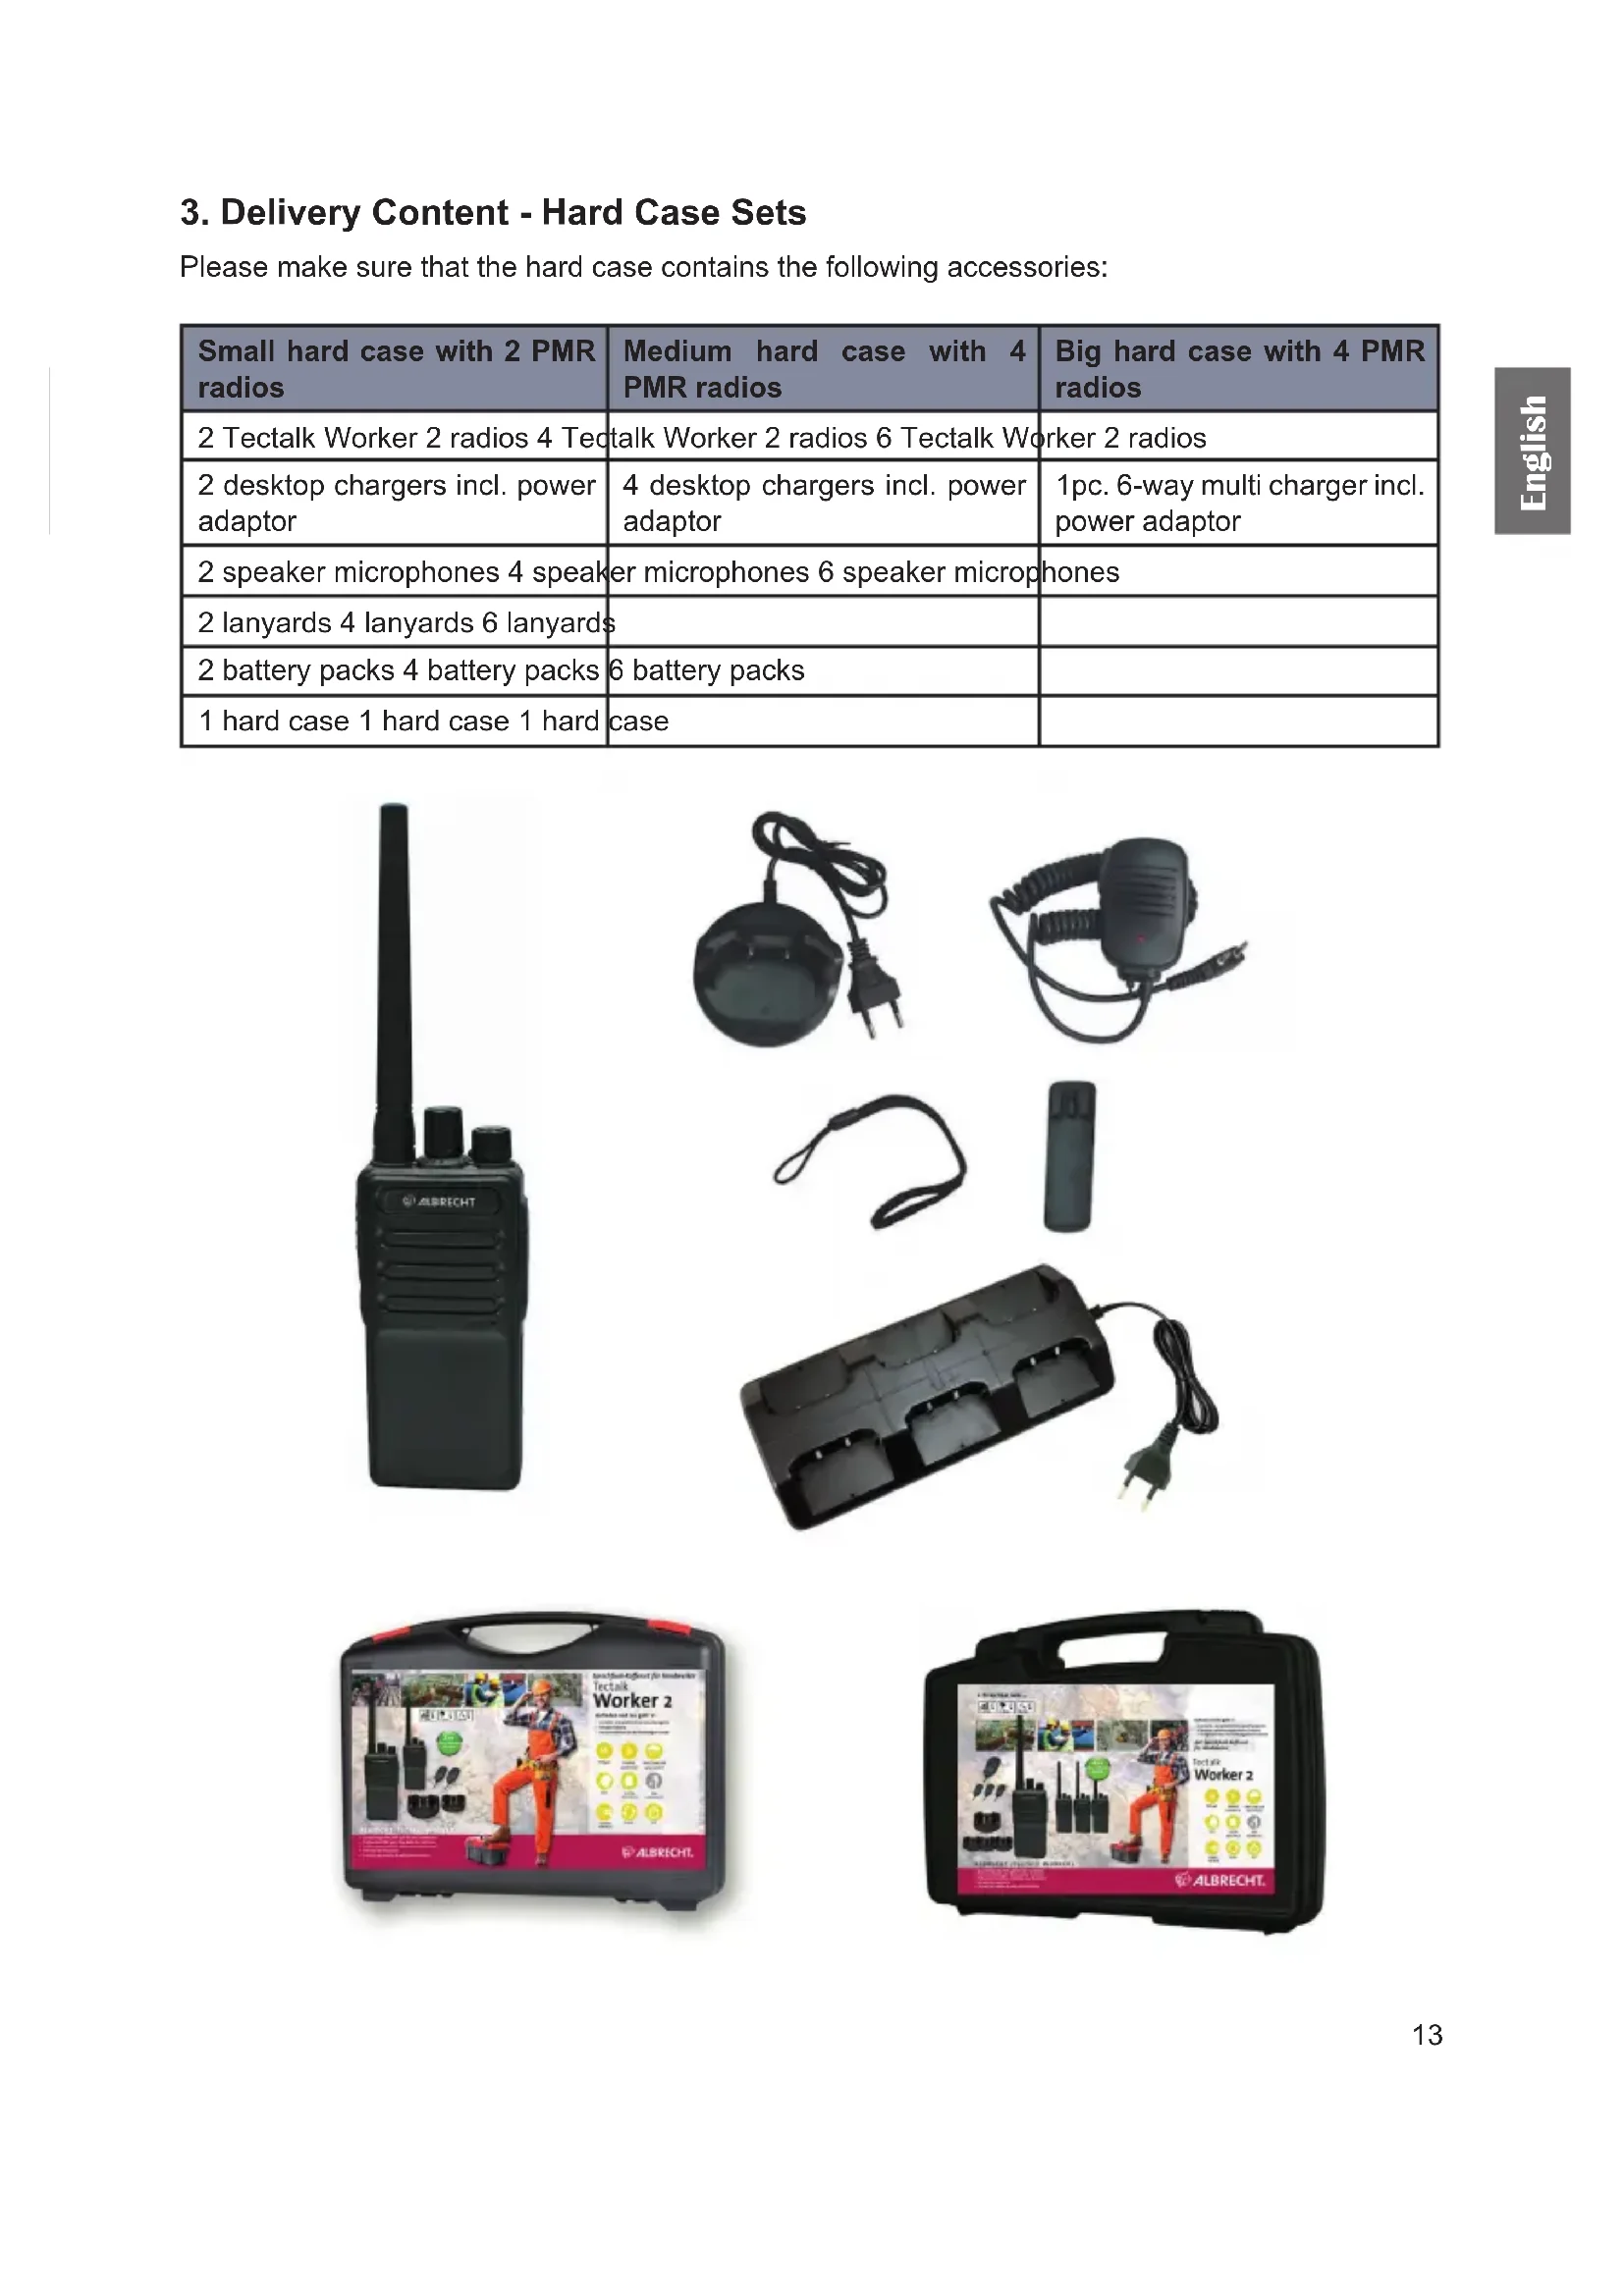
3. Delivery Content - Hard Case Sets
Please make sure that the hard case contains the following accessories:
| Small hard case with 2 PMR radios | Medium hard case with 4 PMR radios | Big hard case with 4 PMR radios |
| 2 Tectalk Worker 2 radios 4 Tectalk Worker 2 radios 6 Tectalk Worker 2 radios | ||
| 2 desktop chargers incl. power adaptor | 4 desktop chargers incl. power adaptor | 1pc. 6-way multi charger incl. power adaptor |
| 2 speaker microphones 4 speaker microphones 6 speaker microphones | ||
| 2 lanyards 4 lanyards 6 lanyards | ||
| 2 battery packs 4 battery packs 6 battery packs | ||
| 1 hard case 1 hard case 1 hard case | ||

natural_image
Black walkie-talkie with a tall antenna and three side-mounted buttons (no visible text or symbols)
natural_image
Black circular device with a black cable and a power plug, no visible text or symbols
natural_image
Black handheld electronic device with coiled leads and a connector (no visible text or symbols)


natural_image
Black rectangular battery pack with multiple charging slots and a power cord, no visible text or symbols
text_image
Tectalk Worker 2 ALBRECHT.
text_image
ALBRECHT. Worker 2 ALBRECHT.4. Overview Radio
4.1. Controls
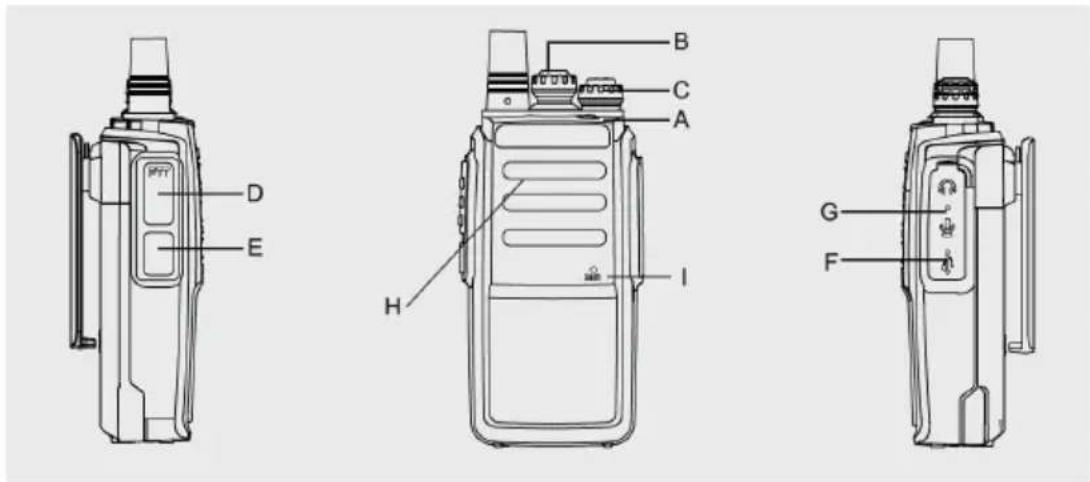
text_image
D E H I B C A G F| No. | Description Function | |
| A LED | Indicator LED lights up green while receiving | LED lights up red during transmission |
| B Channel knob | Rotate the knob to choose a channel (CH1-CH16) | |
| C ON/OFF knob | Volume knob | Rotate the knob clockwise to turn on the radio, anticlockwise to turn off the radio. Rotate clockwise to increase the volume |
| D PTT | switch Press and hold the PTT to transmit, release the button to listen | |
| E Monitor | Press the Monitor button to open | the squelch and receive weak signals |
| F Micro | USB charging socket Connect USB | cable to recharge the battery |
| G Speaker/Microphone socket Connect accessory (with Kenwood plug) like a headset or speaker microphone here | ||
| H Loudspeaker | ||
| I Microphone Talk into the microphone from | a distance of about 5cm for best sound transmission | |
5. Basic operations of the radio
5.1. Battery Charging
Please charge the new battery pack before using it. You can either use the included desktop charger or charge the radios with a Micro-USB charging cable on a power source.
- Plug the power adaptor into an electric socket and connect it to the desktop charger
- Insert the Tectalk Worker 2 or battery into the drop-in charging tray.
- Ensure that the battery's contacts connect with the drop-in charging tray properly. While the charging is taking place, the LED will glow red.
- After about 3 hours charging, the LED will turn green to indicate that the battery is now fully charged.
Note: A new or stored (more than two months) battery pack will not reach its full capacity with the first charging. After 2 or 3 times charging and discharging, it will reach its full capacity.
5.1.1. Low Battery Voltage Warning
When the voltage is lower than the selected value, a voice announcement „Please change battery“ is heard every 5 seconds. No more transmissions by PTT button will be allowed and you hear an alert sound.
5.2. Installing a headset / microphone
Insert the plug of the headset into the speaker/mic socket on the right side of the radio unit. All accessories with “Kenwood” wiring may be used.
Note: The Tectalk Worker 2 is not fully water resistant when using external accessories. Close the rubber cover over the sockets if an external headset is not used.
5.3. Selecting a Channel
This radio is one of the first featuring 16 real PMR446 channels. These 16 channels have been made available by the authorities just recently. Older PMR446 only support 8 real PMR channels. If you plan to use the Albrecht Tectalk Worker 2 with older 8 channel radios we recommend to use the first eight channels. These are the channels which are compatible on all PMR446 radios. Turn the channel knob to select your desired channel.
| Channel Number | Frequency (MHz) | CTCSS/DCS Channel Number | Frequency (MHz) | CTCSS/DCS |
| 1 446. | 00625 OFF 9 446.1 | 0625 91.5 | ||
| 2 446. | 01875 OFF 10 446. | 11875 94.8 | ||
| 3 446. | 03125 OFF 11 446. | 13125 97.4 | ||
| 4 446. | 04375 OFF 12 446. | 14375 100.0 | ||
| 5 446. | 05625 OFF 13 446. | 15625 103.5 | ||
| 6 446. | 06875 OFF 14 446. | 16875 107.2 | ||
| 7 446. | 08125 OFF 15 446. | 18125 110.9 | ||
| 8 446. | 09375 OFF 16 446. | 19375 114.8 |
Note: currently (Jan 2020) not all EU countries have allowed the usage of these 16 channels. This is subject to change. Our country list on the packingis showing the current situation.
6. Transmission
For transmitting, hold the PTT button pressed and speak with normal voice level and a distance of approx. 5cm into the microphone. The status LED is illuminated red while transmitting. If your message is finished, release the PTT button again.
6.1. Reception
When the radio set is switched on, it is ready-to-receive as long as you are not transmitting. If a signal is received on your selected channel, the status LED lights up green.
7. Optional functions by programming software
The following options can be changed by the programming software (not included in basic delivery).
The default settings for the radios are:
Squelch level: 3
Scan: off
VOX: off
Monitor: on
Battery saving: on
Busy Channel Lockout: off
Voice announcement: on
7.1. Squelch
The squelch level can be adjusted in 9 different steps.
The purpose of squelch is to mute the speaker when no signals are present. With the squelch level correctly set, you will hear sound only while actually receiving signals.
Selecting a level too low will result in constant noise, choosing a level too high will suppress weaker transmissions.
7.2. Scan
The scan function can be activated on channel 16.
To use the scan function, turn the channel selector to channel 16. The radio will then automatically scan the channels CH1 to CH15 (each channel can be set by programming software to be included or not during the full scan).
When a signal is found during the scanning process, the radio will automatically stop on that channel.
When there are no more signals on that channels for 5 seconds, the scanning process will continue.
By default the scan function will not scan any channels. This can be changed with the programming software
7.3. VOX (Voice Operated Transmission)
VOX eliminates the necessity of pressing the PTT each time you want to transmit. The Tectalk Worker 2 automatically switches to Transmission Mode when the VOX function senses that you have started to speak into the microphone.
- Select channels CH1 \~ CH5, press and hold the PTT and MONI, then switch on the radio to turn the VOX function ON/OFF. The VOX function can now be used on all channels.
- The VOX gain level can adjust from 1 to 5 levels.
- Level 1 means that VOX is activated even at very low sounds. Level 5 means that you have to speak very loudly into the microphone to activate the VOX.
- When a signal is received, VOX will not activate a transmission
7.4. Monitor
The Monitor function is very helpful when you want to adjust the volume level or receive very weak signals which would normally be blocked by the squelch. Pressing the Monitor button will deactivate
the squelch shortly and lets you hear all signals including some noise.
7.5. Alarm
With the programming software the side key can also be programmed with an alarm tone. This alarm tone can be used to warn people in the direct vicinity it will not be broadcast to other radios.
7.6. Battery Saving
The battery saving function will decrease the amount of power used during operation. When no transmission is being received or sent for more than 10 seconds, Battery Saving function will automatically turn ON (if activated by programming software).
7.7. Busy Channel Lockout (BCL)
Busy Channel Lock-out function can be turned ON/OFF on every channel.
When activated, BCL prevents you from interfering with other parties who may be using the same channel that you have selected. Pressing the PTT button while the channel is in use will cause your transceiver to emit an alert tone and transmission will be inhibited (you cannot transmit). Release the PTT button to stop the alert tone and return to receive mode.
7.8. Time-Out-Timer
The Time-Out-Timer prevents that a radio is accidentally blocking a channel. The timer can either be off or a time between 30 and 300 seconds, selectable in 30 seconds steps. Once the user presses the PTT, the timer counts down and when the time runs out, transmission is interrupted.
7.9. Voice Announcement
To activate the Voice Announcements, select channel 10, press and hold the PTT and Monitor buttons and then switch on the transceiver.
You can select between voice announcements in English or Chinese language. To change the language, select channel 15, press and hold the PTT and Monitor buttons and then switch on the transceiver.
7.10. CTCSS/DCS
CTCSS (Continuous Tone Coded Squelch System) / DCS (Digital Coded Squelch)
CTCSS is a sub-audible tone while DCS is a digital system. There are 38 CTCSS tones and 83 DCS codes available.
You may sometimes want to hear calls from only specific persons or groups. In this case, use the CTCSS or DCS function which allows you to ignore unwanted calls from other persons who are using the same frequency.
8. Technical specification
| General | |
| Frequency Range PMR446: 446.00625 - 446.19 | 375 MHz |
| Memory Channels 16 | |
| Battery pack 1200mAh / 3.7V DC | |
| Frequency stability ±2.5ppm | |
| Operation temperature -20°C to +50°C | |
| Mode of operation Simplex | |
| Antenna Impedance 50 Ω | |
| Dimensions per radio 135x60x40mm | |
| Weight per radio 150g |
| Transmitter | |
| RF Power 500mW | |
| Maximum deviation ≤2.5KHz | |
| Spurious emission ≤7.5uW | |
| Adjacent channel power ≤-60dB | |
| SNR ≥-45dB | |
| QT/DQT | 0.4±0.1KHz |
| Modulation sensitivity | 8-12mV |
| Transmission current | ≤400mA |
| Receiver | |
| Sensitivity | -122dBm(12dB SINAD) |
| Audio power 0.4W(8R Load) | |
| Audio distortion | ≤10% |
| Intermediation | ≥60dB |
| Adjacent channel selectivity | ≥60dB |
| Clutter suppression ≥65dB | |
| Receiver Current | ≤70mA |
9. Safety instructions
• Service should only be done by qualified technicians.
- Do not disassemble or modify the transceiver for any reason.
- Do not expose the transceiver under direct sunlight for long time or to extremely hot condition.
- Do not place the transceiver on any unstable surface.
- Keep the transceiver out of dust, moisture, and water.
- Do not operate the transceiver or charge the battery pack under explosive conditions.
10. Trouble shooting
| No Power or the radio switches off after short time | 1. Check charger and correct battery installation.2. Clean battery contacts3. Replace battery by fully charged or a new battery.4. Battery capacity poor: battery defective or at end of lifetime, replace battery. |
| I cannot communicate with other group members. | 1. Verify, that the channel frequency and the CTCSS are the same in the whole group. If you use factory default programming, this is automatically ok if all members of your group use the same channel number between 1 and 16.2. The other group members are not within the transmission distance. |
| You can hear the voice from other users, but they cannot hear you | Your radio is tuned to a channel number between 1 and 8 (open PMR 446 service without codes) and your partners are using a channel between 9 and 16.Please change your setting to exactly the same number as the partners are using. |
| Others hear my voice with interruptions only 1. | Too weak signal - too far away2. External mic defective? Please check with a service technician |
| I hear too many stations from outside my group | 1. Another Group is using the same channel number – change channel2. You are using a channel between CH 1 and CH 8. Please select a number between CH 9 and CH 16 for your group. |
11. Warranty and Recycling Information
We are legally obliged to include disposal and warranty information as well as EU declaration of conformity with the use instructions in different countries for every unit. Please find this information on the following pages.
2-Year Warranty from Date of Purchase
The manufacturer/retailer guarantees this product for two years from date of purchase. This warranty includes all malfunctions caused by defective components or incorrect functions within the warranty period excluding wear and tear, such as exhausted batteries, scratches on the display, defective casing, broken antenna and defects due to external effects such as corrosion, over voltage through improper external power supply or the use of unsuitable accessories. Defects due to unintended use are also excluded from the warranty.
Please contact your local dealer for warranty claims. The dealer will repair or exchange the product or forward it to an authorized service center. You can also contact our service partner directly. Please include your proof of purchase with the product and describe the malfunction as clearly as possible.
12. WEEE and Recycling

The European laws do not allow any more the disposal of old or defective electric or electronic devices with the household waste. Return your product to a municipal collection point for recycling to dispose of it. This system is financed by the industry and ensures environmentally responsible disposal and the recycling of valuable raw materials.
13. Service Address And Technical Hotline (for units sold in Germany)
Contact our service hotline by phone +49 (0) 6103 9481 66 (regular costs for German fixed network) or e-mail at service@albrecht-midland.de
Declaration of Conformity
Hereby, Alan Electronics GmbH declares that the radio equipment type Tectalk Worker 2 is in
compliance with Directive 2014/53/EU. The full text of the EU declaration of conformity
is available at the following internet address:
http://service.alan-electronics.de/CE-Papiere/

Printing errors reserved.
Information in this user manual are subject to change without prior notice.
natural_image
Abstract maroon globe logo with swirling lines, no text or symbols presentALBRECHT®
Tectalk Worker 2
Radios PMR446

natural_image
Black ALBRECHT radio device with visible grille and two ports (no text or symbols on device body)Manuel Français
1. Sommaire
1 radio Tectalk Worker 2
natural_image
Black Albrecht walkie-talkie, remote control device, and charging bulb (no visible text or symbols)text_image
B C A H I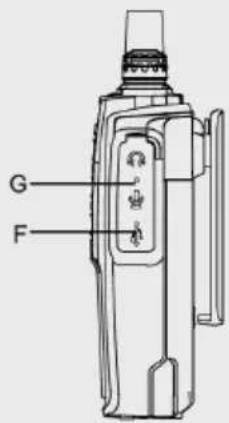
text_image
G FCTCSS (Continuous Tone Coded Squelch System) / DCS (Digital Coded Squelch)
natural_image
Abstract maroon globe logo with swirling lines and arrows, no text or symbols presentALBRECHT®
Tectalk Worker 2
natural_image
Black Albrecht radio device with visible grille and speaker (no text or symbols on device body)Manuale Italiano
1. Contenuto
7.3. VOX (Voice Operated Transmission)....36
7.4. Monitor....37
natural_image
Black Albrecht radio station with attached power cord, remote control unit, and battery (no visible text or symbols)natural_image
Black station walkie-talkie with visible signal lines and antenna (no text or symbols on device body)
natural_image
Black circular device with a black cable and a power plug, no visible text or symbols
natural_image
Black handheld electronic device with coiled cable and connector (no visible text or symbols)


natural_image
Black rectangular battery pack with multiple charging slots and a power cord, no visible text or symbols