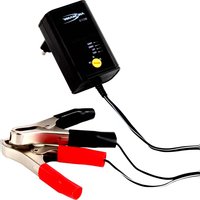
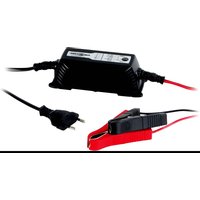
Powerline 4 Ultra - Battery charger ANSMANN - Free user manual and instructions
Find the device manual for free Powerline 4 Ultra ANSMANN in PDF.

| Product Type | Battery Charger |
| Brand | Ansmann |
| Model | Powerline 4 Ultra |
| Number of Slots | 4 |
| Compatible Battery Types | Li-Ion, NiMH, NiCd (various sizes, see manual) |
| Maximum Charging Current per Slot | 2000 mA (depending on number of occupied slots) |
| Adjustable Charging Current | 500 / 1000 / 1500 / 2000 mA |
| Discharge Current | 500 mA |
| USB Port | 5 V, 2000 mA max |
| Charger Power Supply | 12 V DC, 3000 mA max (via included power adapter) |
| Power Adapter | 100-240 V AC, 50-60 Hz, output 12 V DC, 3000 mA |
| Protection Class | II (double insulation) |
| Main Functions | Charge, discharge, test (capacity measurement), maintenance charge |
| Display | Per slot: battery type, charge level, current, voltage, timer, mAh counter, mode |
| Automatic Detection | Li-Ion and NiMH/NiCd batteries, reverse polarity, defective batteries |
| Automatic Shut-off | Yes, when charging is complete (display END) |
| Simultaneous USB and Charging | Yes |
| Cleaning and Maintenance | Dry or slightly damp soft cloth, unplug before cleaning |
| Safety | Do not recharge non-rechargeable batteries, do not cover ventilation openings, do not use near flammable liquids |
| Warranty | 3 years (excluding defects due to non-compliance with instructions) |
Frequently Asked Questions - Powerline 4 Ultra ANSMANN
User questions about Powerline 4 Ultra ANSMANN
0 question about this device. Answer the ones you know or ask your own.
Ask a new question about this device
Download the instructions for your Battery charger in PDF format for free! Find your manual Powerline 4 Ultra - ANSMANN and take your electronic device back in hand. On this page are published all the documents necessary for the use of your device. Powerline 4 Ultra by ANSMANN.
USER MANUAL Powerline 4 Ultra ANSMANN
Scope of delivery....11
Intended use 11
Safety information....12
Product description....13
Functions overview....13
Operation....13
Charging current 15
Modes....15
Display 16
Troubleshooting....16
Maintenance and care....16
Technical Data....17
Disposal....18
Disclaimer....18
Warranty information....18
SCOPE OF DELIVERY
1x Charger
1x PSU
First unpack all parts and check them for completeness and damages. Do not operate the product if it is damaged. Contact your retailer should you find any damage to the product.
INTENDED USE
The product is used for charging Li-ion/NiMH/NiCd rechargeable batteries. It automatically recognizes the battery type and sets itself accordingly. The product also features a USB connection that serves as a USB voltage source. This allows additional appropriate devices to be charged.
The product is designed exclusively for household use; it is not suitable for commercial purposes.
SAFETY INFORMATION
Carefully read the entire instruction manual before first operating the product. It contains important information on handling the product. If you give the product to third parties, you must include this instruction manual.
- Keep children away from the product and the packaging. The product is not a toy. Children must always be supervised to ensure that they do not play with the product.
- The product is not intended for use by person (including children) with reduced physical, sensory or mental capabilities or a lack of knowledge and experience in handling the product. Such persons must first receive instructions from a person responsible for their safety or be supervised while using the product!
- Before using the charger, read all the instructions and safety instructions on the charger and the rechargeable battery.
- Also read the operating instructions of any other devices which are connected to the product.
- Always insert the batteries heeding correct polarity (+ and -) as indicated in the battery compartment.
- Do not charge non-rechargeable batteries.
- The product complies with Protection class II. It features reinforced insulation and thus requires no protective grounding.
- Use the product with the included power supply unit only.
- Always place the product on a flat, stable and heat-resistant surface.
- Do not use the product near flammable liquids or gases.
- Do not cover the ventilation openings on the bottom and sides of the product.
- Do not leave the product unattended during use.
- Use the product in dry indoor spaces only and shield it from moisture.

PRODUCT DESCRIPTION (SEE PAGE 2)
1 Charging compartment indicator
9 Mode
2 Rechargeable battery type
10 USB input
3 Charge level
11 Power supply connection
4 END indicator
12 MODE button
5 Charging current
13 CHANNEL button
6 Timer
14 CURRENT button
7 mAh indicator
15 Charging compartment
8 Voltage indicator
16 Charging contact
17 Power supply unit
FUNCTIONS OVERVIEW
- Single-slot monitoring
• Automatic recognition of Li-Ion and NiMH/NiCd rechargeable batteries
• Automatic charging start when batteries are inserted with correct polarity - Micro controller-monitored charge control
• Automatic charging stop for fully charged rechargeable batteries - Recognition of defective rechargeable batteries
- Display of incorrectly inserted (reverse polarity) rechargeable batteries
• Detailed status display - Trickle charge for NiMH rechargeable batteries
- Discharge function and capacity measurement
- Adjustable charging current
- 5 V USB connection, max. 2 A
OPERATION
Simple charging
- Connect the power supply cable with the power supply connection on the charger.
- Connect the power supply to a suitable wall outlet.
- Slide back the charging contact and insert the rechargeable battery heeding correct polarity (negative terminal (-) on charging contact) into the charging compartment.
- If you do not wish to make any further settings, the product will begin charging with 500 mA charging current after 8 seconds.
- Once the rechargeable battery is fully charged, the display will show the END indicator.
- Remove the rechargeable battery and disconnect the product from the power supply.
Advanced functions
Note: If you wish to select the same mode for several rechargeable batteries, first insert the rechargeable batteries and then hook up the power supply. Then make the desired settings. These settings will be used for all occupied charging compartments. But you can also occupy and set each charging compartment individually.
- After inserting the rechargeable battery, you have 8 seconds to select the desired mode and charging current.
- The set mode and charging current are marked at the edge of the display by an arrow each. When the arrows flash, you can make settings.
- The set mode will begin when no button is pressed for 8 seconds and the arrows at the edge of the display are permanently lit.
- If you wish to make any subsequent changes:
- Use the CHANNEL button to toggle to the charging compartment in question. - Press and hold the MODE button for 4 seconds until the arrows begin flashing.
Note: The values recorded up until this point (mAh indicator and timer) are reset to 0.
Button functions
Button Function
MODE Change mode
CHANNEL Show status for next charging compartment
Note: Only occupied charging compartments can be shown.
CURRENT Change charging current
USB connection
- The USB connection serves as a voltage source with 5 V and max. 2000 mA.
- The USB connection and charging compartments can be used at the same time.
CHARGING CURRENT
Note: The maximum charging current per charging compartment depends on the number of occupied compartments.
| Occupied charging compartments | Max. charging current per compartment |
| 1-2 2000 mA | |
| 3 1500 mA | |
| 4 1000 mA |
Note: We recommend charging rechargeable batteries with a charging current of 500/1000 mA if there is enough time. This will prevent excessive heating and protect the battery.
Caution: As a general rule: The charging current value may not exceed the battery capacity value.
Example: Battery capacity 1400 mAh - Charging current 1000 mA
MODES
CHARGE
Charge rechargeable battery. Once the rechargeable battery is fully charged, the display will show the END indicator.
DISCHARGE
Discharge rechargeable battery. Once the rechargeable battery is discharged, the display will show the END indicator.
Note: The discharging current is limited to 500 mA.
TEST
Measure rechargeable battery capacity and then charge (charge - discharge - charge). Once the rechargeable battery is charged the second time, the display will show the END indicator. The measurement is complete and the battery fully charged.
Note: You can select the charging current for the charging process.
Measured value: The charge flow is measured during discharging only. The mAh indicator shows the rechargeable battery's capacity value.
DISPLAY
- The timer shows the duration of time that the mode is currently in operation.
- The mAh indicator shows the charge flow until now.
- The voltage indicator shows the rechargeable battery's current voltage.
Note: If no button is pressed for 30 seconds, the display backlight turns off automatically.
Indicator Charge level
| approx. 0-20 % | |
| approx. 20-40 % | |
| approx. 40-60 % | |
| approx. 60-80 % | |
| approx. 80-100 % |
TROUBLESHOOTING
| Indicator Possible cause Solution | ||
| Zero | No rechargeable battery is inserted/ recognized. | Reinsert the rechargeable battery. |
| Err | The rechargeable battery is defective. Li-Ion <2 V, NiMH/NiCd <0.2 V | Return the rechargeable battery to a collection point. |
| The rechargeable battery is inserted incorrectly (reverse polarity). | Reinsert the rechargeable battery with correct polarity. | |
MAINTENANCE AND CARE
Cleaning
- Before cleaning the product, disconnect the product from the power supply and remove all rechargeable batteries.
- Use only a soft, dry or slightly damp cloth (where necessary with a little mild dishwashing detergent) to clean the product. Never use any abrasive cleaners or solvents to clean the product.
TECHNICAL DATA
Charger
Power supply....12 V ——, max. 3000 mA
Protection class....II
USB output....5 V, max. 2000 mA
Charging compartments......4
Charging current ....500/1000/1500/2000 mA
Discharging current....500 mA
Trickle current....25 mA
Power supply unit
Power supply....100-240 V\~, 50-60 Hz
Output....12 V =..., max. 3000 mA
Protection class....II
Suitable rechargeable battery types
| Max.number | Type (Li-Ion) |
| 2 32650 (limited by size) | |
| 3 | 26650, 26500, 25500, 22650, 22500, 21700, 20700(limited by size) |
| 4 | 18700, 18650, 18500, 18490, 18350, 17670, 17650,17500, 17350, 16650, 16500, 16340 (RCR123A), 14650,14500, 14430, 14350, 13650, 13500, 13450, 12650,12500, 12340, 10500, 10440, 10350, 10340 |
| Max.number | Type (NiMH/NiCd) Max. capacity |
2 Mono D
12000 mAh3 Baby C
4 Mignon AA/ Micro AAA
DISPOSAL
Dispose the product in accordance with local regulations. The dustbin symbol indicates that waste electrical and electronic equipment may not be disposed of with normal household waste within the EU. Please use local recycling and collection points or contact the retailer where you purchased the product.
Batteries and rechargeable batteries are recyclable and may not be disposed of with household waste. Always return used batteries and rechargeable batteries to intended collection points.
You thus fulfill your statutory obligations and contribute to protection of the environment.
DISCLAIMER
The information contained in this instruction manual is subject to change without prior notice. ANSMANN assumes no liability for direct, indirect, accidental or other types of damage or consequential damage that result from improper handling of the product or failure to comply with the information contained in this instruction manual. We assume no liability and grant no warranty claims in cases of improper use of the product.
WARRANTY INFORMATION
We offer a three-year warranty on the device. Damages to the device due to failure to observe the instruction manual will void the warranty. This does not affect your legal warranty right.

The product meets the conditions of the European Union.
MODE D'EMPLOI ORIGINAL
CHARGEUR POWERLINE 4 ULTRA
TABLE DES MATIÈRES
INNEHÅLLSFÖRTECKNING
97959 Assamstadt | Germany
Hotline: +49 (0) 6294 / 4204 3400
E-Mail: hotline@ansmann.de | www.ansmann.de