Brauheld Pro - Beer dispenser Klarstein - Free user manual and instructions
Find the device manual for free Brauheld Pro Klarstein in PDF.
| Product type | All-in-one beer brewing system |
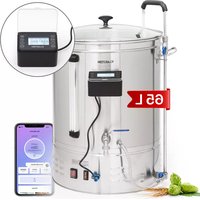
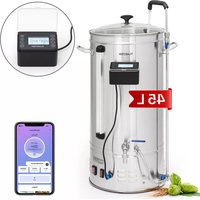
| Maximum capacity (liquid) | Up to 30 L (model 10034586) / 65 L (model 10035516) |
| Maximum capacity (liquid + malt) | Up to 25 L (30 L model) / 55 L (65 L model) |
| Power | 100-2500 W (30-35 L model) / 100-3300 W (45-65 L model) |
| Power supply | 220-240 V ~ 50/60 Hz |
| Temperature range | 30 °C to 100 °C |
| Step programming | Up to 11 steps per recipe |
| Manual mode | Yes (temperature, power, time adjustment) |
| Recipe mode | Yes (save and select up to 9 recipes) |
| Hop alarm | Up to 10 programmable alarms |
| Circulation pump | 220 V pump included |
| Circulation valve | Mash Flow Technology (circulation valve) |
| Drain valve | With safety lock |
| Included spare parts | Perforated plate, filter tube, filter container, stopper, circulation hose, quick coupling |
| Cleaning | Do not use in dishwasher; hot water and mild detergent |
| Safety | Dry-run protection, overheating, anti-steam lid, on/off switch |
| Display | Digital screen with temperature, power, time |
| Electrical connection | Grounded socket 10-16 A |
Frequently Asked Questions - Brauheld Pro Klarstein
User questions about Brauheld Pro Klarstein
0 question about this device. Answer the ones you know or ask your own.
Ask a new question about this device
Download the instructions for your Beer dispenser in PDF format for free! Find your manual Brauheld Pro - Klarstein and take your electronic device back in hand. On this page are published all the documents necessary for the use of your device. Brauheld Pro by Klarstein.
USER MANUAL Brauheld Pro Klarstein
text_image
QR code image containing encoded data, no visible human-readable textINHALTSVERZEICHNIS
natural_image
Close-up of a metallic cylindrical object with a red curved arrow pointing to a small circular feature, no visible text or symbols.natural_image
Three grayscale images showing a cylindrical container with internal components, one with a central rod and another with a perforated lid (no text or symbols)natural_image
Symbol of a trash bin crossed with a diagonal line, no text or numbers presentUnit 6 Riverside Business Centre
Brighton Road
Shoreham-by-Sea
BN43 6RE
United Kingdom
Dear Customer,
Congratulations on purchasing this device. Please read the following instructions carefully and follow them to prevent possible damages. We assume no liability for damage caused by disregard of the instructions and improper use. Scan the QR code to get access to the latest user manual and more product information.

text_image
QR code image containing encoded data, no visible human-readable textCONTENT
Safety Instructions 18
Product Overview 19
Assembly 20
Operation 23
Control Panel and Commissioning 24
Manual Mode 25
Recipe Mode 26
Further Functions 27
Troubleshooting 29
Cleaning and Care 30
Hints on Disposal 30
Manufacturer & Importer (UK) 30
TECHNICAL DATA
| Item number | Power supply | Max Capacity (Liquid only) | Max Capacity (Liquid and malt) | Power consumption |
| 10034586 | L 30 L 100-250220-240 V | 30 L 25 L | 100-2500 W | |
| 10034587 35 | 0 W | |||
| 10034588 45 | L 50/60 HzL 35 L 100-330 | 0 W | ||
| 10035516 65 | L 55 L 100-330 | 0 W |
SAFETY INSTRUCTIONS
- Children must not use the appliance! Persons with reduced physical, sensory or mental capabilities or those with a lack of experience and knowledge may only use the device if they are instructed on how to do so by a person responsible for their safety, or if they are supervised and understand the hazards associated with the use of the device.
- Read all instructions carefully.
- Check the nameplate on the device and make sure that the power supply of the device matches the power supply of the power connector.
• The plug should be earthed. - Do not use the unit if the power cord is defective.
- Contact your service representative if the unit does not work or is damaged.
- Switch off the unit by the switch before removing the power plug.
- Turn off the appliance before moving it.
- Hold the plug firmly when removing the power cord. Do not pull the power cord.
- Do not let the power cord hang over a table top.
- Place the unit securely in the middle of the table.
- Do not turn on the appliance when the water tank is empty.
- Do not place the appliance next to a gas cooker, electric heater or heated oven.
- Do not overflow the power cord or plug with water.
- Before cleaning, unplug the appliance from the wall outlet and allow the appliance to cool.
• After use, turn off the power and unplug the appliance.
• This appliance requires a 10-16 A power outlet. - This equipment should only be installed in an environment where it can be supervised by trained personnel.
- Do not remove the lid while cooking.
- Turn the lid so that the steam does not escape from the handles.
- Do not carry the appliance when it is full.
- If the appliance is overfilled, boiling water may overflow.
- This appliance must not be installed in environments where a jet of water is required.
- This appliance must not be cleaned with a water jet or immersed in water.
- Protection against overheating and dry running: The unit has dry running protection. This protection is automatically activated when the unit is running dry. If the appliance overheats, the thermostat switches off. In this case, top up with water or wait until the unit cools down. Make sure that there is at least 3 litres of water in the container after switching off.
- The mash becomes hot when the appliance is in operation. Always use heat-resistant oven gloves when handling the handles.
- Do not immerse the mash tun in water. Protect the power cord from moisture.
Note: In some countries it is required by law to register the production of beer for personal consumption with the authorities.
PRODUCT OVERVIEW
text_image
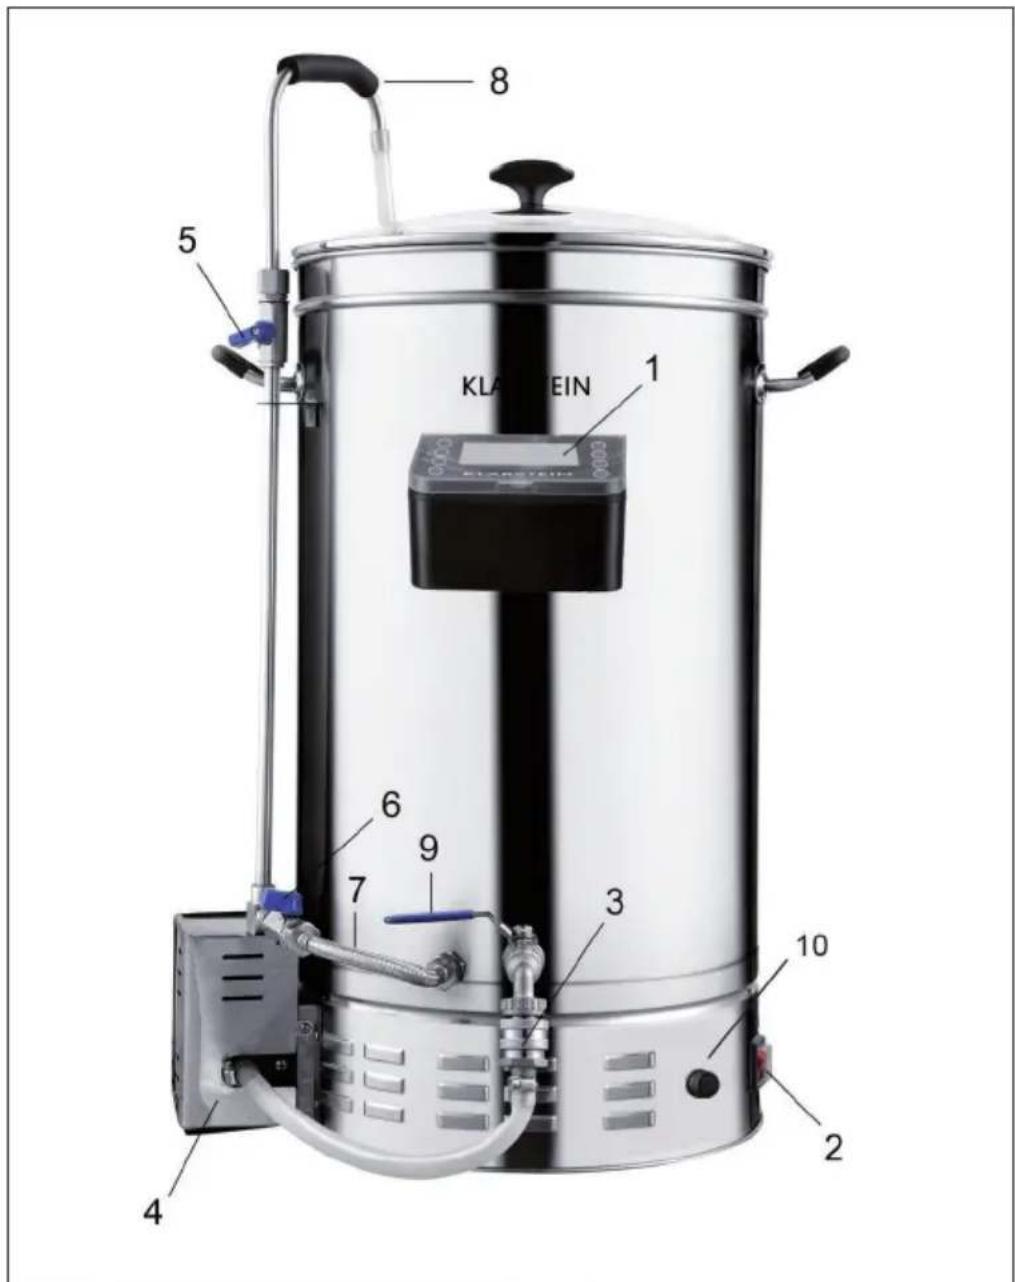
KLARIN 1 2 3 4 5 6 7 8 9 10| 1 | Controller | 6 | Anti-burn valve (Anti-Burn-Circulation) |
| 2 | Switch | 7 | Anti-burn tube (Anti-Burn-Circulation) |
| 3 | Connector | 8 | Circulation tube (Mash Flow Technology) |
| 4 | 220V Pump | 9 | Tap |
| 5 | Circulation valve (Mash Flow Technology) | 10 | Socket of controller |
ASSEMBLY
Parts
 |  |  |
| Sparge plate Filter tube Filter basket | ||
 |  |  |
| Stopper Circulation tube Quick connector | ||
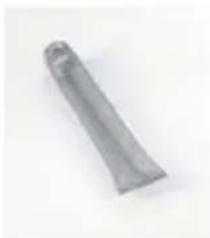
Filter tube assembly

natural_image
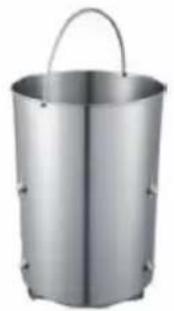
Close-up of a metallic cylindrical object with a red curved arrow pointing to a small circular feature, no visible text or symbols.Sparge plate assembly
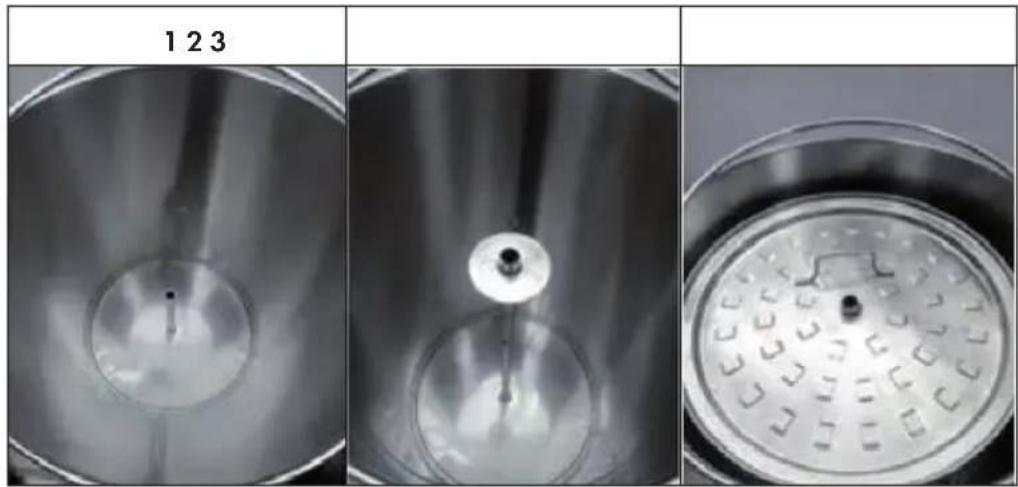
natural_image
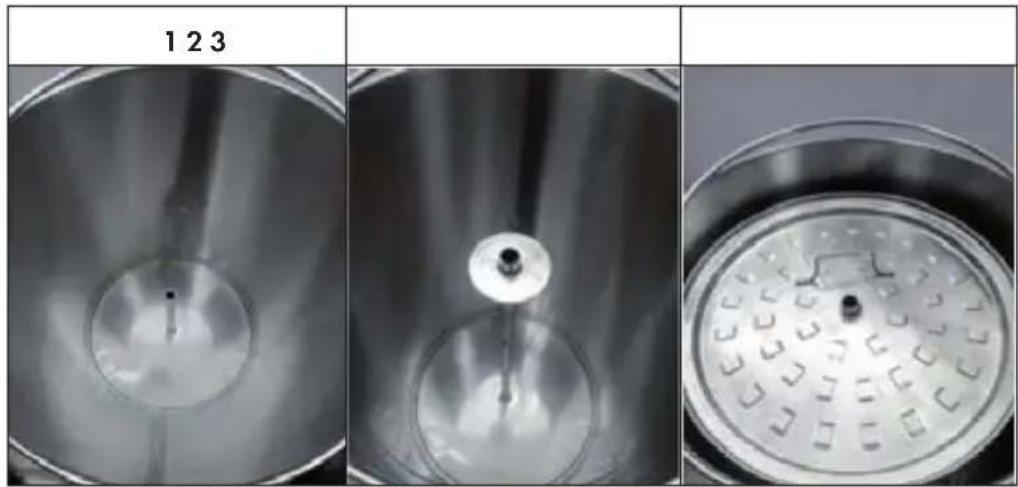
Three grayscale images showing a circular container with internal components, one with a central dot and another with a grid pattern (no text or symbols)Filter basket assembly
| 1 2 3 | ||
| Basket feet go through the groove | OR | Basket feet hang on the urn |
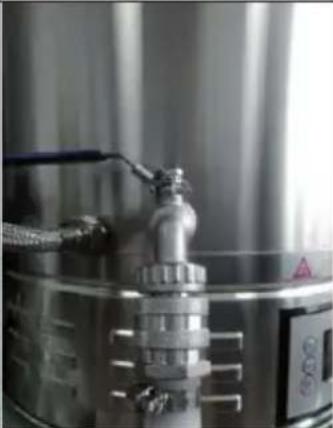
Circulation tube assembly
| Insert Tighten | nut Slide the rubber | hose onto the circulation pipe and lead the other end of the hose through the cover. |
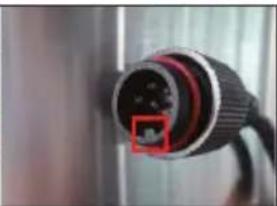
Quick connector assembly
| 1 | 2 |
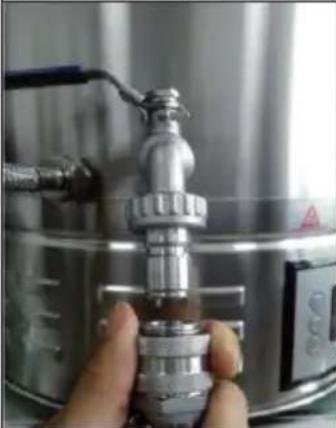 |  |
| Pull the locking ring downwards | Push onto the tap and release the locking ring. Check that the connection is correctly engaged. Otherwise, water may leak. |
OPERATION
Controller Operation
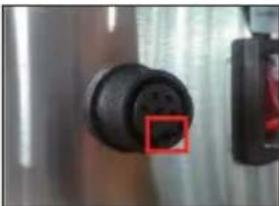 |  | 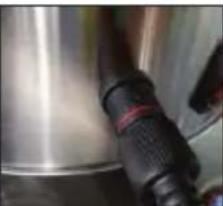 |  |
| Socket Plug Insert Screw & lock | |||
Note Never screw too much and lock too tight. Otherwise it would damage the socket and make it loose.
Switch operation
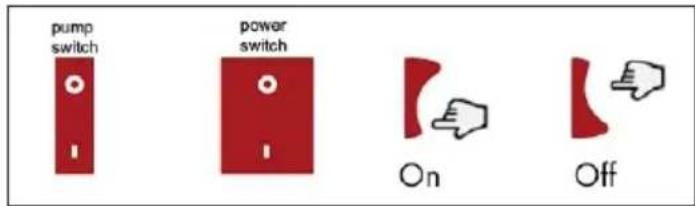
text_image
pump switch power switch On OffTap operation
| Closed Pull the circlip towards the end of the lever and turn the lever 90° counterclockwise. | Open. To close, pull the circlip towards the end of the lever and move the lever clockwise by 90°. |
Valve operation
Note: Never open the circulation valve before assembling the circulation tube and make the tube go through the lid. Otherwise the hot water or wort may cause burns.
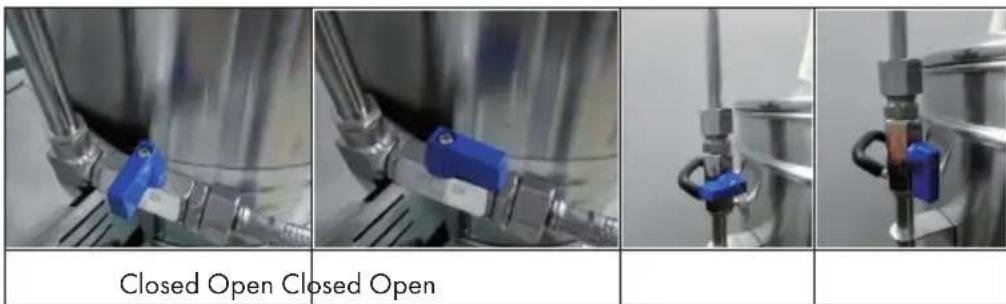
text_image
Closed Open Closed OpenCONTROL PANEL AND COMMISSIONING
Control Panel
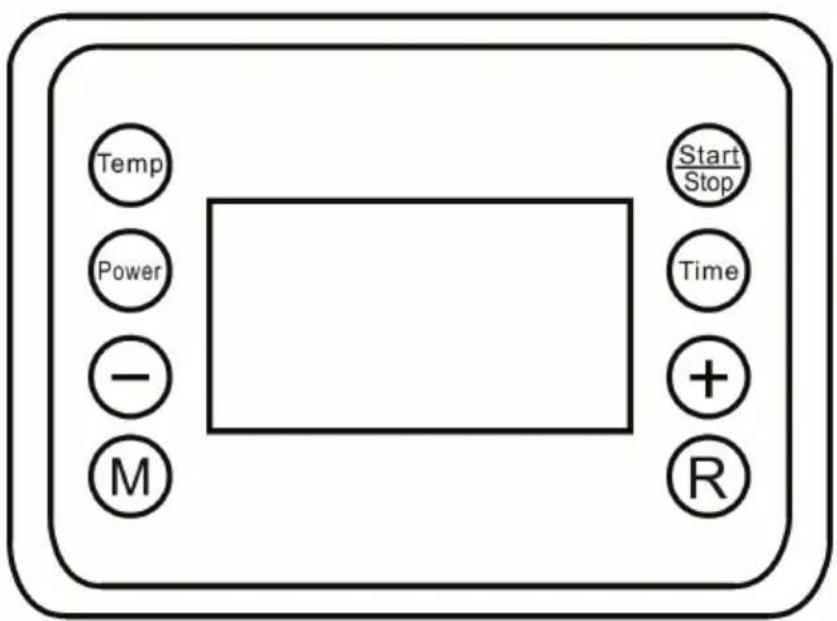
text_image
Temp Power - M Start Stop Time + R| Temp | Adjust the temperature from 30°C to 100°C. |
| Power | Set the power from 100 W to maximum power. |
| Time | Set the time from 1 minute to 99 minutes. |
| Start/Stop | Start/stop program. |
| M | Enter the manual mode or go to the next step. |
| R | Go to the recipe mode or to the next step. |
| + | Decrease value |
| - | Increase value |
Switch on the device

After plugging in and switching on, the display shows the current temperature.
MANUAL MODE
| 1 2 3 | ||
| Step 01Power --00W Target --°C | Step 01Power --00W Target 67°C | Step 01Power 2500W Target 67°C |
| Press the M button once to switch to Manual mode. The default setting of Temp, Power and Time is [0]. | Press the TEMP button once and set the desired temperature. Use the (+/-) buttons to adjust the temperature in 1°C increments. | Press the POWER button once and set the desired power. Use the (+/-) buttons to adjust the temperature in 100W increments. |
| 456 | ||
| Step 01Power 2500W Target 67°C | Step 02Power --00W Target --°C | Step 08Power 1000W Target 90°C |
| Press the TIME button once and set the desired time. Use the +/- buttons to adjust the temperature in 1-minute increments. | After you have set all 3 values, press the M button again. You can program a maximum of 11 steps. | The display will show the set values. |
| 7 | 8 |
| Mashing15°C 65MinStep 01Power2500W Target 67°C | 15°C |
| Press the START button once. The display will show [Mashing], indicating that the unit is operating. | Long press STOP button to stop running and restart. Short press STOP button to pause the countdown for sparging during running. |
RECIPE MODE
Save recipes manually
| 1 2 3 | ||
| Step 01Power --00W Target --°C | Step 01Power 2500W Target 67°C | Step 02Power --00W Target --°C |
| Press the R button once to switch to recipe mode. [Recipe] appears on the display. | Press the TEMP, POWER, and TIME buttons one after the other to set the desired values for the first step. Use the (+/-) buttons to adjust the temperature in 1 °C/100 W/1 minute increments. | Press the R button again to move to the next step. |
| 456 | ||
| Step 08Power 1000W Target 90°C | Step 08Power 1000W Target 90°C | Step 01Power 2500W Target 67°C |
| Press the TEMP, POWER, and TIME buttons one after the other to set the desired values for the second step. You can program a maximum of 11 steps. | Then press POWER and TIME simultaneously for 3 seconds to save the recipe. | Press the START button once. The display will show [Mashing], indicating that the machine is operating. |
| 7 | 8 |
| 15°C | 15°C \ Step 01 \ Power --00W Target --°C |
| Long press STOP button to stop running and restart. Short press STOP button to pause the countdown for sparging during running. | To select a stored or preset recipe, press TEMP and POWER simultaneously and use the +/- buttons to select a recipe. You can save up to 9 recipes. |
FURTHER FUNCTIONS
Note: If you want to change the setting of any step (temperature/power/time) in manual mode during operation, press the Temp/Power or Time button once and press the (+/-) button to change.
Setting the hop alarm
| Mashing Recipe 0115°C 65MinStep 01 Hop Alert 01Power2500W Target 67°C | If, during operation, you want to set a timer for a particular step to remind you to add the hop, long press the TIME button and use the (+/-) button to set the time. |
| Mashing Recipe 0115°C 65MinStep 01 Hop Alert 10Power2500W Target 67°C | The number to the right of Hop Alert indicates the time. While it is flashing, the value can be adjusted. Then press the TIME button once to move to the next Hop Alert or wait briefly for the Hop Alert to start automatically. You can set a total of 10 hop alarms. Press the TIME button once to set the next hop alarm. Note:Hop alarm 1 only becomes active after a temperature of 100 °C has been reached. |
| Mashing Recipe 0115°C 65MinStep 01 Hop Alert 04Power2500W Target 67°C | After the hop alarm starts, Number to the right of Hop Alert shows the sequence. For example, Hop Alert 04 stands for the fourth hop alarm. When a hop alarm has expired, a signal sounds and the next hop alarm starts. Press the TIME button to stop the beep. |
Delete recipe settings
| 15°C | If you want to delete the setting of any recipe in recipe mode, return to standby mode and press the START button for 3 seconds. After a signal sounds, the setting is cleared. |
Calibrating the temperature
| -01 | If the boiling temperature does not match the temperature displayed in the thermometer, press and hold (+/-) the buttons simultaneously for 3 seconds and correct the displayed temperature by up to +/- 10 °C. Press the (+/-) button. Then wait 5 seconds to save the selected value. You can also correct the temperature before putting the machine into operation.Once corrected, it will be stored and you will not need to correct it next time unless the temperature is inaccurate again. |
Recipe suggestions
| Recipe 1: Light beer | |||
| Step Temperature Time Power | |||
| 1 40 °C 1 min. 2500 W | |||
| 2 52 °C 20 min. 1500 W | |||
| 3 63 °C 40 min. 1500 W | |||
| 4 73 °C 35 min. 1500 W | |||
| 5 78 °C 10 min. 1500 W | |||
| Recipe 2: Full body beer | |||
| Step Temperature Time Power | |||
| 1 40 °C 1 min. 2500 W | |||
| 2 52 °C 20 min. 1500 W | |||
| 3 63 °C 20 min. 1500 W | |||
| 4 73 °C 35 min. 1500 W | |||
| 5 78 °C 20 min. 1500 W | |||
| Recipe 3: Lager | |||
| Step Temperature Time Power | |||
| 1 40 °C 1 min. 2500 W | |||
| 2 52 °C 20 min. 1500 W | |||
| 3 61 °C 35 min. 1500 W | |||
| 4 69 °C 35 min. 1500 W | |||
| 5 78 °C 10 min. 1500 W | |||
| Recipe 4: Wheat beer | |||
| Step Temperature Time Power | |||
| 1 40 °C 1 min. 2500 W | |||
| 2 44 °C 20 min. 1500 W | |||
| 3 52 °C 20 min. 1500 W | |||
| 4 63 °C 35 min. 1500 W | |||
| 5 73 °C 35 min. 1500 W | |||
| 6 78 °C 10 min. 1500 W | |||
TROUBLESHOOTING
| Problem Possible causes What to do | ||
| No power after turning on the power switch | Controller cord is not connected to the PCB | Reconnect controller cord to PCB |
| Dry burn before adding water and the thermostat overload has cut off | Wait for the brewer to cool down to below 175°C | |
| Controller display E1 Temperature | re sensor cord is not connected to the PCB | Reconnect sensor cord to PCB |
| Not heating up after you have finished setting the steps | The start button wasn't held down for long enough | Hold down the start button for 3 seconds |
| Wire connected incorrectly Reconnect wire correctly | ||
| Water not being pumped from the tap | Tap not open Open the tap | |
| Pump and tap not connected Connect the pump to tap with quick connector | ||
| Air or bubbles in the pump Make sure the water level is higher than the tap inlet, turn off the pump ,open one of the valves and then open the tap to get the air out of the pump | ||
| Wort not pumped out Air or bubbles in the pump Make sure the water level is higher than the tap inlet, turn off the pump, open one of the valves and then open the tap to get the air out of the pump | ||
| Filter tube or filter basket is blocked | Power off the brewer, take all the wort out when it is cool enough and clean the filter tube or filter basket | |
| Wort is too thick and sticky Fill with water | ||
CLEANING AND CARE
• Each part that has been in contact with the wort should be cleaned after brewing.
- Do not use a dish washer to clean small parts.
- Do not use acidic, alkaline or salty liquids to clean.
• Water or cleanser essence is suitable for cleaning.
- Pumping hot water through the circulation tube and anti-burn tube to clean is suitable.
HINTS ON DISPOSAL

natural_image
Symbol of a trash bin crossed with a diagonal line, no text or numbers presentIf there is a legal regulation for the disposal of electrical and electronic devices in your country, this symbol on the product or on the packaging indicates that this product must not be disposed of with household waste. Instead, it must be taken to a collection point for the recycling of electrical and electronic equipment. By disposing of it in accordance with the rules, you are protecting the environment and the health of your fellow human beings from negative consequences. For information about the recycling and disposal of this product, please contact your local authority or your household waste disposal service.
MANUFACTURER & IMPORTER (UK)
Manufacturer:
Chal-Tec GmbH, Wallstrasse 16, 10179 Berlin, Germany.
Importer for Great Britain:
Chal-Tec UK limited
Unit 6 Riverside Business Centre
Brighton Road
Shoreham-by-Sea
BN43 6RE
United Kingdom
Estimado cliente:
text_image
QR code image containing encoded data, no visible human-readable textÍNDICE DE CONTENIDOS
natural_image
Close-up of a metallic cylindrical object with a red curved arrow pointing to a small circular feature, no visible text or symbols.natural_image
Three grayscale images showing a circular container with internal components, labeled 123, 1, and 2 (no text or symbols on the objects themselves)natural_image
Symbol of a trash bin crossed with a diagonal line, no text or numbers presentUnit 6 Riverside Business Centre
Brighton Road
Shoreham-by-Sea
BN43 6RE
United Kingdom
Chère cliente, cher client,
text_image
QR code image containing encoded data, no visible human-readable textSOMMAIRE
natural_image
Close-up of a metallic cylindrical object with a red curved arrow pointing to a small circular feature, no visible text or symbols.Installation de la plaque percée
natural_image
Three-panel image showing a metallic container with internal components, labeled 123, and empty for scale (no text or symbols on the objects themselves)text_image
Temp Power - M Start Stop Time + Rnatural_image
Symbol of a trash bin crossed with a diagonal line, no text or numbers presentUnit 6 Riverside Business Centre
Brighton Road
Shoreham-by-Sea
BN43 6RE
United Kingdom
Gentile cliente,
text_image
QR code image containing encoded data, no visible human-readable textINDICE
natural_image
Close-up of a metallic cylindrical object with a red curved arrow pointing to a small circular feature, no visible text or symbols.natural_image
Three-panel image showing a metallic container with internal components and a circular perforated plate, all without any visible text or symbols.text_image
Temp Power - M Start Stop Time + Rnatural_image
Symbol of a trash bin crossed with a diagonal line, no text or numbers presentPRODUTTORE E IMPORTATORE (UK)
Produttore:
Chal-Tec GmbH, Wallstraße 16, 10179 Berlin, Germania.
Unit 6 Riverside Business Centre
Brighton Road
Shoreham-by-Sea
BN43 6RE
United Kingdom

area
| Category | Value | |---|---| | 1 | 100 | | 2 | 100 | | 3 | 100 | | 4 | 100 | | 5 | 100 | | 6 | 100 | | 7 | 100 | | 8 | 100 | | 9 | 100 | | 10 | 100 | | 11 | 100 | | 12 | 100 | | 13 | 100 | | 14 | 100 | | 15 | 100 | | 16 | 100 | | 17 | 100 | | 18 | 100 | | 19 | 100 | | 20 | 100 | | 21 | 100 | | 22 | 100 | | 23 | 100 | | 24 | 100 | | 25 | 100 | | 26 | 100 | | 27 | 100 | | 28 | 100 | | 29 | 100 | | 30 | 100 | | 31 | 100 | | 32 | 100 | | 33 | 100 | | 34 | 100 | | 35 | 100 | | 36 | 100 | | 37 | 100 | | 38 | 100 | | 39 | 100 | | 40 | 100 | | 41 | 100 | | 42 | 100 | | 43 | 100 | | 44 | 100 | | 45 | 100 | | 46 | 100 | | 47 | 100 | | 48 | 100 | | 49 | 100 | | 50 | 100 | | 51 | 100 | | 52 | 100 | | 53 | 100 | | 54 | 100 | | 55 | 100 | | 56 | 100 | | 57 | 100 | | 58 | 100 | | 59 | 100 | | 60 | 100 | | 61 | 100 | | 62 | 100 | | 63 | 100 | | 64 | 100 | | 65 | 100 | | 66 | 100 | | 67 | 100 | | 68 | 100 | | 69 | 100 | | 70 | 100 | | 71 | 100 | | 72 | 100 | | 73 | 100 | | 74 | 100 | | 75 | 100 | | 76 | 100 | | 77 | 100 | | 78 | 100 | | 79 | 100 | | 80 | 100 | | 81 | 100 | | 82 | 100 | | 83 | 100 | | 84 | 100 | | 85 | 100 | | 86 | 100 | | 87 | 100 | | 88 | 100 | | 89 | 100 | | 90 | 100 | | 91 | 100 | | 92 | 100 | | 93 | 100 | | 94 | 100 | | 95 | 100 | | 96 | 100 | | 97 | 100 | | 98 | 100 | | 99 | 100 | | Note: The actual values in the 'Value' column are not provided in the code. I have used the label 'The Region' to represent the 'Region'. The values are estimated based on the provided code.