HD 8184 M Plus - Pressure washer Kärcher - Free user manual and instructions
Find the device manual for free HD 8184 M Plus Kärcher in PDF.

| Product type | High-pressure cleaner |
| Brand | Kärcher |
| Model | HD 8/18-4 M (HD 8184 M Plus) |
| Operating pressure | 18 MPa (180 bar) |
| Water flow rate | 12.5 l/min |
| Connected power | 4.6 kW |
| Mains voltage | 400 V / 3 phases / 50 Hz |
| Main fuse | 16 A (slow-blow) |
| Protection type | IPX5 |
| Operating weight | 41 kg |
| Dimensions (L × W × H) | 455 × 400 × 700 mm (low handle) |
| Height with high handle | 970 mm |
| Max. supply temperature | 60 °C |
| Max. supply pressure | 1 MPa |
| Min. supply flow rate | 12 l/min |
| Max. suction height | 0.5 m |
| Pump oil type | 15W40 |
| Oil quantity | 0.35 l |
| Sound pressure level | 75 dB(A) |
| Guaranteed sound power level | 91 dB(A) |
| Hand-arm vibrations | 2.3 m/s² (uncertainty K=0.7) |
| Connection system | EASY!Lock |
| Main functions | High pressure, detergent, rotary nozzle included (Plus model), pressure/flow regulation, pressure switch |
| Maintenance | Weekly water filter cleaning, oil change every 500 h or 1 year |
| Safety | Recycling valve, safety valve, trigger lock, safety catch |
| Water supply | Network connection or tank suction (with kit) |
Frequently Asked Questions - HD 8184 M Plus Kärcher
User questions about HD 8184 M Plus Kärcher
0 question about this device. Answer the ones you know or ask your own.
Ask a new question about this device
Download the instructions for your Pressure washer in PDF format for free! Find your manual HD 8184 M Plus - Kärcher and take your electronic device back in hand. On this page are published all the documents necessary for the use of your device. HD 8184 M Plus by Kärcher.
USER MANUAL HD 8184 M Plus Kärcher
71364 Winnenden (Germany)
Tel.: +49 7195 14-0
Fax: +49 7195 14-2212
Winnenden, 2017/07/01
Contents
General notes. 14
Intended use 14
Environmental protection 14
Safety instructions 14
Control elements 14
Colour coding. 15
Unpacking 15
Installing accessories. 15
Initial startup. 15
Operation 16
Interrupting operation. 16
Finishing operation. 16
Only with HD...M, HD...MX: Storing the device .. 17
Frost protection 17
Transport 17
Storage. 17
Care and service 17
Troubleshooting guide 17
Accessories and spare parts 18
Warranty. 18
Technical data 18
EC Declaration of conformity 20
General notes

Read these original operating instructions and the enclosed safety instructions before using the device for the first
time. Act in accordance with them.
Keep both books for future reference or for future owners.
Intended use
Use this high-pressure cleaner only for the following types of work:
Use the high-pressure jet for cleaning machines, vehicles, buildings, tools and similar objects.
We recommend using a rotary nozzle as a special accessory for stubborn soiling.
The HD...Plus is supplied with a rotary nozzle.
ATTENTION
Dirty water leads to premature wear or deposits in the device.
Clean the device using only clean water, or recycled water that does not exceed the following limits:
pH value: 6.5...9.5
- Electrical conductivity: Conductivity of fresh water + 1200 S/cm, maximum conductivity 2000 S/cm
- Settleable particles (sample volume 1 l, settling time 30 minutes): < 0.5mg/l
- Filterable particles: < 50mg/l ,no abrasive substances
Hydrocarbons: < 20 mg/l
- Chloride: < 300mg/l
- Sulphate: < 240 mg/l
Calcium: < 200 mg/l
Total hardness: < 28^, < 50^, < 500ppm (mg CaCO_3/l )
- Iron: < 0.5 mg/l
Manganese: < 0.05 mg/l
Copper: < 2mg / l
Active chloride: < 0.3mg / l
Free of unpleasant odours
Environmental protection

The packing materials can be recycled. Please dispose of packaging in accordance with the environmental regulations.

Electrical and electronic appliances contain valuable, recyclable materials and often components such as batteries, rechargeable batteries or oil, which - if handled or disposed of incorrectly - can
pose a potential threat to human health and the environment. However, these components are required for the correct operation of the appliance. Appliances marked by this symbol are not allowed to be disposed of together with the household rubbish.
Notes on the content materials (REACH)
Current information on content materials can be found at: www.kaercher.de/REACH
Safety instructions
- Read the safety instructions 5.951-949.0-before initial startup.
- Observe the national regulations for liquid jet cleaners.
- Observe the national accident prevention regulations. Liquid jet cleaners must be tested regularly. The test result must be recorded in writing.
- Do not modify the device or accessories.
Symbols on the device
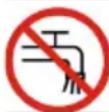
The device may not be connected to the public drinking water network.
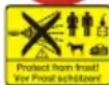
The high-pressure jet must not be directed at persons, animals, live electrical equipment or at the device itself. Protect the device from frost.
Safety devices
Safety devices protect the user and may not be disabled or functionally circumvented.
The overflow valve, pressure switch an safety valve are set and sealed by the manufacturer. Adjustments are performed only by customer service.
Overflow valve with pressure switch
When the water quantity is reduced via the pressure/quantity control on the trigger gun, the overflow valve opens and part of the water flows back to the suction side of the pump.
When the trigger on the high-pressure gun is release, the pressure switch switches off the high-pressure pump and the high-pressure jet stops.
The pump switches on again when the trigger is pulled.
Safety valve
The safety valve opens when the permissible operating pressure is exceeded and the water flows back to the suction side of the pump.
Control elements
See graphics page
1Protector
②Nozzle
Pressure and quantity regulation
4EASY!Lock spray lance
5 EASY!Force high-pressure gun
6 Safety latch
⑦Trigger
8 Unlocking lever
9 EASY! Lock high-pressure hose
Push handle, top (pulled out)
⑪Hose reel
12Push handle, bottom (pushed in)
⑬Rubber band
14 Cable clips, also a hose holder with the HD...M
15Spray lance holder
16 Nozzle storage for rotary nozzle
⑰Power switch
18Spray lance holder
EASY!Lock high-pressure connection
20Sieve
21Hose spout
2 Union nut
23Water connection
24 Skid, stand
25 Holder for foam nozzle*
Transport retainer for surface cleaner*
27Push handle lock
28Crank
- not in the scope of delivery for all device variants
Colour coding
Control elements for the cleaning process are yellow.
- Control elements for maintenance and servicing are light grey.
Unpacking
- Check the contents of the package when unpacking.
- Notify the dealer immediately in the case of shipping damage.
- Only with HD...M PU: Store the drilling template on the packaging for mounting the device on the wall.
Installing accessories
Note
No accessories are supplied in the scope of delivery for the HD...M PU.
Note
The EASY!Lock system connects components quickly and safely via a single turn of the quick-release thread.
Figure A
- Plug the high-pressure nozzle onto the spray lance.
- Fit the union nut and hand-tighten (EASY!Lock).
- Connect the spray lance to the high-pressure gun and hand-tighten (EASY!Lock).
- Release the push handle lock.
- Pull the push handle out to the end position.
For devices without a hose reel:
- Connect the high-pressure hose to the high-pressure gun and high-pressure connection of the device and tighten hand-tight (EASY!Lock).
For devices with a hose reel:
- Remove the cable ties from the pre-installed high-pressure hose and carefully unroll the hose from the drum.
- Lay the high-pressure hose on the ground in a straight line.
- Turn the crank clockwise and wind the high-pressure hose onto the hose reel in evenly distributed layers. Take care to ensure that the hose does not become kinked.
- Connect the high-pressure hose to the high-pressure gun and hand-tighten (EASY!Lock).
Initial startup
Installation of HD...M PU
△DANGER
Danger of injury from electric shock
Only allow authorised technical specialists to install the water supply, electrical connections and high-pressure network.
Ambient conditions
- Dry, frost-free environment.
No danger of explosion.
Solid, level floor or wall of sufficient loading capacity. -
Do not install in the vicinity of residential spaces or offices (noise emission).
-
Accessibility for maintenance work.
Water drain at installation location.
Fastening the device
Note
Screws and dowels for fastening the holder are not provided in the scope of delivery. The must be selected to suit the requirements of the installation location and must be procured separately. Required screw diameter of 6...8 mm.
△DANGER
Risk of injury from a falling device
Take the weight of the device and the loading capacity of the installation location into account when selecting the fasteners.
Figure B
① Wall mounting
②floor installation
③ Mounting opening
4Holder
- Mark the mounting holes on the wall or floor using the drilling template.
- Drill the holes.
- Attach the holder but only tighten the screws lightly.
- Adjust the holder clearance by turning with an open-end wrench.
- Tighten the fastening screws.
- Mount the device.
Electrical connection
△DANGER
Risk of injury from electric shock
Use a plug to connect the device to the mains grid. Permanent connection to the mains grid is prohibited. The plug is used for disconnection from the mains.
HD...M PU: The power supply used for operating the unit must be able to supply enough power for continuous operation.
HD...M PU: All live parts, cables and devices in the work area must be protected against water jets.
- Plug the mains plug into the socket.
Water connection
Connection to a water line
WARNING
Health risk from return flow of contaminated water into the drinking water network.
Observe the regulations of your water supply company. According to applicable regulations, the device must never be used with the drinking water network without a system separator. Use a system separator from KÄRCHER or a system separator as per EN 12729
Type BA. Water that has flowed through a system separator is classified as undrinkable. Always connect the system separator to the water supply and never directly to the water connection on the device.
- Check the feed pressure, input temperature and input amount of the water supply. See the "Technical data" section for the requirements.
- Connect the system separator and water connection of the device with a hose (minimum length 7.5m minimum diameter 1").
The supply hose is not included in the scope of delivery.
- Open the water inlet.
Suck water from the container
- Screw the suction hose (order number 4.440-207.0) and filter (order number 4.730-012.0) onto the water connection.
- Vent the device.
Vent the device
- Unscrew the nozzle from the spray lance.
- Allow the device to run until the escaping water is free of air bubbles.
- In the case of venting problems, allow the device to run for 10 seconds and then switch it off. Repeat the procedure several times.
- Switch off the device.
- Screw the nozzle back in place.
Only with HD...M PU: High-pressure installation
The applicable national regulations for permanently installed high-pressure cleaning systems must be observed.
- Connect the device to the permanently installed piping using a high-pressure hose line.
- Route the permanently installed piping with as few changes in direction as possible.
- Route the piping using padded loose and fixed clips to compensate for pressure and thermal expansion.
- Minimum line cross-sections: a Pipelines: Nominal width DN 15 (1 / 2^n) b Hose lines: Nominal width DN 6.
Operation
△DANGER
Risk of injury from the high-pressure water jet
Never fasten the trigger and safety lever in the actuated position.
Do not use the high-pressure gun when the safety lever is damaged.
Push the safety latch of the high-pressure gun forwards every time before starting work with the device.
Opening/closing the high-pressure gun
- Opening the high-pressure gun: Actuate the safety lever and trigger.
- Closing the high-pressure gun: Release the safety lever and trigger.
High-pressure operation
The device can be operated in a standing or lying position.
Note
The device is equipped with a pressure switch. The motor only starts up when the high-pressure gun is open.
1. Device with a hose reel: Completely unroll the high-pressure hose from the hose reel.
2. Set the power switch to "I"
3. Unlock the high-pressure gun by pushing the safety latch of the high-pressure gun to the rear.
4. Open the high-pressure gun.
5. For devices with pressure and volume regulator: Set the working pressure by turning the pressure and volume regulator.
Operation with detergent
Note
A cup foam lance (optional) is needed for operating with detergent.
△WARNING
Health risk through incorrect handling of detergents
Observe the safety instructions on the detergent.
ATTENTION
Unsuitable detergents can damage the device and the object to be cleaned.
Use only detergents approved by KARCHER.
Observe the dosing recommendations and notes provided with the detergent.
Use detergents sparingly to help conserve the environment.
KÄRCHER detergents ensure fault-free operation. Ask us for a consultation, request our catalogue or our detergent information sheets.
Figure C
① Foam nozzle
2Container
③ Blender
Detergent mixing: 3=high, 2=medium, 1=low
④ suction hose
⑤ Spray lance
- Unscrew the container.
- Plug the desired blender into the suction hose.
- Fill the detergent into the container.
- Screw the container onto the foam nozzle.
- Remove the nozzle from the spray lance.
- Connect the foam nozzle to the high-pressure gun and hand-tighten.
- Start up the high-pressure cleaner.
Recommended cleaning method
- Spray the detergent sparingly on the dry surface and let it work for a while (do not let it dry).
- Rinse off the loosened dirt with the high-pressure jet.
Rinsing out the foam lance
The foam lance must be flushed after use to prevent the formation of detergent deposits.
- Unscrew the container.
- Pour the remaining detergent back into the original packaging.
- Fill the container with clear water.
- Screw the container onto the foam nozzle.
- Operate the foam nozzle for approx. 1 minute to flush the detergent residue.
- Empty the container.
Interrupting operation
- Close the high-pressure gun, the device will switch off.
- Lock the high-pressure gun by pushing the safety latch of the high-pressure gun to the front.
Note
The water pressure in the high-pressure hose is reduced by approx. 70% when the device is switched off. This reduces the actuating force of the high-pressure gun and extends the service life of the device.
Continuing operation
- Unlock the high-pressure gun by pushing the safety latch to the rear.
- Open the high-pressure gun, the device will switch on again.
Finishing operation
- Close off the water inlet.
-
Open the high-pressure gun.
-
Set the power switch to "I" and allow the device to run for 5 to 10 seconds.
- Close the high-pressure gun.
- Turn the power switch to "0/OFF".
- Pull the mains plug out of the socket only when your hands are dry.
- Disconnect the water inlet.
- Open the high-pressure gun until the device is completely depressurised.
- Lock the high-pressure gun by pushing the safety latch of the high-pressure gun to the front.
Only with HD...M, HD...MX: Storing the device
- Fit the spray lance with high-pressure gun into the spray lance holster and latch into position in the spray lance holder.
- Wind the mains cable onto the cable clips.
- HD...M: Wind on the high-pressure hose, hang it over the hose storage compartment and secure with the rubber band. HD...MX: Wind the high-pressure hose onto the hose reel and fold over the crank handle.
- Press the push handle lock and slide in the push handle.
Frost protection
ATTENTION
Frost destroys the device if it is not completely drained of water.
Store the device in a frost-free location.
If frost-free storage is not possible:
- Drain the water.
- Pump commonly available anti-freeze through the device.
- Allow the device for run for a maximum of 1 minute until the pump and lines are empty.
Note
Use commonly available, Glycol-based vehicle antifreeze. Observe the handling instructions of the antifreeze manufacturer.
Transport
CAUTION
Risk of injury, risk of damage
Be aware of the weight of the device during transportation.
ATTENTION
Risk of damage
Protect the trigger of the high-pressure gun from damage.
- When transporting in vehicles, secure the device against slipping and tipping over according to the applicable guidelines.
- Pull the device behind you via the push handle for transporting over longer distances (not with HD...M PU).
- Pull the device step by step when ascending stairs. The skids protect the casing from damage (not with HD...M PU).
Only with HD...M, HD...MX: Transport retainer for surface cleaner
- Plug the connection nozzle of the surface cleaned onto the transport bracket on the high-pressure cleaner.
- Screw on the union nut by approximately 1 turn.
Storage
CAUTION
Risk of injury, risk of damage.
Be aware of the weight of the device during storage.
- Store the device indoors only.
Care and service
△DANGER
Risk of injury due to inadvertently starting up device and also due to electric shock.
Switch off the device immediately and unplug the mains plug before performing work.
Safety inspection/maintenance contract
You can agree on regular safety inspections or close a maintenance contract with your dealer. Please seek advice on this.
Each time before use
- Check the power cable for damage and have a damaged cable replaced immediately by the authorised Customer Service or a qualified electrician.
- Check the high-pressure hose for damage and replace a damaged high-pressure hose immediately.
- Check the device for leaks. 3 drops of water per minute are permissible. Contact Customer Service in the case of more serious leaks.
Weekly
- Clean the sieve in the water connection.
Clean the sieve in the water connection
- Unscrew the union nut.
- Pull out the hose union with sieve.
- Externally clean and rinse the sieve.
Note: Align the hex-head of the hose union for connection to the device.
- Fit the hose union with sieve.
- Tighten the union nut.
Every 500 operating hours, at least annually
- Have the device maintained by Customer Service.
- Changing oil.
Changing oil
Note
See the "Technical data" section for the oil volume and type
- Unscrew the 4 screws.
- Remove the cover.
Figure D
- Pivot the oil drain hose downwards over an oil catch pan.
- Pull the plug out of the oil drain hose.
- Remove the cap.
- Remove the foam from the oil tank.
- Wait until the oil has drained completely.
Figure E
- Insert the plug into the oil drain hose.
- Pivot the oil drain hose upwards and latch in place.
- Fill with the measured correct quantity of oil.
- Insert the foam into the oil tank.
- Fit the cap and press firmly in place.
Figure F
Troubleshooting guide
△DANGER
Risk of injury due to inadvertently starting up device and also due to electric shock.
Switch off the device immediately and unplug the mains plug before performing work.
Have electrical components checked and repaired by the authorised Customer Service.
In case of any malfunctions not mentioned in this chapter, contact the authorised Customer Service when in doubt or when you have been explicitly advised to do so.
Device does not start
- Check the power cable for damage.
- Check the mains voltage.
If the device overheats:
a Set the power switch to "0".
b Allow the device to cool for at least 15 minutes.
c Set the power switch to "1".
- Contact Customer Service in the case of electrical faults.
Device does not reach required pressure
- Check the size of the nozzle and compare with the required size specified in the "Technical data" section.
- Vent the device, see section "Venting the device".
- Clean the sieve in the water connection.
- Check the water supply volume and compare with the required volume specified in the "Technical data" section.
Clean the nozzle. - Contact Customer Service if necessary.
Pump leaking
Up to 3 drops of water per minute are permissible.
In case of more serious leaks, have the device checked by Customer Service.
Pump knocking
- Check the water supply line for leaks.
- Vent the device, see section "Venting the device".
- Contact Customer Service if necessary.
Detergent dosing volume too low
- Refill the foam nozzle cup.
- Plug a larger blender onto the suction hose.
- Check the suction hose and foam nozzle for detergent deposits. Remove deposits using lukewarm water.
Accessories and spare parts
Only use original accessories and original spare parts. They ensure that the appliance will run fault-free and safely.
Information on accessories and spare parts can be found at www.kaercher.com.
Warranty
The warranty conditions issued by our relevant sales company apply in all countries. We shall remedy possible malfunctions on your appliance within the warranty period free of cost, provided that a material or manufacturing defect is the cause. In a warranty case, please contact your dealer (with the purchase receipt) or the next authorised customer service site. (See overleaf for the address)
Technical data
| HD 6/15 | M | HD 6/15MX | HD 6/15 M PU | HD 7/17 M | HD 7/17 MX | HD 7/17 M PU | HD 7/14-4 M | |
| Electrical connection | ||||||||
| Mains voltage V 230 230 230 400 400 400 230 | ||||||||
| P h a s e | ~ | 1 | 1 | 1 | 3 | 3 | ||
| Power frequency | Hz | 50 | 50 | 50 | 50 | 50 | 50 | 50 |
| Connection output | kW | 3.1 | 3.1 | 3.1 | 4.2 | 4.2 | 4.2 | 3.4 |
| Protection class | IPX5 | IPX5 | IPX5 | IPX5 | IPX5 | IPX5 | IPX5 | |
| Power protection (slow-blowing) | A | 16 | 16 | 16 | 16 | 16 | 16 | 16 |
| Extension cable, 30m | mm² | 2.5 | 2.5 | 2.5 | 2.5 | 2.5 | 2.5 | 2.5 |
| Water connection | ||||||||
| Feed pressure (max.) | MPa | 1 | 1 | 1 | 1 | 1 | 1 | |
| Input temperature (max.) | °C | 60 | 60 | 60 | 60 | 60 | 60 | 60 |
| Input amount (min.) | l/min | 12 | 12 | 12 | 12 | 12 | 12 | 12 |
| Suction height (max.) | m | 0.5 | 0.5 | 0.5 | 0.5 | 0.5 | 0.5 | 0.5 |
| Performance data of device | ||||||||
| Nozzle size of standard nozzle | -- 033 033 033 038 038 038 043 | |||||||
| Operating pressure | MPa | 15 | 15 | 15 | 17 | 17 | 17 | 14 |
| Operating pressure (max.) | MPa | 22.5 | 22.5 | 22.5 | 25.5 | 25.5 | 25.5 | 21 |
| Water flow rate | l/min | 9.3 | 9.3 | 9.3 | 11.5 | 11.6 | 11.6 | 11.5 |
| High-pressure gun recoil force | N | 21.3 | 21.3 | 21.3 | 21.3 | 21.3 | 21.3 | 21.3 |
| Dimensions and weights | ||||||||
| Typical operating weight | kg | 30 | 33 | 25 | 32 | 35 | 27 | 39 |
| Length | mm | 455 455 | 290 455 | 455 290 455 | ||||
| Width | mm | 400 400 | 300 400 | 400 300 400 | ||||
| Height of push handle, bottom, (top) | mm | 700 | 890 | 565 700 | 890 | 565 700 | ||
| (970) | (970) | (970) | (970) | (970) | ||||
| HD 6/15 M | HD 6/15 MX | HD 6/15 M PU | HD 7/17 M | HD 7/17 MX | HD 7/17 M PU | HD 7/14-4 M | ||
| Oil volume I 0.25 0.25 0.25 0.20 0.20 0.20 0.35 | ||||||||
| Oil type Type 15W40 15W40 15W40 15W40 15W40 0W40 | ||||||||
| Determined values in acc. with EN 60335-2-xx | ||||||||
| Hand-arm vibration value m/s | 2 | 2.4 | 2.8 | 2.4 | 3.0 | 2.9 | 3.0 | 2.7 |
| K uncertainty m/s20.7 0.8 0.7 0.8 0.8 0.8 0.8 | ||||||||
| Sound level dB(A) 74 74 76 79 78 79 68 | ||||||||
| K uncertaintypA | dB(A) | 3 | 3 | 3 | 3 | 3 | 3 | 3 |
| Sound power level LWA + K uncer-taintyWA | dB(A) | 90 | 90 | 92 | 95 | 94 | 95 | 84 |
| HD 7/14-4 MX | HD 7/16-4 M | HD 7/16-4 MX | HD 8/18-4 M | HD 8/18-4 MX | HD 8/18-4 M PU | |||
| Electrical connection | ||||||||
| Mains voltage | V | 230 | 400 | 400 | 400 | 400 | 400 | |
| Phase | ~ | 1 | 3 | 3 | 3 | 3 | 3 | |
| Power frequency | Hz | 50 | 50 | 50 | 50 | 50 | 50 | |
| Connection output | kW | 3.4 | 4.2 | 4.2 | 4.6 | 4.6 | 4.6 | |
| Protection class | IPX5 | IPX5 | IPX5 | IPX5 | IPX5 | IPX5 | ||
| Power protection (slow-blowing) | A | 16 | 16 | 16 | 16 | 16 | 16 | |
| Extension cable, 30m | mm2 | 2.5 | 2.5 | 2.5 | 2.5 | 2.5 | 2.5 | |
| Water connection | ||||||||
| Feed pressure (max.) | MPa | 1 | 1 | 1 | 1 | 1 | 1 | |
| Input temperature (max.) | °C | 60 | 60 | 60 | 60 | 60 | 60 | |
| Input amount (min.) | l/min | 12 | 12 | 12 | 12 | 12 | 12 | |
| Suction height (max.) | m | 0.5 | 0.5 | 0.5 | 0.5 | 0.5 | 0.5 | |
| Performance data of device | ||||||||
| Nozzle size of standard nozzle | -- | 043 | 042 | 042 | 042 | 042 | 042 | |
| Operating pressure | MPa | 14 | 16 | 16 | 18 | 18 | 18 | |
| Operating pressure (max.) | MPa | 21 | 24 | 24 | 27 | 27 | 27 | |
| Water flow rate | l/min | 11.5 | 11.6 | 11.6 | 12.5 | 12.5 | 12.5 | |
| High-pressure gun recoil force | N | 21.3 | 21.3 | 21.3 | 21.3 | 21.3 | 21.3 | |
| Dimensions and weights | ||||||||
| Typical operating weight | kg | 42 | 40 | 43 | 41 | 44 | 36 | |
| Length | mm | 455 | 455 | 455 | 455 | 455 | 290 | |
| Width | mm | 400 | 400 | 400 | 400 | 400 | 300 | |
| Height of push handle, bottom, (top) mm | mm | 890 (970) | 700 (970) | 890 (970) | 700 (970) | 890 (970) | 565 | |
| Oil volume | I | 0.35 | 0.35 | 0.35 | 0.35 | 0.35 | 0.35 | |
| Oil type | Type OW40 | 15W40 15W40 | 15W40 15W40 | 15W40 | ||||
| Determined values in acc. with EN 60335-2-xx | ||||||||
| Hand-arm vibration value | m/s2 | 2.7 | 2.4 | 2.5 | 2.3 | 2.3 | 2.3 | |
| K uncertainty | m/s2 | 0.8 | 0.7 | 0.7 | 0.7 | 0.7 | 0.7 | |
| Sound level | dB(A) | 69 | 70 | 72 | 75 | 73 | 76 | |
| K uncertaintypA | dB(A) | 3 | 3 | 3 | 3 | 3 | 3 | |
| Sound power level LWA + K uncer-taintyWA | dB(A) | 85 | 86 | 88 | 91 | 89 | 92 | |
Subject to technical modifications.
EC Declaration of conformity
We hereby declare that the machine described below complies with the relevant basic safety and health requirements of the EU Directives, both in its basic design and construction as well as in the version put into circulation by us. This declaration shall cease to be valid if the machine is modified without our prior approval.
Product: High-pressure cleaner
Type: 1.150-xxx
Currently applicable EU Directives
2000/14/EC
2006/42/EC (+2009/127/EC)
2011/65/EU
2014/30/EU
Harmonised standards used
EN 60335-1
EN 60335-2-79
EN 50581
EN 55014-1: 2006+A1: 2009+A2: 2011
EN 55014-2: 2015
EN 62233: 2008
EN 61000-3-2: 2014
HD x/xx
EN 61000-3-3: 2013
HD x/xx
EN 61000-3-11: 2000
Applied conformity evaluation method
2000/14/EG: Appendix V
Sound power level dB(A)
| Measured Guaranteed | |
| HD 6/15 M 87 90 | |
| HD 6/15 MX 87 90 | |
| HD 6/15 M PU 90 92 | |
| HD 7/17 M 92 95 | |
| HD 7/17 MX 91 94 | |
| HD 7/17 M PU 92 95 | |
| HD 7/14-4 M 81 84 | |
| HD 7/14-4 MX 82 85 | |
| HD 7/16-4 M 83 86 | |
| HD 7/16-4 MX 86 88 | |
| HD 8/18-4 M 88 91 | |
| HD 8/18-4 MX 87 89 | |
| HD 8/18-4 M PU 90 92 |
The undersigned act on behalf and under the power of attorney of the company management.
H.Jenner
S. Reiser
Chief Executive Officer
Head of Approbation
Documentation supervisor: S. Reiser
71364 Winnenden (Germany)
Tel.: +49 7195 14-0
Fax: +49 7195 14-2212
Winnenden, 2017-07-01
Contenu
Remarques generales 20
2006/42/CE (+2009/127/CE)
2011/65/EU
2014/30/EU
71364 Winnenden (Germany)
Tel.: +49 7195 14-0
Fax: +49 7195 14-2212
Winnenden, le 01/07/2017
Indices
71364 Winnenden (Germany)
Tel.: +49 7195 14-0
Fax: +49 7195 14-2212
Winnenden, 01/07/2017
Inhoud
Chief Executive Officer
Head of Appropriation
71364 Winnenden (Germany)
Tel.: +49 7195 14-0
Fax: +49 7195 14-2212
Winnenden, 2017/07/01
Interrumpir el service. 44
Finalizar el service. 44
2006/42/CE (+2009/127/CE)
2011/65/UE
2014/30/UE

Chief Executive Officer

S. Reiser
Head of Appropriation
Responsible de documentacion: S. Reiser
71364 Winnenden (Germany)
Tel.: +49 7195 14-0
Fax: +49 7195 14-2212
Winnenden, 2017/07/01
Indices
Concluiraoperations. 52
2006/42/CE (+2009/127/CE)
2011/65/UE
2014/30/UE

Chief Executive Officer

S. Reiser
Head of Approbation
71364 Winnenden (Germany)
Tel.: +49 7195 14-0
Fax: +49 7195 14-2212
Winnenden, 01/07/2017
Indhold
2006/42/EF (+2009/127/EF)
2011/65/EU
2014/30/EU
Anvende harmoniserede standarder
EN 60335-1
EN 60335-2-79
EN 50581
EN 55014-1: 2006+A1: 2009+A2: 2011
EN 55014-2: 2015
EN 62233: 2008
EN 61000-3-2: 2014
HD x/xx
EN 61000-3-3: 2013
HD x/xx
EN 61000-3-11:2000
71364 Winnenden (Germany)
Tel.: +49 7195 14-0
Fax: +49 7195 14-2212
Winnenden, 2017/07/01
Indhold
Generelle merknader 62
Kun HD...M, HD...MX: Transportholder for flaterenser
- Sett tilkoblingsstussen til flaterenseren pa hoytrykksvaskerens transportholder.
- Skru overfalsmutteren på omtrent 1 omdreining.
Lagring
△FORSIKTIG
Fare for personskader, fare for materielle skader.
2006/42/EF (+2009/127/EF)
2011/65/EU
2014/30/EU
Anvendte harmoniserte standarder
NEK EN 60335-1
NEK EN 60335-2-79
NEK EN 50581
NEK EN 55014-1: 2006+A1: 2009+A2: 2011
NEK EN 55014-2: 2015
NEK EN 62233: 2008
NEK EN 61000-3-2: 2014
HD x/xx
NEK EN 61000-3-3: 2013
HD x/xx
NEK EN 61000-3-11:2000
71364 Winnenden (Germany)
Tel.: +49 7195 14-0
Fax: +49 7195 14-2212
Winnenden, 01/07/2017
Inneháll
Allman information 68
71364 Winnenden (Germany)
Tel.: +49 7195 14-0
Fax: +49 7195 14-2212
Winnenden, 2017/07/01
Sisälto
Yleisiä ohjeita 75
Maaraystenmukainen kaytlo 75
| H. Jenner | i.V.Reiser S. Reiser |
| Chief Executive Officer | Head of Approbation |
Dokumentointivastaava: S. Reiser
71364 Winnenden (Germany)
Tel.: +49 7195 14-0
Fax: +49 7195 14-2212
Winnenden, 2017/07/01
71364 Winnenden (Germany)
Tel.: +49 7195 14-0
Fax: +49 7195 14-2212
Winnenden, 2017/07/01
Iqindekiler
Genel uvarilar. 89
2006/42/AT (+2009/127/AT)
2011/65/AT
2014/30/AT
71364 Winnenden (Germany)
Tel.: +49 7195 14-0
Fax: +49 7195 14-2212
Winnenden, 2017/07/01
Coapedxahanne
O6uhe yka3aHn 96
UcnoIb3ObaHne no Ha3HaueHnIO 96
3aunTaOkpykaIoueI cpebl. 96
Yka3aHnnoTexHnke6e3oNaChocTu 96
3nementbIynpaBneHn 96
LBeTOBa MapKnpOBka. 97
PacnaKOBbBaHne 97
YcTaHOBka npHaIeJxHocTn 97
BboB 3Kcnnyatauio 97
UnpaBneHne 98
PpnoocTaHOBka pa60TbI 99
OkoHuaHne pa6oTbI 99
ToIbkoDnHd...M,HD...MX: xpaHeHne ycTpoi-CTBa 99
3aunTaOT3amep3aHn 99
TpaHcnpOpBka 99
XpaeHne. 100
YxOuI TexHnueckoe o6cnyKuBaHne 100
IOMOuB npH HeucnpaBHOCTx 100
PpHnAdJeXHoCTn n 3aNaChbIe qactn .101
TapaHTn 101
TexHHueckne xapaKTepeNCTnKn 101
Deknapaun O COOTBETCTBUN CTahdsapTAM EC. 103
06üne yka3aHn


IpeepnepBbIM npimHeHem ycTpoi-CTBa O3HaKOMNTbCc DaHHoOpnHnHaJIbHO IHCTpyKUne no 3KcNPyata
CIN IN pInIraeMbIMN yKa3aHnA M N O T ExHnke 6e30- nacHOCTN. DeIcTBOBaT B COOTBeTCTBn C HmN. CoXpaHrTb o6 bpoUkpbl dIy DaJIbHeuero NOIb3OBAHNn nn cIeNyUoero BnaJeBca.
IcnoJIb3OBAHHe NO Ha3HaueHnK
MoIounn annapat BbICOKO daBHeHn npedHa3Haueh TOJbKO DnB BbIOJIeHn CneDyUx pa6oT:
OuHCTKa MaunH, ABTOMo6nJIeN, NoCTpoEK, INHCTpyMeHTOB uHaJIoRnUHbIX o6BeKToB CTpyEe BBICOKOr OaBJIeHNIA.
IydaJIeHnCToKnx3aRpa3HeHn peKomeHdyETcNcNoJb3ObaTbpoTOpHyIOΦopCyHkyN3CneuaJbHbIX npHaadJeXHOCTe.
Y moDeni HD...Plus potopnHa qopcyHka BxOHT B KOMnnKeT NoCTaBKn.
BHIMAHNE
3arp3HeHHa B0da BeTe K npexDeBpeMeHHOMy H3HOCy aannapata NIN CKONJIeHNIO B HEM OTIOXeHN.
B yctpoiCTBO CneDyET NOaBaTb TOnbKO uNcTyU NnO6OpOTHyIO BDOy CcoNIODeHnEM CneDyUOuX NpeJeNbHbIX 3NaueHn:
3NaueHne pH:6,5..9,5
3NeKtpnuecka npoBOdmoocb: 3neKtponpoBoDHOCTb CBExeB BObl +1200 MkCM/cm, MaKC. 3neKtponpoBOHOCb 2000 MKCM/cm
OcakdaembeBeuecTba(obem npo6b1 1n, BpemocaxdeHna30MHyT):<0,5Mr/π
- OtФиЛьТрОВБИЯМьЕ BeIeCTBa: < 50 Mr/n, 6e3 a6pa3nBbIX BeIeCTB
- YrIeBoIOpoOaI: < 20 Mr/π
XJOpnD: <300 m/π
Cytbqat: < 240M /n
Kanbui: < 200m /n
- 06zaJxecTKocTb: <28°dH, <50°TH, <500 ppm (mr CaCO₃/n)
KeJe3o: < 0,5Mr/I
MapraHeu: < 0,05M
MeBb: < 2 mR/n
- AktuBhui xJop: <0,3 Mr/n
OTcyTCTBne nIOxnx 3anaXOB
3aunTa Okpyxauoue Cpebl

YnakoobHbme MaTePnAbI NOdaIOCTBtOpnHoh Npepap6Tke. YnakOBky Heo6xOdmo yTNJIN3npoBaTB 6e yuepe6a IyOKpykaUoEe Cpebl.3NeKtpuyeckne n3NeKtpoHHbI YeTpOcTBa cacto CoedePKat ceHHbI MaTePnAbI, npiroDhbIE JIBy BTOpHNo Hnepepa60TK, IN 3aayTuTo KaN KOMnoHeHTbl, Ka6batae, aKKMyJIaTOpblnn
MaCNo, KOtOpbIe npn HeNpaBnIbHOM o6paUeHm nIi HeHaIeXaIeeyTynI3auIN npEcdTabJIOT nOteHcIaIbHyOOnachocTb Inn 3DopOBbIy N ekONOrm. Tem He MeHee, DaHHbIe KOMnoHEtbl Heo6xOIMMbI dnn papaBnIbHO pa60tbl yCTpoiCTBa. YCTpoiCTBa, O6o3HaueHbIe 3TIm CmMBOJOM, 3aIpeSeHo yTynI3uPObaTb BMeCTe C 6bITOBbIMN OTXoJamn.
Yka3aHnno nHrpEnHeTAM (REACH)
* BXOДИТ B KOMПЛЕКТ NOCTABKIN He BCEX yCtpoIcTB
UBeTobA MapKnUpOBKa
IpeedKaKdbIMHaayJompa6oTbI
- Поверпь сеинтеловькабл ha npedmet nobpeckdeHni, nobpeckdeHbI kabeH HeMeIeHHO 3aMeHNTcHnAmn aBTopu3ObaHHo cepBuCHOH cnyKbI nII npopecCNoHaJIbHoro 3JIeKTPka.
2.Поверпьшалг ВсOKОгдавеняHa npedmet NOBpeжdeHn, NOBpeXdEHbIshlaHr HemeDneHHO 3aMeHHTb. - Пороверн repmetинocь уства. Дустимbl 3 калл BOды B мнHyт. Рп 6олee 3нчтелбен yteчke образнвс B cepвсну сnyкш.
ExeHeIbHo
- OuHCTnTb cetTaBtB ΦnJIbTp B natapy6ke Inna BOda BObl.
OuNTka cetTuToR oHnIbTpra B naTppy6Ke DnRA NOBODa BObl
- OTBHTb HAKINHHyo RaKy.
2.ИЗБЛЕЧБЛЯНROВДМЛТУСЕРССЕТЧАТБIMФИЛБТРСМ. - OuHCTnTb ChapyKc CeTuaTbI ΦnJIbTp I nPOMbITb. PnmeaHne: WecTnRpaHHNK WJHaHROBO r TTyce pa BblPOBHBr OBTHOCHTeNbHO npncoeDInHeHnB yctpoiCTBe.
- YCTaHOBtB IJNaHRObIIM UTyuep C CeTcTaBIM ΦnJIb-TPOM.
5.3aTHyt b HauNdHyu raKy.
Kaxdbie 500 yacob 3KcnIyatauH, Ho He peke odHoro pa3a B roD
- BbINOJIHHTb TexHnueeCKoe 06cJIyXKBaHne ycTpoI CTBa CINAMN cepBnCHOn CJyK6bl.
2.3aMeHnTbMacNo.
3aMeHaMacJa
PpmeaHne
KoJInueCTBOI COPT MaCna CM. B pa3JeNe «TexHueckne XapaKTepNCtIKN»
1.BbIBNHTnTb4BnHTa.
2. Chrtb koxy xctpoCTBa.
PucyHok D
- MacnocnBHOI nlaHr NOBepHyb BHN3 HAnpaBHTb B EMKOCtB dIa c6opa macna.
-
BbHyb 3aIyUkky n3 MaCIOCLINBHO rHaHa
-
ChrTb KpbIuKy.
- Bbinyb neHnctyU BCTaBky u3 macJraHoro 6aka.
- NdoKnTaB noka CoIbeTcBce MacJIO.
PucyHok E
8.BCTaBtB 3aIyUky B MacJIOCJIINBHOI JNaHr.
9. MacnocnBHOJ WJIaHr NOBepHyTb BBepx 3aФNK-CNPOBaTb.
10. 3aInTb HndIeKaUee KOINueCTBO MacJa.
11. YctahOBuTb NeHnCTyU BCTaBky B MacJHbI 6ak.
12. YcTaHOBbTb N npNkaTb Bn3 KpbIiKy.
PucyHok F
NOMOuB npn HEnCnpaBHOcTAX
ONACHOCTb
Onachoctb noJyehn TpaBmbl OT cnyaHNO 3anyu-ueHHoro yctpoiCTBa n ydapa 3JIeKTPnuecknM TOKOM.
IpeepBbINOJIHeHnEMIIO6bIXpa6OTHa yCTpoNCTBe BblKJIIOHTb yCTpOINCTBO N BblHyTb ceTeBOI WTeKeP n3 po-3eTKn.
BbnoHnraTb npOBepky n peMOHT 3JIeKtpuYeCKnx KOMnoHeHToB TOIbKO B aBTOpN3OBAHHo cepBuCHOH cJyX6e.
Pn noBpeKdHnX, He yKa3aHHbIX B 3TOM pa3dene, B cnlyae comHeHn nn npu yeTKom yKa3aHn o6pa- taBcB aBtOpn3OBaHHyO cepBnCHyO cnky6y.
YcTpoIcTBo He 3anyckaetc
- Поверпь сеинтелльский Кабел hyпpeMet noBpeждн.
- Поверпь се teBoe HanpЯжен.
- Ecni yctpoNCTBO neperpeTo:
a YCTaHOBtB BbIKIIOuATEJIb yCTpOJCTBa B NOIO-XeHHe «0».
b DaTb yctpoiCTBy OXnAaNTbcra B TeueHne KaK MNHNMyM 15 MNHyT.
cYCTaHOBtB BbIKIIOuATEJIb yCTpoIcTBA B NOIO-XeHHe «1».
- Пи дeф ekTe 3JIeKtpuKn O6paTntbC8 B cepBucHyO cnIyK6y.
ByctpoIcTBHe HdoCTnraetc HyxHoe daBJeHne
YpOBeHb 3BykoBoM MoUHOCTn dE(A)
| Измeper- ньий | rapаNTиpo- ВаHHьий | |
| HD 6/15 M 87 90 | ||
| HD 6/15 MX 87 90 | ||
| HD 6/15 M PU 90 92 | ||
| HD 7/17 M 92 95 | ||
| HD 7/17 MX 91 94 | ||
| HD 7/17 M PU 92 95 | ||
| HD 7/14-4 M 81 84 | ||
| HD 7/14-4 MX 82 85 | ||
| HD 7/16-4 M 83 86 | ||
| HD 7/16-4 MX 86 88 | ||
| HD 8/18-4 M 88 91 | ||
| HD 8/18-4 MX 87 89 | ||
| HD 8/18-4 M PU 90 92 |
IopnncabwneceA DeiCTbYHT no NOpuyehuN C NOHOMOyHMn PYKOBODCTBa KOMNaHN.


S. Reiser
Лицо, OTBETCTBEHHOe 3a BeDEHne ДOKуMeHTaци: III. Paimep (S. Reiser)
71364 Winnenden (Germany)
Tel.: +49 7195 14-0
Fax: +49 7195 14-2212
r.BHHHeHdEh,01.07.2017
Tartalom
Chief Executive Officer

S. Reiser
Head of Approbation
71364 Winnenden (Germany)
Tel.: +49 7195 14-0
Fax: +49 7195 14-2212
Winnenden, 2017/07/01
Obsah
VseobecnePokyny 110
Pouziti v souladus urcenim 110
Ochrana zivotniho prostre 110
2006/42/ES (+2009/127/ES)
2011/65/EU
2014/30/EU
71364 Winnenden (Germany)
Tel.: +49 7195 14-0
Fax: +49 7195 14-2212
Winnenden, 2017/07/01
Kazalo
Splošna navodila 117
Namenska uporaba 117
Varovanje okolja 117
Varnostna navodila. 117
Upravljalni elementi 117
Barvna oznaka 118
Razpakiranje 118
Montaza pribora 118
Zagon 118
Upravljanje 119
Chief Executive Officer

S. Reiser
Head of Approbation
71364 Winnenden (Germany)
Tel.: +49 7195 14-0
Fax: +49 7195 14-2212
Winnenden, 2017/07/01
Spis trešci
Directive UE respectate
2000/14/UE
2006/42/UE (+2009/127/UE)
2011/65/UE
2014/30/UE
Norme armonizate utilizezate
EN 60335-1
EN 60335-2-79
EN 50581
EN 55014-1: 2006+A1: 2009+A2: 2011
EN 55014-2: 2015
EN 62233: 2008
EN 61000-3-2: 2014
HD x/xx
EN 61000-3-3: 2013
HD x/xx
EN 61000-3-11: 2000
Procedura de evaluates a conformitàti
2000/14/UE: Anexa V
Nivel de putere acustica dB(A)
| măsurat | garantat | |
| HD 6/15 M | 87 | 90 |
| HD 6/15 MX | 87 | 90 |
| HD 6/15 M PU | 90 | 92 |
| HD 7/17 M | 92 | 95 |
| HD 7/17 MX | 91 | 94 |
| HD 7/17 M PU | 92 | 95 |
| măsurat | garantat | |
| HD 7/14-4 M | 81 | 84 |
| HD 7/14-4 MX | 82 | 85 |
| HD 7/16-4 M | 83 | 86 |
| HD 7/16-4 MX | 86 | 88 |
| HD 8/18-4 M | 88 | 91 |
| HD 8/18-4 MX | 87 | 89 |
| HD 8/18-4 M PU | 90 | 92 |
Semnatarii actioneza in numele si prin imputernicirea conducerei societati.

Insarcinat cu elaborarea documentatiei: S. Reiser
71364 Winnenden (Germany)
Tel.: +49 7195 14-0
Fax: +49 7195 14-2212
Winnenden, 2017/07/01
Obsah
VseobecnePokyny. 138
2006/42/ES (+2009/127/ES)
2011/65/EU
2014/30/EU
Aplikované harmonizovane normy
EN 60335-1
EN 60335-2-79
EN 50581
EN 55014-1:2006+A1:2009+A2:2011
EN 55014-2: 2015
EN 62233: 2008
EN 61000-3-2: 2014
HD x/xx
EN 61000-3-3: 2013
HD x/xx
EN 61000-3-11:2000
Uplatnováne postupy posudzovania zhody
2000/14/ES: Priloha V

Chief Executive Officer

S. Reiser
Head of Appropriation
71364 Winnenden (Germany)
Tel.: +49 7195 14-0
Fax: +49 7195 14-2212
Winnenden, 01.07.2017
Sadržaj
Opé napomene. 144
Relevantne EZ directive:
2000/14/EZ
2006/42/EZ (+2009/127/EZ)
2011/65/EU
2014/30/EU
Primijenjene uskladene norme
EN 60335-1
EN 60335-2-79
EN 50581
EN 55014-1:2006+A1:2009+A2:2011
EN 55014-2: 2015
EN 62233: 2008
EN 61000-3-2: 2014
HD x/xx
EN 61000-3-3: 2013
HD x/xx
EN 61000-3-11: 2000
71364 Winnenden (Germany)
Tel.: +49 7195 14-0
Fax: +49 7195 14-2212
Winnenden, 1.7.2017.
Sadržaj
Opste napomene 1 5
Namenska upotreba. 151
2006/42/EZ (+2009/127/EZ)
2011/65/EU
2014/30/EU
Srodne harmonizovane norme
EN 60335-1
EN 60335-2-79
EN 50581
EN 55014-1: 2006+A1: 2009+A2: 2011
EN 55014-2: 2015
EN 62233: 2008
EN 61000-3-2: 2014
HD x/xx
EN 61000-3-3:2013
HD x/xx
EN 61000-3-11:2000
71364 Winnenden (Germany)
Tel.: +49 7195 14-0
Fax: +49 7195 14-2212
Winnenden, 2017/07/01
CbDpXaHne
O6uynka3aHn 158
MoHTipaHe Ha npHaJdxJxocHTe 159
IpyckaHe B ekCnIooatau. 159
O6cnykBaHe. 160
IpeKbcBaHe Ha pa6oTaTa 161
PpKJIIOUbaHe Ha pa6oTaTa 161
Camo HD...M, HD...MX: CbxaheHne Ha ypea . 161
3aunTa oT 3ampb3BaHe 161
TpaHcnpTnpaHe 1
CbxaHHeHne. 162
TpIka n npOdpbXkka. 162
POMOUI npH Hn3npaBHOCTN. 162
Akecoapn npeepBn qactn 163
TapaHua 163
Texnueckn daHHN 163
ДеклараязacbOTBEcTBHeHaEO 165
06uynka3aHn


Ppei nIbPBoTO u3nOJ3BaHe Ha ypea npooyTeTe TOBA opuRnHaJHO yIbTbaHe 3a pa60Ta I npuIooKeHIne Yka3aHn 3a
6e30nacnoct. DeiCTBaIte CnopeT T8X.
3ana3e Te BBeTe KnKnn, 3a da nI nIIN3BaTe No-Kbcho
IIN 3a eBentyaneH CJIeDBAuC O6CTBeHHK.
YnoTpe6a no npedHa3HaueHne
I3non3BaIte To3n ypeI 3a NouchTbaHe noD BnCOKo HaJIraH eDINCTBeHO 3a CneHNTe pa6OTn:
IOnucTbaIte MaunHn, ABTomO6nHn, crpaHn, HNcTpymeHTn IIOo6Hn O6eKTH CbC CTpyTa NOD BnCOKO HaJIraHe.
Pnynopntn 3ampbcaBAnn npenopbVbame poTOpHa IIO3a KATO CNEuaJHa PnHAdJeXHOCT.
Pn HD...Plus B KOMJIeKtHa Ha DoCTaBkata e BKIOueHa potOpHa IIO3a.
BHIMAHNE
Mpbchata BODa BOIN Do npexkdeBpeMeHHo 3HocBaHe nI IN OTJaraHn BypeHa.
3axpaHbaTe ypeDa cAmO CnCTa NJIpeuKInpapa H BODa, KOrTO He IpeBnBaBa CNeDHnTe rpaHnHn CTOnHOCTN:
CTOHOC pH:6,5..9,5
- eNeKtpnuecka npoBOdmoCT: npoBOdmoCT Ha Yncta BOda + 1200 S / cm , MaKcImaJIHa npoBOdmoCT 2000 S / cm
- yTaaBauCe BeuecTBa (o6em Ha npo6ata 1 I, BpeMe 3a yTaaBaHe 30 MNHyTu): < 0,5 mg/l
- Φилтпраши ce BeшесТВa: < 50 mg/l, 6e3 a6pa-3NBHn BeшесТВa
BbrrneboOpO: < 20mg / l
Xlopui: < 300mg / l
Cynqatn: < 240mg / l
- Kanzi: < 200 mg/l
- 06ua TBbpyocT: <28°dH, <50°TH, <500 ppm (mg CaCO₃/l)
KeJr3o: < 0,5mg / l
MaHraH: < 0.05mg / l
Me: < 2mg / l
- AktuBEN xnop: <0,3 mg/l
- 6e3 He npTm Mnpn3Mn
3aünta Ha OKoJIHaTa cpeDa

OnakOBbUHNTe MaTePnAIn NOIeXaT Ha peuKJIupaHe. MoJI, n3XBpJIaIte OnakOBKHTe No cbO6paHc OKOIHaTa CpeDa HauH.

EneKtpuecknte n eekTPOHHnTe ypei CbDpKxat
Cehnn MaepnaJIn, NOpJexaUHa peuNKnipaHe, a
YeCTO n cbCTabHn qactn, Hapr. 6atePm, akymlaTOPHN 6atePN IN MacNo, KOINTn HnPaBnHO
6opabene nIN IN3XbBpIYe MORa Ia npEcdTabIbAT noTeHnuaHa OnacHOCT 3a YoBeWKOTo 3dpabe N 3a OKJHaTa CpeJa.3a npaBnHTo cyHKUOnHpaHe Ha ypeJa BCE naK Te3N CbCTaBHn Yactn Ca Heo6xOdMn. O6o3HaueHIne T03N CmBOJypeiNe H Tp8Ba Da 6bDaT IN3XBbpJIHN 3a- eEDHO C 6bTOBIne OTNaDbuN.
6 2 yka3aHn3a cBCTbHn BeuecTBA (REACH)
AkyaJIHa INΦopMaζη OTHOCHO BcCTaBn BeIeCTBa MoKeTe Da Hamepnte Tk: www.kaercher.de/REACH
Yka3aHnna 3a 6e30nacHOCT
- Ппени пьво nyckahe В ekcnnoataця Нуpeда 3адьлжително npoуетete yka3aHnraTa 3a 6e3onac-HocT 5.951-949.0.
Cna3BaIte HaunohHnHTe npedncaHna 3a ctpyn anapatn.
Cna3BaIte HaunohHInTe npedncaHna 3a n36raBaeHa 3lononyKn. CtpyHInTe anapatn Tpr6Ba da ce n3nTbaT peoBHO. Pe3yntaTne OT n3nTbaHeTo Tpr6Ba da CE DOkymeHTnpaB INncMeHa fOpMa.
He npednpneMaTe npomeHn no ypeHa n npHaJnHexKHOCTNe.
CnmboN Bbpxyypeda
YpeBbTe Tp8Ba Da ce Cbbp3Ba DnpeKTHO KbM 06cctBeHaTa MpeKa 3a NITeHa Boga.
He hacoBaIte cTpyra NOI BucKO HnIraHne KbM Xopa, JINBOTHI, AKTNBHO eJIeKTPuCeCKO o6OpyDbaHe IIN KbM camna ypei. Na3eTe ypeDa O T 3aMp3BaHe.
PpeDn3H yCtPOIcTBA
PpeNa3HnTe yCtpoNCTBa CnyKAT 3a 3auNTa Ha non3BateIy I He Tp8Ba Da 6bDat DeakTNBupaH Nnn da Ce nphe6perBa yHKUOnHnpaHETo IM.
IpeINBHNrT BeHTnI, INHeBMAtuHnI rNpeKbCBAu n IpeDna3HnI rNpeKbcBaU ca HAcTpoEHn FapuHOn n Ca nIOM6upaHn. HAcTpoKnTe ce n3BbPWBat eINHCTBeHO OT cepBu3a.
IpeINIBeHBeHTnC nHeBMaTuH eKcbBaay
Pn HamaJraBaHe Ha KOJIueCTBOTO Ha BOdaTc peryIIPAHeTo Ha HAIraHETO IN KOJIueCTBOTO npeINIBHnRT BeHTnl Ce OTbapn Yact OT BOdaTa Ce OTTuHa o6paTHo KbM CmYkATEHATA CTpHa HA NOMnata.
PnOCBO6OxJaBaHe Ha NocTa Ha CnyCbKa Ha NnCToJe Ta 3a pa6ota NOD BnCOKO HaNraHe NHEBMaTnHnIr T npeKbCBaNtKJIIOUByb NOMNaTa 3a BnCOKO HaNraHe N CTpyTa NOD BnCOKO HaNraHe CNIPA.
Ako IocbT Ha cnycbKa ce npuIbPna, nomnata ce BKIOUcBA OTHOBO.
PpeDna3eH Klaanah
IpeDnA3HnT KlananCe OTBapr npi npeBnWabaHe Ha donyCTmOTO pa6OTHo CBpbXHaJraHe N BODaTe Ce OTTuHa 6bpaTHo KbM CmyKaTeHNHata CTpHa Ha NOMnTa.
06cnyXbaun eJeMeHTn
Pn HD...M PU B KOMIIeKta Ha DoCTaBkata He e BKnIO-yeHa npHaDJIeXHOCT.
Yka3aHne
CnCTemata EASY!Lock cBbp3Ba 6bp3o nHaJeKJHO KOMIOHEHTN Upe3 pe36a 3a 6bp30 3aBnBaHe cMo C eEHO PbJIHO 3aBbPTaHe.
Фигура A
- NocTaBeTe IIO3aTa 3a BnCOKO HAnraHe Ha Tpb6aTa 3a pa3npbCKBaHe.
- MoNTpaIaTe n 3aTeHHeTe 3dpaBO xOJIeHIpOBaTa raKa (EASY!Lock).
- Cbpxte Tpb6ata 3a pa3npbckBahe c nncToJeTa 3a pa6ota noD BncoKo HnraHe n 3aTeHHeTe 3dpaBo (EASY!Lock).
4.Ocbo6oTe 6JIOKINOBKaTa Ha nIb3raaTa cko6a.
5.ИЗтеле пьзагаразскобадо краино поожен. <|im_start|>assistant Hne.
Pn ypeN 6e3 6apa6aH 3a Mapkyu:
- CbpxKeTe Mapkya 3a pa6oTa noD BnCOKo HnraHe c nctOJeTa 3a pa6oTa noD BnCOKo HnraHe n 3B0Da 3a BnCOKo HnraHe Ha ypeJa, n 3aTeHete 3dpabo (EASY!Lock).
Pn ypei n 6apa6an 3a Mapkyua:
- Cbane Te Ka6eHnHaTa CTraHa 3a Bp3ka Ha npedBapuTeJHO MOHTnpaHnMa MapKyu 3a pa6oTa NOD BVCOKO HAnraHe N BHmAteHnO pa3BnTe MapKyu oT 6apa6aHa.
- NocTaBeTe Mapkya 3a pa60Ta NOd BnCOKo HajraHe n3NbHaT Ha noDa.
- 3aBbpteteMaHbEnataNoNocokaHaYacOBHkoBata CTpeIka HnTOBa HABNBaTe Mapkya 3a pa6Ota NOB BnCOKo HaJIraHe Ha paBHOMepHI pIaCTObe Bbpxy 6apab6aHa 3a Mapkya.BHIMaBaTeMapkybT da He ce npeBbA.
- Cbpxte Mapkya 3a pa60ta noD BnCOKo HnIraHe C nIcToJeta 3a pa60ta noD BnCOKo HaJIraHe n3aTeHHe 3dpabo (EASY!Lock).
NyckaHe B eKcnNoaTaun
MOHTAK HD...M PU
ONACHOCT
OnachocT OT HapaHBAhe, onachocT OT eNeKtpn-ueckn ydap
Bb3naraIte HcHctanaunTa Ha 3axpaHbaHeTo C B0da, Ha eIeKtpuueckn I3BOJ HA MPexka 3a BUCOKo HJIrahe cAmO Ha OTopn3npAH CneuaJIInCTN.
YcnoBnaHa3ao6nkaJauata cepda
Cyxa 3aobkaJra cpea 6e3 ycIOBn 3a 3ampb3BaHe.
- Μινησα έλ ΑπαCHOCT Θ ΕΚCηΠΟΥ.
- YCTOYNBa, paBHa OCHOBa INHOCIMOCNOC6Ha CTeHa.
He nHCTaJIpaIte 6JIn3O Do JKNIIuHN NOMEueHn nn OoNc (WymOBN emCmN).
- DocTbI 3a pa60Tu no noDpBxKa.
- 3xOa 3a BODaTa Ha MCTOTO Ha NHCTaJaUa.
3akpenBaHe Ha ypeda
Yka3aHne
BnHTOBete n IIO6eJIne 3a 3akpeINBaHeTo Ha NbPkaHa He ca BKNIOUeHN B KOMNIEKTA Ha NOCTABKaTa. Te Tp6Ba Da Ce NOpbUaT DOnbJInHTeJIHO N da CbOTBeTCTBaT Ha N3NCKBaHnIra Ta HA McTOTO Ha MOHTaX. Heo6xoDm DnAmEtbp HbNTOBete 6...8 mm.
ONACHOCT
OnachocOT HapaHraBaHe OT ndau ypei
Ipn n36opa Ha enementte 3a 3akpenBahe B3emaTne IOD BHIMAHNE TERIOTO Ha ypeDa HOCIMOCO6HocTTA Ha MCTOTO Ha MOHTaKa.
ФигураВ
①CTeHeH MOHTaX
② MoHTaJHa IOna
3 MoHTaXeH OTBOP
4bpxka
- OTe6eJExTe OTBOpTe B cTeHaTa IIn IOna C 6IOna 3a OTBOpN.
- HanpaBeTe oTBopuTe.
- MoHTnpaIte Dbpxkaay, 3aTeHHeTe BnHTOBeTe JIeKO.
- HactpoTe OTCTOHNHeTo Ha IbpxKaHa Ype3 BbptHe C BNKOB raeueH KJIouy.
5.3aTeHHeTe BnHToBeTe. - MoThnPaIte ypeHa.
Enektpnueckn3B0d
ONACHOCT
OnachocT OT HapaHbAHe nopadn eJektpuecknydap
Cbpb3BaIte ypeIa c eIeKtpnueckata Mpeka nocpeICTBOM uenceI. 3a6paHeHa e Bpb3Ka c eIeKtpnueckataMpeka 6e3 BB3MOxHOCt 3a N3KJIIOUBAHe. IeNceIbT ClykN 3a N3KJIIOUBAHe OT MpeKaTa.
HD...M PU: Heo6xOJIMOTO 3a pa60TaTa Ha ypeda eJeKtpo3axpaHbAHe Tp86Ba Da e npoeKtnpaHo 3a pejkm Ha NoctoHHa pa60Ta.
HD...M PU: Повекдашиектучесь чсн, кабели урети в работна за ТразБа да 6дат зашип teи OT ВODи пьси.
1.BknoyeMpexKOBuaeN B KOHTaTa.
N3B0d 3a BOda
Cbpb3BaHe KbM BOJOpBOoD
△PENyPENKDEHNE
Onachoc3a 3dpabeto nopadn BpbuaHeTo Ha 3aMbpcHa BOda B MpekaTa 3a NITeHa BOda.
CnazBaIte npedncaHraTa Ha BOOCha6DnteHOTnpednpnTne.
CbIaCHO BaIIHnTE npEINncaHn ypeBt HNKOra He Tp8Ba Da ce n3NoI3Ba 6e3 CnCTEmeH pa3DeIInTe KbM MpeXaTa 3a NITeHa BOda. N3NoI3BaIte CnCTEmeH pa3DeIInTe Ha KARCHER nN, KaTo aNTepHaTnBa, CnCTEmeH pa3DeIInTe B cBoTBcTcBHe c EN 12729, TnB BA. BOata, npemHana npe3 CnCTEmeH pa3DeIInTe, Beue He ce CnTA 3a rOdHa 3a NneHe. BnHarn CBbp3BaIte CnCTEmHnra pa3DeIInTe KbM BOOpnpoBODa, HNKORA DnpeKTHO KbM IN3BOda 3a BOda Ha ypeA.
1.Поверявiate BOДОпрOBDA 3a HaJIЯгHe,TeMnepeIpya n KOJINueCTBO Ha NOCTbIbuaaTa BOda.N3-нСКВанЯ -ВЖ.pa3deJI "TexHnueckn DaHHN".
2.CbpxKeTe CnCTeMHna pa3dJeHnTeN nI3BOda 3a BOda Ha ypeDa c Mapkyu (MHNMaHa dIbJxHa 7,5 m, MNHMaNeH dNaMeTbp 1"). 3axpaHBaunrAT Mapkyu He e BkIIOHe H KOMnIeKTa Ha DOCTaBkata.
3. OTbOpTe BxOda 3a B0da.
I3cMyKBaHe Ha BOdaTa OT pe3epBOapa
- 3aBnHTeTe BCMyKaTeHnHa MapKyu (KaTaIoxKeH HOpE 4.440-207.0) nФuNTbpa (KaTaIoxKeH HOpE 4.730-012.0) KbM n3BOda 3a BOda.
2.06e3Bb3dutyweTe ypeHa.
06e3Bb3dyaBaHe Ha ypea
- Pa3BnIte IIO3aTa OT Tpb6aTa 3a pa3npbckBaHe.
- Octabete ypeda da pa6oTn,doKaTo BODaTa 3anOHe da n3nn3a 6e3 mexypeta.
- Pn np6JIemn npn 06e3Bb3dUyuaBaHaTe OCTaBeTe ypeDa da pa6OTn B npoDbJxKeHne Ha 10 cekyHn, CJeT TOBa rO n3KJIIOUcTe. NpOTopeTe npoueca HrKOJIko TbTN.
4.ИЗкlioуeteуpeда. - 3aBnHTeTe IIO3ata OTHOBO.
Cama HD...M PU: Hnctaun C BncoKaHaRaHe
PnHCTaIaIyraTAp8Ba Da ce Cb6IIODaBaT HauNoHaHNHe BaJIiDNPiPeDnCaHn 3a NocToHn HNCTaJIpaHn CNCTeMn 3a NoUcTBAHe NOD BVCOKO HaJraHe.
- CbpxeTe ypea KbM NOCToHNO HCTaHnpaHaTa Tpb6Ha Mpeka C TbBkAB Tpb6OpOBo3 a pa6ota NoD BnCOKO HaJraHe.
2.ПолагаTe noctoHNo HnCtAnuHa Tpb6Ha MpeJka Taka, Ye da ce HaNarat MaIKN npOmeHb HAnpabJIeHneTo.
3.CcJI KOMnEHCnpaHe Ha pa3uPraBaHTo BCJeCTBHe Ha HApraHe N TOIINHa NOnaRaTe Tpb6HaTaMpexKa CbC CMeKHaBaU N ODbNxHN HeNoDnXHNCKo6n. - Минимални сесянна Нтpbбnte:
a Tpb6oPBOOAn: HomHaJIeH dIaMeTbp DN 15 (1/2").
b _BKBKN TpB6oNpOBoN: HomHaJIeH dIaMaTeTbp DN 6.
06cnyXbaHe
ONACHOCT
OnachocOT HapaHbAHe OT BODHaTa Ctpy noD BNCOKO HaJraHe
Hnkora He fncnpaTe NoCTa Ha cnycbKa n npedna3-HnA NOCT B 3aDeIcTBaHa N03uNIA.
He n3non3BaIte nIcToIeta 3a pa6Ota noD BnCOKo HaJIraHae, aKo npEpa3HnT NoCT e NOBpeDen.
IpeuBcKaKbPa6ToNo ypeHaTnCHeTe HAnpeipeNa3Hn3aIbBaU MExaHn3bMa Ha nNCTOneTa 3a pa6oTa NOBnCOKo HnraHe.
OТварян/3aTВарян Ha nuctoJeta 3apa6ota noD BnCOKO hajrahe
- O'TbapraHe Ha nIcToJIeTa 3a pa6Ota NoI BnCOKo HaJIraHe: HATncHete npEpa3HnI NOCT N IocTa Ha cnycbKa.
- 3aTbaprHe Ha NnctOneta 3a pa6ota NoD BnCOKo HaJnraHe: OTnycheTe npedna3HnI NOCT nNoCTa Ha cnYcbKa.
Pa6Ota C BucOko HaIraHe
YpeTMOKe Da Ce N3NOJ3Ba B N3PpBeHO INI JIeHaJIIO NOJOXKeHne.
Yka3aHne
YpeBt e obopydBaH c NHeBMaTnueH npeKbCBAu. DnIraTeJIr cpa6oTbCa mo Ako NnCTOneTbT 3a pa6Ota noD BnCOKO HnIraHe e OTbOpEh.
- YpeC 6apaban 3a Mapkya: Pa3BnIte n3zIIO mapkya 3a pa6oTa IOd BnCOKo HJIraHe OT 6apa- 6aHa 3a Mapkya.
- NocTaBeTe npeKbcBaHa Ha ypeHa "I".
- Ocbo6oTe TnCTOJeta 3a pa6ota noD BnCOKO HaJIraHe, 3a CEiTa HATNCHETe Ha3ad npedna3HnA 3a- nBbau MEXAHIN3bM Ha NCTOJeta 3a pa6ota noD BnCOKO HAIraHe.
-
Otvopete nictoeta 3a pa6ota noD BncoKo haIraHe.
-
Пи уретс реруларе на налгаганeto и колчесвOTO: Habсточа pa6OTHTo налгаганe уретс Вьртete на реруларeto на налгаганeto и КолчесвOTO.
Pa6ota c nouuctBaun npenapatn
Yka3aHne
3a pa60Ta C NOUcTBaUu npenapatn e Heo6xoDm ypeq 3a PnHa C pe3epBoap (onu).
△PENyPENKDEHNE
Onachoc3a 3dpabeto npaHn HnpaBnHa pa6oTa c nouchBaun npenapatn
Cb6IIOdaBaIte yka3aHnra 3a 6e3oNaCHOCT, nocOeyHa nouICTbaun npenapat.
BHIMAHNE
HenoXoJaun NoocTbaun npenapaT MoRat da nobpejrt ypea n noocTbaHH o6ekt.
I3non3BaTe caMo oOobpeHn OT KARCHER noocTba- u npenapatn.
Cb6IIOaBaIte npIIOXeHInTe KbM NOUcTbaun Ipe napat npenopbKn 3a Do3nPOBKa n yka3aHn.
C ueI ona3BaHe Ha OKoHHaTa cpeJa 3nOJ3BaITe IKOHO HIO NOUcTbaU IN pepapATN.
NouctBaunte npenapatn Ha KARCHER rapaHTnpat 6e3npo6lemHa pa6oTa. MoJ, KOHCyTTnpaIte ce nIN nonckaTe HaunKaTALOR INn HauNTe INHΦopMaOnOHn IInCTOBe 3a NouctBaunppepaTn.
Фигура C
1H03a 3a nHa
②Pe3epBoap
3KoMnIeKTo6IeHnCmecen nouicTbaU npenapat: 3=BucokO, 2=cpeiHo,1=HscO
4BcMyKaTeJIeH Mapkyu
⑤Tpb6a3a pa3npbckBaHe
- Pa3BnIte pe3epBoapa.
- NocTaBeTe JeHaHaTa 6JIeHda BbB BCMyKaTeJHHa MapKyu.
3.Cinete nouchTbaun npenapaT bpe3epBoapa. - 3aBnHTePe3epBoapa KbM IIO3ata 3a PnHa.
- Cbaene duo3ata Ha Tpb6ata 3a pa3npbckBahe.
- MoNTpaIte IIO3aTa 3a IINHa HAnICToJIeTa 3a pa-6Ota NOD BVCOKO HANrAHe N 3aTeHETe 3dpaBO.
- IycheTe ypeDa 3a NOUcTBaHe IOD BnCOKO HAnraHe B EKcnNoatauIa.
PpenopbuaHMeToa3a noocTbaHe
- HanpbckaTe IKOHOMnHNO NOUcTbaunI npenapat Bbpx cyxata NOBbpxHOCTIOCTaBeTe Da nOeInCTBa (He n3CyuaBaIte).
- OTMnIte pa3TbOpEnaT aMpbcOTnA cbc cTpyra NOD BUCOKO HaIraHe.
H3nlaKBaHe Ha ypeHa 3a nHa
CneynoTpe6a ypeBt 3a nHa Tp8Ba da ce n3nlaKba, 3a da ce npedotbpaTn OTJaraHeTo Ha noHCTBaUIn npenapatn.
- Pa3BnIte pe3epBoapa.
2.ИЗнел Te octaTbKa OT NOUcTBaunЯ npenapat O6paTHO BdoCTaBeHaTa onaKOBka. - HanbHHeTe pe3epBoa pa c YnctTa Boda.
- 3aBnHTe pe3epBoapa KbM DIO3aTa 3a nHa.
- Pa6oTeTe c IIO3aTa 3a NaHa B npOdbIjKeHne Ha npi6JI. 1 MInHyTa, 3a Da OTMnEte ocTaTbci OT no- YnCTBaUJN ppenapat.
6.Изпразантуpeзервога.
IpekbcBaHe Ha pa6oTaTa
- 3aTbOpTe nIcToJeTa 3a pa6ota noD BnCOKo HaJIraHe, ypeBt Ce n3KnHouBa.
- OcnrgpeTe nictoIeta 3a pa6ota noD BncoKo HanaIraHe, 3a ceJIta HaTNCheTe HAnpei npEJa3HnA 3a- nBbAuMexAHn3bM.
Yka3aHne
Пи n3клioчbaHe Ha ypeda HaЯгагeto Ha BODaTa cna-dc npn6n.70%.Taka cnntata 3a 3adeiCTBaHe Ha ntoTeTa 3a pa6ToI NOd BnCOKO HaЯrgaHe HAMJaBA n ekCnIloaTuCAIOHNNrT CpOK Ha ypeDa ce yBeJIuHaBa.
PpOdbJxKaBaHe Ha pa6oTaTa
1.Ocb6oBeTe NCTOLeTa 3a pa6To nOd BnCOKo HaJIraHe,3a CEJI Ta HATNCHeTe Ha3aI npeJna3HnA 3aIIbBaU MEXAHIN3bM Ha NCTOLeTa 3a pa6To nOd BnCOKO HAIraHe.
2. OTbOpete nIcToIeta 3a pa6ota noB BnCOKo haJIraHe,ypeDbT Ce BKJIIOUyBa OTHOBO.
PpNKJIIOUcBaHe Ha pa6OtaTa
- 3aTbOpTe BxOda 3a BOda.
- Otvbopete nictoeta 3a pa6ota noD BncoKo haJraHe.
- 3aBbptTe npekbcbaa Ha ypeHa Ha "I" n ocTabete ypeDa da pa6OtN 5 do 10 ckyHn.
- 3aTbOpTe NcToJeTa 3a pa6Ota NOd BnCOKo HaJIraHe.
- 3aBbptTe npeKbcBaHa Ha ypeHa Ha "0/OFF".
6.ИЗьрваite Мрековя пенил OT контakta caMo cbc cyxnpbue. - OtrpaHete BxoJa 3a BOJa.
- OToBopTe nIcToJeTa 3a pa6ToT noD BnCOKo HnJaRaHe, DOKaTo ypeDbT He ce HaMnpa noD HaJraHaHe.
9.OcnrgpeTe nictoIeta 3a pa6ota noD BncoKo HanaIraHe, 3a cIeTtHaTncHete HAnpei npedna3Hn4 3aBbau MexAHn3bM.
Camo HD...M, HD...MX: CbXpaHeHne Ha ypeDa
- NocTabe Tpb6aTa 3a pa3npbCKBaHe c nncToIeta 3a pa60Ta NOI BnCOKO HAnraHe B NoCTabKaTa 3a Tpb6aTa 3a pa3npbCKBaHe nΦnKcnpaTe B DbpxkaHa Na Tpb6aTa 3a pa3npbCKBaHe.
- HABNITe MpeXOBn3 3axpaHbAa, Ka6eI OKoIIO IbPkaHa Ha Ka6ena.
- HD...M: Habnite Mapkya 3a pa6ota noB Bucoko Hajrahe, 3akaueTe HaNIOCTABkata 3a Mapkya n fHKcapaTe C rymeHata JeHTa. HD...MX: Habnite Mapkya 3a pa6ota noD BUCOKo HauRaHe Ha 6apa-6ana 3a Mapkya n cnycheTe dpbXkata Ha MaHInBeJATA.
- HatncheTe 6IoknpoBkata Ha IIb3raaata cKo6a n np6epeTe IIb3raaata cKo6a.
3aunTa OT 3ampb3BaHe
BHIMAHNE
Pn3aMpb3BaHe HeHaHbIHO n3npa3HeHnT OT Boda ypei ce nobpekda.
CbxpaHbBaTe ypeHa Ha MxCTO, KbDeTo JINCBat ycIOBnA 3a 3ampb3BaHe.
Ako He e Bb3MOxHO cBxpaHeHne 6e3 aMp3BaHe:
1.ИЗTOUte BOДаТ.
2.ИЗнOMВаITE npe3урда KOHBENHOHaEN npena-paT 3a 3auNTa OT 3ampb3BaHe.
3. Octabete ypeda da pa60t MAKCMaJIHO 1 MNHyTa, DOKATO NOMnata N Tpbbnte ce n3npa3HrT.
Yka3aHne
N3no3BaTe KOHBENHOnHOHaHN npenapatn 3a 3auNTa OT 3ampb3BaHe 3a MOTOPHN ppeBO3HN cpeCTBa Ha 6a-3ata Ha rIKoN. C6JIIOdaBaNTE npabnata 3a 6opabeHe, daeHn OT npon3BOInTeJHa npenapata 3a 3auNTa OT 3ampb3BaHe.
TpaHcnpTnpaHe
△PENNA3JNBOCT
Onachoct OT HapaHbAhe, onachoct OT nobpeda
KoJInueCTBO N Bn D Ha MaCNoTo - Bx. pa3JeI "TexHnueCKN DaHHN"
- Pa3BnTe 4-Te BnHTa.
2.CbaneKanakaHa ypeda. Unpya D - HabeTe MacNON3nyckaTeHnHa Mapkyu HaOJy Iro DpbkTe HaCcb6bnpaTeJeH CbD 3a MacNo.
4.ИЗва对接пpo6kaTа OT macNON3nyckaTeJHnЯ МарКуч. - CbaJeTe Kanaka.
6.ИЗва对接пенонлacrо от рezepваора за масл.
7.ИЗакайTe,ДOKATO macNoTo ИЗteYe HanbIHo.ФИгурA E - Пoctabete npo6kaTаВ maclon3nyckaTeJIHnIaMapKyu.
9.ObbpeHareHaropeMaclonn3nyckaTeHNHa Mapkyu I roΦnkcapaTe. - CnneTe n3uNCHeHTo KOJIuHcTBo MaCNo.
- Cnoxete neHonJaCTa B pe3epBoapa 3a MacNo.
- NocTaBete Kanaka n ro npNTnCHe CnJIHO. Fnrpya F
HOMOu npn HEn3npaBHOCTN
ONACHOCT
OnachocOT HapaHbAHe NopaDN BKNIOUBaUc Ce He npedHaMepeHo ypeN OT eJekTpuecku yap.
PpeiB CBAKBN pa60TN n3KNIOUBAIte ypea n 13-DbpNBaiTe MPeXOBnI uenCen.
Bb3naraIte npOBepkata n peMOHTa Ha eJeKtpueckn KOMIOHEHTN cAmO Ha OTOpN3npAHn cepBN3.
Pn Hn3npaBHOCTN, KOnTO He Ca CnOmeHaTn B HaCTo- aata TnaBa, NtbpceTe OTOpn3npaH cepBn3 Pn CbMHeHne nn npn n3pnuHo yKa3aHne 3a TOBa.
YpeBt He MoKe da ce cTapTnpa
- Поверете письединтелся Кабел за повда.
PpOBepeTe MpeXkoBTo HanpeXeHne.
Ako ypeDbTe nperepJI: aPiocTabete npeKcbcBaHa Ha ypeDaHa
b OcTaBete ypeDa da ce oxlaDN B npOdbJxHeHnHa Hau-MaNko 15 MNHyTN. c NocTaBete npeKbcBaCa Ha ypeDa Ha "1". - Pn eJektpnueckn depeKT noTbpcTe cepBn3.
YpeBbT He noctnra Hajrahe
- Поверете гоLEMн ha Na Дюза, Heo6xOДma гоLEMнha - Вж. Глава "Тexнчeckn дHHN".
- O6e3Bb3dnywete ypea, Bx. rnaBa "O6e3Bb3dywaBAhe Ha ypea".
-Почисте тату визвoda 3а Вда. -
Поверете КоличесьOTO на постбльвацату ворда, необхODIMо КоличесьTO - Вж. Глава "Текниочи данн".
-
NouncteteIIO3ata.
- Pn Heo6xOaMocT noTbpcTe cepBn3.
Pomnata He e xepmetuHa
Ionycka ce n3nyckaHe Ha do 3 Kaikn Boda 3a eHa MNHyTa.
- Пи по-cилна nponycklnBOCT b3naarTe npOBepkaHa ypeda ot cepBn3a.
Nomnata xiona
- PpOBepeTe noDaaHHeTo 3a B0da 3a XepMeTnUHOCt.
- 06e3Bb3dywete ypea, Bx. rnaBa "O6e3Bb3dywa-BaHe Ha ypea".
- Pn Heo6xOaMocT noTbpcTe cepBn3.
PnmebT ha noocTbau npenapat e TBbpde MaJIbK
- DōnǚlìHēte pe3εpBoapa Ha Dió3aTa 3a nǐyHa.
- NocTabeTe no-roJMa 6JIeHda Ha BCMyKaTeHnHa MapKyu.
- Поверете BCmykaTeJIHnIa Mapkyu nДIO3aTa 3a Янha 3a OTlaRaHnIOT NOUcTbAun npenapatn. OT- MnIte OTlaRaHnIa TC XJaKa BOJa.
Akkcecoapn n pe3epBHN qactn
N3no3BaTe cAmO opRnHaJIHn akcecoapn oopRnHaJIHn pe3epBHN qactn, no To3n HauIN OcnIpyraBe 6e3oNaChata n 6e3npo6JemHa ekCnloaataqna Ha ype- da.
HOpmaun OTHOCHOKCECOAPn pe3epBHu actu 1e HamepuTe Tk: www.kaercher.com.
TapaHcH
BbB BcKa DaBpxkBa Ca BaINHn N3daeHnTe OT HaWNr OToPn3npaH DnCTpn6yTop rapaHcuOHn yCJOBn.
EbeHTyAnHn NOBpeHn Ha Baun ypeI ueOTcTpaHm B paMKInTe Ha rapaHcuONHHn CPOK 6e3nIaTHO, aKO ce Ka cae 3a DeΦeKT B MaTePnAInTe NIN pOn3BOcTBeH DeΦeKT. B cIyauH Na IpeJraBaHe Ha npABo Ha rapaHzua, ce Obphete KbMa Baun dNCTpn6ytop NIN KbM Han-6JIu3KnO OTOpu3npanCepBn3, KATO npeDCTaBnTE KacOBaTa 6eJexKa.
(Adpec, Bk. 3aHaTa cTpaHa)
TexHHueckn daHHN
| HD 6/15 | M | HD 6/15MX | HD 6/15M PU | HD 7/17M | HD 7/17MX | HD 7/17M PU | HD 7/14-4 M | ||||||||||||||||||||||||||||||||||||||||||||||||||||||||||||||||||||||||||||||||||||||||||||||||||||||
| Ельектуqueшии звор | |||||||||||||||||||||||||||||||||||||||||||||||||||||||||||||||||||||||||||||||||||||||||||||||||||||||||||||
| Мрекову наразожения V 230 230 230 400 400 400 230 | |||||||||||||||||||||||||||||||||||||||||||||||||||||||||||||||||||||||||||||||||||||||||||||||||||||||||||||
| Фа за | ~ | 1 | 1 | 1 | 3 | 3 | 3 | ||||||||||||||||||||||||||||||||||||||||||||||||||||||||||||||||||||||||||||||||||||||||||||||||||||||
| М р eж o | В a | ч e c c c c c c c c c c c c c c c c c c c c c c c c c c c c c c c c c c c c c c c c c c c c c c c c c c c c c c c c c c c c c c c c c c c c c c c c c c c c c c c c c c c c c c c c c c c c c c c c c c c c d | |||||||||||||||||||||||||||||||||||||||||||||||||||||||||||||||||||||||||||||||||||||||||||||||||||||||||||
| Присьединтелна мошноct | kW | 3,1 | 3,1 | 3,1 | 3,1 | 4,2 | 4,2 | 4,2 | 3,4 | a | |||||||||||||||||||||||||||||||||||||||||||||||||||||||||||||||||||||||||||||||||||||||||||||||||||
| Тил зашипа | IPX5 | IPX5 | IPX5 | IPX5 | IPX5 | IPX5 | IPX5 | IPX5 | |||||||||||||||||||||||||||||||||||||||||||||||||||||||||||||||||||||||||||||||||||||||||||||||||||||
| HD 6/15 | M | HD 6/15MX | HD 6/15MPU | HD 7/17M | HD 7/17MX | HD 7/17MPU | HD 7/14-4 M |
| Изual宪eni Stojnoctni cIbIaNoHo EN 60335-2-xx | |||||||
| Стойост на вибрацьanta рыка-pамо | m/s2 | 2,4 | 2,8 | 2,4 | 3,0 | 2,9 | 3,0 |
| Heystойчвocst K m/s20,7 | 0,8 | 0,7 | 0,8 | 0,8 | 0,8 | 0,8 | 0,8 |
| H I B O H a | |||||||
| Heystойчвocst KpA | d | B | ( | A | ) | 3 | 3 |
| Инbos на звукова мошноct LWA + Heystойчвocst KWA | d | B | ( | A | ) | 9 | 0 |
| HD 7/14-4 | MX | HD 7/16-4M | HD 7/16-4MX | HD 8/18-4M | HD 8/18-4MX | HD 8/18-4M | HD 8/18-4M |
| Ельстриески ИЗВОД | |||||||
| Мржови habржени | V | 230 | 400 | 400 | 400 | 400 | 400 |
| Фаза | ~ | 1 | 3 | 3 | 3 | 3 | 3 |
| Мржова чебота | Hz | 50 | 50 | 50 | 50 | 50 | 50 |
| Письединелна мошноct | kW | 3,4 | 4,2 | 4,2 | 4,6 | 4,6 | 4,6 |
| Тил зашита | IPX5 IPX5 IPX5 IPX5 IPX5 IPX5 | ||||||
| Проблaitел (иертын) | A | 16 | 16 | 16 | 16 | 16 | 16 |
| Удьжителен kaбел 30m | mm2 | 2,5 | 2,5 | 2,5 | 2,5 | 2,5 | 2,5 |
| Извор за ворda | |||||||
| Налгане на постьпвацата ворda (мак.) | MPa | 1 | 1 | 1 | 1 | 1 | 1 |
| Temperatура на постьпвацата ворda (мак.) | °C | 60 | 60 | 60 | 60 | 60 | 60 |
| Колочьо на постьпвацата ворda (Min.) | l/min | 12 | 12 | 12 | 12 | 12 | 12 |
| Висуна на засмквае (мак.) | m | 0,5 | 0,5 | 0,5 | 0,5 | 0,5 | 0,5 |
| Данни за мошноctта на урда | |||||||
| Галемина на дюза за.stандартуна дюза | -- | 043 | 042 | 042 | 042 | 042 | 042 |
| РавOTно налиега | MPa | 14 | 16 | 16 | 18 | 18 | 18 |
| РавOTно с蜱ухсанега (мак.) | MPa | 21 | 24 | 24 | 27 | 27 | 27 |
| Дебит, ворda | l/min | 11,5 | 11,6 | 11,6 | 12,5 | 12,5 | 12,5 |
| Еakтivна сима на пистоleta за paеба по Двиску налиега | N | 21,3 | 21,3 | 21,3 | 21,3 | 21,3 | 21,3 |
| Размэри и тergla | |||||||
| Тилочно собстевно тerglo | kg | 42 | 40 | 43 | 41 | 44 | 36 |
| Дылжina | mm | 455 | 455 | 455 | 455 | 455 | 290 |
| Широчиа | mm | 400 | 400 | 400 | 400 | 400 | 300 |
| Висуна, пььзага скоба дoly, (rope) | mm | 890 (970) | 700 (970) | 890 (970) | 700 (970) | 890 (970) | 565 |
| Колочьо на маслоу | I | 0,35 | 0,35 | 0,35 | 0,35 | 0,35 | 0,35 |
| Вид масло | Tin | OW40 | 15W40 | 15W40 | 15W40 | 15W40 | 15W40 |
| Изual宪eni Stojnoct Ni bIgnaNoHo EN 60335-2-xx | |||||||
| Стойост на вибрацьanta рыka-pамо | m/s2 | 2,7 | 2,4 | 2,5 | 2,3 | 2,3 | 2,3 |
| Heystойчвocst K | m/s2 | 0,8 | 0,7 | 0,7 | 0,7 | 0,7 | 0,7 |
| Инbos на звуково налиега | dB(A) | 69 | 70 | 72 | 75 | 73 | 76 |
| Heystойчвocst KpA | dB(A) | 3 | 3 | 3 | 3 | 3 | 3 |
| Инbos на звукова мошноct LWA + Heystойчвocst KWA | dB(A) | 85 | 86 | 88 | 91 | 89 | 92 |
3ana3BaMe cn npaBTo Ha TexHnueckn IpomeHN.
Chief Executive Officer
Head of Approbation
Пьномошник по дOKум entaцята: S. Reiser
71364 Winnenden (Germany)
Tel.: +49 7195 14-0
Fax: +49 7195 14-2212
BunHeHdEn, 2017/07/01
Sisukord
Uldised juhised. 165
Sijtotstarbeline kasutamine. 165
Keskkonnakaitse 166
Ohutusjuhised 166
Tarvikute monteerimine
Markus
Vee sisseimemine mahutist
- Kruvige imivoolik (tellimisnumber 4.440-207.0) ja filter (tellimisnumber 4.730-012.0) veevo tuuhenduse kulge.
- Eemaldage seadmest ohk.
Toode: Körgsurveypesurid
Tüüp: 1.150-xxx
Asjaomased Eü direktiivid
2000/14/EU
2006/42/EU (+2009 / 127 / E)
2011/65/EL
2014/30/EL
71364 Winnenden (Germany)
Tel.: +49 7195 14-0
Fax: +49 7195 14-2212
Winnenden, 2017/07/01
Satures
71364 Winnenden (Germany)
Tel.: +49 7195 14-0
Fax: +49 7195 14-2212
Vinendene (Winnenden), 01.07.2017.
71364 Winnenden (Germany)
Tel.: +49 7195 14-0
Fax: +49 7195 14-2212
Vinendenas, 2017-07-01
3Mict
3araJIbHI Bka3iBKn. 185
BnKOpncTaHHa 3a npu3HaueHHaM 185
OxopoHa doBknna 186
Bka3iBkn 3TexHikn 6e3neKn 186
ElenemEnKepyBaHHa 186
KoJIbOpOBe MapKyBaHHa. 186
Po3naKyBaHHa 186
UcTaHOBJIeHHI npuJaIaI. 187
BbeHnB Eeknnyataio. 187
KepyBaHHa 188
IpeepuBaHHpo6oTu 189
3aBepenHpa o6oTu 189
JInue HD...M, HD...MX: 36epirahn npncTpo.. 189
3axnCT BiD 3aMep3aHna 189
TpaHcnpTyBaHHra 189
36epirahnra 189
Dorla Ta texhuihe o6cyroBvBaHHa 189
Dionomora B paazi HecnpaBHOCTe. 190
Ppniladra ta 3anachi deTani 190
TapaHTia 190
TexhiHixapakTepcntuKu 191
3aBa npo BiDnOBiDnicb HopMaM EC 192
3araJIbHI Bka3iBKN
IpeepnBVKOpncTaHHm npnCTPOO O3HaONMTncb 3Lio OpurHahHOIO IHCTpyKciEO 3ekcnnyataa Ta
Bka3iBkamn 3 Texhikn 6e3neKn, uo doaotbcra. DjTn BiDnOBiDHO Do Hx.
36epiratn obuBbi 6poUpy nIra noanbwo BnKopnCTaHH aO bnaHactynHoro BlaCHka.
BnKopncTaHHa 3a npu3HaueHHaM
Ley Mmouyn anapat BnCOKOro TnCKy npn3haueHn BnKJIIOHO nIg BNKOHaHH 3a3haueHnx HnXq pe6it.
MaunH, TpaHcnopTHi 3ac06n, cnopyu, IHcTpymeHTn Ta noDi6Hi o6'ekTu OUnuBaTu cTpyMeHem BucOKoro TnCKy.
IINBnDAJIeHNNCTiIKNIX3a6pydHeHb MN peKOMeHdyEM BnKOpNCTOBByBaTN pOTOpHy fOpCyHky Jk DoJaTkoBe O6JaNHaHH.
Y npicptpoi HD...Plus poTopha opocyHka BXoJntb do KOMnJIeKTy noCTaBKn.
YBAGA
3a6pydHeHa BOda npn3BOoNTb Do nepeDyachoro 3HOwYBaHHa PnCTpOo a6o yTBOpEHn B HbOMy BiDKnaDeHb.
Y npictpi donyckaetbca noaay a nme yncto a6o o6pobJeHOI BOIN, kA He nepeBnUyE Bka3aHnx HxKHe nporOBHX NOKa3HNKIB.
pH-φakTop: 6,5...9,5
- EneKtponpObiHicThb: npoBiHicThb NHTHOI BODN +1200 MKCM/cm, MaKcMmaJIbHa npoBiHicThb 2000 MKCM/cm
- PeuobHH, 0o ociaotb (o6'EM npo6n 1 n, yac ocidaH3 30 xBnHH): < 0,5 m/π
- PeuOBHH, lo BIDΦIbTpOByIOBc: < 50 Mr/π, Hea-6pa3nBHI peoBHNI
ByrIeBoDiHi: < 20mr/
XJnpn: < 300M /n
CytbpaTn: < 240 m/π
KaIbui: < 200m r /
- 3araJIbHa TBePicTb: < 28^, < 50^, < 500ppm (Mr CaCO _3 / )
3ani3o: < 0,5M /n
Mapraheb: < 0,05M /n
MiNb: < 2 Mr/n - AKTNBHH xJIoP: <0,3 Mr/π
- Be3 HennpemHnx 3anaXIB
Oxopoha doBkiiIJIa

Nakybanbhi MaTepiann npuaTHI DO BTOpHHoi nepepo6Kn. YnakOBky Heo6xIDHO yTNJI3yBatu 6e3 wKOOn dnn DOBkinnJ.

EneKtpnHi Ta eNeKtpoHHi npncTpoi Hanuactiwe MicTb ciHHi MaTepiAaN, Aki npndaTHi Do BToPnHOI nepepo6Kn, Ta KOMnoHeHTN, Taki k6Taapei,
akymyIaTOPn YMaCTnIO, kY pa3i HenpaBnJIb-
HORO NOBODKEHH 3 HUMa 60 He npabnblhoI yTNl3aui MOKytb CTBOPHTN noteuHy He6e3neky dny 3doPO8J IIOHN Ta DOBkIIJI. Ondak ci KOMnoHEHTN Heo6xIDH dna HanexKHOI ekcnlyatauii npucTpoI. Pnpctpoi, no3Hauehi cum CmBOJOM, 3a6opohReTbcra yTNl3yBatn pa3om i3 No6yTOBM CMITTM.
Bka3iBkn ⅢOIO KOMnOHeHTIB (REACH)
AkyaJIbHI BiIDOMOCTI npo KOMNoHEHTN HabeDeHi Ha caHti: www.kaearcher.de/REACH
Bka3iBkn 3 texhikn 6e3nekn
- Pered nepshm yBeDeHHam npncTpoB B ekcnnyatauio cnid o6ob'3KOBO 03HaHOMnTncb i3 Bka3iBkamn 3 Texhikn 6e3neKn 5.951-949.0.
- DToPmMyBaTncb HaioHaJIbHnx npaBnI KopnCTyBaHHpIKoCTpyMHHHM MNoOuHM anapaTaMn.
-ДоТРИМУВATиСьHaцioHaJIbHIX npaBnI TexHIKN 6e3neK.PiKocTpymHHi MMIOH i anapTu cnid peryIЯрHo nepeBiprTu. Pe3yIbTaT nepeBipk nciD dokyMeHTyBaTu NICbMOBO.
3a6opohraetbcBHOCTUN 3MiHn Do npncTPOIO Ta npnila.
CnmboHnHa npncTpoi
He donyckaetbca 6e3nocepeHne nIDeHaHHn npncptpo do rpoMaDCbKOi MepeXi NTHorO BOdoNocTaHaHHa.
He cnpraMoBbAtn CtpyMiHb BOniN iN BncoKm TnCKOM Ha IIODeN, TBapIN, YbIMKHeHe eJeKtpnue ObnadHaHHa Hn CaMn npnctpi. 3axuata n pncTpi BID MOpOy.
3anobixhi npictpoi
3anobixhi npncptoi npn3haeHi Ina 3axncty kopnctyBaua; 3abopoharetbc aX BumkaTn a6o obxodntu ixhi yHKii.
Ipepyckn Knaan, MaHomeTpnuH Bmukay i 3a-nobixn Knanah yctahOBleni onlom6oBaHi Ha 3aBodi. PeryIOBAHHdo3BOJAEbCg Dopyatn Niwe cnibpo6tHKam cepBicHOcnyk6n.
Ipeynckn Klanan h b3 MaHOMeTpHnBMnKaayem
Ypa3i 3HnHexHHBnTpAtn BOAn 3a DonomoroIpeyITopa TnCKy IBnTpAtn BiDkPnBaεTbCn nepenynckn Knapani YacTHHa O6'Emy BoAn NOBepTaεTbcn Do CTOpOHN BCMOKTyBaHHHa HAcOca.
KoJIb BiIpycKaeTbcra CnyckHn BaxJIb BNCOKOHanipHoro nicToJeTa, MaHOMEtpruHn BmNKaU BmNKaE HaCOC BNCOKO TnCKy i nOdaay cTpymHe BOi N D BNCOKM TnCKOM npnnHReTbcra.
KuO 3aTMyTN CnyckHn BaXiNb, HAcOC BMnKaETbcr 3HOy.
3ano6ixhni Klaanah
3anobixhnn Klanan BiiKpnaBcBcBpa3i nepeBnueHn DOynctmoro po6oHoro HndnukOBoro Tncky,nicra QTOBOda NOBepTaetbCdo CTOPOHN BCMOKTyBaHHn Hacoca.
EJemeHTN KepyBaHHa
INB.CTOPIHKy306paKeHHaMn
①BaXncha DeTaIb
② HopcyHka
3 PeryIaTOp TnCKy Ta BnTpauN*
④СтрумMuHHa Tpy6ka EASY!Lock
5 BuCOKoHaHIN nictOJeT EASY!Force
6 ZanobixHHn fikcaTop
⑦CnycknBaxiNb
8 BaXiNb po36nokyBaHHa
9 BucoKoHaipnH mHaH EASY!Lock
10Pyuka, yropi (BntraHyta)
11Баразбандяшнога
12PyuKa, BnH3y (BtRHyTa)
⑬ΓymoBa ctpiHa
14Tpmau Ka6enH, y moeni HD...M TakoK Tpmau
15TpmaCtpyMNHOI Tpy6Kn
16Полчka ДЯ рOTOPHoiФОсун*
17BvIMKauchnpusTpoIO
18HhiDIO nA CTpyMNHHoI Tpy6kn
19NaTpy6ok BucOKoTnCKy EASY!Lock
20Cituaactn fInbtp
② Natpy6ok dny niD'edHaHHaJHaHa
22HaKnudha raika
3NaTppy6ok DnpiNikKIOUeHHB OBOOnocTaaHH
24NoI03Kn,OnOpHnNoI03
25Tpmau nfaopcykn nna o6po6kn niHOo
26TpmaqIgOuNcYBaHaNoBepxohb nIac TpaHc-nOpTyBaHHa
27ΦikcaToppyukn
28PykiB'
- He B yicb BapiaHTax ПпсТpoH BXODITb ДО KOMЛeKTy NOCTaBKN
KoIbopoBe MapkyBaHnHa
- ElenemHTn KepyBaHHra Ipocecom OunueHHra No3Ha-yeHi KOBTmKoJIbOpom.
- ElenemHTN KepyBaHHaTexHiHm O6cIyROByBaHHaM i cepBICOM No3HaueHi CbitNo-cipIM KOJbOpom.
Po3naKyBaHHa
1.Пдчacpo3nakyBaHHNepeBipTuBMicYnakOBKn.
2.По Виьнели покдженипд чс ТраснортуВанн HeaHNoBIDOMTN DInepy.
3.Пишдя HD...M PU: 36epeTи CBepДИЛьнишабнон Ha ynapobuДЯ HabciHOrO mOnTaKу npICtpoI.
YcTaHOBJIeHHI npNJaIaI
Bka3iBka
Y npicptoi HD...M PU npinlaqna He BxOaNTb do KOMnJIeKTu noCTaBKn.
Bka3iBka
CnCTema EASY!Lock 03BONe WBNIOK No HauHNO 3'EDHyBaTN KOMIOHEHTN, NOBepTaOuN iX y pIb6OBOMy 3'EDHaHHI JINWE Ha ODNH OBePT.
PncyHOK A
- YctaHOBNTnΦopCyHky BnCOKOro TnCKy Ha CtpymnHy Tpy6Ky.
- YctaHOBNTi BpyHy 3atraHHTn HauNDHy raKy (EASY!Lock).
- 3^ нати CTpyMHHy Tpy6ky 3 BnCOKOHanipHmnicToJeTOM i 3aTyrHyTu BpyHy (EASY!Lock).
- BiDnyctuTn φikcatop pykn.
- BntaTn pykdyo kiHceBoro nonoxeHHa.
Pnctpo6e36apa6aHaJnaIshnra
1.Пд'бнати ВсOKOHanipншлангdo ВсOKOHanipHoro nicToTe Ta natpy6ka BcOKoro Tncky npnctpoю n 3aTaryntВpyHy (EASY!Lock).
Pnucptoi 36apa6aHOM JIy IJIHaHa
- 3HnT KabeBHy CTaKky Ha nonepeHbO BCTaHOBHeHOMy BucOKoHaipHOMy WnaHry Ta oBepeXHo po3ropHyTu Wnahr 3 6apabaha.
- Po3Knactn po3ropHyTm BnCOKoHAnipHn IJNaHr Hn iJnO3i.
- Nobeptatn pykib'3a roHHNKOBIO CTpiKIO, npu cboMy pIBHomipHO HAMOTyOuH BUCOKOHAnipHN mHa 6apa6an dny shaHra.CniKyBaTn 3a Tm, uo6 shaHr He 3ruHbCra.
4.Пд'сднВиСОКОнIHINшИАгdo ВиСОКОнIINHORO nicToJIeTa N3aTЯrHyTN BpyHy (EASY!Lock).
BVeDeHnB eKcnnyataciIO
BctaHOBnEHn HD...M PU
△HE6E3NEKA
He6e3neKa TpaBMyBaHHaYepe3 ypaKeHHa eJek-TPnHm Ctpymom
IopyaIte niknueHH npntpoIO do BOJOnocTaHn, eNEKtpuHOI MepeXi Ta MepeXi BNCOKO TnCKy BKNJIouHO aBTOpN3OBaHm CneuaiaNCTam.
yMOBn HABKOJIINHbOro cepeOBuua
Cyxe cepeobuune,3axueneBidMopo3y.
Bicntb He6e3neKn B6xy.
TBePda pIBHa noBepxH a6o CTiHa 3 DOCTaTHbOIO HeCHOIO 3dAthictIO.
He BCTaHOBJIIOBaTn No6JN3y KNTJIOBnx a6o ophiHnx npMiuIeHb (reHepyBaHHra Wymy).
HaraBnictb doctny dna npoBeeHHraTexHOrO 6cbnyroByBaHHra.
CTiKaHHaBOnHaMicui MoHTaxy.
KpinnenH npncToPO
Bka3iBka
T Ta IIO6eI IJN KpINNEHH TpIMaHIB He BXOJaTb Do KOMJIeKTy NOCTABKn. IX Heo6xIDHO npuIDaTn DO DaTKOBI BIDNOBIDHO DO OOC6NBOCTeM Micr BCTAHOB-Heo6xIDH N diametp TBnHTiB -6...8 MM.
HE6E3NEKA
He6e3neKa TpaBMyBaHnHaYepe3 naIHn H npncTpoPiIac Bn60py KpinbHnx eJemEnTIB ypaxOByBatn Macy npncTPO Ta HeCHy 3dAthCtB Micz BCTaHOBHeHH.
PncyHok B
1HactiHHM MoHTax
2Ha3eMHn MOHTaK
③ MoThaXHHoTbip
4PIMaH
1.ПознayntMicuaДЯOTBOPiHаCTiHi a6o NiIaN03i 3a DonOMOrO CBepdJIbHOrO KOHdyKTopa.
2.ПрocьердпиТОТВОРИ.
3.YcTaHOBHTn TpMaui, npNXoHITn TBHHTAMn, He 3aTAYIOH iX.
4. BiDpyuHOBaTN BiDCTaHb TpMaayIB 3a DOnOMoROBnIKONODi6HOrO raKOBOrO KJIHOyA.
5.卍日bHo3aTaryHtRbHHTn
6. YctaHOBHT npucTpii.
EneKtpuHne nIDKnIOueHHa
HEBE3NEKA
He6e3neKa TpaBMyBaHHaYepe3 ypaXeHHa eJIeK-TPnHm Ctpymom
IiKnIOHTn WTeNCEbHy BUNKy npncTpoIO do eNeKTPnuHOI MEPexi. BkOpNCtAHH HePO3HmHOro 3'eHaHN3 eNEKtpomepekeHo He dOnyckaetbcra. TENTcEBhaBUNKa pnp3HaueHa DnB BiDJIIOHeHH BId MEPexi.
HD...M PU: eNeKtpoKuBneHn, Heo6XiDHe IJn po6Otn npucTpoI, MaE 6yTuPo3paxObaHe Ha TpNBany ekCnIyatauio.
HD...M PU: KomnoheHTN, lo npoBOaTb eNeKtpuHn CTpym, ka6eni Ta npocTroB pOboi 30Hi MaOTb 6yTN BOO3axuueHmN.
- BctabTu wTeNceJIbHy BuNKy Bpo3eKy.
Natpy6ok dIy nIKnHeyHH BODOnocTaaHH
IiiknueHn do BODnpoBiaHOi liHii
△NONEPEDXEHH
He6e3neka dnia 3doopOB'yepe3 3BOPOTnNnotIK 3a6pydHeHOI BOIN B MepeKy NHTHORO BOJONocTa- yAHHa.
IOTpIMyBaTncb npaBn, yCTaHOBneHnx nIDnpnEMCTBOM i3 BOJOnOCTaHaHH.
3riHIO 3 uHHHM npabnam He Do3BOJraTbca EKC nnyatai npncTropo 6e3 cnCTemHoro po3diIObaya B Mepeki NTHORO BOONOCaAHN. BIKOPNCOTByBatn CnCTemHn po3diIObay KARCHER a6o IHsI CNCTemHn po3diIObay, zo BiNobiae BmOram EN 12729, TIN BA.Boga, o npoiuHaape3 cnCTemHn po3diIObay, klaacfikyEcbraK HENpuaTaHa dna NNTR.CnCTemHn po3diIObay niEcdHyBaTN NIIe do NiHBo DO-nocapdHbO do natpy6ka npncTropo IJI niKlUoyehn BODOnocTa-ahHH.
1.ПepeBipuTn liHIO BOJOnOCTauaHHHa TnCK, Tempepatyp Ta BntpaTy BOi Ha BXoDi. BmOrn HabeDeHo B po3di «TexHiXiapakTepcntKuN»
2.3'EdHaTn CnCTeMHn po3diHOBa i naTpbyok npi- cTPOIO JIJI KJIIOUeHHB OBOIOcTaayHHa 3a DOnOMoHO WHaHra (MIHIMAbHa DOBXnHa 7,5 M, MINImaBHi DiAmTep 1"). IiDbIHn WNaHR He BXODHTb Do KOMNKeTy nOCTaBKn.
3. Bɪdɪkpɪnɪ nɒdəʊ y Bɔːn.
YcMOKtYBaHHaBn3pe3epByapa
1.ПигИНТИN BCMOKTYBAJIbHn шланг (HOMepДЯЗAMOBNeHH4.440-207.0)i φINbTp (HOMepДЯЗAMOBNeHH4.730-012.0)do naTPy6ka dЯ nIDKNIOYEHNA BOdONOCaAHN.
2. Buaanitn noBITp3 npntpoIO.
BudaeHHn noBITp3 npuctpo
- BiDrbHHTnTnΦOpCyHky BiD cTpymHHoI Tpy6Kn.
2.ДаTN pIncToPOI nonpaIOBAtN DoTn,doKn BOa He 6ynde BnXoNTn 6e3 6yNb6aWOk.
3.Ypa3i BnHnKHeHH npo6Jem i3 BuaJeHHaNIOBITpI DaTn npncToPOI nonpaUOBaTN 10 cekyHd, a ToDi BnMKHyTN. IobTopuTN onepauIQ KjIbKa pa3IB. - Bumkhuty npucptpi.
5.3HOBy HArBnHTnTΦopCyHky.
Лише HD...M PU: yctaHOBJIeHHЯ CnCTeMH BnCOKOrO TnCKy
niú yac yctaHOBnHHe OOB'3KOBO CπiD IOtpmYBaTnCra YHHnx HaioHaIbHx npaBn IoDo ctaioHapHnx MNoHx CNCTeM BUCOKOTo TCKy.
1.Пд'бнати npicrtiй do ctaioHaphoI py6o-npoBIDHOI Мерекi 3a donomoroB BucokohanipHoro shaHronpoBOda.
2.Порк_naци сдацioнару trубогпobіду Мереку tak,лоб 3надобиocьяkomORA мeнше pa3iB 3MiHIOBaTи habрм.
3. 3aJnKOMneHcaui DeOpMaui npu CTncHeHHi Ta TeNIOBOro po3wnpeHHn npoknaTn Tpy6onpObiHy MepeKy 3 BkOpNCtAHm HexopcTKo Ta JkopCTKO 3akpinneHx XOMyTIB.
4. MihimalbHn nonepueHn nepepi3: a Tpy6oNpOBoDn: HOMHaJIbHn diameTp DN 15 (1/ 2");
b wJnaHronpOboN: HomHaJIbHn diAmetp DN 6.
KepyBaHHa
HE6E3NEKA
He6e3neKa TpaBMyBaHHn iD iicO cTpymHbOu nID BnCOKM TnCKOM
3a6bopohraetbcra fikcybaTn cnyckHni i 3anobixHHn BaXeni B HATNCHTOMY NOJKeHHI.
He BnKOpNCToBbATN BnCOKOHanipHn niCToNET, RaIOnuKOJKeHO 3ano6ixHn Baxinb.
Ipeed BnKoHaHHaM 6yNb-kaX po6i i3 npncTroem nepecyBaTN 3an06iXHm fikcatop BnCOKoHaipHoro nicToJeta Bnepe.
BiDkPnBaHH/3aKpNBAHH BnCOKOHanipHoro nictoeta
- BiikpnbAHnB BnCOKOHanipHOro niCTOeta: HATNCHyTN Ha 3ano6iXhni i cnYCKHn BaxKeJI.
2.3akpmbaHnBvBCOKoHaipHOro nictOJeTa: BiDnycTu 3anobixkHni i cnyckhni Baxeni.
Eknyatai niBnCOKM TnCKOM
Pnucpii moke ekcnnyaTyBaTncB cTOny a6o Jekayomy noJoxeHHi.
Bka3iBka
Pnpctpi Ochauen MaHometpnuHm Bmkaayem.
Bnryh 3anyckaetbce JIWE B TOMy pa3i, JaKIO BnCOKoHanipnni nictoNET BiKpntn.
1.Пистрий i3 6apabahom dniaшпнra: nobHicTIO po3- ropyTN BucokohanipnHm 3 6apabana dnia shnaHra.
2.YCTaHOBHTN BIMNKaU npNCPOU B NOJIOKeHHA
3. Po36JIOkyBaTN BUCOKOHanipHn NiCToNET, NepeBIBuN 3ano6iXn H KCaTOp BUCOKOHanipHoro NiCTOJeTa Ha3aI.
- BiDkpTN BVCOKOHanipHn niCToJET.
- Пистрий зретуларов ТUCКУ ТАВТРИ: Наштувати робочи ТUCK, NOBepтагчп ретуларов ТUCКУ ТАВТРИ.
Ekcnnyataaia 3 MmHMM 3ac06amn
Bka3iBka
Дя ekcnnyataquii 3 MnHnMn 3ac6amn notpi6hni po3nJIbOaBn 3 6aNoHOM (onci).
△NONEPEDXEHH
He6e3neKa IJRA 3IOpOB'B pa3i HeHaJIexHoro NOBODKeHHa 3 MmHmM 3ac06amn
IOTpIMyBaTncBbKa3iBOK i3TexHikn 6e3neKn rA MmHOMy 3ac06i.
YBAGA
HenpndaTHMI MmHi 3acO6MoKyTb NOxKOaHTn npctpi i o6'kT qHcHHa.
BukopncToBbATn NIIe MmHi 3ac06N,do3BOJIeHI φipMOHO KARCHER.
DotpmyBaTncapeKomeHdauioOdo3yBaHHaBkA3iBOK,0oOdaHObCdoMmHOro 3acO6y.
3aJna 3axnCTy DOBkInnMaMmHm 3aci6 cniD BnKOpnCTOByBaTn OuaaIINBO.
MmHi 3ac06n KARCHER rapaHTyOt b63nepe6iHy po60Ty. PekomeHdyEMo OTPmuATN KOHCyIbTaUIO a60 3AMOBHTn HaI KaTaNOr YI INΦOpMaui Hi MaTepiAn Npo HauJI MMHI 3ac06n.
PncyHOK C
①ΦopcyHkaДЯOBp6Kn iNHO
2 Pe3epByap
3Ha6ip 3acJiHok Do3yBaHHMnHoro 3ac06y: 3=BeNka d03a, 2=cepeHNrdo3a,1=MaNa do3a
4BCMOKTOBaJIbHmIJIaHr
⑤ CtpymnHHa Tpy6ka
- BiikpyTuTn pe3epByap.
- BCTaBHTN y BCMOKTyBaJIbHn IJNaHr NOTpi6Hy 3aCJIiKy.
- 3aunTu MmHm 3ac6 y pe3epByap.
4.ПрикрутугпpeзэрвуарdoфорсундяобрбкniHOIO. - BiД'eДнATи Форсуну BiД CTpyMHnHоI Tpy6Kn.
6.Пд'снатифорсунуДЯOBбкпиHOДВиСКоhanipHOrO NiCToJeTa 3aTyrHyTN BpyHy. - YbIMKHyTm MNoOuN anapat BnCOKOro TnCKy.
PekomeHdoBaHH MeToD uHneHH
1.OuaaIINBO po3nnJNTMmHn 3ac6Ha cyxu noBepxHIO 3aJIuWHTn Ha DeaKn Yac (He BntnpaTn).
2. Po3HHHn6pyd 3MNTN cTpyMeHem BOINPiB BnCOKIM TNCOM.
PpomBaHH po3nIIOBa4a niH
ДяЗлобiraHHЯ BiKnaDEHHaM MnHoro 3ac6by po3nJIIOBaY niHN icJЯ BnKOpNCtAHHa CπiD npOMBa- TN.
- BiikpyTuTn pe3epByap.
- 3aIIuK MmHOrO 3acOby BnInTn Ha3aD y Tapy.
- Hanntu Bpe3epByap NCTy BoIy.
4.ПрикрутупpeЗервуарdoфорсундяобрбкniHIO. - Працьати Форсунkoю дя обробкнию 6пи3б-ko1xbnlnH,лоб ВIMNTN 3aJIuSKMнИHorO 3aco-6y.
- CnpoxkHnTn pe3epByap.
IpeepuBaHnpo6oTn
- 3aKpTN BnCOkOHanipHn NiCTOJeT; npNCtpiBumKHeTbCra.
2.3aikcybTu BnCOkOHanipHn nictoJeT,nepeBwU 3anobixHn ikcatop BnepeJ.
Bka3iBka
PiДчacBIMKHeHHI npICTpOHO TnCK BOHn3MeHHyeTbCnnp6IIN3HO Ha 70%.Le npIN3BOInTb Do 3HIXKeHHNobIHOrO 3ycnnII BnCOKOHanipHoro NiCTOneta Ta36iNbWeHHn CTpOKy CnyXb npiCTpoIO.
PpOdoBxehnpo6oTu
- Po36IIOKByBn BnCOKoHAnipHn NiCTOJeT, nepeBIBu 3aNo6iKHN fikCaTop Ha3aJ.
- BiKpTN BnCOkOHaipHn niCToNET; npncTpi 3HOBy yBIMKHeTBcR.
3abepweHn po6oTn
- 3akpiTn noaCy BOiN.
- BiDkPHTB BUCOKOHaipHn niCToJET.
3.Перевеси ВИМИКАmpUCТpoUВ noLOXKeHHA《I》i datnnpucTpoI nonpaioBaTu5-10cekyHd.
4.3akpnTN BVCOKOHanipHn nicToJET. - Перазец Вимикай пистою в положеня «0/OFF».
- BntaryBatu WTeNceJIbHy BUNky 3 po3eTKn JInIe cyXmM pyKaMn.
- BiД'eнгИshIaHrnoIaChI BOHn.
- BiikpnTu BucokohanipHn niCToNETaK, 0o6 cKnHy-TuCK y npucTpoi.
9.3aΦikcyBaTu BnCOkOHanipHn NiCTOJeT,nepeBIBuN 3ano6iKHNΦiKCaTOP BnpeJ.
Лише HD...M, HD...MX: 36epiraHHЯ npucTppoI O
1.CtpymHHy Tpy6ky 3 BnCOKOHanipHm NiCToNETOM BCTaBHTN B H3IO DnA CTpymHHOITpy6Kn Ta 3aΦikCyBaTN y TpImaqi CTpymHHOITpy6Kn.
2. 06MOTaTm MepexeBn Ka6eNb HABKOJIO TpIMaJa Ka6eJIIO.
3. HD...M: HAMOTN BUCOKOHANIPH NJNaHr, NOBICHTN Ha NOJIuKy DnA JIaHaHra Ta 3aKpInNTn rymoBOO CTpiKoO. HD...MX: HAMOTN BUCOKOHANIPH NJNaHr Ha 6apaban dnn JIaHaHra Ta BiDkInHyTn pyky pykib'ra.
4. Hatncnytn Ha qikcatop pyknta cknactn pyky.
3axnct BiD 3aMep3aHHN
YBAGA
I3 npctpo He nobHicTIO BuaJeHO BOy, BIn MoKe 3pyuHyBaTnCn iD dicU MOpOy.
36epiratni npicptiy y miczi, 3axuheHomy BiD mopo3y.
JaKo 36epiraHnB Micci, 3axnueHomy BiM OPO3y, HEMOxJIuBe:
- 3ЛNTN BODY.
- Покаятуеозпострий 3вчайни ргнфрз.
3.Дати пистою nonpaioBoTu He doBwe
1 XbHnHH, DOKn HAcoc i NiHII He cnOpOxHrTaBcA.
Bka3iBka
BnKOpNCToBbATn 3BnuaHn aHTnΦpn3 Ha oChOBi rIikOJIIO nIa TpaHCnOpTHnx 3ac06IB. DToPmYBaTncr IHCTpykui i3 BnKOpNCtAHn, HadaHnx BnPo6HnKOM aHTnΦpn3y.
TpaHcnpTyBaHH
△OBEPEXHO
He6e3neKa TpaBMyBaHHa, He6e3neKa NowKoJKeHNH
Iorna TaTexHicHe 06cnyroByBaHHa
△HE6E3NEKA
He6e3neka TpaBMyBaHHaYepe3 BnnaKoBO 3any-ueHnn npncptpi Ta ypaXeHHa eKeTpnuHm ctpyMOM.
IpeepnpoBeHnem 6yNb-kaNX po6IT BmNkATn npu-ctpi i BntraTn wTeNCbHy BNky.
IHCneKci3 TexHikn 6e3neKn / DorOBip npo TexHicHe o6cnyroByBaHHa
Bn moKeTe domoBntncs3i CBOIM dInepom npo peryIaRhe npoBeeHnIHcneKui i3 Texhik6e3neKn a60 yknaTn dorobip npo Texhniche 6cbnyroByBaHH. PekOMeHdyEMO 3BepHyTncs3a KOHCyIbTaUciEIO.
IpepeKoXHm BnKOpncTaHHaM
- NpeBipn 3'EnhyBaHn Ka6eNb Ha BiDcyTHicTb NoWKoJKeHb.Y pa3i BnBnHn NaWKoJKeHHa HeraHHO 3BepHyTnc dIy 3AmHn Ka6eJIIO do aBTOpN-3ObaHOi cepBicHOi cnyK6n abo Do qaxIBz3 eNEKTpKn.
2.ПepebipTuBnCOKoHaipHnIuHaRHa BiCyTHicTb NOwKOJKeHb. NpOkoJKeHn BnCOKoHaipHn IuaHr HeaHHO 3amHHTN. - NpebipnT repMeTnHicTh npncToIO. DonyckaTbcBntiKaHH 3 Kpanelb BODn Ha XBUNHy. Kaio herepMeTnHicTh cepno3Hiwa, cniD 3BepHyTncd ocepBicHOcIyK6n.
LOTnXHn
- OuHCTn ciTuaCTn pIbTp y naTppy6ky nla niKJIIOUeHHBaOJOnocTaauHHa
OuHHeHH ciTuactoro fInbTaB natpy6ky DnI niKIOUeHH BOJOnoCTaHaHH
- BiikpyTnHaKnDHy raKy.
- BnHrtn naTpy6ok dny nID'eHaHHa 3 cit- yactTM pInbTpom.
- OuCTHT Ta npomTn ciTuactn fJIbTp 3OBHi. PpIMrKa. WeCTurpaHHNK nATpy6ka dIy niIeJHaHHra WlaHra HappaBnTn B 6iK 3'EdHaHHB pni- cTpoi.
- Bctabtn natpy6ok dny niD'edhannn 7naHra 3 cit- yactm fInbtpom.
- 3aTMyn HauNHy raiKy.
Yepe3 koxhi 500 roDnH po6oTn, aJe He piDme, hIX pa3 Ha pik
- DopyuHTn cepBicHni cnyk6i npoBecTu texHiue He 6ClyroByBaHHra npncTpoH.
2.3amHnMaCTnJIO
3aMiHa MaCTnJa
Bka3iBka
O6'em i mapka maCTnna Bka3aHi B po3diNi «TexHicHi xa-pakTepncTnKU».
1.BnKpyTuTn 4BnHTn.
2.3HATN KOKx npncTpoIO.
PncyHOK D
3.ПовернTuшангДЯЗИВаHHЯMaCTиаBHNi уТPIMyBaTиHaD36ipHnKOMMaCTиla.
4. BntaHyTu npo6ky 3i wHaHra dJa 3nBaHHmaCTuJa.
5. 3nKpnuKy.
6. BnHrTn 3 MaCTnIbHOrO 6aKa nInctn MaTepiaJ.
7. Noyekatn, NOKMactno NOBHCTO CTeue.
PncyHok E
8.Bctabtn npo6ky y uanr dny 3nBann MaTna.
9.ПовернгшалгдялваньmaCTиаBROPуTa 3aФikCyBaTu NOrO.
10. Hanntu doctaTHIO kIbkiCTb MaTnla.
11. BCTaBtN nIHHCTn MaTePiaI y pe3epByap dIra Ma-ctnla.
12. YctahOBHTa ta ijIbHO npNTnCHyTn KpnuKy.
PucyHOK F
Donomora B pa3i HecnpaBHOCTe
△HE6E3NEKA
He6e3neka TpaBmyBaHnHape3 BnnaKoBO 3anyu- nHnn npncptpi Ta ypaKeHH eJektpnHm cTpyMOM.
PpeI npOBeHnHm 6yNb- knxPo6it BmNkATn npuCTpi i BuTgatn WTeNCJIbHy BNky.
Ipebeipky ta pemont eJneKtpnHnx KOMnoHeHTB cIid DopyaTH Nlue aBTopn3ObaHni cepbich cnyXbi.
Y pa3i BnBHeHH HeCnpaBHocTe, He OnHcHx y cboMy po3dini, a6o B pa3i cyMHIBi Cn BiNobIHnx cTKNX BkA3IBOK 3BePTaTncra Do ABTOpN3ObaHOi cepBicHOI cnJyK6n.
Pnucpii He 3anyckaTbcra
- IpeBipTu 3'eHyBaIbHn Ka6JIb Ha BiCyTHiCt b noWKoJKeHb.
- IpepeBipuTu Happy Mupexki.
- YKIO npncpti neperpibc: a YCTaHOBNTN BIMNKaU npncptpoB B NOJIOXeHHA 0
b DaTn npncTpO OXoIOHyTu npOTaROM He MeHue HIX 15 XBUNH.
C YCTAHOBHTN BUMNKaU INPUCPTPOU B NOIOXKeHHA 《1》. - Y pa3i HecnpaBHOCTI eJKeTpUHOro 6bNaHaHHa 3BepHyTnca Do cepBicHoI cnyK6n.
Y npctpoi He CTBOPHOeTbCnCK
- Перави позмір Форсунк, дів. роздін «Тex-hiчhi xapakтетпctнк».
Budanitn nobiterp 3 npnctroo, nB. po3diJ «BuaJIeHHra nobiterp 3 npnctroo>.
OuHCTn ciTuaTni fInbTp y naTp6ky nIaKJIIOHeHH BOIONoCTaHaHH. - IpepeBipuTn 06'Em noaui Boi, iB. po3iJ «TexHiHHi xapaKTePncTknU»
OuHCTnTHΦopcyHky.
3a Heo6xioHocti 3BepHyTncs Jo cepbcHOi Cnyk6n.
Herepmetnuyhictb Hacoca
DonyckaetbcBNTiKaHHa 3 KpaneJIb BOIN Ha XBNJNHy.
- Y pa3i cepno3hi0oi HEREpMeTuHocTi DOpuyuTN cepBichin cnyk6i nepeBipuTN npucpii.
Hacoc «Ctykae»
- Ipebebipu Tn repMeTnHicTh uHaHa nOaui BoN.
Budanitn nobiterp 3 npnctroo, nB. po3diJ «BuaJIeHHra nobiterp 3 npnctroo>.
3a Heo6xioHocti 3BepHyTncsdo cepbcHoi cnyk6n.
3amana kijbkictb MmHoro 3ac06y, 0o doaactbcra
-ДоитMuHn3acioy6aIohΦopcyHKnDn8o6pO6kn NiHOIO.
BCTABNTYBCMOKtyBaIbHnIbnHg6InbUy3acNih Ky.
- Ipebeipntu BCMOKTyBaJbHn JNaHr i fOpcyHky dna o6p6kn niHO Ha npEaMeT BiKnaDeHb MIn-Horo 3ac06y. BdaanTu BiKnaDeHHra Tepno BO-doIO.
PpnaT Ta 3anachi deTani
CniD BnKOpNCTOBByaTNIiue opurihalbHe npuaadTa opurihalhi 3anacHi YactHIn, TOMy IIO came BOHN rapaHTyOt b6e3neuHy ta 6e3nepe6iHy ekcnnyatauio npncIPO.
InfopmaiaIIOO npnnaT Ta 3anachnx qactnhMiCTnbcaHa caNTi www.kaercher.com.
TapaHTia
YkoXHi KpaHII diIOb BiINOBiHI rapaHTiHi yMOBn, BCTaHOBHeI yNOBHOBaXeHOO oprAH3aJIeHO 36Ty Ha-woi npOdyKuII B ciJ KpaiHi. MoXnBi HecnpabHocTi npuNady npoTAROM rapaHTiHorO cTPOKY MNU cyBaEMo 6e3-KoUToBHO, RaIO npuHa HecnpaBHOCTI NOnraE B DeΦeKTax MaTePiAnIB aBO BnPo6HcMy 6paKy. Y pa3i BNHNKHeHHa PteH3I nPoTAROM rapaHTiHorO cTPOKY npoxAHH 3BepTaTusca, MaOuy npu Co6I YeK npo NOKynKy, Do TOpROBeNbHOI oprAhi3aJI, 0o npOdaI npOdyKT, aBO Do NaHbNkQoi yNOBHOBaXeHOI clyK6N cepBicHO ro 05cnyroByBaHH. (Adpecn DInB. Ha 3BOpOTi)
| Texhuihi xapaekterpncn | ||||||||
| HD 6/15 | M | HD 6/15 | HD 6/15 | HD 7/17 | HD 7/17 | HD 7/17 | HD 7/14-4 M | |
| Еlektrочne piDKluoyenя | ||||||||
| Hanpyra мерекi B 230 230 230 400 400 230 | ||||||||
| К - c T b | Φ a 3 | ~ | 1 | |||||
| Ча с Т о T a | M e p e | e j k i | ||||||
| Пд'едунвая потужнICTь кВТ 3,1 3,1 4,2 4,2 4,2 3,4 | ||||||||
| Тил зхису | IPX5 | IPX5 | IPX5 | IPX5 | IPX5 | IPX5 | IPX5 | |
| Зхисм мерекi (иерций) | A | 16 | 16 | 16 | 16 | 16 | 16 | |
| Пожбухалький кабел 30 M | MM² | 2,5 2,5 | 2,5 2,5 | 2,5 2,5 | 2,5 2,5 | 2,5 2,5 | 2,5 2,5 | |
| Пдкluoyеня вороностааня | ||||||||
| Тик на вх Di (мakc.) | Мпa | 1 | 1 | 1 | 1 | 1 | 1 | |
| Temperatура на вх Di (мakc.) | °C | 60 | 60 | 60 | 60 | 60 | 60 | |
| Ви Т р a T a | H a | H a | H a | H a | H a | H a | H a | |
| Висота всмokтувашия (мakc.) | M 0,5 0,5 0,5 0,5 0,5 0,5 0,5 0,5 0,5 0,5 0,5 0,5 0,5 0,5 0,5 0,5 0,5 0,5 0,5 0,5 0,5 0,5 0,5 0,5 0,5 0,0 0,5 0,5 0,5 0,5 0,5 0,5 0,5 0,5 0,5 0,5 0,5 0,5 0,5 0,5 0,5 0,5 0,5 0,5 0,5 0,5 0,5 0,5 0,5 0,5 0,8 0,8 0,8 0,8 0,8 0,8 0,8 0,8 0,8 0,8 0,8 0,8 0,8 0,8 0,8 0,8 0,8 0,8 0,8 0,8 0,8 0,8 0,8 0,8 0,8 0,9 0,9 0,9 0,9 0,9 0,9 0,9 0,9 0,9 0,9 0,9 0,9 0,9 0,9 0,9 0,9 0,9 0,9 0,9 0,9 0,9 0,9 0,9 0,9 0,9 0,8 0,8 0,8 0,8 0,8 0,8 0,8 0,8 0,8 0,8 0,8 0,8 0,8 0,8 0,8 0,8 0,8 0,8 0,8 0,8 0,8 0,8 0,8 0,8 0,0 0,8 0,8 0,8 0,8 0,8 0,8 0,8 0,8 0,8 0,8 0,8 0,8 0,8 0,8 0,8 0,8 0,8 0,8 0,8 0,8 0,8 0,8 0,8 0,8 0,6 0,8 0,8 0,8 0,8 0,8 0,8 0,8 0,8 0,8 0,8 0,8 0,8 0,8 0,8 0,8 0,8 0,8 0,8 0,8 0,8 0,8 0,8 0,8 0,8 0,1 0,8 0,8 0,8 0,8 0,8 0,8 0,8 0,8 0,8 0,8 0,8 0,8 0,8 0,8 0,8 0,8 0,8 0,8 0,8 0,8 0,8 0,8 0,8 0,8 0,4 0,8 0,8 0,8 0,8 0,8 0,8 0,8 0,8 0,8 0,8 0,8 0,8 0,8 0,8 0,8 0,8 0,8 0,8 0,8 0,8 0,8 0,8 0,8 0,8 0,5 0,8 0,8 0,8 0,8 0,8 0,8 0,8 0,8 0,8 0,8 0,8 0,8 0,8 0,8 0,8 0,8 0,8 0,8 0,8 0,8 0,8 0,8 0,8 0,9 0,8 0,8 0,8 0,8 0,8 0,8 0,8 0,8 0,8 0,8 0,8 0,8 0,8 0,8 0,8 0,8 0,8 0,8 0,8 0,8 0,8 0,8 0,8 0,9 0,1 0,8 0,8 0,8 0,8 0,8 0,8 0,8 0,8 0,8 0,8 0,8 0,8 0,8 0,8 0,8 0,8 0,8 0,8 0,8 0,8 0,8 0,8 0,8 0,9 0,4 0,8 0,8 0,8 0,8 0,8 0,8 0,8 0,8 0,8 0,8 0,8 0,8 0,8 0,8 0,8 0,8 0,8 0,8 0,8 0,8 0,8 0,8 0,8 0,9 0,3 0,8 0,8 0,8 0,8 0,8 0,8 0,8 0,8 0,8 0,8 0,8 0,8 0,8 0,8 0,8 0,8 0,8 0,8 0,8 0,8 0,8 0,8 0,8 0,8 0,7 0,8 0,7 0,8 0,8 0,8 0,8 0,8 0,8 0,8 0,8 0,8 0,8 0,8 0,8 0,8 0,8 0,8 0,8 0,8 0,8 0,8 0,8 0,8 0,8 0,8 0,8 0,3 0,8 0,8 0,8 0,8 0,8 0,8 0,8 0,8 0,8 0,8 0,8 0,8 0,8 0,8 0,8 0,8 0,8 0,8 0,8 0,8 0,8 0,8 0,8 0,9 0,6 0,8 0,8 0,8 0,8 0,8 0,8 0,8 0,8 0,8 0,8 0,8 0,8 0,8 0,8 0,8 0,8 0,8 0,8 0,8 0,8 0,8 0,8 0,8 0,9 0,7 0,8 0,8 0,8 0,8 0,8 0,8 0,8 0,8 0,8 0,8 0,8 0,8 0,8 0,8 0,8 0,8 0,8 0,8 0,8 0,8 0,8 0,8 0,8 0,9 0,5 0,8 0,8 0,8 0,8 0,8 0,8 0,8 0,8 0,8 0,8 0,8 0,8 0,8 0,8 0,8 0,8 0,8 0,8 0,8 0,8 0,8 0,8 0,8 0,1 0,9 0,9 0,9 0,9 0,9 0,9 0,9 0,9 0,9 0,9 0,9 0,9 0,9 0,9 0,9 0,9 0,9 0,9 0,9 0,9 0,9 0,9 0,9 0,9 0,1 0,9 1 | 1 | 1 | 1 | 1 | 1 | 1 | |
| Дani по потужни恭敬ly | ||||||||
| Розмір stандагтой мфорсунік | -- 033 033 033 033 038 038 043 | |||||||
| Р о b o u c h | m m | 22.5 | 22.5 | 22.5 | 25.5 | 25.5 | 25.5 | 21 |
| Побочиш naошікій тізк (мakc.) | Мпа | 455 455 | 290 455 | 455 455 | 290 455 | 290 455 | 290 455 | |
| Шірініа | ММ | 400 400 | 300 400 | 400 400 | 300 400 | 300 400 | 300 400 | |
| Висота ручь�у (b) | ДМ | 700 | 890 | 565 700 | (970) | (970) | (970) | |
| Пожбухаль (b) | Д | Б( | (A) | 3 | 3 | 3 | 3 | |
| Бізәні (b) | Д | Б( | (A) | 3 | 3 | 3 | 3 | |
| Пожьні (b) | Д | Б( | (A) | 3 | 3 | 3 | 3 | |
| Бізі (b) | Д | Б( | (A) | 3 | 3 | 3 | 3 | |
| Бізі (b) | Д | Б( | (A) | 3 | 3 | 3 | 3 | |
| Бізі (b) | Д | Б( | (A) | 3 | 3 | 3 | 3 | |
| Бізі (b) | Д | Б( | (A) | 3 | ||||
| Бізі (b) | Д | Б( | (A) | 3 | ||||
| Бізі (b) | Д | Б( | (A) | 3 | ||||
| Бізі (b) | Д | Б( | (A) | 3 | ||||
| Бізі (b) | Д | Б( | (A) | 3 | 3 | |||
| Бізі (b) | Д | Б( | (A) | 3 | ||||
| Бізі (b) | Д | Б( | (A) | 3 | ||||
| Бізі (b) | Д | Б( | (A) | 3 | ||||
| Бізі (b) | Д | Б( | (A) | 3 | 3 | 3 | 3 | |
| Бізі (b) | Д | Б( | (A) | 3 | 3 | 3 | 3 | |
| Бізі (b) | Д | Б( | (A) | 3 | ||||
| Бізі (b) | Д | Б( | A) | 3 | ||||
| Бізі (b) | Д | Б( | A) | 3 | ||||
| Бізі (b) | Д | Б( | A) | 3 | ||||
| Бізі (b) | Д | Б( | A) | 3 | ||||
| Бізі (b) | Д | Б( | B) | 2.5 | 2.5 | 2.5 | 2.5 | |
| Бізі (b) | Д | Б( | B) | 2.5 | 2.5 | 2.5 | 2.5 | |
| Бізі (b) | Д | Б( | B) | 2.5 | 2.5 | 2.5 | 2.5 | |
| Бізі (b) | Д | Б( | B) | 2.5 | 2.7 | 2.7 | 2.7 | |
| Бізі (b) | Д | Б( | B) | 2.5 | 2.5 | 2.5 | 2.5 | |
| Бізі (b) | Д | Б( | B) | 2.5 | 2.5 | 2.5 | 2.5 | |
| Бізі (b) | Д | Б( | B) | 2.5 | 2.6 | 2.6 | 2.6 | |
| Бізі (b) | Д | Б( | B) | 2.5 | 2.6 | 2.6 | 2.6 | |
| Бізі (b) | Д | Б( | B) | 2.5 | 2.6 | 2.6 | 2.6 | |
| Бізі (b) | Д | Б( | B) | 2.5 | 2.7 | 2.7 | 2.7 | |
| Бізі (b) | Д | Б( | B) | 2.5 | 2.7 | 2.7 | 2.7 | |
| Бізі (b) | Д | Б( | B) | 2.5 | 2.7 | 2.7 | 2.7 | |
| Бізі (b) | Д | Б( | B) | 2.5 | 2.6 | 2.6 | 2.6 | |
| Бізі (b) | Д | Б( | B) | 2.5 | 2.6 | 2.6 | 2.6 | |
| Бізі (b) | Д | Б( | B) | 2.5 | 2.5 | 2.5 | 2.5 | |
| Бізі (b) | Д | Б( | B) | 2.5 | 2.5 | 2.5 | 2.5 | |
| Бізі (b) | Д | Б( | B) | 2.5 | 2.4 | 2.4 | 2.4 | |
| Бізі (b) | Д | Б( | B) | 2.5 | 2.4 | 2.4 | 2.4 | |
| Бізі (b) | Д | Б( | B) | 2.5 | 2.4 | 2.4 | 2.4 | |
| Бізі (b) | Д | Б( | B) | 2.5 | 2.5 | 2.5 | 2.5 | |
| Бізі (b) | Д | Б( | B) | 2.5 | 2.4 | 2.4 | 2.4 | |
| Бізі (b) | Д | Б( | B) | 2.5 | 2.5 | 2.5 | 2.5 | |
| Бізі (b) | Д | Б( | B) | 2.5 | 2.5 | 2.5 | 2.5 | |
| Бізі (b) | Д | Б( | B) | 2.5 | 2.2 | 2.2 | 2.2 | |
| Бізі (b) | Д | Б( | B) | 2.5 | 2.2 | 2.2 | 2.2 | |
| Бізі (b) | Д | Б( | B) | 2.5 | 2.2 | 2.2 | 2.2 | |
| Бізі (b) | Д | Б( | B) | 2.5 | 2.1 | 2.1 | 2.1 | |
| Бізі (b) | Д | Б( | B) | 2.5 | 2.1 | 2.1 | 2.1 | |
| Бізі (b) | Д | Б( | B) | 2.5 | 2.1 | 2.1 | 2.1 | |
| Бізі (b) | Д | Б( | B) | 2.5 | 2.2 | 2.2 | 2.2 | |
| Бізі (b) | Д | Б( | B) | 2.5 | 2.1 | 2.1 | 2.1 | |
| Бізі (b) | Д | Б( | B) | 2.5 | 2.2 | 2.2 | 2.2 | |
| Бізі (b) | Д | Б( | B) | 2.5 | 2.2 | 2.2 | 2.2 | |
| Бізі (b) | Д | Б( | B) | 2.5 | 2.4 | 2.4 | 2.4 | |
| Бізі (b) | Д | Б( | B) | 2.5 | 2.4 | 2.4 | 2.4 | |
| Бізі (b) | Д | Б( | B) | 2.5 | 2.2 | 2.2 | 2.2 | |
| Бізі (b) | Д | Б( | B) | 2.5 | 2.4 | 2.4 | 2.4 | |
| Бізі (b) | Д | Б( | B) | 2.5 | 2.2 | 2.2 | 2.2 | |
| Бізі (b) | Д | Б( | B) | 2.5 | 2.2 | 2.2 | 2.2 | |
| Бізі (b) | Д | Б( | B) | 2.5 | 2.5 | 2.5 | 2.5 | |
| Бізі (b) | Д | Б( | B) | 2.5 | 2.2 | 2.2 | 2.2 | |
| HD 7/14-4 | HD 7/16-4 | HD 7/16-4 | HD 8/18-4 | HD 8/18-4 | HD 8/18-4 | ||||
| MX | M | MX | M | MX | M PU | ||||
| Розмір stандагтоюй φорсунки -- 043 042 042 042 042 042 | |||||||||
| Р о б о ч ú и у н ш к в н п с (маск.) | M | П п а a | 2 | 1 | 2 | 4 | 2 | ||
| Швдікість підаши, в да л/хь 11,5 11,6 11,6 12,5 12,5 12,5 | |||||||||
| Си л в д а ч в с с к с о н р н н п п н п п п п п п п п п п п п п п п п п п п п п п п п п п п п п п п п п п nictoileta | H | 21,3 | 21,3 | 21,3 | 21,3 | 21,3 | 21,3 | ||
| Розмірі та масі | |||||||||
| Ти pop в pop ma а м а ca | Кг | 42 | 40 | 43 | 41 | 44 | 36 | ||
| Д в ж и ha | ММ | 455 455 455 455 455 290 | |||||||
| Б ш р н ha | ММ | 400 400 400 400 400 300 | |||||||
| В с ота, р ч ka в н з у, (у ropi) | ММ | 890 (970) | 700 (970) | 890 (970) | 700 (970) | 890 (970) | 565 | ||
| О б ем мacrúla | Л | 0,35 | 0,35 | 0,35 | 0,35 | 0,35 | 0,35 | ||
| Мар ka мacrúla | Ти n | 0W40 | 15W40 | 15W40 | 15W40 | 15W40 | 15W40 | ||
| Розраховani з н ч avenу н н н н н н н н н н н н н н н н н н н н н н н н н н н н н н н н н н н н н н н н н н н н н н н н н н н н н н н н н н н н н н н н н н н � EN 60335-2-xx | |||||||||
| З н avenу н н н н н н н н н н н н н н н н н н н н н н н н н н н н н н н nC | 2 | 2,7 | 2,4 | 2,5 | 2,3 | 2,3 | 2,3 | ||
| П о х б ka K | m/c2 | 0,8 | 0,7 | 0,7 | 0,7 | 0,7 | 0,7 | ||
| Р в нь з в у ково т н с у | ДБ(A) | 69 | 70 | 72 | 75 | 73 | 76 | ||
| П о х б ka KpA | ДБ(A) | 3 | 3 | 3 | 3 | 3 | 3 | ||
| P в нь з в у ково notу н н н н н н н н н н н н н н н н н н н н н н н н н н н н н н н н nCwA | Д | Б | ( | A | ) | 8 | 5 | 8 | 6 |
Mn 36epiraem0 3a co6oI npabo Ha BheceHHaTexHiHnx 3Min.
3aYBa npo BiDnOBiDnHicTb HopMaM EC
LIMM 3aBnEMO, 30 3a3HaueHa HnKHe MaHnHa 3a CBOIMN KOHCTpykTINBHNM 3aYmOM i KOHCTpykuieIO, a TaKOK 3a BnKOpNCtAHM HAMn BnKOHaHHr M BiIDNoBIaEc YHHM OCHOBOIIOJXHM BmOram IIOo 6e3neKn Ta OXOPOH 3dOpOB'AnpeKTNB EC. Y pa3i BHeceHHra HeyroKeHX 3HAM 3MiH Do MaUHHu Ua 3aBA BTPaAe CBOIO YHHICTb.
Bupi6: Mmouh anapaT BnCOKOro TnCKy TnI: 1.150-xxx
BidnoBidiHdIupeKtNBEC
2000/14/EG
2006/42/EG (+2009 / 127 / EG)
2011/65/EC
2014/30/EC
3actocobyaHrapMOHI3OBAH HOpM
EN 60335-1
EN 60335-2-79
EN 50581
EN 55014-1: 2006+A1: 2009+A2: 2011
EN 55014-2: 2015
EN 62233: 2008
EN 61000-3-2: 2014
HD x/xx
EN 61000-3-3: 2013
HD x/xx
EN 61000-3-11: 2000
3actocobyaHm MeToD ouiHKn BiINOBIOHOCTI
2000/14/EG:Додастok V
PibEnb 3BykoBoi noTyxHocTi, dE(A)
71364 Winnenden (Germany)
Tel.: +49 7195 14-0
Fax: +49 7195 14-2212
M. BiHHeHdEh, 01.07.2017
目录
一般性注意事项. 193
按规定使用. 193
环境保护. 193
安全注意事项. 193
操作元件. 193
颜色标记. 194
拆除包装. 194
装配配件. 194
投入运行. 194
操作. 195
中断运行. 195
结束运行. 195
仅HD...M、HD...MX:保管设备. 195
防冻保护. 195
运输. 195
存放. 195
维护和保养. 196
故障排除. 196
附件和备件. 196
质量保证. 196
技术数据. 196
EC一致性声明. 198
一般性注意事项


71364 Winnenden (Germany)
Tel.: +49 7195 14-0
Fax: +49 7195 14-2212
Winnenden, 2017/07/01
| HD 8/18-4 M PU | HD 8/18-4 MX | HD 8/18-4 M | HD 7/16-4 MX | HD 7/16-4 M | MX | |||||
| 50 | 50 | 50 | 50 | 50 | 50 | δe | δe | δe | δe | δe |
| 4.6 | 4.6 | 4.6 | 4.2 | 4.2 | 3.4 | δe | δe | δe | δe | δe |
| IPX5 | IPX5 | IPX5 | IPX5 | IPX5 | IPX5 | |||||
| 16 | 16 | 16 | 16 | 16 | 16 | μd | μd | (δe) | (δe) | μd |
| 2.5 | 2.5 | 2.5 | 2.5 | 2.5 | 2.5 | 2μd | μd | 30a | JL | JL |
| 111 | (δe) | (δe) | (δe) | (δe) | ||||||
| J | ||||||||||
| 6060 | (δe) | (δe) | (δe) | (δe) | ||||||
| δe | δe | δe | δe | δe | ||||||
| 12 | 12 | 12 | 12 | 12 | 12 | a | a | (δe) | (δe) | (δe) |
| 0.5 | 0.5 | 0.5 | 0.5 | 0.5 | 0.5 | ρ | ρ | (δe) | (δe) | (δe) |
| 042 | 042 | 042 | 042 | 042 | 042 | -- | -- | (δe) | (δe) | (δe) |
| 1416 | (δe) | (δe) | (δe) | (δe) | ||||||
| J | ||||||||||
| 2124 | (δe) | (δe) | (δe) | (δe) | ||||||
| J | ||||||||||
| 12.5 | 12.5 | 12.5 | 11.6 | 11.6 | 11.5 | a | a | (δe) | (δe) | (δe) |
| 21.3 | 21.3 | 21.3 | 21.3 | 21.3 | 21.3 | b | b | (δe) | (δe) | (δe) |
| 36 | 44 | 41 | 43 | 40 | 42 | c | c | (δe) | (δe) | (δe) |
| ρ | ρ | (δe) | (δe) | (δe) | ||||||
| ρ | 400400400400400400300 | (δe) | (δe) | (δe) | ||||||
| 565 | (970) | 890 | (970) | 890 | (970) | 700 | (970) | 890 | (δe) | (δe) |
| 0.35 | 0.35 | 0.35 | 0.35 | 0.35 | 0.35 | d | d | (δe) | (δe) | (δe) |
| 15W40 | 15W40 | 15W40 | 15W40 | 15W40 | 0W40 | g | g | (δe) | (δe) | (δe) |
| EN 60335-2-xx | (δe) | (δe) | (δe) | (δe) | ||||||
| 2.3 | 2.3 | 2.3 | 2.5 | 2.4 | 2.7 | 2/ρ | 2/ρ | (δe) | (δe) | (δe) |
| 0.7 | 0.7 | 0.7 | 0.7 | 0.7 | 0.8 | 2/ρ | 2/ρ | K | (δe) | (δe) |
| 697072757276(Aaia) | (δe) | (δe) | ||||||||
| 333333(Baia) | pA | (δe) | (δe) | |||||||
| 8586889189922(aia) | + LWA | (δe) | (δe) | |||||||
yJb
JyIgBgagAaAsVla
ylaasivil jaxsylipzvniljglgagxlo
Jabil ylll lal aol .aaii I
"aaallllglalll
"JgJll JaaJbJgJll
.
aai aajaaai aai jaoai aiai ao gj
"aaaiJoo
aiai bji
Jwiaa
a 100
a0x jro Jgjgljyswll Jooosui
a > 2 或 c > 5
L
golgo g 9 aalll aalag
"JgJU Jauu"JauJJbai JgJU Jauu
jg>Jb :HD...MX g HD...M b
1.
Joo Joo
- xL yL
goo 1 aaoog jlll biaal gobj:HDM.3
:HD...MX .bIbI bI bI aolg ggljlae>
aagg ggbjll o k l lal aol gbs
a aal j
.4>9 g9JU 169 J69 Jj j 1c b2eol .4
JdJI JI 1
a
.1alllnlo bao a|g| ppo jol jil jj 2a
aizill jol Jl 150 so jlgll baxl
:doJoo Joo Joo Joo Joo Joo Joo
.1
jzglucglaalaaolooaiaofo 2
j 3.
J
wawl aLgAaIglaIaIglo
Joo Jaaa Jaaa Jaae oae Joo
aal no aIal algal aeil all
#
aag
jLjyJoojj Jb, aLoYl Jbs
jgljll jgolcJlJaiIi
a
J 1
Jn Jnnnnnnnnnnnnnnnnnnnnnnnnnnnnnnnnnnnnnnnnnnnnnnnnnnnnnnnnnnnnnnnnnnnnnnnnnnnnnnnnnnnnnnnnnnnnnnnnnnnnnnnnnnnnnnnnnnnn
J
jJyJ1JzJgJzJgJzJgJzJgJzJgJzJgJzJgJzJgJzJgJzJgJzJgJzJgJzJgJzJgJzJgJzJgJzJgJzJgJzJgJzJgJz
JrJrJrJrJrJrJrJrJrJrJrJrJrJrJrJrJrJrJrJrJrJrJrJrJrJrJrJrJrJrJrJrJrJrJrJrJrJrJrJrJrJrJrJr
g jll l l l l l g bgs
100 100
Jg yduw wswll J> .aqdo
yaeil ao: jyo.c
ab = 1
Jellbdoalabio Jsw.7
gogall abll a, b
0 1
Jlll lal jll Jll 2
gjll jghg csh
J 1 J 1 1 1 1 1 1 1 1 1 1 1 1
abio
1.
.2
Jlll lal lclgI Jol .3
sgeJll caiJI eIJI J4.
Lai jao Jai Jai aag oJg jll Jaiil .5
cabio
.6
Juswll aulac gbo
jglg 1.
Jajj 2
L
.70%70 sjgl.Ja clal bdo Jai pui jglslabix
Jelai jll bai jw Jjoo g 00
jgluol jyjosl jgo
Jusill alolgo
Jz>duo plallg. Jlll Jdai 1
.
J 2.
J
.1
Jlll lal 2.
Jaa JgJgJgJgJgJgJgJgJgJgJgJgJgJgJgJgJgJgJgJgJgJgJgJgJgJgJgJgJgJgJgJgJgJgJgJgJgJgJgJgJgJgJgJgJgJgJgJgJgJgJg
10
1 4
"OFF/0" 100J J jj
.6
.
jglll j 1 l l l l l l l l l l l l l l l l l l l l l l l l l l l l l l l l l l l l l l l l l l l l l l l l l l l l l
J
Jd>duoalglllalalssuoln 9
.
- p_ab 的
.(aog1 1 jll jall, p 7.5 Jgb jdl)
y.a.iizilgbs
3..
JnJnJnJnJnJnJnJnJnJnJnJnJnJnJnJnJnJnJnJnJnJnJnJnJnJnJnJnJnJnJnJnJnJnJnJnJnJnJnJnJnJnJnJnJnJnJnJnJnJnJ
()jieJg4(44020ZnJ1p)laaiIgbr>
.1aJdOg4.730012.0
jgljllcogellwaa2.
jglllcogll
J1.
.1eolafgclglllJjJ2
10 Jjgljll jilgll gai jslw gg .3
a o aalaaal j. aiol
jglc04.
.55
JJI JIaJIaJIaJIaJI:HD...M PU pJIaJIaJIaJI
L aJll aJll jll oJy Jx
aJll Jb2jll
aLJIJIJIJIJIJIJIJIJIJIJIJIJIJIJIJIJIJIJIJIJIJIJIJIJIJIJIJIJIJIJIJIJIJIJIJIJIJIJIJIJIJIJIJIJIJIJIJIJIJIJIJIJIJIJIJIJIJIJIJIJIJIJIJIJIJIJIJIJIJIJIJIJIJIJIJIJIJIJIJIJIJIJIJIJIJIJIJIJIJIJIJIJIJIJIJIJIJIJIJIJIJ
aaialljwglgll
0 20 0gS sill Jswy. aaiJ ywglal asw o> .2
aJyI JyI yI yI yI yI yI yI yI yI yI yI yI yI yI yI yI yI yI yI yI yI yI yI yI yI yI yI yI
go oJgIaIaIaIaIaIaIaIaIaIaIaIaIaIaIaIaIaIaIaIaIaIaIaIaIaIaIaIaIaIaIaIaIaIaIaIaIaIaIaIaIaIaIaIaIaIaIaIaIaIaI
aogkall ojjg ailll alll
:JUJUJUGUGLB4.
DN 15 (1/2 wJyI aJyI yJyI a
.DN6 1
Jlaes
16 × 25
.1"gogll jgljzao J 2
Jg>duu palaI JJIaI IaiaI JuaaI JauaI .3
aallll lalalal
Jellal bai jll J 4.
albioll go pall jolll 1aall
aaiiie 1e gglgll aalaae eae eae
4
Jalalpwzjgljgejia jskawlaill jg caiabial
aai
KARCHER aJoo Joo
J
HD...M PU pIbJ
山
aIg aoo egog jb;alol jbs
pIaipgai piaiio aiaio 1261
Jellal baiall aawg ayll alogll slwgl llae
abzglg
Iwll Jb Jb Iw
- 2a + b = 5 时,
Jaaiakayjgagugog auiia
J 1 J 1 J 1 J 1 J 1 J 1 J 1 J 1 J 1 J 1 J 1 J 1 J 1
Jc Jssjll. jll aKg go Jall jg aIog sll
aJ
jglj jzssgjlljll aiaaHd...M PU pbl
Jaaal Jzaiil go polgaua
oJgUyUyUyUyUyUyUyUyUyUyUyUyUyUyUyUyUyUyUyUyUyUyUyUyUyUyUyUyUyUyUyUyUyUyUyUyUyUyUyUyUyUyUyUyUyUyUyUyUyUyU
aalj j no Jaa Jaa Jaa Jaa Jaa
J 1
alil alog
clll alogj Jogill
aclaoaswfoaallolalgjrol
cllly aieeall lalaae olae 100
Lj jn Jy Laiu yauo yauu uauu Lg 9
pall Jol dssw. 100
aagull aeg 100
pall Jol g 100
pall Jol g 100
pall Jol g 100
pall Jol g 100
pall Jol g 100
oJgJgJgJgJgJgJgJgJgJgJgJgJgJgJgJgJgJgJgJgJgJgJgJgJgJgJgJgJgJgJgJgJgJgJgJgJgJgJgJgJgJgJgJgJgJgJgJgJgJgJ
"aaioaolgo
goljololjol jowHd...M go...yJoljol
11p0b0jllo
12
③ b a,b = 1
14
15jll o
16]gJU
ogolIJe aaioll aoguLb>HD...M PU go b
J 1
JaaJIa
L
JeIgDgDgHdHd...MPU gaiJg
.
J
JUdAeAsyIaBbEASY!Lock JaaJIa
Jgsw Jk,10g 1>gl g
A JSCWJ
wJlOgswloIcJllIaiaIaiaI .1
.(EASY!Lock) pL> L l#g jolgo 2
oogglall ggo Jell Ibsial wmoJog.3
.(EASY!Lock) >
A
jglglggl Jyogg jda .5
a1 + a2 + a_3 = 6
:ogb jll oS y ogjoll ojey 10
Jw Jlll Ibaol gbr 10 1
.0sJU 1
J 2
a 3
lglssggs
JILI JIOO OIOLOIOIOIOIOIOIOIOIOIOIOIOIOIOIOIOIOIOIOIOIOIOIOIOIOIOIOIOIOIOIOIOIOIOIOIOIOIOIOIOIOIOIOIOIOIOIOIOIOIO
Jllbaiaal wdoa 00 Jllbaiaial pgsj Jogu .4
)P<>L oEASY!Lock