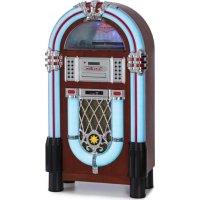
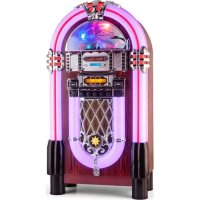
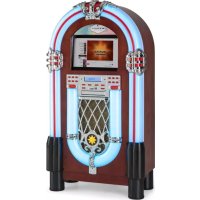
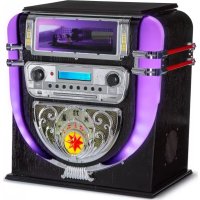
Arizona DAB - Jukebox Auna - Free user manual and instructions
Find the device manual for free Arizona DAB Auna in PDF.

User questions about Arizona DAB Auna
0 question about this device. Answer the ones you know or ask your own.
Ask a new question about this device
Download the instructions for your Jukebox in PDF format for free! Find your manual Arizona DAB - Auna and take your electronic device back in hand. On this page are published all the documents necessary for the use of your device. Arizona DAB by Auna.
USER MANUAL Arizona DAB Auna
Member of Berlin Brands Group
Handwerkerstr. 11
15366 Dahlwitz-Hoppegarten
Deutschland
Congratulations on purchasing this equipment. Please read this manual carefully and take care of the following hints to avoid damages. Any failure caused by ignoring the items and cautions mentioned in the instruction manual is not covered by our warranty and any liability. Scan the QR code to get access to the latest user mannaual and other information about the product:

CONTENTS
Safety Instructions 22
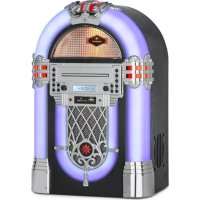
Product Overview 23
Control Panel 24
Operation 26
Listening to a Compact Disc 26
Listening to the Radio 29
BT Functions 30
USB/SD Input 31
Troubleshooting 33
Disposal Considerations 35
Declaration of Conformity 35
TECHNICAL DATA
| Item number 10038371 | |
| Power supply 100 - 240 V ~ 50/60 Hz | |
| FM frequency range 87.5 - 108 MHz | |
| DAB frequency range 174.928 - 239.200 MkHz | |
| BT specifications | |
| Frequency band | 2402-2480 MHz |
| Maximum radio-frequency power | 3.5 dBm |
SAFETYINSTRUCTIONS
- Observe all notes listed in the operating instructions.
- Do not use the unit near water or in a humid environment.
- Make sure that no liquid is spilled over the unit and the unit openings.
- Move the unit carefully to avoid damaging it.
- Do not block the device outputs.
- Do not place the unit near heat sources (e.g. heating). Do not expose the device to direct sunlight.
- Plug the power plug of the unit into the power outlet in the manner intended.
- The device is equipped with overload protection. Should this need to be replaced, contact customer service or a similarly qualified person.
- Unplug the unit from the wall outlet if it will not be used for a long period of time.
- Do not attempt to service or repair the unit yourself. In this case, the warranty expires.
- The mains plug is used to disconnect the device from the mains after it has been switched off. Make sure that the mains plug is always freely accessible.
- Do not expose the device to splash water or place objects filled with liquid, such as vases, on the device.
- Do not expose the batteries to extreme heat such as sunlight or fire.
- Do not obstruct the ventilation of the unit by blocking the ventilation openings with objects such as newspapers, tablecloths, curtains, etc..
- Ensure that a minimum distance of 5mm to all sides of the unit is maintained.
- Do not place sources of open flame ignition, such as lit candles, on the unit.
- Dispose of used batteries in an environmentally friendly manner.
- Use the device only in temperate climate, not in tropical climate.
WARNING
Risk of injury! To reduce the risk of electric shock, do not open either the cover or the back of the unit. The device does not contain any parts that could be serviced by the customer. Please contact customer service or similarly qualified personnel for maintenance and repair.
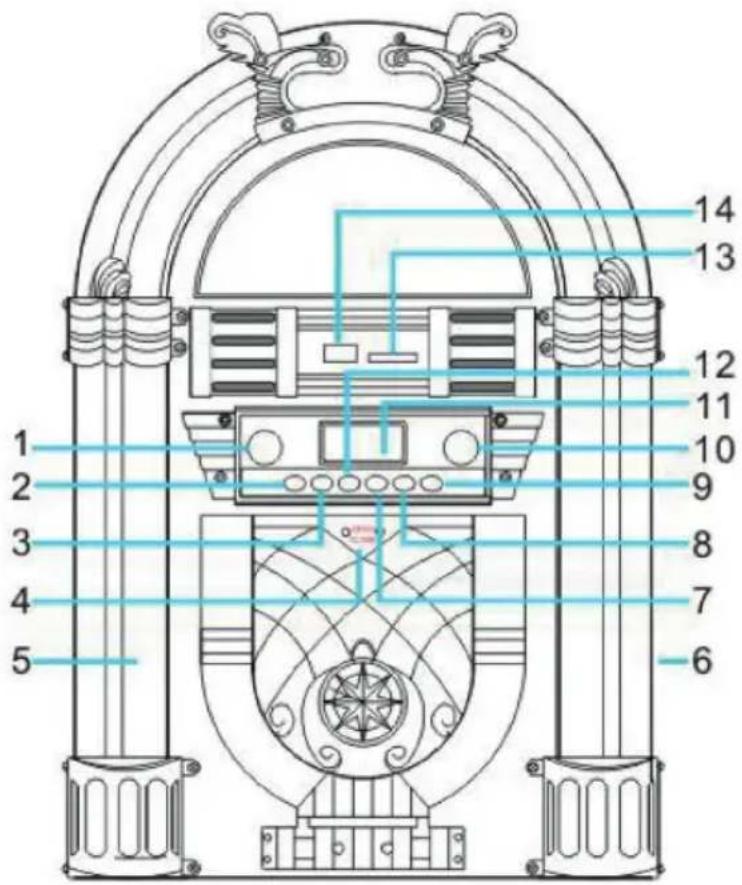
- Volume knob
- Power/Mode
- Pause/Play/Scan
- CD door Open/ Close
- 7 Colour changing LED lighting
- Speaker
- Prev/Tuner
- Prog/Enter mode
- Next/Tuner+
- Lighting Effect ON/OFF
- LCD Display
- Stop /Info
- SD Slot
-
USB Slot
-
FM Antenna
- LED Light Mode Switch
- DC Power Input
- Power adapter
CONTROL PANEL
Power/Mode
Use the Power/Mode button to turn ON the Jukebox. The default mode when you switch ON is RADIO. This button also allows you to choose your desired playback mode. You will scroll through in order: DAB/FM RADIO, CD/MP3, USB, SD and BT. To power OFF the Jukebox, press and hold down the Power/Mode button for 3 seconds until the display turns OFF.
II / SCAN
Use the scan button to play or pause tracks while in playback modes CD, USB, SD or BT. The Play/Pause/Scan button is also used when in RADIO mode to automatically search for stations.
Stop / Info
Use the Stop/Info button to stop tracks playing in playback modes CD, USB, SD. In DAB/FM status or hold down the Stop/Info button for 3 seconds as the menu function.
After USB music reading stops, press and hold "Stop /Info" for 3 seconds, the software update information will appear (make sure it is the latest version of applicable software).
Prev Tuner
In FM and DAB playback state,Selection for the previous station,"Menu" function state, select for theThe previous project.
In CD and USB,SD playback state,press "Prev/To play the previous track.
Press and hold down the this button for 3 seconds to rewind back through a track, You can then release the button to start play.
In Bluetooth playback state,press "Prev/1" to play the previous track.
Programming/Repeat/Enter
When playing CD, MP3. USB. SD, press PROG once to repeat one song, the REP indication at the top left corner on the led display will flash. Press the "Prog" display "REP FOLDER" repeat album. Press "Prog" one more time to repeat all songs in the track and the REP indication at the top left corner on the LED display will appear.
Second mortgage to play songs randomly, the LED displays "RAN" on the bottom of the display.
When playing CD, USB, SD, press STOP to stop. When playing CD, USB, SD, press "stop" to stop. Press the "Prog" Mode button. Tracks can be
reselected and rearranged. Further info on this function on page 9. In FM and DAB playback state, function of "confirm" by pressing "Prog/Enter" when making relevant selection operation.
Next Tuner+
In FM and DAB playback state,Selection for the next station,"Menu" function state, select for the next item.
In CD and USB,SD playback state,press "Next/ to play the next track, Press and hold down the this button for 3 seconds to fast forward through a track. You can then release the button to start play. In Bluetooth playback state,press "Next/ to play the next track.
Digital audio broadcasting Reception
FREQUENCY RANGE: DAB 174.928--239.200 MHZ
- Press the "Power/ Mode" button (No. 2 on the Jukebox parts list) to wake the Jukebox from standby mode. The unit will automatically enter Digital audio broadcasting mode and automatically search for nearby DAB signals.
- Press the To the high-end search signal.
- Press the .The low - end search signal.
- Press the "Scan" search for the saved DAB channel (up to 20 stops).
- Press the "Info" to see information about the signal site.
-
Press and hold the button "Info" for 3 seconds and then change to MENU.
-
Display "Scan Setting", press "Enter" to confirm, then press or to select "All stations" or "Strong Only", press "ENTER" to confirm.
- Display "SW Version". Press "Enter" to confirm and see the Version number (such as "JSY .......DAB" or something else).
- Display the "Language", press "Enter" to confirm and then press or to select "English,Deutsch,French or Italiano". Press "Enter" to confirm
- Display Factory Reset, press on to select "No or Yes" and press "Enter" to confirm.
- To turn off the radio, simply press the "Mode" button to other audio playing mode by pressing. The Mode button Press and hold for 3 seconds to turn off the power.
Notes concerning DAB and FM
- The FM antenna must be fully extended and the radio must be in a good location (the signal antenna is on the back of the unit). Stations with a weak signal can only be tuned in manually.
- A maximum of 20 stations can be stored. If there are less than 20 local stations with strong signals, they can only be stored to all stations that can receive strong signals. If you do not have 40 strong stations, you cannot Store 20 position.
OPERATION
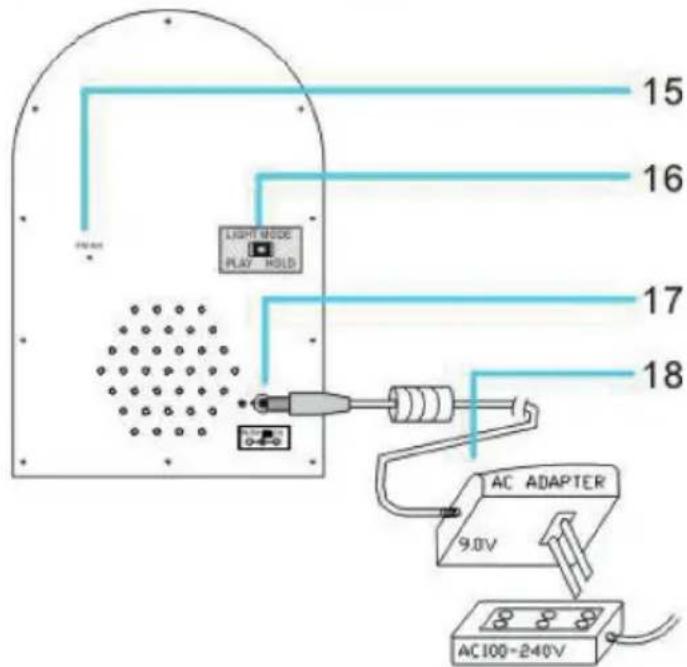
Insert the plug of the supplied Power Adaptor into the unit's DC Input Socket (Part no. 15 shown on Figure under "Description of Parts") and then insert the adaptor plug into a mains power socket.
Power Button / Function Mode
Press the button to select the function mode: DAB - FM - CD - USB - SD - BT - OFF. Long press for 3 seconds after power off.
Light On/Off Button
Press this button to Power On or Power Off the lights.
LISTENING TO A COMPACT DISC
-
Press Power Button
-
Select the CD Mode
Opening the CD Compartment and Playing a CD
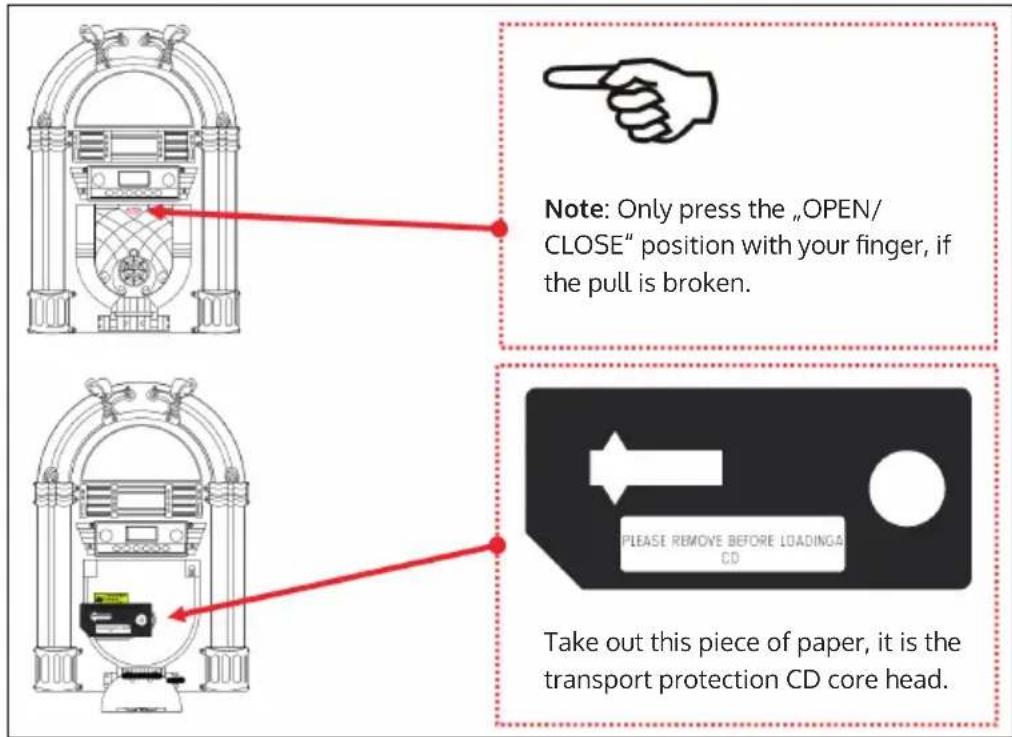
- Place the CD Disc on the holder.
- Jukebox should now automatically identify the total number of songs displayed on the LCD display.
- Press PLAY/PAUSE button once, the CD starts to Play.
- Press PLAY/PAUSE again to PAUSE the track.
Volume Knob
To adjust the volume level, rotate the volume knob clockwise or anticlockwise.
PREV HW/TUNER
Whilst a track is playing, press this button to skip previous track. Press and hold to rewind the track.
NEXT RF/TUNER+
Whilst a track is playing, press this button to skip forward to the next track. Press and hold to fast forward the track.
STOP BAND
Press this button to stop playing the track.
PROG/PLAY MODE
- Whilst a track is playing, pressing this button enables mode of "Repeat Track"
- Whilst you are not playing a CD, press this button to Program the playing mode. Press this button (PROG) whilst you are not playing a CD, "P01" would be displayed on the LCD Display.
- Press "PREV" or "NEXT" buttons repeatedly to select the desired track number.
- Press "PROG" button again to confirm and save your selection and "P02" will be displayed soon.
- Repeat steps 3 and 4 by selecting the track numbers of your choice, and the track will be saved in the same order. Continue entering the tracks in this way until all of your desired tracks are stored (up to around 60 songs).
- When you have entered all track numbers that you want, press the PLAY/PAUSE button to begin playing the programmed sequence of tracks.
- To erase your programmed tracks, press "STOP" button in program mode, open the CD Door, or change to another function mode, and the normal playback will resume.
- Repeat and random playback features When playing CDMP3. Usb. SD,Press "Prog" once to repeat all songs in the track and the "Rep A" indication at the top left corner on the
Handling the Discs
- This unit has been designed specifically for sound reproduction from compact discs bearing the mark. No other discs can be used.
- To remove a disc from its storage case, press down on the center of the case and lift the disc out, holding it carefully by the edge.
- Fingersprints and dust should be carefully wiped off the disc recorded surface with a clean cloth.
- Never use chemicals such as record sprays, anti-static sprays or fluid, benzene or thinner to clean compact discs. Such chemicals will do irreparable damage to the discs plastic surface.
- Discs should be returned to their cases after use to avoid serious scratches that could cause the laser pick up to skip.
- Do not expose discs to direct sunlight or high humidity and temperature for extended periods.
- Log exposure to high temperature can warp the disc.
- Do not stick paper or write anything with a ballpoint pen on the surface of the label side.
- Do not use irregular shaped CD's (Octagonal, heart-shape, etc) all of which can damage the unit.
led display will appear; Press the "Prog" display "Rep 1" to repeat one song; Press "Prog" one more time to repeat album. Continue pressing the button to play songs randomly, the led display "Rand" on the bottom of the display.).
- Press the "POWER" button to choose "FM" Mode. Long press for 3 seconds and then power off.
- Pressing "Scan" will start a search for stations automatically and also searches memory stations.
- Search for stations as above mentioned. Press or Hold it still for 4 seconds and select Forward or backward the channel you already memory. And the table number will be displayed.
Manual Tuning
Press or it will decrease or increase by 0.05 MHz for FM.
Info
Press and hold the button "Info" for 3 seconds and then change to MENU.
- Display "Scan Setting", press "Enter" to confirm, then press " or " to select "All stations" or "Strong Only", press "ENTER" to confirm.
- Display the "Language", press "Enter" to confirm and then press or to select "English, Deutsch, French or Italiano. Press "Enter" to confirm.
- Display Factory Reset, press "or" to select "No or Yes" and press "Enter" to confirm.
To turn off the radio, simply press the "Mode" button to other audio playing mode by pressing.
Notes:
A maximum of 40 stations can be stored. If there are less than 20 local stations with strong signals, they can only be stored to all stations that can receive strong signals. If you don't have 20 strong stations, you can't Store 20 position.
BT FUNCTIONS
- The "mode" switch function switch to BT.
- Pairing bluetooth device appear "JUKEBOX", can be connected, once complete matching, bluetooth device can play music.
- In place of songs, and then choose the songs you want, your bluetooth device operation.
- The volume adjustment, adjust the "volume" control on your demand.
-
This machine has three buttons can be manipulated.
-
Press ,PREV , or ,NEXT , repeatedly to select the desired song.
- Press ,Pause , button to play or Pause a song.
Note: If the volume seems to be too low, adjust the rotary volume control on the front panel. Or your mobile device volume.
Switch on light and light modes
| ON OFF | ON: Light bright OFF: Light not bright |
| LIGHT MODE PLAY HOLD | PLAY: The light colour cycle changes. HOLD: Light colour stops in a certain state |
- LED Mode Switch is at the back of main machine panel, Switch select "HOLD", lock current LED color.
- Push the convert button the colour "LIGHT MODE" Pushbutton once to hold the lights colour. Push the convert button it again to resume colour changing.
- The lights can hold on 7 different colours (light blue, dark blue, green, pink, red, yellow or white).
USB/SD INPUT
This Jukebox features a USB 2.0 input which enables MP3 files to be loaded on to a USB 2.0 flash drive and played back through the Jukebox.
Insert the USB drive into the USB input on the Jukebox and press the Power/Mode button on the control panel to switch ON. Press the Power / Mode button on the Jukebox repeatedly until "USB" is shown on the LCD display. If the tracks have been loaded on to the drive correctly, the LCD display will show the number of folders loaded on to the USB drive by showing "F" followed by 3 numbers
Example 1: "F004" indicates there are 4 folders loaded on to the drive), and then display the number of individual tracks loaded on to the drive.
Example 2: "027" indicates that there are 27 tracks loaded on the drive in total). The Jukebox will automatically start playing from the USB drive.
Playing and Pausing a Track
To either:
a) Play a track when the USB is in STOP mode;
b) Pause any tracks that are playing or;
c) Play a track when it is paused Press the Pause/Play button.
Stopping a Track from Playing
To stop the USB from playing, press the Stop/Info button. If you wish to commence playing from Track 1 again, press the Pause/Play button again.
To Skip to the Next Track
To skip to the next track, press the Next/Tuner+ button on the control panel. It will skip to the next track in the folder or to the next folder if it is the last track in the current folder. If the Jukebox is in random ("RAN") mode the next track will be selected at random from any of the loaded folders.
To Skip to the Previous Track
To skip to the previous track, press the Prev/Tuner- button on the control panel. It will skip to the previous track in the folder or if it is the first track in this folder it will skip to the last track in the previous folder. If the Jukebox is in shuffle ("RAN") mode, the next track will be selected at random from any of the loaded folders.
To Repeat One/All Tracks or Select Random Play
- To repeat ONE track, press the Prog/Play Mode button once (when there is no repeat function selected). The repeat symbol "REP" will flash on the top left of the LCD display.
- To repeat all tracks in a folder (applicable for USB drives with multiple folders only), press the Prog/Play mode button twice (when there is no repeat function selected). The flashing "REP" will now be solid, and the word "FOLDER" will also be displayed on the bottom right of the LCD display.
- To repeat all tracks on the USB drive, press the Prog/Play mode button again. The "REP" symbol will stay solid, and "FOLDER" will disappear.
- To shuffle the tracks being played, press the Prog/Play mode button again. The letters "RAN" will now be displayed on the bottom left of the LCD display. To disable any repeat or random selection, press the Prog/Play mode button until "REP" or "RAN" are no longer showing on the LCD display.
Notes: The functional operation is the same in SD state. Programming Tracks to Play(the function is the same as the CD).
TROUBLESHOOTING
LINN
| Problem Possible Cause | Suggested Solution | |
| Power does not come on when the power switch is pressed | Unit is Unplugged Connect the unit to the power adaptor supplied with the product | |
| No sound comes out of the speakers | The volume is turned down to low level. | Adjust the volume. |
| The input selector does not match the playback/source | Re-select the desired input source. | |
| The Sound is disturbed | The unit is too close to a TV Set or another such device | Turn off the TV or other appliance or re-locate the Jukebox device |
| Cannot listen to any station or signal appears weak | The station is not tuned-in properly. | Tune-in the desired station properly. |
| A TV set is being used nearby and is interfering with the radio reception | Turn-Off the interfering TV set. | |
| The sound is distorted. | The antenna is not oriented properly | Re-orient the antenna until the reception improves |
CD-PLAYER
| Problem Possible Cause | Suggested Solution | |
| CD stops immediately after starting, or unit pauses or stops during play | The CD is inserted upside down. | Insert the CD with the printed side right-side up. |
| The CD is dusty or dirty or there is condensation on the CD. | Carefully clean and dry the CD | |
| No sound The CD Player | is Paused | Press the Play/Pause button to resume playing the track |
| Specific CD is noisy or playback stops or skips | The CD is scratched or damaged. | The CD should be changed. |
| The disc is very dirty. Carefully clean the CD | ||
| "nod" is shown on the CD display | The CD is scratched or damaged. | The CD should be changed. |
| The disc is very dirty. Carefully clean the CD | ||
DISPOSAL CONSIDERATIONS

If there is a legal regulation for the disposal of electrical and electronic devices in your country, this symbol on the product or on the packaging indicates that this product must not be disposed of with household waste. Instead, it must be taken to a collection point for the recycling of electrical and electronic equipment. By disposing of it in accordance with the rules, you are protecting the environment and the health of your fellow human beings from negative consequences. For information about the recycling and disposal of this product, please contact your local authority or your household waste disposal service.
DECLARATION OF CONFORMITY
CE UK CA
Manufacturer:
Chal-Tec GmbH, Wallstrasse 16, 10179 Berlin,
Germany.
Importer for Great Britain:
Berlin Brands Group UK Ltd
PO Box 1145
Oxford, OX1 9UW
United Kingdom
Hereby, Chal-Tec GmbH declares that the radio
equipment type Arizona DAB+ is in compliance with
Directive 2014/53/EU. The full text of the EU declaration
of conformity is available at the following internet
address: use.berlin/10038371
For Great Britain: Hereby, Chal-Tec GmbH declares that the radio equipment type Arizona DAB+ is in compliance with the relevant statutory requirements. The full text of the declaration of conformity is available at the following internet address: use.berlin/10038371
Cher client, chere clientele,
Berlin Brands Group UK Ltd
PO Box 1145
Oxford, OX1 9UW
United Kingdom