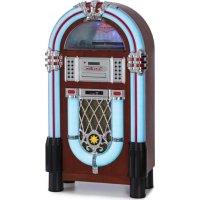
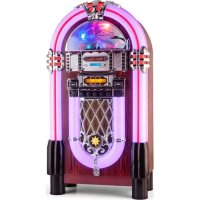
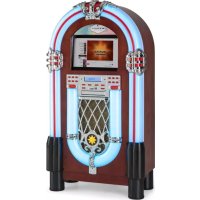
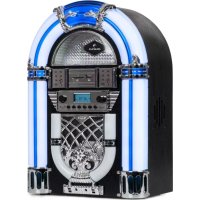
Kentucky - Jukebox Auna - Free user manual and instructions
Find the device manual for free Kentucky Auna in PDF.

User questions about Kentucky Auna
0 question about this device. Answer the ones you know or ask your own.
Ask a new question about this device
Download the instructions for your Jukebox in PDF format for free! Find your manual Kentucky - Auna and take your electronic device back in hand. On this page are published all the documents necessary for the use of your device. Kentucky by Auna.
USER MANUAL Kentucky Auna
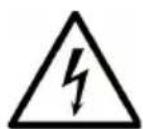
The lighting flash and arrow head within the triangle is warning sign alerting you of dangerous voltage inside the product
CAUTION
RISK OF ELECTRIC SHOCK DO NOT OPEN
CAUTION:TO REDUCE THE RISK OF ELECTRIC SHOCK DO NOT REMOVE COVER (OR BACK).NO USER SERVICIABLE PARTS INSIDE.REFER SERVICING TO QUALIFIED SERVICE PERSONNEL.

The excclamation point within the triangle is a warning sign alerting you of important instructions accompanying the product
MP3/WMA Music File requirements.
Member of Berlin Brands Group
Handwerkerstr. 11
15366 Dahlwitz-Hoppegarten
Deutschland
Congratulations on purchasing this equipment. Please read this manual carefully and take care of the following hints to avoid damages. Any failure caused by ignoring the items and cautions mentioned in the instruction manual are not covered by our warranty and any liability. Scan the QR code to get access to the latest user manual and other information about the product.

CONTENTS
Technical Data 23
Safety Instructions 25
Overview 28
Operation 29
Radio Functions 34
CD Operation 37
USB/SD Operation 37
AUX IN 38
Playable File Requirements 38
Troubleshooting 39
Disposal Considerations 40
Declaration of Conformity 40
TECHNICAL DATA
| Item number 10033772 | |
| Power input 110-240 V~ | 50/60 Hz |
| Power consumption 24 W | |
| Speakers 2 x 4.5 W | |
| Radio frequencies FM 87.5 - 108 MHz | |
| BT frequency | 2402-2480 MHz |
| Radio-frequency power | 4 dBm |
WARNING
| CAUTION RISK OF ELECTRIC SHOCK DO NOT OPEN | |
| CAUTION: TO REDUCE THE RISK OF ELECTRIC SHOCK AND SERIOUS PERSONAL INJURY, DO NOT REMOVE ANY COVER. NO USER-SERVICABLE PARTS INSIDE. REFERServICING TO QUALIFIED SERVICE PERSONNEL ONLY. WARNING. TO REDUCE THE RISK OF FIRE OR ELECTRICAL SHOCK, DO NOT EXPOSE THIS PRODUCT TO WATER, RAIN OR MOISTURE. | |
| 4 | Triangle with lightning plus explanation as follows: DANGEROUS VOLTAGE: The lightning flash with arrowhead symbol within the equilateral triangle is intended to alert the user to the presence of uninsulated dangerous voltage within the product's enclosure that may be of sufficient magnitude to constitute a risk of electric shock to persons. |
| ! | Triangle with exclamation point plus explanation as follows: ATTENTION: The exclamation point within the equilateral triangle is intended to alert the user to the presence of important operating and maintenance (servicing) instructions in the literature accompanying this product. |

To reduce the risk of electric shock do not use this plug with an extension cord or receptacle.
SAFETY INSTRUCTIONS
Read instructions - All the safety and operating instructions should be read before the product is operated.
Retain instructions - The safety and operating instructions should be retained for future reference.
- Heed warnings - All warnings on the product and in the operating instructions should be adhered to.
- Follow instructions - All operating and user instructions should be followed.
- Cleaning - Unplug the product from the wall outlet before cleaning. Do not use liquid cleaners or aerosol cleaners. Use a damp cloth for cleaning.
- Attachments - Do not use attachments not recommended by the product manufacturer as they may cause hazards.
- Water and moisture - Do not use the product near water, for example near a bathtub, wash bowl, kitchen sink, or laundry tub, in wet basement, or near a swimming pool, or any other similar location.
- Accessories - Do not place this product on an unstable cart, stand, tripod, bracket or table. The product may fail, causing serious injury to a child or adult and serious damage to the product. Use only with a cart, stand, tripod, bracket or table recommended by the manufacturer or sold with the product. Any mounting of the product should be with an accessory recommended by the manufacturer.
- Any product and cart combination should be moved with care; quick stops, excessive force and uneven surface may cause the product and cart combination to overturn.
- Ventilation - Slots and openings in the cabinet are provided for ventilation and to ensure reliable operation of the product and to protect it from overheating. These openings must not be blocked or covered. The openings should never be blocked by placing the product on a bed, sofa, rug, or other similar surface. This product should not be placed in a built-in structure such as a bookcase or rack unless proper ventilation is provided or the manufacturer's instructions have been adhered to.
- Power sources - This product should be operated only from the type of power source indicated on the marking label. If you are not sure of the type of power supply to your home, consult your product dealer or local power company. For products intended to operate from battery power, or other sources, refer to the operating instructions.
- Power cord protection - Power supply cords should be routed so that they are not likely to be walked on or pinched by items placed upon or against them, paying particular attention lo cord at plugs, convenience
receptacles and the point where they exit from the product.
- Protective attachment plug - The product is equipped with an attachment plug having overload protection. This is a safety feature. See Instruction
- Manual for replacement or resetting or protective device. If replacement of the plug is required, be sure the service technician has used a replacement plug specified by the manufacturer that has the same overload protection as the original plug
- Outdoor Antenna Grounding - If an outside antenna or cable system is connected to the product, be sure the antenna or cable system is grounded so as to provide some protection against voltage surges and built-up static charges.
- Lightning - For added protection for this product during a lightning storm or when it is left unattended and unused for long period of time, unplug it from the wall outlet and disconnect the antenna or cable system. This will prevent damage to the product due to lightning and power-line surges.
- Power lines - An outside antenna system should not be located in the vicinity of overhead power lines or other electric light or power circuits, or where it can fall into such power lines or circuits. When installing an outside antenna system, extreme care should be taken to keep from touching such power lines or circuits, as contact with them might be fatal.
- Overloading -Do not overload wall outlets, extension cords, or integral convenience receptacles as this can result in a risk of fire or electric shock.
- Object and liquid entry - Never push objects of any kind into this product through openings as they may touch dangerous voltage points or short-out parts that could result in a fire or electric shock. Never spill liquid of any kind on the product.
- Servicing - Do not attempt to service this product yourself as opening or removing covers may expose you to dangerous voltage or other hazards.
Refer all servicing lo qualified service personnel. - Damage requiring service - Unplug this product from the wall outlet and refer servicing to qualified service personnel under the following conditions:
a. When the power supply cord or plug is damaged.
b. If liquid has been spilled or objects have fallen into the product,
c. If the product has been exposed to rain or water,
d. If the product is not operating normally by following the operating instructions. Adjust only those controls that are covered by the operating instructions as an improper adjustment of other controls may result in damage and will often require extensive work by a
qualified technician to restore the product to its normal operation. e. If the product has been dropped or damaged in any way.
- When the product exhibits a distinct change in performance this indicates a need for service.
- Replacement parts - When replacement parts are required, be sure the service technician has used replacement parts specified by the manufacturer or have the same characteristics as the original part. Unauthorized substitutions may result in fire, electric shock, or other hazards.
- Safety check - Upon completion of any service or repairs to this product, ask the service technician to perform safely checks to determine that the product is in proper operating condition.
- Heat - The product should be situated away from heat sources such as radiators, heat registers, stoves, or other products (including amplifiers) that produce heat.
OVERVIEW
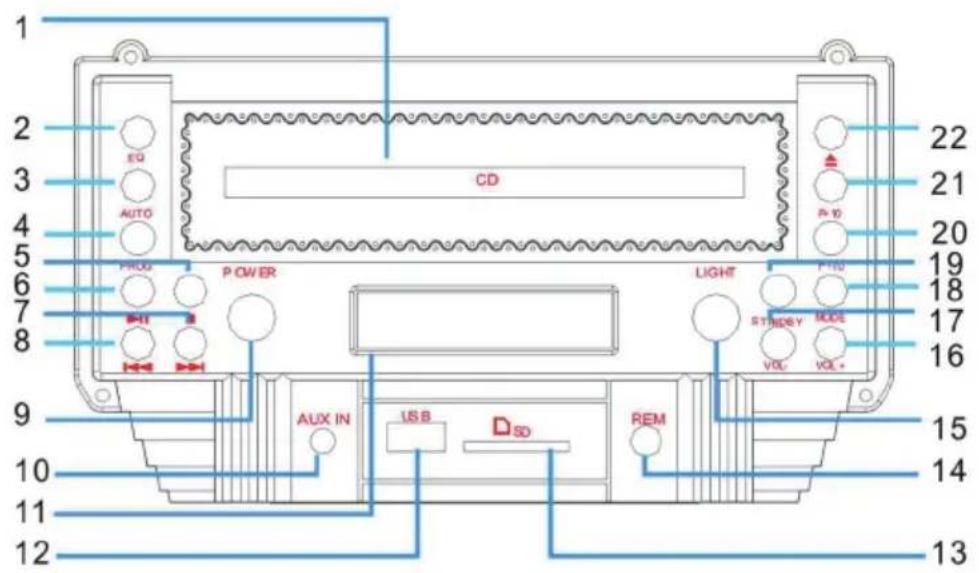
1 CD tray
2 EQ (voice patterns)
3 AUTO (automatic search radio program)
4 PROG(programming)
5 (STOP)
6 II (PLAY/PAUSE)
7 (NEXT/Fast forward)
8 (BACK/Fast rewind)
9 POWER: power switch
10 AUX input socket
11 Display
12 USB input socket
13 SD input socket
14 Remote control receiving window
15 LED lamp power switch
16 VOL+ (Increase the volume
17 VOL-(Reduce the volume
18 MODE
19 STANDBY
20 F-10( back 10 previous tracks)
21 F+10 (Increase the volume
22 OPEN/CLOSE
OPERATION
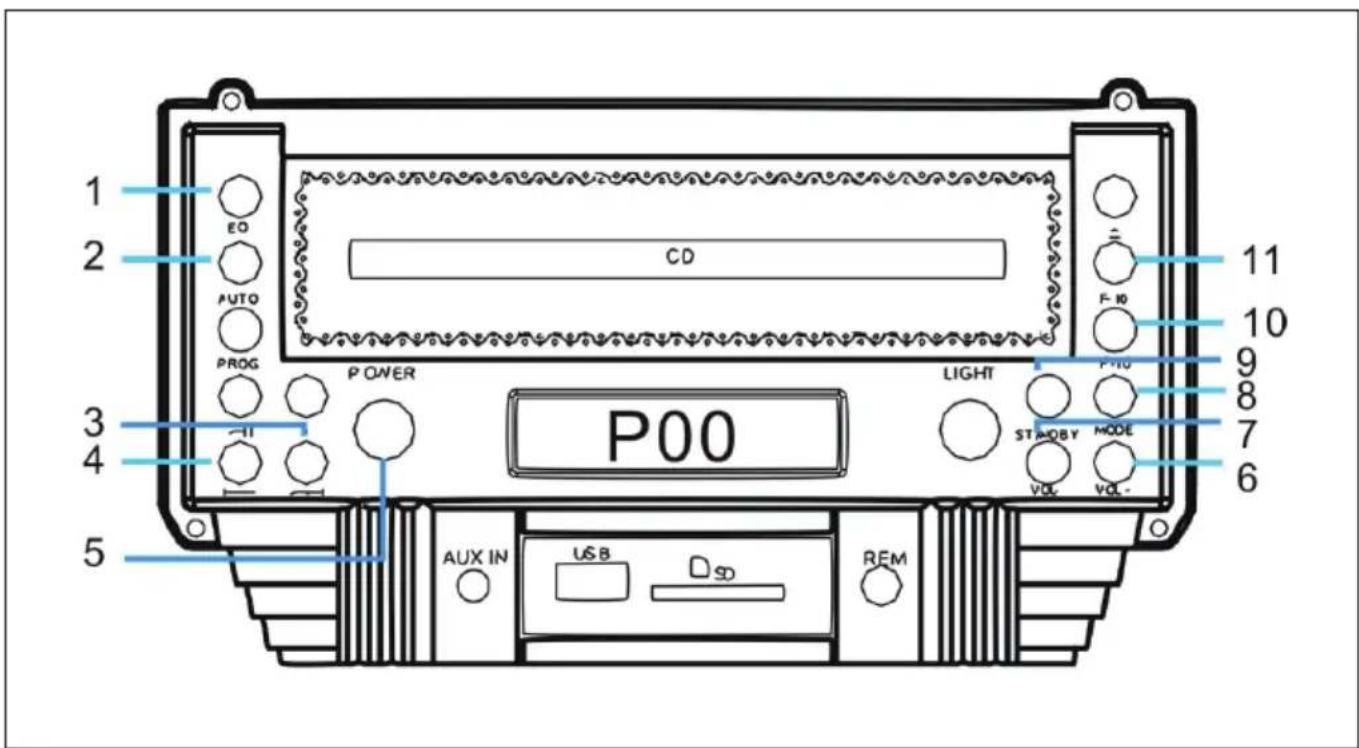
| POWER | To turn the unit off, simply press the "STANDBY" button (No. 19 on the control panel diagram) to set the Jukebox to standby. If the "POWER" button (No. 9 on the control panel diagram) is used to turn the Jukebox off, it will erase the time setting and the above process will need to be repeated in order to reset the correct time the next time it is turned on. |
| Standby | Press the standby button and enter FM radio mode. |
| MODE | (CDMP3/USB/SD/BT/AUX/RADIO MODE Selected button) change playback mode between CDMP3, USB, SD, BT, AUX or RADIO. |
| ▲ | OPEN/CLOSE: Press in CD mode to make the CD door open or close. |
| II | Press to play or pause a track. |
| « | PRV/F.B(Back): press to play the previous track. |
| » | Nex/f.f(Next): press to play the next track. |
| ■ | Stop: press to stop a track. Press the play button to re-start music playback. |
| F-10 | Press to go back 10 previous tracks. |
| F+10 | Press to go forwards 10 tracks. |
| VOL+/- | Press to control the sound level |
| EQ | Press to change the equalizer setting. The equalizer settings preloaded on the Jukebox are Flat (FLA), Rock (ROC), Classical (CLA), Pop (POP), and Jazz (JAZ). |
| PROG | PROG (Program): Allows you to program only particular songs of your choice to play back from your music source. Further info on this function on page 6-7. |
| LIGHT | LIGHT:The power rotaion power will turn the light on or off. |
| SETTING THE CORRECT TIME. | |
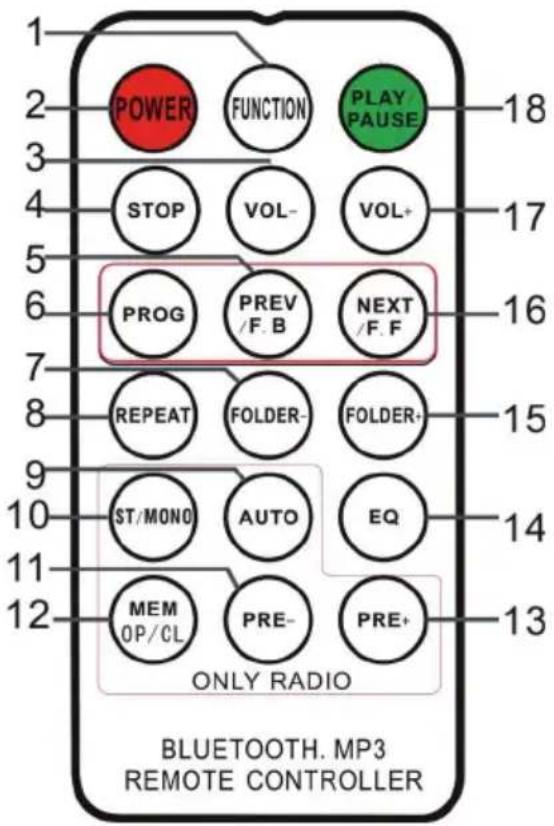
Remote control
-
Function: To select between the different functions such as the FM tuner, CD player, USB input, SD input, BT and Phonograph.
-
Power: the POWER button on the remote control diagram to exit standby mode and enter FM Radio Mode.
-
VOL - : reduce voice, press the button repeatedly or press once and hold down until you reach the desired volume level.
-
Stop : press to stop a track.
-
PREV/F.R: fast back: press to go to the previous track or rewind back through a track. You can then press the play button to start playback.
-
Program: Allows you to program only particular songs of your choice to play back from your music source. (Further info on this function below).
a. While playing back from a music source, press the stop button.
b. Press the program button to enter the program mode. The word PROG will flash in the bottom left corner of the display screen. A position number will also flash on the screen (eg: p01).
c. Press the next or back buttons to select which track you want to program into position. When you have made your selection, press the program button to save it.
d. You can then repeat the same steps to fill in more positions.
e. When done, press play to begin your music playback. You can do this at any stage once you have programmed the amount of tracks you want.
f. At any stage during the programming process you can press stop to cancel.
g. 'FUL' will display on the LCD screen when the Max amount of memory location have had been filled.
- Folder-: Press to skip to the first track in the previous folder. If theJukebox is in random ("RAN") mode the folder skipping function will be disabled.
- Repeat: Press to replay one particular song. Press the button once repeating ONE song only, press the button twice repeating ALL the songs, press the button three times repeated RANDOM play.
- Auto: Press the Radio Auto to search and save stations
- ST/Mono: Stereo / Mono Selection in Radio (where available).
- PRE-: To play back previously stored radio stations.
- MEM-OP/CL: (1) Tune the radio to the desired station the jukebox has a 20 station memory to store the user's favourite radio stations.
(2)CD mode for CD door to go out and close function.
Note: when programming to store radio stations, local radio programs must have a strong signal of 20 stations or more in order to store to 20 stations. Otherwise, only the number of stations that can be received can be stored.
- PRE+: To play back a next stored radio station.
- EQ: To change the Equalizer setting equalizer settings preloaded on to the Jukebox are Flat (FLA), Rock (ROC), Classical (CLA), Pop (POP), and Jazz (JAZ).
- Folder+: Press to skip to the first track in the next folder. If the Jukebox is in random ("RAN") mode the folder skipping function will be disabled.
- NEXT/F.F: Fast forward, press to go to the next track or fast forward through a track. You can then press the playback button to start playback.
- VOL +: Increase the volume, press the button repeatedly or press once and hold down until you reach the desired volume level.
- Play/pause button: Press to play or pause a track.
Setting the time
When the Jukebox enters standby mode the LCD display panel will illuminate and the time "00:00" will appear on the LCD display panel.
To set the time, simply press the "PROG" button on the control panel or remote control (No. 4 on the control panel diagram or No. 6 on the remote control diagram) and hold this button down for 3-5 seconds, until "12-H" is displayed on the screen ("12-H" indicates that the time will be set in 12 hour format). Then, press or you can choose between the 12 or 24 hour format. Once "12-H" is displayed on the screen press the "PROG" button again. The display will revert to "00:00" on the display, however, with the "12" flashing.
Use the or buttons on the control panel or on the remote control (No. 3 and 6 on the control panel diagram or remote control diagram), to select the correct hour (keep in mind it will be set it 12 hour time). Then press the "PROG" button to confirm. The second "00" will now flash.
Use the "▶" or "←" buttons to select the correct minutes. Rhen press the "PROG" button to lock this figure in.
BT Jukebox Instruction
Mode selection: Switch "BT" position, the CD panel LEDs will start flashing fast.
Working on "CD Panel": when the LCD display is flashing quickly, with a sound. BT pairing is initiated.
When the LCD display begins to flash slowly, mobile phone and BT pairing has been successful. Mobile phone display"juke box".Then it can connect with jukeboxes. Play the music.#
Notes
If the LCD display does not blink during pairing, you can turn off the "BT" button, then reopen and attempt pairing again.
a. :Press "PLAY" button, it will play. Press again, it will "PAUSE."
b. : Press, select the previous song;
c. : Press, select the next song;
d. Vol- : Volume - (you can press continuously or press all the time);
e. Vol+: Volume+ (you can press continuously or press all the time), but it will be alarmed when volume is maximum.
f. To end the pairing, press the MODE button to access other functions or turn off the BT connection from the BT device.
You can also use your BT device to control the volume.
RADIO FUNCTIONS
Keys relevant for the radio
| 1 Equalizer |
| 2 AUTO (Automatic station search) |
| 3 Forward / Fast forward |
| 4 Reverse / Fast rewind |
| 5 POWER (power switch) |
| 6 VOL+ (increase volume) |
| 7 VOL- (reduce volume) |
| 8 MODE |
| 9 STANDBY |
| 10 F+10 (10 titles back) |
| 11 F+10 (10 titles forward) |
General operation
- Press the ON/OFF button on the control panel to turn the power on. The appliance automatically switches to standby mode.
- Press the ON/OFF button on the control panel again to activate the appliance. The unit is automatically in FM radio mode.
- If the unit is not in radio mode, press the MODE button repeatedly until the display shows the desired mode:
| Mode Display | |
| FM Radio | P00 |
| CD | / nod |
| USB | USB |
| SD | Sd |
| BT | bBLUE |
| AUX AUX |
Search radio stations
Note: The built-in station memory can store up to 20 stations. However, the frequency of the station is not displayed, only the memory location of the station.
- When you use the radio for the first time, press the ON/OFF button on the control panel to turn on the unit. The unit will automatically go into standby mode.
- Press the ON/OFF button on the control panel again to activate the unit. The unit is automatically in FM radio mode. If the unit is not in radio mode, press the MODE button repeatedly and select FM mode. The display will show [P00] and a signal will sound from the speakers.
Option 1: Automatic search and save
- Press the AUTO key to perform an automatic search from 87.5 MHz upwards. The first 20 stations found are stored in memory and marked as [P01] to [P20].
- Press the PRE- or PRE+ keys to navigate through all stored stations. The LCD display will show [SCAN] and [P01] to [P20].
Option 2: Automatic search without storing
- Press and hold the button to find radio stations with strong reception. This search function does NOT automatically save the found stations and does NOT search for the first found radio station.
- Press the button briefly and repeatedly. The FM tuner searches the FM band in steps of 0.05 MHz up or down each time the button is pressed.
Option 3: Manual search and save
Press and hold the button to find radio stations with strong reception. Then press the MEM button to store the found station in one of the program locations [P01] to [P20]. You can select the desired program location by pressing the F+10/F-10 button. Confirm your selection by pressing the MEM key again.
Important notes on the radio function
- A maximum of 20 stations with a strong transmitter signal can be stored.
- All stored settings are deleted when the unit is disconnected from the mains.
CD OPERATION
a. Press the MODE button until the LED display indicates "- - - -". The display will then show the number of songs and then begin to start playback.
b. Press to select your desired song. Press fast forward, press to fast forward to fast forward through a track. You can then press the playback button to start playback.
c. To program, press the STOP button to stop playback. Then press PROG to enter programming mode. The LED display will flash and indicate "P 01". Select the song that you want to program and then press PROG again. Press "Play/Pause" to stop programming and start to play back the programmed songs. This unit can program up to 20 songs.
USB/SD OPERATION
a. Press the "Mode" button until the LED display indicates "USB or SD". The display will then show number of folders, then number of songs and start playback.
b. Press "▶or Prev" or "F+/-10" to select your desired song.
c. Press REPEAT once on the remote control to repeat one song. The REP indication in the top left corner on the LED display will flash. Press the "REP" display "REP FOLDER" to repeat the album. Press REPEAT one more time to repeat all songs in the track and the REP indication in the top left corner on the LED display will appear. Press REP again to cancel repeat function.
d. To play songs randomly, press the REPEAT button until the LED display "RAN" on the bottom of the display.
e. For programming, press "STOP" button to stop playback. Press "PROG" to enter programming mode. The LED display will flash and indicate "P 01". Select the song that you want to program and then press "PROG" again. Press "Play/Pause" to stop programming and start to playback the programmed songs. This unit can program up to 20 songs.
Note: when programming to store radio stations, local radio programs must have a strong signal of 20 stations or more in order to store to 20 stations. Otherwise, only the number of stations that can be received can be stored.
AUX IN
Listening to AUX-IN
- Insert the provided Aux-in cable into the Aux-in Jack, the unit will immediately goes into Aux-in mode. The LED display will indicate "AUX".
- Use the controls on your Aux-in audio source to select your desired songs.
Light Mode
Press the "LIGHT" ON/OFF button to open the LED power supply in the product on the back of the panel colour switch. Switch the select to "PLAY" and the colour will change gradually. Switch the select to "HOLD" to lock the current LED colour.
PLAYABLE FILE REQUIREMENTS
MP3/WMA Music File requirements.
MP3/WMA file compatibility with this unit is limited as follows:
Frequency: within 32 to 48kHz
- Bit rate: within 32 to 320 kbps (MP3), 40 to 192kbs (WMA).
Maximum files: up to 999.
Maximum folders: up to 99.
- File extensions:.mp3 or .wma.
Compatible USB Devices Or SD Cards
- USB Flash Drive: supports USB2.0 or USB1.1.
- File System: FAT16/32 (NTFS file system is not supported).
Maximum files: up to 999. - External HDD, card readers, and locked devices are not supported.
TROUBLESHOOTING
The following checks will assist in the correction of most problems which you may encounter with your set. Before going through the checklist below, first check the following points.
Symptom Possible Causes / Remedies
| Radio reception | |
| No radio reception. The MODE selector has not been set to the correct position. Press the ➔ and ➔ buttonsto find a radio station. Switch the AUX IN jack to "OFF". Press "VOL+" to turn up the volume. | |
| CD player operation | |
| Disc does not play Or sound skips | Reload the disc with the label side up. |
| Clean the disc. | |
| Sound skips Change the installation location. Press the ON/OFF button. | |
| Unit is not working. Press the STOP button and then program the tracks. | |
| General | |
| Programmed disc play will not function. | The AC power cord is not connected to an AC wall outlet. Check that the power cord is connected firmly. Push the power button from the “OFF” position to the “ON” position. |
| Severe hum or noise. The TV | or VCR is too close to the stereo system. Separate from the TV or VCR. |
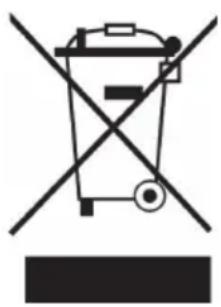
If there is a legal regulation for the disposal of electrical and electronic devices in your country, this symbol on the product or on the packaging indicates that this product must not be disposed of with household waste. Instead, it must be taken to a collection point for the recycling of electrical and electronic equipment. By disposing of it in accordance with the rules, you are protecting the environment and the health of your fellow human beings from negative consequences. For information about the recycling and disposal of this product, please contact your local authority or your household waste disposal service.
This product contains batteries. If there is a legal regulation for the disposal of batteries in your country, the batteries must not be disposed of with household waste. Find out about local regulations for disposing of batteries. By disposing of them in accordance with the rules, you are protecting the environment and the health of your fellow human beings from negative consequences.
DECLARATION OF CONFORMITY
CE UK CA
Manufacturer:
Chal-Tec GmbH, Wallstrasse 16, 10179 Berlin, Germany.
Importer for Great Britain:
Berlin Brands Group UK Ltd PO Box 1145
Oxford, OX1 9UW
United Kingdom
Hereby, Chal-Tec GmbH declares that the radio equipment type Kentucky is in compliance with Directive 2014/53/EU. The full text of the EU declaration of conformity is available at the following internet address: use.berlin/10033772
For Great Britain: Hereby, Chal-Tec GmbH declares that the radio equipment type Kentucky is in compliance with the relevant statutory requirements. The full text of the declaration of conformity is available at the following internet address: use.berlin/10033772
Chere cliente, cher client,
The lighting flash and arrow head within the triangle is warning sign alerting you of dangerous voltage inside the product
CAUTION
RISK OF ELECTRIC SHOCK DO NOT OPEN
CAUTION:TO REDUCE THE RISK OF ELECTRIC SHOCK DO NOT REMOVE COVER (OR BACK).NO USER SERVICIABLE PARTS INSIDE.REFER SERVICING TO QUALIFIED SERVICE PERSONNEL.

The exclamation point within the triangle is a warning sign alerting you of important instructions accompanying the product
ATTENTOIN: N'OUVREZ PAS LE BOITIER POUR EVITER UN CHOC ÉLECTRIQUE ET DE SÉRIEUSES BLESSURES. L'APPAREIL NE CONTIENT AUCUNE PIECE À ENTRETENIR PAR L'UTILISATEUR. ADRESSEZ-VOUS EXCLUSIVÉMENT À DES PROFESSIONNELS. MISE EN GARDE: POUR RÉDUIRE LES RISQUES D'INCENDIE OU DE CHOC ÉLECTRIQUE, N'EXPOSEZ JAMAIS L'APPAREIL À L'EAU, LA PLUIE OU L'HUMIDITE.
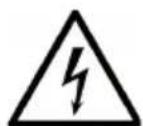
The lighting flash and arrow head within the triangle is warning sign alerting you of dangerous voltage inside the product
CAUTION
RISK OF ELECTRIC SHOCK DO NOT OPEN
CAUTION:TO REDUCE THE RISK OF ELECTRIC SHOCK DO NOT REMOVE COVER (OR BACK).NO USER SERVICIABLE PARTS INSIDE.REFER SERVICING TO QUALIFIED SERVICE PERSONNEL.

The exclamation point within the triangle is a warning sign alerting you of important instructions accompanying the product
PRECAUCION: NO ABRA LA CARCASA PARA EVITAR DESCARGAS ELECTRICAS Y LESIONES GRAVES. EN EL INTERIOR NO HAY COMPONENTES A MANTENER POR EL CLIENTE. PONGASE EN CONTACTO UNICAMENTE CON ESPECIALISTAS CUALIFICADOS. ADVERTENCIA. PARA REDUCIR EL RIESGO DE INCENDIO O DESCARGA ELECTRICA, NO EXPONGOA EL APARATO AL AGUA, LA LLUVIA O LA HUMEDAD.

Illuminatione led 92
The lighting flash and arrow head within the triangle is warning sign alerting you of dangerous voltage inside the product
CAUTION
RISK OF ELECTRIC SHOCK DO NOT OPEN
CAUTION:TO REDUCE THE RISK OF ELECTRIC SHOCK DO NOT REMOVE COVER (OR BACK).NO USER SERVICIABLE PARTS INSIDE.REFER SERVICING TO QUALIFIED SERVICE PERSONNEL.

The exclamation point within the triangle is a warning sign alerting you of important instructions accompanying the product
ATTENZIONE: NON APRIRE L'ALLOGGIAMENTO, IN MODO DA EVITARE FOLGORAZIONI E SERIES LESIONI. ALL'INTERNO NON CI SONO COMPONENTI CHE NECESITANO DELLA MANUTENZIONE DA PARTE DELL'UTENTE. RIVOLGERSI ESCLUSIVAMENTE A TECHNICI QUALIFICATI. AVERTIMENO: PER RIDURRE IL RISCHIO DI INCENDI E FOLGORAZIONI, NON ESPORRE IL DISPOSITIVO A PIOGGIA, ACQUA O UMIDITA.