Pureness - Media player Auna - Free user manual and instructions
Find the device manual for free Pureness Auna in PDF.
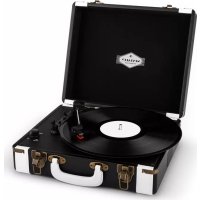
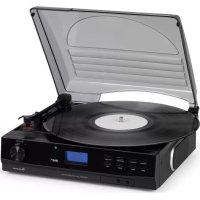
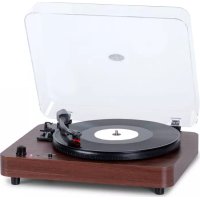
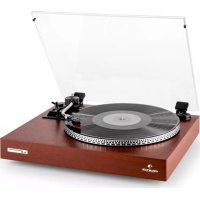
| Product Type | Vinyl turntable with playback and recording functions |
| Brand | Auna |
| Model | Pureness |
| Main Functions | Playback of 33 1/3 and 45 RPM vinyl records, PC recording via USB, RCA line output, switchable built-in preamplifier |
| Power Supply | Mains adapter (DC plug) with power cord |
| Playback Speeds | 33 1/3 and 45 RPM (adjustable) |
| Counterweight Adjustment | Adjustable tracking force (recommended 4-6 g) |
| Auto Stop | Yes, can be enabled/disabled |
| USB Port | Yes, for PC recording |
| Audio Output | Line Out RCA (stereo), switchable Phono/Line |
| Phono/Line Switch | Yes, allows using built-in preamp (EQ ON) or direct phono signal (Phono Thru) |
| Safety Instructions | Do not expose to water or humidity, do not open, unplug before cleaning, etc. |
| Maintenance | Clean with a soft, dry cloth, do not use abrasive products |
| Spare Parts | Replacement stylus and cartridge (reference not specified) |
| Recycling | Compliant with WEEE directive – do not dispose of with household waste |
| PC Recording | Requires AUDACITY software (free) and a USB cable |
Frequently Asked Questions - Pureness Auna
User questions about Pureness Auna
0 question about this device. Answer the ones you know or ask your own.
Ask a new question about this device
Download the instructions for your Media player in PDF format for free! Find your manual Pureness - Auna and take your electronic device back in hand. On this page are published all the documents necessary for the use of your device. Pureness by Auna.
USER MANUAL Pureness Auna
INHALT
natural_image
Simple line drawing of a plug with a cable and terminal connector (no text or symbols)flowchart
graph TD
    A["Step 1: Rotation of cylindrical component"] --> B["Step 2: Rotation of cylindrical component"]
    B --> C["Step 3: Rotation of cylindrical component"]
    C --> D["Step 4: Rotation of cylindrical component"]
natural_image
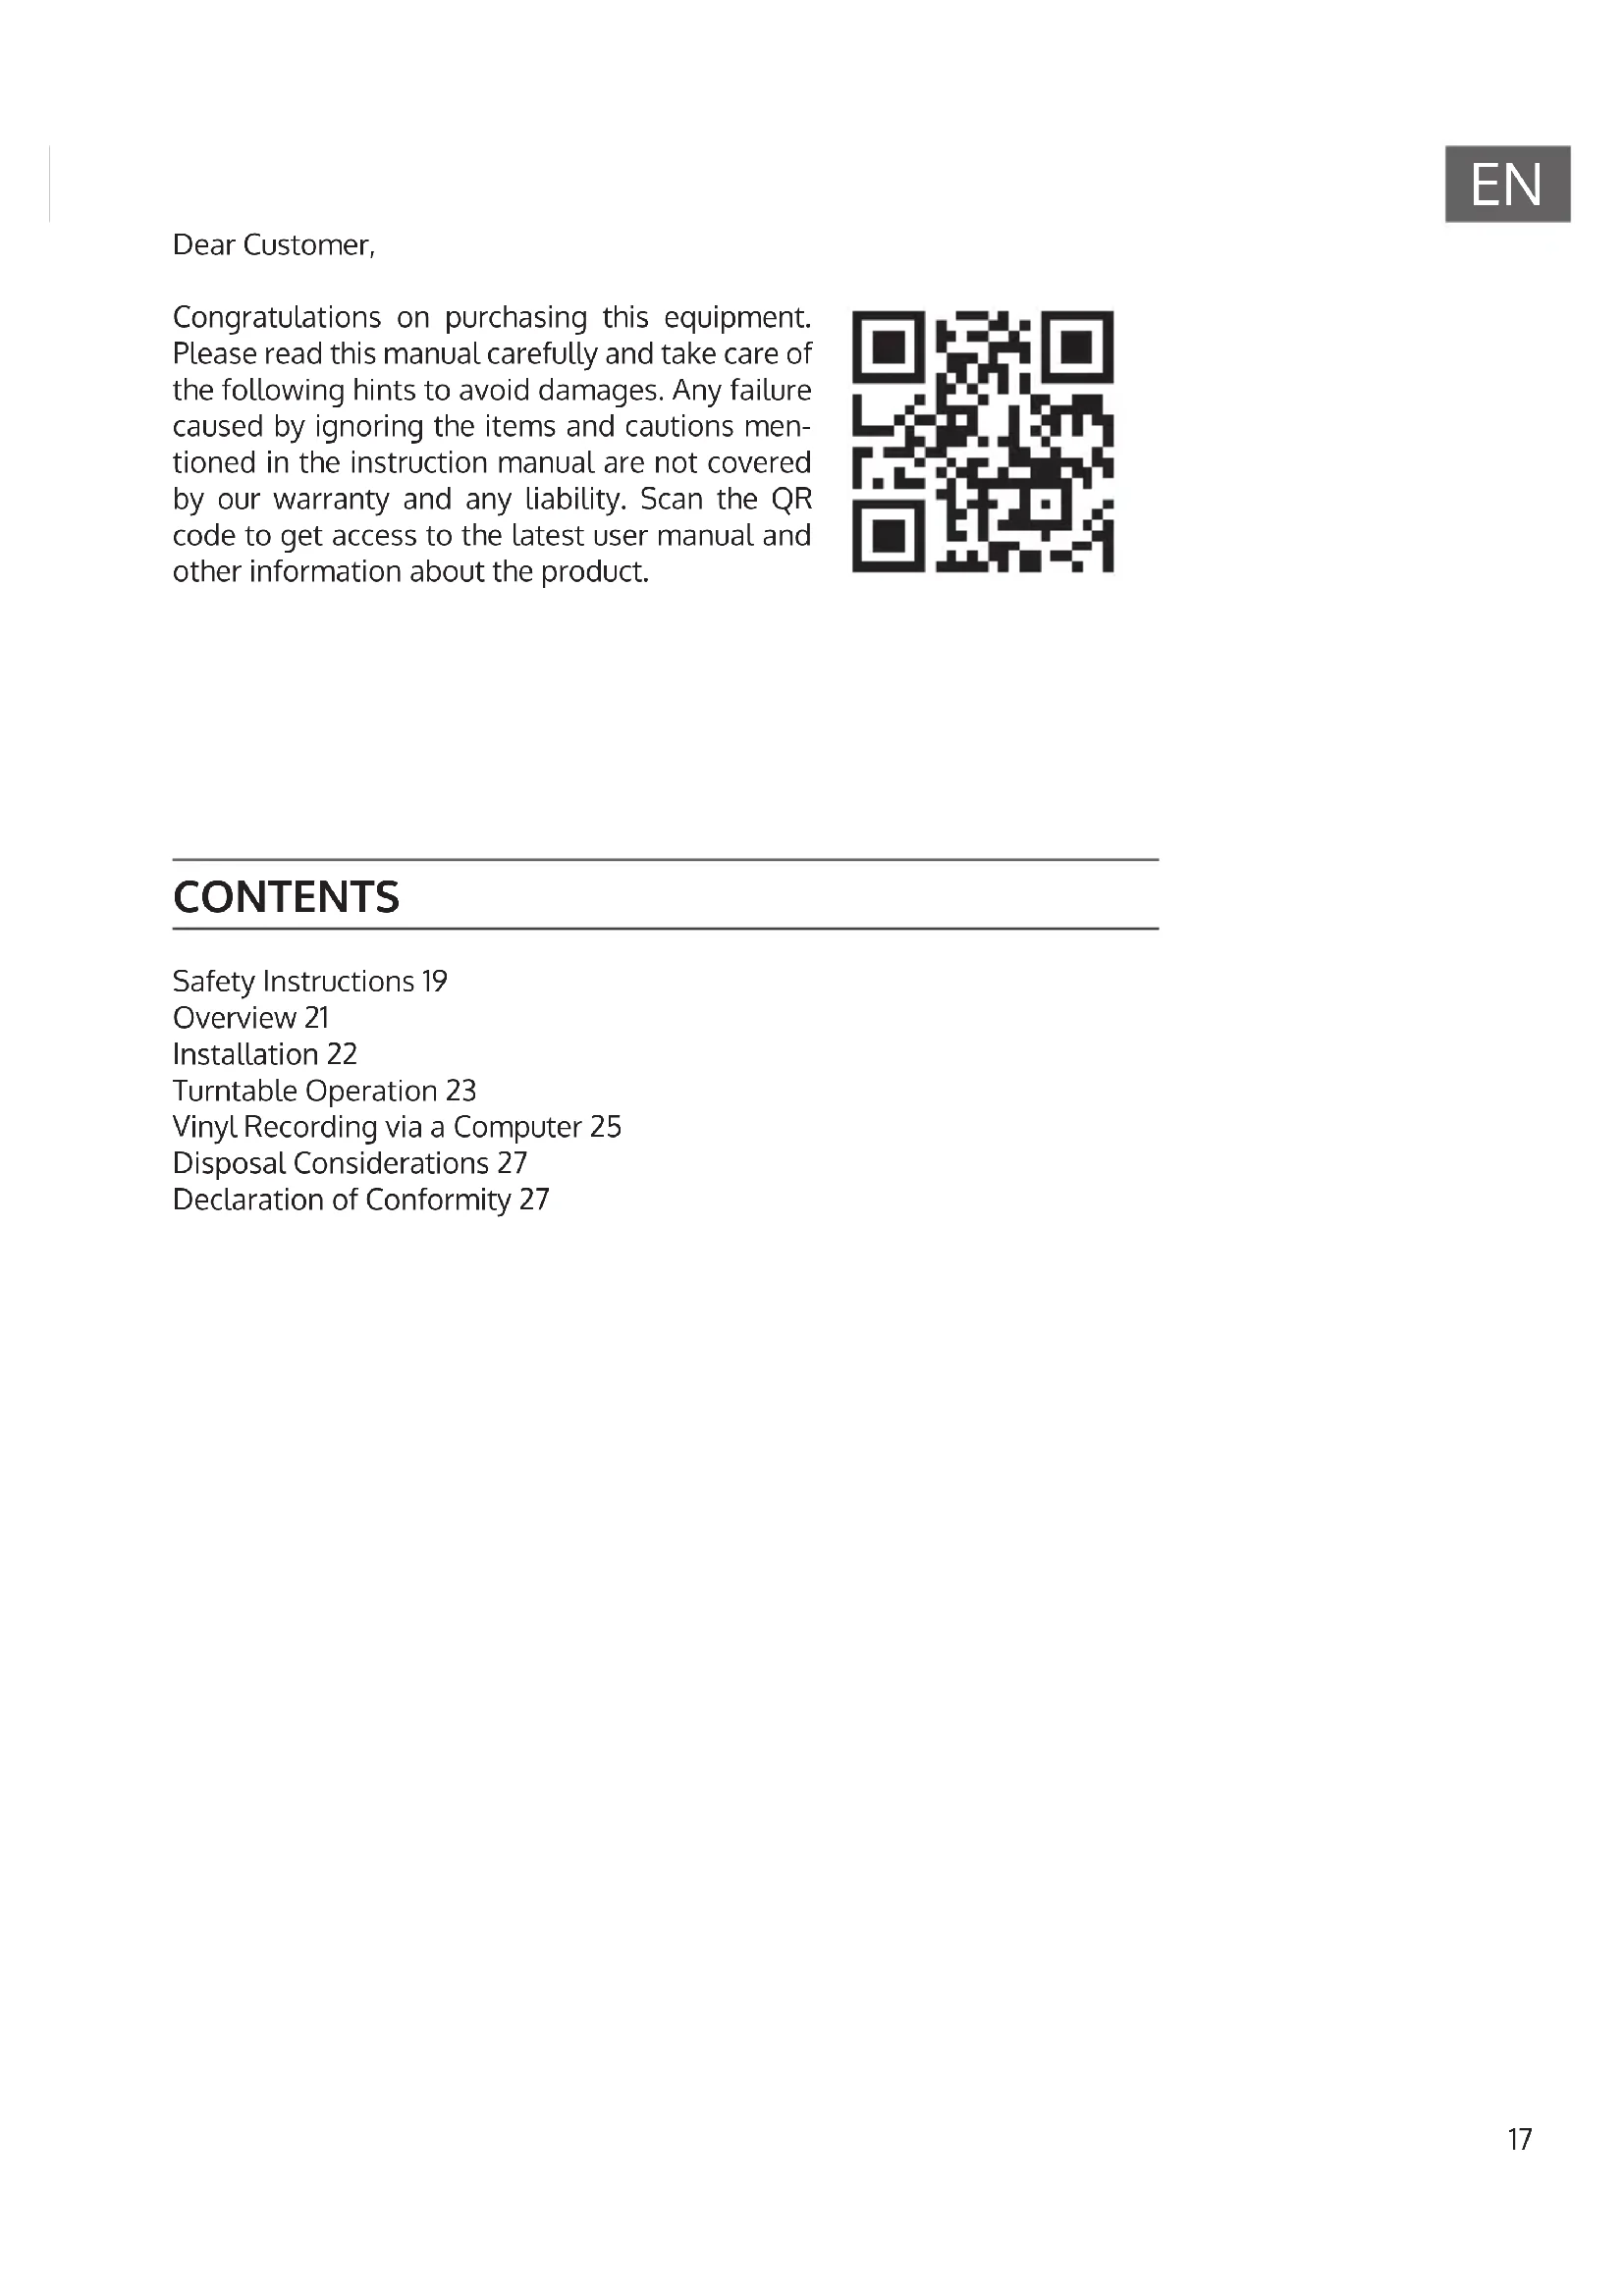
Symbol of a trash bin crossed with a diagonal line, representing no waste or discharge (no text or labels)Congratulations on purchasing this equipment. Please read this manual carefully and take care of the following hints to avoid damages. Any failure caused by ignoring the items and cautions mentioned in the instruction manual are not covered by our warranty and any liability. Scan the QR code to get access to the latest user manual and other information about the product.

CONTENTS
Safety Instructions 19
Overview 21
Installation 22
Turntable Operation 23
Vinyl Recording via a Computer 25
Disposal Considerations 27
Declaration of Conformity 27
WARNINGS
 | CAUTION |  |
| RISK OF ELECTRIC SHOCKDO NOT OPEN | ||
| CAUTION: TO REDUCE THE RISK OF ELECTRIC SHOCK AND SERIOUS PERSONAL INJURY, DO NOT REMOVE ANY COVER. NO USER-SERVICABLE PARTS INSIDE. REFER SERVICING TO QUALIFIED SERVICE PERSONNEL ONLY.WARNING. TO REDUCE THE RISK OF FIRE OR ELECTRICAL SHOCK, DO NOT EXPOSE THIS PRODUCT TO WATER, RAIN OR MOISTURE. | ||
 | Triangle with lightning plus explanation as follows:DANGEROUS VOLTAGE: The lightning flash with arrowhead symbol within the equilateral triangle is intended to alert the user to the presence of uninsulated dangerous voltage within the product's enclosure that may be of sufficient magnitude to constitute a risk of electric shock to persons. |
 | Triangle with exclamation point plus explanation as follows:ATTENTION: The exclamation point within the equilateral triangle is intended to alert the user to the presence of important operating and maintenance (servicing) instructions in the literature accompanying this product. |

To reduce the risk of electric shock do not use this plug with an extension cord or receptacle.
SAFETY INSTRUCTIONS
Read these instructions. All uses guidelines must be read before using the device. Keep the instructions for future use.
- Attention, use and security guidelines must be respected.
- The device must not be used near water or be put in contact with moisture.
- Make sure has no liquid is spilled on device and device openings.
- Move device carefully, avoid shocks.
- Do not block the breakdown of the device outputs.
- Do not place the device near from a heat source (e.g. radiator). Do not expose it to the Sun.
- Plug the device as indicate on this information form.
- This device has a connection with overload protection. Replacement should only be done by an experienced technician or the device manufacturer.
- For cleaning the device, please follow the recommendations of the notice.
- The power cord should be unplugged when not using for a long period of time.
• Device shall be repaired by a qualified person when:
a. the power cord is damaged,
b. objects have fallen into the apparatus or a liquid has been spilled into device,
c. device was exposes to the rain,
d. device does not work correctly without notable exterior change,
e. device is broken.
- The user shall not try to maintain device beyond that which is described in this information form.
- The apparatus shall not be exposed to dripping or splashing and that no objects filled with liquids, such as vases, shall be placed on apparatus.
- To be completely disconnect the power input, the mains plug of apparatus shall be disconnected from the mains." as the disconnect devices is the mains plug of apparatus.
- The mains plug of apparatus should not be obstructed OR should be easily accessed during intended use.
- Battery shall not be exposed to excessive heat such as sunshine, fire or the like.
- Excessive sound pressure form earphones and headphones can cause hearing loss.
- Minimum distance (8 cm) around the apparatus for sufficient ventilations;
- The ventilation should not be impeded by covering the ventilation opening with items such as newspaper, table-cloths, curtain etc;
- No naked flame sources such as lighted candles should be placed on the apparatus;
- Attention should be drawn to the environmental aspects of battery disposal;
- The use of apparatus in moderate climates.
- Danger of explosion if battery is incorrectly replaced.
- Replace only with the same or equivalent type.
- The main plug shall remain readily operable.
OVERVIEW
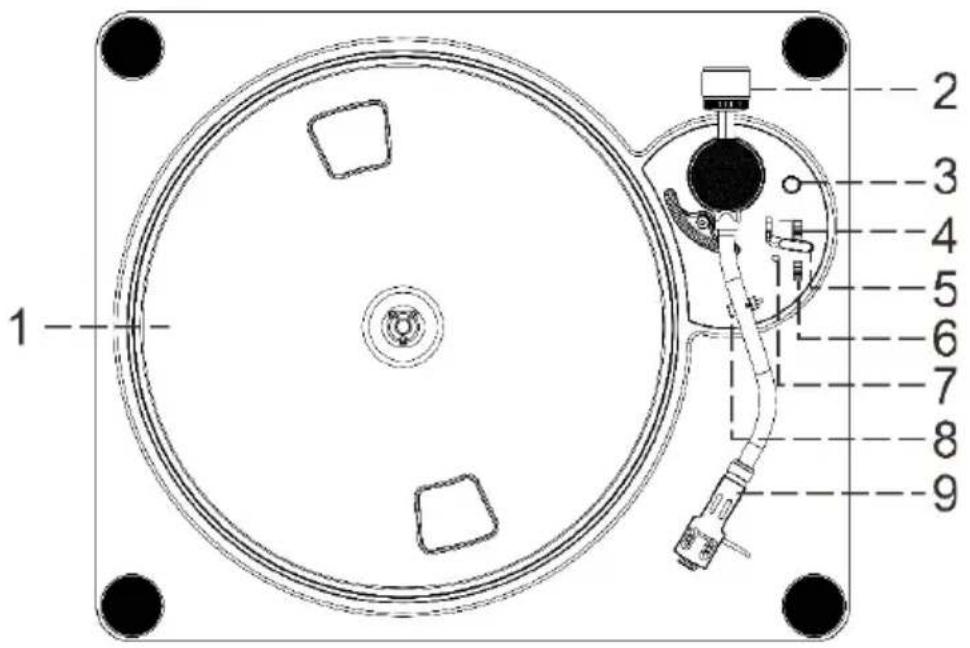
1 Turntable platter
2 Counter weight
3 Pitch adjustment
4 Turntable speed selector
5 Cue lever
6 Auto stop on/off switch
7 Power LED indicator
8 Tone arm lock
9 Cartridge head shell
natural_image
Simple line drawing of a plug with a cable and terminal connector (no text or symbols)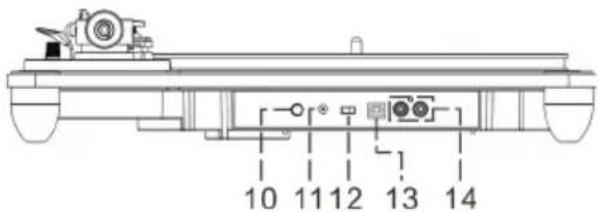
10 Power On/Standby button
11 DC input jack
12 Phono / Line
13 USB Port for Computer Connection
14 Line Out socket (RCA)
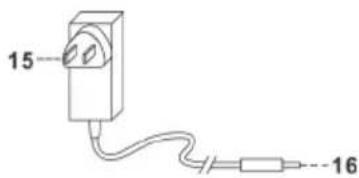
15 AC/DCadaptor
16 DCplug
INSTALLATION
Precautions
- Unpack all parts and remove protective material.
- Do not connect the unit to the mains before checking the mains voltage and before all other connections have been made.
- Do not cover any vents and make sure that there is a space of several centimeters around the unit for ventilation.
Installation of counter weight
- Slide in the counter weight (2) completely into the rear of the tone arm until it reaches the end. Turn it clockwise until it click with pit inside.
- Twist the counter weightclockwise & backwarduntil it reach the whiteinner line as below figure.
- Twist the counter marking until it reach position "0". The pressure at the position "0" at the white line is 3 grams.
- Rotate the counter weight anti-clockwise and inward for a whole turn, ie when reaching "0" again, it will increase for 1 gram. It means that the press will reach 4 grams after turning for one turn inward, 5 grams after turning for two turns inward.
- To reduce the press, rotate the counter weight clockwise and backward for a whole turn to reduce the press for 1 gram.
- Keep rotating the counter until it reaches the appropriate working pressure.

flowchart
graph TD
    A["Step 1: Rotation of cylindrical component"] --> B["Step 2: Rotation of cylindrical component"]
    B --> C["Step 3: Rotation of cylindrical component"]
    C --> D["Step 4: Rotation of cylindrical component"]
Remark : the working pressure of the provided stylus is from the range 4-6 grams. According to the cartridge manufacturer. All stylus has its own working pressure and please refer to the specification respectively.
Connection
- Insert the DC plug (16) to the DC jack (11) of the main unit, then connect the AC/DC adaptor (15) to AC outlet.
- Please connect your turntable unit to your Hi-Fi / Amplifier system with speaker for music listening. It can be done by connecting the Line out
socket (14) to the auxiliary input jacks on your Hi-Fi / Amplifier system with RCA cables.
- You may select the Phono Thru (Phono Direct) / EQ ON (via Pre-amplifier) button (12).
If set the Phono Thru / EQ ON selector (12) at EQ ON position, the output signal will pass through the system's built-in pre-amplifier circuit. If set the selector (12) at Phono Thru, the output signal will come directly from the cartridge and without amplified.
- Press the Power On/Standby (10) button to low position and the Power LED Indicator (7) will be light up in red. Your system is now ready to play your music. Please refer to the Operations section of this Manual for details.
TURNTABLE OPERATION
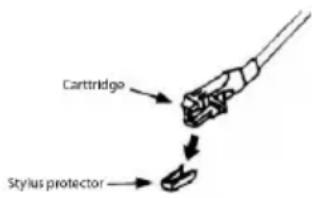
- Remove the stylus protector.
- Untie the cable holding the tone arm in place, and make sure to unlock the Tone Arm Lock (8) before operating the unit.
- It is recommended to set the Phono / Line selector (12) to Phono Thru.
-
The Auto Stop On/Off switch (6) is set in "ON" position.
-
Press the Power On/Standby (10) button to low position and the Power LED Indicator (7) will be light up in red.
- Set the speed selector (4) to the proper position depending on the record to be played.
- Place the record on the platter.
- Set the cue lever (5) to the up position and slowly move the Cartridge Head Shell (9) to the record side. The platter will start to rotate and position the tone arm over the desired position of the record.
- Pull down the cueing lever (5). The tone arm will come slowly on the recorder and start playback.
- At the end of record, the platter will automatically stop spinning. Lift the tone arm from the record and return it to the rest.
- To stop manually, lift the tone arm from the record and return it to the rest.
Remarks
- Some types of records may have an auto-stop area outside the preset limit, so the turntable may stop before the last track finishes. In this case, set the Auto Stop On/Off switch (6) to the "OFF" position. This allows the record to play to the end, but please note that it will not stop automatically. You must manually raise the tone arm and place it back in
the rest and then turn off the power to stop the turntable from spinning.
- Users should not change to a ceramic cartridge system, otherwise unit can't be connected anymore to an Aux-in of music-centre
Adjustments
Platter speed fine adjustment
- During playback of record, turn the Pitch Adjustment (3) to fine adjust the platter rotation speed.
- Turning clockwise (+) will increase the turning speed and anti-clockwise will slow down the speed.
- Turn the Pitch Adjustment until the output sound performance is up to your satisfaction
Tone arm stopping position alignment
The position of the tone arm complete playback and return to the rest station can be adjusted at the alignment screw (#15 for 30 cm vinyl; #16 for 17cm vinyl).
Line out connection
You can connect the system to your own Hi-Fi system by connecting the line out socket (14) to the auxiliary input socket with a RCA cable.
If set the Phono / Line selector (12) at EQ ON position, the output signal will pass through the system's built-in pre-amplifier circuit. If set the selector (12) at Phono Thru, the output signal will come directly from the cartridge and without amplified.
VINYL RECORDING VIA A COMPUTER
For example with Audacity
Before getting start, please install the "AUDACITY" recording software to your computer. Below is an example using a computer with Microsoft XP and the Audacity software installed. For other Windows OS or Mac OS, please visit Audacity website for details.http://audacity.sourceforge.net/
- Turn on your computer and allow it to boot fully. Turn the unit power ON, connect the USB port (10) from the unit to your computer via the USB cable provided. The unit connected to your PC will be recognised as a USB device.
- Open the "AUDACITY" program. Under the "EDIT" tab, select "PREFERENCES".
- 3) Click the "DEVICE" tab and then choose the "2-USBPnP Audio Device" at Recording and Playback device section
- Select Channels "2 (STEREO)" and then click "OK" to close preference setting window.
- Playback the phono to be recorded into the computer.
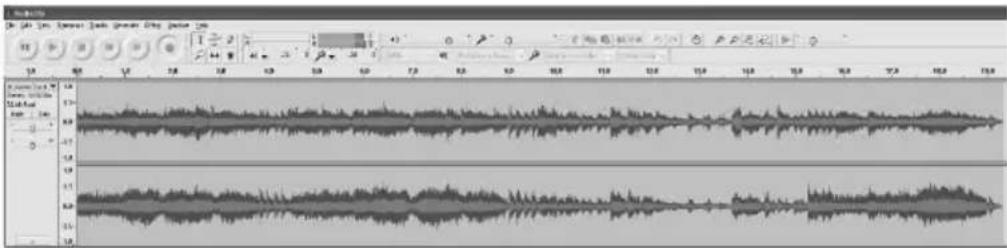
- Click the red Record button on the software control panel. You will see a waveform moving and can listen to the record playing through computer speakers.
- When you have finished the recording, click the yellowStop button on the software control panel.
- Now click "FILE" and choose to save your recording file.
- Click the greenPlay button to playback your finished recording or refer below simple explanation for operate Audacity.
10.
A. Use the Audacity control panel to record or listen the music you have recorded
- Click ● button to start recording.
- Click ◀ the button to skip to start;
- Click ▶ the button to skip to end;
- Click ▶ the button to play;
- Click II the button to pause;
- Click ■ the button to stop.

B. Click the record button to start recording, left and right tracks will show on your computer screen. If you cannot see the sound waves appear on the Interface when recording, adjust the Input volume bar.
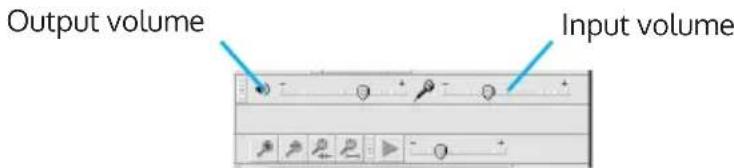
C. Adjust the input and output volume by sliding the Input and Output Volume bars.
NOTE: Free software (AUDACITY) licensed under the GNU general public license (GPL).
More information as well as open source code can be found on the provided CD or on the website at:http://audacity.sourceforge.net/
Listening and exporting to mp3
To listen to your digitized audio, you will need a third party application that can play wav files. You can also use any standard audio CD burning software to burn your wave files to an audio CD.
If you would like to save your vinyl recordings as MP3 files after recording them using AUDACITY, you will need to install the optional "LAME MP3 ENCODER" plug-in to the software provided on the CD. Once a file is in MP3 format it can be played on any MP3 compatible mobile digital device.
In AUDACITY, when you attempt to EXPORT AS MP3... for the first time after installing the lame MP3 encoder plug-in, you will be asked for the location of the plug-in file. Browse to the LAME MP3 PLUGIN FOLDER you copied the plug-in file to and select the file. Subsequently, audacity will remember the location of this file.
DISPOSAL CONSIDERATIONS

natural_image
Symbol of a trash bin crossed with a diagonal line, representing no waste or discharge (no text or labels)If there is a legal regulation for the disposal of electrical and electronic devices in your country, this symbol on the product or on the packaging indicates that this product must not be disposed of with household waste. Instead, it must be taken to a collection point for the recycling of electrical and electronic equipment. By disposing of it in accordance with the rules, you are protecting the environment and the health of your fellow human beings from negative consequences. For information about the recycling and disposal of this product, please contact your local authority or your household waste disposal service.
DECLARATION OF CONFORMITY
CE UK CA
Manufacturer:
Chal-Tec GmbH, Wallstrasse 16, 10179 Berlin, Germany.
Importer for Great Britain:
Berlin Brands Group UK Ltd
PO Box 1145
Oxford, OX1 9UW
United Kingdom
Hereby, Chal-Tec GmbH declares that the radio equipment type Pureness is in compliance with Directive 2014/53/EU. The full text of the EU declaration of conformity is available at the following internet address: use.berlin/10035078
For Great Britain: Hereby, Chal-Tec GmbH declares that the radio equipment type Pureness is in compliance with the relevant statutory requirements. The full text of the declaration of conformity is available at the following internet address: use.berlin/10035078
Chère cliente, cher client,
SOMMAIRE
natural_image
Simple line drawing of a plug with a cable and terminal connector (no text or symbols)
Installation du contrepoids
flowchart
graph TD
    A["Step 1: Rotation of cylindrical component"] --> B["Step 2: Rotation of cylindrical component"]
    B --> C["Step 3: Rotation of cylindrical component"]
    C --> D["Step 4: Rotation of cylindrical component"]
natural_image
Symbol of a trash bin crossed with a diagonal line, no text or numbers presentDÉCLARATION DE CONFORMITÉ

Fabricant :
Chal-Tec GmbH, Wallstraße 16, 10179 Berlin, Allemagne.
Berlin Brands Group UK Ltd
PO Box 1145
Oxford, OX1 9UW
United Kingdom
CONTENIDO
natural_image
Simple line drawing of a plug with a cable and terminal connector (no text or symbols)
flowchart
graph TD
    A["Step 1: Roll and expansion"] --> B["Step 2: Rotation and rotation"]
    B --> C["Step 3: Rotation and rotation"]
    C --> D["Step 4: Rotation and rotation"]
natural_image
Symbol of a trash bin crossed with a diagonal line, no text or numbers presentINDICE
natural_image
Simple line drawing of a plug with a cable and terminal connector (no text or symbols)
11 Entrada de DC
12 Phono / Line
13 Connessione USB
14 Collegamento Line Out
flowchart
graph TD
    A["Step 1: Roll and end"] --> B["Step 2: Rotation of cylindrical component"]
    B --> C["Step 3: Rotation of cylindrical component"]
    C --> D["Step 4: Rotation of cylindrical component"]
Volume in entrata
NOTA:
Software gratuito (AUDACITY) concesso in licenza con la GNU General Public License (GPL).
natural_image
Symbol of a trash bin crossed with a diagonal line, representing no waste or discharge (no text or labels)Berlin Brands Group UK Ltd
PO Box 1145
Oxford, OX1 9UW
United Kingdom