TT931 - Media player Auna - Free user manual and instructions
Find the device manual for free TT931 Auna in PDF.
User questions about TT931 Auna
0 question about this device. Answer the ones you know or ask your own.
Ask a new question about this device
Download the instructions for your Media player in PDF format for free! Find your manual TT931 - Auna and take your electronic device back in hand. On this page are published all the documents necessary for the use of your device. TT931 by Auna.
USER MANUAL TT931 Auna
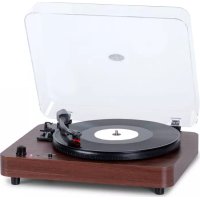
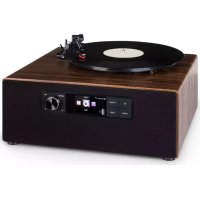
natural_image
Vintage wooden and black flatbed tea receiver with clear glass cover and metal grille (no visible text or symbols)flowchart
graph TD
    A["Step 1: Roll pin, arrow"] --> B["Step 2: Rotation arrow, rotation arrow"]
    B --> C["Step 3: Rotation arrow, rotation arrow"]
    C --> D["Step 4: Rotation arrow, rotation arrow"]

natural_image
Symbol of a trash bin crossed with a diagonal line, representing no waste or discharge (no text or labels)Elektroaltgeräte
Congratulations on purchasing this product. Please read and follow these instructions, in order to avoid damaging the item. We do not cover any damages that may arise from improper use of the item or the disregard of the safety instructions.
Important Safety Advice
- Read all instructions before using.
- To protect against a fire, electric shock or personal injury, do not immerse cord, electric plugs or device in water or other liquids.
- Do not expose the appliance to extreme temperatures. The appliance shall be used in moderate climates.
- The use of attachments that are not recommended by the appliance manufacturer may result in fire, electric shock or personal injury.
- Do not open the unit by removing any cover parts. Do not attempt to repair the unit. Any repairs or servicing should be done by qualified personell only.
- Only qualified persons may perform technical work on the product. The product may not be opened or changed. The components cannot be serviced by the user. The manufacturer is not responsible for any radio or TV interference caused by unauthorized modifications.
- The appliance is not a toy. Do not let children play with it. Never let children insert foreign objects into the appliance.
- Never clean the surface of the device with solvents, paint thinners, cleansers or other chemical products. Instead, use a soft, dry cloth or soft brush.
- Save these instructions.
Small objects
Keep small objects (i.e. screws, mounting material, memory cards etc.) and packaging out of the range of children. Do not let Children play with foil. Choking hazard!
Transporting the device
Please keep the original packaging. To gain sufficient protection of the device while shipment or transportation, make sure to put it back in its original packaging.
Cleaning the surface
Do not use any volatile liquids, detergents or the like. Use a clean dry cloth.
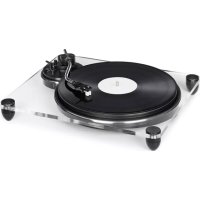
Overview
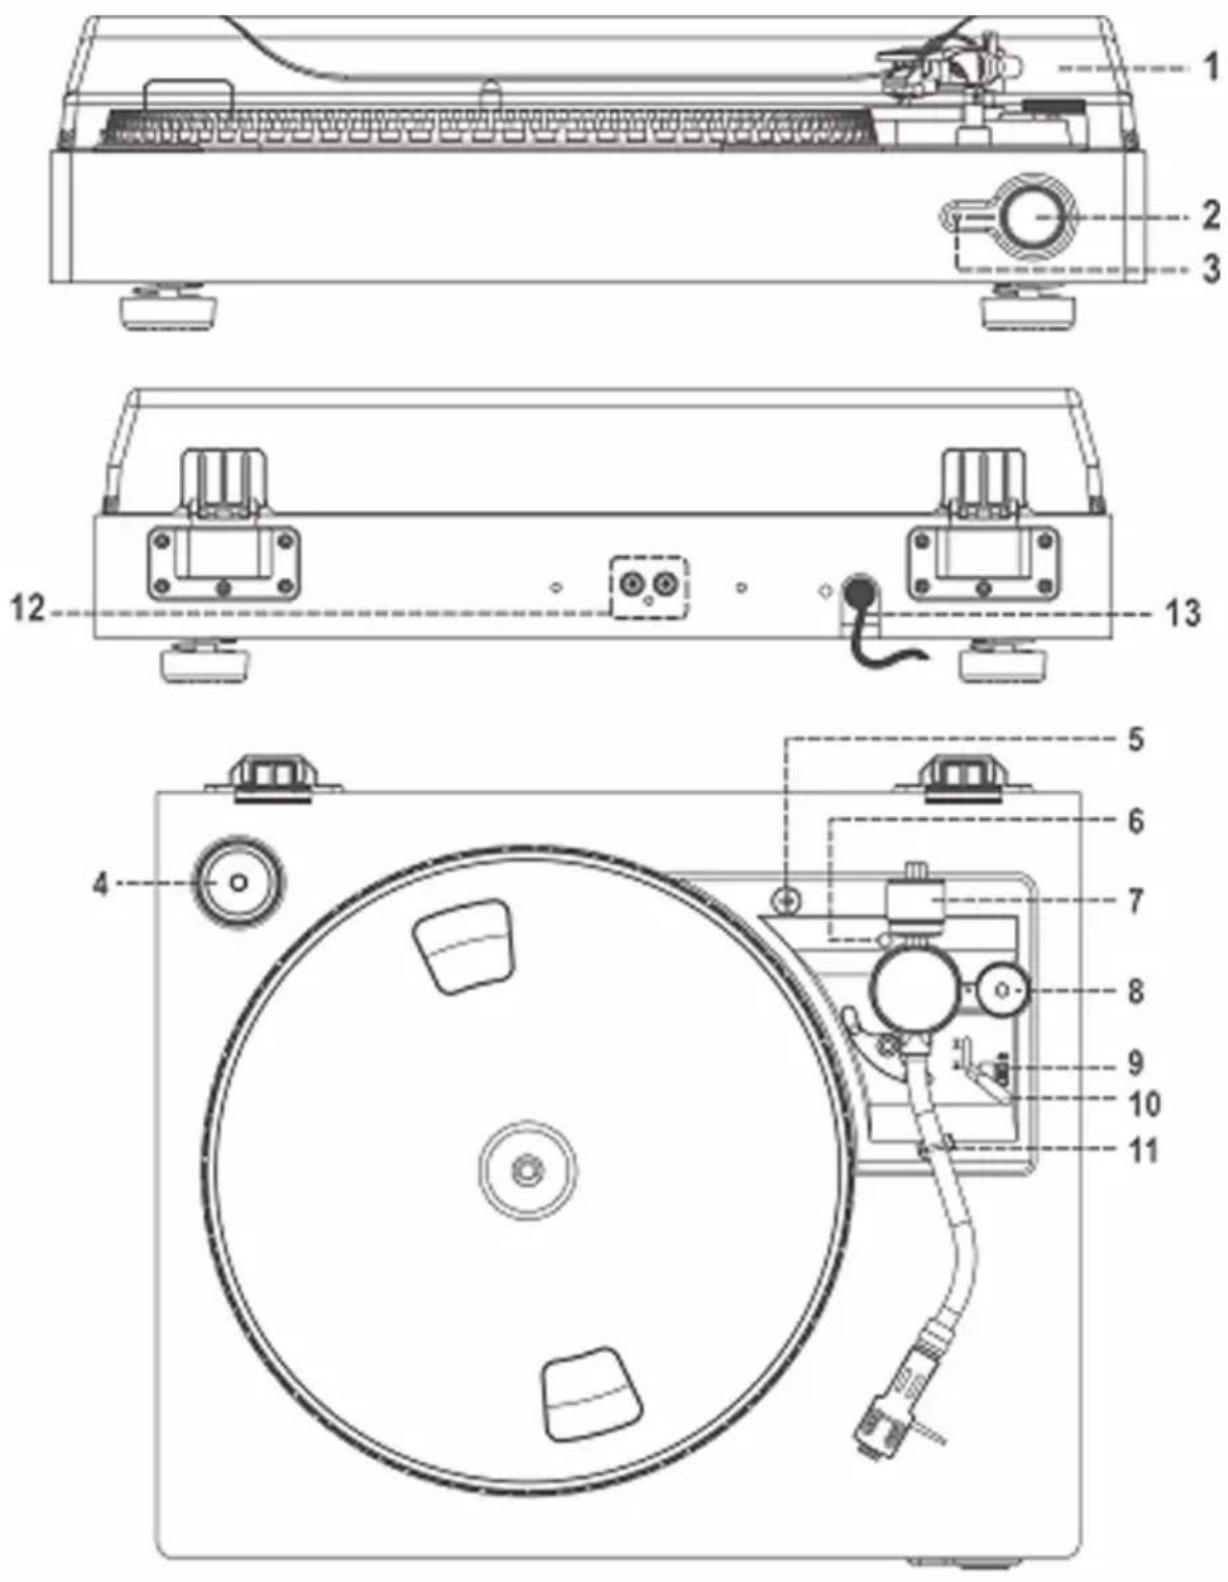
| Dust cover | 18Pitch adjust |
| Power switch | 29RPM selector |
| Power LED | 310Cueing lever |
| PUCK | 411Tone arm lock |
| Anti shock screw | 512Line-Out |
| Alignment screw w/ cover | 613Mains power cord |
| Counter weight | 7 |
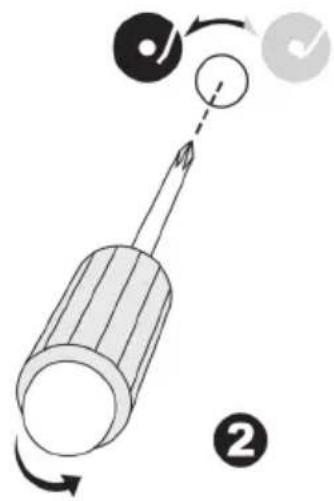
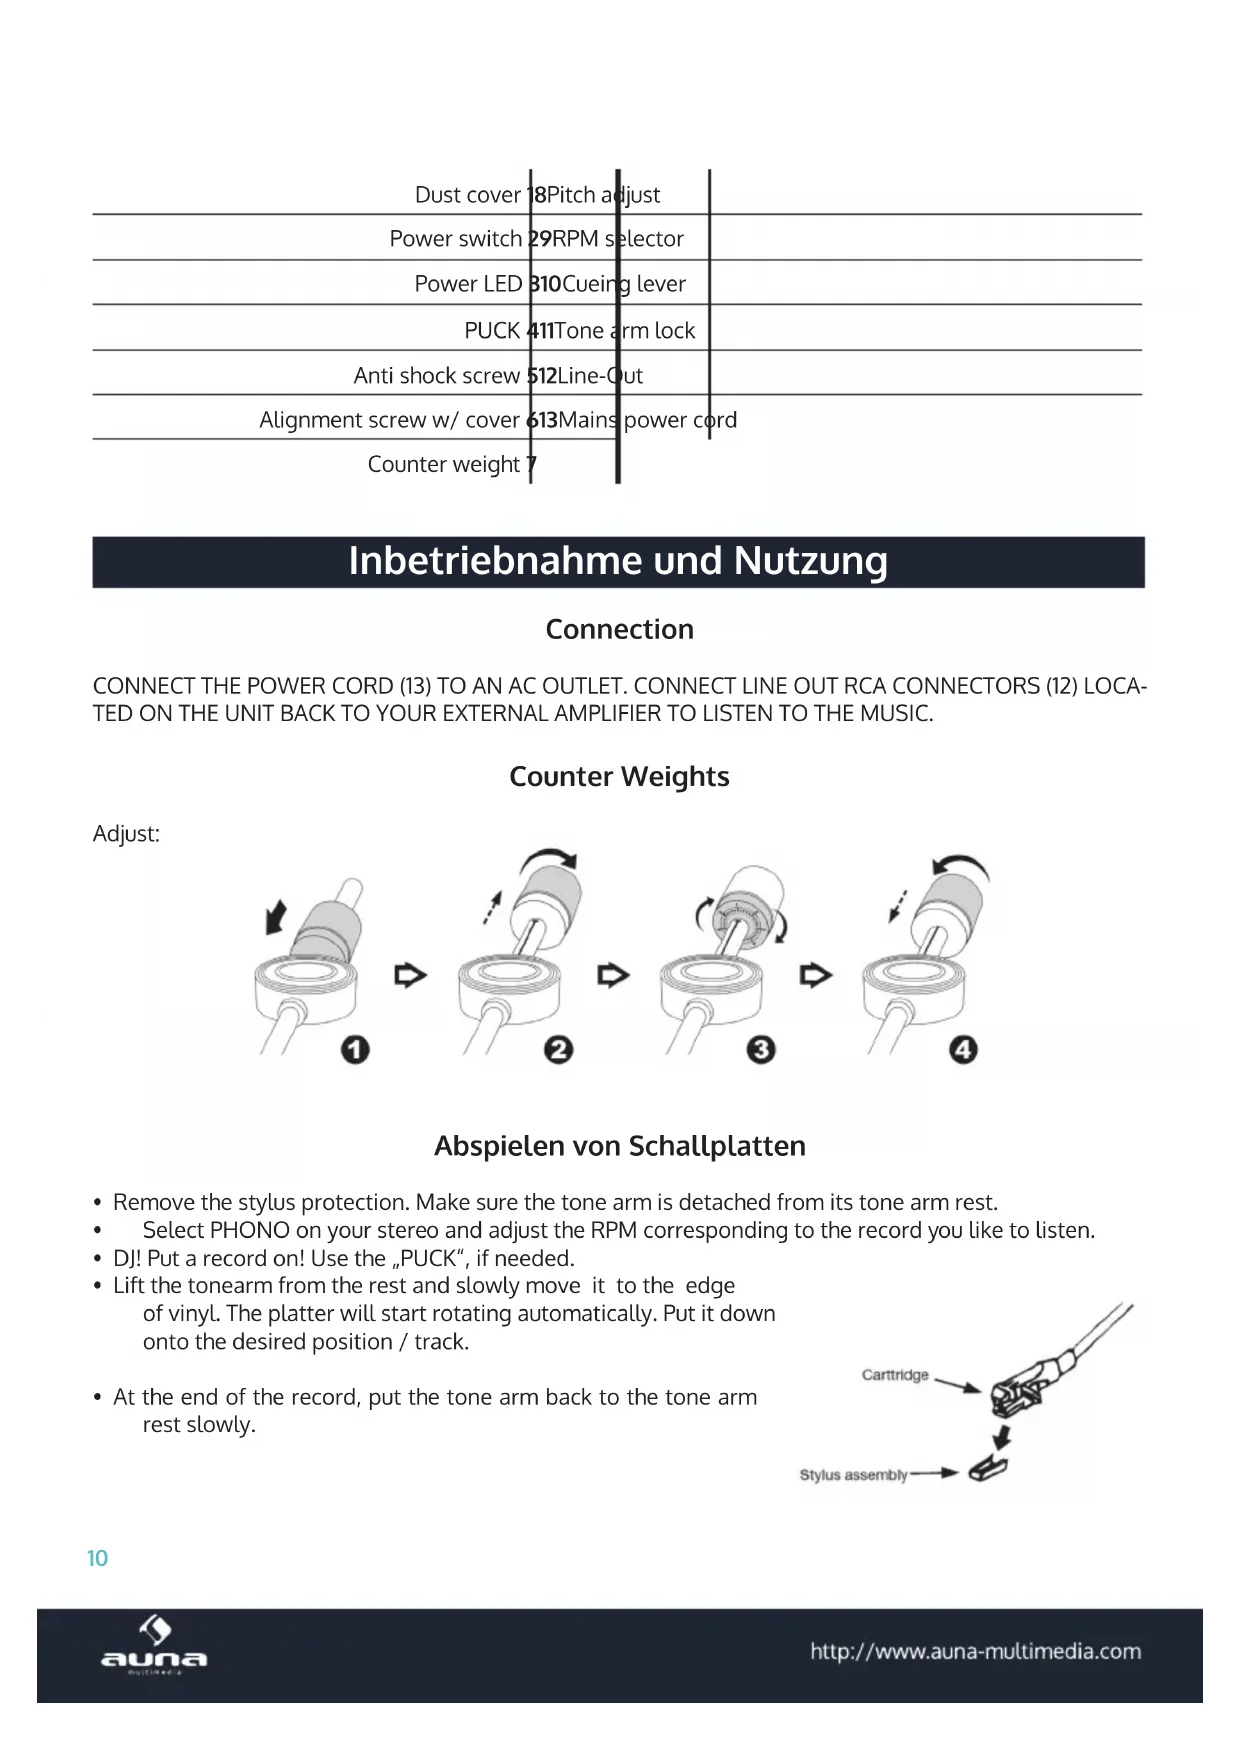
flowchart
graph TD
    A["1: Roll to cylindrical component"] --> B["2: Rotation arrow, rotating part"]
    B --> C["3: Rotation arrow, rotating outer ring"]
    C --> D["4: Rotation arrow, rotating inner ring"]
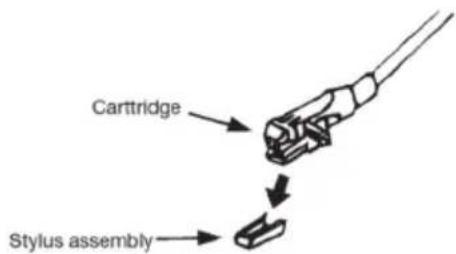
- Remove the stylus protection. Make sure the tone arm is detached from its tone arm rest.
- Select PHONO on your stereo and adjust the RPM corresponding to the record you like to listen.
- DJ! Put a record on! Use the „PUCK“, if needed.
- Lift the tonearm from the rest and slowly move it to the edge of vinyl. The platter will start rotating automatically. Put it down onto the desired position / track.
- At the end of the record, put the tone arm back to the tone arm rest slowly.
Adjustment / Maintenance
PITCH: Use the PITCH control to fine tune the RPM.
Abnehmer-Position: Use the alignment screw to move the tone arm:

RE-ATTACHING THE TURNTABLE DRIVE BELT
The turntable drive belt is factory fitted - use these instructions only if the turntable fails to revolve ...
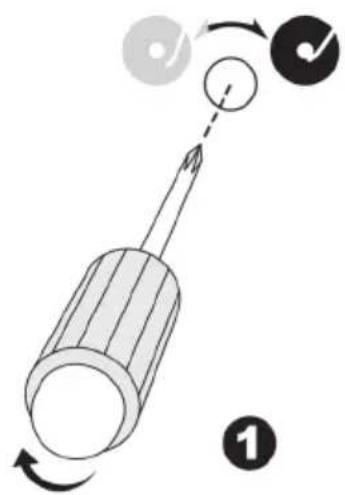
| STEP 1Remove the turntable anti-slip mat from the platter. Loo-king through one of the holes in the platter, check if the belt has indeed come off the turntable pulley.Use a screwdriver to remove the black iron 'C'-clip (iron binder) and lift the turntable off the Turntable mechanism. | 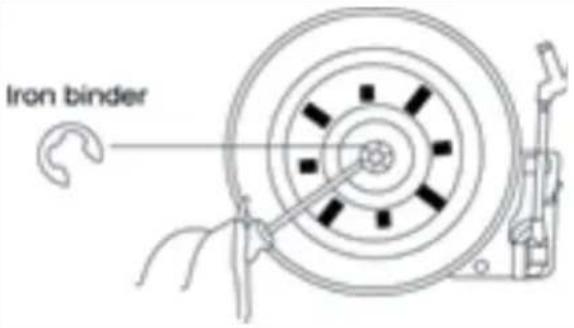 |
| STEP 2Retrieve the dropped black rubber band (the drive belt) and place it around the platter base - then pull the belt out gently without overstretching.Turn the platter over while holding on to the belt. | 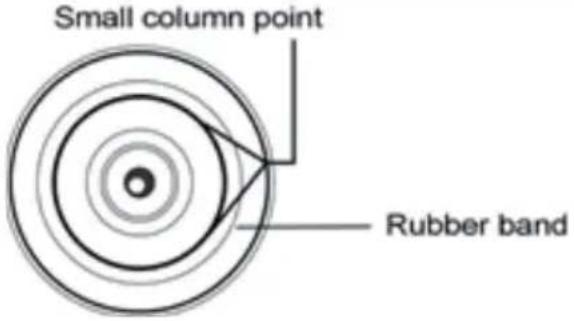 |
| STEP 3Looking through one of the holes in the platter, locate the small Brass Pulley (the pulley is attached to the turntable motor).Then proceed to hook the pulled out part of the rubber belt by hand around the Pulley and then line up the centre of the platter with the silver turntable spindle.Lower the platter gently onto the deck and let go until it is back in position. | 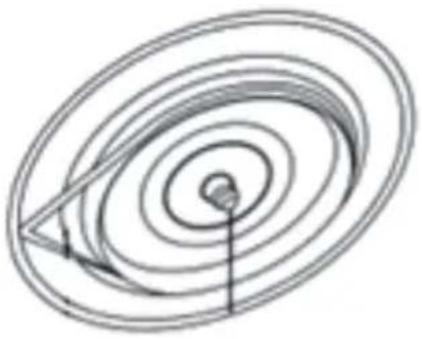 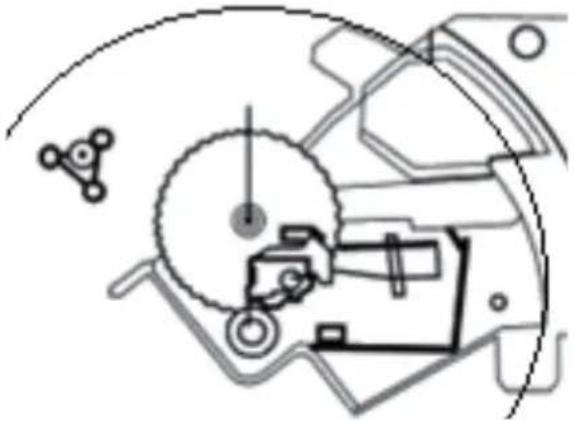 |
| STEP 4When the turntable platter is in the correct position, check the belt is still around the pulley and then replace the ‘C’-clip to secure the turntable to the spindle. | 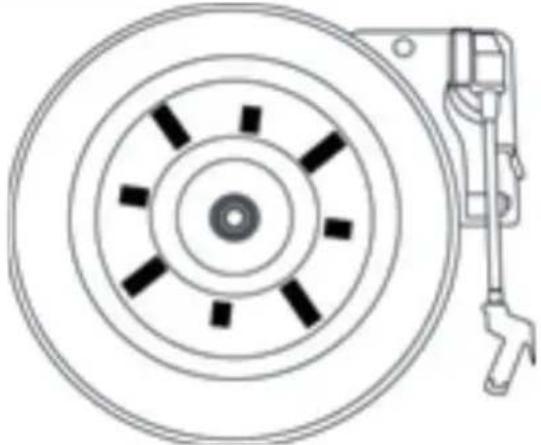 |
Environment Concerns
natural_image
Symbol of a trash bin crossed with a diagonal line, no text or numbers presentAccording to the European waste regulation 2002/96/EG this symbol on the product or on its packaging indicates that this product may not be treated as household waste. Instead it should be taken to the appropriate collection point for the recycling of electrical and electronic equipment. By ensuring this product is disposed of correctly, you will hep prevent potential negative consequences for the environment and human health, which could otherwise be caused by inappropriate waste handling of this product. For more detailed information about recycling of this product, please contact your local council or your household waste disposal service.
Declaration of Conformity
Manufacturer: Chal-Tec GmbH, Wallstraße 16, 10179 Berlin, Germany.
This product is conform to the following European directives:
2014/30/EU (EMV)
2011/65/EU (RoHS)
CE
Chère cliente, cher client,
flowchart
graph TD
    A["Step 1: Roll pin, clockwise arrow"] --> B["Step 2: Rotation arrow, clockwise arrow"]
    B --> C["Step 3: Rotation arrow, clockwise arrow"]
    C --> D["Step 4: Rotation arrow, clockwise arrow"]