Carnegy61 - MIDI Keyboard Schubert - Free user manual and instructions
Find the device manual for free Carnegy61 Schubert in PDF.
User questions about Carnegy61 Schubert
0 question about this device. Answer the ones you know or ask your own.
Ask a new question about this device
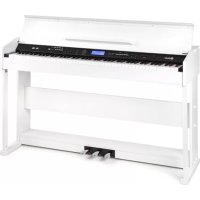
Download the instructions for your MIDI Keyboard in PDF format for free! Find your manual Carnegy61 - Schubert and take your electronic device back in hand. On this page are published all the documents necessary for the use of your device. Carnegy61 by Schubert.
USER MANUAL Carnegy61 Schubert
text_image
QR code image containing encoded data, no visible human-readable textINHALT
Technische Daten 3
Panel Control and External Function 6
Vorbereitung 8
flowchart
graph LR
    A["DC 9V"] -->|DC plug| B["adapter"]
    B --> C["Main socket"]
text_image
SUS PEDALtext_image
Ø6.35mm Headphone output jack HEAD- PHONES Ø 6.35mm Headphone plug Headphonetext_image
Line out LINE OUT Amplifier Speaker boxUSB(MIDI) Jack
text_image
Technical diagram of a door frame assembly with numbered components for identification and assembly reference.text_image
MASTER VOLUME
SPLIT

- Press the [PIANO] button, it can enter or exit the piano performance directly.
- At the mode of piano performance, the method to choose the style is the same as other mode.
AKKORDBEGLEITUNG
Einzelakkord 1
Press the one key teaching button once again to exit this function.
Member of Berlin Brands Group
Handwerkerstr. 11
15366 Dahlwitz-Hoppegarten
Deutschland
natural_image
Symbol of a trash bin crossed with a diagonal line, no text or numbers presentBerlin Brands Group UK Ltd
PO Box 1145
Oxford, OX1 9UW
United Kingdom
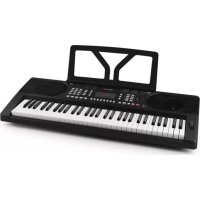
Dear Customer,
Congratulations on purchasing this device. Please read the following instructions carefully and follow them to prevent possible damages. We assume no liability for damage caused by disregard of the instructions and improper use. Scan the QR code to get access to the latest user manual and more product information.

text_image
QR code image containing encoded data, no visible human-readable textCONTENTS
Technical Data 21
Safety Instructions 22
Panel Control and External Function 24
Preparation before performance 26
Installation of piano body 28
Style Function 31
Chord Accompaniment 32
Disposal Considerations 36
Manufacturer & Importer (UK) 36
TECHNICAL DATA
| Item number 10009094 | |
| Power supply (power adapter) 9 VC 55 | 0-800 mA |
Features
- Polyphony: 32pcs
• 300 kinds of tones - 80 pieces of demo songs
- Effect control: Touch, Split, Dual, Sustain, Metronome, Percussion
- Recording and programming: Recording, Play back, program.
- Learning: One key teaching, following teaching, Ensemble teaching.
SAFETY INSTRUCTIONS
- Do not disassemble or modify this instrument in any way, otherwise it will cause the shock, scalding and personal injury risk. You should entrust the internal inspection, debugging and maintenance to your dealer or the place you bought it form.
- If there is wet and tear occurs in power cord or power plug, or a sudden power failure when play, and occur the abnormal odour or smoking from the electronic grand piano, you should turn off the power, unplug the power plug immediately and find qualified repairman to carry out the overhauling.
- Before cleaning the electric grand piano, you should turn off power and unplug the power plug, do not do the charged operation with wet hands. Do not wipe and clean the electric grand piano with corrosive solvent.
- Do not put the electric grand piano on vibrating, slantwise or unstable surface, otherwise the electric grand piano may overturn to hurt human body. You should always ensure that you use the screws provided to fix the electric grand piano on the bracket. the electric grand piano may overturn from the bracket and cause the risk of personal risk if the electric grand piano is unstable.
- Avoid the electric grand piano in rain or use it in the washy and wet place. Do not put the following objects on the electric grand piano.
- Container (vase, potted plant, cup, cosmetic bottle or medicine bottle) are full of water or other liquid.
- Small metal objects (including hairpin, sewing needle and coin).
- The fire source of the naked fire, such as the lighted candle. Prevent the water, liquid, small metal objects and fire source from spraying out into this instrument, then, it may cause the fire disaster or electric shock.
- Avoid placing the electric piano at the following places in order to avoiding damaging the electric piano and internal components:
• The place of high temperature and much dust.
- Kitchen or other places with oil fume.
- The neighborhood of the air conditioner. The place where the sunlight shines directly or any other places that create high temperature promptly.
- Do not place the electrical piano near other electric appliances, such as TV, radio, speakers, otherwise mutual disturbance between electric appliances may be incurred. Do not place heavy matter on the piano and do not use too large force to hit the keys or switches.
- When you do not use the electrical piano for a long time, please remove power plug. And when you remove the power plug, please hold the plug instead of electric wire to pull it out.
- Be sure to install bracket according to the instructions and fasten all connections. Moreover, select an appropriate position to install the rack.
- When you place the electrical piano on the bracket, take care and not to let your fingers be clamped between the piano and rack.
- When you move the electrical piano, there should be two persons at least carrying together. The brackets may overturn and cause the risk of
personal.
- Regularly examine whether screws are tightened. You should tighten them if you have found the loose screws.
- Do not place power cord near heating source such as radiator etc. Do not over bend power cord.
- Do not place heavy objects on power cord. Do not place power cord where people walk. Do not wrap other things around power cord in order to avoid damaging it.
- Do not play music loudly for a long time. Be careful when use Headphone, because too high volume will easily hurt your audition.
PANEL CONTROL AND EXTERNAL FUNCTION
Left panel control

text_image
1 MASTER VOLUME ↑ TEMPD 2 ACCOMP VOLUME 3 10 11 12 13 14 INTRO/INDING STNG FILE IN VARIATION START/STOP SINGLE CHORD 1 4 SINGLE CHORD 2 5 FINGER CHORD 6 CHORD CLOSE 7 BASE CHORD 8 ACCORDION 9 GUITAR 15 16 17 18 19 20 35 P.37 PICO PRE METRONOME TRANSPOSE 21 ②₂1 Master Volume
2 Tempo
3 Accomp Volume
4 Single Chord 1
5 Single Chord 2
6 Finger Chord
7 Chord Close
8 Bass Close
9 Accordion
10 Intero/ending
11 Sync
12 Fill-in
13 Variation
14 Start/Stop
15 Record
16 Play
17 Program
18 Percussion
19 Metronome
20 Transpose
21 Guitar
22 LCD Display Screen
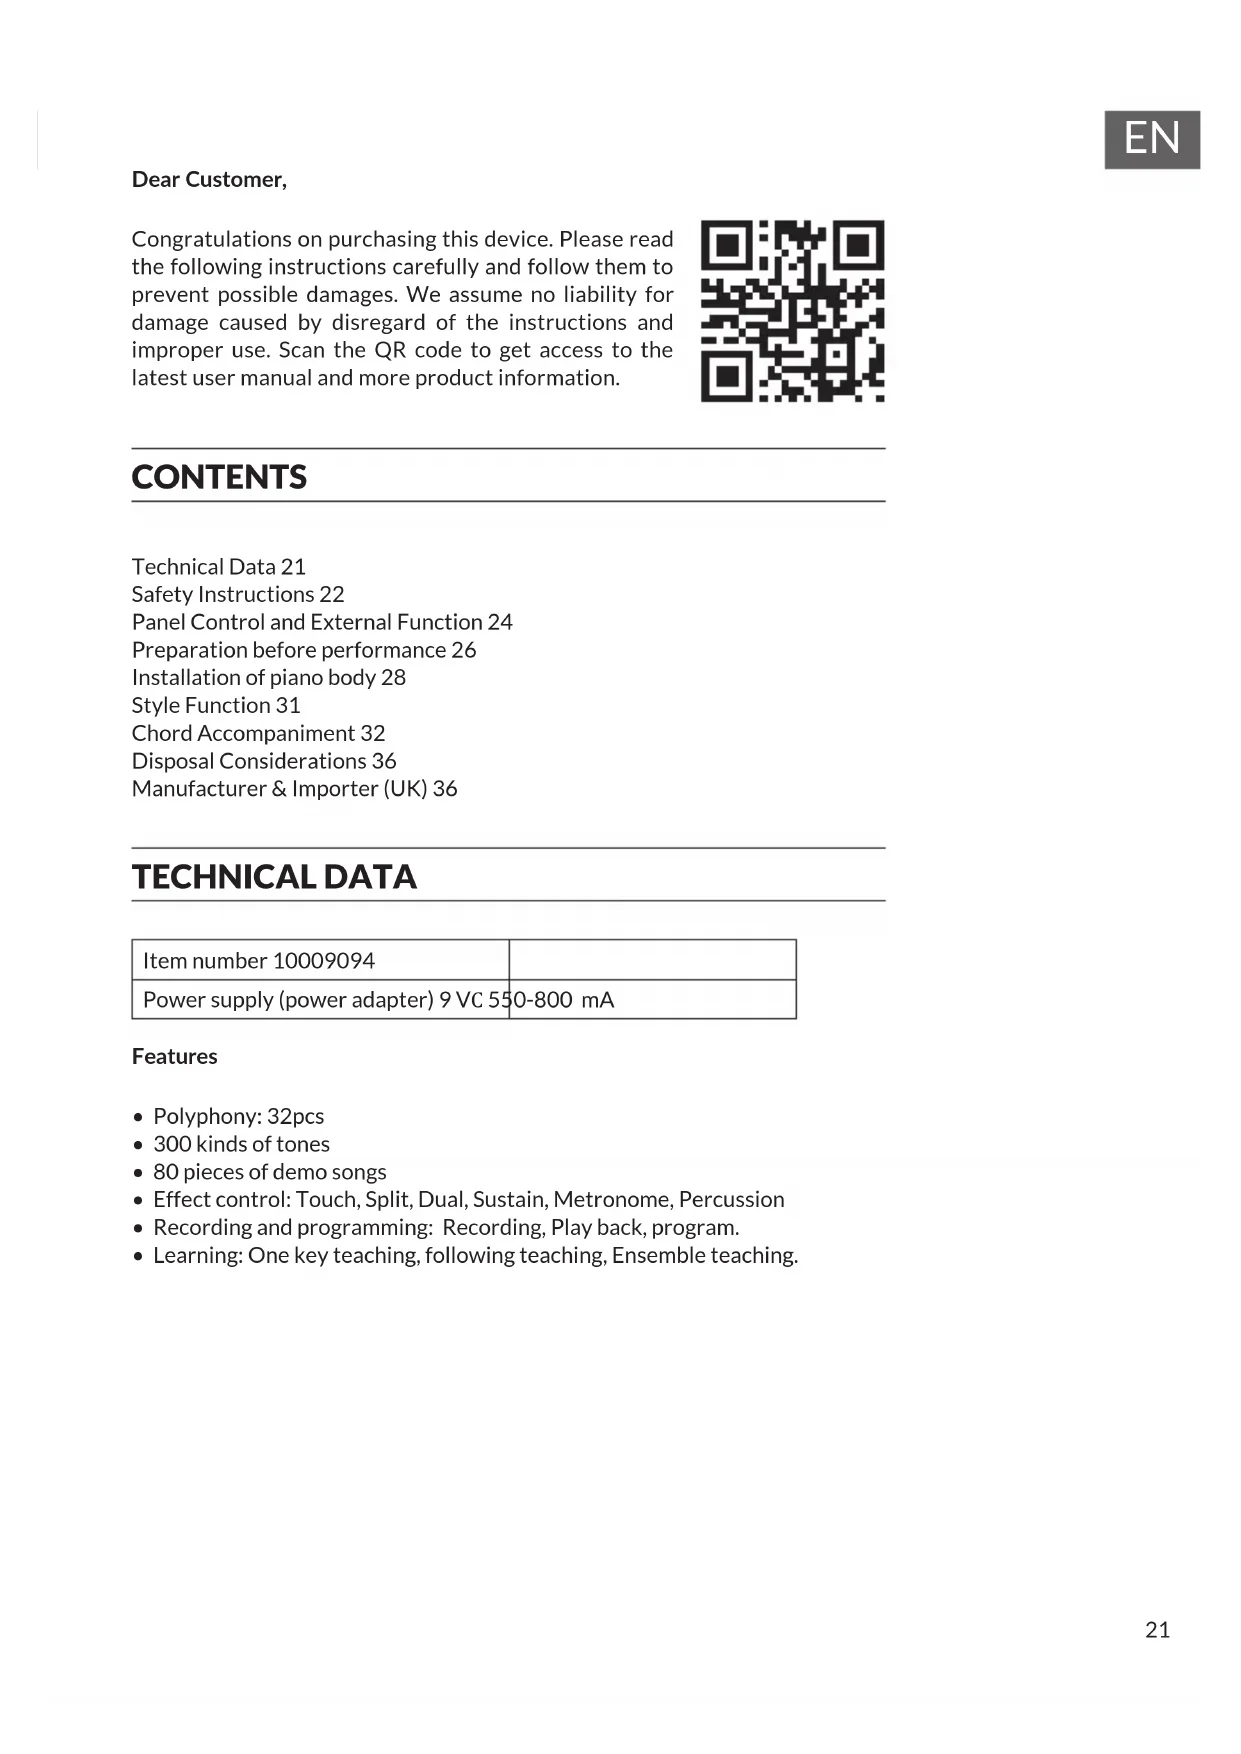
LCD display
text_image
BEQ0316/20 #b#e4 1m89 mM7aug MAIN ACC. TO3E RN4M 351G TE7PO Split 9 WB 10 18Record 12Program 16Play #b# b# #b# b# 15 b# #b# b# #b# b# sus 11 Finger 12 Single 131 Chord display area
2 Volume display
3 Tone
4 Rhythm
5 Song
6 Number display area
7 Tempo
8 Metronome
9 Keyboard split
10 Vibration
11 Sustain
12 Finger chord
13 Single chord
14 B/W key display area
15 Staff display area
16 Play
17 Program
18 Record
Right panel control

text_image
PANO STYLE TONE 23 24 25 32 33 34 35 DEMO ONE REVE FOLLOW ENSEMBLE 1 2 3 + 26 4 5 6 7 8 9 - DOUBLE SPLIT SUSTAIN VIBRATION TOUCH 27 28 29 30 31 36 37 38 39 40 MEMORY M1 M2 M3 M4 Φ 4123 Piano 33 One Key
24 Style 34 Follow
25 Tone 35 Ensemble
26 Number 0\~9/+/-
36 Memory
27 Dual 37 M1
28 Split 38 M2
29 Sustain 39 M3
30 Vibration 40 M4
31 Touch 41 Power Switch
32 Demo
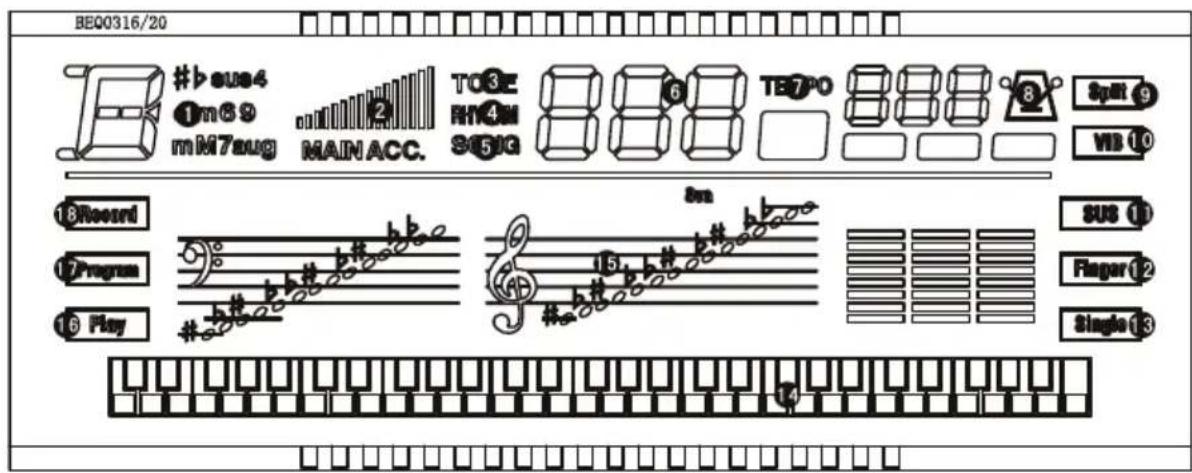
Back panel control
text_image
- - + PHONES LINE OUT SUS PEDAL USB ① ② ③ ④ ⑤1 DC 9V
2 Headphone jack
3 Line out
4 Sustain Pedal
5 USB to device
PREPARATION BEFORE PERFORMANCE
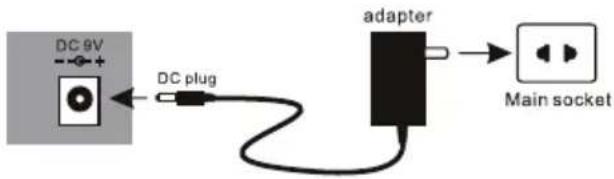
Power connection
- Firstly, Make sure whether the power switch of Electrical piano is at OFF position. If not, pull the Switch to OFF position.
- Connect the power cord: Insert power cord into power socket.
flowchart
graph LR
    A["DC 9V"] -->|DC plug| B["adapter"]
    B --> C["Main socket"]
Caution: When you do not use this electrical piano, you should get out of the plug of AC power from power socket safely in order to avoid the obstacle of piano parts or other accident for the power is on for along time.
- Do not pull out power cord from power socket when the power is on.
- Fuse replacement shall only be made by qualified person.
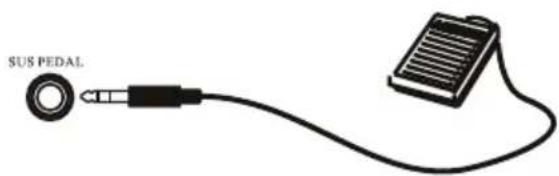
Use of Pedal Sustain
The function of sustain can produce natural sustain by stepping upon sustain pedal when you perform. Please insert the plug of sustain pedal into SUS PEDAL jack. You can open/close the sustain function through the sustain pedal plug.
text_image
SUS PEDALUse of headphone
Insert headphone plug into "HEADPHONE" jack in the rear of electrical piano. At the same time internal speaker cuts off automatically. It does not interfere with anybody else, if you use headphone during performance, it is special for personal monitor and exercising at night.

text_image
Ø6.35mm Headphone output jack HEAD- PHONES Ø 6.35mm Headphone plug HeadphoneConnection with Amplifier or Hi-Fi Equipment
This electrical piano has built-in speaker system. It can be connected with other external amplifier or speaker system. First turn off the power of electrical piano and external equipment, then insert one end of stereo audio cable into LINE IN or Aux IN jack of other hi-fi equipment and insert the other end into LINE OUT jack in rear panel of electronic piano.

text_image
Line out LINE OUT Amplifier Speaker boxUSB(MIDI)Jack
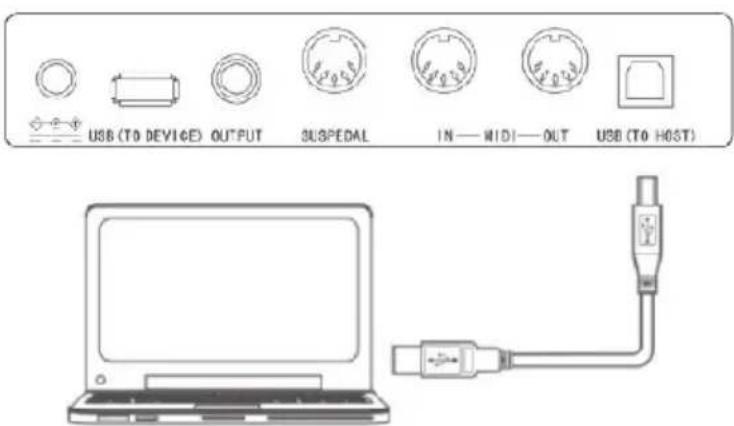
This digital piano supports one USB jack, it can be connected to personal computer directly.
You only need one USB cable, one end is inserted into USB jack of this keyboard, another end is inserted into USB port of computer, it can transfer information between the piano and computer, which means that you can store the music that you had played on this keyboard to the computer, and you also can open and play MIDI document in your computer and the MIDI will be played from this keyboard as well.
Note: The USB audio equipment can not be set for input and output at the same time when you do the setting of the computer software, or else the sound will be overlapping when you play the keys. All the above external equipment are not equipped with this digital piano, the users need to buy by themselves. Please help to understand.
text_image
USB (To DEVICE) OUTPUT SUSPEDAL IN—WIDI—OUT USB (To HOST)INSTALLATION OF PIANO BODY
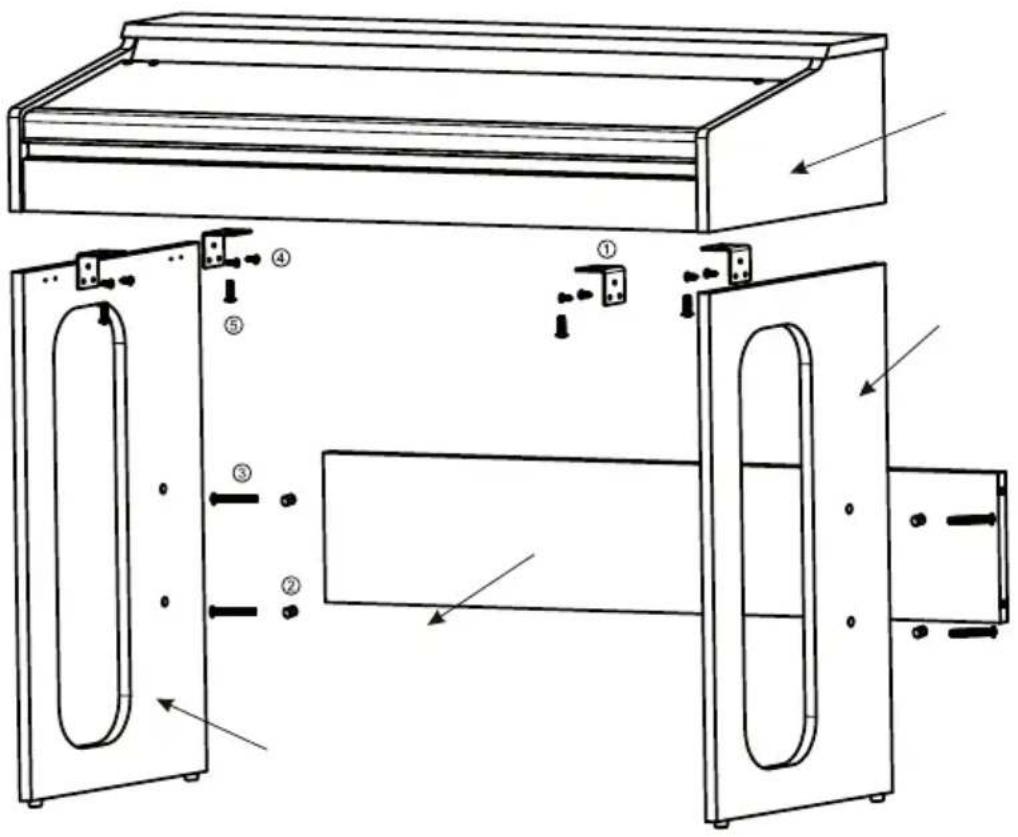
text_image
Technical diagram of a door frame assembly with numbered components for identification and assembly reference.| Illustration | Name Quantity | ||
| 1 |  | Angle iron 4 | |
| 2 |  | Nut screw 4 | |
| 3 |  | Screw-TM6*50 4 | |
| 4 |  | Screw-TA4*12 8 | |
| 5 | ### | Screw-TM6*20 4 |
- Use 8 pcs TA4*12 screws to fix the angle iron on the left and right stand board separately.
- Fix the 4pcs of nut screw into the four holes of connection board.
- Use the 4pcs of TM6*50 screw to fix the connection board with the left and right stand board, then the stand is assembled ready.
- Put the piano body on the wooden stand and use the 4pcs of TM6*20 screw to fix it.
Turn on power
Press [POWER] button to turn on power, press it again to turn off power of electrical piano.
Master Volume Adjustment
After turn on the piano, turn the [MASTER VOLUME] button to the right, adjust the volume from small to big. Users can do the suitable adjustment on the whole volume which depends on their requirement.
Play the keyboard with different voice
Tone Selection
There is 0\~299, total 300 kinds of voice for your choice. The detailed voice, please refer to the tone list.
The default status is [TONE], when the electrical piano is open. If current status is not TONE, you need to press [TONE] button.
And you can select voice by pressing the number 0\~9 number or “+”, “-” button. The LED display will show the number that you choose. If you select the voice by pressing the three numbers and the number is above 300, it is not effective and the voice will resume to the previous one.
EFFECTS & CONTROLS
Double Voice
Under normal status, press [DOUBLE] button, the digital piano enters the model of dual voice. Namely each note is composed of two voices. The first voice is the voice before you pressed [DOUBLE] button, and the second voice is the selected voice after pressed [DOUBLE] button. If the function is off, LED display shows "dbl/Off", the voice will resume to the current voice.
Keyboard split
Press [SPLIT] button, from the left 24th button, the keyboard forms left and right two tone keyboards. In 'tone' mode, press number or "+/-" button to adjust voice for right zone keyboards. Press [SPLIT] button again, exit the function. The keyboard resume to the voice of low key area.
text_image
MASTER VOLUME
The display shows "SPL/Off".
SUSTAIN

VIBRATIO

TOUCH


PRC

METRONOME
TRANSPOSE
Sustain
Press [SUSTAIN] button to start sustain function. It will produce prolonged effect if you play with B/W keys at the same time.
Press [SUSTAIN] button again to exit the function.
Vibration
Press [VIBRATION] button to start vibration function. It will produce the aquiver effect tone if you play with B/W keys at the same time.
Press [VIBRATION] button again to exit the function.
Touch
This electrical piano is touch keyboard. When the piano is open, touch function starts automatically. When you play keyboard with different force, the electrical piano will play different size volume.
Press [TOUCH] button, the touch function exits and keyboard touch is canceled. Press [TOUCH] button once again to restart touch function.
Percussion
Press the [PRC] button. The Beat voice be produced. Then each key correspond to each percussion, total 61 kinds of percussion. Press [PRC] button again, exit the beat function.
Metronome
Press [METRONOME] button, the tick-tock beat sound will occur. Here are four kinds of beats can be chosen, 1/4, 2/4, 3/4, 4/4.
Press this button again, it goes into the next kind of beat. The LED has the relative display. Press [METRONOME] button to exit this function.
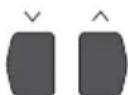
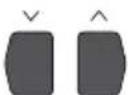
Transpose
Press [TRANSPOSE] button + or - to increase or decrease the transpose value up “^” and down “∨”, 6 levels and shift the pitch of entire keyboard up and down in semitone intervals.
Press the / buttons simultaneously to return to default status of keyboard tone.
STYLE FUNCTION
Selecting Style
This electrical piano has 300 kinds of style for your choice. For style table, please refer it to detailed Appendix. Press [STYLE] button to enter Style selection function. LED displays current style number. The default style is "000". You can select the style by pressing the number 0\~9 buttons directly or press "+/-".
Accompaniment volume adjustment
The default Accompaniment Vol is 16, you can adjust Accompaniment Vol by pressing [ACCOMP VOLUME] “^/v” button. The LED has the relative display when you adjust. The system will restore the default Accompaniment Vol automatically if you press the Accompaniment Vol ^ and v button at the same time. The default volume is 16 after the power is on.
Tempo Adjustment
Press [TEMPO] ∧/∨ buttons, it can adjust the playback tempo of style, metronome, demo song. The adjustment range is 30-240, the default is “120” after the power is on. The system will restore the default tempo automatically if you press the TEMPO“∧”and “∨”button at the same time.
Start/Stop
In default status when the piano is open, press the[START/STOP]button to play STYLE. Press[START/STOP]button again, It can exit other functions.
Intro/Ending
When you press [INTRO/ENDING] button before starting the style, an intro will be played, and then it continues to play after restored to the normal style, when you press [INTRO/ENDING] button during style playback, the style playback will be finished after a paragraph of ending is played.
Sync Function
Press [SYNC]button to start sync accompaniment function and press any key of 19 keys in left hand to start style synchronously. If chord function is started, press relevant key of 19 keys in chord area to start auto chord synchronously. If a style is being played previously.
Press [SYNC]button to stop style and start sync accompaniment function. If sync function has been started, press [SYNC]button to exit sync function. At the status of Sync, the red point as LED shows will be flashed with style. At the status of Sync, you can press [INTRO/ENDING], and press any key of 19 keys in left hand, then the style will start to play from intro.
Fill-in
Press [FILL-IN] button to insert a intermezzo during style playback as to
STYLE

ACCOMP VOLUME

V

^
TEMPO

V

^
PIANO

enhance the performance effect, after finishing the inserted style, the piano will continue to play the original style.
Variation
At the mode of style, press [VARIATION] button, the piano will play the style with an style of variation. Press [VARIATION] button to exit this function.
Mode of piano performance
The digital piano designed this function specially. It can let you choose the Piano mode quickly when at other status.
- Press the [PIANO] button, it can enter or exit the piano performance directly.
- At the mode of piano performance, the method to choose the style is the same as other mode.
CHORD ACCOMPANIMENT
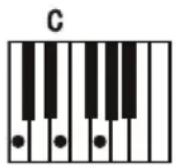
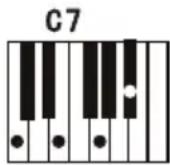
Single Chord 1
When style is started, press [SINGLE CHORD 1] button to enter the function of single finger auto chord, Now in 1\~19 keys of chord area, applying chord Accompaniments, press [START/STOP] button to exit this function. Please refer to the chord program as below.

text_image
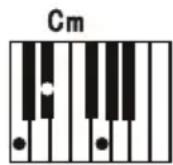
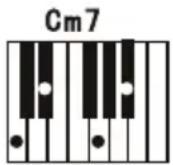
C Cm C7 Cm7Single Chord 2
When style is started, press [SINGLE CHORD 2] button to enter the function of single finger auto chord, Now in 1\~19 keys of chord area, applying different fingerings to hear different chord Accompaniments, press [START/STOP] button to exit this function. Please refer to the chord program as below.

text_image
C Cm C7 Cm7Finger chord
When style is started, press[FINGER CHORD] button to enter the function of fingered auto bass chord. Now in 1-19 keys of chord area, applying different fingerings to hear different chord accompaniments. Press [START/STOP] button to exit this function.
Chord Close
Under chord state, press [CHORD CLOSE] button to stop chord accompaniment while style continues to play.
Bass Chord
At the mode of chord, press the [BASS CHORD] button to create an effective of heavy bass;press the [BASS CHORD] button again to exit the function.
SINGLE CHORD 1

SINGLE CHORD 2

FINGER CHORD

CHORD
CLOSE

BASS
CHORD

Status memory
- This electronic piano has panel registration memory function, it can be used for saving your most favorite setting as to the setting can be tuned out easily and promptly when you need it.
- After you have adjusted the voice, style and tempo, press the [MEMORY] button, and press any of the [M1-M4] button, then the current voice, style and tempo will be recorded.
- Tune out stored panel setting: Pressing any of the [M1-M4] button that had been recorded in previous.
Recording Function
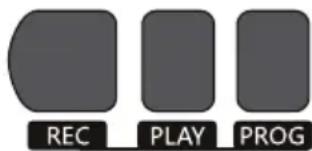
- Press [REC] button to enter recording model. You can hear metronome sounds and the default tempo is 120. Now press any button or drum key to start recording.
- The maximum recording quantity is 180. When the maximum quantity is full, metronome sound will stop and record cannot be continued. Every time you press this button, the memory in previous recorded will be cleared and the piano will enter into the recording model again. 2. Press [PLAY] button to play the recorded notes.
- Press [PROG] button to enter into style programming mode, press keyboard to program a paragraph of style. This edited style can record 32pcs drum points at the most. Press [PLAY] button to play the edited drum sound in sequence, forming a kind of self-made style after
text_image
REC PLAY PROGprogramming is finished. The best style play effect can be got by adjusting [TEMPO ∧/∨] buttons. Every time, you press [PROG] button, it will clear last memory and enter into programming mode again.

DEMO
Demo playback
The total demo songs is 80pcs.
Press [DEMO] button to play song. Press this button again, It will play the next song. (Please refer the 14th page DEMO Appendix). Press [START/STOP] button, the playback of the Demo will stop.
Intelligent Teaching
Press the [ONE KEY], [FOLLOW] or [ENSEMBLE] button to enter the teaching function then press the number keys or the ∧/∨ button to select different teaching Songs.
Press the one key teaching button once again to exit this function.
- One key teaching: Only there is key pressed, then the demo will be continued. Otherwise, the demo will be stopped. No matter you play correctly or not, the song will be automatically played continuously.
- Following teaching: The main part of demo will be recovered. Follow the display to play the note correctly, then play the next note which is shown automatically on display.
- Ensemble teaching: The main part of demo will be recovered, similar as Karaoke, the demo will resume to play. After learning one song, you will repeat to learn the current song. You also can choose your favourite song to learn.


ONE KEY FOLLOW
ENSEMBLE
TROUBLE SHOOTING
| Trouble Possible reason/eliminating method | |
| Accompanying a little noise when turning ON/OFF power | Normal phenomenon. please do not worry. |
| After turning on power, press keyboard but no sound can be emitted. | Check whether volume control key is at proper position or headphone jack is held by other equipment to break off built-in speaker system. |
| Distorted or discontinued sound, or even system halted. | Using unqualified AC adapter. Please use the AC adapter provided with this electronic piano. |
| In a tone, note and note quality has the slight difference. | This is normal phenomenon caused by different tone sampling system of the electrical piano. |
| When using Sustain function, some tones have long sustain but some have short sustain. | This is normal phenomenon since the sustain setting of different tones of the electrical piano was best length. |
| Abnormal in volume or accompaniment volume | Check whether volume control and accompaniment volume control are in proper setting. |
| In SYNC status, auto accompaniment does not work. | Check whether Single chord or Finger chord is set, now pressing a note at left-hand keyboard area(19 keys in the left of keyboard) |
| When using AC adapter, the electronic piano does not emit sound after started up and there was anything display on the LED. | Check whether power socket is energized, AC adapter is well plugged, poor connection of power socket of inadequate power voltage. |
| The pitch of note is not correct. Check whether the parameter of Transpose is “00”. | |
| When using mobile phone, the electronic piano will emit noise. | Mobile phone can disturb the electronic piano. To avoid the noise, turn off mobile phone or use it far away. |
DISPOSAL CONSIDERATIONS
natural_image
Symbol of a trash bin with crossed x and y axes, no text or labels presentIf there is a legal regulation for the disposal of electrical and electronic devices in your country, this symbol on the product or on the packaging indicates that this product must not be disposed of with household waste. Instead, it must be taken to a collection point for the recycling of electrical and electronic equipment. By disposing of it in accordance with the rules, you are protecting the environment and the health of your fellow human beings from negative consequences. For information about the recycling and disposal of this product, please contact your local authority or your household waste disposal service.
This product contains batteries. If there is a legal regulation for the disposal of batteries in your country, the batteries must not be disposed of with household waste. Find out about local regulations for disposing of batteries. By disposing of them in accordance with the rules, you are protecting the environment and the health of your fellow human beings from negative consequences.
MANUFACTURER & IMPORTER (UK)
Manufacturer:
Chal-Tec GmbH, Wallstrasse 16, 10179 Berlin, Germany.
Importer for Great Britain:
Berlin Brands Group UK Ltd
PO Box 1145
Oxford, OX1 9UW
United Kingdom
Cher client, chère cliente,
text_image
QR code image containing encoded data, no visible human-readable textSOMMAIRE
Fiche technique 37
flowchart
graph LR
    A["DC 9V"] -->|DC plug| B["adapter"]
    B --> C["Main socket"]
text_image
SUS PEDALtext_image
Ø6.35mm Headphone output jack HEAD- PHONES Ø 6.35mm Headphone plug Headphonetext_image
Technical diagram of a door frame assembly with numbered components for identification and assembly reference.| Illustration Nom Nombre | ||
1 Angle 4 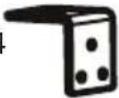 | ||
2 Écrou 4  | ||
3 Vis TM6 ^1  | ||
4 Vis TA4*12  | ||
| 5 Vis TM6*20 [OZZZ] |
EFFETS ET FONCTIONNEMENT
A deux voies
text_image
MASTER VOLUMETONE

Instruments de percussion
text_image
STYLE ACCOMP VOLUME TEMPOPIANO

ACCORD D'ACCOMPAGNEMENT
Accord unique 1
natural_image
Symbol of a trash bin crossed with a diagonal line, no text or numbers presentBerlin Brands Group UK Ltd
PO Box 1145
Oxford, OX1 9UW
United Kingdom
Estimado cliente:
text_image
QR code image containing encoded data, no visible human-readable textCONTENIDO
Datos técnicos 53
flowchart
graph LR
    A["DC 9V"] -->|DC plug| B["adapter"]
    B --> C["Main socket"]
text_image
SUS PEDALUso de auriculares
text_image
Ø6.35mm Headphone output jack HEAD- PHONES Ø 6.35mm Headphone plug Headphonetext_image
Technical diagram of a door frame assembly with numbered components and directional arrows indicating assembly steps.text_image
MASTER VOLUME
SUSTAIN

VIBRATION

TOUCH


PRC

METRONOME
TRANSPOSE
Sostenido
text_image
STYLE ACCOMP VOLUME TEMPOPIANO

natural_image
Symbol of a trash bin crossed with a diagonal line, no text or numbers presentBerlin Brands Group UK Ltd
PO Box 1145
Oxford, OX1 9UW
United Kingdom
Gentile cliente,
text_image
QR code image containing encoded data, no visible human-readable textINDICE
Dati tecnici 69
flowchart
graph LR
    A["DC 9V"] -->|DC plug| B["adapter"]
    B --> C["Main socket"]
text_image
SUS PEDALCuffie
text_image
Ø 6.35mm Headphone output jack HEAD- PHONES Ø 6.35mm Headphone plug Headphonetext_image
Line out LINE OUT Amplifier Speaker boxUSB(MIDI) Jack
text_image
Technical diagram of a door frame assembly with numbered components for identification and assembly reference.text_image
MASTER VOLUME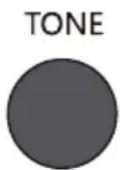
SPLIT


VIBRATION

TOUCH


PRC


TRANSPOSE
Sustain
ACCOMPAGNAMENTO CON ACCORDI
Accordo singolo 1
natural_image
Symbol of a trash bin crossed with a diagonal line, representing no waste or discharge (no text or labels)PRODUTTORE E IMPORTATORE (UK)
Produttore:
Chal-Tec GmbH, Wallstraße 16, 10179 Berlino, Germania.
Berlin Brands Group UK Ltd
PO Box 1145
Oxford, OX1 9UW
United Kingdom
Tontabelle Table of Tones
| No. | Name No. | Name | |||
| 0 | Acoustic Grand Piano 62 Synth Brass 1 124 Telephone Ring | ||||
| 1 | Bright Acoustic Piano 63 Synth Brass 2 125 Helicopter | ||||
| 2 | Electric Grand Piano 64 Soprano Sax 126 Applause | ||||
| 3 | Honky-tonk Piano 65 Alto Sax 127 Gunshot | ||||
| 4 | Rhodes Piano 66 Tenor Sax 128 Percussion | ||||
| 5 | Chorused Piano 67 Baritone Sax 129 Rhythm electric Piano | ||||
| 6 | Harpsichord 68 Oboe 130 Baritone Xylophone | ||||
| 7 | Clavichord 69 English Horn 131 Cean Piano | ||||
| 8 | Celesta 70 Bassoon 132 Bright Dulcimer | ||||
| 9 | Glockenspiel 71 Clarinet 133 Rhythm Grand Piano | ||||
| 10 | Music box 72 Piccolo 134 Traditional Piano | ||||
| 11 | Vibraphone 73 Flute 135 Aluminium jean | ||||
| 12 | Marimba 74 Recorder 136 Rock Grand Piano | ||||
| 13 | Xylophone 75 Pan Flute 137 Electronic organ | ||||
| 14 | Tubular Bells 76 Bottle Blow 138 Psychedelic electronic | ||||
| 15 | Dulcimer 77 Shakuhachi 139 Water jean | ||||
| 16 | Hammond Organ 78 Whistle 140 Bright Guitar | ||||
| 17 | Percussive Organ 79 Ocarina 141 Orchestra piccolo | ||||
| 18 | Rock Organ 80 Lead 1 (square) 142 Heavy metal guitar | ||||
| 19 | Church Organ 81 Lead 2 (sawtooth) 143 Crystal guitar | ||||
| 20 | Reed Organ 82 Lead 3 (caliope lead) 144 Queer electric Piano | ||||
| 21 | Accordian 83 Lead 4 (chiff lead) 145 Bright bass | ||||
| 22 | Harmonica 84 Lead 5 (charang) 146 Rock Electric Bass | ||||
| 23 | Tango Accordian 85 Lead 6 (voice) 147 Psychedelic Bass | ||||
| 24 | Acoustic Guitar (nylon) 86 Lead 7 (fifths) 148 Rhythm Electric Bass | ||||
| 25 | Acoustic Guitar (steel) 87 Lead 8 (bass+lead) 149 Heavy metal bass | ||||
| 26 | Electric Guitar (jazz) 88 Pad 1 (new age) 150 Magic electronic | ||||
| 27 | Electric Guitar (clear) 89 Pad 2 (warm) 151 Bright violin | ||||
| 28 | Electric Guitar (muted) 90 Pad 3 (polysynth) 152 Atonic violin | ||||
| 29 | Overdriven Guitar 91 Pad 4 (choir) 153 Heavy bass orchestra | ||||
| 30 | Distortion Guitar 92 Pad 5 (bowed) 154 Synth clarinet | ||||
| 31 | Guitar Harmonics 93 Pad 6 (metallic) 155 Interactive Lead | ||||
| 32 | Acoustic Bass 94 Pad 7 (halo) 156 orchestral keyboard | ||||
| 33 | Electric Bass(finger) 95 Pad 8 (sweep) 157 Bagpipes | ||||
| 34 | Electric Bass (pick) 96 FX 1 (rain) 158 Synth Banjo | ||||
| 35 | Fretless Bass 97 FX 2 (soundtrack) 159 Japan Synth | ||||
| 36 | Slap Bass 1 98 FX 3 (crystal) 160 Church Piano | ||||
| 37 | Slap Bass 2 99 FX 4 (atmosphere) 161 Church electric Piano | ||||
| 38 | Synth Bass 1 100 FX 5 (brightness) 162 Synth Piano | ||||
| 39 | Synth Bass 2 101 FX 6 (goblins) 163 Baritone Piano | ||||
| 40 | Violin 102 FX 7 (echoes) 164 Piano PAD | ||||
| 41 Viola 103 FX 8 (sci-fi) 165 String Piano | |||||
| 42 Cello 104 Sitar 166 Metal Piano | |||||
| 43 Contrabass 105 Banjo 167 Light rhythm Piano | |||||
| 44 Tremolo Strings 106 Shamisen 168 Electric Piano Pad | |||||
| 45 Pizzicato Strings 107 Koto 169 Classical piano | |||||
| 46 Orchestral Harp 108 Kalimba 170 Organ Guitar | |||||
| 47 Timpani 109 Bagpipe 171 Electric Guitar | |||||
| 48 String Ensemble 1 110 Fiddle | 172 Synthesis Nylon Guitar | ||||
| 49 String Ensemble 2 111 Shanai | 173 Synth Electronic Guitar | ||||
| 50 Synth Strings 1 112 Tinkle Bell 174 Bright Clean Guitar | |||||
| 51 Synth Strings 2 113 Agogo 175 Orchestra Guitar | |||||
| 52 Choir Aahs 114 Steel Drums | 176 Psychedelic Guitar | ||||
| 53 Voice Oohs 115 Woodblock 177 Bright organ | |||||
| 54 Synth Voice 116 Taiko Drum 178 Pick organ | |||||
| 55 Orchestra Hit 117 Melodic Tom 179 Synth accordion | |||||
| 56 Trumpet 118 Synth Drum 180 Bright Violin | |||||
| 57 Trombone 119 Reverse Cymbal 181 Stringed violinin | |||||
| 58 Tuba 120 Guitar Fret Noise 182 Trill violinin | |||||
| 59 Muted Trumpet 121 Breath Noise 183 Electronic violinin | |||||
| 60 French Horn 122 Seashore 184 Large violinin | |||||
| 61 Brass Section 123 Bird Tweet 185 Rhythm Orchestra | |||||
| No. | Nam | No. | Name | No. | Name |
| 186 | Pizzicato Violin | 224 | Metal Sax | 262 | Orchestra lead |
| 187 | Pizzicato Ensemble 1 | 225 | Baritone Sax ensemble | 263 | Glockenspiel lead |
| 188 | Pizzicato Ensemble 2 | 226 | Crystal Sax | 264 | Bass lead |
| 189 | Percussion band 227 Soft Baritone | 227 | Sax 265 Fifths lead | ||
| 190 | Baritone Synth Contrabass | 228 | Synth Baritone Sax 266 Wind lead | ||
| 191 | Bass Flute 2 | 229 | Heavy metal Sax 267 Atmosphere lead | ||
| 192 | Distortion Contrabass | 230 | Church Oboe | 268 | Sharp lead |
| 193 | Contrabass Lead | 231 | Oboe ensemble | 269 | Bright lead |
| 194 | Violin Lead 232 Bass Oboe | 270 East nation pad | |||
| 195 | Cello Lead | 233 | Bright Oboe | 271 | Atmosphere pad |
| 196 | Pizzicato rhythm | 234 | Dstortio oboe | 272 | Electric bass pad |
| 197 | High Harp | 235 | English Horn ensemble | 273 | Electric piano pad |
| 198 | Harp ensemble | 236 | Pizzicato English Horn | 274 | Clean guitar pad |
| 199 | Synth Harp 2 | 237 | Diplophonia English Horn | 275 | Western pad |
| 200 | Baritone Trumpet | 238 | Bright English Horn | 276 | Sci-fi pad |
| 201 | Trumpet ensemble | 239 | Synth English Horn | 277 | Metal sci-fi pad |
| 202 | rhythm Trumpet | 240 | Psychedelic Synth Lead | 278 | Clarinet pad |
| 203 | High Trumpet 2 | 241 | Vibraphone Synth Lead | 279 | Electronic dance pad |
| 204 Synth Trumpet 242 Marimba Synth Lead 280 Double kalimba | |||||
| 205 Bass Trombone 243 Metal FX 281 Bright kalimba | |||||
| 206 Trombone ensemble 244 Electronic FX 282 Crystal kalimba | |||||
| 207 rhythm Trombone 245 Electronic String Ensemble | 283 Synth kalimba | ||||
| 208 High Trombone 246 Wind FX 284 Electronic bagpipe | |||||
| 209 baritone Trombone 247 Clarinet FX 285 Wind bagpipe | |||||
| 210 Synth Trombone 248 Organ FX 286 High bagpipe | |||||
| 211 Violin French Horn 249 Crystal FX 287 | Bright bagpipe | ||||
| 212 French Horn ensemble 250 Synth Shamisen 288 | Orchestra bagpipe | ||||
| 213 Electronic French Horn 251 Electronic Shamisen 289 Bangdi | |||||
| 214 Synth French Horn 252 Bright Sitar 290 Pipa | |||||
| 215 PsychedelicSynth Brass 253 Whistle Accord 291 Erhu | |||||
| 216 Distortion Synth Brass 254 Rhythm Nation 292 | Gaohu | ||||
| 217 Vibraphone Synth Brass 255 Bright Koto 293 Suona | |||||
| 218 Rock Synth Brass 256 Koto Lead 294 Dasuo | |||||
| 219 Synth Muted Trumpet 257 Dipophonia Koto 295 Guzheng | |||||
| 220 Soprano Sax ensemble 258 Baritone Koto 296 Sanxian | |||||
| 221 Hit Soprano Sax 259 Synth Koto 297 Guqin | |||||
| 222 Synth Soprano Sax 260 Environmental Lead 298 Xiao | |||||
| 223 National Sax 261 Metal Lead 299 China percussion | |||||
Stiltabelle Table of Styles
| No. | Name No. | Name No. | Name | ||
| 0 | Beat1 62 | Soul4 124 | Mideast | ||
| 1 | Beat2 63 | Soul5 125 | Pop | ||
| 2 | Beat3 64 | Newsoul 126 | Love_ballad | ||
| 3 | Beat4 65 | Big_band1 127 | EasyBeat | ||
| 4 | Beat5 66 | Big_band2 128 | SoftBeat | ||
| 5 | Beat6 67 | Blue_grass 129 | Pop_samba1 | ||
| 6 | Beat7 68 | Jazz_samba 130 | Pop_samba2 | ||
| 7 | Beat8 69 | Jazz_waltz1 131 | Shuffle | ||
| 8 | Beat9 70 | Jazz1 132 | Jazz Band | ||
| 9 | Beat10 71 | Jazz2 133 | Shuffle1 | ||
| 10 | Beat11 72 | Swing1 | 134 Shuffle2 | ||
| 11 | Beat12 73 | Swing2 | 135 Slow_folk | ||
| 12 | Beat13 74 | Swing3 | 136 Step | ||
| 13 | Beat14 75 | Jazz_waltz2 | 137 16ballad1 | ||
| 14 | 16beat1 | 76 Merengue1 138 16ballad2 | |||
| 15 | 16beat2 | 77 Merengue2 139 Love_ballad1 | |||
| 16 | 16beat3 | 78 Country1 | 140 Love_ballad2 | ||
| 17 | Rock1 | 79 Country2 | 141 Swing1 | ||
| 18 | Rock2 | 80 Country3 | 142 Swing2 | ||
| 19 | SlowRock | 81 Country4 | 143 Swing3 | ||
| 20 | Cnty Rock | 82 Country5 | 144 Reggae | ||
| 21 | DancRock | 83 Country6 | 145 Rhumba1 | ||
| 22 | Easy Rock | 84 Country7 | 146 Rhumba2 | ||
| 23 | GlamRock | 85 Cntrwal1 | 147 Rhumba3 | ||
| 24 | Har Rock 1 | 86 Cntrwal2 | 148 Rhumba4 | ||
| 25 | HarRock2 | 87 SlowCnt1 | 149 Salsa | ||
| 26 | PopRock 88 | SlowCnt2 | 150 Samba1 | ||
| 27 | RockRoll 89 | SoulCntr | 151 Samba2 | ||
| 28 | Rock Beat | 90 Mambo1 | 152 Cobmo | ||
| 29 | RockFolk | 91 Habanera | 153 Jorpo | ||
| 30 | Rocky Pop | 92 Vallenat | 154 | OrientalBeat1 | |
| 31 | HardRock | 93 Baiao 155 OrientalBeat2 | |||
| 32 | Had 3 Beat | 94 Bequine | 156 | OrientalBeat3 | |
| 33 | Plena | 95 Bolero | 157 OrientalBeat4 | ||
| 34 | Dance1 96 | Bossanoval1 | 158 OrientalBeat5 | ||
| 35 | Dance2 97 | Lambada | 159 OrientalBeat6 | ||
| 36 | Dance3 98 | Mambo | 160 OrientalBeat7 | ||
| 37 | Dance4 99 | Samba | 161 OrientalBeat8 | ||
| 38 | Dance5 100 | Reggae | 162 OrientalBeat9 |
| 39 | Dance6 101 Rhumba 163 | OrientalBeat10 | ||
| 40 | Dance7 102 Tango1 164 | OrientalBeat11 | ||
| 41 | Dance8 103 Bossanoval2 | OrientalBeat12 | ||
| 42 | Dance9 104 Bossanoval3 | OrientalBeat13 | ||
| 43 | Dance10 105 Bossanoval4 | OrientalBeat14 | ||
| 44 | Bachata1 106 Bossanoval5 | Classical beat1 | ||
| 45 | Bachata2 107 Calypso 169 | Classical beat2 | ||
| 46 | Soul_funk 108 Tango2 170 | Classical beat3 | ||
| 47 | Euro_soul 109 Tango3 171 | JazzRock1 | ||
| 48 | Funky_soul1 110 March1 | JazzRock2 | ||
| 49 | Funky_soul2 111 March2 | Soft Rock | ||
| 50 | Funky_soul3 112 March3 | Classic Rock | ||
| 51 | Funky_soul4 113 March4 | Folk rock1 | ||
| 52 | Funky_soul5 114 Polka1 | Folk rock2 | ||
| 53 | Slow_soul1 115 Polka2 | WaltzRock | ||
| 54 | Slow_soul2 116 Polka3 | Heavy metal rock1 | ||
| 55 | Slow_soul3 117 Waltz1 | Heavy metal rock2 | ||
| 56 | Funky_soul6 118 Waltz2 | Rock | ||
| 57 | Funky_soul7 119 Waltz3 | Rock | ||
| 58 | Funky_soul8 120 China1 | Middle Eastern rock | ||
| 59 | Soul1 121 China2 | 183 Traditional rock | ||
| 60 | Soul2 122 China3 | 184 Rock disco | ||
| 61 | Soul3 123 Thailand | 185 Britpop1 |
| No. | Name No. | Name | |||
| 186 | Britpop2 | 224 New Orleans | Blues 262 Middle East tango2 | ||
| 187 | NewRock | 225 New York Blu | es 263 Middle East tango3 | ||
| 188 | Modern dance1 | 226 Piano | Blues 264 Reggae March1 | ||
| 189 | Modern dance2 | 227 Soul-Blues | 265 Reggae March2 | ||
| 190 | Modern dance3 | 228 Urban | Blues 266 Reggae March3 | ||
| 191 | Modern dance4 | 229 Blues w | waltz1 267 Reggae March4 | ||
| 192 | Modern dance5 | 230 Blues merengue | e1 268 Classical polka | ||
| 193 | New century1 | 231 Blues merengue | 2 269 Mento | ||
| 194 | New century2 | 232 Contemporary | R&B1 270 Political Reggae | ||
| 195 | New century3 | 233 Contemporary | R&B2 271 Classical Waltz1 | ||
| 196 | Rock Dance1 | 234 | Contemporary R&B3 272 Classical Waltz2 | ||
| 197 | Rock Dance2 | 235 | Contemporary R&B4 273 Classical Waltz3 | ||
| 198 | Jazz bachata1 | 236 | Contemporary R&B5 274 Chinese Classical1 | ||
| 199 | Jazz bachata2 | 237 | Deep Funk 275 Chinese Classical2 | ||
| 200 | Psychedelic 1 | 238 | Doo Wop 276 Chinese Classical3 | ||
| 201 | Psychedelic 2 | 239 | Left-Field Hip-Hop 277 Chamber pop | ||
| 202 | Post Rock | 240 | Motown 278 Techno-Tribal | ||
| 203 | Soft Rock | 241 | Slow R&b1 279 Classical ballad1 | ||
| 204 | Goth Psychedelic | 242 | Slow R&b2 280 Classical ballad2 | ||
| 205 | SoulPsychedelic 1 | 243 | Slow R&b3 281 Light ballad | ||
| 206 | SoulPsychedelic 1 | 244 | Lyric R&b 282 Pop_classic | ||
| 207 | SoulPsychedelic 1 | 245 | R&b march1 283 Britpo samba1 | ||
| 208 | SoulPsychedelic 1 | 246 | R&b march2 284 Britpo samba2 | ||
| 209 | Psychedelic swing | 247 | Afro-Beat 285 Downtempo | ||
| 210 | Funky_soul1 | 248 | Afro-Pop 286 Big Beat | ||
| 211 | Reggae soul1 | 249 | Celtic Pop 287 Trip-Hop1 | ||
| 212 | Reggae soul2 | 250 | Hawaiian Pop 288 Trip-Hop2 | ||
| 213 | Space | 251 | Indian Pop 289 Rhythm ballad | ||
| 214 | Free Psychedelic 1 | 252 | European Traditions 290 Lyric step | ||
| 215 | Free Psychedelic 2 | 253 | World Fusion 291 Lyric rhythm1 | ||
| 216 | Free Psychedelic 3 | 254 | Asia samba 292 Lyric rhythm2 | ||
| 217 | Free Psychedelic 4 | 255 | Traditional Reggae 293 Slow ballad1 | ||
| 218 | Free jazz 256 Middle East | tango1 294 Slow ballad2 | |||
| 219 | Country Blues | 257 | Reggae-Pop 295 Xinjiang 1 | ||
| 220 | Electric Blues | 258 | Roots Reggae 296 Xinjiang 2 | ||
| 221 | Folk-Blues 259 ReggaeBeat1 | 297 Henan | |||
| 222 | Jazz Blues | 260 | ReggaeBeat2 298 Dongbei | ||
| 223 | Jump Blues | 261 | Dancehall 299 Shanbei | ||
| No. | Code of song | No. | Code of song | No. | Code of song |
| 0 | Hey Pampow 27 Polonaise | 54 Opus | 40 by Mozart | ||
| 1 | Nocturne 28 Katyusha 55 Susanna | ||||
| 2 | In the rain 29 Red River Valley | 56 F | ountain | ||
| 3 | Reed 30 | Brandenburg Concertos | 57 | Maiden's Prayer | |
| 4 | Air string music 31 Danse Russe | 58 Four seasons spring | |||
| 5 | Canon | 32 Chong | Erfei 59 Swan Lake | ||
| 6 | The first Christmas 1 | 33 | Toreador Song | 60 | Fur Elise |
| 7 | Coldness | 34 The Cuckoo Waltz | 61 William Tell Overture | ||
| 8 | Minuet in G | 35 Old French song | 62 Smile Polka | ||
| 9 | Entertainer | 36 Habanera | 63 Spain Matador March | ||
| 10 | Bach's Minute | 37 | Waltz of the Flowers | 64 | Turkish March |
| 11 | American Patrol 38 Fantasiaie from Chiop | 65 Four Swans | |||
| 12 | Oh, the Christmas tree | 39 | Waltz in G flat major | 66 | Abide With Me |
| 13 | Oh, my dear Clementine | 40 | Island Of Capri | 67 | Spring Song |
| 14 | Rudolph the Red-Nosed Reindeer | 41 Carmen | 68 Minute Waltz Op | ||
| 15 | Silver | 42 Carmen Aragon | 69 Gavotte | ||
| 16 | Beethoven Sonata | 43 | Carmen Overture | 70 | Schubert Serenade |
| 17 | O sole mio | 44 | Cute little spider | 71 | Serenade - Haydn |
| 18 | Socks 2 | 45 | Clementine sonata | 72 | Moments Musicaux |
| 19 | Winter | 46 | Croatian Rhapsody | 73 | Hungarian Dance |
| 20 | Long long ago | 47 Radetzky March 74 Yankee | |||
| 21 | Romance De Amor | 48 | The Blue Danube | 75 | Waltz |
| 22 | Concerto D'Amour | 49 | Mariage D'Amour | 76 | The tragic third movement |
| 23 | Music Box Dancer | 50 | The Magic Flute-overture | 77 Polka, Italy | |
| 24 | Ann Polka 51 Mozart | 78 Minuets | |||
| 25 | River of Babylon | 52 | Santa Claus is coming to town | 79 Rhythm Of Rain | |
| 26 | White Christmas | 53 Silent Night |