IAN 375774 - Dumbbells CRIVIT - Free user manual and instructions
Find the device manual for free IAN 375774 CRIVIT in PDF.
User questions about IAN 375774 CRIVIT
0 question about this device. Answer the ones you know or ask your own.
Ask a new question about this device
Download the instructions for your Dumbbells in PDF format for free! Find your manual IAN 375774 - CRIVIT and take your electronic device back in hand. On this page are published all the documents necessary for the use of your device. IAN 375774 by CRIVIT.
USER MANUAL IAN 375774 CRIVIT
natural_image
Close-up of a black dumbbell with two wheels and a central shaft (no text or symbols visible)
text_image
PDF ONLINE www.lidl-service.comKURZHANTEL-SET, 10 KG 10KG DUMBBELL SET SET D'HALTÈRES COURTS, 10 KG
DE AT CH
KURZHANTEL-SET, 10 KG
Gebrauchsanweisung
FR BE
SET D'HALTÈRES COURTS, 10 KG
Instructions for use
NL BE
HALTERSET, 10 KG
Gebruiksaanwijzing
CZ
ČINKA 10 KG
Návod k použití
ES
natural_image
Illustration of two people performing a stretching exercise, one lifting the other (no text or symbols)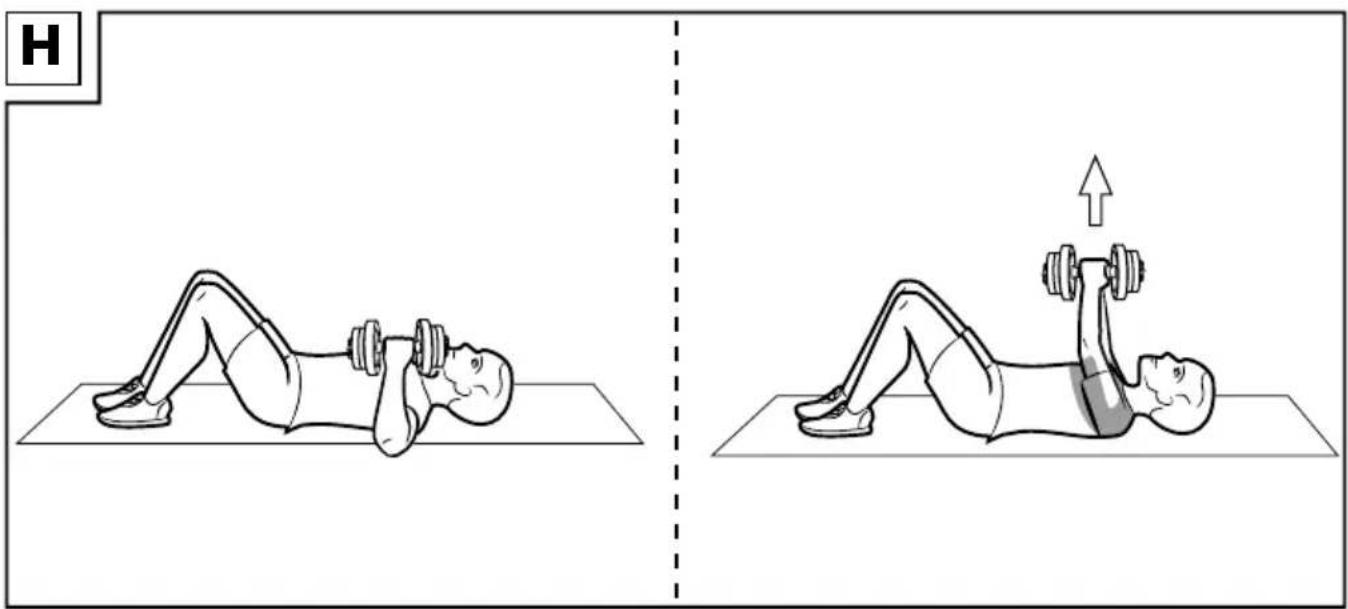
natural_image
Illustration of a person performing a sit-up exercise with dumbbells, showing two sequential poses (no text or symbols)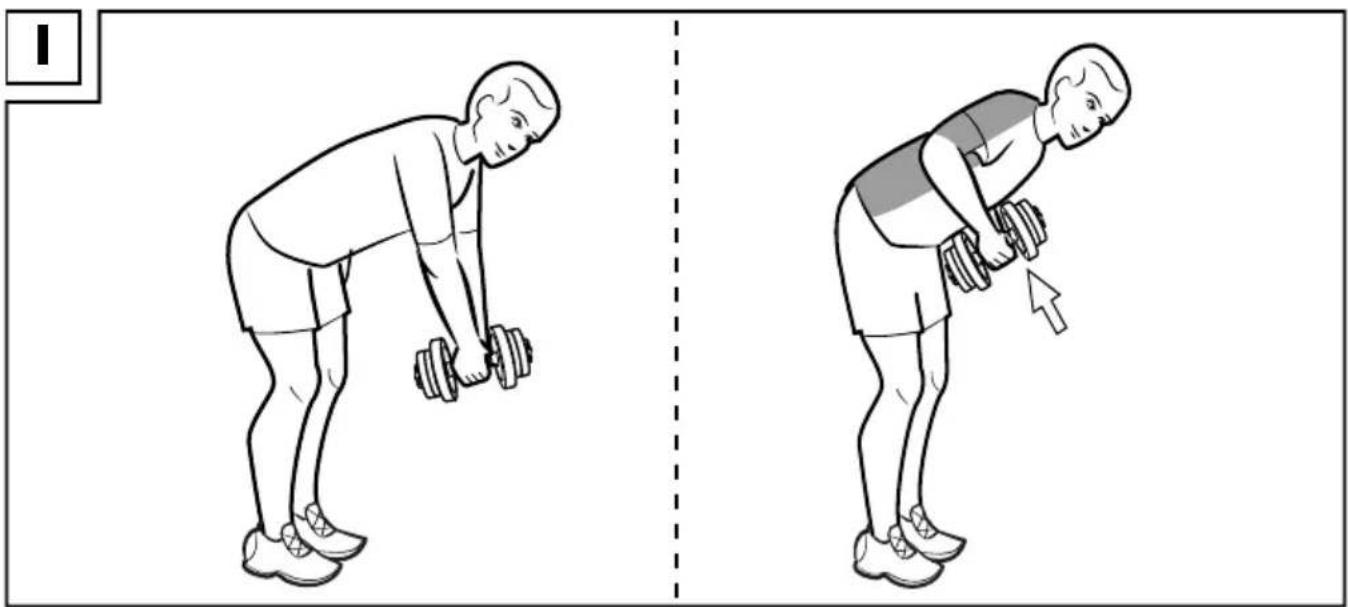
natural_image
Illustration of a person performing a dumbbell exercise, showing two sequential poses (no text or symbols)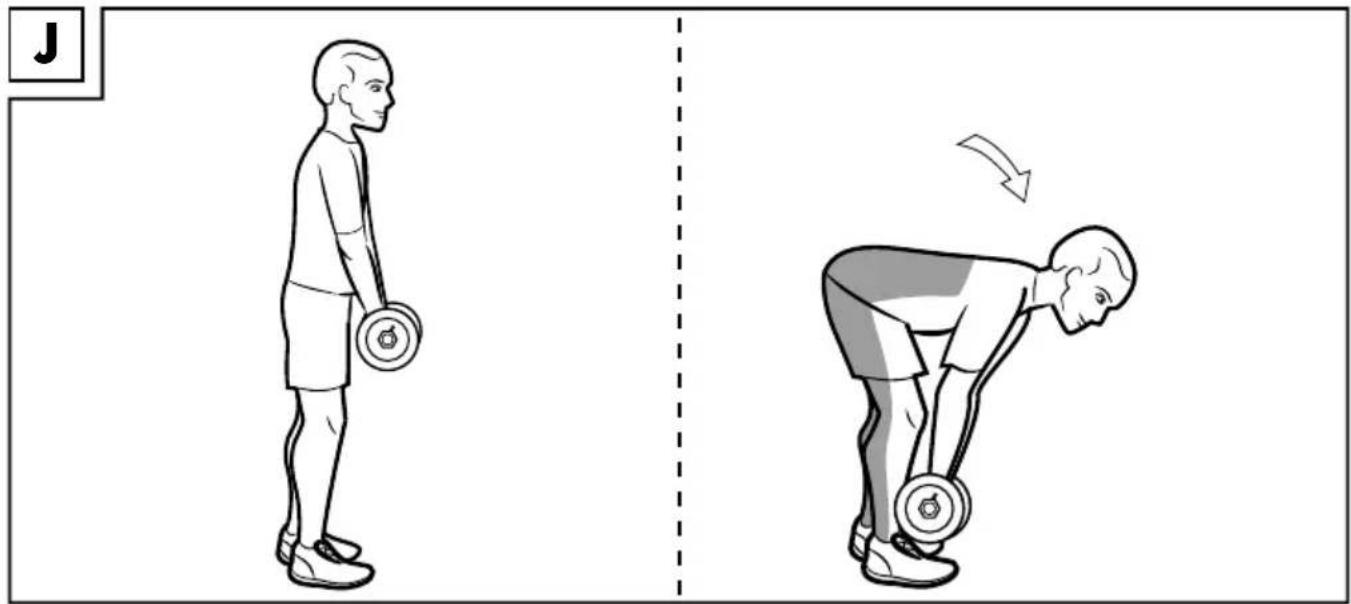
natural_image
Illustration of a person performing a dumbbell exercise, showing posture changes (no text or symbols)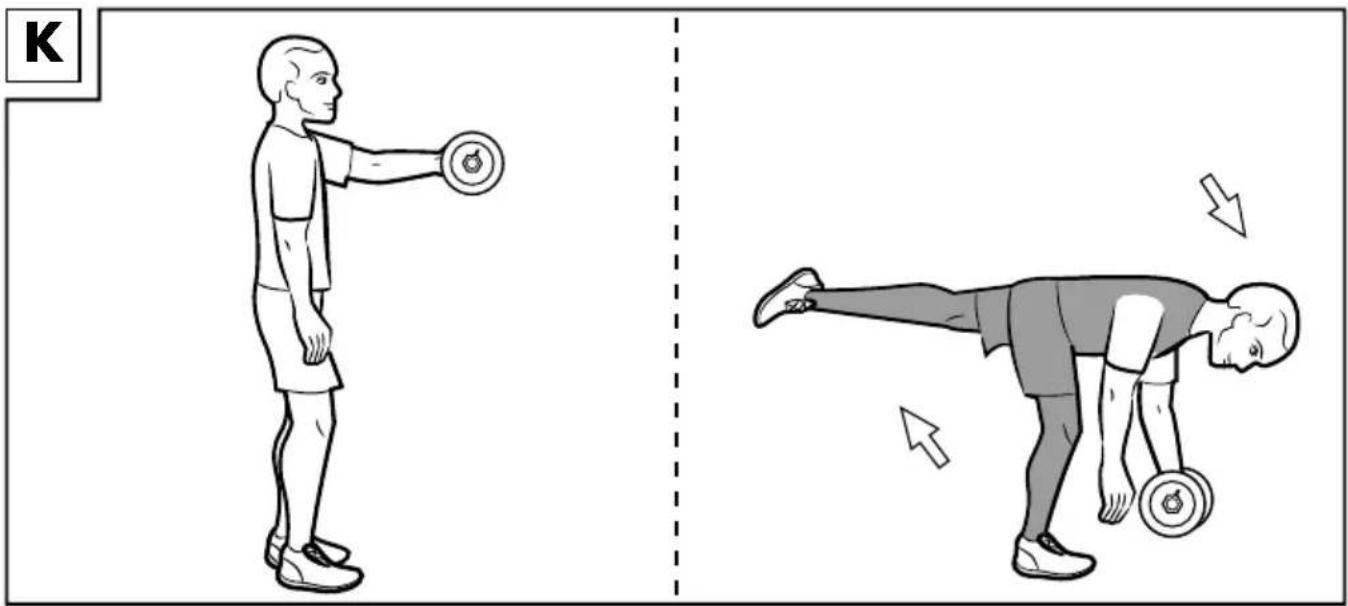
natural_image
Illustration of a person performing a dumbbell exercise, showing posture changes (no text or symbols)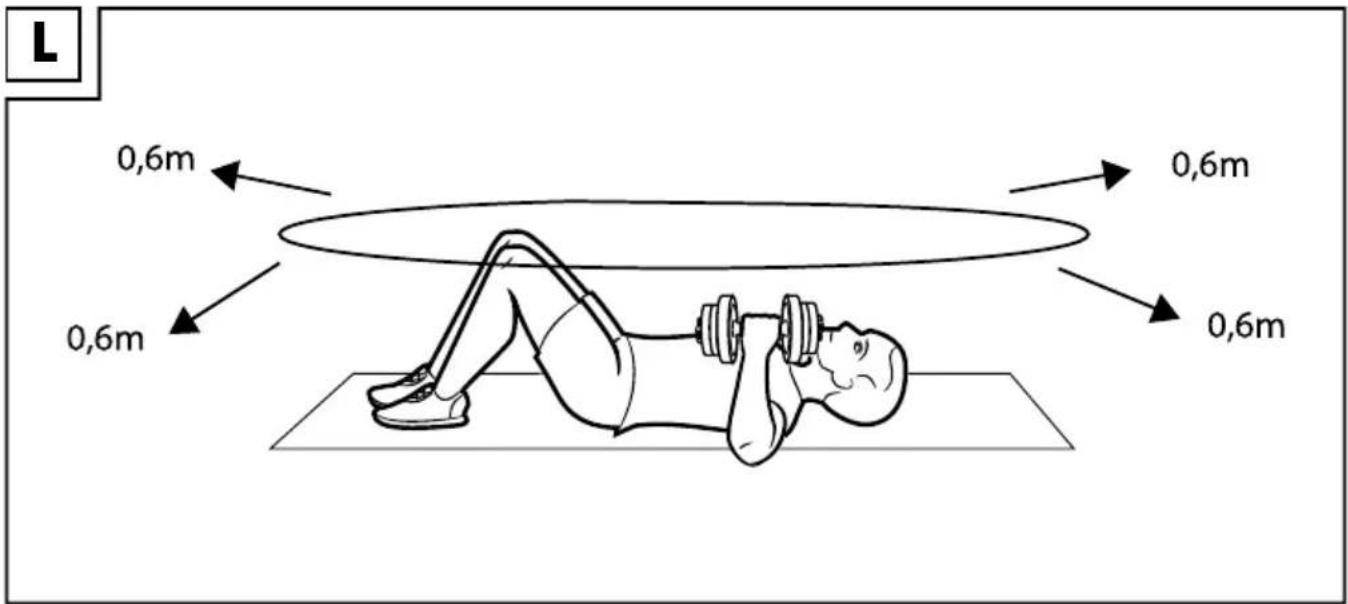
text_image
L 0,6m 0,6m 0,6m 0,6mDE AT CH
Extra caution - risk of injury o children! 17
Dangers due to wear and tear! 17
Mounting the weight discs 17
General exercise instructions 17
Warming up 17
Exercise suggestions 18
Stretching 20
Storage, cleaning 20
Disposal 21
Notes on the guarantee and
service handling 21
FR BE
You have chosen to purchase a high-quality product. Familiarise yourself with the product before using it for the first time.

Read the following instructions for use carefully.
Use the product only as described and only for the given areas of application. Store these instructions for use carefully. When passing the product on to third parties, please also hand over all accompanying documents.
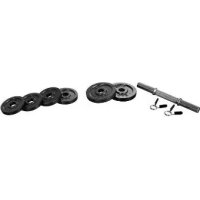
Package contents (Fig. A)
1 x dumbbell bar (1)
2 x weight disc 2kg (2)
4 x weight disc 1 kg (3)
2 x dumbbell quick release fastener (4)
1 x instructions for use
Technical data
Dumbbell bar: approx. 2kg
Diameter: approx. 30mm
Length: approx. 350mm
Weight disc, small: approx. 1kg
Diameter: approx. 119mm
Strength: approx. 17mm
Hole diameter: approx. 31 mm
Weight disc, large: approx. 2kg
Diameter: approx. 155.5mm
Strength: approx. 21.5mm
Hole diameter: approx. 31 mm
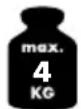
Max. load per dumbbell quick release fastener in vertical position: 4kg
Max. load (incl. dumbbell bar): 10kg
Important: be sure to attach the same weight to both sides.
Important: only use the weights that are included in the package contents with the dumbbell.

Date of manufacture (month/year): 08/2023
ISO 20957 Class H
Scope of application: home use
Intended use
This product was developed as an exercise device for exercising your entire body. The product is designed for personal use and is not suitable for medical, therapeutic or commercial purposes.
Safety information

Life-threatening hazard!
- Never leave children unattended with the packaging materials. There is a risk of suffocation.

Risk of injury!
- This product may be used by children 14 years of age and older, as well as by persons with diminished physical, sensory or mental abilities or lack of experience or knowledge, if they are supervised or instructed in the safe use of the product and understand the associated risks.
- Children must not be allowed play with the product.
- Consult your doctor before you start exercising. Make sure you are healthy enough to exercise.
- Attach the same weight to both ends of the dumbbell bar.
- Attach the weight discs to both sides of the dumbbell according to their weight and size. The largest and heaviest weight discs must be attached first, and the smallest and lightest last.
- Always keep the instructions for use with the suggested exercises readily available.
- Do not use the product if you are injured or your health is impaired.
• Always remember to warm up before exercising and exercise according to your current performance ability. Overexertion and over-exercising can lead to serious injuries. - Stop exercising immediately and contact a doctor if you experience pain, weakness or fatigue.
- Pregnant women should only exercise after consulting with their doctor.
- The product must only be used by one person at a time.
-
The product is not suitable for therapeutic purposes.
-
Keep a clear space of at least 0.6m around the training area (Fig. L).
• Exercise on a flat, non-slip surface only. - Do not use the product near steps or landings.
- Use the product only as specified in the 'Intended use' section.
- When using the product, be aware of its weight and do not underestimate this.
- Do not exercise when you are tired or distracted. Do not exercise directly after eating a meal. Wait approx. 2 hours before beginning to exercise.
- Ventilate the exercise room sufficiently but beware of draughts.
- Keep yourself sufficiently hydrated during your workout.
- No modifications may be made to the product!
- Use only genuine spare parts.

Extra caution – risk of injury to children!
- Do not allow children to use this product unsupervised. Instruct them in the correct use of the product and maintain supervision. Only permit children to use the product if their mental and physical development allows it. This product is not a toy.
- Bear in mind that children are playful and like to experiment. Avoid situations and behaviours that are not appropriate for the product.

Dangers due to wear and tear!
- Check the product for damage or wear before each use. Only use the product if it is in perfect condition!
- The safety of the product can only be guaranteed if it is regularly inspected for damage and wear and tear.
- Check the product regularly for damage or deterioration. If damaged, it must not be used anymore.
- Pay particular attention to wear of the dumbbell quick release fasteners.
- Protect the product from extreme temperatures, sun and moisture. Improper storage or use of the product could lead to premature wear and tear, which could result in injury.
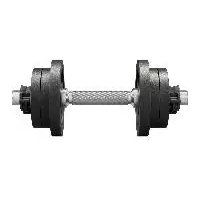
Mounting the weight discs
- Attach the weight discs (2) and (3) to both sides of the dumbbell (1) according to their weight and size. The largest and heaviest weight discs must be attached first, and the smallest and lightest last (Fig. B).
Important: be sure to attach the same weight to both sides.
- Slide the dumbbell quick release fasteners (4) onto the ends of the dumbbell bar and fasten them. This will prevent the weight discs from sliding off while exercising. The click system shown makes it possible to quickly change the weight discs. Make sure that the dumbbell quick release fasteners are positioned close to the weight discs so that they do not slide out of position while exercising (Fig. C).
General exercise instructions
Exercise tips
- Wear comfortable sports clothing and athletic shoes.
- Warm up before each exercise session and end the session gradually.
• Take sufficient breaks between the exercises and keep yourself sufficiently hydrated. - If you are a beginner, never exercise with too much intensity. Increase the intensity of the exercise sessions slowly.
- Perform all exercises smoothly, not jerkily and not fast.
- Be sure to breathe steadily. Exhale during exertion and inhale upon release.
- Maintain correct body posture while exercising.
Warming up
Take sufficient time before each exercise session to warm up. Some simple warm-up exercises are described below.
You should repeat each exercise 2-3 times.
Neck muscles
- Turn your head slowly to the left and to the right. Repeat this movement 4–5 times.
- Rotate your head slowly, first in one direction then in the other.
Arms and shoulders
- Clasp your hands behind your back and pull them upwards slowly. If you bend your upper body forwards at the same time, all muscles will be optimally warmed up.
- Roll both your shoulders forwards for one minute, then roll them back.
- Pull your shoulders up to your ears and then let them drop again.
- Circle your right and left arms alternately forwards and then, after one minute, backwards.
Important: don't forget to keep breathing steadily!
Leg muscles
- Stand on one leg and lift your other leg, with the knee bent, approx. 20cm off the floor.
- Rotate your raised foot first in one direction, then change direction after a few seconds.
- Switch legs and repeat this exercise.
- Lift one leg after the other and take a few steps on the spot. Make sure you only lift your legs to a height where you are still able to maintain your balance well.
Exercise suggestions
Below are a selection of possible exercises.
Shoulder presses in sitting position (Fig. D)
Muscles used: arm, shoulder and core
Starting position
- Sit down on a chair and place your feet hip-width apart on the floor. Your legs should be bent at a 90° angle.
- Hold the product horizontally in one hand.
- Extend your arm from the side of your body so that it is parallel to the floor. The arm not holding the product rests on your thigh.
- Bend your elbow at a 90° angle. The back of your hand is facing backwards. Make sure your wrist is straight.
-
Tense your leg, buttock and abdominal muscles throughout. Straighten your upper body and pull your shoulder blades back/down.
-
Lift your arm up while breathing out, and remain in this position for a moment.
Important: your upper body remains straight and your arm remains slightly bent when stretched up.
End position
- Slowly return your arm to the starting position.
- Repeat this exercise 5-10 times in three sets and then switch arms.
Important: perform the movement slowly. Only your arms should move, your shoulders should remain lowered during the entire exercise.
Triceps (Fig. E)
Muscles used: back of upper arm
Starting position
- Place your feet side by side on the floor, hip-width apart, and bend your knees slightly.
- Hold the product vertically with both hands behind your head. Hold the weight disc(s) at one of the ends of the dumbbell while doing so.
Note: your knees remain slightly bent.
- Tense your leg, buttock and abdominal muscles throughout. Your upper body is upright. Push your shoulder blades back/down.
- Now stretch your arms up while moving the product over your head.
- Hold the position for a moment.
End position
- Then slowly lower the product back to the starting position.
Note: make sure you do not completely straighten your elbows, and that they are pointing outwards.
Repeat this exercise 5–10 times in three sets. Take a 90-second break between each set.
Important: perform the movement slowly and do not completely straight-en your elbows during the stretch.
Make sure your elbows are pointing outwards when bent.
Squats (Fig. F)
Muscles used: core and leg
Starting position
- Stand on the floor with your feet shoulder-width apart. Your toes should be pointing forwards and your knees slightly bent.
- Take the product vertically in your hands and hold it in front of you at chest height with your arms bent.
- Tense your buttock, arm and abdominal muscles.
- Push your buttocks back. Bend your knees and hips and enter a squat position. Push your shoulder blades back/down at the same time.
- Briefly hold this position.
End position
- Then return to the starting position while breathing out.
- Repeat this exercise 5–10 times in three sets.
Important: perform the movement slowly and keep your back straight throughout the entire exercise.
Reverse lunge (Fig. G)
Muscles used: arm, shoulder, core and legs
Starting position
- Stand on the floor with your feet shoulder-width apart. Your toes should be pointing forwards and your knees slightly bent.
- Hold the product vertically with both hands at shoulder height in front of your chest while bending your elbows.
- Take a lunging step back with your left leg. Bend your left knee at a 90° angle so that it almost touches the floor.
- Remain in this position for a moment.
End position
- Return your left leg to the starting position while breathing out.
- Repeat this exercise 5–10 times in three sets and then switch sides. Take a 90-second break between each set.
Important: tense your core muscles throughout the entire exercise.
Muscles used: central area of chest, shoulder and back of upper arm
Starting position
- Lie on your back and bend your legs at a 30^ angle. The soles of your feet should be flat on the floor.
- Take the product in your hands and hold it above your ribcage with your arms bent.
- Tense your leg, buttock and abdominal muscles. Pull your shoulder blades back/down. Your neck is aligned with your spine.
- Extend your arms upward while breathing out. Your shoulders remain on the floor and your elbows are slightly bent.
- Remain in this position for a moment.
End position
- Slowly return your arms to the starting position.
- Repeat this exercise 5–10 times in three sets. Take a 90-second break between each set.
Important: perform the movement slowly. Only your arms should move. Your shoulders and lower back remain on the floor throughout.
Bent-over dumbbell row (Fig. I)
Muscles used: upper arm, core and back
Starting position
- Stand on the floor with your feet shoulder-width apart and your knees slightly bent.
- Hold the product in both hands vertically.
- Bend your upper body forward by approx. 45^ . Extend your arms vertically downwards.
- Pull the product towards you to the height of your navel while breathing out. Bend your elbows to do this and guide them behind your body.
End position
- Slowly return to the starting position.
- Repeat this exercise 5-10 times in three sets. Take a 90-second break between each set.
Important: maintain core tension during the exercise. Keep your upper body straight and try to push your shoulder blades back/down. Push your chest forward.
Deadlifts (Fig. J)
Muscles used: core and back of leg
Starting position
- Stand on the floor with your feet hip-width apart and tense your buttocks.
- Grip the product horizontally. The backs of your hands are facing forwards. Your arms are extended downwards.
- Lean forwards slowly.
- Then bend your knees gently and guide the product down your body and legs until you have reached the middle of your shins.
End position
- Quickly return to the starting position while breathing out.
- Repeat this exercise 5–10 times in three sets. Take an approx. 90-second break between each set.
Important: maintain core tension during the exercise. Keep your upper body straight and try to push your shoulder blades back/down.
Single leg deadlift (Fig. K)
Muscles used: core and leg
Starting position
- Stand on the floor with your feet hip-width apart. Your toes should be pointing forwards and your knees slightly bent.
- Extend your left arm in front of you at 90° and hold the product horizontally in your left hand.
- Tense your buttock and core muscles and extend your right arm in front of you, also at 90°.
- Shift your weight to your right leg. Bend your upper body forwards and stretch your left leg out behind you. The leg you are standing on is slightly bent.
- At the same time move your left hand with the product down towards the floor. Your back remains straight and your right arm remains extended.
Important: make sure you rotate your hips as little as possible.
- Remain in this position for a moment.
End position
- Quickly return to the starting position.
- Repeat this exercise 5-10 times in three sets and then switch sides.
Important: perform the movement slowly. Your feet are firmly planted on the floor, your shoulders remain lowered and your lower back is straight.
Stretching
Take sufficient time to stretch after each exercise session. Some simple exercises to do this are described below.
You should perform each exercise 3 times per side for 15–30 seconds.
Neck muscles
- Stand in a relaxed posture.
- Pull your head gently to one side with one hand, first to the left and then to the right.
This exercise stretches the sides of your neck.
Arms and shoulders
- Stand up straight with your knees slightly bent.
- Bend your right arm behind your head until your right hand is between your shoulder blades.
- Grip your right elbow with your left hand and pull it backwards.
- Change sides and repeat the exercise.
Leg muscles
- Stand upright and lift one foot off the floor.
- Rotate it slowly, first in one direction, then the other.
- Switch feet after a while.
Important: make sure your thighs remain parallel to each other. Push your pelvis forward when doing so, keeping your upper body upright.
Storage, cleaning
When not in use, always store the product clean and dry at room temperature. Only clean the product with a damp cloth and wipe dry afterwards.
IMPORTANT! Never clean the product with harsh cleaning agents.
Disposal

Dispose of the product and packaging materials in accordance with current local regulations. Store the packaging materials (foil bags, for example) out of the reach of children. For further information about disposal of the product no longer needed, contact your local council. Dispose of the product and the packaging in an environmentally friendly manner.

The Recycling Code distinguishes different materials to be returned for recycling. The Code consists of the recycling symbol for the recycling process and a number that identifies the material.
Notes on the guarantee and service handling
The product was produced with great care and under continuous quality control. DELTA-SPORT HANDELSKONTOR GmbH gives private end customers a three-year guarantee on this product from the date of purchase (guarantee period) in accordance with the following provisions. The guarantee is only valid for material and manufacturing defects. The guarantee does not cover parts subject to normal wear and tear that are thus considered wear parts (e.g. batteries) or fragile parts such as switches, rechargeable batteries, or parts made of glass.
Claims under this guarantee are excluded if the product has been used incorrectly, improperly, or contrary to the intended purpose, or if the provisions in the instructions for use were not observed, unless the end customer proves that a material or manufacturing defect exists that was not caused by one of the aforementioned circumstances.
Claims under the guarantee can only be made within the guarantee period by presenting the original sales receipt. Please therefore keep the original sales receipt. The guarantee period is not extended by any repairs carried out under the guarantee, under statutory guarantees, or as a gesture of goodwill. This also applies to replaced and repaired parts.
If you wish to make a claim please first contact the service hotline mentioned below or contact us by e-mail. If there is a guarantee case, then the product will be repaired or replaced free of charge to you or the purchase price will be refunded, depending on our choice.
Your legal rights, in particular guarantee claims against the respective seller, are not limited by this guarantee.
IAN: 434725_2304
GB Service Great Britain
Tel.: 0800 404 7657
E-Mail: deltasport@lidl.co.uk
IE Service Ireland
Tel.: 1800 101010
E-Mail: deltasport@lidl.ie
Félicitations!