
18118L18 - Dumbbells CRIVIT - Free user manual and instructions
Find the device manual for free 18118L18 CRIVIT in PDF.
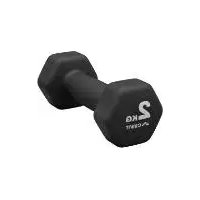
| Product type | Dumbbell set, 10.5 kg |
| Brand | Crivit |
| Model | 18118L18 |
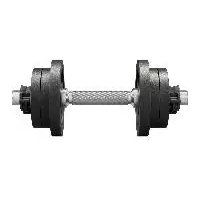
| Bar material | Chrome-plated steel |
| Bar length | 35 cm |
| Bar diameter | 30 mm |
| Bar weight | Approximately 1.95 kg |
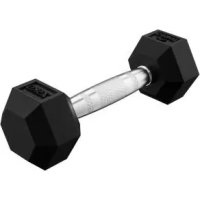
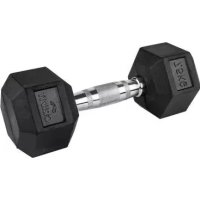
| Dumbbell plates | 6 lacquered cast iron plates: 2 x 2 kg, 2 x 1.25 kg, 2 x 1 kg |
| Inner diameter of plates | 30 mm |
| Locks | 2 spring clip locks |
| Maximum weight | 10.5 kg |
| Usage class | H (home) according to EN 957-2 |
| Recommended age | From 14 years |
| Use surface | Solid, level and horizontal, safety distance of 1.5 m |
| Maintenance | Clean with warm water, dry, store in a dry place |
| Warranty | 3 years |
| Target muscles | Biceps, triceps, chest, back, shoulders, legs |
| Number of described exercises | 8 exercises |
| Manufacturer | Crivit (Lidl) |
Frequently Asked Questions - 18118L18 CRIVIT
User questions about 18118L18 CRIVIT
0 question about this device. Answer the ones you know or ask your own.
Ask a new question about this device
Download the instructions for your Dumbbells in PDF format for free! Find your manual 18118L18 - CRIVIT and take your electronic device back in hand. On this page are published all the documents necessary for the use of your device. 18118L18 by CRIVIT.
USER MANUAL 18118L18 CRIVIT
natural_image
Two black dumbbells with metallic weights, one with a textured handle and the other with a textured handle (no visible text or symbols)HANTEL-SAINTEL,53KG 10,5

DE AT CH
HANTEL SENTE, SEKG 0,
DUMBBELL SET 10.5 KG
Instructions
IAN 292204
22 (GB) Instruction manual 16
23 Tec nical data 16
24 Important safety information 16
25 Training notes 16
25.1 General Training Notes 16
25.2 Exercise notes 17
25.3 Exercises 17
26 Maintenance & care 18
27 Warranty 18
28 Service 18
(A) Bizeps (A)Bizepntel--Curls
(G) Sc ultern (GFrontbenFront eben
Name: ISM Service Center
E-Mail: SERVICE@LA-SPORTS.DE
(C) Pectoraux - Pull-over
Nom: ISM Service Center
E-Mail: SERVICE@LA-SPORTS.DE
D-51427 Berg. Gladbac, Germany
22 (GB)(GB)STRUCTION MANUALNSTRUCTION MANUAL
Congratulations!
Wit your purc ase you ave decided on a ig - quality product. Get to know t e product before you start to use it. Carefully read t e following assembly instructions. Use t e product only as described and only for t e given areas of application. Keep t ese instructions safe. Wen passing t e product on to a t ird party, always make sure t at t e documentation is included.
Please note t at t e training equipment corresponds to EN 957-2 class H (H = Home use). T e maximum weig t is 10.5 kg. According to DIN EN ISO 20957-1, t e training item is not suited for teenagers below 14 years of age.
Parents and other supervisors should be aware of their responsibility, because due to children's natural play instinct and their joy at experimenting they may get into situations and show behaviour for which training equipment is not suitable.
If you allow children to use te equipment you s ould take teir mental and p ysical development and above all teir liveliness into consideration. You s ould supervise te c ildren and above all s ow tem ow to use te equipment correctly. Training equipment by no means is suitable as toy.
23 TECHNICAL DATA
| Description | Dumbbell Set, 10.5 kg |
| Barbell | C romed steel, lengt 35 cm, a p-prox. 1.95 kg, diameter 30 mm |
| Weig ts | 6 weig t plates made of painted cast iron, inner diameter 30 mm 2 x ap-prox. 2 kg (diameter approx. 154 mm, t ickness approx. 20.5 mm), 2 x 1.25 kg (diameter approx. 125 mm, t ickness approx. 19 mm) and 2 x 1 kg (diameter approx. 119 mm, t ick-ness approx. 18 mm) |
| Closures | 2 spring clamp closures for fixing t e weig t plates (approx. 0.035 kg / piece) |
| Weig t | approx. 10.5 kg |
| Load | Maximum 10.5 kg |

24 IMPORTANT SAFETY INFORMATION
a) Please read t is manual and retain it!
b) Read and follow t e instruction manual and any other information before assembling and using t e appliance. A safe use of t e device can be achieved only if it was properly assembled and used properly. It is your responsibility t at all users of t e device are aware of t e warnings.
c) Always seek your GP to detect possible ealt risks and prevent before beginning any exercise program. Notice your body signals. Incorrect or excessive exercise can damage your ealt. If you ever feel during exercise pain, tightness in the c est, irregular earlbeat, extreme sortness of breath, dizziness or lig t eadedness, stop exercising immediately and consult your p ysician.
d) Keep children and pets away from t e equipment. T is device is intended for use by adults.
e) Use t e set on a stable, flat, orizontal surface with a protective covering for t e floor or carpet. T e safety distance around s ould be at least 1.5 m. Compensate for uneven floors.
f) C eck and make sure before each time of use t at all screws and nuts are properly tig tened. T e reliability can be maintained only if it is c ecked regularly.
g) T e device is particularly suitable for training t e upper body and arm muscles, and improves overall endurance and fat burning.
25 TRAINING NOTES
Wit your interest in strengt training you ave taken an important step towards mobility and ealt - because strengt training strengtens t e muscles. Strengt training not only prevents t e loss of muscle mass and strengt, but improves on t is even. T e mobility of t e joints is increased - reducing t e risk of injury.
Your blood pressure, your c olesterol, your blood sugar, your motivation and even your mood can be greatly improved by a little sport. You can change your character in moderation. In conjunction with proper diet will reduce your body fat and improve your sil ouette.
25.1 General Training Notes
Eac exercise should consist of the following tree parts:
- Warm Up
- Cardio or weig t exercise
- Cool Down & stretching
Warm Up
T is stage elps get t e blood flowing around t e body and t e muscles working properly. It will also reduce t e risk of cramp and muscle injury. It is advisable to do a few stretc ing exercises. Eac stretc s ould be eld for approximately 30 seconds, do not force or jerk your muscles into a stretc - if it urts, STOP.
T e Training
T e start of endurance (often also called cardiovascular or cardio training because of t e positive effects on t e cardiovascular system) or a force or muscle training is t e first step in t e fig t against civilization infectious diseases and p ysical symptoms, especially wit advancing age.
Cool Down
Just as a warm-up should be performed before each training session, a cool-down should take place after a unit. A Cool Down starts the relaxation phase; the operating temperature of the body will come back down and shows the transition of stress relaxation.
T e cool-down s ould last at least 10 minutes (as t e Warm Up) and is controlled slowly dropping down to t e lowest level. T e pulse rate s ould drop as low as possible.
Stretcing
As already mentioned, you can stretc before/during t e warm-up your muscles easily. After t e training you s ould definitely stretc your muscles. A stretc ing afterwards returns t e muscle to its original lengt , t us preventing muscle sortening. T e more strenuous t e training as been, t e more important is t e stretc ing afterwards.
Particularly important is t e stretc ing for t e exercised muscle groups. Stretc ing s ould be noticeable for t e muscle addressed, but it s ould never urt. Stretc ing s ould take 20 to 30 seconds per muscle.
25.22 Exercise Inchesiones
Start your training with about 7 - 8 reps per exercise set. Increase the number of repetitions according to your individual preferences slowly to 11 - 12 reps per set. If you notice that your muscles are tired, reduce the scope of your training. Ideally train 3 - 4 times a week. However, be sure that between individual exercises one day of rest is inserted so t at t e muscles and t e body are able to recover sufficiently.
Also, perform all exercises with a stable body centre. T e spine (particularly t e lumbar spine) must be kept straig t, so t at t e individual vertebrae are eld in t e biomec anically correct position, e.g. to protect t e disc against faulty loads.
Do not train with momentum and / or jerkily. Perform all exercises in a smooth and controlled manner. Note that in case of improper or excessive training negative effects on your ealt are possible.
25.32 Exercices
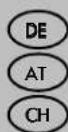
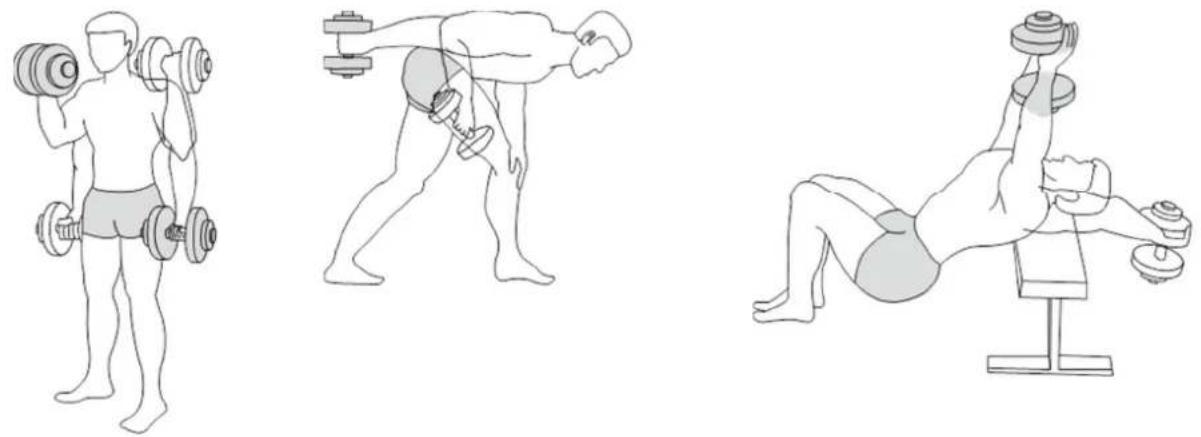
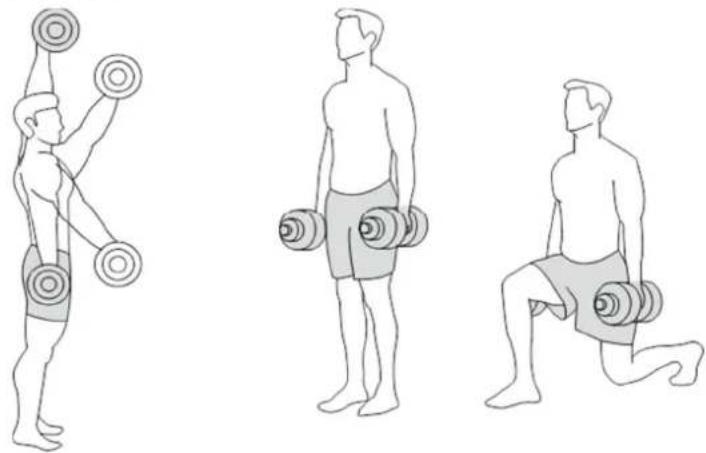
(A) Biceps
Stand as s own wit your feet about s oulder widt apart and your back straigt wit tigt core muscles. Hold a dumbbell in eac and as s own. Lift up a dumbbell w ile you let t e oter down in t e same course. T e weig t s ould be eld in parallel wit your body at t e beginning of t e exercise, t at is, wit palms facing inward. During t e lifting it is rotated so t at t e palm facing upward at t e end. During t e lowering p ase it is t e ot er way around. During t e training p ase, t e elbow s ould be kept close to t e body so t at t e biceps will be trained in isolation.
(B) Triceps
Take a step position as s own and bend your upper body wit a sturdy trunk forward. Hold yourself wit one arm on t e front knee and take t e dumbbell in t e ot er and. Lift t e elbow wit your arm bent up at torso eig t. Straig ten your arm t en backwards and upwards and t en let t e weig t back down. During t e training p ase, t e elbow s ould be kept close to t e body so t at t e triceps is trained in isolation.
(C) C est - Covers
Lie as s own wit t e upper back on a flat benc (make sure t at t is is stable) and rest t e oulders wit your ead free. Hold t e dumbbell wit bot ands (e.g. on a weig t plate) and old t e barbell directly above your c est wit your arms bent slightly. Move t e bar now back over t e ead. Lift t e weig t back up again and return to t e starting position.
Lie as s own wit your back on a flat benc (make sure t at t is is stable) and place your feet for more stability on eac side. Take a dumbbell in eac and and old your arms slig tly bent over your c est. Now move t e dumbbells laterally down to about s oulder level. Lift
the weights back up again and return to the starting position.
(E) Back
Stand leaning forward with your feet about shoulder width apart and your back straight with tight core muscles as shown. Support yourself with one hand on a bench or a chair. Take the dumbbell in the other hand and let the arm hang down loosely. Pull the weight slowly and controlled towards the chest while the back remains straight and the body tense. Let the weight slowly back down. Begin this exercise with low weights.
(F) Shoulder - Side raise
Stand with your feet about shoulder width apart and your back straight with tight core muscles as shown. Alternatively, this exercise can also be performed very well while sitting. Grasp the dumbbell or dumbbells if you train both sides simultaneously in an upper grip and pull your shoulder blades back with the elbows slightly bent. Lift the arm or arms then to about shoulder height, do not raise the shoulders themselves, though. Afterwards, return the weight(s) back into the starting position.
(G) Front raise
Stand with your feet about shoulder width apart and your back straight with tight core muscles as shown. Alternatively, this exercise can also be performed very well while sitting. Grasp the dumbbell or dumbbells if you train both sides simultaneously in an upper grip and pull your shoulder blades back with the elbows slightly bent. Lift the arm or arms then to about shoulder height (optionally go further to over your head), do not raise the shoulders themselves, though. Afterwards, return the weight(s) back into the starting position.
(H) Legs
Stand with your feet about shoulder width apart and your back straight with tight core muscles as shown. Let your arms with the weights hang loosely on either side. Now, move slowly and in a controlled manner into a big lunge as shown. Make sure that your front leg's knee remains constantly over the foot and your back is straight. Stand up again and change legs.
26 MAINTENANCE & PERFORMANCE
Never use abrasive or caustic cleaning agents. The product will otherwise be damaged. Only clean the product with lukewarm water and dry well with a cloth. Always store the product dry and clean, in a temperate room.
27 WARRANTY
The product was produced with great care and under constant supervision. You receive a three-year warranty for this product from the date of purchase. Please retain your receipt. The warranty applies only to material and workmanship and does not apply to misuse or improper handling. Your statutory rights, especially the warranty rights, are not affected by this warranty.
With regard to complaints, please contact the following service hotline or contact us by e-mail. Our service employees will advise as to the subsequent procedure as quickly as possible. We will be personally available to discuss the situation with you.
Any repairs under the warranty, statutory guarantees or through goodwill do not extend the warranty period. This also applies to replaced and repaired parts. Repairs after the warranty are subject to a charge.
28 SERVICE
Name: ISM Service Center
E-Mail: SERVICE@LA-SPORTS.DE
Tel: ++800 52776787 (free of charge)
Corporate Address:
I.S.M. GmbH, Rathenaustr. 4,
D-51427 Berg. Gladbach, Germany
(A) (B) (C)
(D) (E) (F)
(G) (H)
I.S.M. Import Service Management GmbH, S.M. Import Service Management GmbH
Rat enaustrasse 4
D- 51427 Bergisc Gladbac
Germany
Model 18118L-18

- Sc ultern (GFrontbenFront eben
- (GB)(GB)STRUCTION MANUALNSTRUCTION MANUAL
- Congratulations!
- TECHNICAL DATA
- IMPORTANT SAFETY INFORMATION
- TRAINING NOTES
- General Training Notes
- Warm Up
- T e Training
- Cool Down
- Stretcing
- Exercise Inchesiones
- Exercices
- Biceps
- Triceps
- C est - Covers
- Back
- Shoulder - Side raise
- Front raise
- Legs
- MAINTENANCE & PERFORMANCE
- WARRANTY
- SERVICE
Brand : CRIVIT
Model : 18118L18
Category : Dumbbells