Misterchef - Chair Foppapedretti - Free user manual and instructions
Find the device manual for free Misterchef Foppapedretti in PDF.
User questions about Misterchef Foppapedretti
0 question about this device. Answer the ones you know or ask your own.
Ask a new question about this device
Download the instructions for your Chair in PDF format for free! Find your manual Misterchef - Foppapedretti and take your electronic device back in hand. On this page are published all the documents necessary for the use of your device. Misterchef by Foppapedretti.
USER MANUAL Misterchef Foppapedretti
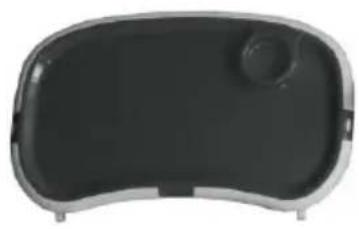
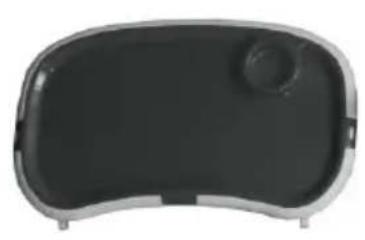
A Tray
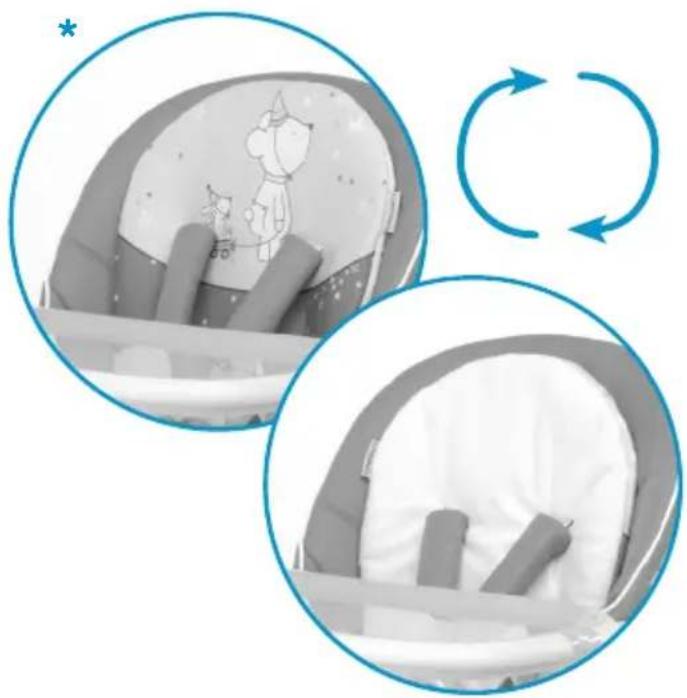
B Seat frame, set: seat, padding, reducer * and safety straps
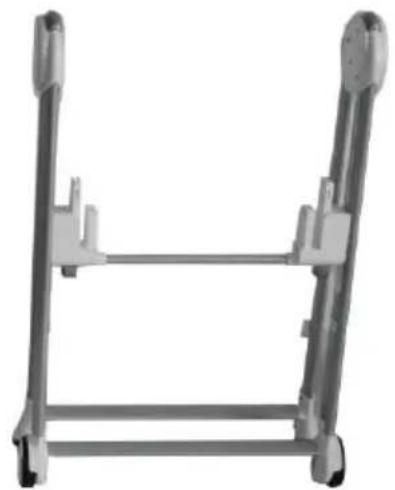
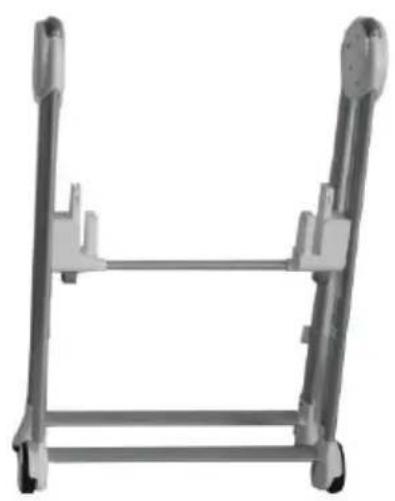
C Leg frame
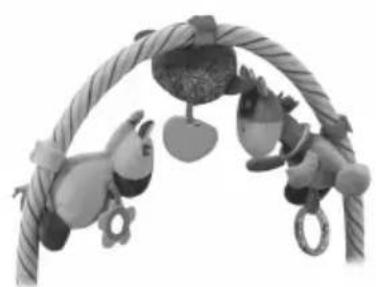
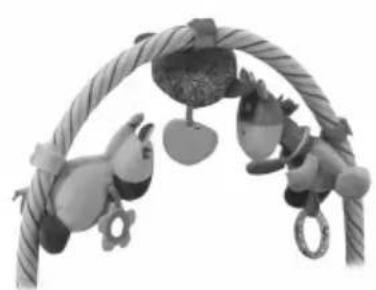
D Toy arch
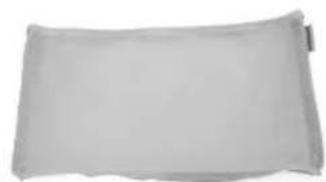
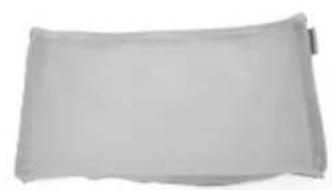
E Basket
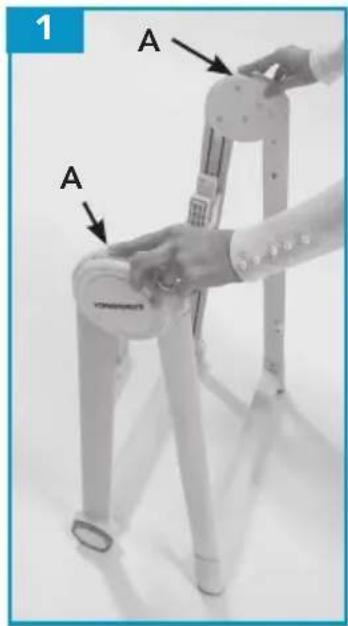

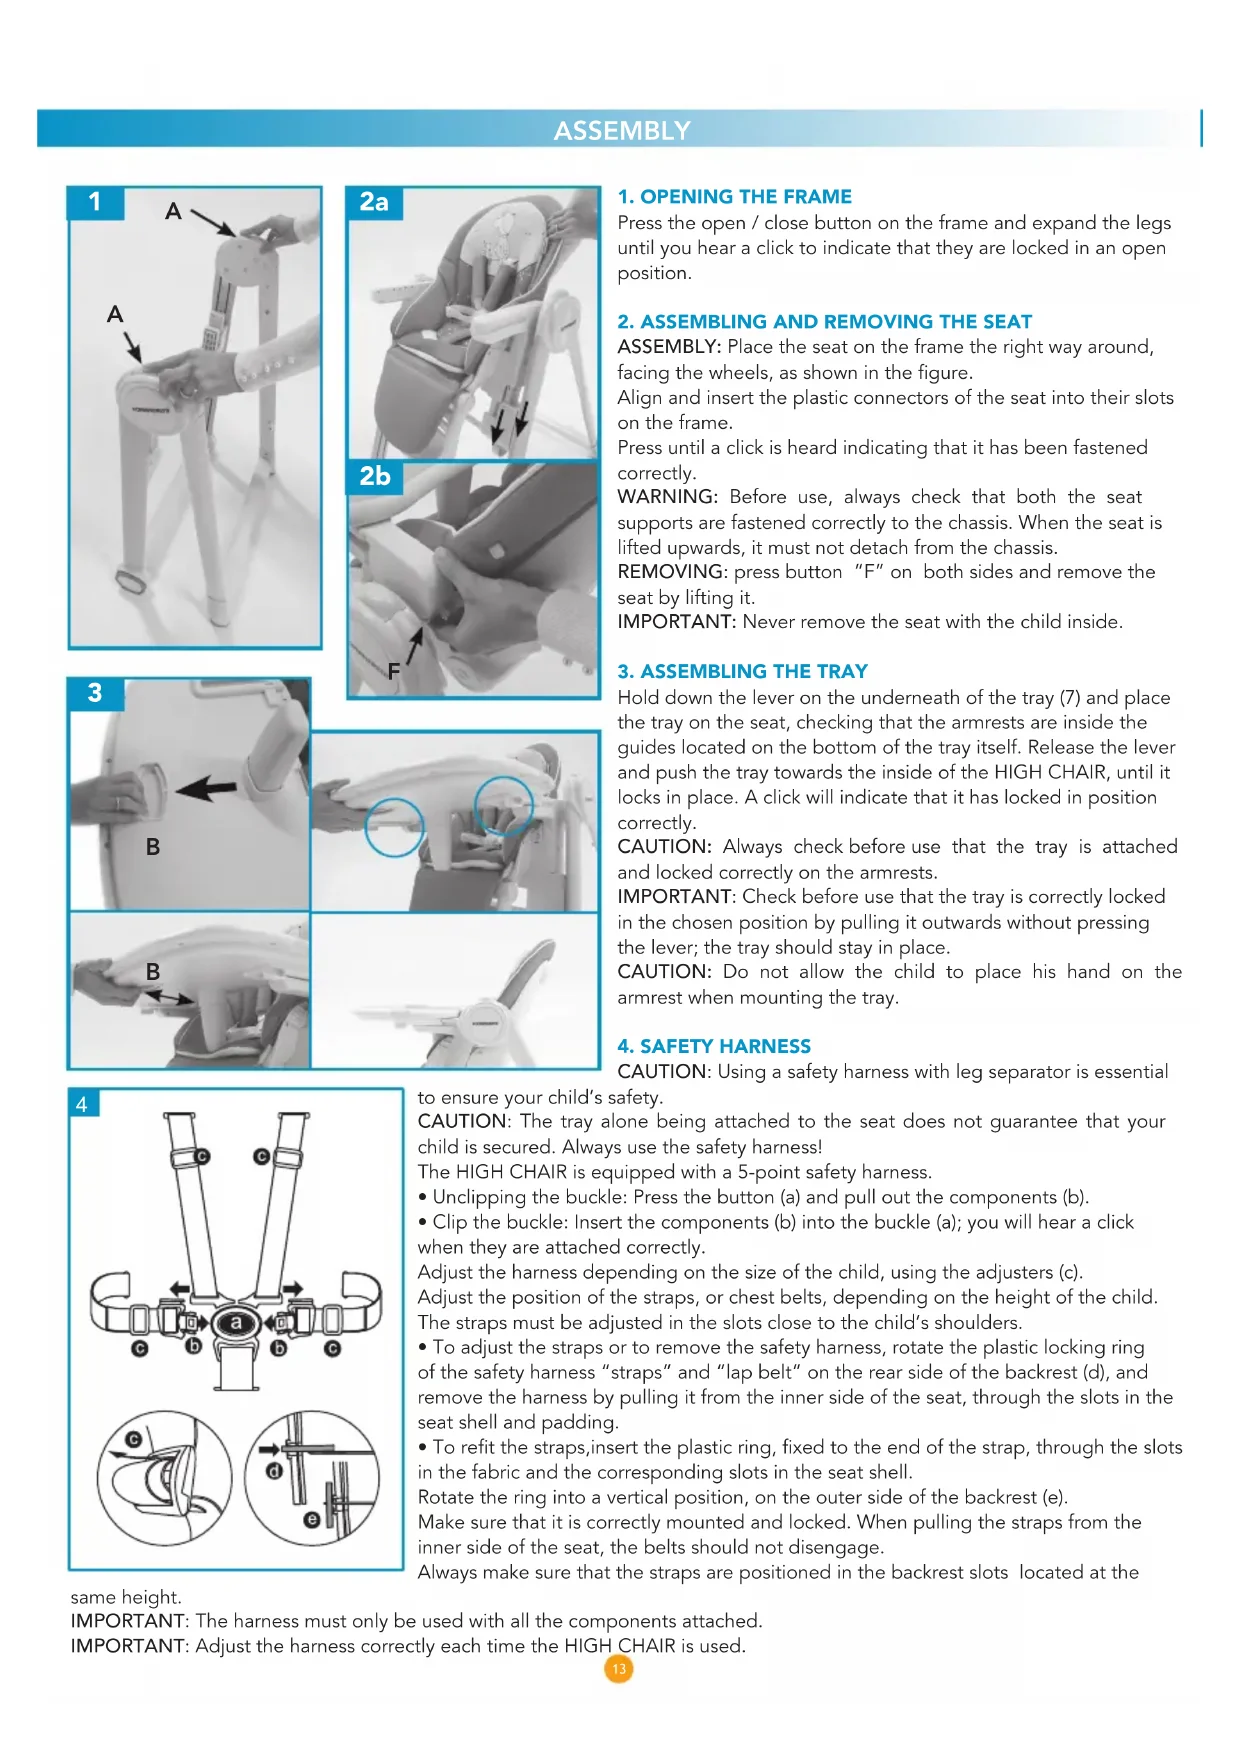
1. OPENING THE FRAME
Press the open / close button on the frame and expand the legs until you hear a click to indicate that they are locked in an open position.
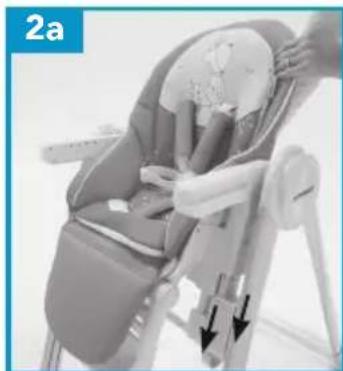
2. ASSEMBLING AND REMOVING THE SEAT
ASSEMBLY: Place the seat on the frame the right way around, facing the wheels, as shown in the figure.
Align and insert the plastic connectors of the seat into their slots on the frame.
Press until a click is heard indicating that it has been fastened correctly.
WARNING: Before use, always check that both the seat supports are fastened correctly to the chassis. When the seat is lifted upwards, it must not detach from the chassis.
REMOVING: press button "F" on both sides and remove the seat by lifting it.
IMPORTANT: Never remove the seat with the child inside.
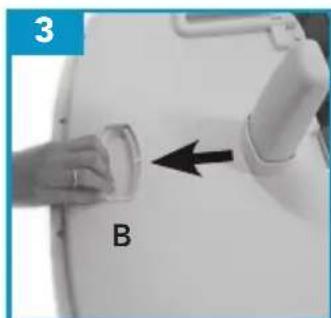
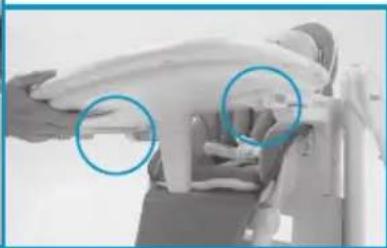
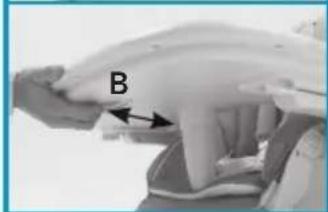
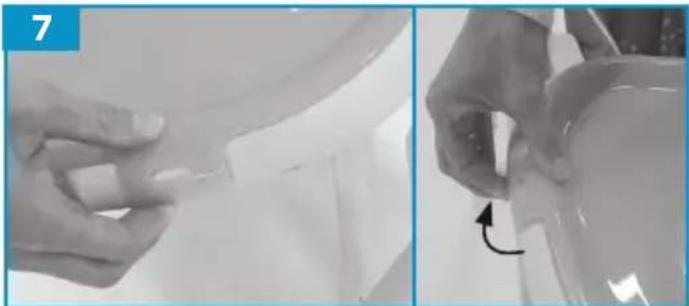
3. ASSEMBLING THE TRAY
Hold down the lever on the underneath of the tray (7) and place the tray on the seat, checking that the armrests are inside the guides located on the bottom of the tray itself. Release the lever and push the tray towards the inside of the HIGH CHAIR, until it locks in place. A click will indicate that it has locked in position correctly.
CAUTION: Always check before use that the tray is attached and locked correctly on the armrests.
IMPORTANT: Check before use that the tray is correctly locked in the chosen position by pulling it outwards without pressing the lever; the tray should stay in place.
CAUTION: Do not allow the child to place his hand on the armrest when mounting the tray.
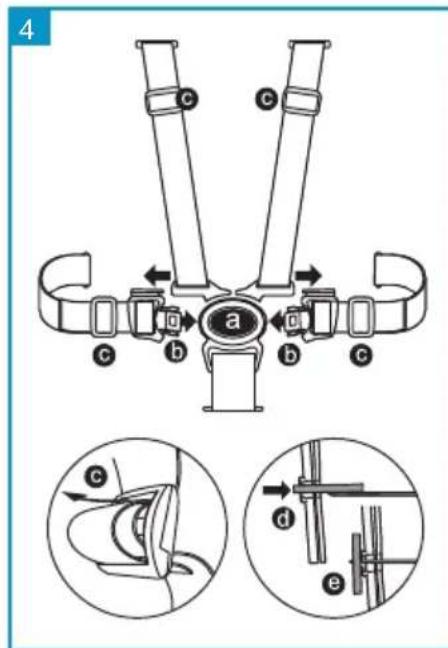
4. SAFETY HARNESS
CAUTION: Using a safety harness with leg separator is essential to safety.
CAUTION: The tray alone being attached to the seat does not guarantee that your child is secured. Always use the safety harness!
The HIGH CHAIR is equipped with a 5-point safety harness.
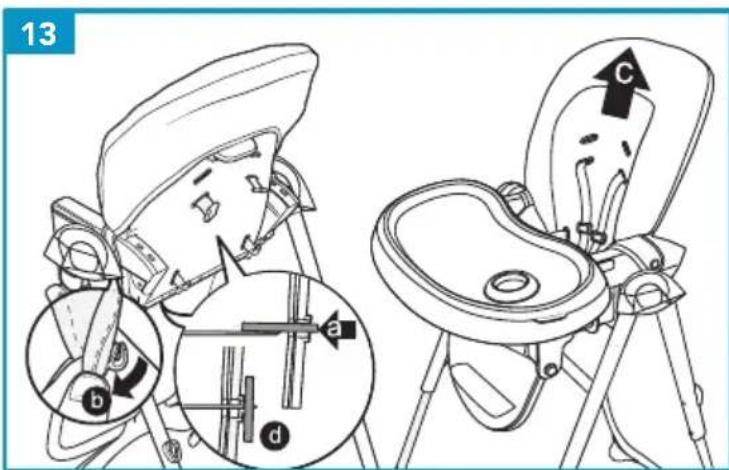
- Unclipping the buckle: Press the button (a) and pull out the components (b).
- Clip the buckle: Insert the components (b) into the buckle (a); you will hear a click when they are attached correctly.
Adjust the harness depending on the size of the child, using the adjusters (c).
Adjust the position of the straps, or chest belts, depending on the height of the child.
The straps must be adjusted in the slots close to the child's shoulders.
- To adjust the straps or to remove the safety harness, rotate the plastic locking ring of the safety harness "straps" and "lap belt" on the rear side of the backrest (d), and remove the harness by pulling it from the inner side of the seat, through the slots in the seat shell and padding.
- To refit the straps, insert the plastic ring, fixed to the end of the strap, through the slots in the fabric and the corresponding slots in the seat shell.
Rotate the ring into a vertical position, on the outer side of the backrest (e).
Make sure that it is correctly mounted and locked. When pulling the straps from the inner side of the seat, the belts should not disengage.
Always make sure that the straps are positioned in the backrest slots located at the
same height.
IMPORTANT: The harness must only be used with all the components attached.
IMPORTANT: Adjust the harness correctly each time the HIGH_CHAIR is used.
ASSEMBLY
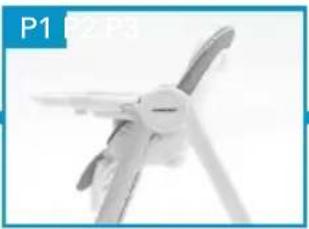
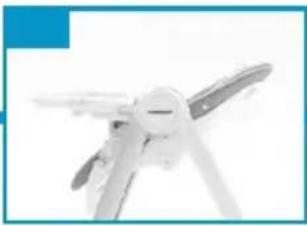
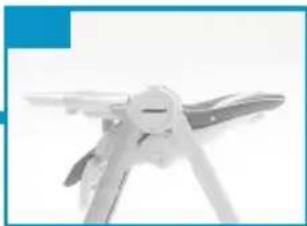
5. ADJUSTING THE BACKREST
The high chair backrest can be reclined in 3 positions (P1), (P2) and (P3).
To adjust the tilt of the backrest, press the button (C) located at the top on the back, lift up or recline the backrest to the desired position and release the lever. The backrest will lock in one of the three positions and you will hear a click when it is engaged.
This process can also be carried out with the child in the high chair.
IMPORTANT: for children unable to sit up unaided (under 6 months of age), use the backrest in position 3 only (bouncer version).

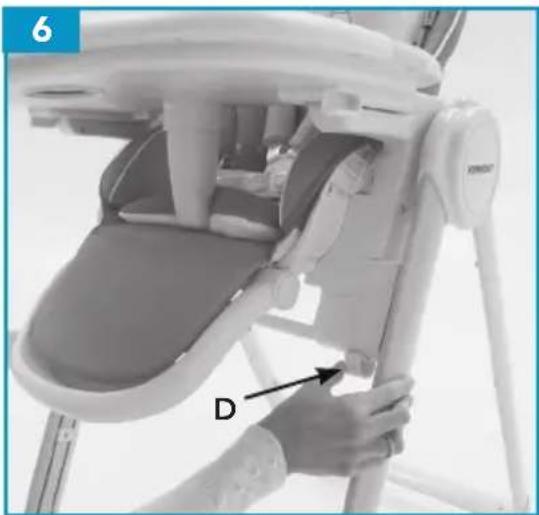
6. ADJUSTING THE HEIGHT OF THE HIGH CHAIR SEAT
The HIGH CHAIR can be positioned at 5 different heights.
- To lift up the seat: Hold the backrest at the top and pull it upwards until you reach the desired height.
- To lower the seat: push the "D" buttons at the bottom outwards at the same time and lower the seat to the desired position. Release the buttons. A click will indicate that it has locked in position.
Make sure that the seat is locked properly in the new position.
CAUTION: Make sure you adjust the seat without the child placed in the HIGH CHAIR.
7. REMOVING THE INNER TRAY
To remove the inner tray (8) pull the clips on the sides and lift it up. The inner tray is fixed to the main tray using a pressure mechanism. To attach the inner tray, place it on top of the main tray and press downwards; the securing clips will lock the inner tray to the main tray.
CAUTION: Always make sure that the inner tray is correctly clipped to the main tray, before each use.
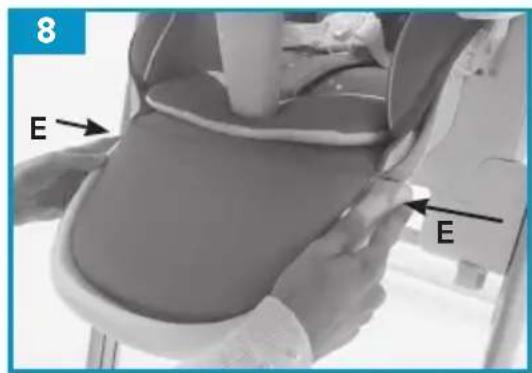
8. ADJUSTING THE LEG REST
The leg rest can be adjusted to 3 positions.
Press the two "E" adjustment buttons at the same time and raise or lower the leg rest support.
Release the buttons and check that the leg rest has locked correctly in the desired position.
A click will indicate that it has locked correctly.
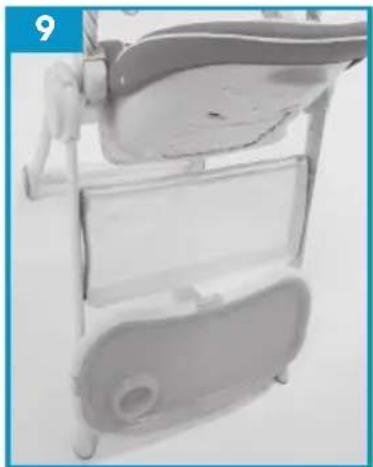
9. STORING THE TRAY
When not in use, the tray can be attached to the rear of the frame using the two hooks. Remove the tray from the seat and position it as shown in the figure. Align and insert the attachment pins on the leg frame into the attachment guides located on the underneath of the tray itself. Press downwards to attach the tray to the frame. To remove the tray from the frame, lift it upwards.
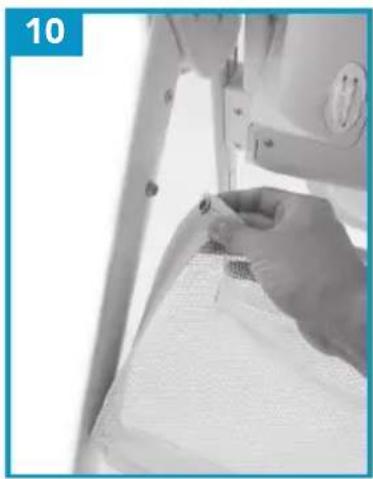
10. ASSEMBLING THE STORAGE BASKET
Attach the basket to the 4 clip buttons on the back frame, with the basket opening facing upwards.

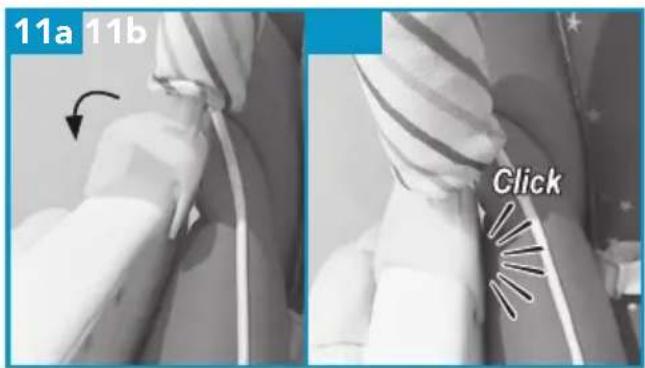
11. ASSEMBLING AND USING THE TOY BAR
ATTENTION: The TOY BAR has a right and left hook support; place the left support correctly oriented with the left-hand side of the highchair - see figure 11a, and follow the same process for the right-hand side.
Attach the toy bar onto both armrests, as shown in the figure. A click will indicate that it has attached and locked correctly (Fig. 11b).
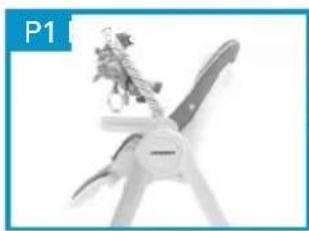
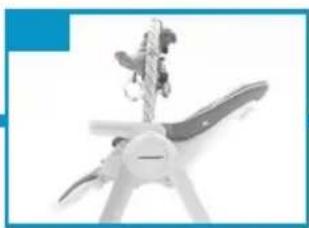
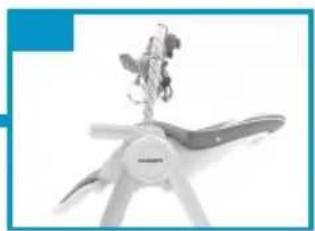
The toy bar has three adjustment positions (P1), (P2) and (P3).
ASSEMBLY
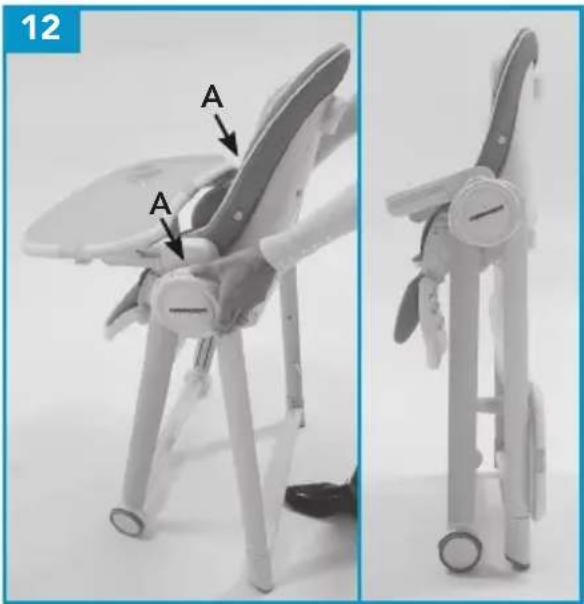
12. CLOSING THE HIGH CHAIR
CAUTION: Make sure that the child, and any other children, are at a safe distance away when carrying out these steps. Make sure that the moving parts of the HIGH CHAIR do not come into contact with the child's body during these steps.
CAUTION: If in use, remove the tray before closing by attaching it to the back of the frame using the two hooks. See step 9.
Adjust the backrest and the leg rest to a vertical position.
To reduce its dimensions, we recommend that you adjust the seat to the lowest position; see step 6.
CLOSING: Stand behind the highchair. Press the "A" buttons located above the hinges and, at the same time, bring together the highchair legs (Fig. 12) until you hear the click indicating that they are locked in the closed position.
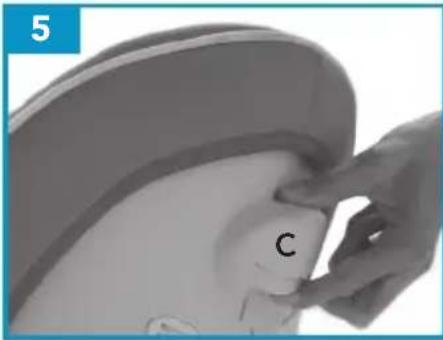
REMOVING THE PADDING FOR WASHING
Rotate the plastic locking ring of the safety harness "straps" and "lap belt" on the rear side of the backrest (a), and remove the harness by pulling it from the inner side of the seat, through the slots in the seat shell and padding. Rotate the plastic locking ring of the leg separator on the underneath of the seat and remove the belt by pulling it from the inner side of the seat, through the slots in the seat shell and padding.
Unclip the press stud that secures the fabric at the sides to the armrest (b).
Remove the lining from the seat (C).
ASSEMBLING THE PADDING
Place the padding on the seat.
Insert the plastic ring, fixed to the end of the strap, through the slots in the fabric and the corresponding slots in the seat shell.
Rotate the ring into a vertical position, on the outer side of the backrest. Check that it has locked correctly.
Insert the plastic ring, fixed to the end of the lap belt, through the slots in the fabric and the corresponding slots in the seat shell.
Rotate the ring into a vertical position, on the outer side of the backrest. Check that it has locked correctly.
Insert the plastic ring, fixed to the end of the leg separator belt, through the slots in the fabric and the corresponding slots in the seat shell.
Rotate the ring into a horizontal position, on the underneath of the backrest. Check that it has locked correctly.
IMPORTANT!
READ CAREFULLY AND KEEP FOR FUTURE
REFERENCE.
CAREFULLY OBSERVE THE FOLLOWING CONFIGURATIONS FOR USE PROVIDED FOR THE PRODUCT:
FOR USE AS A BOUNCER: For children unable to sit up unaided (from birth up to 6 months, maximum weight 9kg ) always use the fully reclined backrest only, position P3.
Conforms to standard EN 12790:2009.
FOR USE AS A HIGHCHAIR: For children able to sit up unaided, from 6 months up to 3 years of age or 15kg . Conforms to standard EN 14988:2017.
HIGHCHAIR VERSION: The product is intended for children who are able to sit up unaided up to 3 years of age or weighing up to 15kg
BOUNCER VERSION: For children unable to sit up unaided (from birth up to 6 months, maximum weight 9kg ) always use the backrest in the most reclined position only.
- When used in the bouncer version, this product is not intended for prolonged periods of sleep.
- When used in the bouncer version, this product does not replace the cot. If your child needs to sleep, place them in an appropriate cot.
WARNING
- "WARNING: Never leave the child unattended".
- "Always use the restraint system".
- "Falling hazard: Prevent your child from climbing on the product".
Do not use the product unless all components are correctly fitted and adjusted". - "Be aware of the risk of open fire and other sources of strong heat in the vicinity of the product"
-
"Be aware of the risk of tilting when your child can push its feet against a table or any other structure".
-
In order to guarantee the safety of your child when using this product, it is necessary to use the safety harness with crotch strap correctly fitted to the seat, the restraint barrier and the padded seat reducer. Always use the safety harness.
- This product is intended for children able to sit up unaided and up to 3 years or a maximum weight of 15kg .
WARNING: This HIGH CHAIR must only be assembled by an adult. - Ensure that it is correctly assembled before use.
- WARNING: Do not use this HIGH CHAIR if any part is broken, torn or missing.
- WARNING: This HIGH CHAIR must not be used if one of the elements has not been assembled or attached correctly and adequately.
- Do not use components, spare parts or accessories that have not been supplied or approved by the manufacturer.
WARNING: Only use the HIGH CHAIR when your child is able to sit upright unaided and is aged over 6 months. - WARNING: The HIGH CHAIR is suitable for children with a maximum weight of 15kg .
- WARNING: Never leave your child unattended in the HIGH CHAIR.
WARNING: Always use the safety harness to prevent the child being seriously injured by falling or sliding out of the product.
WARNING: Check regularly that the harness is correctly attached and not damaged or frayed. - WARNING: Make sure that the child always has the harness properly secured and adjusted to the right size.
- IMPORTANT: The harness must only be used with all the components attached.
- CAUTION: The tray alone being attached to the seat does not guarantee that your child is secured. Always use the safety harness!
WARNING: NEVER lift the HIGH CHAIR or adjust the height of the seat with your child placed inside.
WARNING
- CAUTION: Do not place the HIGH CHAIR near to windows or walls, or where there are cords, curtains or similar, which may be used by the child to climb or cause suffocation or strangulation.
- WARNING: Proximity to fire or other sources of strong heat, such as electric or gas heaters, can be dangerous.
- Do not place the product near to stairs.
- Do not place it on a raised surface, e.g. on a table or a worktop.
- Use the product only on flat surfaces.
- Do not use as a car seat or travel seat.
- Do not move or carry the product with your child inside it.
- CAUTION: Make sure that your child is at a safe distance when opening or closing. When adjusting the HIGH CHAIR (tilting the backrest or positioning the tray) make sure that the moving parts of the HIGH CHAIR do not come into contact with your child's body.
- Do not allow your child to climb into the HIGH CHAIR unaided or to play in it or dangle out of it. This product is not a toy.
- This product is intended for use by a single child.
- Check periodically that all the components are locked correctly.
- Remove and dispose of the packaging safely. Plastic bags can be dangerous, with a risk of suffocation, if handled by children.
- Make sure that all users are aware of how to work the product correctly.
MAINTENANCE and CLEANING
- Make sure that all the locking devices are functioning properly and check regularly that the safety devices are correctly engaged and locked.
- Check all parts subject to wear or tear regularly.
- Do not use spray lubricants, do not use aggressive substances.
- To clean the HIGH CHAIR, use a sponge, hot water and a mild soap or detergent, and dry thoroughly.
- Stubborn stains may be removed with a mild detergent. Never use abrasive substances, products containing ammonia or bleach, or alcohol-based detergents.
- To clean the lining, follow the instructions on the washing label.
The contents of this document as stated below will come into effect as from 01.01.2005 and replace, on every account and in full, any previous message referring to the guarantee provided by Foppa Pedretti S.p.A.
FORMAL GUARANTEE
Foppa Pedretti S.p.A. the head office of which is located at n. 11 Via Volta, Grumello del Monte (Italy), guarantees directly to the Consumer that this brand new product is free of faults with regard to the materials, design and manufacture and that it complies with the characteristics as declared by the manufacturer.
This formal guarantee is valid in all Member Countries of the European Union and it neither excludes nor limits the Consumer's rights in accordance with mandatory measures provided for by the law with regard to the Retailer of the Product.
To take advantage of this formal guarantee, the Consumer must return the faulty product to the Retailer, presenting to the same the proof of purchase of the Product which must clearly show the Retailer's address, the date of purchase of the Product with the Retailer's stamp and signature and an indication of the Product itself or, alternatively, the receipt which must not have been altered and which must clearly show the same information as that referred to above.
The formal guarantee is valid for twelve (12) months from the date of purchase of the Product. During this period, Foppa Pedretti S.p.A. will repair or replace the faulty product, at its own discretion. The formal guarantee is granted to the end buyer of the Product (Consumer) and it neither excludes nor limits the mandatory rights of the Consumer as provided for by the law and/or the rights that the Consumer may have with regard to the Dealer/Retailer of the Product.
EXCLUSIONS TO THE FORMAL GUARANTEE.
The formal guarantee is excluded in the case of damage caused to the Product for the following reasons: if the product is used in a way that does not comply with the information contained in the use and assembly instruction sheet, if the product is knocked or dropped, if the Product is exposed to humidity or extreme heat or environmental conditions, or to sudden changes in the same, corrosion, oxidization, unauthorized alterations or repairs to the Product, repairs using unauthorised spare parts, improper use, improper maintenance or failure to carry out the same, improper maintenance compared to the information given on the use and assembly instruction sheet, incorrect assembly, accidents, damage caused by food or drink, damage caused by chemical products, cases of force majeure.
In any case, Foppa Pedretti S.p.A. declines all responsibility for damage caused to persons or to property, other than the Product, when such damage is caused by a failure to comply with the instructions/advice/warnings cont a ined in the manua I or, alternatively, in the use and assembly instruction sheet provided with each Product for the owner/user. (Purely as an example, in the case of a cot : "Check your baby constantly.
Make sure that the sheets and blankets do not cover the baby's head...").
Furthermore, Foppa Pedretti S.p.A. declines all responsibility for damage to persons and to property when the breakage of its products is due to a deterioration in the components of the Product that are subject to wear. All the components of the Product made of plastic are considered to be components subject to wear.
LISTE DES COMPOSANTS
A

B
C
D
E
EXCLUSIONS DE LA GARANTIE CONVENTIONNELLE.
5.PYOMIISHKAIESHIIAATHS
H TnTnC Kapekacivai avakalvoueyn 3 0eis (P1), (P2) kai (P3).
Tia va puthetaiote Tnv KIion Tns TTATNT, Tnntote To KOUPTI (C) Tnou Bpioketai OTo Etnaw Tiow uepoc, avaonkwote n auqote Tnv KIion Tns TTATNT oTnv Etiuunr thcKai apnoTe to poXIo. H TAIATn Tou KAioapatoC 0a KLEIDOWeI OE mia atTO TPEIC THEAEIG KAI 0a AkoOeTE evkIK KLEIDWAPATO.C H DIAIDKAOSA MTOpeI VA YIVEI AKOJA KAI OTAV TO TAIdi KaTeai OTNV KApEKA.
\SHMANTIKO: yia Taiia Tou dev iai o e tho va kaioouv aiova touc (kaw 6 mnuw) xpoiopoioote nvy tlan mvo otn thoan 3 (ekdoan likvo/npaε).
TAPAHINHbIEOB3ATEJIbCTBA
KOMmaHn Foppa Pedretti S.p.A. OfHuHaJIbHo 3aperncTpnpoBaHHo n o aDpecy: Grumello del Monte (Italia) Via Volta 11, KOTopar rapaHTnpyET HeNocpeDCTBHeHHo NOpTeHIO, YTO daHHoe H3dJIne, TOIbKO yTO BbInyUeHHOE C fApRKn, He NMeet DeΦeKTOB Hm MaTePnaJIOB, Hn IpoeKTHpOBAHHa, Hn Ipon3BOIDCTBeHHbIX, IN COOTBETCTByET 3aABJIeHHbIM XapaKTepNCtIKam.
Hactoiaa rapaHTna DeiCTBnteJIbHa BO Bcex CtpaHaxyHehX E3C n He NCKIIOuAet n He orpaHnUHbaET npabaIolb3OBateJI, B COOTBeTCTBn C 3aKOHOaTeJIbCTBOM,peIlaMeHTnpyIOUHM B3aMooTHOWeHnC Ipon3BOJNTeJem N3dJIIn.
YTo6bI BOCNoJIb3OBAbCra DaHHoI rapaHTneI,
IOTpe6nteJIb DoJIKeH npINHeCTn DeΦeKTHoe I3DeJIne
PpOaBcy, PpeIOCTaBbN DOKyMeH, yOcTOBepaUoiu o npno6peTeHnn N3deJIIn, c neHaTbIO n PoDnncbIO
PpOaBca N yKa3aHHeM
Ha3BaHn Ha3deJn Ha, KaK aIbTePHaTnBa, Kaccobk Yek, 6e3 KaKx-Jn6o H3MeHeHn, n3 KOtOPOrO YeTKo BnHa BCaYka3aHHa Do 3TOrO HOpMaun. IapaHTn NMeet cPoK DeiCTBn DBeHaDcaTb (12) MeCauCeB C DaTbI npNo6peHn Ha3deJn.
B TeueHne Bblweyka3aHHoro cpoKa KOMnHaH N Foppa Pedretti S.p.A. 063yeTcN OTPeMoHTnpOBaTb HnI 3aMeHnTb, Ha CBoi Bbl6Op, DeΦeKTHoe N3dJIHe. RapaHTnI npEoCTabLraETcK OKeHuOMy POKynaTeJIO N3dJIIn (POnlb3OBAteJIIO)
H He NckIIOUaET H He OgraHnUHbAe T npab DaHHoro POnb3OBaTeJI, PnpedycmOTpeHHbIX DeiCTByUOuIM 3aKoHOdaTeJIbCTBOM H/INn PpaBAMn POnb3OBaTeJI, Ha npedbIaJIeHne CBOHX npab B aDpec DInlepa/ PpOdaBuza N3dJIY.
HE NOKPBIBAOTCRAPAHTHEN.
. TapaHTneH He NOKpbIBaetc yUep6,CB83aHHbI C HcNoJIb3OBaHHeM N3dEInn,BO3HNKUn No CLeDyIOuIM M PruHAM: HEnpaBnJIbHOe HcNoJIb3OBAHHe, He COOTBeTCTByIOUeeyKa3aHnA, CoepXaUIMC8 BO BKlaDbIWe C INHCTpyKUnmN NO MoHTaxy N EKcIIyaTaun, YdApBI N NaDeHnN 3dEInn, N3dEInne POnDBepraJoc B03dECTBnO
BlaJXHocTH HIN 3KCTpeMaIbHbIM TeMnepaTypam H He6IarOpnptnHbIM ycIOBnAM OKpykaIOUe CpeDbIC NOCToHHOcmEHOn 3Tnx yCIOBn, Kopp03N IN OKcJIeHHIO, a TaKKe HecaHKUHOHPOBaHHOMy peMOHTY IIN MoHΦnKaUHN, N3dJIne HCNoIb3OBaIOCb He IIO Ha3NaueHHIO HIN HeNPaBnIbHO, 6e3 CO6JIIODeHHY Ka3AHN B INCTpyKUHX IO MOHTaXy I KcNlyaTaUHN, PnI NLOXOM YXODE HIN OTCyTCTBn TAKOBO, pEMoHTEC NcNOJb3OBaHHem HeOpNHaHaIbHbIX 3aNpAcTeN, PO npuHHe HnpaBnIbHOc6OpKn, abAPnN, BO3JeCTBnI NII HAnNTKOB, XmMueCKNX BeIeCTB, a TaKKe BCJeDCTBVE Upe3BbUaHbIX 6cTOAeTJIbCTB.
B LIO6OM Cnyae, KOMnHaNr Foppa Pedretti S.p.A. He HecET HNKAKoI OTBeTCTBeHHocTH 3a yuep6, npuHHeHHbI JIOdAM NnnpedMeTaM,OTNNHbIM OT N3deJIyra, No npuHHe HecO6JIooDeHry uKa3AHn / npedncaHn / npedypeKJdeHn, cOpEkaunxCBA DaHHOM pyKOBOcTBe Nn, KaK aNbTePHaTHBa, B "INcHTpyKcHn NO MONTaxy N 3KcNlyaatauH", COnpOBQdaIoUe KaKDoe N3dJeNe n npedHa3NaueHHOe Ira BlaJeIbua/NoIb3OBateJIa. (HaNPmep, YnCTO B KaueCTBe npimepa, B Cnyae DeTCKoN KPOBatKn: "HnkOrDa He OCTaBIAIte 6e3 npncMOtpa pe6eHka. KoHTpoJIpyTe, qTO6bl rOloba pe6eHka He OKa3aJaacb NOKpbITOn npocTbHEO nn ODeJIOM...").
Kompanna Foppa Pedretti S.p.A., Kpome npoeryo, He Hecet Nkakoi OTBeTCTBHeHOctn 3a yuepe6, npuHHbI JIOdAM NmMyUeCTBy, eCNI NOLOMka ee npOdyKcN CBa3aHa c pa3pySeHHeM KOMnoHEtOB N3deJIny, NoDBepraEmbIX HopMaJIbHOMy N3HOcy. KomnoHENTamN, noDBepraIoUcMMscr HopMaJIbHOMy N3HOcy, CHTaOTcBCE nlaactMaCCOBbie KOMnoHEtBi N3deJIny.
DIJELOVI
A

B
C
D
E