Steam & Sweeper 2 in 1 2706 - Steam cleaner ARIETE - Free user manual and instructions
Find the device manual for free Steam & Sweeper 2 in 1 2706 ARIETE in PDF.
User questions about Steam & Sweeper 2 in 1 2706 ARIETE
0 question about this device. Answer the ones you know or ask your own.
Ask a new question about this device
Download the instructions for your Steam cleaner in PDF format for free! Find your manual Steam & Sweeper 2 in 1 2706 - ARIETE and take your electronic device back in hand. On this page are published all the documents necessary for the use of your device. Steam & Sweeper 2 in 1 2706 by ARIETE.
USER MANUAL Steam & Sweeper 2 in 1 2706 ARIETE
WITH REGARD TO THIS MANUAL
Even if the appliances are made in conformity with the European regulatory specifications in force and therefore all potentially hazardous parts are protected. Carefully read these warnings and use the appliance only for the use it is designed for in order to prevent accidents and damage. Keep this manual close by for future consultation. If you should decide to give this appliance to other people, remember to also include these instructions.
The information provided in this manual is marked with the following symbols indicating:

Danger for children

Warning of burns

Danger due to electricity

Warning - material damage

Danger of damage originating from other causes
INTENDED USE
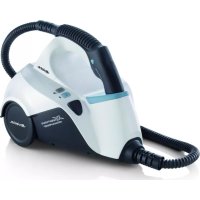
You can use the appliance both as a broom, thanks to the action of its turbo brush, and as a floor washer. The turbo brush removes dust and grime from the floor and retains them in the special container. Bulky or heavy objects cannot be removed using the turbo brush. The steam function carefully washes and sanitises floors such as marble, ceramic, stone, tile, parquet and hardwood floors provided they are treated and waterproof. The cloth absorbs excess moisture. The appliance uses the active power of steam without the help of detergents and soaps.
No other use of the machine is contemplated by the manufacturer, which is exempt from any liability for all types of damages caused by improper use of the machine. Improper use also results in any form of warranty being forfeited.
RESIDUAL RISKS

Warning!
Do not use the appliance on wax-treated surfaces. The wax will be removed by the heat and steam action. Do not use on untreated or permeable wood floors. Do not leave the appliance turned on for a long time on any type of wooden surface: the wood could swell.
Test the appliance first on a concealed area of the floor in the house. As an alternative, ask the floor manufacturer for information on cleaning procedures.

After you have turned off the appliance and unplugged it, let it rest on the preheating base provided. Keep the appliance out of the reach of children.
IMPORTANT SAFEGUARDS
READ THESE INSTRUCTIONS CAREFULLY.
- This appliance is designed solely for household and similar uses.
- We decline any responsibility resulting from misuse or any use other than those covered in this booklet.
- We suggest you keep the original box and packaging, as our free-of-charge service does not cover any damage resulting from inadequate packaging of the product when this is sent back to an Authorised Service Centre.
- Using accessories not recommended or not supplied by the manufacturer of the appliance may entail risks of fire, electric shock or injuries to people.

Danger for children
- This appliance is not suitable for use by people (children included) with physical, sensorial or mental disabilities; users lacking experience and knowledge of the appliance, or those who have not been given the user's instructions, must be supervised by a person responsible for their safety.
- Children must be supervised at all times to ensure they do not play with the appliance.
- Position the appliance so that children cannot reach the hot parts.
- Do not leave the packaging near children because it is potentially dangerous.
- Prevent children from grabbing the power cord, in this way making the appliance fall.
- In the event that this appliance is to be disposed of, it is suggested that the power cord is cut off. It is also recommended that all potentially dangerous components are rendered harmless to prevent children hurting themselves when playing with the apparatus.

Warning of burns
- Do not touch the metal parts of the appliance, the hot water or the steam when it is in operation and for several minutes after it is turned off since it could cause burns.
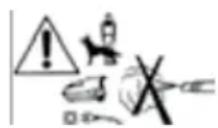
- Do not aim the jet of steam towards parts of the body or pets, plants or delicate objects.
- Do not leave the appliance on the ground when running or right after it is turned off. Always use the accessory for carpet cleaning for setting down the appliance.
-
Never aim the jet of steam towards equipment containing electrical parts (inside ovens, for example).
-
Before removing the cloth from the steam head, unplug the power cord. Wait at least 5 minutes so that the steam head and cloth cool down.

Danger due to electricity
- Before plugging the appliance into the mains socket, ensure that the voltage shown on the rating plate matches the local voltage supply.
- The use of extension leads, which have not been authorised by the appliance manufacturer, may cause damage and accidents.
- Always connect the appliance to an earthed socket.
- Do not immerse the appliance in water or other liquids.
- Do not use the appliance if your hands are wet or if you are barefoot.
-
Do not use the appliance if the power cord or the plug are damaged, or if the appliance is faulty. To prevent any accident, all repairs, including the replacement of the power cord, must be carried out by an Authorised Service Centre or, in any case, by qualified personnel.
-
Do not plug any other high power appliance (electric heaters, irons, radiators, etc.) into the same socket. Danger of electric overload.
- Do not set the hot parts of the appliance on the power cord.
- Do not pull the power cord to unplug the appliance.
- Do not leave the power cord against sharp edges or sharp parts.
- Make sure that the power cord does not come into contact with hot surfaces.
- Do not move the appliance pulling it by the power cord.
- Remove the power cable from the socket-outlet in case of a thunderstorm.
Warning - material damage
- Do not use the appliance for cleaning untreated or non-waterproof wooden floors, soft plastics, wooden objects and leathers.
- Do not use the appliance on glass surfaces.
- Do not use the appliance with the cloth worn. Danger of the floor becoming damaged and scratched.
- Do not use the appliance without the filter.
- Always unwind the power cord before use.
- The use of extensions not approved by the manufacturer can result in damage to property and personal injury.
- Using the appliance with no water in the tank may damage the pump. Check the water level in the tank on a regular basis.
- Do not use sparkling (carbonated) water. If the tap water is particularly hard (higher than 20^ ), use a mixture of 50% tap water and 50% demineralised water.
- The appliance must only be cleaned with a soft, slightly damped, cloth after unplugging the appliance and allowing all its parts to cool down. Never use solvents which may damage the plastic parts.
- Do not pour vinegar, descalers or other scented substances into the tank; otherwise, the warranty may be revoked.
- Always unplug the appliance before putting it away. Wait for it to cool down and completely empty the tank.
- Do not expose the appliance to atmospheric agents (rain, sun...).
- Any modifications made on this product that are not explicitly authorised by the manufacturer may lead to the forfeiture of its safety and guarantee of its use by the user.
Danger of damage originating from other causes
- Do not collect very hot objects or objects that are smoking or burning such as cigarettes, matches or ashes that are still hot.
- Do not use the appliance in closed environments and in the presence of fumes given off by oil-based paints, solvents or waterproofing agents, or by flammable power or other toxic or explosive fumes.
-
When using on stairs, use extra caution.
-
Keep hair, fingers, clothes, bracelets and necklaces or other body parts away from openings and rotating parts of the appliance when it is running.
- Fill up the tank with water before starting up the appliance. Be sure to unplug the appliance before pouring water into the tank.
- Turn on the appliance only when it is in working position.
- Never leave the appliance unattended when it is connected to the power supply.
- When you have to leave for even a short period of time, always place the appliance on its accessory for carpet cleaning (S). Turn off the appliance and always unplug the electric power cord.
- Store indoors in a cool, dry area.
- SAVE THESE INSTRUCTIONS FOR FUTURE REFERENCE.
DESCRIPTION OF THE APPLIANCE (FIG.1)
A - Grip
B - Steam dispensing button
C- Handle
D - ON indicator light
E - Cord storage hook
F - Steam adjusting dial
G - Water tank
H-Filter
I - Motor body
L - Steam head
M - Dust container
N - Brush cover
O - Turbo brush on button
P - Floor washable cloth
Q - Washable cloth for delicate floors
R - Measuring cup
S - Attachment for carpet cleaning
T - Handle release button
U - Steam discharge nozzle
V - Cloth fixing Velcro
Z - Turbo brush
ASSEMBLING THE APPLIANCE
Proceed as follows after removing the appliance from the box:
Assemble the motor body to the steam head (Fig. 2). Tighten the screw supplied to lock the components (Fig. 3).

Warning!
Check the tightening of the screw from time to time.
Press the handle release button (T). Lift the handle until it is aligned with the motor body (Fig. 4-5).
INSTRUCTIONS FOR USE
Totally unwind the power cord by releasing it from apposite cord storage hooks (E). Remove the water tank (G) by slightly pressing it downwards, then tilt and remove it (Fig. 6). Turn the tank upside-down and remove the cap (Fig. 7). Fill the tank up to the MAX mark using the supplied measuring cup (R) - Fig. 8. Screw the cap back on without using too much force.

Warning!
NEVER fill the tank beyond the MAX level. If the tap water is particularly hard (higher than 20^ ), use a mixture of 50% tap water and 50% demineralised water.
Insert the tank (G) by slightly pressing it downwards and at the same time pushing it inwards. Do not force the pin on the upper side of the tank during its removal/insertion.
The appliance can be used with only the turbo brush or only steam, or by activating both vacuum/steam functions at the same time. It is recommended to use the two functions separately by first removing the dust from the floor and only afterwards activating the steam function.
Using the turbo brush
Press button (O) to start the turbo brush (Fig. 9). The turbo brush will start to turn and together with the movement created by the appliance, will collect the dust and small debris from the floor, putting it into the container (M).

Warning!
Do not turn the steam head upside-down to try to clean the turbo brush during use. Danger of becoming entangled and pulled. Danger of the dust container falling.
Press the button (O) again to stop the turbo brush.
Using the steam function
After use of the vacuum function, unplug the appliance. According to the kind of floor to be cleaned, choose the suitable cloth (P-Q) and position it under the steam head (L) - Fig. 10. Lay the cloth on the apposite Velcro (V).
The cloth for delicate floors (Q) is suitable for parquet, wood, laminate.
The floor cloth (P) is suitable for tiles, terracotta tiles floor, stone, marble that require a deep cleaning.

Warning!
Make sure that the tank has been adequately filled to prevent dry operation.
To protect the floor from high temperatures, it is recommended to let the appliance heat or cool on the accessory for carpet cleaning.
Before using the appliance be sure that the objects and surfaces to treat are resistant or compatible with the high steam temperature. It is recommended to consult the manufacturer's instructions and perform a test on a concealed part or a sample particularly on treated terracotta tiles and wooden surfaces.
If the appliance is left standing on the floor while it is in operation, you may notice a whitish ring. Do not be alarmed because this can be removed with a decalcification agent or with some drops of vinegar.
Insert the plug into the socket, which must be earthed. The indicator lamp (D) will turn on, indicating that the appliance is on and that the internal boiler is starting to heat up. Be sure to have first removed the dust from the floor. Run the appliance over the floor after pushing the steam dispensing button (B).
Steam delivery can be adjusted through the apposite dial (F), by rotating it from a minimum (-) to a maximum level (+).
For more delicate floors, as parquet, wood or laminate, it is advisable to adjust steam delivery at a lower level, while, for surfaces requiring a deeper cleaning, e.g. marble, terracotta tiles floor, tiles or stone, it is advisable to adjust at a higher level.

Warning!
Do not use the steam function without the cloth. The cloth can be purchased at Authorised Service Centres.
Use the appliance in well-lit rooms.

Warning!
Danger of burns! Do not turn the steam head upside-down during use to remove the cloth.
Unplug it from the socket-outlet. Wait at least 5 minutes so that the steam head and cloth cool down.
You can remove the cloth during use to rinse it. Press the button (B) to stop steam dispensing before removing the cloth and unplug it from the socket-outlet.
Filling the boiler during use
No special operation is necessary when the water in the tank runs out. Just unplug the machine, pull out the tank and fill it with fresh cool water again. If the tap water is particularly hard (higher than 20^ ), use a mixture of 50% tap water and 50% demineralised water.
Using accessory for cleaning carpets
The accessory must be used only to clean carpets and similar soft surfaces. Do not use on hard surfaces.
Lay the carpet attachment (S) on the floor on the flat side. Make sure the cloth is positioned underneath the steam head (L). In case of carpets, use the floor cloth (P). Position the appliance on the attachment (S) by slightly pressing (Fig. 11). The appliance is now ready for use.
After use
Remove the power cable from the socket-outlet. Empty the water tank completely so as to prevent the water from stagnating, which may form lime deposit.

Warning!
Wait at least 5 minutes so that the steam head and cloth cool down.
Remove cloth. Wrap the electrical power cord on hooks (E) - Fig. 12. Press the handle release button (T). Fold the handle to close the appliance (Fig. 13). Position the appliance on the attachment for carpet cleaning (S). Position the motor body vertically.

Warning!
Make the joint between steam head and motor body snap so that the appliance is stable in a vertical position.
Put the appliance in a dry place and away from the reach of children.
CLEANING AND MAINTENANCE

Warning!
Always unplug the appliance before cleaning it. Let the appliance to cool down for a few minutes.

Warning!
Never immerse the appliance in water or other liquids.

Warning!
Check the state of the power cable of your appliance on a regular basis before using it, and if it is damaged, take it to the service centre closest to you to have it replaced only by specialised personnel.
Do not use abrasive products for cleaning the appliance.
Do not put vinegar, decalcifying agents or other fragrant substance inside the tank; otherwise, the warranty may be revoked.
Cleaning the appliance
Clean plastic parts with a damp, non-abrasive cloth and dry them with a dry cloth.
Clean the water tank from time to time by putting fresh water in it. Rinse and empty.
For cleaning washable cloths, refer to indications on labels. From time to time, remove and empty the dust container (M)
- Fig. 14. Remove the brush cover (N) - Fig. 15. Clean the turbo brush (Z) by removing accumulation of dust (Fig. 16). Reposition the brush cover (N).
Filter replacement
The filter (H) must be replaced every 4-6 months or after 100 cleaning cycles (one cycle is equivalent to the consumption of a full tank of water). Unplug it from the socket-outlet. Wait for the hot parts to cool down. Remove the tank. Extract the filter (H) by pulling it upwards, parallel to the motor body. Replace the filter with a new one, being sure to put it firmly in its seat (Fig. 17).

Warning!
Immediately switch off the appliance in case of operational faults and electrical failures. Unplug it from the socketoutlet. Wait for the appliance to cool down.
| PROBLEM CAUSE REMEDY | ||
| On light off Not plugged in | Check that the appliance is properly plugged in. Check that there is current on the power supply line. Try to plug the appliance into another socket-outlet. If the problem continues, contact an Authorised Service Centre. | |
| No steam comes out of the nozzle | Steam dispensing button not pressed | Press the steam dispensing button all the way down. |
| The appliance is not ready for use | Press the steam dispensing button for thirty (30) seconds or until you hear the noise of the pump. Wait for the steam to come out. | |
| Water shortage in tank | Fill the tank up to the level marked MAX. | |
| Incorrect insertion of the tank in its seat | Remove the tank and put it back in, making sure it is in the right position. | |
| The steam exit holes may be blocked by limescale | Contact an Authorised Service Centre. | |
| Unexpected increase of the noise level of the pump | Water shortage in tank Turn off the appliance and fill the water tank. | |
| Incorrect insertion of the tank in its seat | Remove the tank and put it back in, making sure it is in the right position. | |
| Water leakage from the nozzle | Possible condensation residue in the steam duct | Press the steam dispensing button until you see steam coming out. Position a soft cloth so as to not dampen the floor. If water continues to come out, turn off the appliance. Wait at least 5 minutes so that the steam head and cloth cool down. Try again. |
A PROPOS DU MANUEL
LISEZ ATTENTIVEMENT CES INSTRUCTIONS.
VEILIGHEIDSWAARSCHUWINGEN
LEES DEZE INSTRUCTIES AANDACHTIG DOOR.
BESCHRIJVING VAN HET APPARAAT (FIG. 1)
OnachocTb, Bbl3bIbAemJpyrMMn npuHAM
ПРIMEHEHNE NO HA3HAUYEHNIO
Bbl moke Te nCnoB3oBaT np6op kak dny noDmetnna (c nomOu bTo Typ6oTeKn), taK n DnMaMbTB noNob. Typ6oTeKa ydaJareT C nona nblb mycop, nomea aX B cneuaIbHbI nbIeSc6oOpHy bOtceK. Typ6oTeKa He npedHa3NaueHa dny UdaJeHnMy Mycopa B BVde KpyhIX o6bemHbIX npdMeTOB. FyHKUnpa npedHa3NaueHa dny Mblb I De3HfKeU HAnOlbHbIX NOKpBTNI 3MpAmOpA, KepamueckO nnTK, KaMhra, KaFenbHO nnTK, napketa n DepeBa TBepdbIX npoI, O6pa6oTaHHoro n NOKpBTOrO BnArOCTOJKM COCTABOM. NcNoB3oBAHne TkaHEBOH hAKPaDKn PO3BOJAEr YdaJIaTb n3nnuKIN BlaRn. BmecTo MoOxxCpeCTB mbla nCnoB3yeTc cnJa napa np6opa.
IIO6oe npuMeHne DaHHoro yCTpoiCTBa, He npedymOTpeHHoe n3rOToBnTeNem, OCB6oKdaet erO ot IIO6oIOTBeTCTBeHHOCTH 3a IOBpeKdEHN Iyuep6, Bbl3BaHHbIe TAKIM npuMeHneM. PnpuMeHne He no Ha3NaeHIO npuBOJNT K OTMeHe IIO6oI φOpMbI rapaHTn.
OCTATOUHbIE PNCKN

BHHMaHne!
He nCnONb3OBaTb np6op Ha BOCKOBbIX NOBepxHocTg. IoD Bo3DeIcTBnEM TENla napa BCK MoKeT CXOHTb. HeNb3a NcONb3OBaTb np6op Ha HAnONbHom NOKpbITm N3 Heo6pa6oTaHHoro DepeBa Nm N3 dpyrnx HerepMeTuHbIX MaTePnaIOB. He OCTaJIaTb np6op Ha JIO60J DepeBraHHo NOBepxHOCTn B TeueHne DInTeJIbHOrO nepNoDa BPemH: DepeBO IMeET CBOIcTBo BCnyBaTbcr O TBnXHOCTn.
Ipeed nepBbIM nCnoJb3OBAHnem peKomeHdyeTcra nonpo6oBaTb DeiCTBne np6opa Ha He3aMeTHOM yAcTke noJa. B kaueCTBe aJIbTePHaTINbbl peKomeHdyem 3anpocntb y npOn3BODInTeJr HanoJIbHO r NOKpbITN r INΦopMaUIO o cnocobe erO YnCTKN.

BbIKHouN pIbOp n BbHyB BNKy n3 po3eTKn, Heo6xOIMO ocTaBHT b ero Ha HeKOTOpoe BpemHa , IMHeUSeiCBA KOMPNeKe TnoCTaBKe dIy npedBaupntelhoro paorpeBa. CneJeT depKaTb np6op noJaIbwe ot deTei.
O COBJIODEHm MEP B30nACHOCTN
IPEd IEPBbIM NcNoJIb3OBAHnEM YTHoA HEOBXOJIMO BHIMATEJIbHO IPOuHTATb CJEyIOUne IHCTpyKUn.
- ΘTOT npi6op npeHa3Haueh nCKIIOHTeIbHO dIЯ nCIOJIb3OBAHnB B DOMaSHnx I 6byTOBbIX yCNOBnAx.
-
I3ROTOBNTeJIb He HecET OTBeTCTBeHHOCTn 3a He npaBnIbHoe NcNoIb3OBaHne np6opa nnncnoIb3OBaHne ero B ueJx, He npeducmOTpeHHbIX daHHbIM pyKOBOdCTBOM.
-
PekomehdyetcXpaHHTbOpHnHaIbHyU ynaKOBky, T.K. 6ecPnAthoe cepBnCHoe 06CnyKuBaHne He npedycmOTpeHO B clyuae NOBpeJdeHn, Bbl3BaHHbIX HecOOT-BETCTByIOSeYnaKOBKo I3dEJIpy npn erO OTCbIJIke B aBTOpN3OBaHHbI LHeHTp CepBnCHOrO 06CnyKuBaHn.
- Историяа akceccуаров He pekomehdobahbIX npOn3BODHTeJIem Или He BXOДЯиx B KOMПЛeKT пибopa, может CTaTB пичнов BO3rOpaHnry, удара ЗлЕКТрпчecKOrTo TOKA Или HaHeCEHnY Bpeda YeJIOBeKy.
OnachoctbДЯдTei
-Даньи пибор He Должен Испolyватбя Лцам (ВКлоча DeTe) с орар
-НчehыIMN ФиЗЧЕCKIMN ИЛУ YMCTBEHьIMN CПОСБНСТЯМ NЛС C ПОнжен
-Ноч БИТБИТБHOCTBЮ; Лцам, He YMEЮSSM NOLb3OBaTbCS Pn6OpOM, 3a
-ИСКПЮЧЕНЕМ ТEX, KOTOPbie MOrY T рИМЕЯТь erO NOd HabIJODEHMe М dpyrIX
-Лиц, HeCyUx OTBETCTBEHHOCTb 3a INX 6e3ONaCHOCTb, ЛбО NOcJIe OБьЯСЕНЯ
-правил erO рИМЕHENIA.
He donyckaIte, yTo6bI detn irpaIIc npnbopom.
- Pa3Meuatab np6op taKIM o6pa3OM, yTO6bl DeTAM 6blIN HeIOCTyHbI HArpeTbie.
actn np6opa.
- Bo n36eXaHHe onaCHOCTn He OCTaBnTb yNaKOBky OT npNbopa B MeCTax, DoCTyINhBIX DeTAM.
- CnéДиТь 3a Tem,ЧToБы ДeТи He MOrЛn NotЯнТь 3a ПpoВОД И СпpoВоцИрOBaТь.
naDEHne npi6opa.
- При полном п配电ашипьзовая пибором OTpe3aТь питуший пpoBODдя пивedeши пибopaВ 6e3oNAcHoe coCTOЯнe. PekomeHyETcя сLEITb,чTOБы OTdeЛьнtie DeTaNпирбopa,п徳ставлJOUоNe ONaCHOCtB, HeNCNoIb3OBaJIncb DeTbMn ДяИrgbl.
cbo BoOpOBoHOn (50%) n demnHepaN3OBaHNo (50%) BObl.
- YIcTka yTHOra npOn3BOoNTcH Hea6pa3NBHO n CJIeRka BnaxHO TKAHbIO n TOJbKO NocLe TORO, KaK Bbl BblAunn BNkUy 3JIeKTPueCKoro pPOBOda NITAHn I3 PO3ETKn I BCE qAcTn yTHOra OCTblln., 3anpeuaetc npImeHrT bIIObIe paCTBOpTeJI, NOckOJIbKy OHN MOrY T NOBpeDntb PIACTMaCCOBbie qACTN.
He haJIINBaTb B 6aOK yKCyc, yMraHTeIb IJN apOMaTH3nPoBAHHbIe XnIDKOCTN; B npOTNBHom Clyuae DeIcTBnE rapaHTm cpa3y Je npeKpauaetc.
- Ipeed tem, kak y6paTb npnbop, BblHyTb BnIky n3 po3etkn. Pocne noHoro oxJaXdEHHa BblNTb n3 6auchka BCIO BODY.
He IOnyckaTb BO3dEiCTBnHa np6op aTMocepHbIX paKTopOB (doXd, coHua n T.D.).
- IIO6bIe, He pa3peWeHHbIe npOn3BOJTeJIem MoDnΦnKaUIN npN6opa MOryT npNBeCTN K NOtepe npN6OpOM rapaHTmN IN CDeJaTb He6e3OpaChbIM erO nCNoJIb3OBAHne NOTpe6nteJIem.

Onachoctb, Bbl3bIbAemar pyrHm npnHaMn
- He pekomehnyetc npimehyt b IydaJeHn C nola Mycopa, COCToJero H3 ropaux npedmetOB B BVde HENOTUweHHbIX CNrapeT, CNueK NII nn neIpa.
He nCnoIb3OBAtB npi6op B 3aKpbITbIX NOMEuEHNx IN B6JIIN3N IcTOHnKOB napOB IaKa, Macna, pactBOpnteJe nn CpeDCTB dIy BOHOENpOHnCaEMoN npoNTKN, BOCIIaMeHJIOUeROcI NOPOsKa IIIN DpyrNX TOKCnueCKnx INI B03rOpaEmbIX Be- IeeCTB.
Bydte oc06eHNO octopoxhbl kOrda noIb3yeTecb np6opom Ha neCTHnue.
CneyuETn36eraTb nonadHnB O BpaauoIeCeAactn npnbopa BOJoc, naIb-ueB nDpynx YacTei TeJa, a TaKKe OdeXdbI, pa3NHybIX YkpaWeHn. - Перд пимеонемаappapata 3anonHnTb 6aok BODo. 3anonHeHne BODOdoJxHO npocxOHTb prn BbyHyToB BuIke npOBoDa nITaHnI N3 p03eTKN 3JIeKTPnueCKOrTOkA.
BknHouaTb np6op TOnbko, KOrda OH haxoNTcB pa6Oyem noJoxeHN.
He octabTb nodknHbK 3neKtpocetnp6op 6e3 npncMoTpa. - Ecni Bbl npednojaraete OTCyTCTBOBaTB KOpOTKoe BpeMra, To peKOMeHdyETcnaNoJIb3OBaTB npncnOco6JIeHne IJRA YnCTKN KOBPOB (S), UTO6bl npncJIOHHTb np6op. BblIOuHTb np6op n 06aTeIbHO OTCoEINHTb shHyp OT pO3ETKn 3JIeKTPONITAHNA.
XpaHnTb npnbop peKoMeHnyeTcB cyxOM, XopoIo npOBeTpnaEMOM nOmeIeHN.
COXPAHNTb HACTOJUEE PYKOBODCTBO NO 3KcPlyATAuN.
ONICAHNE PUNBOPA (PNC.1)
A-PykoTka
B-Khonka noaunapa
C-Pyka
D- INHdkaTOp BKNIOueHnA
E-KpOyOKHAMOTKNWHypa
F-Perynaytop npapa
G-BoJHNo6aK
H-ΦnIbTp
I-KopnycDbirataTeN
L- Napobar roJOBka
M-Пылесборнik
N-3aunTHna cetka 电
O-KHONKa BKNIOUeHnI Typ6oIeTkn
P-MoUaJaTkaHeBaHaKaJaIka
Q-Moioaera TkaHeBa HaKaIaKdKa IJr DeIeNkAtbIX NIOOB
R-Mephmyctakah
S-HacaKaIINyNcTKNKOBPOB
T-Khonka pa36nKnpOBKn pyuKn
U - OTBepCTne BbIXOda npa
V-3actekknHaIinnykax HaMOUeIcraTkAHeBOHaklaIke
Z-Typ6oTeKa
MOHTAXIPINEOPA
BbInyB np6op n3 Kopo6Kn, BbINOnHnTb cneDyUOuNe DeIeCTBna:
Co6paTb KOpNyc MoToPa Do npoBoi rOIOBKn (Pnc. 2). 3aKpyTntb npnIraIOUeCBAHTbI Do noJIHOIΦuKcaUN qAcTeINpIbopa (Pnc. 3).

BHHMaHHe!
PpOBepntb HndexKHOCTb KcCaun KpeHneHn.
HaxaTb Ha KhoNky BbIKIIOueHn8 6NoKIpOBKn pyKn (T). NObepHyTb pyKy Do coBMeIeHn8 C Kopnycom MoTopa (Pnc. 4-5).
PYKOBODCTBO IIO 3KcIyATAUIN
IOnHocTbIO pa3MOTaTe 5Hyp 3NeKTPoNtAHnC KpOuKOB HAMOTKn (E). ChrTb pe3epByap (G), Haxab erO cnerKa BnIs, 3aTeM HAKIoHInTe N BbTaUaHTe erO. IpeBepHInTe 6ak n CHmMtTe 3aRJySky (pnc.7). HanoHInTe 6ak c nOMoCbIO MepHoro cTaKaHa Do MaKcImaJIbHO rOpBnA (pnc.8). 3aBHTnTe 3arJySky 6e3 Upe3MePHorO ycInna.

BHHMaHHe!
HnkOrda He HanoHrB 6aOk Bblwe MaKcMaHbHoro yPoBn. B cIyae CnIbHO KaIbCmHnpOBaHHo BObl (CTBepdctbBO bIe 20 rpa. ApenHeTaf) peKOMeHdyETcA nCIOJIb3OBaTb CMECb n3 50% BObl n3-IOd KpaHa n50% demnhepaHn3OBaHHo BObl.
BCTaBbTe 6ak (G), Haxab ero cIerka Bn3 n OndHOBpeMeHHO BHyTp. CtapaTecb He HaxkMaTb CnIbHO Ha 3y6uK B Bepx-He yactn 6aka npu ydaJIeHHN/BCTaBKe.
Pn6bop 3anporpamMnpoBaH ha OndHOBpeMeHHoe HcNoJIb3OBAHne Jn6o TOnIbKO fynKuN Ty6oJeTK, Jn6o TOnIbKO npa, N6o OndHOBpeMeHHo AKTINBaCm FyHKU BCAcbIBaHn/obpa6OTKn napom. PeKomeHdyETc NcNoJIb30BaTb 3TN DBe FyHKU IN OTdJIbHO dpyr OT dpyra: Chayana ydaNTb Nblb C NOJa I TOJIbKO 3aTeM npNBBeBcTn B DeiCTBnE FyHKUIno npa.
NcnoJb3ObaHne Typ6oUeTkn
IyBKnHueHHaKaTbKHOky (O) PnC 9. Typ6oTeKa HauHET BpaTaBcN ODHOBpeMeHHO C BpaUeHNm OH npntynr K ydaeneHIO c nona nbIn n MeIKoro Mycopa, nmeua Ix B nbIne6bOpHK (M).

BHHMaHHe!
He pekomehdyetcnapebopaunbaTb napobyo roNobky BO Bpemnncno30BaHn np6opaa, nbITaRcNouCTNTb Typ6oUeKy. OnachocTb 3acTpeBaHn n 3aTgBnBaHn BHyTppa3nnHbIX npedMeTOB. OnachocTb naeHn nnleC6OpHnka.
Ee pa3 haxkTaBKnky (O) DnB BbIKHoueHn Tpy6oUeTkn.
HcnoIb3ObaHne FyHKuHn napa
Iocne nCnoB3OBAHnna np6oBa B kaueCTBe nbilecoCA OTKIIouHTe erO OT 3NeKTpnuECKo p03eTKN. B 3aBNCmOCTH O Tnna noJa Bbl6epnte TkaneByu HaknaKy (P-Q) n NomeCTte ee nOД napOByU roIOBky (L) (pnc. 10). 3aKepeNTe TkaHb IInnykamn (V). TkaH dIra DeJInkatThbIX noIOB (Q) peKOMEHyETcIЯ NapKeTa, depeBa, lamHHata.

BHHMaHHe!
Y6eIITb8 B TOM, YTO pe3epByap HanoJIHeH BOIO DO HyXHOrO yPOBnBa BO n36eKaHne pa6oTbI npu6opa npn nyCTOM pe3epByape.
I npEdoxpaHeHn HAnObnHoro NOKpbTnO T Bo3DeNCTBnB BbICOKX TemnepaTyp peKOMeHdyETc HapeBaTb I OXJaKaTaB np6Op ToJbKO Ha npncnocObHeHn DnYnCTKn KOBPOB.
Ipeed nCnoB3OBAHnem npnbopa y6eHntbcr B TOM, YTO BCE o6pa6aTb1Baemble obBeKtB I NOBepxHOCTN MoryT PNOBepraTcB O3dEiCTBnIO BbICOKNX TemnepaTyp nnap. B cnyae c HanoJIbHbIM NOKpbITnMn 3 TeppaKOTOBn PINTKN, DepeBa, peKOMeHNyETcR CJeOBAbT COBEtAM, IN3IOKeHHbIM B INHCTpyKUnx PpON3BOJNTeJIa, a TAKKe IpoBecTN pNo6Hyu YnCTky B He3aMeTHOM MeCTe INN Ha o6pa3ce.
Ecni octabite np6op Ha noIy BO BKIOueHHOM COCTOHN, TO cnYCTa HEKOTOpoe BpemcMOXeTe 3aMeTnTB NOBJIeHne 6eIOBaTOro opeJHa. He cOnT OcO6o 6ecNOKoNTbC, NocKoJIbKy 3TO T OpeON IeKo ydaJIeTcR C NOMOuBO obBuHoro DeKaIbUqHmUpuyUoTo CpeDCTBa, IN60 C NOMOuBu H6oJIbUO KOnIYeCTBa yKCyca.
BBeIe 7TeNceBHyIO Bnky B po3eTKy 3NeKtpueeCKo Toka, KOtopa DOnJxHa 6bItb 6oppyoBaHa 3a3emneHem. Ecnn 3axnraetc nHnKaTOp (D), 3TO 3NaHT np6Op BKnOuey H BHyTpEHH KOTeH HaHnaET HarpeBaTcR.
Y6eIHTbcra, YTO C nOla ydaeneHa BcB nbIb. IpoBecTn np6opom no nOly, HaxaBa cnyckOBm MexAHn3M nIpa napa (B). MoXHO perynipobatb ciny notoka npapc nOMoUbHO perynrTopa (F) C MNHIMaJIbHorO ypOBHr (-) Do MaKcImaJIbHoro ypOBHr (+).
Дясamьix Deикathbix NOOB, TAKINK KAK NAPKeT, DEPEBO IIN IAMHaT, peKOMeHdyETcR yCTaHaBnBaTb CInIy napa H MInHMaJIbHbI yPOBeHb, B TO BpEM KAK IOBepxHOCTN, IODBepraEmbIe TJIy6OKO ONUCTKe, HApIMeP, MpaMOp, KInPnU, TeppaKOTA INI KAMEHb, yCTaHOBnte peryJrTOp Ha MaKcMmaJIbHbI yPOBeHb.

BhmuHne!
He nCnoB3oBaTb yHKUIO npa 6e3 npMHeHn BONOKHcToH HacAdKn. TkaHb MoXHO npNo6peCTn B aTOpN3oBaHHbIX CEHTpax cepBnCHOrO o6CnyKuBaHn.
IcnoJb3ObaT bp6OpB XopoIo OceUeHHbIX nomeUeHnX.

BHHMaHHe!
CyueT onacHocb nonyeHn OKorOB! Iy anaHeHn TkaHeBn HknaKn HEnb3n nepeBopaNBAt b npOByIO roNoBky, KOrda np6op BkIouen.
OTKJIOHTb 3Hyp 3JIeKTPoNTaHnIg OT po3ETKn. IIOOxKaTb He MeHee 5 MInHyT, NOka napOBa rOIOBka n TkaHeBaHaKJIaDka He ocTbIHyT.
IOnyckaetc CHMaTb I npOnoJacKnBaT KaHb BO Bpem NcNoJb3ObaHn np6opa. Ipeep TeM, KAc ChrTaTkAHeByo HknaKy, Heo6xOIMHO HaxaTb Ha KhoNky (B) n octaHOBntb noauly npa, 3aTeM OTKIOuHTb np6Op ot 3JeKTPOceTu.
HanoJIHeHne 6aka B npOceCpe pImMeHn
Iocne TOrO, KaK 3aKoHHTcB Oda B pe3epByape, He Tpe6yeTc PpeDnPHIMaTb HNKaKne CneuaJIbHbIe DeiCTBnA. DocTaTOUHO bYdET, NocLe BbIKIOueHn ITeNCEJIbHO BUNKn n3 po3eTKn TOKa, DoCTaTB bak I CHOBa ero HAnONHITb HaTypaJIbHOu IN CBExe BOdoB. B clyae NOblSeHHo JecTKoCTn (60nee 20^ ) BOdbI peKOMeHdyETc NcNoJIb3OBA Tb 50% BOdbI n3-NOk KpaHa n 50% dInCTINlIpOBaHHo BOdbI.
HcnoIb3ObaHne akceccyapa nla chCTkn KObpOB
3TOT akceccyapdoJxhen nCnOJIb30BaTbCToJbKO dIy NcCTKn KOBPOB uHaJIOrNHybIX MArKnx NOBepXHocTei. He nCNOJIb30BaTb np6Op Ha TBepDbix NOBepXHOCTaX.
IomeCTte Hacadky dny KObPOB (S) nlocko CTopoHOHa noI. Y6eNTecb, yTO TKAHb HaxOHTcno napOBor rONOBKOI (L). Iy KOBPOB peKOMeHdyETc npIMeHrTb TkaHeByIO HaKaJAdKy dny nona (P). YcTaHOBnTe np6Op ha Hacadky (S), cnerka HaxMITE (pnc. 11 YcToPoIcTB roTOBO K nCnObl30BaHnIO.
IocJe HcNoJIb3ObaHn
OTcoeINHb npOBoI INTahnIa n3 po3ETKn Toka. IOnHOCTbIO BblNTb BOy u3 6ka, TaKIM O6pa3OM, I36eRa OTCTOBAbl, KOTOPa MoKET CNOC6CTBOBaTb O6pa3OBAHIO N3BcTeN.

BHHMaHHe!
IIOOxdaTb He MeHee 5 MNHyT, noka napoBa rOIOBka n TkaHeBa HaKJaKa He OCTbIHyT.
Снмп Te TkaHeByu NaKnaIky. HAmotaTe шур эNeKtpOnnTaHЯ Ha KpOchk (E) (pnc.12). Haxmnte Ha Khonky pa36no-KnpOBKn pyuKn (T). COrHnte pyuK u CNoKtne np6op (pnc. 13). YcTaHOBnTe np6op Ha hacaIky dIy ChCTkn KObpoB (S). UcTaHOBnTe MOTOpHbI OTceK B BErTuKaJIbHoE NOIOxHne.

BHHMaHne!
IITTO TOTobI npBecTn npBop B ycToHnBOe BepTKaJIbHOe nOJKeHne, Heo6xoJIMO 3aUeJKNHyTb 7apHnp Mekdy napOBn rONOBKOn KOpNycOM MOTopa.
PomeCTnTb npnbop BCyxoe MeCTo, noaIbwe OT DeTei.
OuHCTKA N TEXOBcJyXKNBAHNE

BHHMaHHe!
Ipeed uNCTKoI np6opa OTKJIIOHTb ero OT cETn 3NEKTPoNTaHnA. DaTb np6bpy OxnaIITBCB TteHHe HeckOJIbKnx MmHyT.

BHHMaHHe!
HnkOrda He onyckaTb np60p B BOy uJIn B DpyrNe XnKocTn.

BHHMaHHe!
Bcerda npOBepaTb coCToHne UHypa BaWero np6opa nepei nCnoIb3ObaHnem I B Cnyae o6hApyKeHn noBpeKdEHH O6paTb8a B 6nKaunu cHTp cepBnCHOrO 6cnjXnBaHnI dIe erO 3aMeHb, KOTOpYIO MoKET pOn3-BODITb TOnkO CneuaNbHO NOIroTOBHeHbI nepcoHaI.
He nCnoB3oBaTb a6pa3nBhIe BeueCTBa dIy uNCTKn npu6opa.
He do6abTb B 6ak yKcyc, aHTnHaKnHn Hnn apomatn3npoBaHHbIe BeIecTBa; B npOTNBOM cIyuae deIcTBne rapaHTn Cpa3y Je Ipekpaaaetc.
Ounstka annapata
Пл actmaccobblie cheTn CneIyet OuHtAtpB npn NOMOu BnaJHO Hea6pa3NbHO cAnpeTKn, nocne Yero npoTepeTb cyxon TkaHbIO. Bpemr OT BpemeH npOBODHTb OUcNTKy 6aka n 3aONHraTb erO CBexeB BODo. CnoOnCHyTB n BblNTb.
Peped uCCTKoT KtaHEBOH HAKNaIDKn O3HaKOMNTbcr C yKa3aHnMa H a 3TNKeTke. Bpemr OT BpemeH Heo6XoDMo BblHMATb n OnopoxHbTb PbIEc6bpHMK (M)(pnc.14). ChmMtTe 3aunTHyo ceTKy co 7eTKn (N) (pnc.15). OChntte TpyboeTKy (Z), ydaJIra CKONBswIOc Pblb (pnc.16). UcTaHOBInTe Ha MeTO 3aunTHyo ceTKy 7eTKn (N).
3aMeHnTbΦnJIbTp
Heo6xOIMO MeHrTb 4-6 Meca, IIO6 oocne 100 pa6OuHX cIKNOB (ODINcKp PAeBN HCIOJIb3OBAHIO OndHO nonHO pe3epByapa BObl). OTKIOUHTb np6op ot cetn 3JeKTPoNTaHn. DoXdAcbra noka ocTBHyT HArpeTbe qactn np6opa.CHrTb pe3epByap. N3BNeYb 6IbTp (H), NotaHyB erO Bepx, npaPAnIbHO KOpNcy MToopa. 3AmEHtB 6IbTp Ha HObl, ObpaTIB OC6oe BHIMAHme Ha To, UTObl OH 6bln COOTBeTCTBYUOUM 6pa3OM yCTaHOBNEH B na3 (Pnc. 17).

BHIMAHne!
B cnyae Bo3HKnHOBeHHn HeNoJaoK B pa6ote yTIOra nIIN 3JeKtpoABapm HEO6xOIMHO HeMeIeHHO BbIKIouHTb np6Op. BbHyTb uHyp n3JeKtpop03eKn. IooKDaTb noka np6Op ocTBiHET.
| ПОНБЛЕМы ПИЧИНБ | СПОСОБы UСТРАЕНЯ | |
| Индikатор Влночения He ropit | Вилka He BCTablenera Y6eHITbCS, | ЧTo BnIka BCTablenera B po3eTky. Y6eHITbCS, ЧTo B эЛeKTPocSErtn prncyTCTByeT TOK. ПОпобовать пОдКлIOчпь ВиIky K Дуго рo3eTke.Есln пОбlemу He ydaetcpeHITb, obpaHITbCS B abTOpI3OBaHHbI серВись 的цeHTp. |
| Пар He NOCTuyaET n3 COOTBETCTBvyUZHx OTBERCTH | № haxat BblknochateJIb noDACh napa | HaxatBo Do ynpa BblknochateJb noDAChnapa. |
| Пробор He roTOB K иСпОЛьЗОВанJO | Держать HaxatbIM BblknochateJIb noDAChnapaВ Teчене 30 сek. Или do tex nop, поа He bуdET спБИSeH шуm haoCoA. ДождATь с noDAChnapa. | |
| HexBaTka BoIb B pe3eRByape | HanoHnITb pe3eRByap BODоДо МAKCImaJIbHO OTMeTkn. | |
| HenrabINbHO BCTablENHbI B СBOe rHe3do pe3eRByap | ВынTu b IN BNOBb BCTabITb pe3eRByap, y6eDINBUnsCb, ChTo On yCTaHOBlen PrabINbHO. | |
| OTBERCTH BblOda napa MoryT ЗавATьСЯ n3BecTKOBbIM налетOM | ОбразITeСь B abTOpI3OBaHHbI CERВИСHь 的цeHTp. | |
| HeoxiДанHo усilNTся шуm pri nabote Hacoca | HexBatka BoIb B pe3eRByape B | КлIOCHtB prIObOPи NaIITb BODу B pe3eRByap. |
| HenrabINbHO BCTablENHbI B СBOe rHe3do pe3eRByap | ВынTu b IN BNOBb BCTabITb pe3eRByap, y6eDINBUnsCb, ChTo On yCTaHOBlen PrabINbHO. | |
| Вытеканe Вды n3 OTBERCTH noDACh napa | ВозMOЖhoe skONJIeHne octaTkoB KOHNecata B Trpy6ke noDACh napa | Держать HaxatbIM BblknochateJIb noDAChnapa Do tex nop, поа He naHET BblXODITb Nap. ПОсTeIITb MЯrkuto TKaHb, ChTo6bI He yBnaJXrTb HanoJIbHoe pOKpbITne. Есln BODa prOdoJIgKaeT noCTyaNATb, BblKIOchITb prIObOp. NoDOxJaTb He MeHee 5 MINUT, поа napOBa rOLOVka n TKaHEBa NAcJIaDka He OCTbIHY. ПОпрбОВаТь зае pa3. |
IaTa n3rOToBnEHHyka3aHa Ha Kopnyce H3dEINB 3aWuΦpoBaHHom BIne SN wk/yrabcdefg,
rdewk-HepeI npoI3BOIDCTBa
yr-roD npOu3BOoCTBa
abcdefg - cepuHbH Homep n3dennr
CoOTBeTCTByET Tpe6oBaHnIaM
TP TC 004/2011 «O 6e3oNaChocTn Hn3KOBONbTHoro 6OpyIOBaHn, yTBepXdEh PeIeHnem Komccn TaMOKeHHoro coJoz3a N9768 ot 16 abrycta 2011 roda
TP TC 020/2011 «ЗлелктоматICAL COBMECTMOCTB TEXHUNeCKNX cpeiCTB», yTBePJIeH PeIeHNem KomnCm TAmOJKeHHOro coIO3a N879 ot 9 DeKa6pR 2011 roda
HOpmaun O cepTnKauun B npJIOKeHH K rapaHTnHOMy TaHOHy n/nn Ha ynaKOBKe m3dJIa.
220-240B~ - 50Γι - 1500Bτ - Knacc I - IPX4
CdeJanaHO B Kntae
IMnopTeP:OOO«MeNaTEx>
IOpnueckn apec:127006, ropoM MockBa, yInua CaObaT-PtnympaJIbHa, dom 16, cTroeHne 3, IOM. I, KOM 2
Фaktnueckm aDpec:119048, r. MockBa, yI. YcaVeBa, d.29, Kopnyc 3, nom.II, kom.3
I3ROTOBNTeJIb: De' Longhi Appliances Srl/«ДeNoHn AnNnaeHCnc CPJI» AApec: 50013 Ntann,Флоренця,Кamnn
TopyajianAriete+7915165611
Tobap noctabnraeTcB CObpaHHOM Bnde, CneuHaNbHbIX Tpe6oBaHn K nepeBo3Ke HxaHeHHo He yTaHOBNeHo.
YTNIN3NPOBAtB COOTBETCTBnC 3aKoHOaTeIbCTBOM MeTa peaJIIM3aUIM.
TapaHTnHbI cpoK 2 roJa. CpoK cJyK6bl n3dEInna 2 roJa.
HOpMaIgOceTnKaIINBnpIOXKeHNKraPHTNHOMyTaHOHyNHaYnaKOBKeN3deJIy.
OE BC
ailll jbs
1
Y. jll 1j y gall all j! pii . aaiil aill c jgll Jaoiui Y
J i 1al l gail gila 1 jlln c jgll Jaoiui
j n j k: qgll nn aIgbl jial ll gbl n e gi s Ile Jk w jge

S OBC = S COD + S_ BOC
J 1 J 1
1
J 1 J 1

JLo
Jaaai Jia aiee
J 1 J 1 J 1 J 1 J 1 J 1 J 1 J 1 J 1
J 1 1 1 1 1 1 1 1 1 1 1 1 1 1 1 1 1 1 1 1 1 1
.
y
jbi
J (Jab) J 1 J 1 J 1 J 1 J 1 J 1 J 1 J 1 J 1 J 1 J 1 J 1 J 1 J 1 J 1 J 1 J 1 J 1 J 1 J 1 J 1 J 1 J 1 J 1 J 1 J 1
J 1 J
JJI JJIJIJIJIJIJIJIJIJIJIJIJIJIJIJIJIJIJIJIJIJIJIJIJIJIJIJIJIJIJIJIJIJIJIJIJIJIJIJIJIJIJIJIJIJIJIJIJIJIJIJIJIJIJIJIJIJIJIJIJIJIJIJIJIJIJIJIJIJIJIJIJIJIJIJIJIJIJIJIJIJIJIJIJIJIJIJIJIJIJIJIJIJIJIJIJIJIJIJIJI
. 1 1 1 1 1 1 1 1 1 1 1 1 1 1 1 1 1 1 1 1 1 1 1 1 1 1 1 1 1 1 1 1 1 1 1 1 1 1 1 1 1 1 1 1 1 1 1 1
1
Jc 111 jn jnll lall jlal no JzjL
J 1
aIwUeIgI cIgI aI
J 1 J 1 1 1 1 1 1 1 1 1 1 1 1
jies
y
()
J 5
J 1
S_ AOB = 12 · OB · AB = 12 × OA × 3
aiee aiee eae ee eee
a
Jn Jnss aal 45 nnnn nn nnnn nn nnnnnnnnnnnnnnnnnnnnnnnnnnnnnnnnnnnnnnnnnnnnnnnnnnnnnnnnnnnnnnnnnnnnnnnnnnnnnnnnnnnnnnnnnnnnnnnnnnn
.
.
.
jLj 15! jJl jIyS JIy S JIy
a
Ariete 5k
Ariete
(.g 1
a 1
a 1
JSSS JSSS
a + b = 3
.
aill 11 aiee 15 abw y w d n jgll J
< 0, < 0, > 0
4
J 1
aegaaal g jybl sljwlln aegaaall gl all
1
Joo 1
y
jil# jg jai
JJIJIJIJIJIJIJIJIJIJIJIJIJIJIJIJIJIJIJIJIJIJIJIJIJIJIJIJIJIJIJIJIJIJIJIJIJIJIJIJIJIJIJIJIJIJIJIJIJIJIJIJIJIJIJIJIJIJIJIJIJIJIJIJIJIJIJIJIJIJIJIJIJIJIJIJIJIJIJIJIJIJIJIJIJIJIJIJIJIJIJIJIJIJIJIJIJIJIJIJIJ
J 1
.
p 1
. jjll clll g
Joo 2. (j)
Ae 15 e g aal 15 . (j y jy
J 20 20
.1500 50% 50%
J 1
yiaa yao aiee
a 1
.
g j 1
.
J 1
J 1
.(la g g g jal)gjglggl
Jn Jnnn nn nnnnnnnnnnnnnnnnnnnnnnnnnnnnnnnnnnnnnnnnnnnnnnnnnnnnnnnnnnnnnnnnnnnnnnnnnnnnnnnnnnnnnnnnnnnnnnnnnnnnnnnnnnnnnnn
1
1
J 1
Jalal Jlal j
e 1
j 1 j 1 j 1 j 1 j 1 j 1 j 1 j 1 j 1 j 1 j 1 j 1 j 1 j 1 j 1 j 1 j 1 j 1 j 1 j 1 j 1 j 1 j 1 j
J 1
1
y
a
Jaaee 8
y
y 1
1
.
i
(1)
[{\left( 2n + 1\right) }^{2} - 8{m}^{2} = 1]
jzB
E - C
-
D
-
E
J 1
JH
J 1
J- L
- M
[a + b = c]
j0
-
aallll lss
R
Soll
1- T
- U
10 1
- Z
jglz
111 111 111 111 111 111 111 111 111 111 111
(204
.(3
1
1
J 9 J (O) jll bai jil
.(M)
14
.
.(O)
Jljjg Jlaa
J 100000000000000000000000000000000000000000000
(V) "g" (10 L) (L)
aJlll lI g 1111 (Q) aJll lI g Jlll aJll
.
!
.
g 8 g j 8 g j 8 g j 8 g j 8 g j 8 g j 8 g j 8 g j 8 g j 8 g j 8 g j 8 g j 8 g j 8 g j 8 g j 8 g j 8 g j 8 g j 8 g j 8 g j 8 g j 8 g j 8 g j 8 g j 8 g j 8 g
1
g a 1 g 1 1 1 1 1 1 1 1 1 1 1 1 1 1 1 1 1
14 1
J
J
J
J
J
J
J
J
J
J
J
J
J
J
J
J
J
J
J
J
J
J
J
J
J
J
J
J
J
J
J
J
J
J
J
J
J
J
J
J
J
J
J
J
J
J
J
J
J
J
J
J
J
J
J
J
J
J
J
J
J
J
J
J
J
J
J
J
J
J
J
J
J
J
J
J
J
J
J
J
J
J
J
J
J
J
J
ii
Jiaiui Jixie jie 1
.(15 1
A
jlll
100 4-6 (H) jlll jll l l l l l l l l l l l l l l l l l l l l l l l l l l l l l l l l l l l l l l l l l l l l l l l l l l l l l l l l l l l l l l l l l l l l l l l
!
1
J 1