6246 - Steam cleaner ARIETE - Free user manual and instructions
Find the device manual for free 6246 ARIETE in PDF.
User questions about 6246 ARIETE
0 question about this device. Answer the ones you know or ask your own.
Ask a new question about this device
Download the instructions for your Steam cleaner in PDF format for free! Find your manual 6246 - ARIETE and take your electronic device back in hand. On this page are published all the documents necessary for the use of your device. 6246 by ARIETE.
USER MANUAL 6246 ARIETE
natural_image
Illustration of a steam iron with a spool, showing its handle and base (no text or symbols)Stiratrice verticale e femo da stiro
Garment steamer and iron
Défroisseur vertical et fer à repasser
Vertikale Bügelmaschine und Bügeleisen
Ferro e escrova de vapor vertical
Verticale strijkijzer en gewoon strijkijzer
-Ariete
natural_image
Illustration showing two-step foot movement: one on a shoe, the other on a lamp and a small object (no text or symbols)
natural_image
Two-step illustration showing foot positioning and a close-up of the ankle joint (no text or symbols)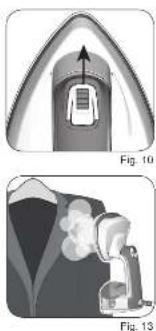
natural_image
Two grayscale illustrations showing a device inside a dome-shaped structure, labeled Fig. 10 and Fig. 13 (no text or symbols on the devices themselves)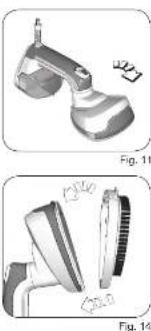
natural_image
Two grayscale illustrations of a hairpin and a comb, labeled Fig. 11 and Fig. 14 (no text or symbols on the objects themselves)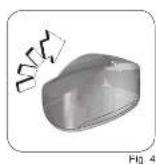

natural_image
Illustration of a steam iron being placed on a surface, with a magnified inset showing the interior detail (no text or symbols)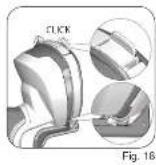
natural_image
Illustration of a steam iron with a coiled cord and handle (no text or symbols)natural_image
Illustration of a kitchen electric shaver with smoke rising (no text or symbols)natural_image
Illustration of a steam iron with labeled component A (no text or symbols on the device itself)natural_image
Illustration of a hand using a hairdryer to press or install a device, labeled 'B' (no text or symbols on the diagram itself)natural_image
Illustration of hands using a hairdryer to clean or install a device (no text or symbols visible)Fig. 20
natural_image
Illustration of two steam iron machines, one emitting smoke and the other emitting vapor (no text or symbols)Fig. 21
This appliance is made in conformity with appropriate European Regulations in force, to protect the user wherever possible from potential hazards. Even if you are familiar with this type of appliance, carefully read this manual before use. Only use this appliance for the purpose it is designed for in order to prevent accidents and damage. Keep this manual close by for future consultation. If you should decide to give this appliance to other people, remember to also include these instructions. The information provided in this manual is marked with the following symbols indicating:
Danger for children
Danger due to electricity
⚠️ Danger of damage originating from other causes
Warning of burns
Caution. Property damage
DANGER warns of possible serious injury or danger of death
WARNING warns of injuries and serious damage to property
CAUTION warns of minor injuries or damage to property
INTENDED USE
The appliance is designed to iron and revive fabrics.
The appliance can be used with or without water.
The appliance must be used indoors and in dry environments. Do not use the appliance outdoors or in rooms with high humidity.
SAFETY WARNINGS
READ THESE INSTRUCTIONS CAREFULLY.
- This appliance is intended to be used in household and similar applications. Any other use of the appliance is not intended by the Manufacturer who does not accept any responsibility for damages of any kind caused by improper use of the appliance itself. Improper use also results in any form of warranty being forfeited.
- We decline any responsibility resulting from misuse or any use other than those covered in this booklet.
• We suggest you keep the original box and packaging, as our free-of-charge service does not cover any damage resulting from inadequate packaging of the product when this is sent back to an Authorised Service Centre. - Using accessories not recommended or not supplied by the manufacturer of the appliance may entail risks of fire, electric shock or injuries to people.
Danger for children
- The appliance can be used by children aged 8 years and up only if they are monitored by a responsible person or if they have received instructions regarding the appliance safe use and if they have understood the dangers which may arise during the appliance use.
- Cleaning and user maintenance shall not be made by children unless they are
aged from 8 years and above and supervised. Children must be supervised at all times to ensure they do not play with the appliance.
- Keep the iron and its cord out of reach of children less than 8 years of age when it is energized or cooling down
- Do not leave the packaging near children because it is potentially dangerous.
- In the event that this appliance is to be disposed of, it is suggested that the power cord is cut off. It is also recommended that all potentially dangerous components including the power cord are rendered harmless to prevent personal injury. Do not let children play with the appliance or its components.
- Store the appliance in a safe place, out of reach of children.
Danger due to electricity
- This appliance can be used by persons who have reduced physical sensory or mental capabilities, or lack of experience and knowledge, only if they are monitored by a responsible person or if they have received and understood instructions regarding the appliance safe use and if they have understood the dangers which may arise during the appliance use.
- Before plugging the appliance into the mains socket, ensure that the voltage shown on the rating plate matches the local voltage supply.
• Always connect the appliance to an earthed socket. - Do not immerse the appliance in water or other liquids.
- Do not use the appliance with wet hands or bare feet.
- If the power cord is damaged, it must be replaced by the manufacturer or by its Technical Assistance Service or by a similarly qualified person in order to avoid any hazard.
- Do not plug any other high power appliance (electric heaters, irons, radiators, etc.) into the same socket. Danger of electric overload.
- Remove the plug from the electrical outlet before filling the tank with water.
- Do not put the tank in its seat if it is wet. Clean the tank with a dry cloth.
⚠️ Danger of damage originating from other causes
- Fill up the tank with water before starting up the appliance. Be sure to unplug the appliance before pouring water into the tank.
- Turn on the appliance only when it is in working position.
- When placing the iron on its stand, ensure that the surface on which the stand is placed is stable.
- Never leave the appliance unattended when it is connected to the power supply.
- When you must be away even for a short time, place the appliance on a stable and horizontal surface. Turn off the appliance and always unplug the electric power cord.
- The appliance is not to be used if it has been dropped, if there are visible sign of damage, faults or suspected defects after dropping or if it is leaking water. Imme-
diately unplug it from the socket-outlet. Never operate the appliance if defective. To prevent any accident, all repairs, including the replacement of the power cord, must be carried out by an Authorised Service Centre or by suitably qualified personnel. Otherwise, the warranty may be revoked.

Warning of burns
- Never try to use the appliance turned to yourself to iron the garments you wear.
- Do not touch the metal parts of the appliance, the hot water or the steam when it is in operation and for several minutes after it is turned off since it could cause burns.
- Danger of burns. The construction characteristics of the appliance this publication refers to do protect the user from possible contact with the steam dispenser while it is being used or for several minutes after it is turned off.
- Care should be taken when using the appliance due to the emission of steam.
- During the ironing operations supporting the dispenser on the support with the nozzles turned on the opposite side with respect to your position.
- After turning off the appliance and pulled the plug from the socket leave it on the ground.
- Unplug the appliance during filling and cleaning.
Never aim the jet of steam towards equipment containing electrical parts (ex. inside ovens).
- Do not touch the appliance soleplate. Before turning the soleplate to move it in steam iron position turn off the appliance. Wait until the appliance has completely cooled.
- Before proceeding with the accessories installation or removal, turn off the appliance. Wait until the appliance has completely cooled.

Warning. Hot surface.

Caution. Property damage
- Fully unwind the cord before use.
- The use of extensions not approved by the manufacturer can result in damage to property and personal injury.
- Using the appliance with no water in the boiler may damage the pump. Check the water level in the tank on a regular basis.
- Do not use sparkling (carbonated) water. If your water supply is very hard, we suggest you use demineralised water instead.
- Do not pull the power cord to unplug the appliance.
- The appliance must only be cleaned with a soft, slightly damped, cloth after unplugging the appliance and allowing all its parts to cool down. Never use solvents which may damage the plastic parts.
- Do not pour vinegar, descales or other scented substances into the tank. Penalty
the end of warranty.
- The appliance does not need descaling for correct use.
- Before storing the appliance unplug it from the mains supply. Wait for the appliance to cool down (at least 30 minutes). Fully empty the tank.
- Before cleaning or maintenance, always disconnect the plug from the mains supply. Let the appliance to cool down for a few minutes.
- Do not store the appliance resting on the brush bristles
- Do not leave the appliance exposed to weathering (rain, sun, etc.).
For proper disposal of the product in accordance with the European Directive 2012/19/EU please read the dedicated leaflet attached to the product.
• ALWAYS KEEP THESE INSTRUCTIONS.
Identification data
The rating plate under the power base shows the following identification data of the appliance:
• manufacturer and CE marking
- model (Model.)
- serial number (SN)
• electrical supply voltage (V) and frequency (Hz)
• electrical power consumption (W)
• assistance toll-free phone number
Always give the model and serial number to the Authorised Service Centres when requesting assistance.
SUGGESTIONS
Before you start to use the appliance check the instructions on the fabric label. If you do not know the composition of the article to be ironed, choose a part of the article which will not be seen. Make a test in this point.
Do not use the appliance on silk or velvet fabric. Some garments are ironed well upside down or from the bottom upward.
If the nozzles begin to be clogged, you will hear a gurgling noise. Regularly check the cleanliness of the nozzles.
For harder and thicker garments it is necessary to move the brush several times on them.
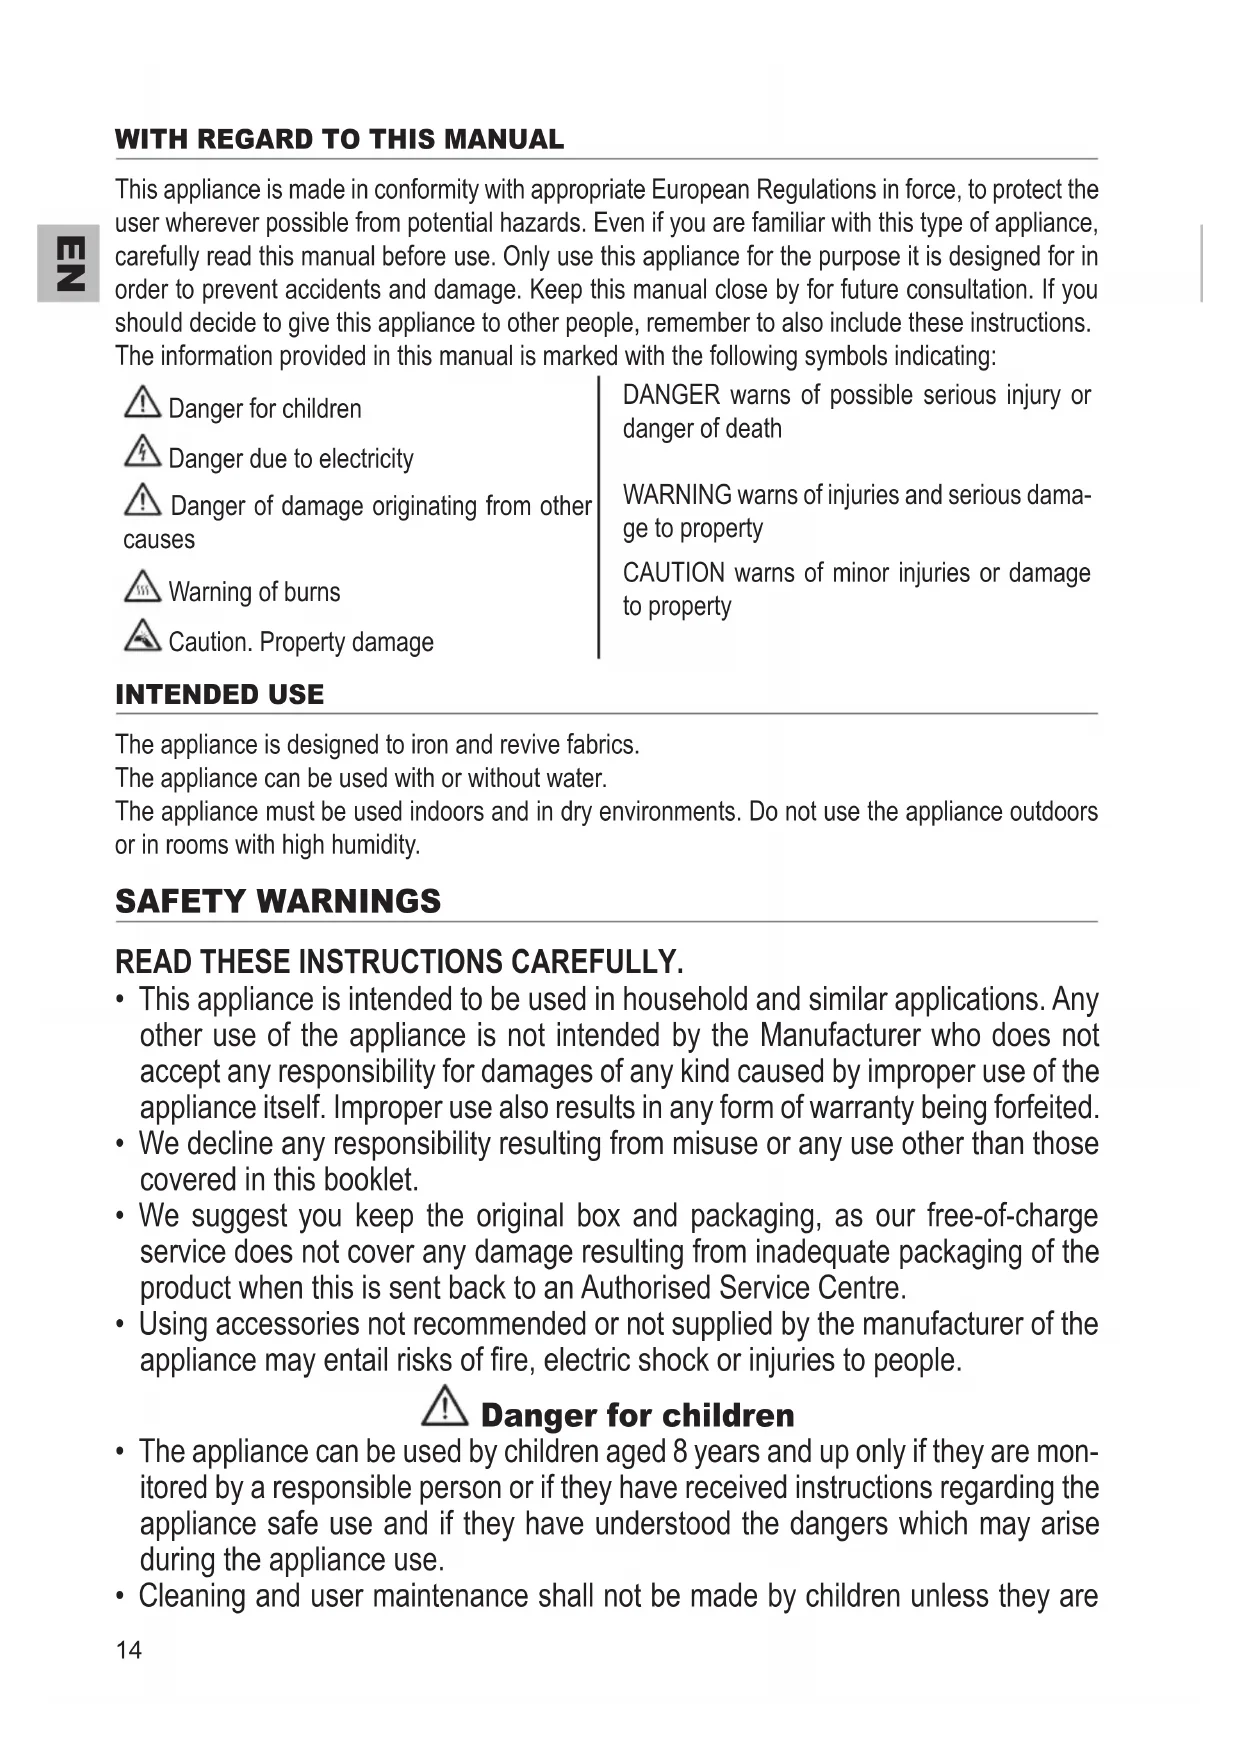
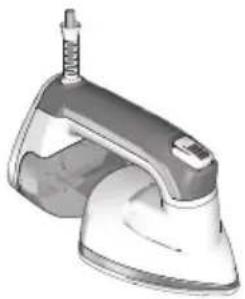
DESCRIPTION OF THE APPLIANCE
A - Power cord
B - Support base
C - Water tank
D - Operation indicator
E - Continuous steam lock slider
F - Steam button
G - Handle
H - Plate with nozzles
I - Wrinkles accessory
J - Brush
1 - Iron position 2 - Garment steamer position
natural_image
Illustration of a steam iron with a screw and handle (no text or symbols)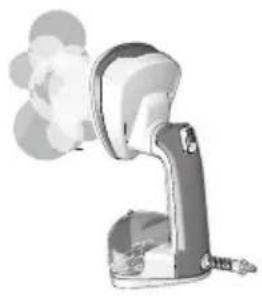
natural_image
Illustration of a steam iron with smoke rising (no text or symbols)3 - From Iron to Garment steamer position

natural_image
Illustration of a steam iron with labeled section A (no text or symbols on the device itself)A Put the iron in vertical position
natural_image
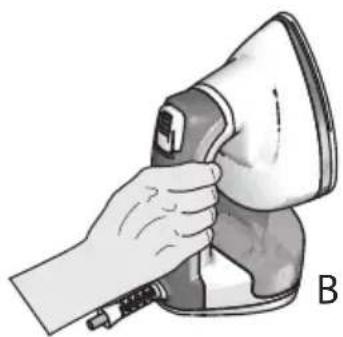
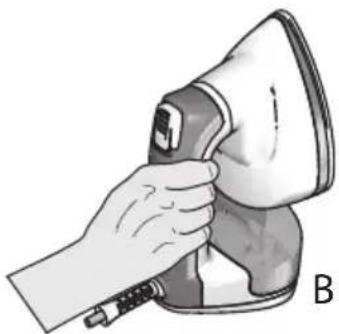
Illustration of a hand using a steam iron to press down a device (no text or symbols visible)B Hold the iron at the base
natural_image
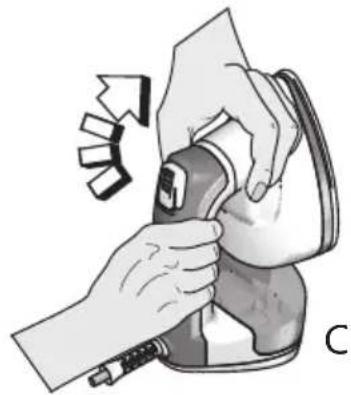
Illustration of hands using a power tool to clean or install a device, with no visible text or symbols.C Turn the soleplate clockwise using the specific handle
Filling the tank before use

Danger. Risk of electric shock
Remove the plug from the electrical outlet before filling the tank with water.
Do not put the tank in its seat if it is wet. Clean the tank with a dry cloth.
- Remove the components from the box.
- Place the appliance on a horizontal and stable surface.
- Totally unwind the power cord.
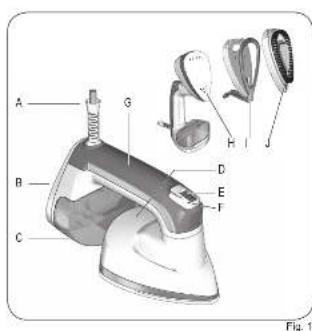
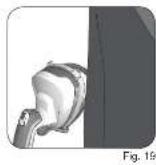
- Turn the soleplate clockwise using the specific handle. Place the soleplate in Garment mode (Fig. 2).
- Remove the tank from its seat (Fig. 3).
- Turn the tank upside down (Fig. 4).
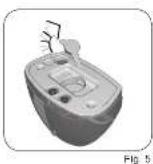
- Open the tank cap (Fig. 5)
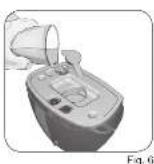
- Fill the tank with fresh natural water up to the MAX level (Fig. 6).
In the case of particularly calcareous waters (with hardness greater than 20^ f) use a mixture composed of 50% of tap water and 50% of demineralised water.
- Close the tank cap.
- Fit the tank into its seat. The correct insertion is done with a "click" (Fig. 7).
-
Turn the soleplate counterclockwise using the specific handle (Fig. 9). Position the soleplate in steam iron mode.
-
Block the soleplate with the tank. On the tank there is a plastic pivot that has to be blocked in the seat on the soleplate (Fig. 8).
NEVER fill the tank beyond the MAX level. The product functions with normal tap water. Never use pure demineralized water.
Do not add any additives or chemicals (such as for example, amides, starches, perfume or other): Otherwise, the warranty may be revoked.
Switching on the appliance
The first time the appliance is switched on, it is possible to see a light emission of smoke: This transitory effect is perfectly normal and will disappear very soon.
- Insert the plug into a power outlet. The operation indicator (D) starts flashing. The plate starts to warm up. When the on/off switch light remains on, the appliance has reached the temperature and is ready for use.
Before using the appliance, clean the soleplate on an old cloth to make sure that the soleplate and tank are clean and to allow residual test water that has remained inside the pipes to vaporize. - Press the steam button (F) and keep it pressed several times until you see the steam. Steam does not come out immediately after pressing the steam button, because the water has to pass from the tank to the steam generator.
- Pass the appliance on the cloth.
- Place the fabric on an ironing board. Pass the appliance on the garment. Press the steam button (F) and keep it pressed.
- To emit a continuous and constant jet of steam, press the steam button. Move the continuous steam lock slider upwards (Fig. 10).

Warning. Risk of burns. Risk of fire
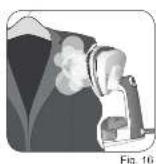
Use the appliance only with horizontal or vertical movements from the bottom upwards and vice versa. Do not use the appliance upside down, with the nozzles upwards (Fig. 20). Danger of hot water leakage from the nozzles. Danger of fire.

Warning. Risk of burns
Do not use the appliance on fabrics that are held by other people.
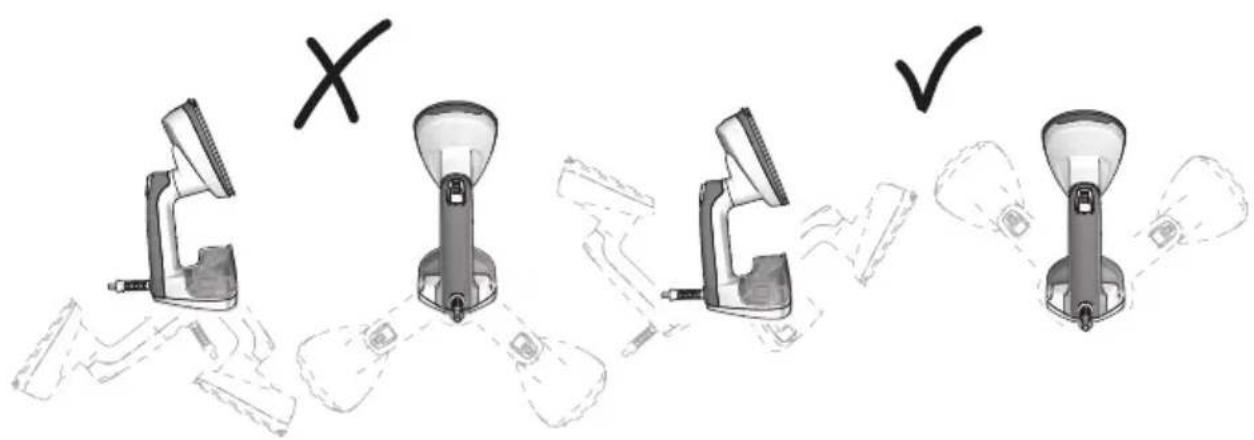
Fig. 20
Filling the boiler during use
Always check the level of water in the tank while you are ironing.
- Unplug the appliance from the electric outlet. Let the appliance to cool down for a few minutes.
- Turn the soleplate clockwise using the specific handle. Place the soleplate in Garment mode (Fig. 2).
- Remove the tank.
- Turn the tank upside down (Fig. 4).
- Open the tank cap (Fig. 5)
- Fill the tank with fresh natural water up to the MAX level (Fig. 6).
- Close the tank cap.
- Fit the tank into its seat. The correct insertion is done with a "click" (Fig. 7).
- Turn the soleplate counterclockwise using the specific handle (Fig. 9). Position the soleplate in steam iron mode.
- Insert the plug into a power outlet.
Steam ironing as steam iron
Garments ironing is possible only for those fabrics that have the three-point mark (…) label.

Warning. Risk of burns.
Do not touch the appliance soleplate. Before turning the soleplate to move it in steam iron position turn off the appliance. Wait until the appliance has completely cooled.
- Fill the tank with water.
- Place the fabric on an ironing board.
- Turn the soleplate counterclockwise using the specific handle (Fig. 9). Reposition the soleplate in steam iron mode.
- Block the soleplate with the tank. On the tank there is a plastic pivot that has to be blocked in the seat on the soleplate (Fig. 8).
- Use the iron as a normal steam iron.

Warning. Risk of burns.
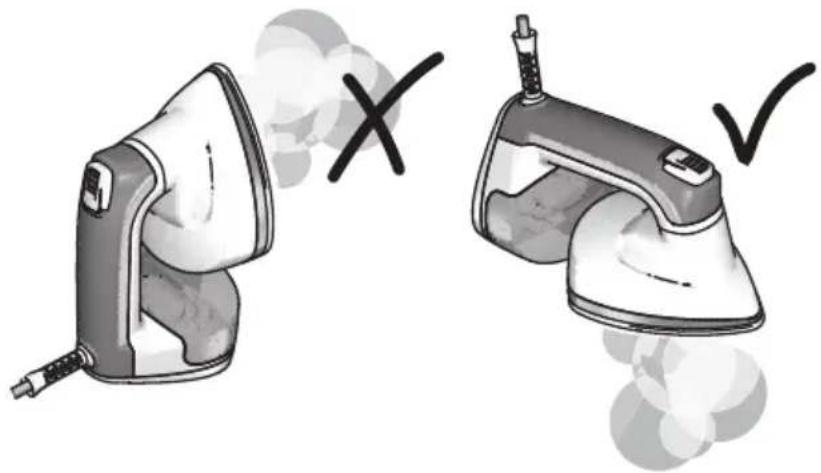
Do not use the steam with the iron in vertical position (Fig. 21).
natural_image
Illustration of two steam iron machines, one emitting smoke and the other emitting vapor (no text or symbols)Fig. 21
Dry ironing as steam iron
Garments ironing is possible only for those fabrics that have the three-point mark ( ·s ) label.

Warning. Risk of burns.
Do not touch the appliance soleplate. Before turning the soleplate to move it in steam iron position turn off the appliance. Wait until the appliance has completely cooled.
- Place the fabric on an ironing board.
- Turn the soleplate counterclockwise using the specific handle (Fig. 9). Position the soleplate in steam iron mode.
- Block the soleplate with the tank. On the tank there is a plastic pivot that has to be blocked in the seat on the soleplate (Fig. 8).
- Use the iron as a normal steam iron.
Ironing as Garment steamer
Garments ironing is possible only for those fabrics that have the three-point mark ( ·s ) label.

Warning. Risk of burns.
Do not touch the appliance soleplate. Before turning the soleplate to move it in steam iron position turn off the appliance. Wait until the appliance has completely cooled.
- Place the garment on a folding rack.
- Pull the garment with your free hand. Place the appliance on the garment folds. Press the steam button (F) and then release it. Move the appliance from right to left. Move the appliance from the bottom upwards. Press the steam button (F) several times.
- To emit a continuous and constant jet of steam, move the continuous steam lock slider upwards (Fig. 12).
- When you finish ironing let the clothes dry on the hanger.
Freshen the clothes with the brush and remove the lint

Warning. Risk of burns.
Do not touch the appliance soleplate. Before proceeding with the accessories installation or removal, turn off the appliance. Wait until the appliance has completely cooled.
NEVER use the brush when the appliance is in steam iron mode.
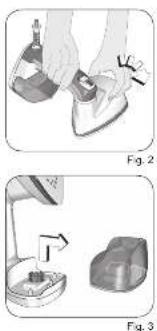
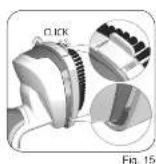
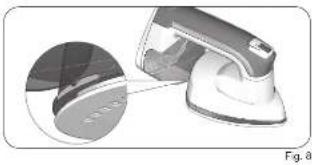
- Attach the brush. First insert the brush tip (Fig. 14). The correct insertion is done with a "click" (Fig.15).
- Place the garment on a folding rack. Pull the garment with your free hand. Place the appliance on the garment folds. Press the steam button (F) and then release it. Move the appliance from right to left. Move the appliance from the bottom upwards and brush. Press the steam button (F) several times.
- To emit a continuous and constant jet of steam, move the continuous steam lock slider upwards (Fig. 12).
- At the end of the work, allow to dry clothes on the folding rack.
- Remove the brush after the appliance has completely cooled.
Remove the wrinkles from the clothes with the wrinkles accessory

Warning. Risk of burns.
Before proceeding with the accessories installation or removal, turn off the appliance. Wait until the appliance has completely cooled.
NEVER use the wrinkles accessory when the appliance is in steam iron mode.
- Remove the brush.
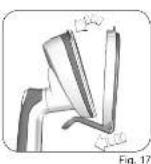
- Assemble the wrinkles accessory. The correct insertion is done with a "click" (Fig. 17).
- Place the garment on a folding rack. Pull the garment with your free hand. Push the accessory levier. Insert the cloth in the slit. Press the steam button (F) and then release it. Move the appliance from the top to bottom until you removed the wrinkle (Fig. 14). Press the steam button (F) several times.
- To emit a continuous and constant jet of steam, move the continuous steam lock slider upwards (Fig.12).
- Remove the wrinkles accessory after the appliance has completely cooled.
Upholstery, curtains and fabrics
The tents and garments can be treated when they are hanging. Tablecloths and upholstery fabrics must be hung on a rod, like a curtain rod. Before you start ironing delicate fabrics, it is recommended to test it in a hidden part of the garment such as a flap.
AFTER USING THE DEVICE
After using the appliance without steam
- Unplug it from the electric outlet. Let the appliance to cool down for a few minutes.
- Put the appliance in a dry place and away from the reach of children.
After using the appliance with steam
- Let out all the residual steam without pressing the steam button (F).
- Unplug it from the electric outlet. Let the appliance to cool down for a few minutes.
- Empty the water tank completely so as to prevent the water from stagnating, which may form lime deposit.
- Put the appliance in a dry place and away from the reach of children.
CLEANING AND MAINTENANCE

Warning. Risk of burns.
Before cleaning or maintenance, always disconnect the plug from the mains supply. Let the appliance to cool down for a few minutes.

Caution. Risk of material damage
Do not wind the power cord around the appliance.
Do not store the appliance resting on the brush bristles.
Cleaning the appliance
Clean plastic parts with a damp, non-abrasive cloth and dry them with a dry cloth. Do not use abrasive products to clean the device.
Descaling cleaning
To prolong the life of your iron, we recommend that this procedure be carried out at regular intervals (once or twice a month). This is an activity that allows you to remove the limescale deposits and the impurities from inside the soleplate thanks to the steam and hot water, we suggest you to carry out this operation over a basin.
- Carry out the operations described in the paragraph "Filling the tank during use".
- Keep the appliance in horizontal position over a basin. Insert the plug into a power outlet. Make sure that the operation indicator light (D) is not blinking.
- Press quickly the steam button (F) for 5 times. The “SELF CLEAN” function will be activated and steam and hot water will come out from the soleplate holes removing limescale and deposits from within the soleplate.
- Gently move the iron back and forth until the tank is completely emptied.
- Unplug from the electric outlet. Let the appliance to cool down for a few minutes and repeat the operation.
- Make sure that the soleplate is completely dry before storing the iron.
Before using the appliance, clean the soleplate on an old cloth to make sure that the soleplate and tank are clean and to allow residual test water that has remained inside the pipes to vaporize.
Tank cleaning
To clean the tank, insert fresh water, rinse and drain.

Caution. Risk of material damage
Do not pour vinegar, descales or other scented substances into the tank. Penalty the end of warranty.
The warranty does not cover damage caused by clogging due to lime.
Cleaning the soleplate and shell
Any deposits and other residue on the soleplate can be removed using a cloth soaked in a water and vinegar solution.
Clean plastic parts with a damp, non-abrasive cloth and dry them with a dry cloth.
Cleaning the accessories
- Remove accessories from the appliance.
- To clean the brush, remove the dust with your hands.
- To clean the wrinkles accessory, move it from right to left on a dry towel.
A PROPOS DU MANUEL
LISEZ ATTENTIVEMENT CES INSTRUCTIONS.
Attention. Surface chaude.
Attention. Dommages matériels
natural_image
Illustration of a steam iron with a screw and handle (no text or symbols)natural_image
Illustration of a steam ironing machine (no text or symbols visible)natural_image
Illustration of a steam iron with labeled section A (no text or symbols on the device itself)natural_image
Illustration of a hand using a megaphone to press equipment (no text or symbols visible)natural_image
Illustration of hands using a power tool to clean or install a device (no text or symbols visible)Fig. 20
natural_image
Illustration of two steam iron machines, one emitting smoke and the other emitting smoke (no text or symbols)Fig. 21
natural_image
Illustration of a steam iron with a handle and spool (no text or symbols)natural_image
Illustration of a kitchen electric shaver with smoke rising (no text or symbols)natural_image
Illustration of a steam iron with labeled component A (no text or symbols on the device itself)natural_image
Illustration of a hand using a portable iron shaver to clean or store items (no text or symbols visible)natural_image
Illustration of hands using a power tool to clean or install a device (no text or symbols visible)Abb. 20
natural_image
Illustration of two steam iron machines, one emitting smoke and the other emitting vapor (no text or symbols)Abb. 21
natural_image
Illustration of a steam iron with a handle and spool (no text or symbols)natural_image
Illustration of a kitchen electric stove with steam rising (no text or symbols)natural_image
Illustration of a steam iron with labeled section A (no text or symbols on the device itself)natural_image
Illustration of a hand using a megaphone to press equipment (no text or symbols visible)natural_image
Illustration of hands using a hairdryer to clean or install a machine (no text or symbols visible)natural_image
Illustration of two steam iron machines, one emitting smoke and the other emitting smoke (no text or symbols)Fig. 21
- CONSERVAR ESTAS INSTRUÇÕES.
INSTRUÇÕES PARA O USO
natural_image
Illustration of a steam iron with a coiled cord and handle (no text or symbols)natural_image
Illustration of a kitchen electric shaver with smoke rising (no text or symbols)natural_image
Illustration of a steam iron with labeled component A (no text or symbols on the device itself)A Posicionar o ferro na vertical
natural_image
Illustration of a hand using a hairdryer to press or install a device, labeled 'B' (no text or symbols on the diagram itself)natural_image
Illustration of hands using a hairdryer to clean or install a device (no text or symbols visible)
Fig. 20
natural_image
Illustration of two steam iron machines, one emitting smoke and the other emitting smoke (no text or symbols)Fig. 21
Refrescar as roupas com a escova e remover as bolinhas das roupas

VEILIGHEIDSWAARSCHUWINGEN
LEES DEZE INSTRUCTIES AANDACHTIG DOOR.
BESCHRIJVING VAN HET APPARAAT
natural_image
Illustration of a steam iron with a spool, showing its internal structure and base (no text or symbols)natural_image
Illustration of a steam iron shaver with smoke rising (no text or symbols)natural_image
Illustration of a steam iron with labeled section A (no text or symbols on the device itself)natural_image
Illustration of a hand using a portable iron shaver to press down a surface (no text or symbols visible)natural_image
Illustration of hands using a power tool to clean or install a machine component (no text or symbols visible)natural_image
Illustration of two steam iron holders, one emitting smoke and the other emitting smoke (no text or symbols)Fig. 21