Aivo Connect - Battery charger iOttie - Free user manual and instructions
Find the device manual for free Aivo Connect iOttie in PDF.
User questions about Aivo Connect iOttie
0 question about this device. Answer the ones you know or ask your own.
Ask a new question about this device
Download the instructions for your Battery charger in PDF format for free! Find your manual Aivo Connect - iOttie and take your electronic device back in hand. On this page are published all the documents necessary for the use of your device. Aivo Connect by iOttie.
USER MANUAL Aivo Connect iOttie
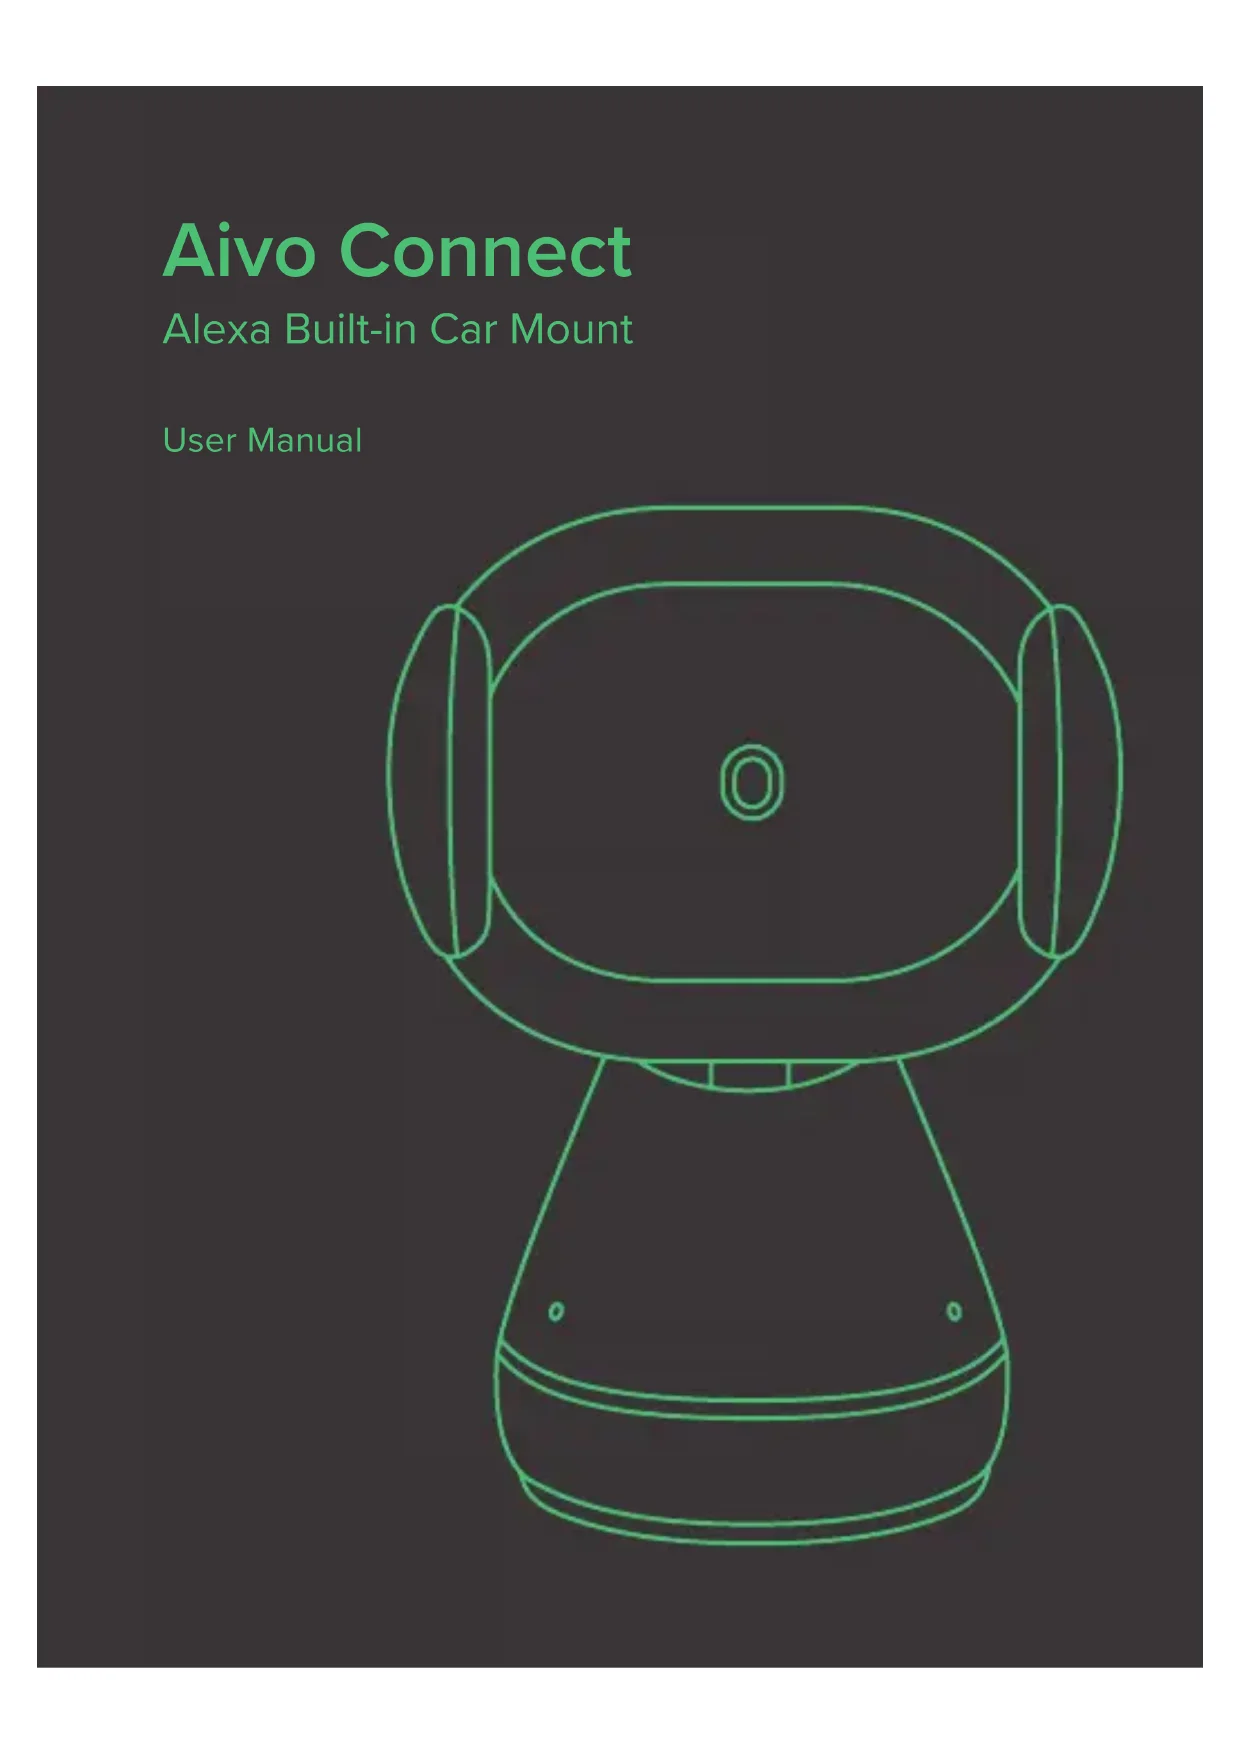
Alexa Built-in Car Mount
User Manual

natural_image
Line drawing of a robot head with green outline, no text or symbols presentAivo Connect
Alexa Built-in Car Mount
User Manual
| English | 04–17 |
| French | 18–31 |
| Italian | 32–45 |
| German | 46–59 |
| Spanish | 60–73 |
| Japanese | 74–87 |
Please follow these steps in the order below to set up your device properly!
01 Download iOttie Connect & Amazon Alexa apps
02 Product Information
Device Compatibility
Critical Information
What's in the Box?
Product Specifications
Safety Information
03 Product Setup
Assembly & Installation
Using the Automatic Mounting System
Qi Alignment Guide
04 Alexa User Experience
Welcome to Alexa
Pairing & Connecting a Device
App Settings & Management
Using Alexa
Alexa Settings & Preferences
Things to Try with Alexa

01InDownload the iOttie Connect & Amazon Alexa apps
Download the iOttie Connect app and Amazon Alexa app from the Apple App Store or the Google Play Store on your smartphone.

Available on the App Store

GET IT ON Google Play

The iOttie Connect app ensures you have the latest device firmware installed for optimal performance and device management.
Follow the instructions in the app and update your device firmware.

Amazon Alexa app will run in the background to receive voice-activated commands.
Once logged into the Amazon Alexa app, you can set Music, Navigation and other preferences to use your favorite Apps.
! Make sure you are using a reliable Wi-Fi or Cellular Data Connection and Power Source.
02 Product Information
For an optimal charging experience, please follow the detailed instructions in this manual when using the Aivo Connect.
Device Compatibility
Please make sure your device is Qi-Wireless compatible.
Compatible devices include:
Apple
iPhone 12, 12 Mini, 12 Pro, 12 Pro Max, 11, 11 Pro, 11 Pro Max, X, XS, XS Max, XR, 8, and 8 Plus.
Samsung
Galaxy S21, S21+, S21 Ultra, S20, S20+, Note20, Note20 Ultra, Z Flip, Z Fold, Note10, Note10+, S10e, S10 S10+, Note9, S9, S9+, Note8, S8, and S8 Plus.
Pixel 5, 4, and 3.
! Please only use the included cable and power adapter.
! Third party components may negatively impact wireless charging performance.
Critical Information

Mounting at a perpendicular angle to the mount works best within the proximity sensor.

If mounting at an angle, phone will need to be closer to sensor for arms to open.
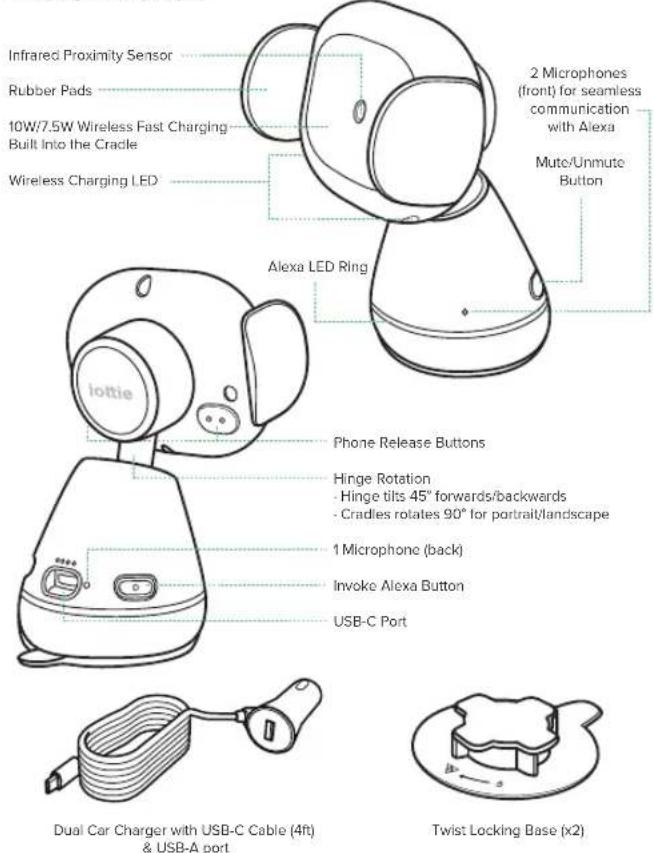
What's in the Box?
text_image
Infrared Proximity Sensor Rubber Pads 10W/7.5W Wireless Fast Charging Built Into the Cracle Wireless Charging LED Alexa LED Ring 2 Microphones (front) for seamless communication with Alexa Mute/Unmute Button Iottie Phone Release Buttons Hinge Rotation - Hinge tilts 45° forwards/backwards - Cradles rotates 90° for portrait/landscape 1 Microphone (back) Invoke Alexa Button USB-C Port Dual Car Charger with USB-C Cable (4ft) & USB-A port Twist Locking Base (x2)Product Specifications
Aivo Connect Mount
| ITEM SPECIFICATION | |
| INPUT 9V/1.67A, 5V/2A | |
| CHARGING PORT USB-C | |
| DEPTH 2.68" | |
| WIDTH 3.15" | |
| HEIGHT 4.61" | |
| WEIGHT | 6.17 oz |
Car Charger Specifications
| INPUT OUTPUT | |
| 12V-24V | USB-A 5V/2.1AUSB-C 5V/3A, 9V/2A, 12V/1.5A |
Safety Information
! Always be safe, do not set up this device while driving.
! Android Phones: Setup smart unlock on your device. Please add a trusted device in settings. Certain features only work when smart unlock is enabled.
iPhone iOS & other Face ID Users: Do not use while driving!
03 Product Setup
Assembly & Installation

- Select desired mounting location on the dashboard and clean the surface before installation.
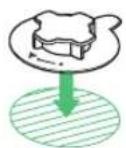
- Remove the adhesive cover from the bottom of the twist-locking base. With the arrow facing the driver, place it at the desired mounting area. *Press and hold firmly for 30 seconds to securely adhere.

- Connect the Aivo Connect to twist-locking base, with a 1/4 clockwise turn to lock into place.
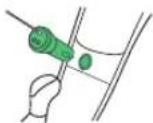
- Connect power cord to back of Aivo Connect and plug charger into car's power source.
Having trouble with mounting on dashboard?
If your car features a leather or curved dashboard, we recommend installing the Aivo Connect to your windshield to ensure our adhesive twist-locking base is at its most secure.
Using the Automatic Mounting System
Mounting and Charging
natural_image
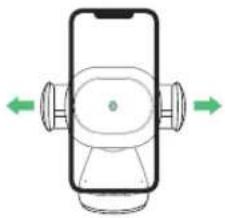
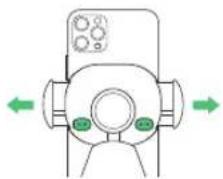
Diagram of a smartphone with directional arrows indicating left and right movement (no text or symbols)- Side arms on mount automatically open via silent step motor when phone is detected in front of Proximity Sensor on mount.
natural_image
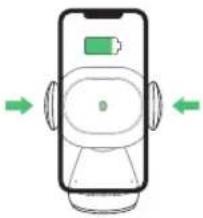
Diagram of a smartphone with a battery and green directional arrows indicating left and right sides (no text or symbols)- Once phone is placed in mount, arms will automatically close after one second. Qi wireless charging will start immediately.
Releasing Device
natural_image
Diagram of a mechanical device with directional arrows indicating movement or force (no text or symbols)Buttons behind cradle arms on both sides of device can open the arms. One or both buttons can be pressed.
The Aivo Connect is powered via a USB-C cable and coin cell phone battery. There is no on/off switch on the device. Once plugged in, the device will remain on unless the vehicle shuts off power when in parking mode.
Backup battery will continue to operate the Aivo Connect cradle arms (open & close) after power has been disconnected or turned off.
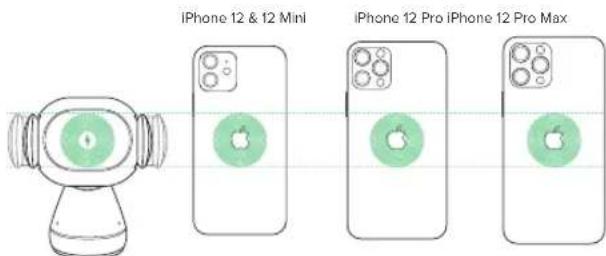
Qi Alignment Guide
The Qi Receiver Coil is generally located in the center area of the phone. Check with your phone's manufacturer for specific Qi coil location. Below are some examples for commonly used phones.
! The Qi coil on the mount is located in the center, in between the arms and around the Infrared Proximity Sensor.
text_image
iPhone 12 & 12 Mini iPhone 12 Pro iPhone 12 Pro Max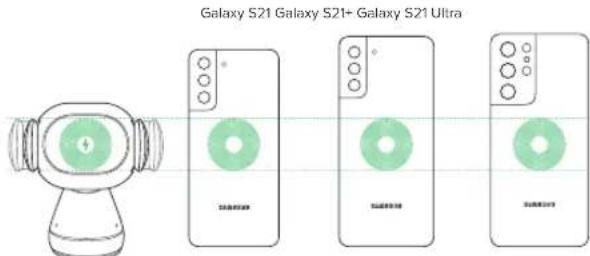
text_image
Galaxy S21 Galaxy S21+ Galaxy S21 Ultra! CAUTION: If device flashes red a foreign object is detected and device must be removed to prevent overheating.
EN 10 / 11
04 Alexa User Experience
Welcome to Alexa
You can talk to Alexa on your Aivo Connect mount. With Alexa, you can ask to get directions, play music, place calls, listen to audiobooks, hear the news, check the weather, control smart home devices, and many more—all while you keep your hands on the wheel and eyes on the road.
The Aivo Connect mount supports access to tens of thousands of Alexa skills from within your vehicle.
For an optimal experience, please follow the detailed instructions for Alexa setup found in the manual or the iOttie Connect app.
• Some Alexa Skills may require an Amazon Prime membership.
• Make sure your phone's Bluetooth is on and connected to your car's Bluetooth.
- The Aivo Connect with Built-in Alexa uses your cellular data when not connected to WiFi. A clear network connection is required for Alexa to work properly, otherwise there may be delays or interruptions. iOttie is not liable for data usage.
- Alexa streams from the cloud. Please note that this may use data. Data charges may apply.
- Alexa streams media instead of local files. Please note that this may use data. I Ottie is not liable for data usage.
- For voice messaging, please allow permission settings by going to Contacts > Profile and Settings > Permission
text_image
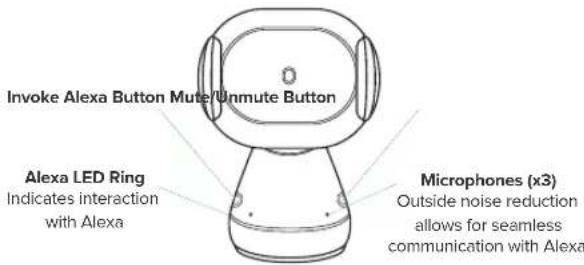
Invoke Alexa Button Mute/Unmute Button Alexa LED Ring Indicates interaction with Alexa Microphones (x3) Outside noise reduction allows for seamless communication with AlexaAlexa LED Indicators
| Solid White Powering On | |
| Flashing Orange Searching Device | |
| Solid Orange Device not found | |
| Flashing Cyan (Flash 3x) Device is connected | |
| Solid Cyan Wake Word Activated | |
| Alternating Dark Blue & Cyan Thinking | |
| Flashing Red Device Not Connected | |
| Solid Red Mute | |
| No Light No interaction in progress | |
Qi Wireless LED Indicators
| Solid White Qi Wireless charging engaged | |
| Flashing Red | Foreign Object Detected; wireless charging blocked |
| No Light No charging in progress |
Pairing & Connecting a Device 3. Once device is paired and connected, the LED Ring
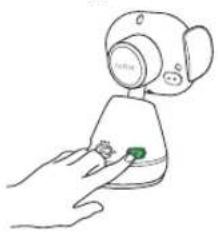
- After Aivo Connect powers on, hold the Invoke Alexa Button for 5 seconds to initiate Setup Mode. The LED Ring will pulse orange as Alexa directs you to the Alexa App to add a new device.
natural_image
Simple line drawing of a hand holding a small green object, no text or symbols present
- In the Alexa App, navigate to Add Device > Auto Accessory, then select from available devices: iOttie Aivo Connect (######) and pair device. Allow location access and make sure Bluetooth is discoverable and turned on.
! WARNING: For your safety, please do not pair/connect device while driving.
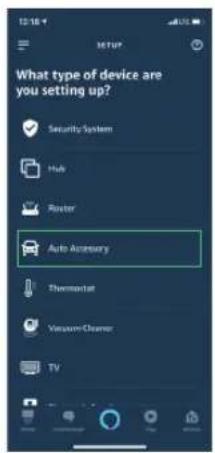
text_image
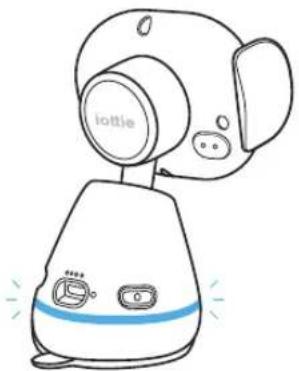
What type of device are you setting up? Security System Hub Router Auto Accessory Thermalat Vacuum Cleaner TVwill flash blue three times before turning off. Alexa is now ready to use.
natural_image
Line drawing of a cartoon-style robot with a labeled 'lottle' and blue buttons, no text or symbols present.Device will now connect automatically when it is powered on and your smartphone is in close range.
* To unpair device, hold the Invoke Alexa button for 5 seconds until it flashes orange and select "Forget Device" from phone's Bluetooth settings.

Updating Device Firmware via iOttie Connect App For an optimal user experience, make sure you have the most up-to-date device firmware installed from the iOttie Connect app. Follow instructions for updating device firmware in the app.
Using Alexa
- A Wake Word can be used to ask Alexa anything. The wake word is simply "Alexa."
- The Invoke Alexa Button on the back of the mount base can also be used instead of the wake word.
- The Mute/Unmute Button also on the back of the mount base can be used to turn Alexa on/off.
! There will be no visual cue on your smartphone that announces the connection except that the color of Avio Connect's LED light should be blue.
! The Alexa App must be running in the background of your phone for the device to work. When app is reopened, it will reconnect automatically.
Alexa Settings & Preferences
Navigation Setting
Alexa will use your default maps app. To use a specific map (i.e. Waze or Google Maps) the default must be changed within the Alexa app.
- Go to the menu and select "Settings"
- Select "Traffic"
- Select "Default Navigation App"
Music Setting
When playing music, Alexa will default to Amazon Music. If using another service, the default must be changed within the Alexa app.
- Go to the menu and select "Settings"
- Select "Music & Podcasts"
- Select "Default Services"
Call and Text Message Setting
To enable Voice Messaging and Calling features, please enable Alexa access to your contacts for seamless communication.
*Alexa App menu names subject to change at any time.
Things to Try with Alexa
With Alexa, users can ask for directions, play music, make hands-free calls, control smart home devices, and much more. Just ask!

Navigation
Alexa, navigate to Prospect Park.
Alexa, take me to the nearest gas station.
Alexa, get directions to home.

Music
Alexa, turn up the volume.
Alexa, play rock music.
Alexa, rewind 15 seconds.

Communication
Alexa, call Home.
Alexa, text "Hello" to John.
Alexa, call Hannah.

Miscellaneous
Alexa, find a nearby gas station.
Alexa, what's the weather?
Alexa, tell me a story.
Alexa, resume my audiobook.
Alexa, lock the front door.
Alexa, what's on my to do list?
Alexa, how does my day look?
Alexa, what movies are playing?
Alexa, what's the news?
Available on the App Store

GET IT ON Google Play

natural_image
Diagram of a mechanical device with directional arrows indicating movement or force (no text or symbols)text_image
Diagram showing four identical devices with green circular icons, each connected to a device labeled in Chinese.natural_image
Illustration of two hand-drawn models with green and orange liquid, no text or symbols presenttext_image
What type of device are you setting up? Security System Hub Router Auto Accessory Thermalat Vacuum Cleaner TVnatural_image
Line drawing of a cartoon-style robot with a lollipop and blue buttons, emitting light beams (no text or symbols)Supporto Aivo Connect
| ELEMENTO CARATTERISTICHE | |
| INGRESSO 9V/1.67A, 5V/2A | |
| PORTA DI CARICA USB-C | |
| PROFONDITÀ 2,68" | |
| LARGHEZZA 3,15" | |
| ALTEZZA 4,61" | |
| PESO | 500 gr |
Car Charger Specifications
| INGRESSO USCITA | |
| 12V-24V | USB-A 5V/2.1AUSB-C 5V/3A, 9V/2A, 12V/1.5A |
Safety Information
natural_image
Diagram of a smartphone with directional arrows indicating left and right movement (no text or symbols)natural_image
Diagram of a smartphone with battery and green directional arrows indicating left and right motion (no text or symbols)text_image
Diagram showing four different types of mobile devices with Chinese labels, including a robot and three smartphone screens.Indicato ri LED wireless QI
natural_image
Line drawing of a hand holding a small green object, with no text or symbols present.
text_image
What type of device are you setting up? Security System Hub Router Auto Accessory Thermalat Vacuum Cleaner TVnatural_image
Line drawing of a cartoon-style robot with a lottle and blue buttons, no text or symbols presentAvailable on the App Store

GET IT ON Google Play

natural_image
Line drawing of a humanoid robot with head, torso, and front-mounted sensors (no text or symbols)natural_image
Simple line drawing of a hand holding a small green object near a camera (no text or symbols)
text_image
What type of device are you setting up? Security System Hub Router Auto Accessory Thermalat Vacuum Cleaner TVnatural_image
Line drawing of a cartoon-style robot with a labeled 'iottle' and blue buttons, no text or symbols present.Available on the App Store

GET IT ON Google Play

natural_image
Diagram of a smartphone with directional arrows indicating left and right movement (no text or symbols)natural_image
Diagram of a smartphone with battery and green directional arrows indicating left and right motion (no text or symbols)text_image
Diagram showing four different types of mobile devices with Chinese labels, including a robot and three smartphone screens.natural_image
Line drawing of a hand holding a small green object near a device (no text or symbols)
text_image
What type of device are you setting up? Security System Hub Router Auto Accessory Thermalat Vacuum Cleaner TVnatural_image
Line drawing of a cartoon robot with a lottle and blue buttons (no text or symbols)Available on the App Store

GET IT ON Google Play

natural_image
Diagram of a smartphone with directional arrows indicating left and right movement (no text or symbols)natural_image
Illustration of a mobile phone with a battery and green directional arrows indicating left and right sides (no text or symbols)natural_image
Diagram of a mechanical device with directional arrows indicating movement or force (no text or symbols)text_image
Diagram showing four smartphone models with Chinese labels indicating '手机' (mobile phone) and '其他' (other devices)natural_image
Line drawing of a hand pressing a small green button on a device (no text or symbols)
text_image
What type of device are you setting up? Security System Hub Router Auto Accessory Thermalat Vacuum Cleaner TVnatural_image
Line drawing of a cartoon-style robot with a lottle and blue buttons, no text or symbols presentThis device complies with part 15 of the FCC rules. Operation is subject to the following two conditions: (1) this device may not cause harmful interference, and (2) this device must accept any interference received, including interference that may cause undesired operation.
NOTE: The manufacturer is not responsible for any radio or TV interference caused by unauthorized modifications to this equipment. Such modifications could void the user's authority to operate the equipment.
NOTE: This equipment has been tested and found to comply with the limits for a Class B digital device, pursuant to part 15 of the FCC Rules. These limits are designed to provide reasonable protection against harmful interference in a residential installation. This equipment generates uses and can radiate radio frequency energy and, if not installed and used in accordance with the instructions, may cause harmful interference to radio communications. However, there is no guarantee that interference will not occur in a particular installation. If this equipment does cause harmful interference to radio or television reception, which can be determined by turning the equipment off and on, the user is encouraged to try to correct the interference by one or more of the following measures:
• Reorient or relocate the receiving antenna.
- Increase the separation between the equipment and receiver.
- Connect the equipment into an outlet on a circuit different from that to which the receiver is connected.
- Consult the dealer or an experienced radio/TV technician for help
- This device and its antenna(s) must not be co-located or operating in conjunction with any other antenna or transmitter.
This equipment complies with FCC radiation exposure limits set forth for an uncontrolled environment. This equipment should be installed and operated with minimum distance of 20 cm between the radiator and your body. This transmitter must not be co-located or operating in conjunction with any other antenna or transmitter.
Operating temperature: -10-55°C
Operating frequency range: 2402-2480MHz Rated Power: For Classic: 9.1dBm, BLE: 8.1dBm
Declaration of Conformity Hereby, iOttie, Inc. declares that the radio equipment type - Aivo Connect of HLCRIQ204 is in compliance with Directive 2014/53/EU.
The full text of the EU declaration of conformity is available at the following internet address: www.lottle.com
This device may be used in each EU member state.
If you love your iOttie product, let us know by leaving a review online, or connect with us on our social platforms.