Video Doorbell 1080p - Doorbells eufy - Free user manual and instructions
Find the device manual for free Video Doorbell 1080p eufy in PDF.
| Product Type | Wireless Video Doorbell 1080p |
| Brand | Eufy |
| Model | Video Doorbell 1080p (T8213 / T8010X HomeBase) |
| Video Resolution | 1080p HD |
| Viewing Angle | 160° (diagonal, estimated) |
| Night Vision | Yes, infrared |
| Power Supply | Rechargeable battery or doorbell wiring 8-24 V AC |
| Battery Life | Up to 6 months (depending on usage) |
| Charging Time | 6 hours (0 to 100%) |
| Charging Port | Micro-USB |
| Connectivity | Wi-Fi 2.4 GHz and 5 GHz |
| Voice Assistant | Compatible with Amazon Alexa and Google Assistant |
| Local Storage | HomeBase 2 with built-in storage (no monthly fees) |
| Two-Way Audio | Yes, with microphone and speaker |
| Motion Detection | PIR sensor |
| Customizable Motion Zones | Yes, via eufy Security app |
| Operating Temperature | -20 °C to 45 °C |
| Protection Rating | IP65 (rain and dust resistant) |
| Dimensions (doorbell) | Approximately 12 x 6 x 5 cm |
| Weight (doorbell) | Approximately 200 g |
| Material | ABS plastic |
| Installation | Wall mounting (with or without drilling); 15° wedge included |
| App | eufy Security (iOS and Android) |
| Subscription Required | No, free local storage |
| Warranty | 1 year (see manufacturer's conditions) |
Frequently Asked Questions - Video Doorbell 1080p eufy
User questions about Video Doorbell 1080p eufy
0 question about this device. Answer the ones you know or ask your own.
Ask a new question about this device
Download the instructions for your Doorbells in PDF format for free! Find your manual Video Doorbell 1080p - eufy and take your electronic device back in hand. On this page are published all the documents necessary for the use of your device. Video Doorbell 1080p by eufy.
USER MANUAL Video Doorbell 1080p eufy
Anker Innovations Limited. All rights reservedeufy Security and eufy Security Logo are trademarks of Anker Innovations Limited, registered in the United States and other countries. All other trademarks are the property of their respective owners.
51005003046 V0I
QUICK START GUIDE
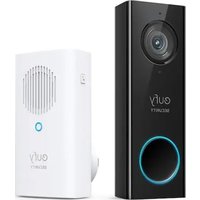
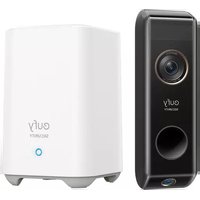
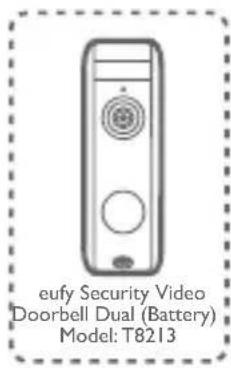
eufy Security Video Doorbell Dual (Battery)
KURZANLEITUNG
GUIA DE INICIO RAPIDO
GUIDE DE DEMARRAGE RAPIDE
GUIDA RAPIDA
SNELSTARTGIDS
GUIA DE INICIO RAPIDO
S OBC = S COD + S BOC - S BOC
English
Deutsch
Espanol
Français
Italiano
Nederlands
Portuguese
华
197
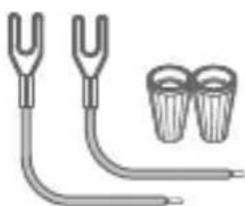
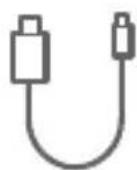
WHAT'S INCLUDED
For Video Doorbell Installation
eufy Security Video Doorbell Dual (Battery)
Model:T8213

Mounting Bracket

15^ Mounting Wedge (Optional)
Screw Hole Positioning Card
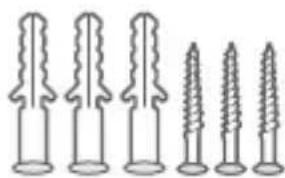
Screw Pack
Extension Wires and Wire Nuts (Optional)
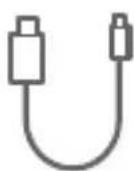
micro-USB charging cable

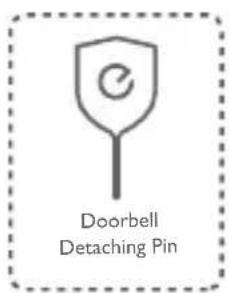
Detaching Pin

Quick Start Guide
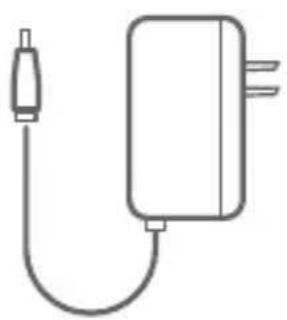
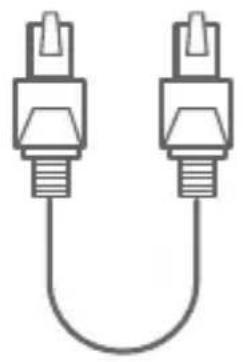
For HomeBase 2 Installation
HomeBase 2 Model:T8010X
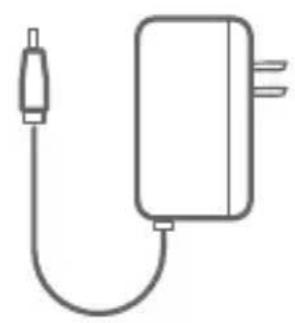
Power Adapter for HomeBase 2
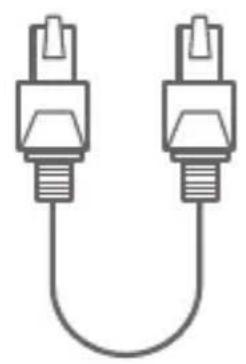
Ethernet Cable for HomeBase 2
Note: Power plug may vary in different regions.
2 EN
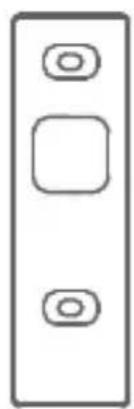
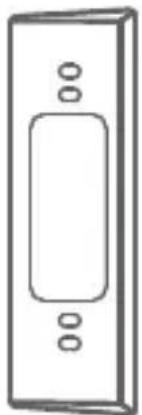
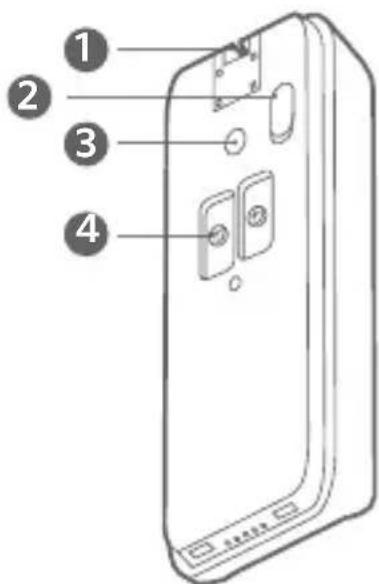
2 / PRODUCT OVERVIEW
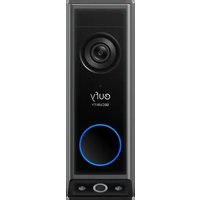
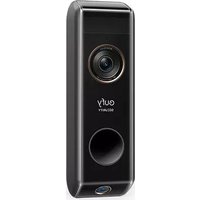
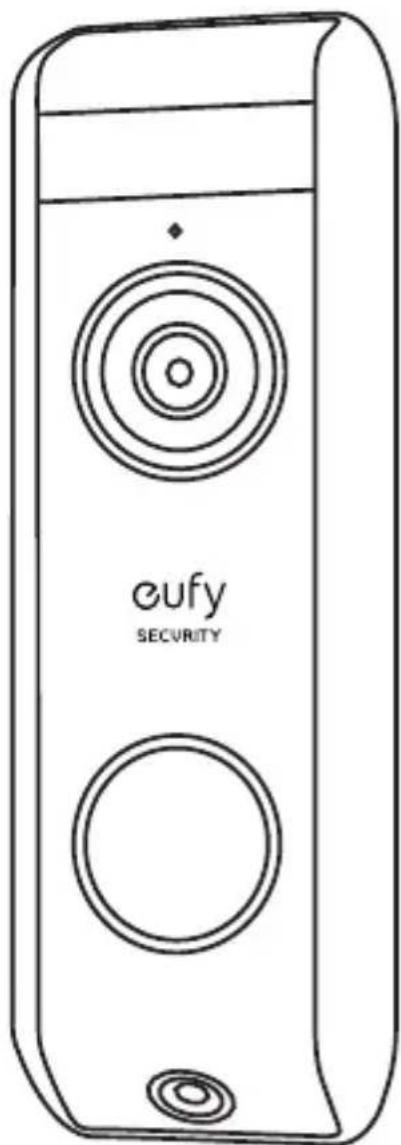
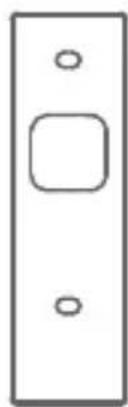
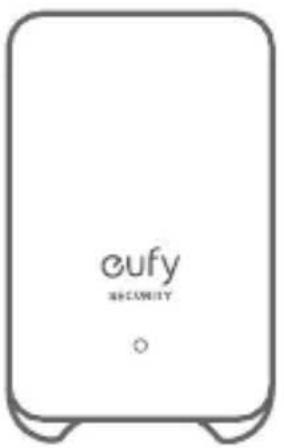
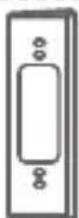
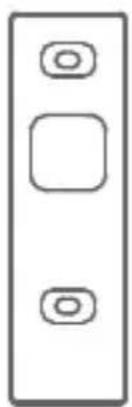
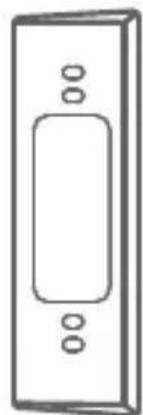
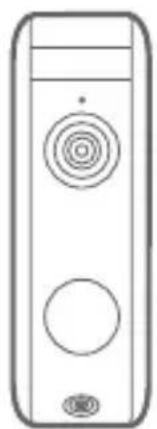
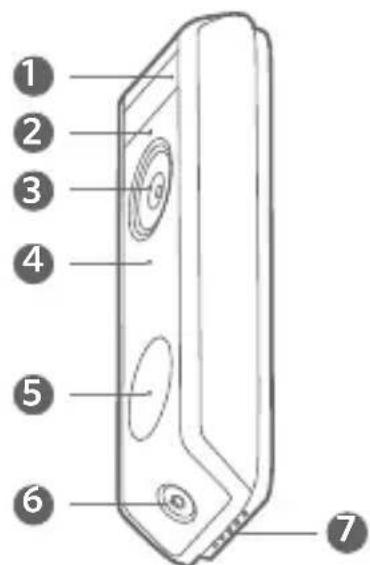
Video Doorbell
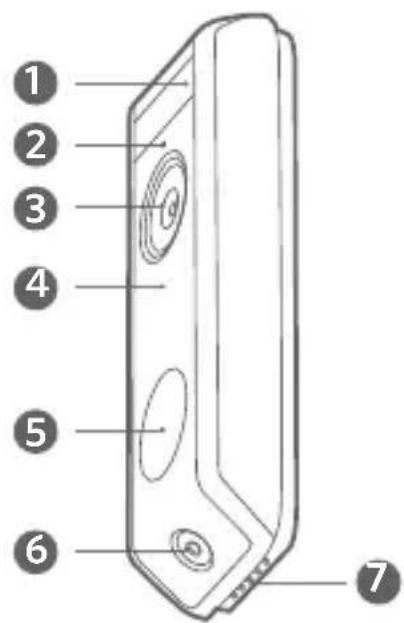
Front View:
Rear View:
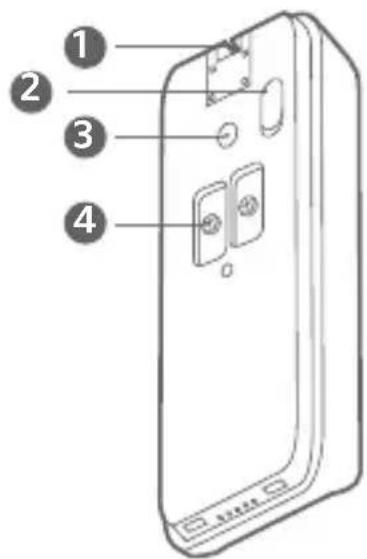
I. Motion Sensor
2. Microphone
3. Primary Camera Lens
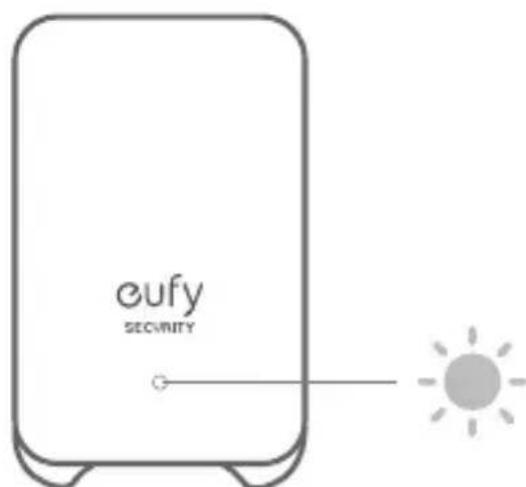
4. Ambient Light Sensor
5. LED Ring / Doorbell Button
6. Secondary Camera Lens
7. Speaker
I. Detaching Mechanism
2. Micro USB Charging Port
3.SYNC/RESET Button
4. Power Terminals for Existing Doorbell Wires (Optional)
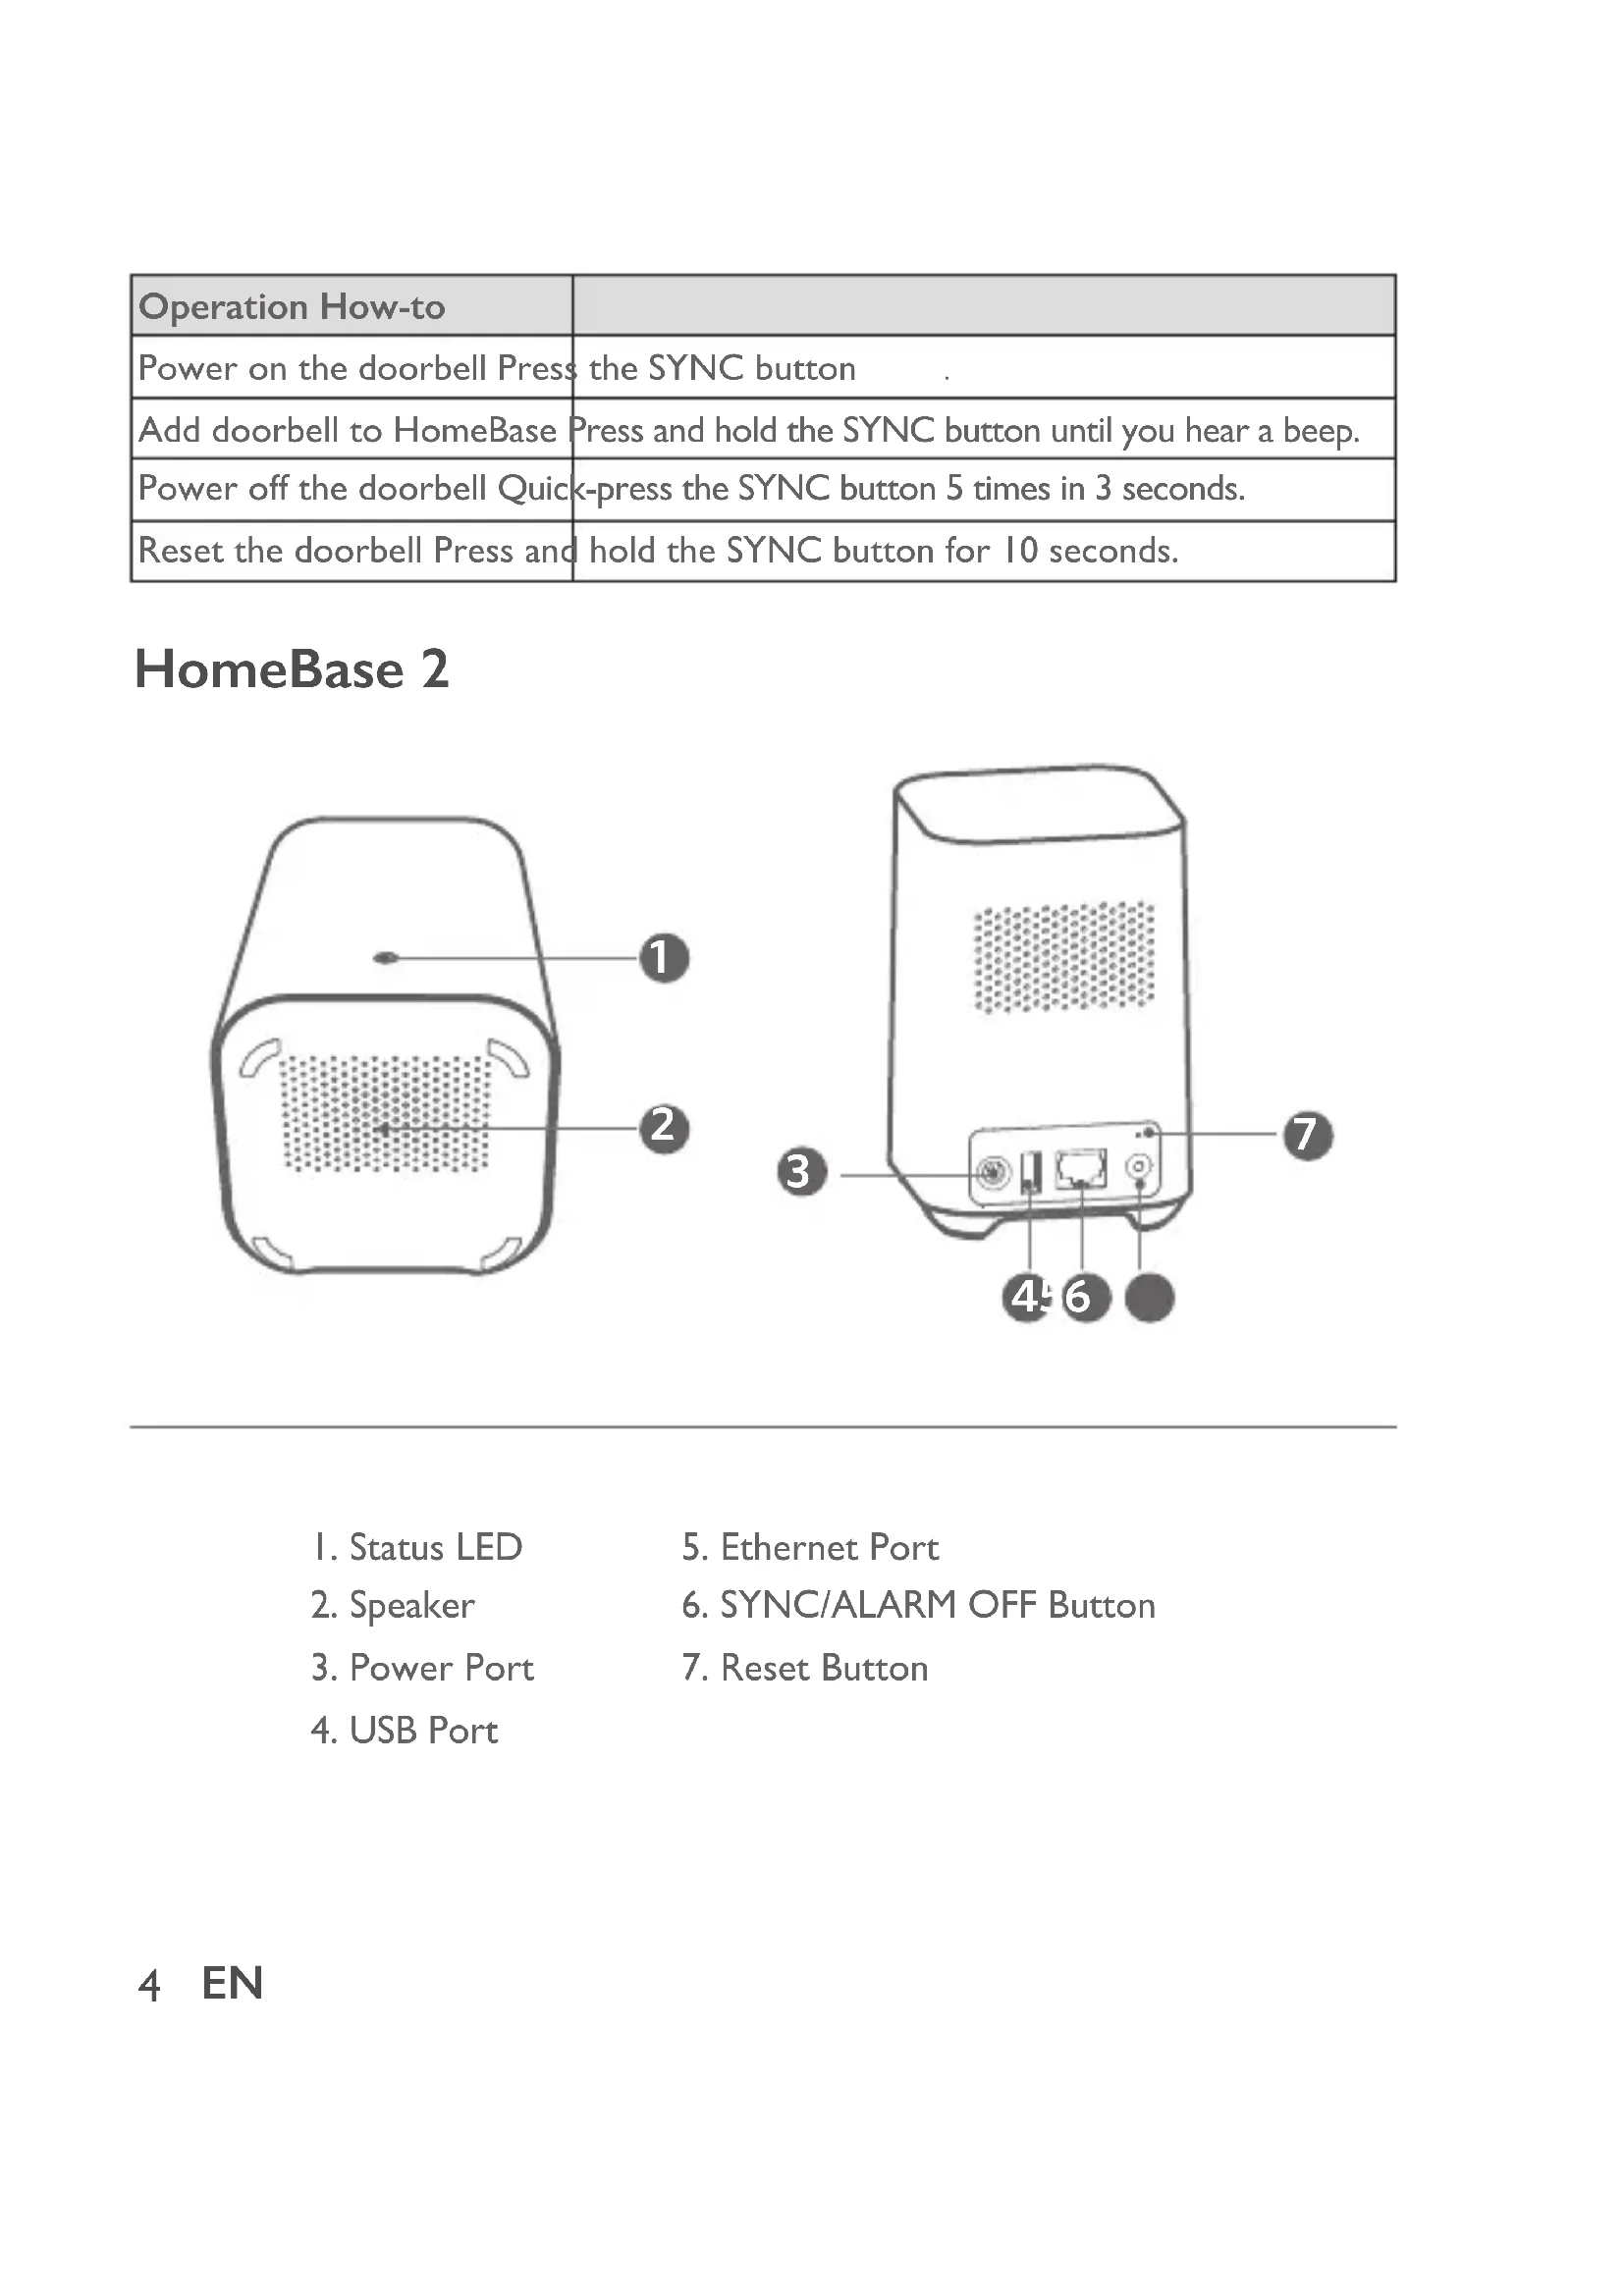
| Operation How-to | |
| Power on the doorbell Press the SYNC button. | |
| Add doorbell to HomeBase Press and hold the SYNC button until you hear a beep. | |
| Power off the doorbell Quick press the SYNC button 5 times in 3 seconds. | |
| Reset the doorbell Press and hold the SYNC button for 10 seconds. |
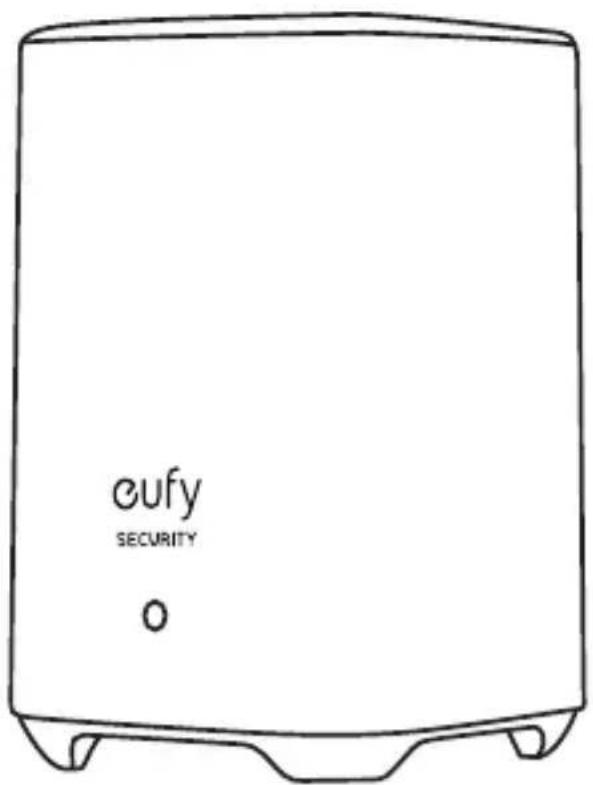
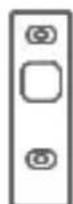
HomeBase 2
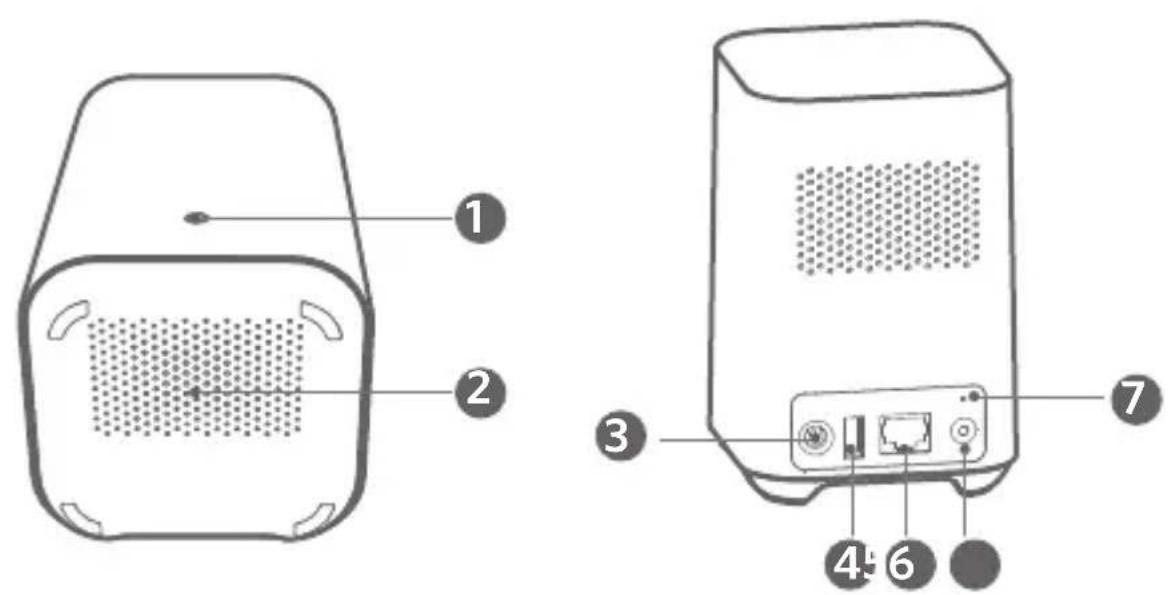
I. Status LED
-
Ethernet Port
-
Speaker
-
SYNC/ALARM OFF Button
-
Power Port
-
Reset Button
-
USB Port
4 EN
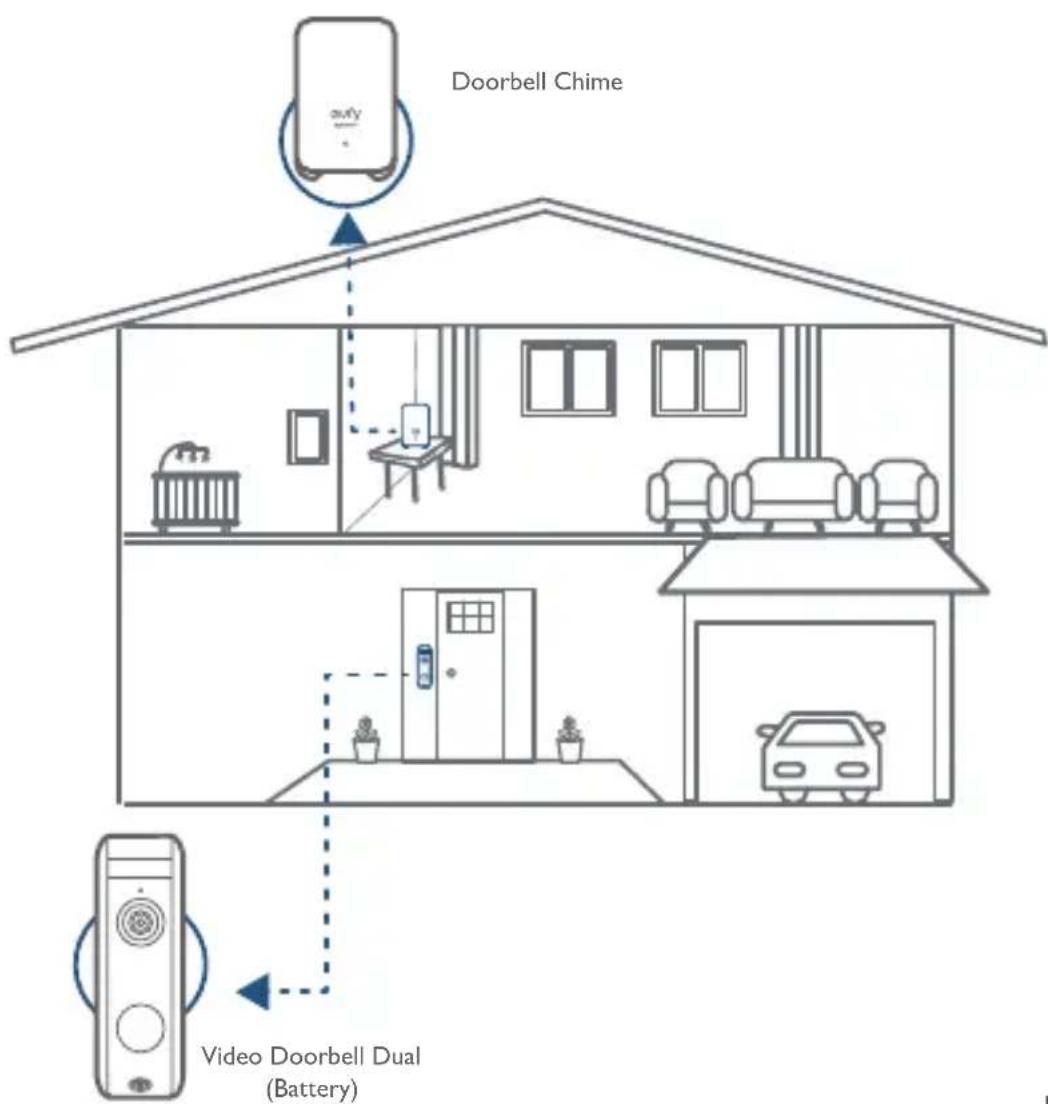
How the System Works
The video doorbell system includes 2 parts. One is the video doorbell at your door. The other is the HomeBase in your house.
The video doorbell detects motion at your porch and allows you to answer the door anytime and anywhere. The HomeBase stores video clips on its built-in storage. When someone rings the doorbell, people in the house will be notified.
4 / STEP I CONNECTING THE HOMEBASE
Connect HomeBase 2 to the Internet
I. Power on the HomeBase 2, then use the ethernet cable provided to connect the HomeBase 2 to your home router.
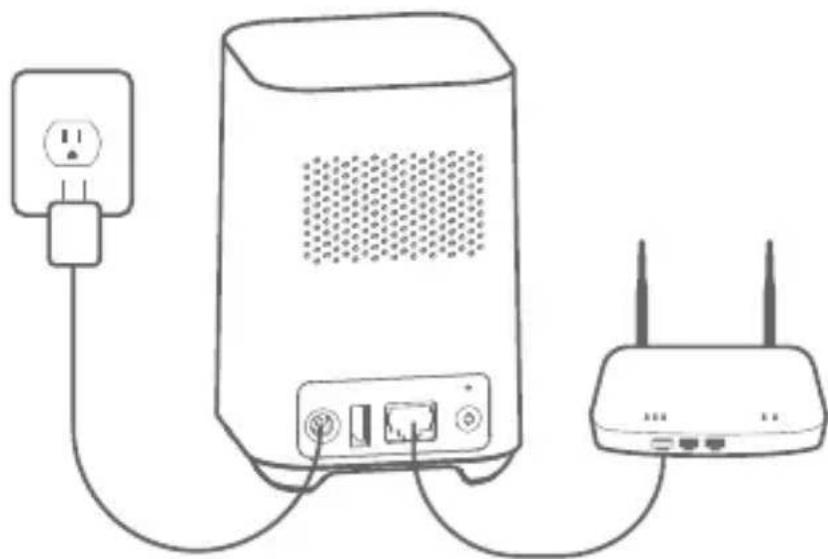
- The LED indicator turns blue (this may take up to 1 min) when HomeBase 2 is ready for setup.
6 EN
5 / STEP 2 SETTING UP THE SYSTEM
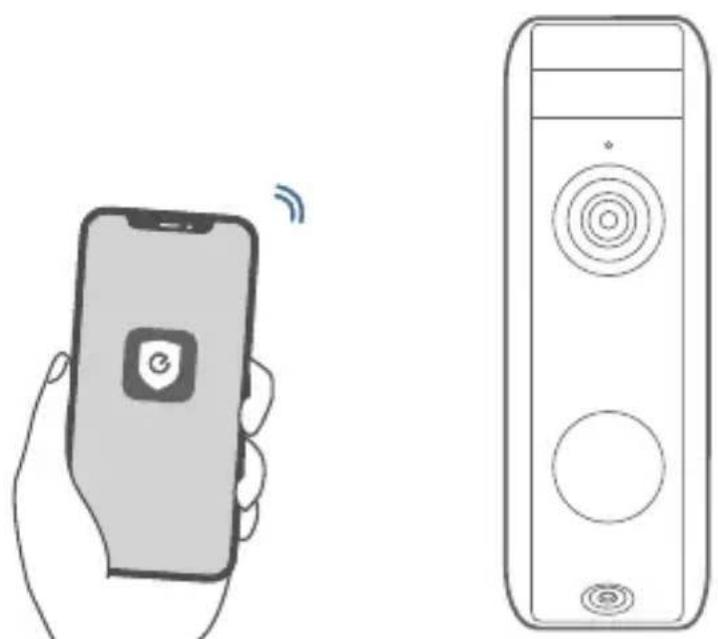
Download the App and Set up the System
Download the eufy Security app from the App Store (iOS devices) or Google Play (Android devices).


Sign up for a eufy Security account, then follow the onscreen instructions to complete the setup.
Option I - Battery Powered
- If you don't have existing doorbell wiring at the front door, use the built-in battery. You are free to determine the doorbell position and the mounting is easy and quick.
2 When the doorbell battery level is low, you need to detach and charge it. - If you choose this option, please jump to STEP 4 FINDING A MOUNTING SPOT.
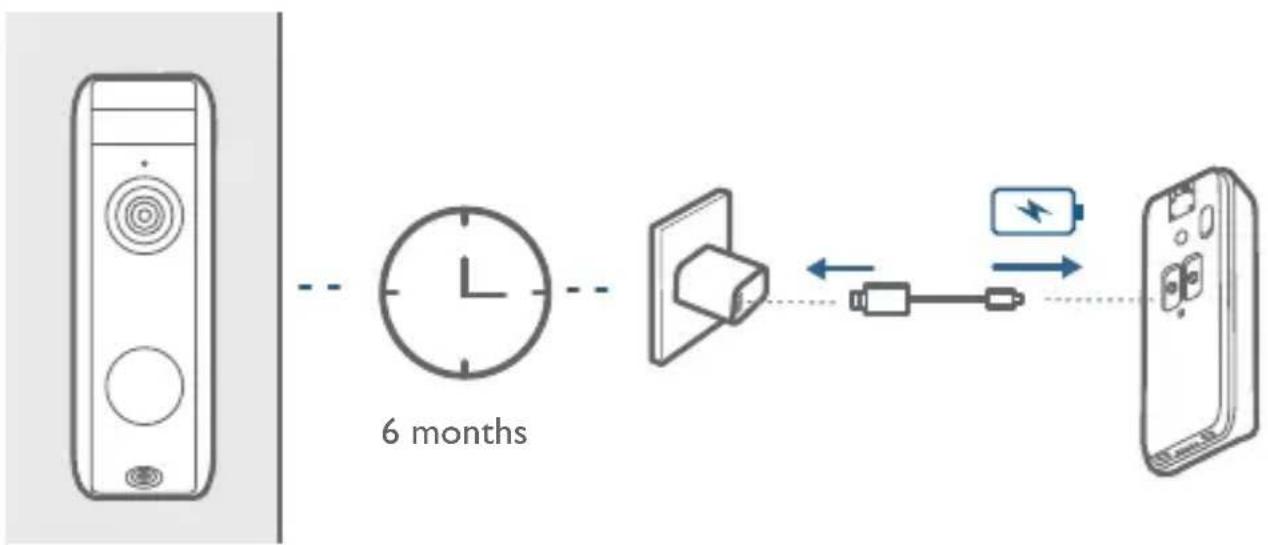
Note: The battery life varies depending on usage. In most common cases, a doorbell may have up to 10 events per day and each recording lasts 20 seconds on average. Under this scenario, the doorbell battery life can last up to 6 months.
8 EN
Option 2 - Doorbell Wire Powered
- If you have existing and working doorbell wiring at the front door, the doorbell will be powered by the wires constantly. So you don't need to detach and charge it after installation.
- Since the doorbell is connected to the wires, the mounting position is limited.
- If you choose this option, please jump to APPENDIX 3 POWERING THE DOORBELL WITH EXISTING DOORBELL WIRES.
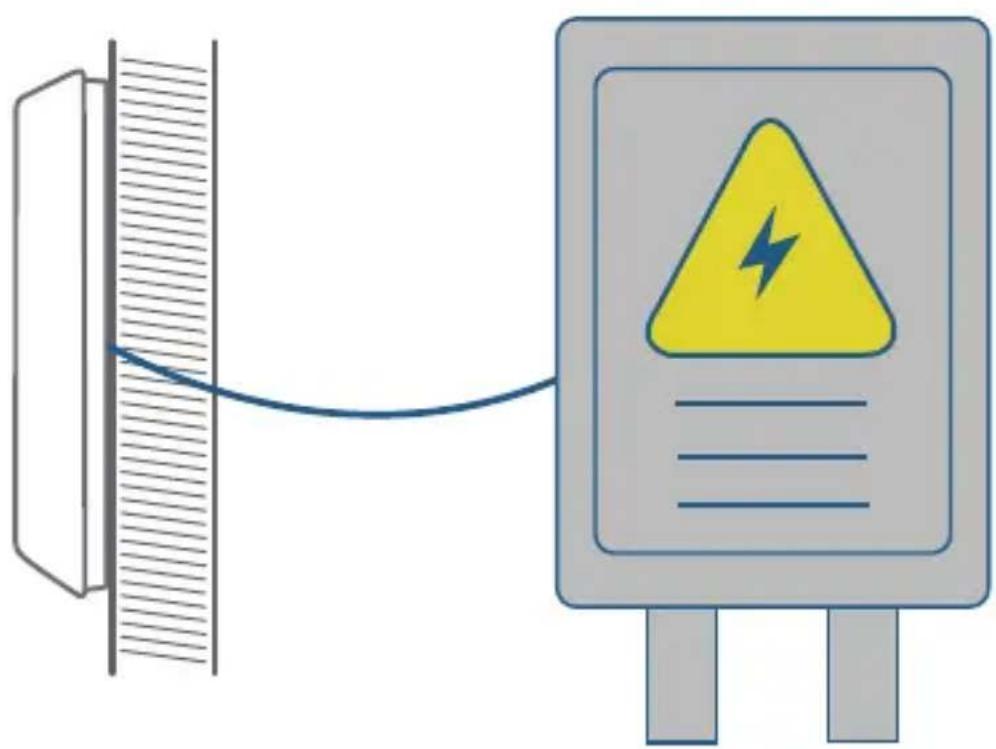
8-24V AC Doorbell Wiring
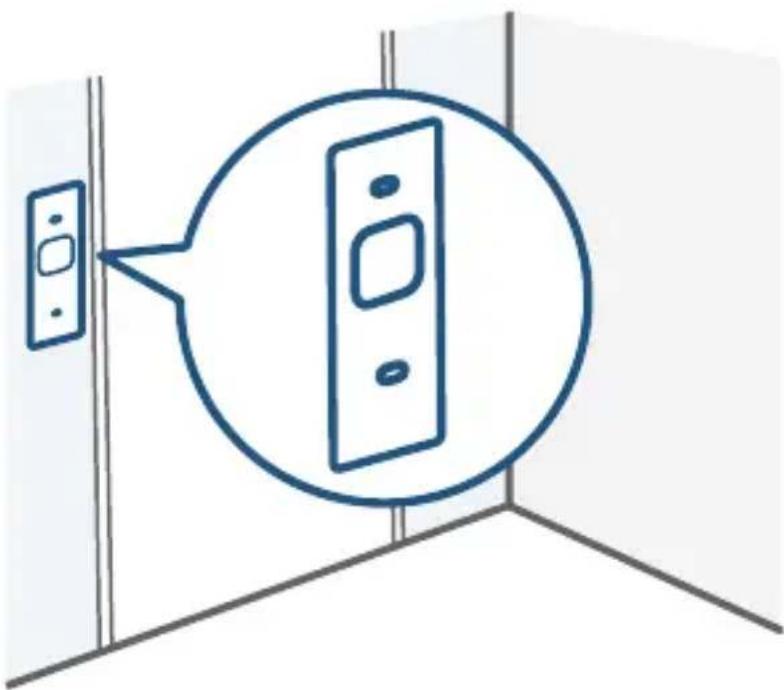
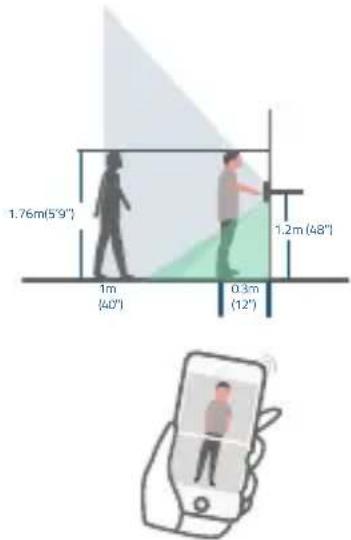
Find a Mounting Spot
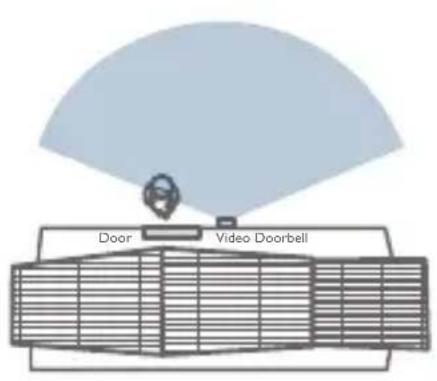
Take the video doorbell to your front door and check the live view on the app at the same time. Find a location where you can see the desired field of view.
Consider the following factors:
- Check if you can reuse the existing holes and anchors on the wall or door frame.
- If you want to place the doorbell close to a side wall, make sure the wall doesn't show up in the field of view. Otherwise IR light will be reflected and night vision will become blurry.
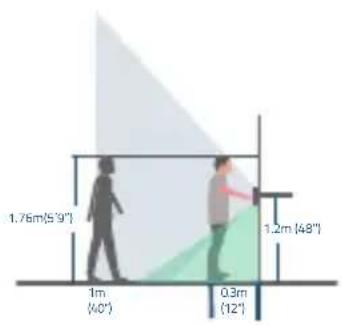
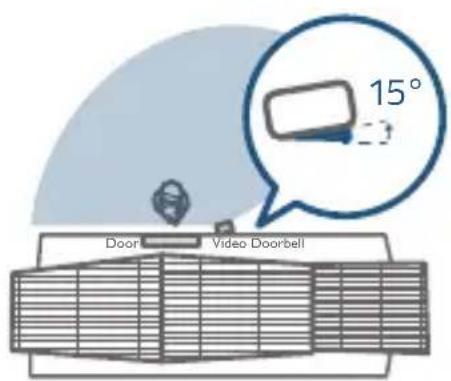
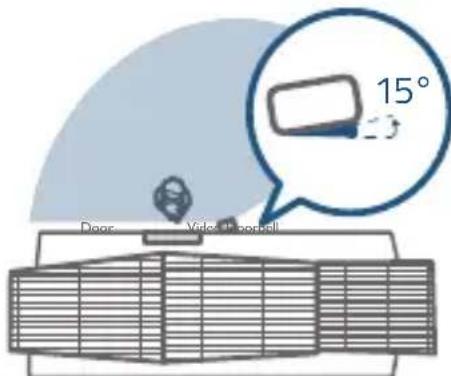
- If you are drilling the mounting holes for the first time, the recommended mounting height is 48'' / 1.2m from the ground.
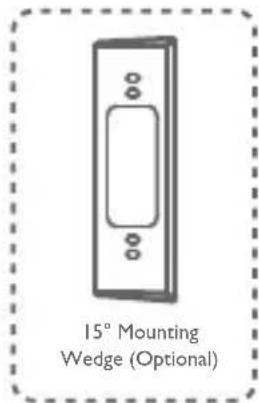
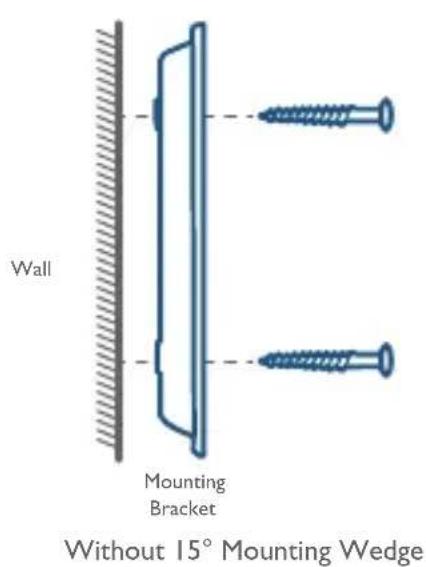
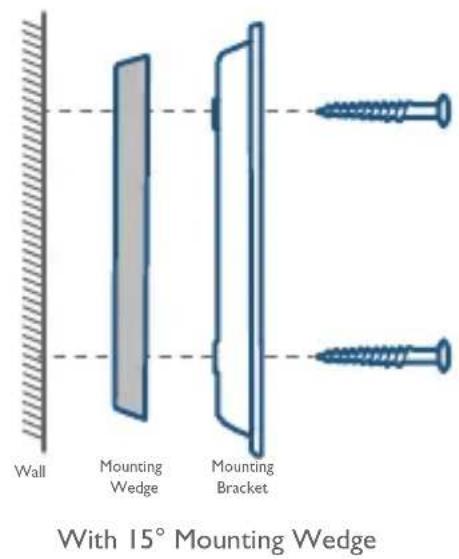
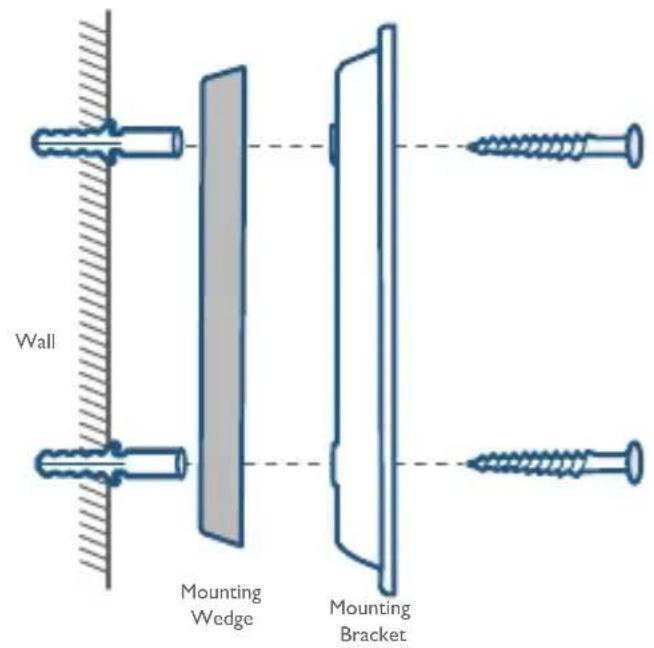
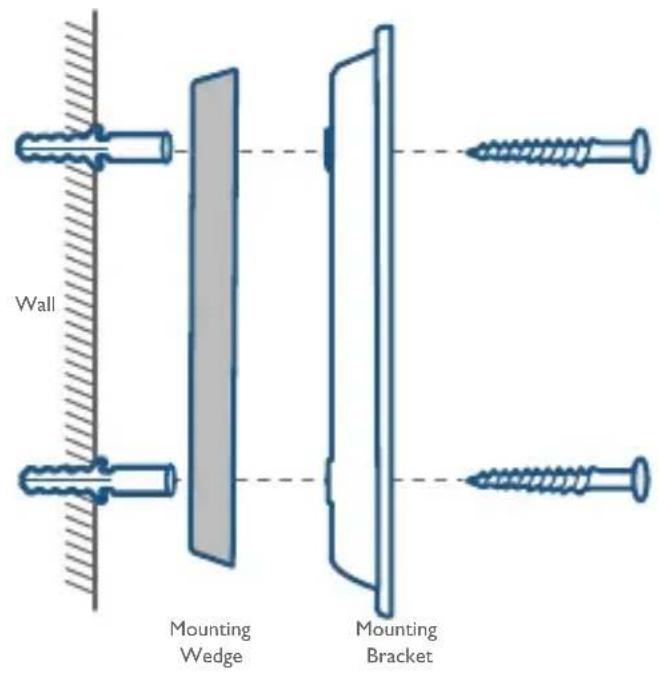
- To adjust the angel, use the 15^ mounting wedge as a supplementary mounting bracket.
Without 15^ Mounting wedge With 15^ Mounting wedge
Place the screw hole positioning card against the wall to mark the position.
Mount the Doorbell on a Wooden Surface
If you're mounting the doorbell on a wooden surface, you don't need to pre-drill pilot holes. Use the provided screws to secure the mounting bracket on the wall, the screw hole positioning card indicates the position of the screw holes.
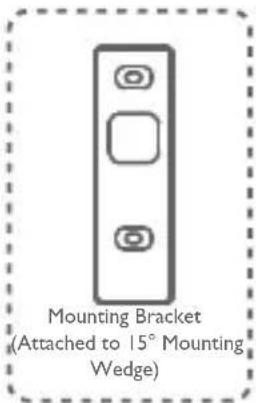
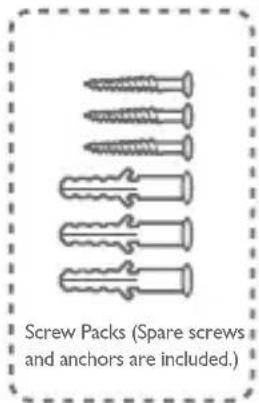
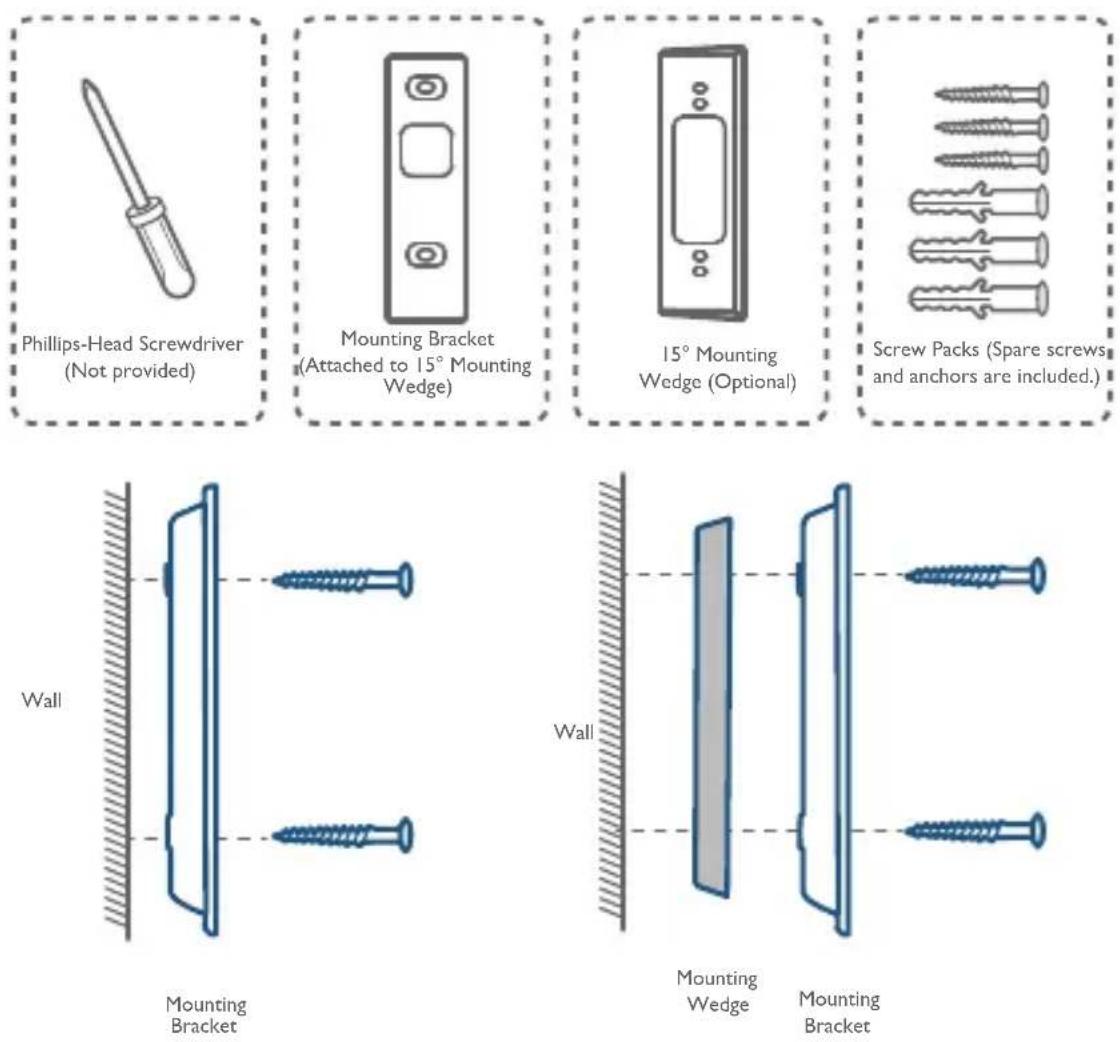
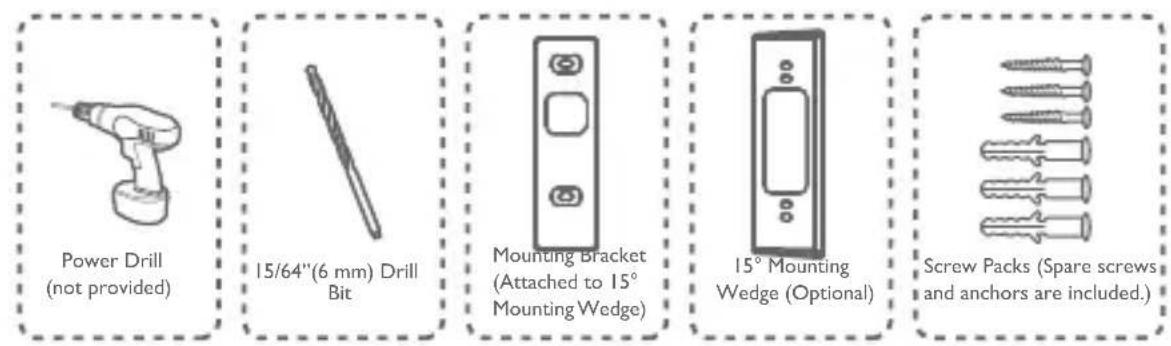
What you need: Screwdriver, Mounting Bracket, 15^ Mounting Wedge (Optional), Screw Packs
12 EN
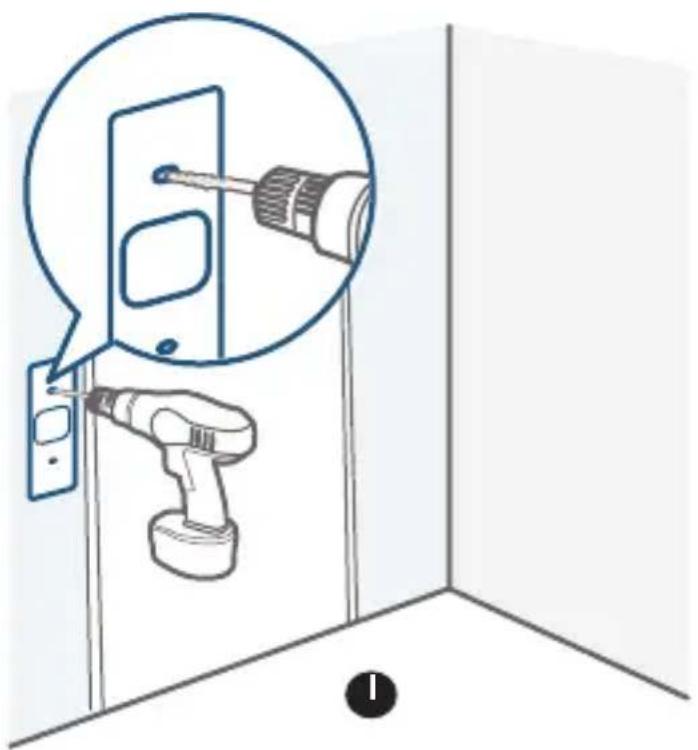
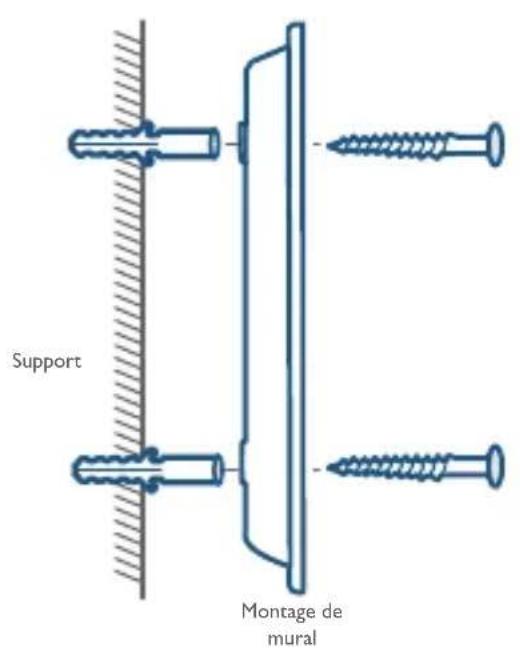
Mount the Doorbell on Surfaces Made Out of Hard Materials
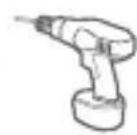
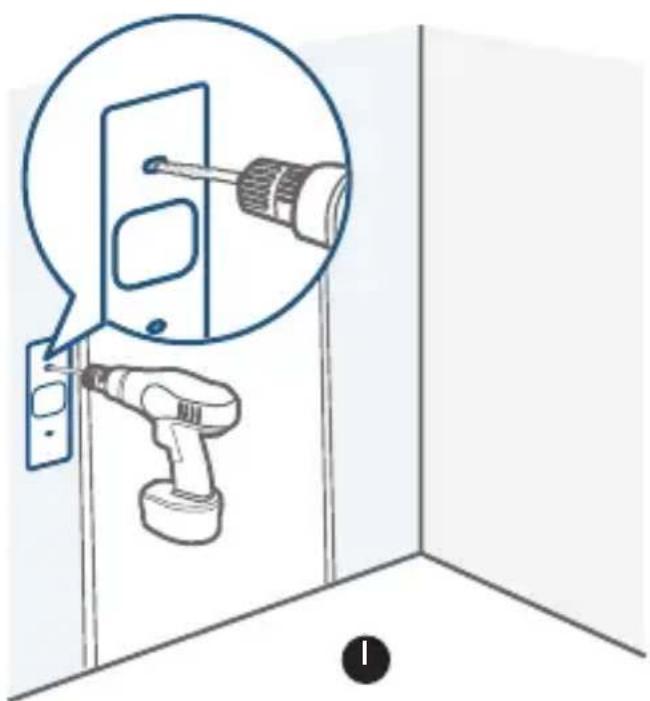
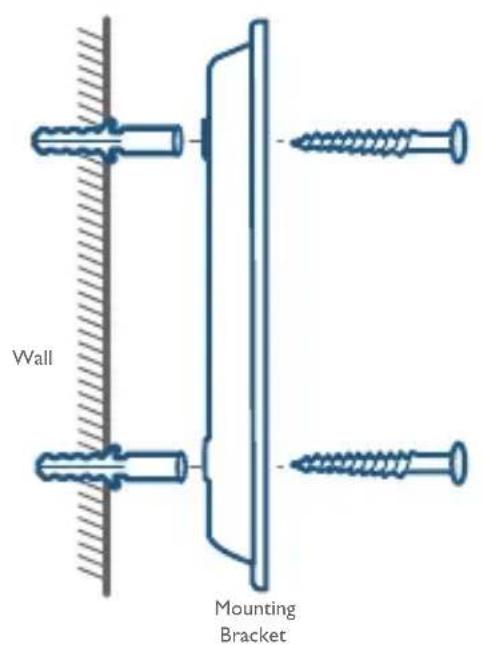
I. If you're mounting the doorbell on a surface made out of hard materials, like brick, concrete, stucco, drill 2 holes through the screw hold positioning card with a 15/64 (6mm) drill bit.
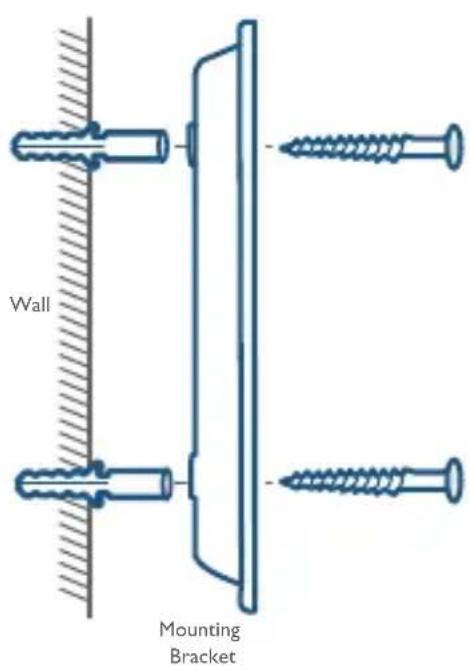
2 Insert the provided anchors, and then use the provided long screws to secure the mounting bracket on the wall.
What you need: Power Drill, 15/64" (6 mm) Drill Bit, Mounting Bracket, 15^ Mounting Wedge (Optional), Screw Packs
Power Drill (not provided)
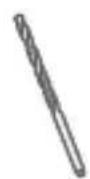
15/64" (6 mm) Drill Bit
Mounting Bracket (Attached to 15^ Mounting Wedge)
15^ Mounting Wedge (Optional)
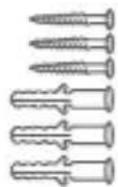
Screw Packs (Spare screws and anchors are included.)
Without 15^ Mounting Wedge
With 15^ Mounting Wedge
2
2
9 / STEP 6 MOUNTING THE DOORBELL
Mount the Doorbell
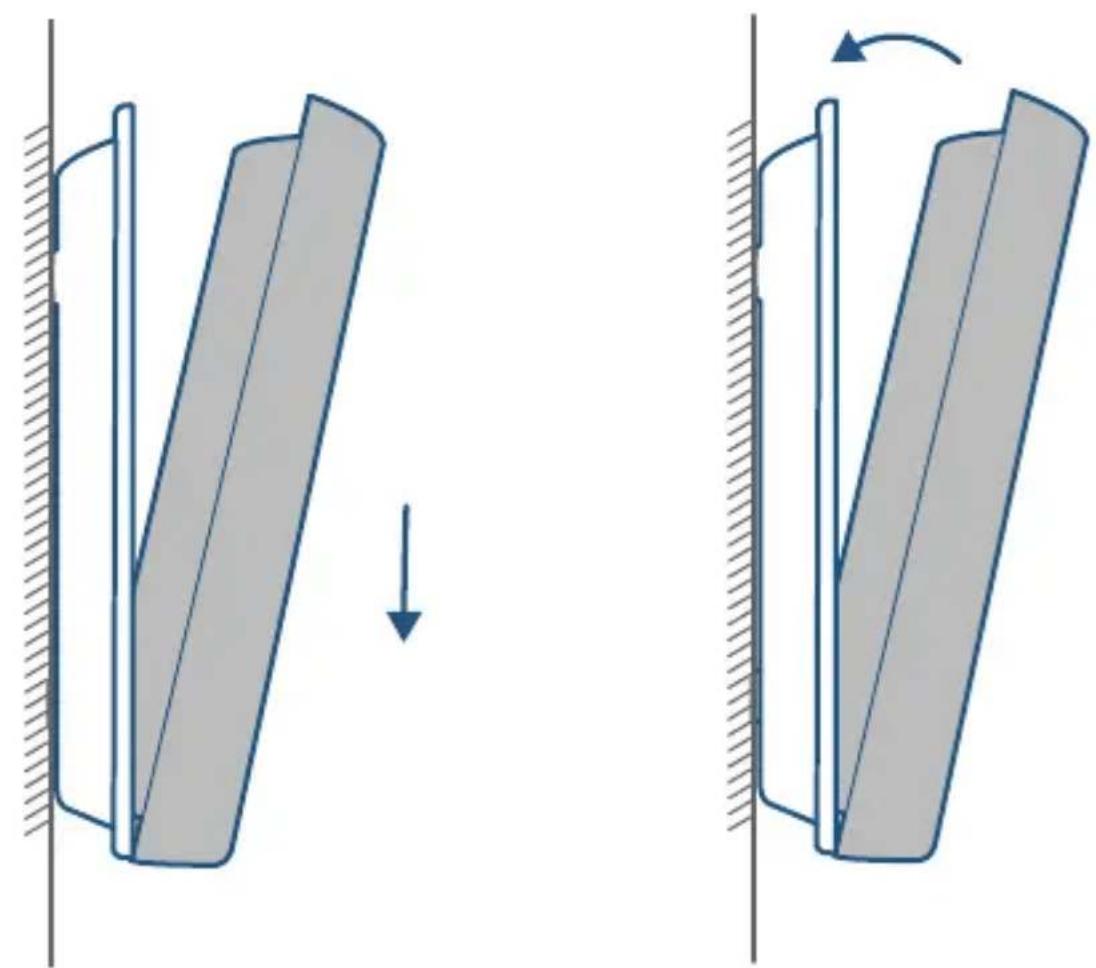
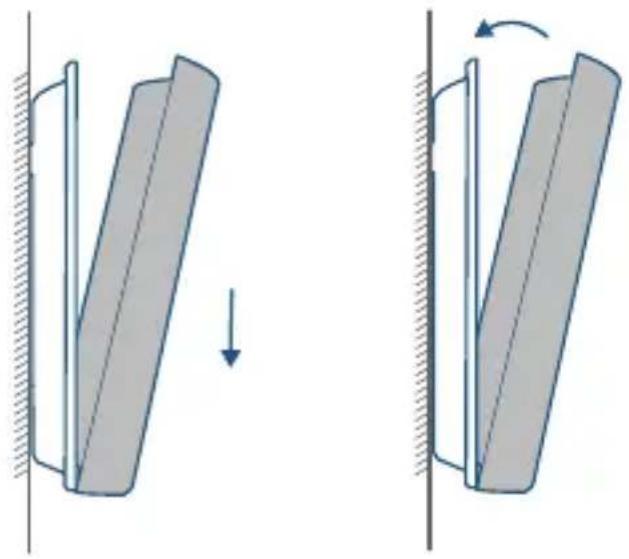
Align the doorbell on the bottom, and then move it into place on top. Press the doorbell down until it clicks.
You're all set!
If you want to detach the doorbell or recharge it, please refer to the following sections.
I O/APPENDIX I DETACHING THE DOORBELL
Detach the Doorbell
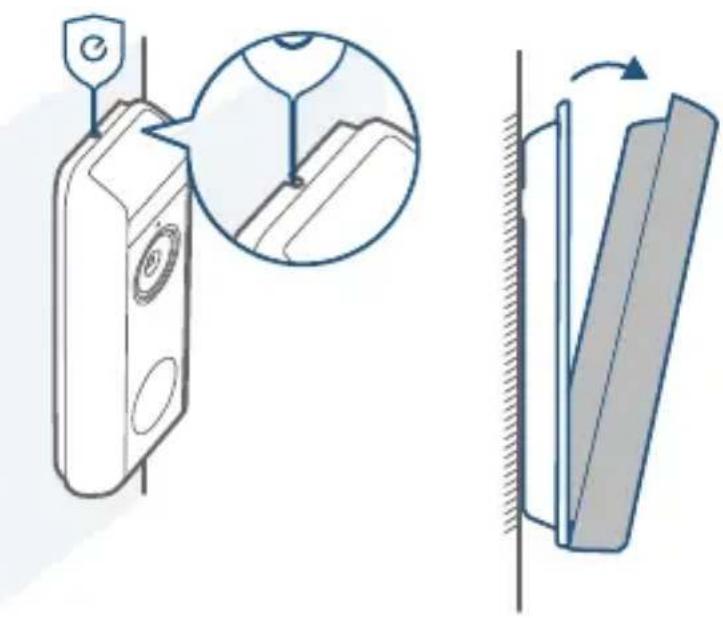
I. Use the doorbell detaching pin provided if you wish to detach the doorbell from the mounting bracket.
2. Press into the pinhole on top of the doorbell, and then lift the top for removal.
What you need: Doorbell Detaching Pin
Recharge the Doorbell
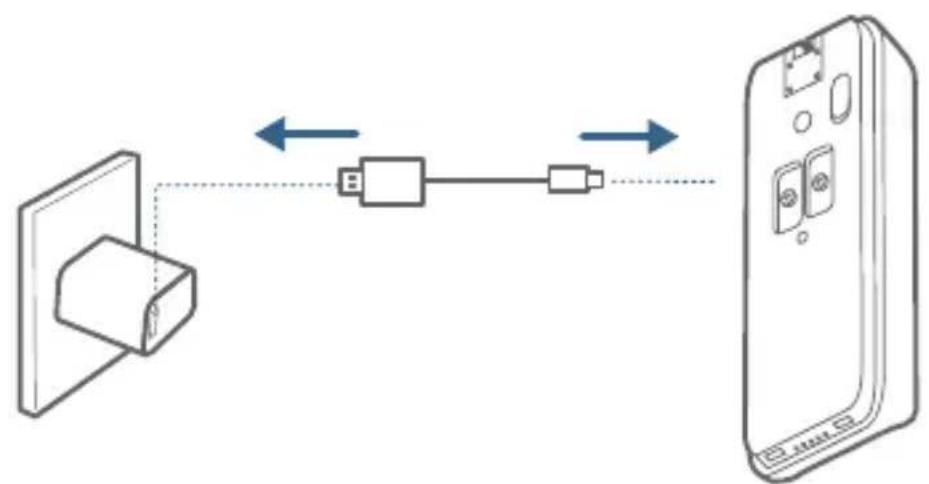
| LED indicator | Charging: Flashing Green |
| Fully charged: Green | |
| Charging time 6 hours from | 0% to 100% |
12/APPENDIX 3 POWERING THE DOORBELLWITH EXISTING DOORBELL WIRES
3.1 Verify whether the doorbell wires are working
-
Ring the existing doorbell to check if it is working. If the doorbell doesn't ring, your doorbell wires may be defective. Power the doorbell on its own battery or consult an electrician to fix the wires.
-
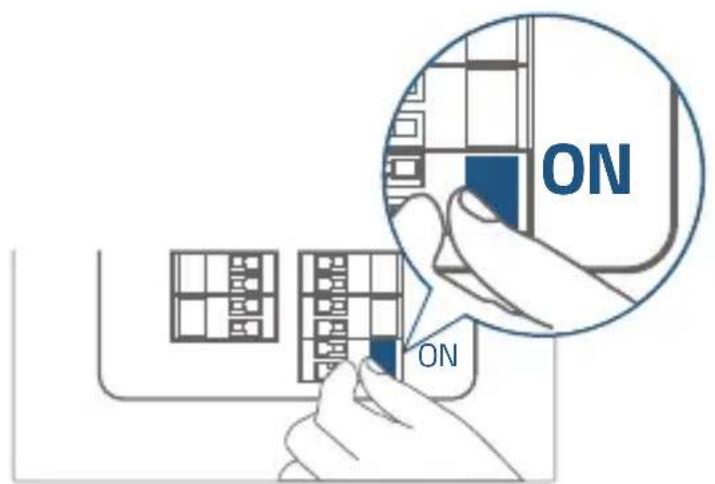
Shut off power at the breaker. Turn the lights on / off in your home to make sure the electricity in your house is properly shut off.
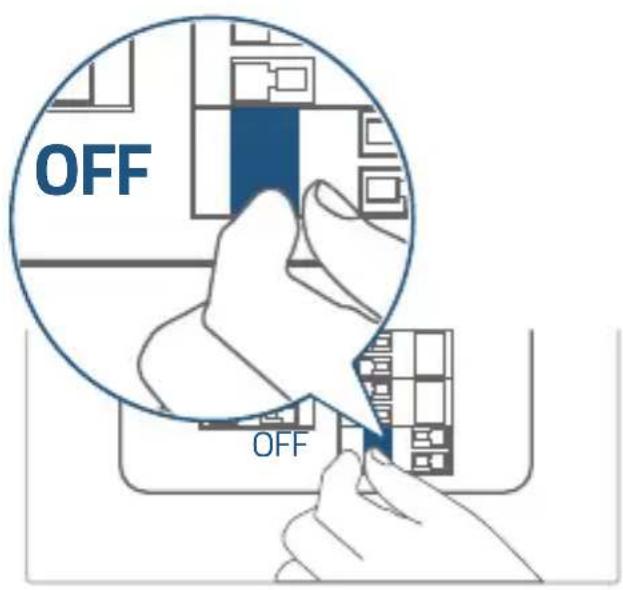

Always be careful when handling wires. If you're not comfortable installing it yourself, have a qualified electrician do it.
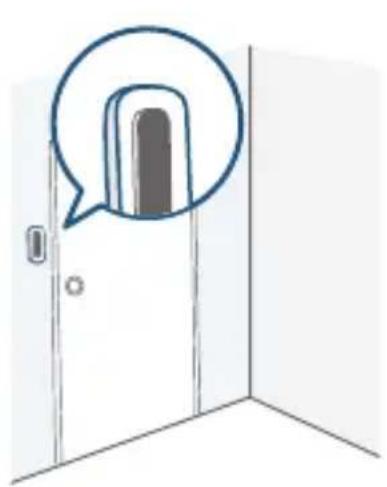
3.2 Detach the Existing Doorbell Button
If you already have existing doorbell wiring:
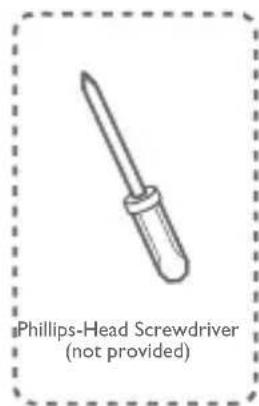
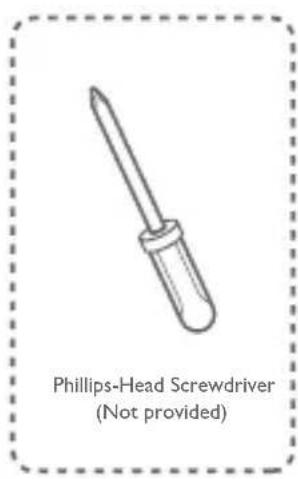
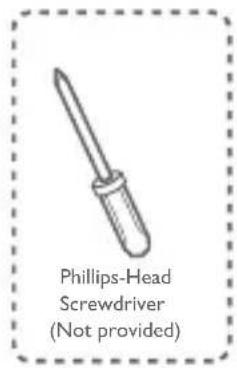
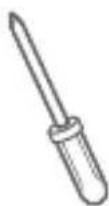
I. Remove the existing doorbell button with a Phillips-head screwdriver (not provided).
2 Pull the two wires out carefully when removing the existing doorbell. Straighten the wire ends if necessary.
What you need: Philips-Head Screwdriver

3.3 Find a Mounting Spot
I. When determining the mounting position of the doorbell, consider these factors:
① Check if you can reuse the existing holes and anchors on the wall or door frame.
② If you are drilling the mounting holes for the first time, the recommended mounting height is 48'' / 1.2m from the ground.
③ To adjust the angel, use the 15^ mounting wedge as a supplementary mounting bracket.
Without 15^ Mounting wedge With 15^ Mounting wedge
- Place the screw hole positioning card against the wall to mark the position.

3.4 Mount the Bracket
If you're mounting the doorbell on a wooden surface, you don't need to pre-drill pilot holes. Use the provided screws to secure the mounting bracket on the wall. The screw hole positioning card indicates the position of the screw holes.
What you need: Power Drill, Mounting Bracket, 15^ Mounting Wedge (Optional), Screw Packs
Without 15^ Mounting Wedge With 15^ Mounting Wedge
If you're mounting the doorbell on a surface made out of hard materials, like brick, concrete, stucco:
① Drill 2 holes through the screw hole positioning card with 15/64''(6mm) drill bit.
② Insert the provided anchors, and then use the provided long screws to secure the mounting bracket on the wall.
What you need: Power Drill, 15/64" (6mm) Drill Bit, Mounting Bracket, 15^ Mounting Wedge (Optional), Screw Packs
22 EN
Without 15^ Mounting Wedge With 15^ Mounting Wedge


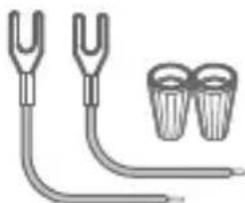
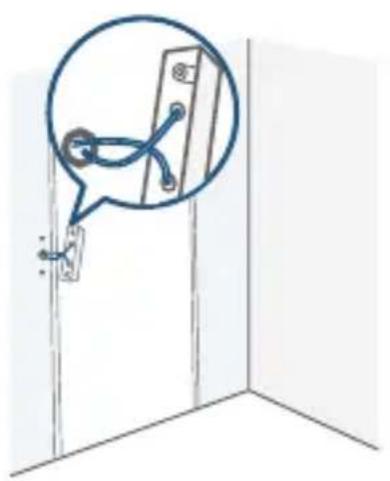
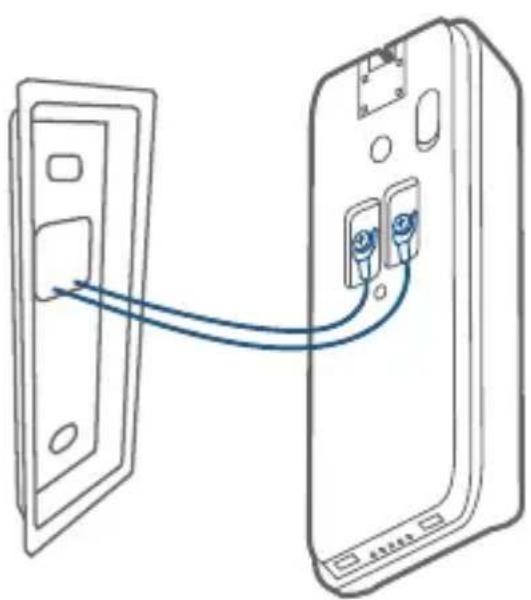
3.5 Connect the Doorbell Wires to the Doorbell
Connect the wires to the terminals at the back of the doorbell, then tighten the terminal screws. Wire can connect to any terminal.
What you need: Wires and Wire Nuts (Optional), Video Doorbell, Philipshead Screwdriver


Note:
- To prevent short-circuiting, make sure the wires are not touching each other after connecting them to the terminals.
- If the wires are too short, use the extension wires and wire nuts provided to make them longer. Use electrical wiring tape instead if there is no more space on the wall for wire nuts.
24 EN
3.6 Mount the Doorbell on the Bracket
Align the doorbell on the bottom, and then move it into place on top. Press the doorbell down until it clicks.

3.7 Restore Power
Switch the master circuit breaker back to ON.
You're all set!
If you want to detach the doorbell or recharge it, please refer to the corresponding sections.
13/NOTICE
This product complies with the radio interference requirements of the European Community
Declaration of Conformity
Hereby, Anker Innovations Limited declares that this device is in compliance with the essential requirements and other relevant provisions of Directive 2014/53/EU. For the declaration of conformity, visit the Web site: https://uk.eufylife.com/.
The adapter shall be installed near the equipment and shall be easily accessible. Do not use the Device in the environment at too high or too low temperature, never expose the Device under strong sunshine or too wet environment. The suitable temperature for the product and accessories is -20^ to 45^ .
When charging, please place the device in an environment that has a normal room temperature and good ventilation.
It is recommended to charge the device in an environment with a temperature that ranges from 5^ 25^ .
Please ensure to use only the adapter offered by the manufacturer. Using unauthorized charger may cause danger and violate the guarantee article.
This adapter is for indoor use only. The adapter type is KA2401A-1202000DE/, output voltage/current is 12Vdc/2A. The plug considered as disconnect device of adapter.
CAUTION RISK OF EXPLOSION IF BATTERY IS REPLACED BY AN INCORRECT TYPE. DISPOSE OF USED BATTERIES ACCORDING TO THE INSTRUCTIONS
RF exposure information: The Maximum Permissible Exposure (MPE) level has been calculated based on a distance of d = 20cm between the device and the human body. To maintain compliance with RF exposure requirement, use
26 EN
product that maintain a 20cm distance between the device and human body. The Device T8213 Wifi Operating Frequency Range:2412~2472 MHz(2.4G); Range:23-24 GHz(24GHz);
Wifi Max Output Power:17.88 dBm(ERIP for 2.4G); Max Output Power:5dbm(EIRP for 24Ghz)
The Device T8010X Wifi Operating Frequency Range:2412~2472 MHz(2.4G); Range:866-866.8 MHz(Sub-IG);
Wifi Max Output Power:18.40 dBm(ERIP for 2.4G); Max Output Power:5.492dbm(EIRP for Sub-IG)
The following importer is the responsible party (contract for EU and UK matters)
This product is designed and manufactured with high quality materials and components, which can be recycled and reused.
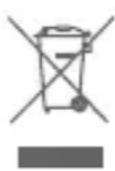
This symbol means the product must not be discarded as household waste, and should be delivered to an appropriate collection facility for recycling. Proper disposal and recycling helps protect natural resources, human health and the environment. For more information on disposal and recycling of this product, contact your local municipality, disposal service, or the shop where you bought this product.

This product complies with the radio interference requirements of the United Kingdom
Declaration of Conformity
Hereby, Anker Innovations Limited declares that this product is in compliance with Radio Equipment Regulations 2017. The full text of the UK declaration of conformity is available at the following internet address: https://uk.eufylife.com Anker Technology (UK) Ltd I Suite B, Fairgate House, 205 Kings Road, Tyseley,
LIEFERUMFANG ENTHALTEN
eufy Security Video Doorbell Dual (Battery)
Modell: T8213

Montagehalterung

15^ -Montagewinkel (optional)
eufy Security Video Doorbell Dual (Battery)
Modelo:T8213
Soporte demontaje
Cuna de montaje de 15^ (optional)

eufy Security Video Doorbell Dual (Battery)
Modèle : T8213

Support demontage

Cable de charge micro-USB

Epingle de detachment
GUIDE DE DEMARRAGE RAPIDE
Sanscale demontage 15^
eufy Security Video Doorbell Dual (Battery)
Modello: T8213
Staffa di montaggio

eufy Security Video Doorbell Dual (Battery)
Model:T8213

Montagebeugel

15^ montagewig (optioneel)
eufy Security Video Doorbell Dual (Battery)
Modelo: T8213

Suporte de instalacao
Cunha de instalacao de 15^ (optional)
I O/ APENDICE I REMOÇA DA CAMPAINHA
Remover a campainha
eufy Security Video Doorbell Dual (Battery)
T8213:jj
S AOB = S COD + S_ BOC
15° (s)

Jauall 1

( 5,1) , 0.3 < 0.
J 1 J 1
micro-USB

S OBC = S COD + S_ BOC
1.12
HomeBase 2

HomeBase 2 T8010X :
HomeBase 2
HomeBase 2
aBlaio aalll
2/

:
1
2
aolw21 1 wol511 aoe.3
bollgol 4
J/DEL.5
a. gil 1 yolS11 aoe.6
aclawl.7
j
Jaiil 1
BSU orciM 2
buiil 1/aiol joll j.3
4
()
eufy Security Video Doorbell Dual (Battery) T8213:
140 23

15 = 20
1
aaii i 11111111111111111111111111
Jalil
e 111111111111111111111111111
3.7
.

Joojj 0
A
13/
y

aal
/2014/53 1
. /https://uk.eufylife.com ::Bg
y 1 y
45° 145° -20° 145°
25 5 10 23 24 25
Jaaalldlaa aag
/KA2401A-1202000DE gJg.
Jg 12 1/
aaii i aiee eae ee e e e e e e e e e e e e e e e
Laiiill
MPE 4y gaa aeg s gaa a: aLwU U ddu jll iag lco
J 20 aal
23-24: (2.4) WiFi T8213: 2412 ~ 2472
(24)
EIRP) 5: (2.4G ERIP) Wifi Max: 17.88
(24 24
866-:(T8010X Wifi: 2412 ~ 2472 MHz (2.4G jzj
(Sub-1G) 866.8
5.492:J(2.4G EIRP) Wif Max: 18.40
(Sub-1G EIRP)
(iaaiia 45laal g yg jn 4aai) jsiwll
12-month limited warranty
12 Monate eingeschränkte Garantie | Garantía limitada de 12 meSES
Garantie limite de 12 mois | Garanzia limitata di 12 mesi | 12 maanden beperkte garantie | 12 meses de garantia
limitada 12
Call Us
United States +1 (800) 988 7973 Mon-Fri 9AM-5PM (PT)
United Kingdom +44 (0) 1604 936 200 Mon-Fri 6AM-11AM (GMT)
Germany +49 (0) 69 9579 7960 Mon-Fri 6:00-11:00
Email Us
Customer Support: support@eufylife.com
Anker Innovations Limited
Room 1318-19, Hollywood Plaza, 610 Nathan Road, Mongkok, Kowloon, Hong Kong

@EufyOfficial @Eur Official @EufyOffic