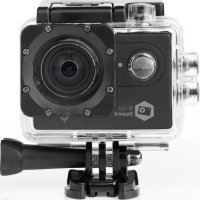
ACAM61BK - Sports camera NEDIS - Free user manual and instructions
Find the device manual for free ACAM61BK NEDIS in PDF.


| Product type | Action camera |
| Brand | Nedis |
| Model | ACAM61BK |
| Maximum video resolution | 4K Ultra HD |
| Front screen | Yes |
| Rear screen | Yes |
| Power supply | Rechargeable lithium-ion battery, charged via USB-C |
| Battery charging time | Approximately 3 hours |
| Storage | microSD card (not included), class 10 min, up to 128 GB |
| Connectivity | Wi-Fi, USB-C, micro-HDMI |
| Compatible app | XDV-PRO (iOS 7+ / Android 4.1+) |
| Waterproofness | Waterproof only with included waterproof housing |
| Detachable parts | Battery, USB-C cable, waterproof housing, mounting accessories |
| Energy consumption | Low, auto standby |
| Maintenance and cleaning | Clean with a soft cloth; do not use chemical products |
| Warranty | See manufacturer's conditions |
| Weight | Approximately 60 g (without battery) |
| Dimensions | Approximately 6 x 4 x 2 cm |
Frequently Asked Questions - ACAM61BK NEDIS
User questions about ACAM61BK NEDIS
0 question about this device. Answer the ones you know or ask your own.
Ask a new question about this device
Download the instructions for your Sports camera in PDF format for free! Find your manual ACAM61BK - NEDIS and take your electronic device back in hand. On this page are published all the documents necessary for the use of your device. ACAM61BK by NEDIS.
USER MANUAL ACAM61BK NEDIS
Dual Screen Action cam to capture action in 5K Ultra HD
ACAM71BK

natural_image
Line drawing of a compact digital camera with front panel and buttons (no text or symbols)
Quick start guide 5

Kurzanleitung 11

C
natural_image
Line drawing of a camera module with connector and cable, no text or symbols presentD

natural_image
Diagram of a device being inserted into a box, showing internal components and directional arrows (no text or symbols)Dual Screen Action cam
ACAM71BK

For more information see the extended manual online: ned.is/acam71bk
Intended use
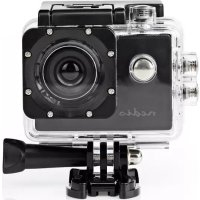
This product is a small and lightweight action camera that captures 4K Ultra HD images and video.
Connect the product to the XDV-PRO app to manage your photos, videos, and settings.
This product is intended for indoor and outdoor use.
This product is intended as a recording device.
Any modification of the product may have consequences for safety, warranty and proper functioning.
This product can be used by children aged from 8 years and above and persons with reduced physical, sensory or mental capabilities or lack of experience and knowledge if they have been given supervision or instruction concerning use of the product in a safe way and understand the hazards involved. Children shall not play with the product. Cleaning and user maintenance shall not be done by children without supervision.
This product is not intended for professional use.
Main parts (image A)
1 Power / mode button
2 OK button
3 Camera lens
4 Front display
5 Back display
6 Charging indicator LED
7 Status indicator LED
8 Battery cover
9 Up button
10 Down button
11 Speaker
12 USB-C port
13 MicroSD card slot
14 Micro HDMI port
Additional parts (not shown in illustration)
15 Battery
16 Waterproof housing
17 Mounting accessories (×6)
18 Bandages
19 USB-C cable
20 3M mats
21 Tethers
22 Lens cloth
Safety instructions
WARNING
- Ensure you have fully read and understood the instructions in this document before you install or use the product. Keep the packaging and this document for future reference.
- Do not let children play with the packaging material. Always keep the packaging material out of the reach of children.
- Only use the product as described in this manual.
- Do not open the product, there are no user serviceable parts inside.
- Do not use the product if a part is damaged or defective. Replace a damaged or defective product immediately.
- Do not drop the product and avoid bumping.
- Do not expose the product to water or moisture without using the waterproof housing.
- Do not use aggressive chemical cleaning agents when cleaning the product.
- Do not dismantle, open or shred batteries.
- Do not expose batteries to heat or fire. Avoid storage in direct sunlight.
- In the event of a cell leaking, do not allow the liquid to come in contact with the skin or eyes. If contact has been made, wash the affected area with copious amounts of water and seek medical advice.
• Properly dispose of the empty battery. - Seek medical advice immediately if a cell or a battery has been swallowed.
- Battery usage by children should be supervised.
- Only purchase the appropriate replacement battery from the Nedis website.
- Observe the charging terminals on the battery and the product and ensure correct use.
- When possible, remove the battery from the product when not in use.
- Only use the battery type(s) recommended in this document.
-
Secondary cells and batteries need to be charged before use. Always use the correct charger and refer to the manufacturer's instructions or equipment manual for proper charging instructions.
-
Keep cells and batteries clean and dry.
- Do not short-circuit a cell or battery.
- Do not store cells or batteries haphazardly in a box or drawer where they may short-circuit each other or be short-circuited by conductive materials.
- Always keep the product and the microSD card away from strong magnetic interference.
• Always store the product in a cool, dry and dust free place.
• Always unplug the product in case of overheating.
Insert or change memory card (image B)
A microSD card (not included) is required to store pictures or videos. Insert the microSD card into the microSD card slot A13.
Use a microSD memory card with at least a class 10 speed rating and a maximum storage capacity of 128GB.
Format the microSD card before use.
- formatting the microSD card will remove all files from the microSD card.
Make sure to back up all files you want to keep before formatting the microSD card.
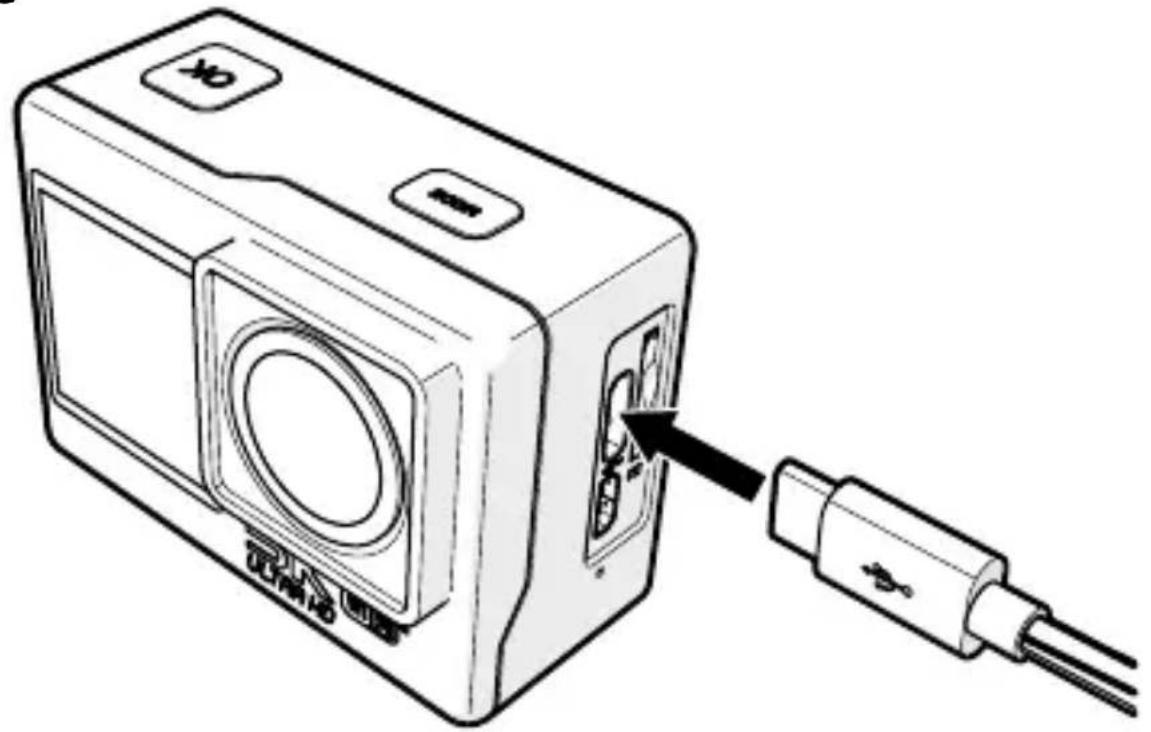
Charging the battery (image C)
The product is delivered with a partially charged battery. For optimal battery life, fully charge the battery before using the product for the first time.
Charge the camera from any USB outlet with the supplied USB-C cable A19. The camera can be charged while recording video. Fully charging the battery takes about 3 hours.
The charging indicator LED A 6 lights up red to indicate the product is charging.
Attaching the product to the accessories
Insert the product into the waterproof housing A16.
Make sure the waterproof housing is completely closed and the gasket is in place.
The product is not waterproof without the waterproof housing.
The waterproof housing A16 can be fitted with the supplied mounting accessories to your clothing, action gear, helmet, etc.
Make sure the attachment is secure.
Make sure the camera does not impede your movement, view, or operation of your action gear.
Switching the product on/off
Press and hold the power / mode button A① for 3 seconds to switch the product on or off.
The status indicator LED A 7 lights up blue when the product is switched on.
Settings menu navigation
- Press and hold the OK button A 2 to enter the settings menu.
In the settings menu:
- Press the up button 19 andthedownbuttonA 10 tonavigatebetweenthe options.
 | Mode setting |
 | Playback |
 | System setting |
 | Back |
- Press the OK button 2 to select and confirm the desired option. For a description of the settings menu, consult the extended manual online.
Switching between modes
Press the power / mode button A 1 to switch between the modes of the product.
The icon in the upper left corner of the display shows the current mode.
| Icon Mode Icon Mode | |||
 | Video Photo |  | |
 | Slow motion Auto |  | |
 | Loop Burst |  | |
 | Time lapse Timer |  | |
Record pictures and video images
In video mode, press the OK button A2 to start or stop recording a video.
The Status indicator LED A 7 flashes during a recording.
In picture mode, press the OK button A2 to take a picture.
Press and hold the down button A10 to switch between the front display A4 and back display A5.
View pictures and video images
In playback mode, press the up button A⑨ or down button A⑩ to go to the next or previous picture or video.
Press the OK button A 2 to play and stop videos.
Transfer files to an external device
Connect the product to your device with the USB-C cable A19. Transfer the files you want to save to your device.
Alternatively, remove the microSD card from the microSD card slot A13 and insert the microSD card into a card reader that is connected to your device.
Use with XDV-PRO App
Use the XDV-PRO App on your mobile device to review images and videos, transfer them to your mobile device, take pictures, record video.
The app works best with iPhone IOS 7 or Android 4.1 and up.
-
Switch on the product.
-
Press the up button A 9 to display the Wi-Fi information.
-
Install and open the XDV-PRO App.
-
Select Wi-Fi network ACAM71BK-XXXX.
-
Enter the password 1234567890 to connect.
View pictures and video images on external device
To view the pictures and video images on a TV or monitor without transferring any files:
Option 1:
-
Plug a micro HDMI - HDMI cable into the Micro HDMI port A 14.
The HDMI cable is not included. -
Plug the other end of the HDMI cable into the external device.
Option 2:
- Plug the USB-C cable A 19 into the USB-C input A 12.
- Plug the other end of the USB-C cable into the external device.
- Press the up and down buttons A 9 10 to select the mass storage mode.
- Press the OK button A 2 to confirm.
Replacing the battery (image D)
- Open the battery cover A 8.
- Remove the empty or damaged battery.
- Place the new battery in the battery compartment.
Only purchase the appropriate replacement battery from the Nedis website. - Close the battery cover A 8.
Disposal

For more information, contact the retailer or the local authority responsible for the waste management.
The product is designated for separate collection at an appropriate collection point. Do not dispose of the product with household waste.
Declaration of Conformity
We, Nedis B.V. declare as manufacturer that the product ACAM71BK from our brand Nedis ^® , produced in China, has been tested according to all relevant CE standards and regulations and that all tests have been passed successfully. This includes, but is not limited to the RED 2014/53/EU regulation.
The complete Declaration of Conformity (and the safety datasheet if applicable) can be found and downloaded via:
nedis.com/acam71bk#support
Dual-Screen-Actionkamera
ACAM71BK
Parti supplementari (non illustrate)
- Dual Screen Action cam to capture action in 5K Ultra HD
- Dual Screen Action cam
- Intended use
- Main parts (image A)
- Additional parts (not shown in illustration)
- Safety instructions
- WARNING
- Insert or change memory card (image B)
- Charging the battery (image C)
- Attaching the product to the accessories
- Switching the product on/off
- Settings menu navigation
- Switching between modes
- Record pictures and video images
- View pictures and video images
- Transfer files to an external device
- Use with XDV-PRO App
- View pictures and video images on external device
- Option 1:
- Option 2:
- Replacing the battery (image D)
- Disposal
- Declaration of Conformity
- Dual-Screen-Actionkamera
- Parti supplementari (non illustrate)
Brand : NEDIS
Model : ACAM61BK
Category : Sports camera