
Mavic 2 Enterprise Advanced - Drone DJI - Free user manual and instructions
Find the device manual for free Mavic 2 Enterprise Advanced DJI in PDF.
| Product Type | Professional drone with thermal and optical camera |
| Brand | DJI |
| Model | Mavic 2 Enterprise Advanced |
| Takeoff weight | 909 g |
| Maximum speed | 72 km/h (S mode, no wind) |
| Maximum practical ceiling | 6000 m above sea level |
| Maximum flight time | 31 minutes |
| Maximum transmission distance | 10 km (FCC) / 6 km (CE, SRRC, MIC) |
| Thermal camera | Uncooled VOx microbolometer, 640x512 @30 Hz, 16x digital zoom, 8-14 µm band |
| Visual camera | 1/2" CMOS sensor, 48 MP, 24 mm equivalent lens, f/2.8 |
| Internal storage | 24 GB |
| Intelligent flight battery | LiPo 3850 mAh, 17.6 V (max), 59.29 Wh, flight time 31 min |
| Smart Controller | Battery 5000 mAh, 2.5 h battery life, 2 h charging time |
| 24 W USB charger | Input 100-240 V, output 3.6-8 V=3 A or 12 V=2 A |
| Navigation systems | GPS + GLONASS |
| Operating frequencies | 2.4 - 2.4835 GHz and 5.725 - 5.850 GHz |
| Gimbal tilt range | -90° to +30° |
| Modular accessories | Spotlight, projector, speaker, RTK module (optional) |
| Operating temperature (drone) | -10°C to 40°C |
| Built-in safety | Omnidirectional obstacle detection, AirSense, password protection |
Frequently Asked Questions - Mavic 2 Enterprise Advanced DJI
User questions about Mavic 2 Enterprise Advanced DJI
0 question about this device. Answer the ones you know or ask your own.
Ask a new question about this device
Download the instructions for your Drone in PDF format for free! Find your manual Mavic 2 Enterprise Advanced - DJI and take your electronic device back in hand. On this page are published all the documents necessary for the use of your device. Mavic 2 Enterprise Advanced by DJI.
USER MANUAL Mavic 2 Enterprise Advanced DJI
KpaTKoe pyKOBOCTBO NOb3OBaTeA
v1.0
Contents
EN Quick Start Guide 2
CHS 快速入门指南 11
CHT 快速入門指南 20
JP イイックスローガイド 29
KR 38
DE Kurzanleitung 47
ES Guia de inicio=rápido 56
FR Guide de démarrage rapide 65
IT Guida di avvio rapido 74
NL Snelstartgids 83
PT-PT Guia de inicio=rápido 92
PT-BR Guia de Inicio Rápido 101
RU KpaTkoe pyKoBOdCTBO nOa3OBaTeA 110
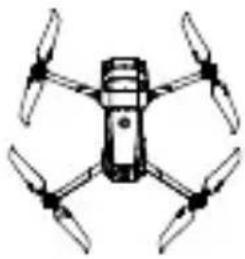
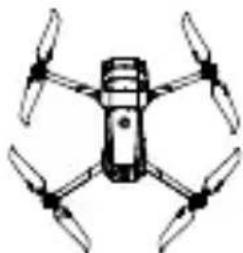
Aircraft
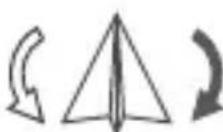
The DJI™ MAVIC™ 2 Enterprise Advanced features omnidirectional Vision Systems and Infrared Sensing Systems, and comes with a fully stabilized 3-axis gimbal camera with a thermal camera and a visual camera, providing both infrared and visual images simultaneously. DJI's Obstacle Sensing technology helps users to fly and capture complex shots while AirSense provides awareness of the surrounding airspace and password protection ensures access to the aircraft and all data is secure. The Mavic 2 Enterprise Advanced supports up to 32 × digital zoom and has a smoother thermal imaging sensor with a significantly higher resolution as well as a higher pixel visual sensor. The aircraft boasts a maximum flight speed of 44.7 mph (72 kph) and a maximum flight time* of 31 minutes.
- Gimbal and Camera
A. Thermal Camera
B. Visual Camera - Forward Vision System
- Downward Vision System
- Lateral Vision System
- Downward Infrared Sensing System
- Auxiliary Bottom Light
- MicroSD Card Slot
-
Front LEDs
-
Motors
- Propellers
- Antennas
- Aircraft Status Indicator
- Upward Infrared Sensing System
- Backward Vision System
- Intelligent Flight Battery
- Battery Level LEDs
-
Power Button
-
Battery Buckles
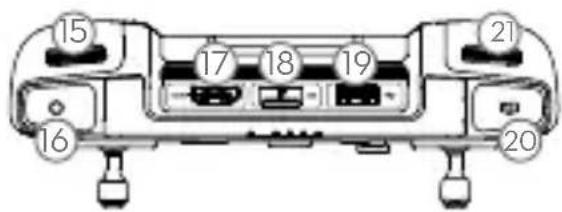
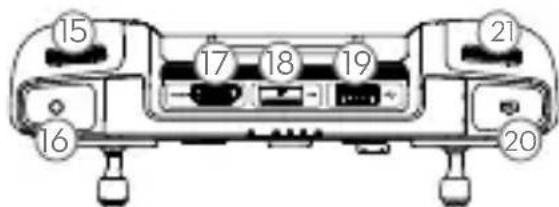
- USB-C Port
- Link Button/Linking Status Indicator
- Extended Port (to connect accessories)
-
Extended Port Cover
-
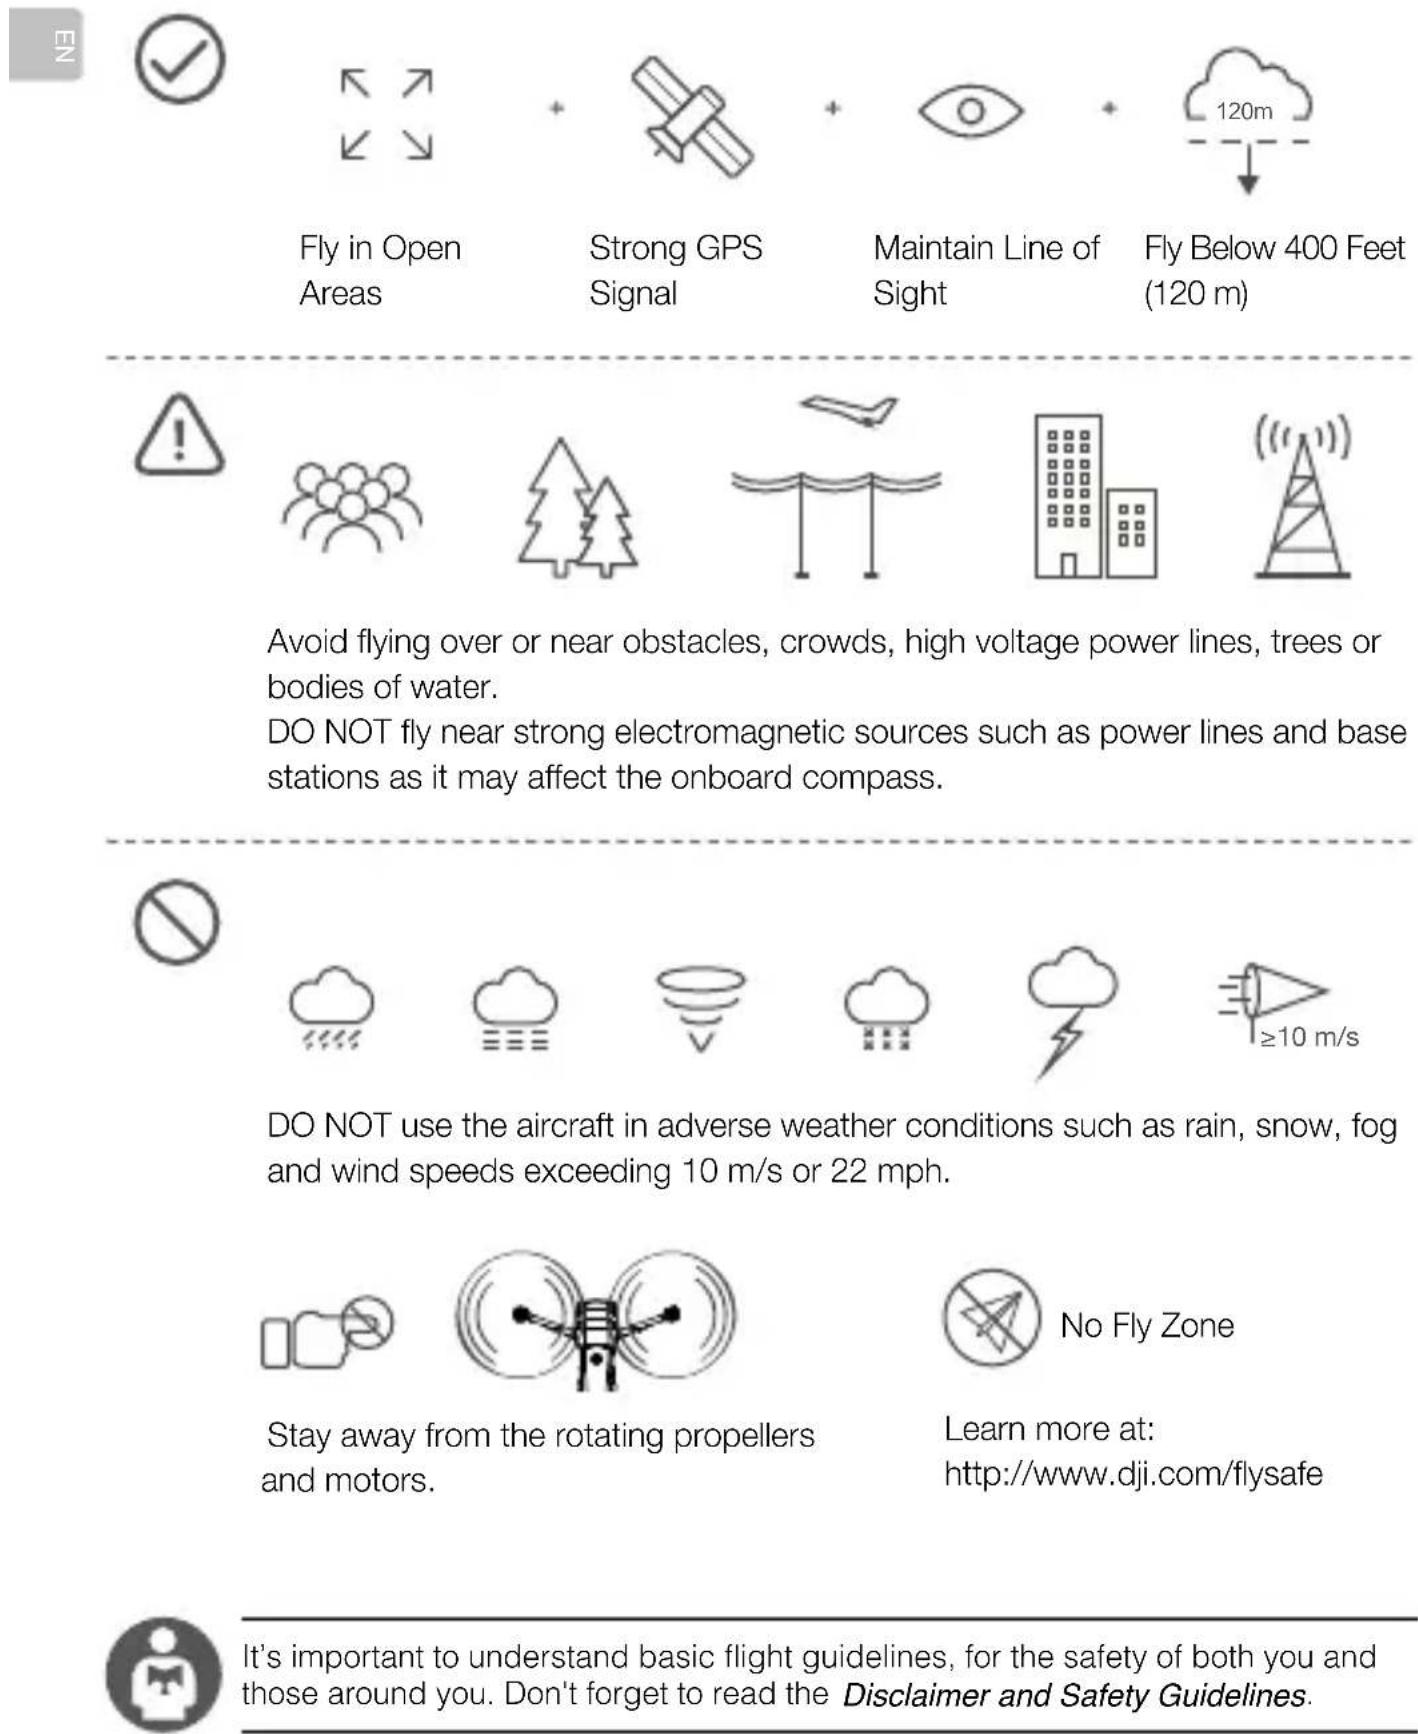
The Vision Systems and Infrared Sensing Systems are affected by surrounding conditions. Read the Disclaimer and Safety Guidelines and User Manual to learn more. http://www.dji.com/mavic-2-enterpise-advanced
** Maximum flight time was tested in an environment with no wind while flying at a consistent 15.5 mph (25 kph).
This value is for reference only.
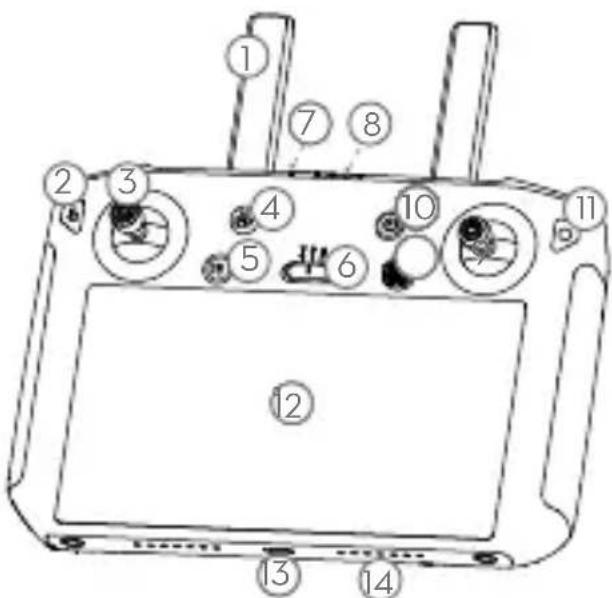
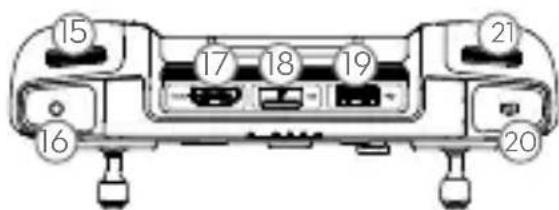
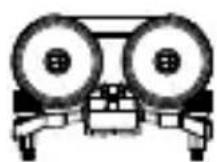
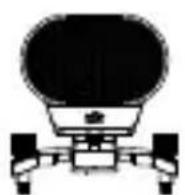
DJI Smart Controller
The DJI Smart Controller is a remote controller built with DJI's long-range transmission technology OCUSYNC™ 2.0, offering a maximum transmission range of 6.2 mi (10 km) and provides a live HD view from the aircraft's camera. The Smart Controller comes with a number of aircraft and gimbal controls as well as customizable buttons and has a built-in 5.5-inch high-brightness screen with multiple functions such as Bluetooth and GNSS. Connection to the Internet via Wi-Fi is also supported. The Smart Controller has a maximum working time of 2.5 hours*.
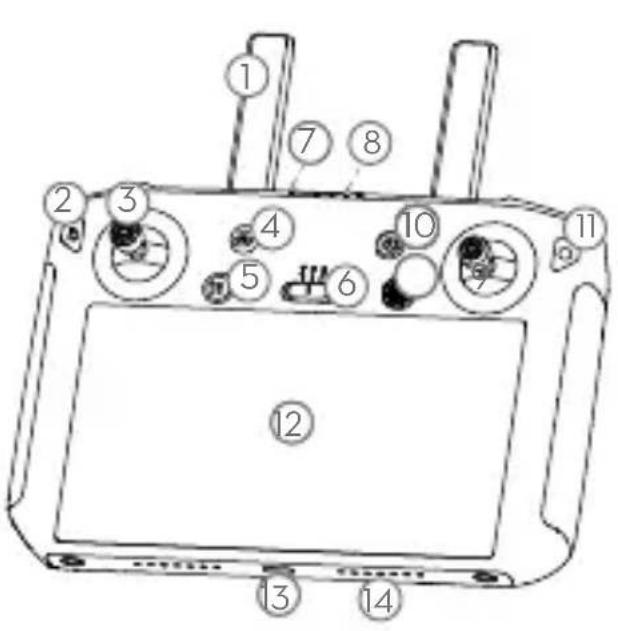
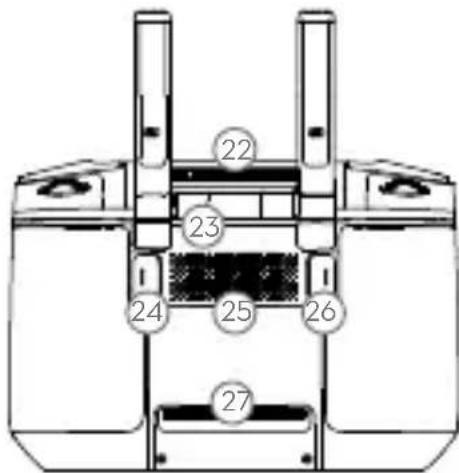
- Antennas
- Back Button / Function Button
- Sticks
- RTH Button
- Flight Pause Button
- Flight Mode Switch
- Status LED
- Battery Level LEDs
- 5D Button
- Power Button
- Confirm Button / Customizable Button C3
- Touch Screen
- USB-C Port
- Microphone
- Gimbal Dial
- Record Button
17.HDMI Port - MicroSD Card Slot
- USB-A Port
- Focus / Shutter Button
- Aperture/Shutter Adjustment Dial
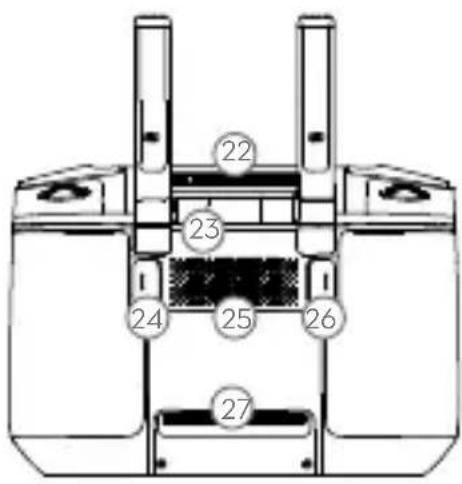
- Air Vent
- Sticks Storage Slot
24.CustomizableButtonC2 - Speaker
26.CustomizableButtonC1 - Air Intake
1. Preparing the Aircraft

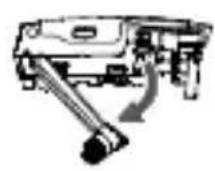
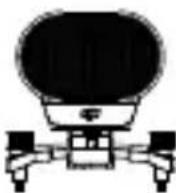
Remove the gimbal cover from the camera.

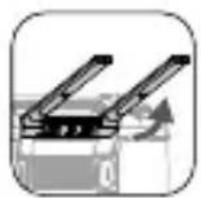
Unfold the front arms. Unfold the rear arms.
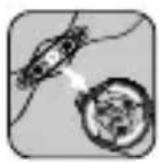
Marked Unmarked
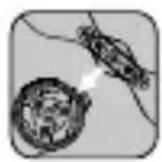
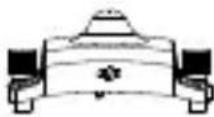
Match the propellers to motors.
Press the propellers down and rotate until they click in place.
Unfolded

Unfold the front arms and the propellers before the rear ones. All arms and propellers must be unfolded before takeoff.
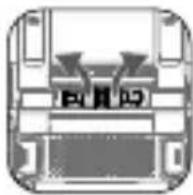
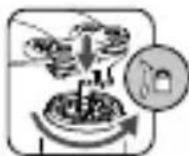
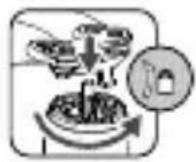
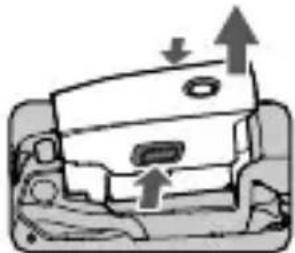
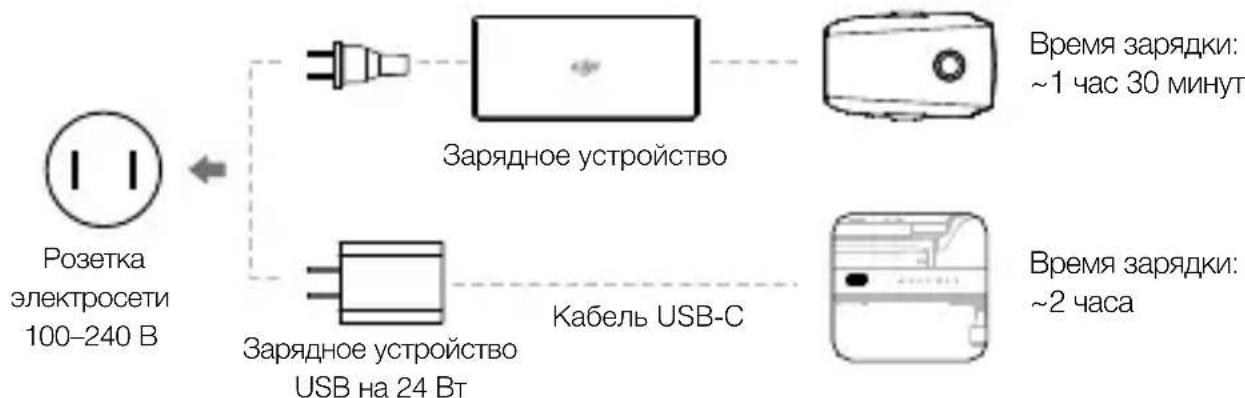
2. Charging the Batteries
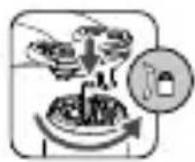
Use the provided charger to fully charge the Intelligent Flight Battery before first use.
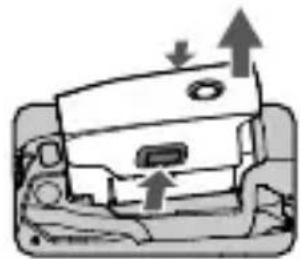
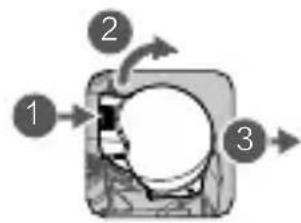
Remove the Intelligent Flight Battery
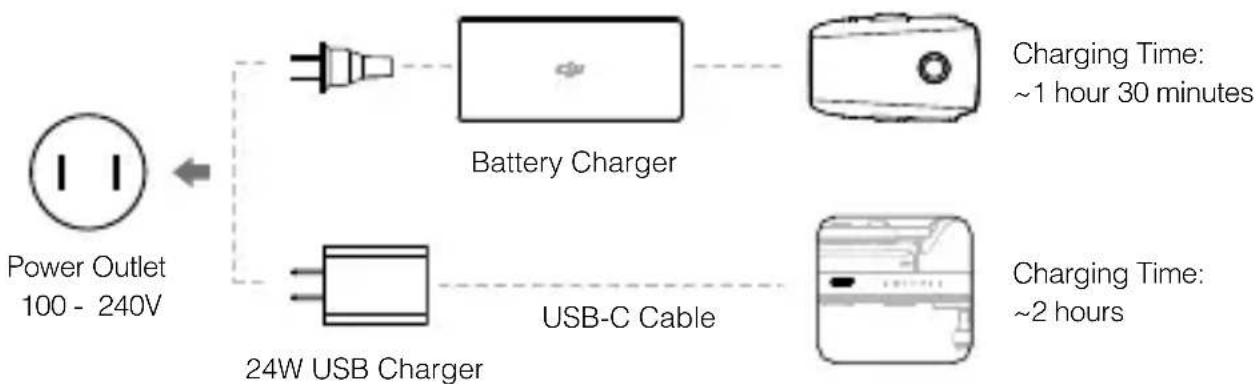

Please use the official 24W USB charger to charge the Smart Controller. When a standard 24W USB charger is not available, it is recommended to use an FCC/CE certified USB charger rated 12V/2A.
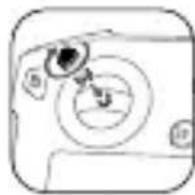
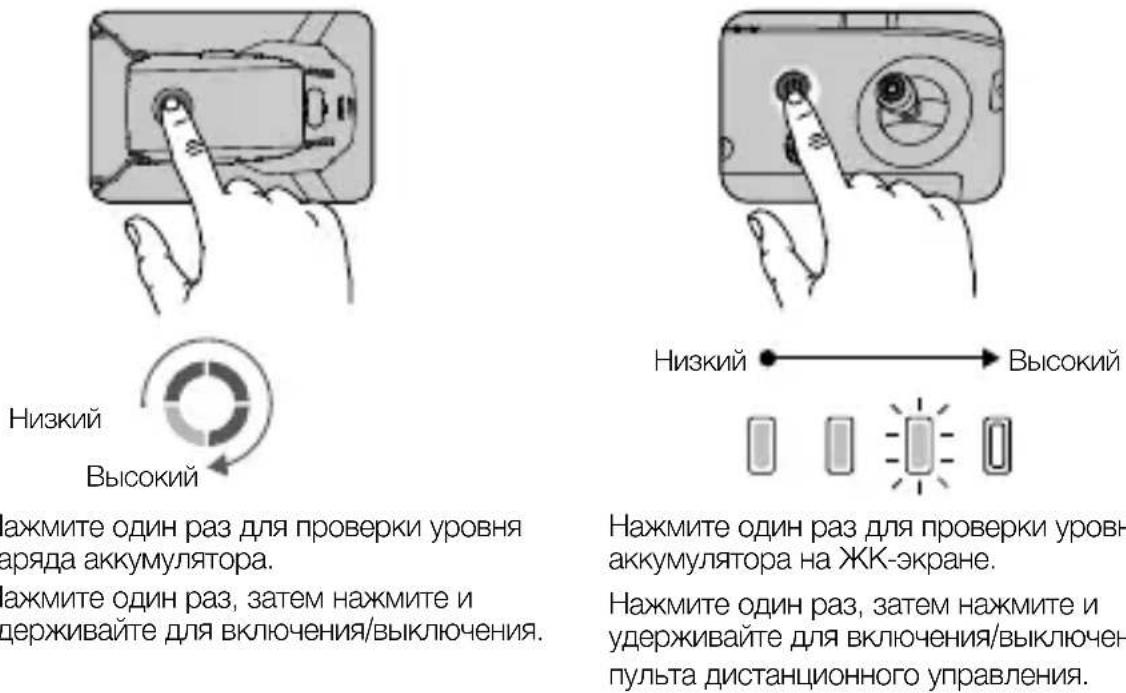
- Checking the Battery Levels and Powering On/Off
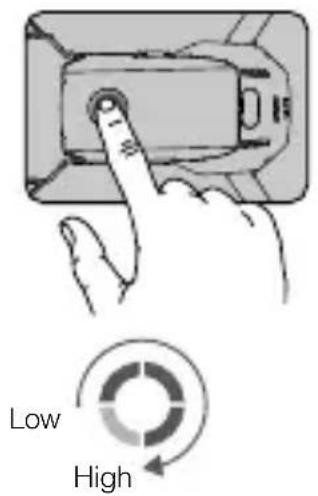
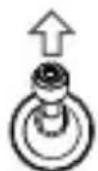
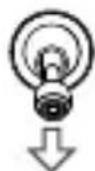
Press once to check the battery level. Press, then press and hold to turn on/off.
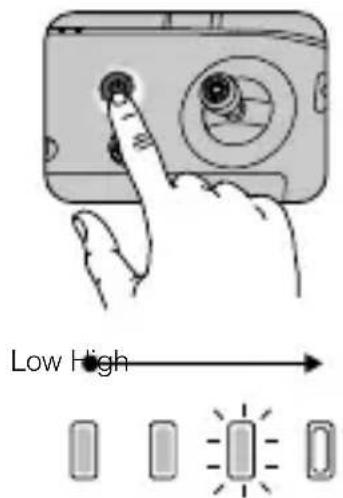
Press once to check the battery level on the LCD screen.
Press once, then press and hold to turn on/ off the remote controller.

Install the battery to the aircraft and power it on. Once the battery temperature is lower than 6^ C, it will auto heat to maintain a temperature between 8 - 10^ C. Refer to the User Manual for more details.
3. Preparing the Remote Controller
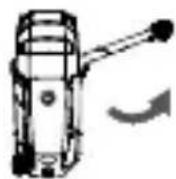
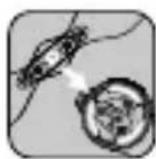
Lift the antennas Rotate to attach Remove the sticks
the sticks
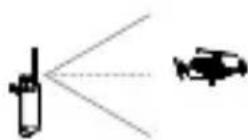
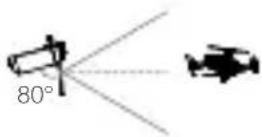
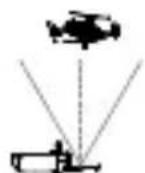
The optimal transmission range is shown above. Ensure the antennas are facing towards the aircraft. When the angle between the antennas and the back of the Smart Controller is 80^ or 180^ , the connection between the Smart Controller and the aircraft can reach its optimal performance.

-
Ensure the control sticks are firmly mounted.
-
In real operation, the DJI Pilot app will prompt to warn that the transmission signal is weak, and please adjust the antennas to ensure that the aircraft is back to the optimal transmission range.
4. Preparing for Takeoff


Power on the remote controller Power on the aircraft Launch DJI Pilot

Use a DJI account to activate the aircraft and the Smart Controller. Activation requires an internet connection. Before activating the aircraft in DJI Pilot, power on the Smart Controller and follow the prompts to activate.

Set a password for the aircraft in the DJI Pilot app to ensure secure access and protect your onboard data.
5. Flight
Before taking off, make sure the Aircraft Status Bar in DJI Pilot displays "Ready to Go".

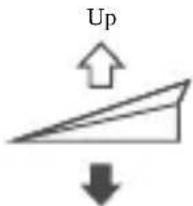
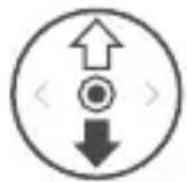
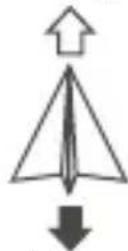
Manual Takeoff / Landing Combination stick command to start/stop the motors
Left stick up (slowly) to take off
Left stick down (slowly) until you touch the ground Hold a few seconds to stop the motors

Only stop motors mid-flight in emergency situations when doing so can reduce the risk of damage or injury. The method to stop the motor can be set in DJI Pilot.
Remote Controller Operation
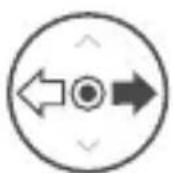
The default flight control is known as Mode 2. The left stick controls the aircraft's altitude and heading, while the right stick controls its forward, backward, left and right movements. The gimbal dial controls the camera's tilt.
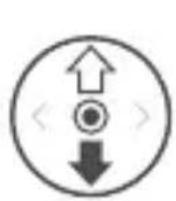
Left Stick
Down
Turn Left
Right Stick
Forward
Backward

Left
Right

- Always set an appropriate RTH altitude before takeoff. When the aircraft is returning to the Home Point, you should guide it with the control sticks.
- Press the Flight Pause button for emergency braking during flight.
* Modular Accessories
M2E Beacon
M2E Spotlight

M2E Speaker M2EA RTK Module
(not included)
6. Fly Safe
Specifications
Aircraft
Takeoff Weight 909 g
Max Speed 72 km/h (S-mode) (near sea level, no wind)
Max Service Ceiling Above Sea Level 6000 m
Operating Temperature Range 14^ to 104^ F (-10^ to 40^ C)
GNSS GPS+GLONASS
Operating Frequency 2.4-2.4835 GHz; 5.725-5.850 GHz
Transmission Power (EIRP) 2.4 GHz
FCC: ≤26 dBm; CE/MIC: ≤20 dBm; SRRC: ≤20 dBm
5.8 GHz
FCC: ≤26 dBm; CE: ≤14 dBm; SRRC: ≤26 dBm
Internal Storage 24 GB
Gimbal
Controllable Range Tilt: -90 to 30^
Thermal Camera
Sensor Uncooled VOx Microbolometer
Lens Focal Length Approx. 9 mm
Equivalent: Approx. 38 mm
Sensor Resolution 640×512 @30Hz
Digital Zoom 16x
Pixel Pitch 12 μm
Spectral Band 8-14 μm
Photo R-JPEG
Video MP4
Temperature Measurement Method Spot Meter, Area Measurement
FFC Auto/Manual
Visual Camera
Sensor 1/2" CMOS, Effective pixels: 48 M
Lens FOV: approx. 84^
Equivalent: 24 mm
Aperture: f/2.8
Focus: 1 m to
ISO Range Video:100-12800 (auto)
Photo: 100-1600 (auto)
Max Image Size 8000×6000
Still Photography Modes Single shot
Interval (2/3/5/7/10/15/20/30/60 s)
Pano: spherical panorama
Video Recording Modes 3840x2160@30fps
1920×1080@30fps
Photo JPEG
Video MP4
Smart Controller
Operating Frequency 2.400-2.483 GHz; 5.725-5.850 GHz
Max Transmission Distance FCC: 10 km; CE: 6 km; SRRC: 6 km; MIC: 6 km
(unobstructed, free of interference)
Transmitter Power (EIRP) 2.4 GHz
FCC: ≤25.5 dBm; CE/MIC: ≤18.5 dBm; SRRC: ≤19 dBm
5.8 GHz
FCC: ≤25.5 dBm; CE: ≤12.5 dBm; SRRC: ≤18.5 dBm
Storage Capacity ROM 16 GB + Scalable (microSD card)
Battery 5000 mAh @ 7.2 V
Operating Temperature Range -4° to 104° F (-20° to 40° C)
Charging Time 2 hr (with a USB charger at 12V/2A)
Battery Life 2.5 hr
24W USB Charger Input: 100-240 V, 50-60 Hz, Max. 0.8 A
Output: 3.6 - 8V = 3.0A / 12V = 2.0A
- Intelligent Flight Battery
Capacity 3850 mAh
Voltage 17.6 V (max)
15.4 V (typical)
Battery Type LiPo
Energy 59.29 Wh
Net Weight Approx. 297 g
Charging Temperature Range 41^ to 104^ F (5° to 40°C)
Heating Method Manual/Auto
Heating Temperature Range -4° to 43° F (-20° to 6° C)
Heating Time 500 s (max)
Heating Power 55 W (max)
- Intelligent Flight Battery Charger
Input 100-240 V, 50-60 Hz, 1.8 A
Output Main: 17.6V = 3.41A or 17.0V = 3.53A
USB:5V=2A
Rated Power 60 W

For more information, read the User Manual: www.dji.com/mavic-2-enterprice-advanced
※ This content is subject to change without prior notice.
MAVIC is a trademark of DJI.
Copyright © 2021 DJI All Rights Reserved.
Printed in China.
认识Mavic2行业进阶版
FCC: ≤26 dBm; CE: ≤14 dBm; SRRC: ≤26 dBm
机载内存 24GB
·云台
FCC: ≤25.5 dBm; CE/MIC: ≤18.5 dBm; SRRC: ≤19 dBm
5.8 GHz
FCC: ≤25.5 dBm; CE: ≤12.5 dBm; SRRC: ≤18.5 dBm
www.dji.com/mavic-2-enterprice-advanced
※内容如有更新,恕不另行通知。
MAVIC是大疆创新的商标。
FCC: ≤ 25.5 dBm; CE/MIC: ≤ 18.5 dBm; SRRC: ≤ 19 dBm
5.8 GHz
FCC: ≤ 25.5 dBm; CE: ≤ 12.5 dBm; SRRC: ≤ 18.5 dBm
www.dji.com/mavic-2-enterprice-advanced
※内容如有更新,恕不另行通知。
MAVIC是大疆創新的商標。
Copyright © 2021 大疆創新 版權所有
Printed in China.
機体
www.dji.com/mavic-2-enterprice-advanced
Copyright © 2021 DJI All Rights Reserved.
Printed in China.
J
DJI St-MT 0031 is DJI's 10th 2.0 10km
Ready to Go' has a sign of an existing sign.
Ready to Go(GPS)
个同 0
Stuk toh ngcHryo RoTo huiu


告

同
I
Jitmee
矣,主当安用,

Pilot 0e t t
·主句加主句
http://www.dji.com/flysafe

FCC: ≤26 dBm, CE: ≤14 dBm, SRRC: ≤26 dBm
内部径量 24GB
·
徒者能的,-90°~30°
·
源:Vox
Lenz 垂直丛 9 mm
[SEL 1/2" CMOS, yohy] 48 MP
Lévz FOV: 84°
[1] 刘越:2/3/5/7/10/15/20/30/60 未
Fandar:Sphere
[2018]
1920×1080@30fps
JPG
同皂MP4
*
音通 幸 双 2.400 2.483GHz,5.725 5.850GHz
FCC: 10 km, CE: 6 km, SRRC: 6 km, MIC: 6 km (未就
通心机 2.4 GHz
FCC: ≤25.5 dBm, CE/MIC: ≤18.5 dBm, SRRC: ≤19 dBm
5.8 GHz
FCC: ≤25.5 dBm, CE: ≤12.5 dBm, SRRC: ≤18.5 dBm
從達長達連ROM16GB+microSD當達從達長達連
BateRl 5000 mAh @7.2 V
音同运动-20\~40℃
充值时间2小时(12V/2A)
[BateRl]uagougian2.5i
24W USB 增速机启:100~240V,50~60Hz,300A
3.6 8V = 3.0A / 12V 2.0A
- トデリ連連 レフロー連連広は
3850 mAh
首頁 17.6 V (則大)
15.4V(日韩)
BateRlUgLiPo
59.29 Wh
南 南 南 南 南 南 南 南 南 南 南 南 南 南 南 南 南 南 南 南 南 297 g
鐘頭云不動步5~40℃
告日
落日日日日日日日日日日日日日日日日日日日日日日日日日日日日日日日日日日日日日日日日日日日日日日日日日日日日日日日日日日日日日日日日日日日日日日日日日日日日日日日
落日500(
落日 55 W ( 壽大)
- 电联信元通 谷拉码 电邮
100~240V,50~60Hz,1.8A
沓
用在 P 时: 17.6V = 3.41A 且 P 为 17.0V = 3.53A
USB:5V→2A
格战 60W

自该而内用是相者,
www.dji.com/mavic-2-enterprice-advanced
Copyright © 2021 DJI All Rights Reserved.
Printed in China.
Fluggerät
FCC: ≤26 dBm; CE: ≤14 dBm; SRRC: ≤26 dBm
Interval (2/3/5/7/10/15/20/30/60 s)
- Intelligent Flight Battery
www.dji.com/mavic-2-enterprice-advanced
MAVIC is a trademark of DJI.
Copyright © 2021 DJI All Rights Reserved.
Gedruckt in China.
Aeronave
FCC: ≤26 dBm; CE: ≤14 dBm; SRRC: ≤26 dBm
Almacenamento interno 24 GB
- Estabilizador
Intervalo controllable Inclinacion: de -90^ a 30^
Cármara tírmica
Sensor Microbolómetro VOx no refrigerado
Distancia focal del objetivo Aprox. 9 mm
Equivalent: Aprox. 38 mm
Resolucion del sensor 640× 512 a 30Hz
Zoom digital 16x
Distancia entre pixeles 12 m
Banda espectral 8-14 μm
Foto R-JPEG
Video MP4
Intervalo (2/3/5/7/10/15/20/30/60 s)
FCC: ≤25.5 dBm; CE: ≤12.5 dBm; SRRC: ≤18.5 dBm
www.dji.com/mavic-2-enterprice-advanced
Intervalle (2/3/5/7/10/15/20/30/60 s)
www.dji.com/mavic-2-enterprice-advanced
The optimal transmission range is shown above. Ensure the antennas are facing towards the aircraft. When the angle between the antennas and the back of the Smart Controller is 80^ or 180^ , the connection between the Smart Controller and the aircraft can reach its optimal performance.

http://www.dji.com/flysafe

Equivalent: ca. 38 mm
Intervallo (2/3/5/7/10/15/20/30/60 s)
www.dji.com/mavic-2-enterprice-advanced
The optimal transmission range is shown above. Ensure the antennas are facing towards the aircraft. When the angle between the antennas and the back of the Smart Controller is 80^ or 180^ , the connection between the Smart Controller and the aircraft can reach its optimal performance.

M2E Baken M2E Spotlight

M2E Luidspreker
FCC: ≤26 dBm; CE: ≤14 dBm; SRRC: ≤26 dBm
Interne opslag 24 GB
Gimbal
Spectrale band 8-14 m
Foto R-JPEG
Video MP4
Sensor 1/2" CMOS, effective pixels: 48 M
Lens Gezichtsveld: ca. 84^
Interval (2/3/5/7/10/15/20/30/60 sec)
FCC: ≤25.5 dBm; CE: ≤12.5 dBm; SRRC: ≤18.5 dBm
Uitgang: 3,6-8 V =3,0 A/12 V =2,0 A
- Intelligent Flight Battery
Capaciteit 3850 mAh
Spanning 17,6 V (max)
15,4 V (normaal)
Type accu LiPo
Vermogen 59,29 Wh
Nettogewicht Circa 297 g
Lader Intelligent Flight Battery
www.dji.com/mavic-2-enterprice-advanced
Faça corresponder as helices aos motores.
FCC: ≤26 dBm; CE: ≤14 dBm; SRRC: ≤26 dBm
Armazenamento interno 24 GB
Suspendao carda
Equivalent: Aprox. 38 mm
Resolucao do sensor 640× 512 @30Hz
Zoom Digital 16x
Distancia entre pixeis 12 m
Banda espectral 8-14 m
Fotografia R-JPEG
Video MP4
Intervalo (2/3/5/7/10/15/20/30/60 s)
FCC: ≤25.5 dBm; CE: ≤12.5 dBm; SRRC: ≤18.5 dBm
Capacidade de armazenamento ROM 16 GB + Escalonavel (cartao microSD)
Bateria 5000 mAh @ 7,2 V
Corresponda as helices ao motors.
Farol M2E Holofote M2E
Alto-falante M2E
FCC: ≤ 26 dBm; CE/MIC: ≤ 20 dBm; SRRC: ≤ 20 dBm
5.8 GHz
FCC: ≤ 26 dBm; CE: ≤ 14 dBm; SRRC: ≤ 26 dBm
Armazenamento interno 24 GB
- Estabilizador
Equivalent: Aprox. 38 mm
Resolucao do sensor 640× 512 a 30Hz
Zoom digital 16x
Distancia entre pixeis 12 m
Alcance spectral 8 a 14 m
Foto R-JPEG
Video MP4
Intervalo (2/3/5/7/10/15/20/30/60 s)
www.dji.com/mavic-2-enterprice-advanced
- AkkymyTop Intelligent Flight Battery
5.CnCTema HNXHINHΦpaKpaChbIX DaTHNKOB
-
CBeToIONoHbIe INHdIKaTOpbl ypoBn3apJa aKkyMylrTopa
-
Luz inferior auxiliar.
-
KhoNka nHTaHnA
-
Cnot dans Kaptbi namrtn microSD
-
3aximblkpenlennnaakkymyIraTopa
-
KhoNka noKNoUeHn/ nHdNKatOp COCToHnI NOKNoUeHn
8.Передные огни
-
NopT USB-C
-
YdInHeHHbI npT (nnoCoeHHeHna akceccyapOB)
-
YdInHeHHa KpbIuKa Inna nopTa
-
ΘлектpoДигагаTeJI
-
Pajoba cnCTem ob30pa n cnCTem HnppaKpachbIX DaTHNKOB 3aBNCNT OT ycNOBn OKpykaOuSei cpebl. YTo6bl NoIyHTb NoIpo6HyIO INHΦopMaUHO, NepeINTE B 3aABLeHne 6 OTKa3e OT TBeTCTBeHHocTN, PpaBnla TexNkn 6e3oNaChOCTn I PykoBOcTBTO Nl3bObaTeJI. http://www.dji.com/mavic-2-enterpise-advanced
** Pe3yIbTaT, NOJyHeHHBn BO BpEma NcBItaHm npn POJIeTe B 6e3BeTpHeHHbIX ycIOBmX C NOCTOHHo CKOPoCTbHO 25 km/4 (15,5 MmN/4). DaHHoe 3HaueHne npINBeHEn OckJIIOHHTeMbHO B cnpaBOOHbIX CEJIAX.
Пульт DJI Smart Controller
DJI Smart Controller - pylbT dinCTaHIOHORO ynpabLeHnC BCTpoEHHO TExHOJorne IpepaHn CnHaJaHa Ha daIbHne pacctoHnra DJI OCUSYNC 2.0. MakcimalbHoe 3NaueHne IpepaHn CnHaJaHD c KaMepbl JeTaTeBHorO aannapata coCTaBJIeT 10 KM. INHTeJIeKTyAIBHyI pylbT no3BOJareT ynpabJIbTB JEtATEbHbIM aannapatom n CTaBNIIN3aTOPOM. OH OCHaUeH HAcTpANBaEMbIM KHOKNAMN, BCTPOeHHbIM 5,5-DIOHMOBbIM BbICOKOgPKM DInCIIeem a TaKKe TaKIMn FyHKUJMaMn kak Bluetooth n CNYTHIKOBBe CNCTeMbI N03LIuOHIpOBaHnR. TaKKe NOdIepXkBaETcR NODKIIuOHeHne K INHTepHety epe3 Wi-Fi. MakcimalbHoe Bpema pa6tby INHTeJIeKTyAIBHO rnybTa CoCTaBJIeT 2.5 Yaca*.

- AHTehHHbI
2.KHONKa Ha3aI》/“FyHKUIN
3.ДжоICTKIN - Khonka Bo3BpaTa DomoN (RTH)
- KhoNka octaHOBKn noJeTa
- NpeeknouateJIb peKIMOB NOJeta
- CBETOIOIDHbI INHdIKaTOP COCTOHHIA
- CBeToIONoHbIe INHnKaTOpbl ypoBn3apya aKKymJrTopa
- Khonka 5D
- Khonka nHTaHn
- Khoŋka noɪdBερχndeHnə / HactpaɪBaemər Khoŋka C3
- CechopHbI 3KpaH
- NopT USB-C
- Minkpooh
- KoJIeSCnKO haKJIIOHa KaMEpbI
- Khonka 3a nnci
- NopT HDMI
- Cnot dans KapbI namrtn microSD
- NopT USB-A
- KhoNka φokycnpoBkn / Khonka cnycka 3aTbopa
- PeryjIaTOp dHaappaMbl/3aTbopa
- BeHTnJIaUNOHHOe OTBepCTne.
- CLOTДЯхраненяДжоICTKOB
- HactpanBaemar KhoIka C2
25.ДИнhamNK - HactpanBaemar KhoIka C1
27.Bo3dyx03a6opHnK
2. Побrotовka дрona

Chinme yexoI ctabnnaTopa c kamepbI.
Pa3noKInTe nepeHnne JyUn.

Pa3loXkIte 3aIhne IyH.
CMapKnpOBko
БeЗ Маркирорвки
CoJIIOJaIteUBeTObYIO KOINPOBkyPOneJIlePoB IN 3JIeKTPoDnBuRaTeJeN.

Haxmte Ha nponeJIepebl nOBepnTe IV Do UeJUka.
Pa3IOXeHHoe COCTOHRHe

Bcerda packlaabte chayala nepeHne lyu, 3aTeM -3aHHe. Bce lyu n nponeJIepbl IJXHbI HxOHTbcR Ba3IOXeHHOM COCToHn nepeD B3JeTOM.
3.Заряда akкулгTopOB
范
IcnoJb3yIte npedocTAbHeHoe B KOMJIeKTe 3apJHoe yCTpOiCTBO, UTO6bl NOJIHOCTbIO 3apJITb aKKMyJrTOp Intelligent Flight Battery neped nepBbIM IcnoJb3ObaHnEM.
CHIMITE aKKyMylTop Intelligent Flight Battery

Icnoj3yte fnpMeHoe 3apnHoe yctpoCTBO USB Ha 24 BTr Ia3apnN INTeJIeKtyaIbHOpyIbTa.EcnfnpMeHoe 3apnHoe yctpoCTBO HeIOCTynHO,peKOMeHNyETcNcNoJb3OBaTb3apnHoe yctpoCTBO USB,cooTBetCTByIOUee cTaNapTy FCC/CE,12B/2A.
-Поберът eуровьз заряда akКуМУЛТОВИ BKЛIOUHTe/BbIKЛIOUHTe nITaHne

YCTAHOBNTe aKKyMylrTop B JetaBbHbI annapa N BKIOUHTe erO. EcNI TEMNEpaTpa aKKyMylrTopa onyCTNTcR Hnke +6^ OH NaHET HaPeBaTbCr DO IOCTNKeHnRA TEmpeatypbI +8 +10^ . POnpObHOCTn CM. B pyKoBOdCTBe NOJb3OBATeJI.
yCTaHOBtB JxKoICTnKl

OnTImaJIbHЯ daJIbHOcTB nepeaun cIrHaJa yka3aHa BblJe. Y6eINTEcB, yTo aHTeHHbI HapabJIeHbI Ha JTeTaJIbHbI aIppaT. CoeINHeHne MeJy INTeJIeKTyalbHbIM nyJIbTom I dpoHOM 6ydt CHTaTbCra ONTImaJIbHbIM, KOrDa yroJ MExdy aHTeHHAMN N 3aJNei NaHeJIbIO npJIbTa coCTaBnE80°...180°.

- Y6eIITecb, yTO JxKoIcTNkN HaJeXHo 3aKepeJIeHbl.
- Ecπ npnloxehne DJI Pilot Bbjaet npedynpexkdeHne o TOM, yTO cnHan cna6bH, Heo6xoHMO nOmeHrTb noLoXeHne aHTeHH dIa DOCTNXeHn ONTMaJIbHOro 3HaueHn DaJIbHOCTn nepeDaHn CnHana.
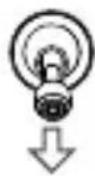
-PyuHNoB3JIeT/IOcAДka
IIOLOXeHnE JxOJCTNkOB IJI BKIOUeHnI/ BBIKIOUeHnI 3JIeKTPoDvIRatEn


MNI


HOBOPHTaJIeBO
HanoBo
PpaBbI JxOcTnK
Bnepei
Ha3a

BneBo
Bnpabo

- Npeen B3JETOM Bcerda yctaHaBJIbAaIe NOxOJaSyIO BbICOTy IJI BA03BpaTa DOMoI. Pn BO3BpATE B INCXOnHyIO TOky IPOH Heo6xOIMO HApBaJIrTb C NOMUBo JKOINKOB.
HaKMTe Ha KONkU octaHOBKn peXIMa IIOJTe dIa ABAPINHO TOpMOXeHn BO BpeMnIOJTeA.
Akceccyapbl
M2E CnHaJIbHbI OROHb

M2EПожектор
M2EДИHAMNK
Modylt RTK M2EA (He BXODIT B KOMNJIeKT)
MoHocThpeepaTnka 2,4T
(3NIM) FCC: ≤ 26 ΜΜ; CE/MIC: ≤ 20 ΜΜ; SRRC: ≤ 20 ΜΜ
O6bEm BHyTpEHHe NAmrTa 24 6aI Ta
CTa6nH3aTop
PabouH nnana3OH yIIOB HauKHOH: -90^ 30^
BpaueHn
TeNIOBn3IOHNa KaMepa
MAtpuia MInkpOboJIoMeTp Ha OKcUe BaHaJnA (VOx)
Φokychoe paCCToHHe OkJIO 9 MM
06bekTnBa 3KBnBaJIeHT:OKOJIo 38 MM
PazpeшенmeMatpnc640×512 npn30T
LunfoBoy 3ym 16x
Uar nKceJ 12 MKM
CnektpaHbIy dHaana3OH 8-14 MKM
ΦoTo R-JPEG
Bndeo MP4
MeToI n3MepEnHn TeMnpaTpby ToeHbN 3aMep, n3MepEnHe pIoUzadiN
FFCABTO/BpyHyIO
-Оптуеская камера
Matpna CMOS 1/2 duimama, yncno 3000KteJe: 48 mH
ObekTnB YroJ o63opa: okolo 84°
3KNBnBaJIeHT:24MM
DnaΦparma:f/2,8
ΦOKYC:OT1MДO∞
Дианэзн ISO Видао: 100-12800 (aВTo)
ΦoTo:100-1600(aBTo)
Makc. pa3mep n3o6paJehn 8000 x 6000
PexmbfOToCbeMkn PokaipoBa
Интурвальна: (2/3/5/7/10/15/20/30/60 c)
PanaHo: cfepeuuecka nHaOpama
Pexmbl BndeocbeMkn 3840x2160co cokopocTbO 30 kaipob/c
1920×1080cockopocTbIO30KaIpoB/c
ΦOTO JPEG
Bndeo MP4
- Пульт Smart Controller
Дианазон pa6o殉х устOT 2,400-2,483 T
MaKc.ДaJIbHocTbпepeJaU FCC:10K;CE:6K;SRRC:6K;MIC:6KM
CNHnla(npnOTcYTCTBnN
BxoD:100-240B,50-60Γu,MaKc.0,8A
MOUHOCTbIO 24BT
BbIXoD:3,6-8B=3,0A/12B=2,0A
- AkkymyIaTop Intelligent Flight Battery
EMKoCTb 3850 MA·u
HanpajkeHne 17,6 B (MaKc.)
15,4B (obbyHoe)
Tn akymyIaTopa IITn-noJIIMepHbI
3Heprn59,29 Bt-
Macca HETTO Okjo 297
Bxo100-240B,50-60T,1,8A
BbIXoJΓIaBHyI:17,6B
USB:5B=2A
HOMHaJIbHa MOLHOCtB
60BT

IOnOHHTeHbHyIO HOpMaUIO MoKHO HaTn B pyKOBOCTBe NOJIb3OBaTeJr:
www.dji.com/mavic-2-enterprice-advanced
※TaOTMeTkaO3Haayet,HToCoedePkaHHe MoKet 6bItbN3MeHEno 6e3IpeDvapntelHoYBeOMJIeHnA.
MAVIC ABJIETCA TOBAPHBIM 3HaKOM KOMIIAHM DJI.
© 2021 DJI BcnpaBa 3aunuHeHbI.
HaneyataHO B Kitae.

WE ARE HERE FOR YOU
在线技术支持

Contact DJI SUPPORT via Facebook Messenger

微信扫一扫获取技术支持
- Contents
- Aircraft
- DJI Smart Controller
- Preparing the Aircraft
- Charging the Batteries
- Preparing the Remote Controller
- Preparing for Takeoff
- Flight
- Remote Controller Operation
- * Modular Accessories
- Fly Safe
- Specifications
- Gimbal
- Thermal Camera
- Visual Camera
- Smart Controller
- - Intelligent Flight Battery
- - Intelligent Flight Battery Charger
- 认识Mavic2行业进阶版
- ·云台
- 機体
- J
- ·主句加主句
- Fluggerät
- Aeronave
- - Estabilizador
- Cármara tírmica
- Lader Intelligent Flight Battery
- Suspendao carda
- Пульт DJI Smart Controller
- Побrotовka дрona
- 3.Заряда akкулгTopOB
- PpaBbI JxOcTnK
- Akceccyapbl
- CTa6nH3aTop
- TeNIOBn3IOHNa KaMepa
- -Оптуеская камера
Brand : DJI
Model : Mavic 2 Enterprise Advanced
Category : Drone