
EA8010 - Coffee machine TAURUS - Free user manual and instructions
Find the device manual for free EA8010 TAURUS in PDF.
| Product Type | Automatic coffee machine with built-in grinder |
| Brand | Taurus |
| Model | EA8010 |
| Category | Coffee machine |
| Pressure | 15 bars |
| Heating system | Compact Thermoblock System |
| Water tank capacity | 1.8 L (approx.) |
| Bean container capacity | 250 g |
| Number of cups | 2 simultaneous cups |
| Functions | Espresso, long coffee (lungo), steam for cappuccino, 2-cup function |
| Settings | Grind fineness, water hardness, coffee temperature, automatic shut-off |
| Steam wand | Adjustable and removable steam wand |
| Included accessories | Cleaning tablets (2), descaler sachet (1), cleaning needle |
| Maintenance | Automatic cleaning program, descaling program, long rinse |
| Safety | Automatic shut-off, overheat protection, shutdown in case of malfunction |
| Power supply | 220-240 V ~ 50-60 Hz |
| Power | 1450 W (approx.) |
| Color | Black / Stainless steel (estimated) |
| Weight | 9.5 kg (approx.) |
| Dimensions (L x D x H) | 28 x 34 x 38 cm (approx.) |
| Usage | Domestic use only |
| Warranty | See warranty card, max 3000 cycles per year |
Frequently Asked Questions - EA8010 TAURUS
User questions about EA8010 TAURUS
0 question about this device. Answer the ones you know or ask your own.
Ask a new question about this device
Download the instructions for your Coffee machine in PDF format for free! Find your manual EA8010 - TAURUS and take your electronic device back in hand. On this page are published all the documents necessary for the use of your device. EA8010 by TAURUS.
USER MANUAL EA8010 TAURUS
Chere Cients, cher Client
For domestic use only.
Please check your guarantee card for more details on the guarantee conditions in your country, with a maximum of 3000 cycles a year. This appliance is intended for domestic use only and is not suitable for commercial or professional use. Any commercial use, inappropriate use or failure to comply with the instructions, the manufacturer accepts no responsibility and the guarantee will not apply. The guarantee expressly excludes espresso machines that do not work or which work poorly because they have not been cleaned or descaled, or because there are foreign bodies in the grinder.
| Lights | Meaning | ||||
| Empty the coffee grounds collector21=14 | Fill tank | Clean Calc | On / Off | ① | |
| ○○○○ | ● | The appliance is ready for a coffee or steam cycle. | |||
| ○○○○ | ○/● | Slow flashing: the device is in the preheating phase or an initialisation cycle. | |||
| ○○○○ | ○/●● | Double flash: a 2 coffee cycle is in process. | |||
| ● | ○○○○ | Product support information in operating parameters setting mode. | |||
| ○/● | ○○○ | ○/●● | Empty the coffee grounds collector (a 2 coffee cycle is underway). | ||
| ○/● | ○○○ | ● | Empty the coffee grounds collector + clean the dra-wer + empty the drip tray. | ||
| ● | ○○○ | ● | Check coffee grounds collector is not missing or incorrectly positioned. Check cleaning tray is not missing or incorrectly positioned. | ||
| ○ | ● | ○○○ | Set water hardness. | ||
| ○ | ○/● | ○ | ○ | ● | Fill tank with water. Check water tank is not missing or incorrectly positioned. |
| ○ | ○/● | ○ | ○ | ○/● | Coffee cycle has stopped due to lack of water. Fill tank with water. |
| ○ | ○ | ● | ○○ | Setting auto off automatic cut-off. | |
| ○ | ○ | ● | ○ | ● | Cleaning program requested or in process. |
| ○ | ○ | ○/● | ○ | ● | Cleaning program: preparing cleaning or rinsing cycle |
| ○○○ | ● | ○ | Setting coffee temperature. | ||
| ○○○ | ●● | Scale removal program requested or in process. | |||
| ○○○ | ○/●● | Scale removal program: preparing scale removal or rinsing cycle. | |||
| ○ | ○/● | ○ | ○/●● | Rinsing cycle or scale removal cycle: request to empty water tank, rinse it and fill with fresh water. | |
| ○ | ○ | ○/●○ | ○/● | ○ | Long rinse request (around 150 ml) see page 5. |
| ○ | ○ | ●●● | Long rinse in progress. | ||
| ○/● | ○/● | ○/● | ○/● | ○ | Constant flashing: operating fault. |
CONTENTS
PAGE
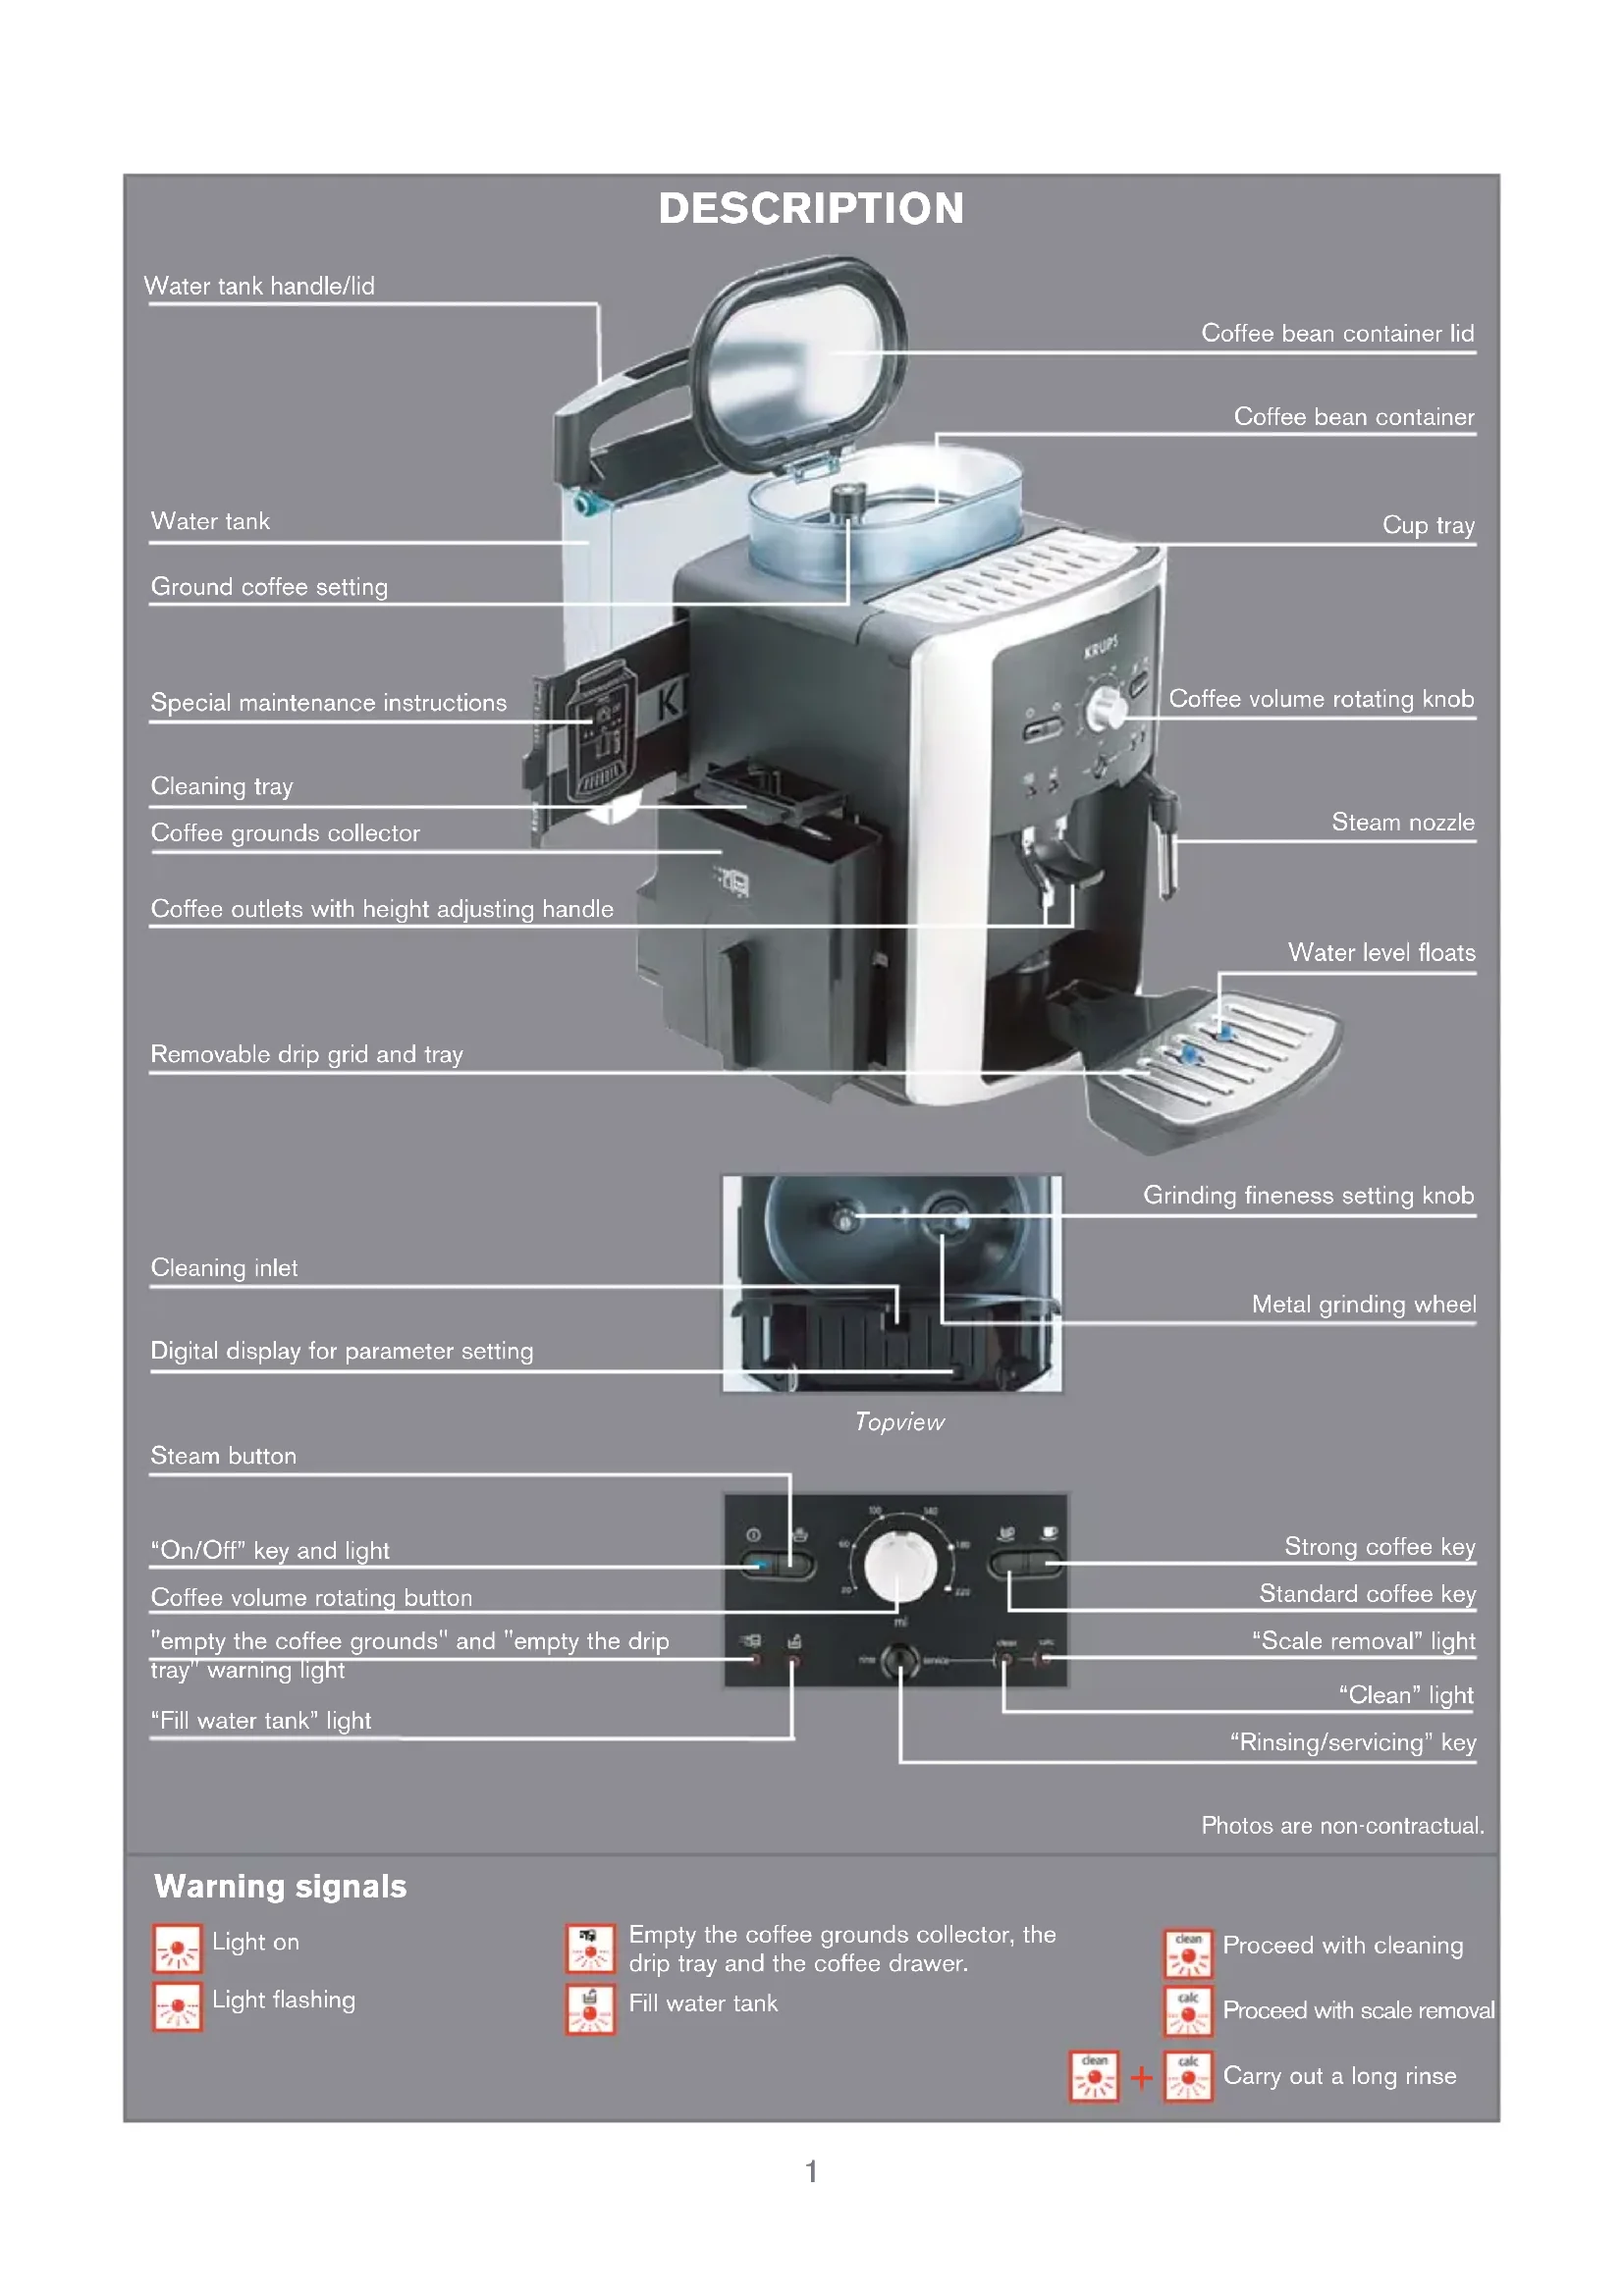
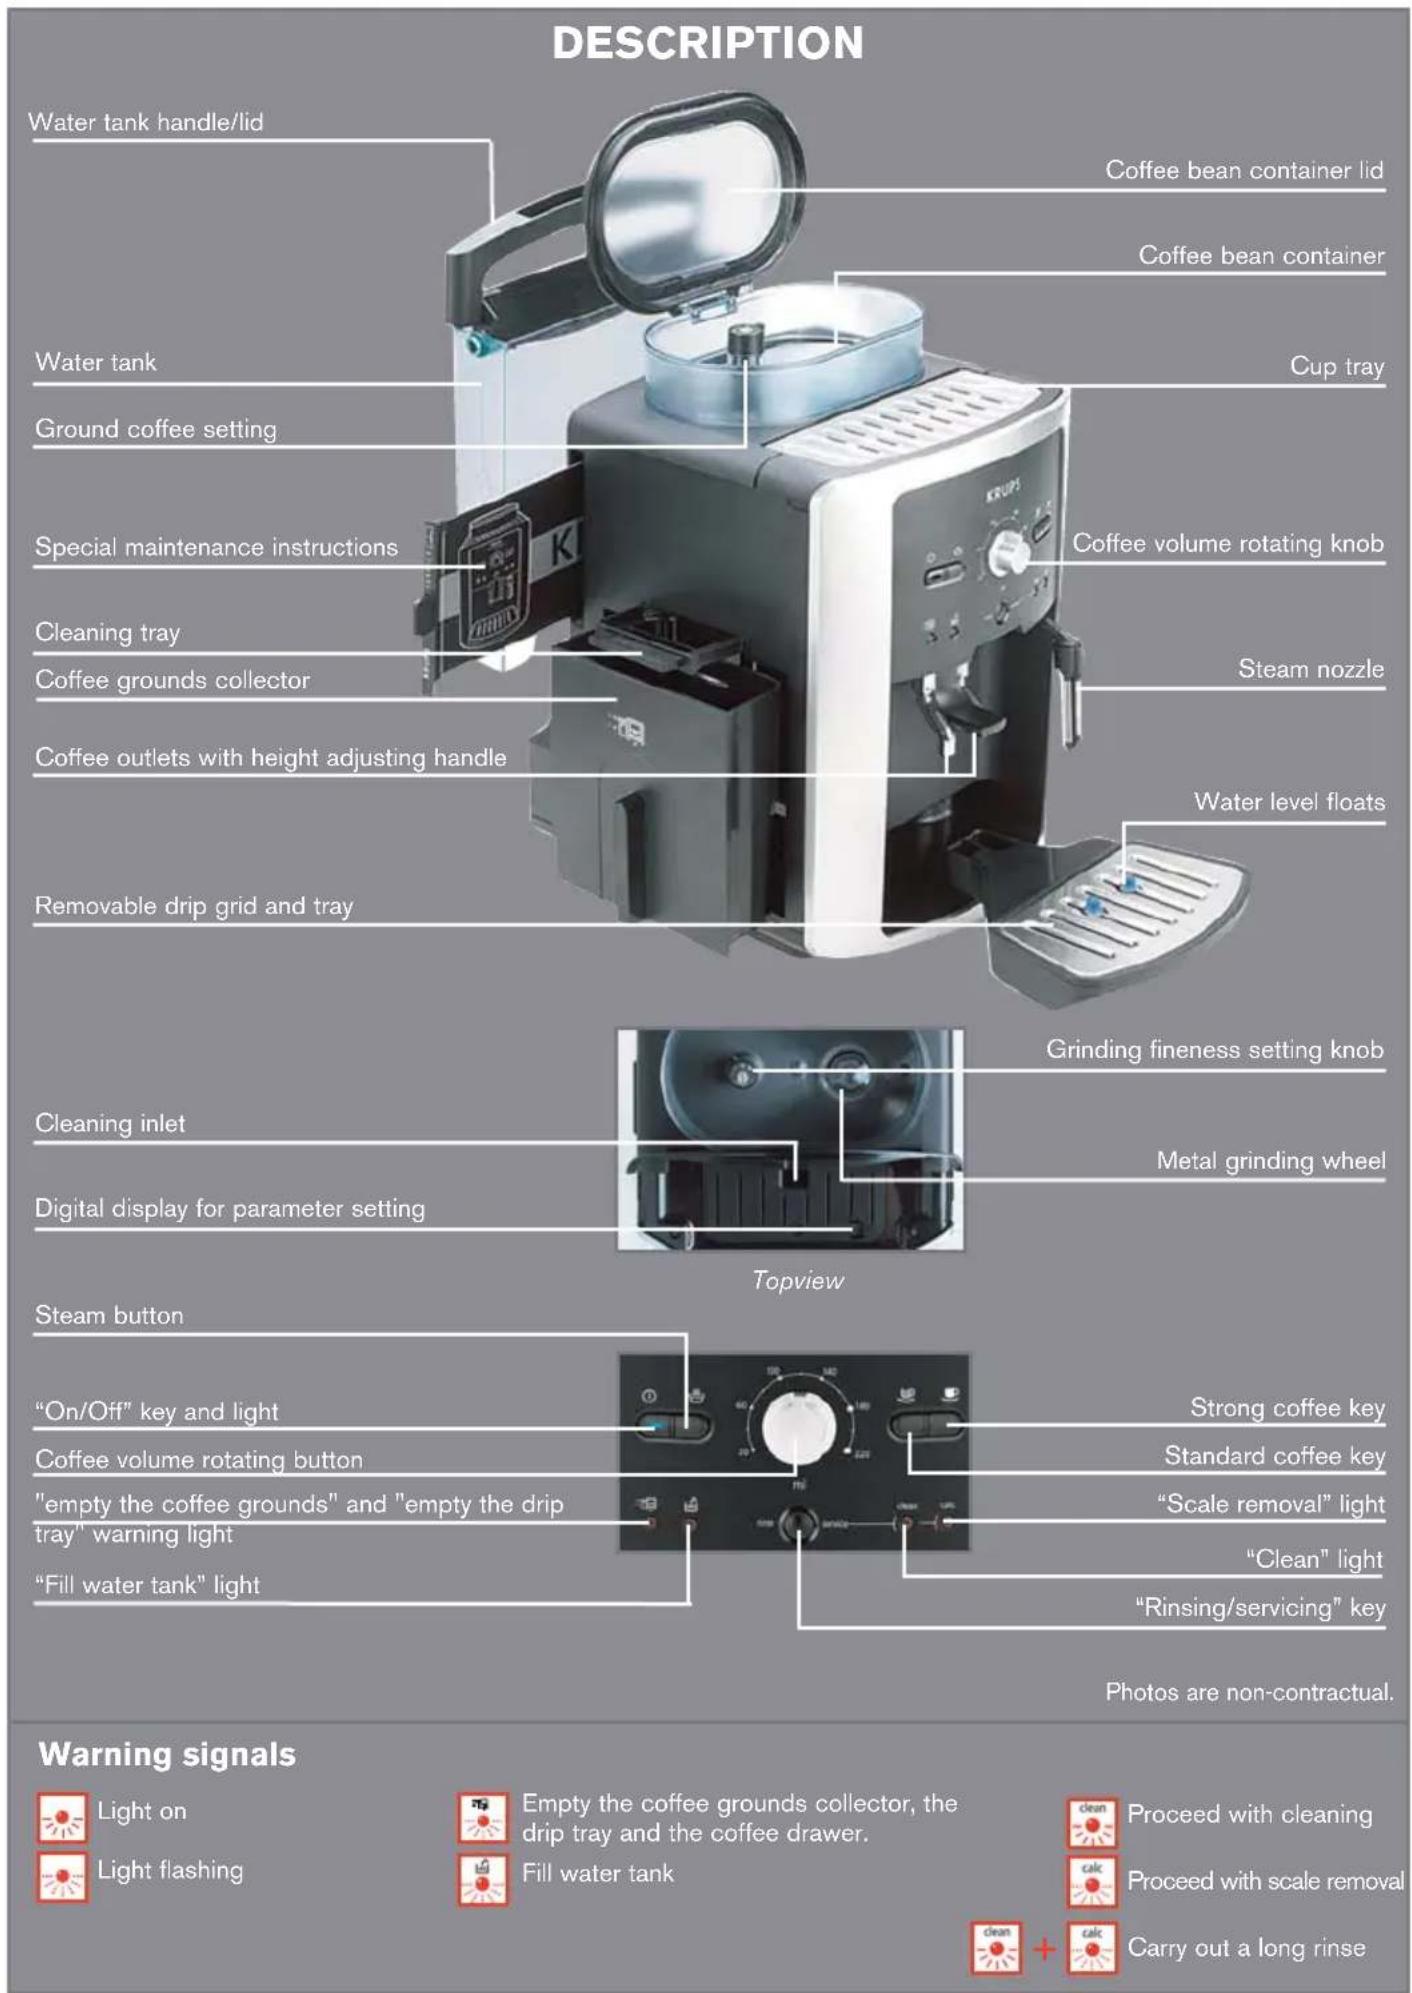
DESCRIPTION 1
Warning signals
Information on espresso coffee
Safety instructions
BEFORE FIRST USE 3
MEASURING WATER HARDNESS
CLARIS - AQUA FILTER SYSTEM CARTRIDGE
SETTING 4
SETTING WATER HARDNESS
SETTING COFFEE TEMPERATURE
SETTING THE AUTOMATIC ELECTRICAL POWER SUPPLY CUT-OFF MECHANISM
PREPARING THE APPLIANCE 5
RINSING OF CIRCUITS
PREPARING THE GRINDER
PREPARING ESPRESSO AND LONG COFFEEES 6
PREPARING AN ESPRESSO (FROM 20 TO 70 ML)
PREPARING A CUP OF COFFEE (FROM 80 TO 220 ML)
2-CUP FUNCTION
PREPARING STEAM 7
FROTHING MILK
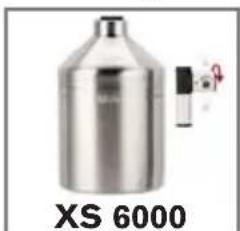
AUTO-CAPPUCCINO SET XS6000
MAINTAINING YOUR APPLIANCE 8
SCALE REMOVAL PROGRAM 10
LONG RINSING PROGRAMME
GENERAL MAINTENANCE 12
MOVING THE APPLIANCE
ELECTRICAL OR ELECTRONIC PRODUCT AT END OF SERVICE LIFE
TROUBLESHOOTING AND CORRECTIVE ACTIONS 13
RECIPES 14
accessories (sold separately)
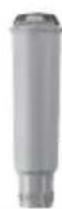
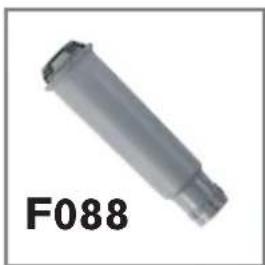
F088Claris
-Aqua Filter
System
Cartridge (not
supplied)
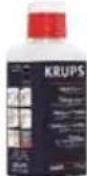
XS 4000
KRUPS
Cleaning fluid for Cappuccino system (not supplied)
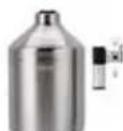
XS6000
Auto-
Cappuccino Set (not supplied)
F054
Dscaling
powder (one sachet supplied)
XS 3000
Packet of 10
cleaning
tablets (two)
tablets sup
plied)
Dear Customer,
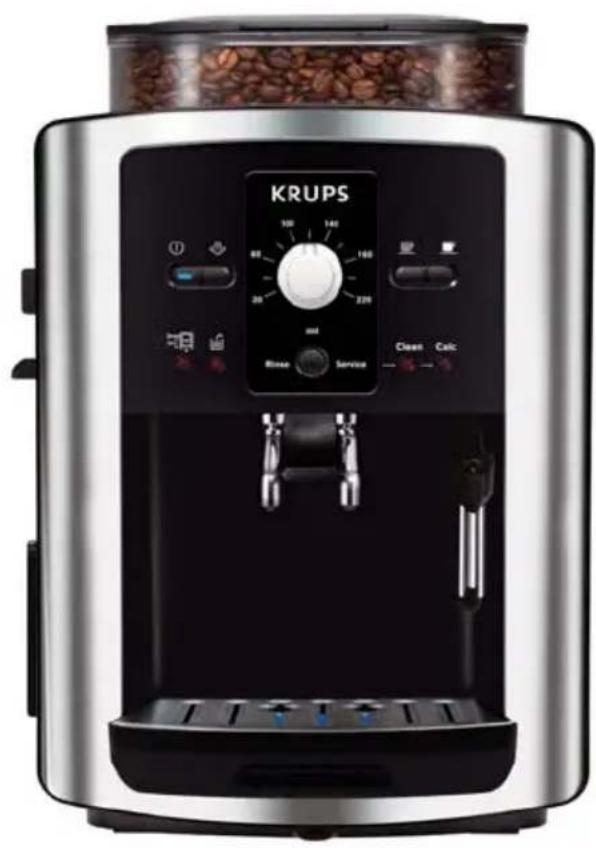
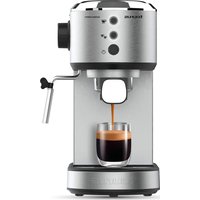
Thank you for having purchased this Krups Espresseria Automatic. We are sure you will enjoy both the quality of the coffee it makes and how easy it is to use.
Whether you want a short, strong shot of a ristretto, a good espresso, a bigger and milder lungo, or a creamy cappuccino, your automatic coffee / espresso machine has been designed so you can enjoy the same quality at home as at the bistro, whatever the time of day and right through the week.
Thanks to its Thermoblock System, its 15 bar pump and because it uses real coffee beans that are ground just before the coffee is made, your Espresseria Automatic will give you a drink containing maximum aroma, with a fine creamy golden brown top produced by the natural oils contained in coffee beans.
Drink your espresso from small porcelain cups rather than the usual coffee cup or mug.
To obtain an espresso at just the right temperature and a nice compact creamy top, we advise you to pre-heat your cup.
After a few trial runs you will find the type of mix and roast of the coffee beans that suits your taste. The quality of the water used is obviously another essential factor in the coffee you make.
Make sure the water has come fresh out of the tap (contact with the air tends to make it stagnant), that it is free from chlorine odours and is cold.
Espresso coffee is richer in aroma than a conventional filter coffee. Despite its stronger, longer-lasting taste, espresso in fact contains less caffeine than filter coffee (about 60 to 80mg per cup as compared with 80 to 100mg per cup). This is due to the shorter percolation time.
Due to the visibility of the containers and its automatic cleaning and scale removal programs, your Espresseria Automatic is extremely easy to use.
Important: Safety instructions
- Read the instructions for use carefully before first using your appliance and keep them for reference: Incorrect use of the appliance will release KRUPS from any responsibility.
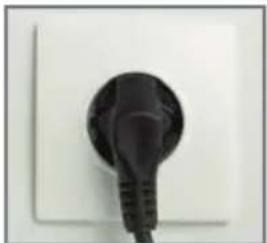
Place on a flat, stable, heat-resistant worksurface. - Connect the appliance only to an earthed mains socket. Check that the power supply voltage shown on the appliance's rating plate corresponds to that of your electrical installation.
- Make certain not to place the appliance near sources of heat such as a hot-plate or use it close to a naked flame.
- Immediately take the plug out of the socket if you notice any problem during operation.
Do not pull the power supply cord to remove the plug.
-Do not let the power supply cord hang down from a table or work surface.
Do not put your hand or the power supply cord on the hot parts of the appliance.
This appliance is not intended for use by persons (including children) with reduced physical, sensory or mental capabilities, or lack of experience and knowledge, unless they have been given supervision or instruction concerning use of the appliance by a person responsible for their safety.
Children should be supervised to ensure that they do not play with the appliance.
For safety reasons, do not use the appliance if the power supply cord or plug are damaged. Only have the power supply cord replaced by an authorised KRUPS service centre.
Always refer to the instructions when removing scale from the appliance.
Protect the appliance against humidity and freezing. - Do not use the appliance if it does not run correctly or if it has been damaged. In this case, have the appliance examined by a KRUPS authorised service centre (see list in KRUPS Service handbook).
- Apart from cleaning and scale removal in accordance with the appliance's user instructions, any intervention on the appliance must be performed by an authorised KRUPS service centre.
In the interests of safety, only use accessories and consumables authorised by KRUPS for your appliance.
Any error in connection negates the guarantee. - Disconnect the appliance as soon as you stop using if for a long period of time and when you clean it.
- All appliances are subject to stringent quality control. Practical tests using appliances taken at random are conducted and this may explain any slight marks showing prior to use.
- You are advised against using multiple plugs and/or extensions.
-Do not put water into the coffee bean container and/or under the servicing flap.
Be careful of the direction of the steam nozzle as steam can cause scalding. - Failure to ensure scale removal, cleaning and regular maintenance or the presence of foreign particles in the grinder will mean that the guarantee will be negated.
Limits to use
This Esso machine must only be used to prepare espressos or coffee, to froth up milk and heat liquids. This product has been designed for domestic use only. Any commercial use, inappropriate use or failure to comply with the instructions, the manufacturer accepts no responsibility and the guarantee will not apply. It is not designed for commercial or professional use.
BEFORE FIRST USE
MEASURING WATER HARDNESS
Before using the appliance for the first time or if you have noted a change in water hardness, it is advisable to adapt the appliance to the water hardness. To determine the water hardness, use the measuring stick delivered with your appliance or get in contact with your water authority.
| Degree of hardness | 0 Very soft | 1 soft | 2 moderately hard | 3 hard | 4 extremely hard |
| °f | <5,4° | >7,2° | >12,6° | >25,2° | >37,8° |
| °dH | <3°>4°>7° | >14°>21° | |||
| °e | <3,75° | >5° | >8,75° | >17,5° | >26,25° |
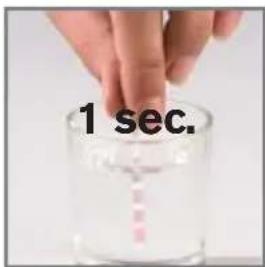
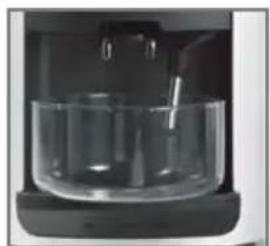
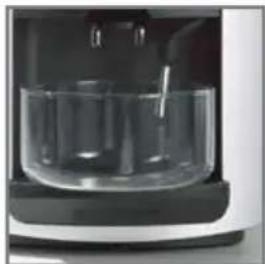
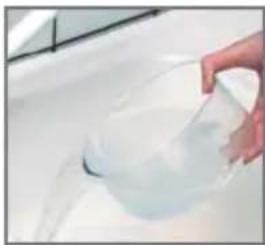
Fill a glass with water and immerse a stick into it.
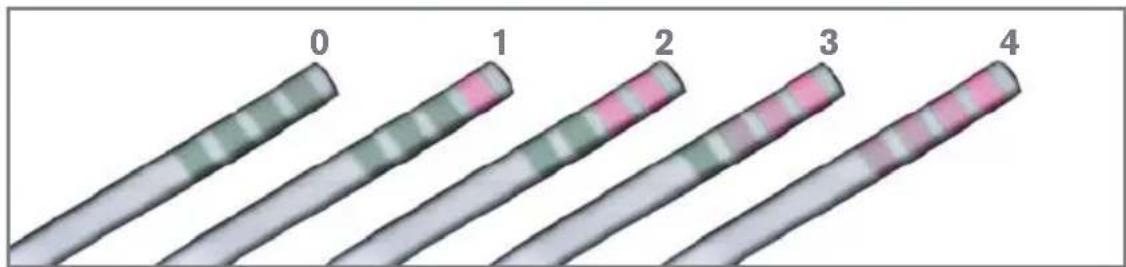
After 1 minute the hardness measurement will appear (moderately hard water).

Use filtered water, but not bottled mineral water.
CLARIS - AQUA FILTER SYSTEM F 088 CARTRIDGE (SOLD SEPARATELY)
To get the best taste from your coffee and extend your appliance's service life, we advise you to use the Claris - Aqua Filter System cartridge sold as an accessory.
It comprises a scale-removing substance and activated carbon that reduces chlorine, impurities, lead, copper, pesticides, etc. that are present in the water. Minerals and trace elements will then be preserved.
Filter the water using the Claris-Aqua Filter System cartridge to reduce carbonate hardness by as much as 75% *
Chlorine - up to 85% *
Lead-up to 90%
Copper - up to 95%*
Aluminium - up to 67%*
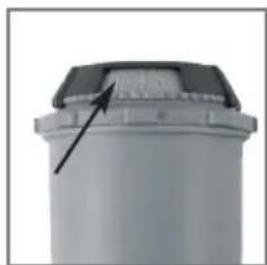
Mechanism to indicate the month the cartridge was fitted and when to replace it (after 2 months at most).
Installing the cartridge in the machine.
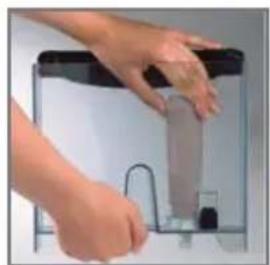
On first use, screw the filter cartridge into the bottom of the water tank.
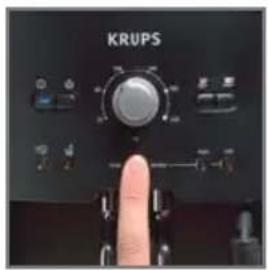
Place a receptacle under the steam nozzle. Run 300 ml of water by pressing the rinse button once for more than 3 seconds. You can repeat this operation if you wish.

The Claris cartridge needs to be replaced after about every 50 litres of water or every two months at least.
- indications provided by the manufacturer
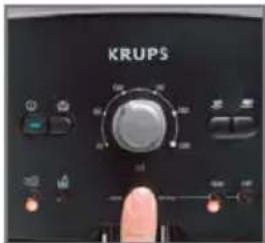
SETTINGS
Connect the appliance to the mains power supply but do not turn it on.
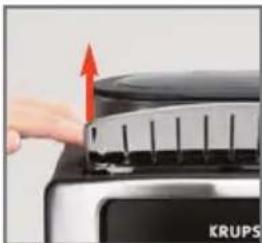
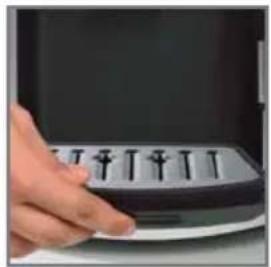
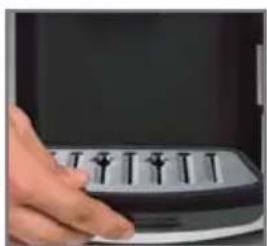
Lift the cup grid by pressing on the back to make it tilt.
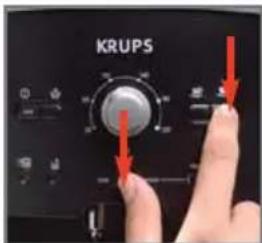
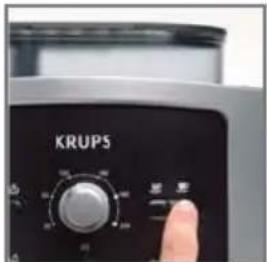
Press the Service' and keys at the same time.
The digital display for parameter setting is under the servicing flap.
Look down vertically to the bottom of the window
Setting water hardness
Appliances are pre-set in the factory for hardness level 3.
The "water tank" light will come on.


Press the key as many times as are needed to select the hardness level for the water used.
0=verysoft
1=soft
2 = moderately hard
3=hard
4 = veryhard
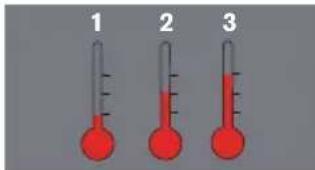
Setting the coffee temperature
Appliances are pre-set in the factory to 2, average temperature.
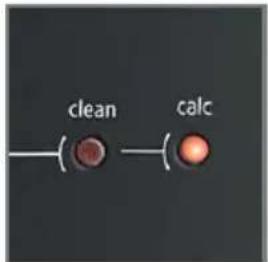
The 'calc' light will come on.

Press the key as many times as are needed to select the desired coffee temperature.

Setting the automatic electrical power supply cut-off (auto-off)
Appliances are pre-set in the factory to 1 hour.
It is possible to turn your machine off automatically after a number of pre-programmed hours. Press the steam key to switch to automatic cut-off setting

The 'clean' light will come on.


Press the key as many times as are needed to select the desired duration.

1=1H
2 = 2H
3 = 3H
4=4H

At each of these stages, you can memorise your settings by pressing the ① button when you have reached the setting you want (the 4 lights flash 2 times) or carry on with the procedure. These settings will remain memorised even if the electrical power is cut off. You can modify these settings at any time by repeating these operations.
PREPARING THE APPLIANCE

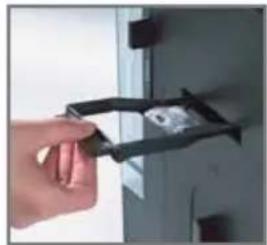
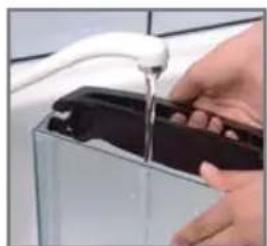
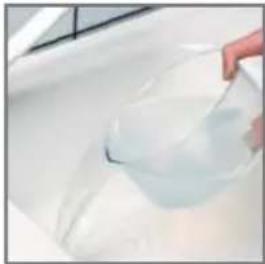
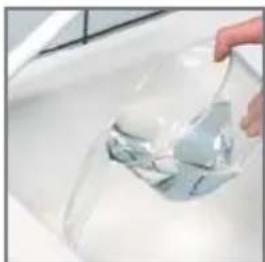
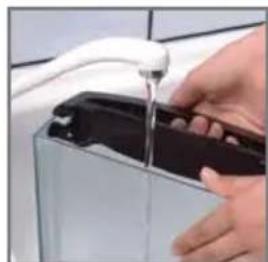
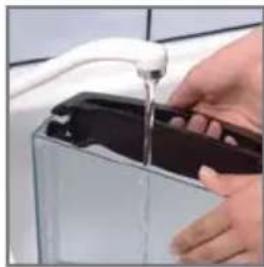
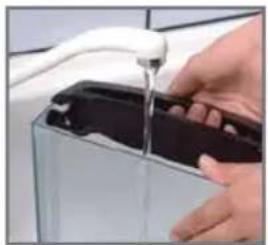
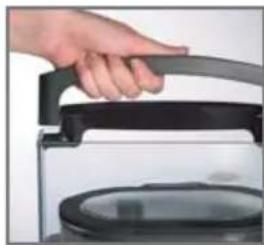
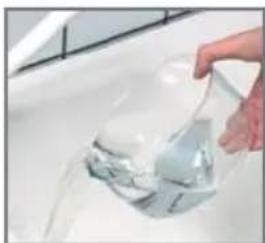
Pull out and fill the water tank.

Put it back in place by pressing firmly and close the lid again.
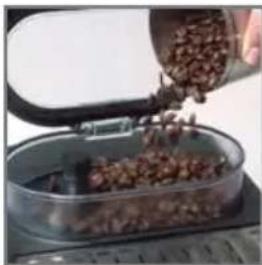
Open the coffee bean container lid. Add the coffee beans (250 g maximum).
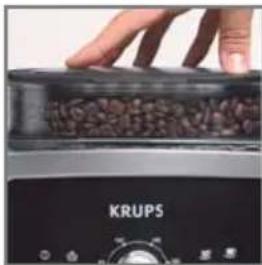
Close the coffee bean container lid again.

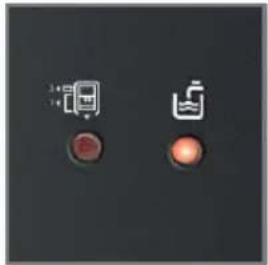
Do not fill the water tank with hot water, mineral water, milk or any other liquid. If you turn on the appliance when the water tank is not in place or not correctly filled (under the "min." level), the "fill water tank" light will come on and making an espresso or a cup of coffee will be made impossible.

NEVER PUT GROUND COFFEE IN THE COFFEE CONTAINER.

It is recommended that you do not use oily, caramelised or flavoured coffee beans for this machine. These kinds of beans may damage the machine.

Check that the coffee beans do not contain any foreign particles such as grit, as any damage caused by the presence of foreign particles will negate the warranty.
Do not put water into the coffee bean container.
Remember to fit the drip tray to avoid waste water flowing onto the work surface and staining it or scalding you.
Check that your water tank is clean.
RINSING OF CIRCUITS

Turn the appliance on by pressing the ① button. The light ① will flash during the pre-heating and initialisation cycle.

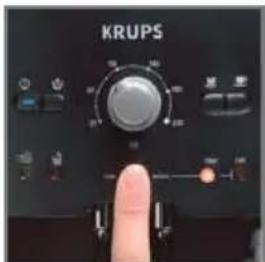
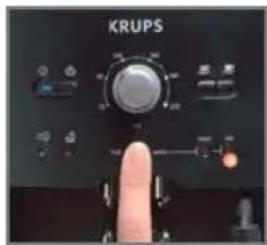
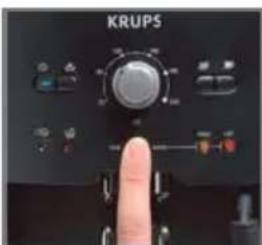
Rinsing out the coffee circuit: Place a recipient of at least 0.5L under the coffee and steam nozzles. Press the 'Service' button quickly to start a coffee circuit rinsing cycle, which will automatically stop after around 40~mL .
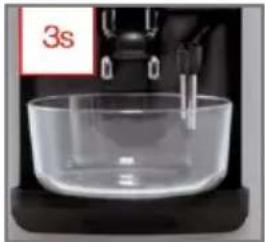
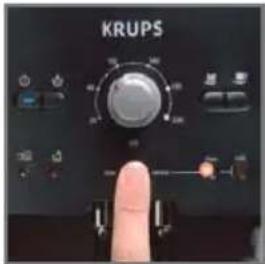
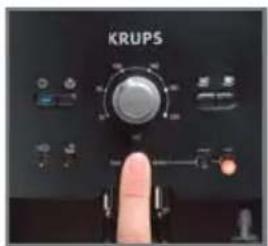
Rinsing out the steam circuit: Press the 'Service' button for 3 seconds to start a steam circuit rinsing cycle, which will automatically stop after around 300~mL

It is preferable to rinse the 2 circuits out at least once after the machine has not been used for several days. Each time you plug your machine in, it will carry out an initialisation cycle.
PREPARING THE GRINDER
You can choose the strength of your coffee by setting the coffee bean grinding fineness.
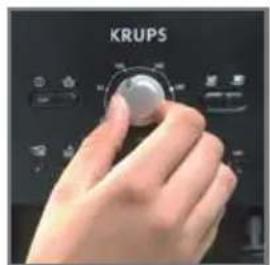
The finer the grinding setting, the stronger and creamier the coffee should be. Set the desired fineness for grinding by turning the 'Grinding fineness setting' knob.
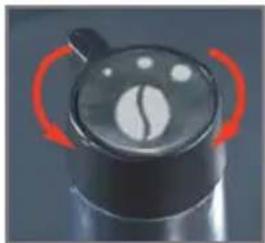
Turn to the left for finer grind.
Turn to the right for coarser grind.

CHANGE THE SETTING DURING GRINDING.
NEVER FORCE THE GRINDING FINENESS SETTING BUTTON
PREPARING ESPRESSO AND LONG COFFEEES

YOUR APPLIANCE IS DESIGNED TO MAKE COFFEE FROM COFFEE BEANS ONLY.
When you first make coffee with the machine or after a long period of absence or a cleaning or scale removal procedure, a little steam and hot water will come out of the steam nozzle (priming).
Splashing or scalding may occur if the coffee outlets are set too high in relation to the size of the cups.
PREPARING AN ESPRESSO (FROM 20 TO 70 ML)
The quantity of water for an espresso must be between 20 and 70ml
Each time you plug your machine in, it will carry out an initialisation cycle.
Press the button ① . The light will flash during the pre-heating and initialisation cycle.
You have now prepared your appliance.
The light will stay on.
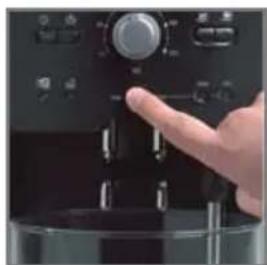
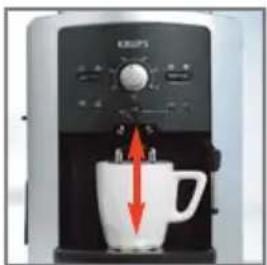
Put a cup under the coffee outlets.
You can lower or raise the coffee outlets to suit the size of your cups.

Select the key to get a strong espresso or the key to get a standard espresso.
You can change the volume of water at any time.
To stop coffee flowing into the cup, you can either again press one of the or keys or turn the knob to the min. position.
PREPARING A CUP OF COFFEE (FROM 80 TO 220 ML)
The quantity of water for a cup of coffee must be between 80 and 220ml

The ground coffee is moistened with a little hot water after the grinding stage.
A few moments later, percolation as such starts.
Beyond a certain amount of coffee in the cup, we recommend - in order to obtain a stronger coffee - to divide your preparation into two separate cycles. Example 2 x 70ml cycles for a cup of 140 ml.

DO NOT REMOVE THE WATER COMPARTMENT BEFORE THE END OF THE CYCLE
(that is around 15 seconds after the coffee has finished dripping through).
2-CUP FUNCTION
You can use your appliance to make 2 cups of coffee or espresso. Remember not to remove the cups after the first cycle. You have now prepared your appliance. The light will stay on.

Put two cups under the coffee outlets.
You can lower or raise the coffee outlets to suit the size of your cups.
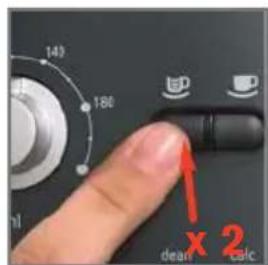
Select the key or key according to your choice, pressing twice rapidly in succession. The light will come on with a double flash to confirm that you have ordered 2 cups of coffee.
The appliance will automatically sequence 2 complete coffee-making cycles.

If you first press the key and then the (or vice versa), the second action will not
be taken into account.
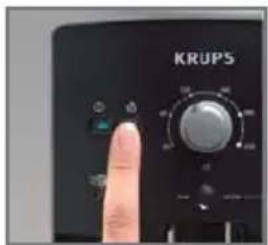
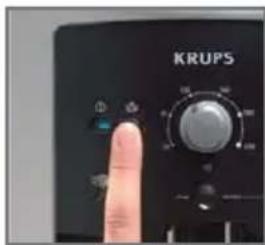
PREPARING STEAM
Steam froths up the milk to make a cappuccino or a caffe latte, for example, and also heats up liquids. As you need a higher temperature to produce steam than to make an espresso, the appliance runs an additional pre-heating phase for steam.

Press the key
The light will flash while the appliance heats up.
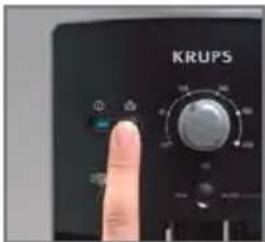
Once pre-heating has been completed, the light will remain on continuously and you can start producing steam by again pressing the key.
Press the button again to stop the cycle

Be careful, because the cycle does not stop immediately.
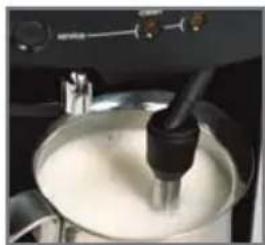
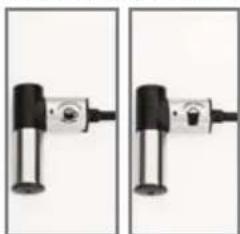
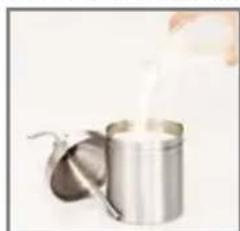
FROTHING MILK

We recommend that you use pasteurised or UHT milk that has been recently opened. Untreated milk does not give the best results. After the steam function has been used, the nozzle can be hot, and we recommend that you wait for a few moments before handling it.
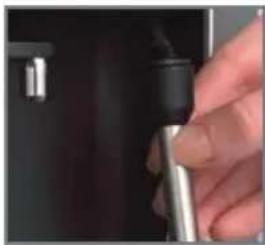
Check that the steam nozzle is correctly fitted.
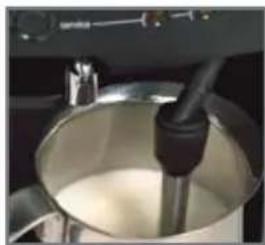
Pour the milk into your milk jug.
Immerse the nozzle in the milk.
Initiate the steam function as explained in the paragraph above.
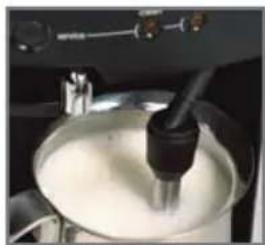
Once your milk is frothy enough...
...again press the key to stop the cycle. Be careful, because the cycle does not stop immediately.

To remove any remaining milk from the steam nozzle, place a receptacle under the nozzle and press the key.
Let the steam escape for at least 10 seconds and then again press the key to stop the process.


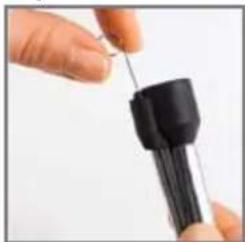
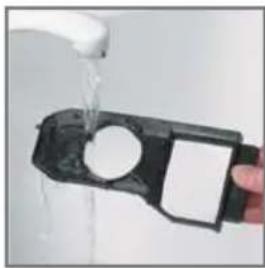
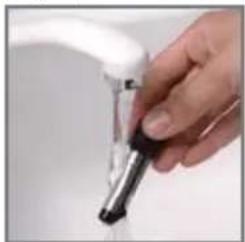
The steam nozzle can be removed for more intense cleaning. Wash it out with water and a little washing up liquid and a small non-abrasive brush. Rinse and dry it. Before putting it back, ensure that the air inlet holes are not blocked by any milk residues. If necessary, unblock them using the needle supplied. Do not wash the steam nozzle in the dishwasher.

To interrupt the steam function, just press any key. Be careful as the nozzle may be hot.
If the nozzle is blocked, unblock it using the needle supplied.
The maximum duration for production of steam per cycle is limited to 2 minutes.
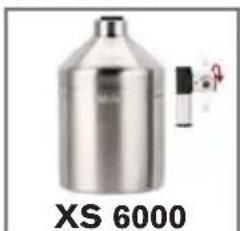
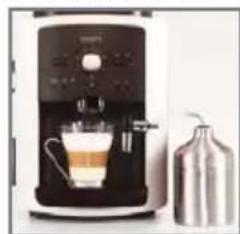
SETTING UP THE AUTO-CAPPUCCINO XS 6000 (SOLD SEPARATELY)
This auto-cappuccino accessory makes it easier to make a cappuccino or a caffe latte.
Attach the various parts together.

Select the cappuccino or caffe latte position on the special nozzle.

Fill up the milk pot and place a cup or a glass underneath the autocappuccino nozzle.
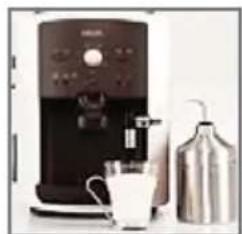
Press the button to start and then to stop the cycle

Place your cup under the coffee outlets and start a coffee / espresso cycle.

To prevent milk from drying on the auto-cappuccino accessory, it must be cleaned thoroughly. It is recommend that you wash it immediately by carrying out a cycle with steam and the accessory pot filled with water in order to clean the inside of the nozzle. To do so, you can use liquid cleaner XS4000, available as an accessory.
MAINTAINING YOUR APPLIANCE
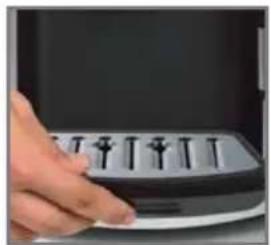
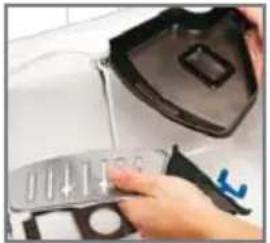
The drip tray receives waste water and the coffee grounds collector receives used coffee grounds. The coffee cleaning tray allows you to eliminate any deposits of coffee grounds.
If the light comes on, remove, empty and clean the drip tray.
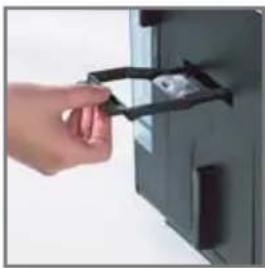
Remove the coffee cleaning tray.
Clean it under water and dry thoroughly.
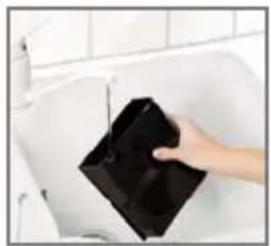
Remove, empty and clean the coffee grounds collector.
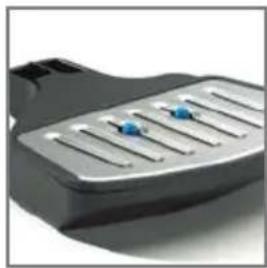
The drip tray is equipped with floats to tell you when to empty it.

As soon as you remove the coffee grounds collector, you will have to empty it completely to avoid any overflow.

The light will remain on if the coffee grounds collector is not slotted in fully or not fitted correctly or if it has been put back in less than 4 seconds. You cannot make espresso or coffee while the light is on or is flashing. The coffee grounds collector has a maximum capacity of 14 coffees.
RINSING OUT THE COFFEE CIRCUIT: SEE PAGE 5
MACHINE CLEANING PROGRAM - TOTAL DURATION: ABOUT 20 MINUTES

When a cleaning operation is necessary, the appliance warns you of this by flashing the "clean" light. This program is only accessible when the machine requests it (i.e. approximately every 300 coffees or espressos).

Caution! To benefit from the guarantee conditions, it is essential to perform the appliance cleaning cycle when informed to do so. Be sure to follow the procedure closely, step by step. You can continue to use the appliance when the light is on, but you are advised to perform the program as soon as possible.
Press the Service button to start up the cleaning program. The 'clean' and lights will flash.
Remove and clean the cleaning tray then fit it again.

Empty and clean the coffee grounds collector then fit it again. The light will go off.


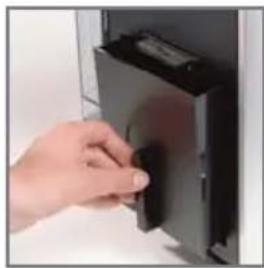
Remove and empty the drip tray.
Remove, fill and re-fit the water tank.

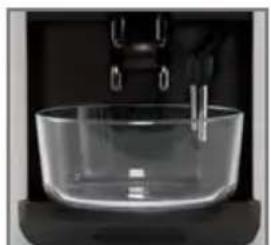
Place a receptacle with a minimum capacity of 0.6 I under the coffee outlets.

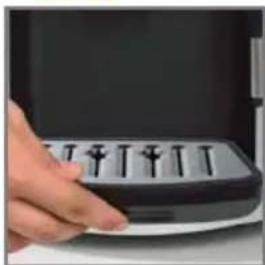
Open the servicing flap and insert a KRUPS cleaning tablet (XS3000) in the cleaning inlet.

Press the 'Service' button to start up the cleaning program.
1 - Cleaning cycle

± 10m
The 'clean' light becomes steady.
The cleaning cycle will be run automatically.
The pump sucks up water intermittently. This operation lasts about 10 minutes and the 'clean' light will flash again.


Empty your waste water receptacle and put it back under the coffee outlets.
Again press the 'Service' button to start the first rinsing cycle.
2 - First rinsing

±5mn
The clean light will become steady again.
The program continues.
A first rinsing cycle will be run automatically. It allows the
applianle to be rinsed and remaining detergent to be elimina
ted. This first rinsing cycle lasts about 5 minutes and once fin
shed the clean light will flash again.

Empty your waste water receptacle and put it back under the coffee outlets.
Again press the Service' button to start the second rinsing cycle.
3 - Second rinsing

±5mn
The 'clean' light again becomes steady.
A second cleaning cycle will be run automatically. This second rinsing cycle lasts about 5 minutes.
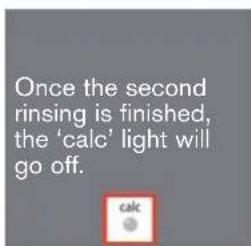
Once the second rinsing cycle has finished, the 'clean' light will go off.

Remove and empty your waste water receptacle.

Empty the drip tray and fit it again.
Fill your water tank.
Your appliance will be ready for use again.

If there is not enough water in the water tank when you start the program, the light will come on to warn you. Add the appropriate amount of water to the container and cleaning will continue automatically
If you press the ① key during cleaning or in the event of power failure, you will have to restart the cleaning program right from the start. This is essential due to water circuit rinsing reasons. In this case, you will need to use another cleaning tablet. Be sure to complete the entire cleaning cycle to avoid any risk of irritation (seek medical advice if cleaning solutions are accidentally swallowed.
The cleaning cycle is a continuous cycle. Do not put your hands under the coffee outlets during the cycle.

Only use KRUPS (XS3000) cleaning tablets. We cannot be held responsible for any damage that may result from the use of tablets from other brands. You can obtain cleaning tablets from KRUPS Service Centres.
Ensure work surfaces are protected during cleaning cycles, especially if they are made from marble, stone or wood.

Make certain to protect your work surface during cleaning and scale removal cycles, especially if they are made of marble, stone or wood.
SCALE REMOVAL PROGRAM - TOTAL DURATION: ABOUT 22 MINUTES.

The quantity of scale deposited depends on the hardness of the water used. The appliance will automatically warn you by the 'calc' light coming on when you need to proceed with scale removal. This program is only accessible when the machine requests it.

Caution! To benefit from the guarantee conditions, it is essential to perform the appliance scale removal cycle when informed to do so. Be sure to follow the procedure closely step by step.
You can continue to use the appliance when the light is on, but you are advised to perform the program as soon as possible.

If your appliances fitted with our Claris - Aqua Filter System F088 cartridge, please remove the cartridge during the descending operation.

Make certain to protect your work surface during cleaning and scale removal cycles, especially if they are made of marble, stone or wood.

Press the Service key to start up the scale removal program. The calc and lights will flash.
Remove and clean the drip tray.


Place a receptacle with a minimum water capacity of 0.6 l under the coffee outlets and under the steam nozzle.
Empty the tank and fill it with lukewarm water up to the 'calc' marking.

Dissolve a sachet of Krups scale remover F054 (40 g).

Only use KRUPS scale removal products, citric acid or tartaric acid. You can obtain scale remover from KRUPS Service Centres. In no event must you use conventional starchy sulphonic acid or other products containing that acid. The manufacturer may not be held responsible for damage to the appliance through use of other products.
1 - Descaling cycle
± 10 ~mm
The 'calc' light stops blinking.
The descending cycle starts and is carried out automatically. The pump occasionally sucks up water which comes out of the coffee nozzles and then the steam nozzle. This operation lasts approximately 10 minutes.

Put the water tank back in place. The light turns off and the 'calc' light stops blinking.
Press the 'Service' button after having carried out all of these operations.
When the cycle has completed, the 'water tank' and 'calc' lights blink.


2 - First rinsing
±6mn
A first rinsing is needed to eliminate the remaining scale remover. This cycle is run automatically. It lasts about 6 minutes.
Empty your receptacle full of waste water.
Empty the drip tray and then put it back again together with the receptacle as previously.
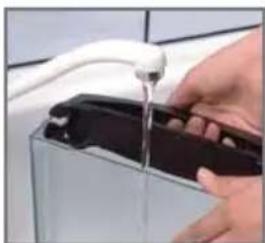
Empty, clean and rinse the water tank and then fill it again up to the "Max. level.
Replace your water tank. The 'calc' light will flash and the light will go off.
Press the Service' key. The calc light will become steady. The automatic cycle will last 6 minutes.


3 - Second rinsing

At the end of the first rinsing, the 'calc' light will flash. A second automatic cycle will last 6 minutes.
±6mn
Remove your waste water recipient and the drip tray then fit them again.
Again press the 'Service' key. The 'calc' light will become steady. A second automa cycle will last 6 minutes.

Empty the drip tray and then fit it again.
Empty and then fill your water tank.
Your appliance is now ready for use again.

If there is not enough water in the water tank, you will be warned by the light.
Add the appropriate amount of water to the tank and scale removal will continue automatically.
If the coffee grounds collector is not fitted you will be warned by the light flashing.
Fit the collector again for the cycle to continue automatically.
If a power failure occurs during the cycle, you will have to start it up again from the start.

Be sure to complete the entire scale removal cycle to avoid any risk of intoxication.
The scale removal cycle is a continuous cycle. Do not put your hands under the coffee outlets during the cycle.
LONG RINSING PROGRAM

When the cycle has completed, the 'water tank' and 'calc' lights blink.

Remove, fill and replace the water tank.
Under the coffee outlets and steam nozzle place a recipient that can contain at least 0.15 L.
Launch the long rinse program by pressing on the "Service" button. The "clean" and "calc" lights stop blinking.

When the long rinsing program is complete, the "clean" and "calc" lights turn off
GENERAL MAINTENANCE
Always remove the power supply cord from the socket and let your appliance cool down before cleaning it. Do not use utensils or cleaning products likely to scratch or corrode the appliance. Wipe the body of the appliance on the outside using a moist cloth.
Clean the cleaning drawer, the drip tray, the coffee grounds collector and the drip tray grid using warm water and washing up liquid detergent.

Rinse the water tank with fresh water.

These parts are not designed to go into the dishwasher.
MOVING THE APPLIANCE
Keep the packing and use it again to move the appliance.

If the unpacked appliance is dropped, it is advisable to have it inspected by an authorised Service Dealer.
ELECTRICAL OR ELECTRONIC PRODUCT AT END OF SERVICE LIFE
Let's all help protect the environment!
1 Your appliance contains many recyclable materials that can be re-used.
Take it to a civic waste collection point.
TROUBLESHOOTING, CORRECTIVE ACTIONS
| The appliance does not turn on after I press the ① button. | Check that the power supply cord plug is correctly inserted in the socket. |
| Water or steam are coming out of the steam nozzle unexpectedly. | If used often, some drops of water may run out of the steam nozzle. |
| The espresso or coffee is not hot enough. | Change the coffee temperature setting. Heat the cups by rinsing them under hot water. |
| The coffee is too weak or not strong enough. | Check that the coffee bean compartment contains coffee and that it is running through properly. Avoid using oily, caramelised or flavoured coffee beans. Reduce the volume you have selected using the knob. Select the ② button. Turn the fineness of grind button to the left to obtain a finer grind. Make your coffee in two separate cycles by using the 2 cup function. |
| The coffee flows too slowly. | Turn the fineness of grind button to the right to obtain a coarser grind (may depend on the kind of coffee being used). Carry out one or more rinsing cycles. |
| The coffee is not creamy enough. | Turn the fineness of grind button to the left to obtain a finer grind. Remove the Claris cartridge. |
| The machine has not produced any coffee | An incident has been detected during the coffee making process. The machine automatically re-initialises and is ready for a new cycle. |
| You used ground coffee instead of coffee beans. | Use your vacuum cleaner to remove the ground coffee in the coffee bean container. |
| The grinder is making an unusual noise. | There is a foreign body in the grinder. Contact the Krups Consumer Service. |
| The grinding fineness button is difficult to turn. | Only adjust the grinder when it is operating. |
| Steam does not come out of the nozzle. | After having turned the machine off and left it to cool Clean and unblock all of the openings in the nozzle using the needle supplied (cf page 7). Unblock the opening of the steam nozzle support pipe using a needle. Remove the Claris cartridge. |
| Not enough froth on the milk. | Check that the steam comes out of the nozzle, dry the little air inlet at the top of the nozzle if necessary. Use a cold recipient and recently opened milk. Possibly change the brand or type of milk (UHT or pasteurised). |
| The milk froth is too bubbly. | Check that the 2 ends of the small stainless steel tube in the flexible part of the steam nozzle are fitted together properly. |
| The Auto-Cappuccino accessory does not suck up the milk (accessory sold separately) | Check that the tube that goes into the milk is not blocked. Check that the flexible tube is fitted tightly into the accessory to prevent air getting in. After having turned the machine off and left it to cool, unblock the outlet of the Auto-Cappuccino accessory. |
| The cleaning or descaling program will not start. | These programs are only possible when the machine requests them ('clean' or 'calc' light on). |
| After having filled the water tank, the light remains on. | Check for correct positioning of the tank in the coffee maker. Check that the float at the bottom of the tank moves freely. Rinse the accessory and if necessary remove scale. |
| After having emptied the coffee grounds collector, the light remains on. | Remove the collector, make certain that it is empty, wait for 8 seconds and then fit it again. Check that the cleaning tray is correctly pushed in. |
| A power failure occurred during a cycle. | The appliance will re-initialise automatically when power is turned on and be ready for a new cycle. |
| There is water or coffee under the appliance. | The drip tray is overflowing. Empty it. Check for correct positioning of the drip tray |
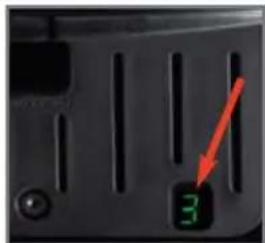
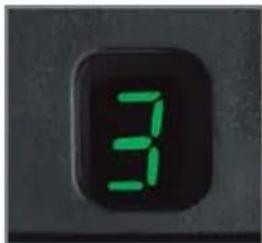
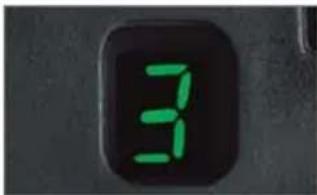
| The 4 red lights flash permanently. | Unplug the machine, remove the Claris cartridge, wait for 20 seconds and then turn it all back on. If the fault persists, note the number which appears on the display under the cup tray and contact the Krups Consumer Service. |

Here are some recipes you can make using your Espresseria Automatic:
Cappuccino
For a cappuccino, the ideal proportions are as follows: 1/3 hot milk, 1/3 coffee, 1/3 milk froth.
Caffe Latte
To make coffee with milk, also often called Latte Macchiato, the proportions are as follows: 3/5 hot milk, 1/5 coffee, 1/5 milk froth.
- For these milk-based preparations, it is best to use cold skimmed milk straight from the refrigerator (ideally between 6 and 8^ C).
To finish off, you can sprinkle with cocoa.
- Café Crème
-
Prepare a conventional espresso in a large cup.
-
Add a little cream to get a café crème.
- Café correto*
Prepare a cup of espresso as usual.
- Then add 1/4 or 1/2 of a liqueur glass of Cognac to taste. You can also use anisette, brandy, Sambuca, Kirsch or Cointreau. There are many other ways to give some punch to your espresso. Just use your imagination.
- Coffee liqueur*
-
Mix 3 cups of espresso, 250g of brown sugar candy and 1/2 litre of Cognac or Kirsch in an empty 0.75 litre bottle.
-
Leave the mixture to marinate for at least 2 weeks.
You will obtain a delicious liqueur. A real treat for coffee lovers.
Italian style iced coffee
4 scoops of vanilla ice-cream, 2 cups of espresso with sugar to taste, 1/8 I milk, fresh cream, grated chocolate.
-
Mix the cold espresso with the milk.
-
Serve the scoops of ice-cream into the glasses, pour the coffee onto them and decorate with fresh cream and grated chocolate.
-
Add a small glass of rum to a cup of sweetened espresso.
-
Decorate with a good layer of fresh cream and serve.
Flambéed espresso*
2 cups of espresso, 2 small glasses of Cognac, 2 teaspoons of brown sugar, fresh cream.
-
Pour the Cognac into heat-resistant glasses, heat and light.
-
Add the sugar, mix, pour in the coffee and decorate with fresh cream.
- Espresso parfait*
2 cups of espresso, 6 egg yolks, 200g sugar, 1/8 litre of sweetened fresh cream, 1 small glass of orange liqueur.
- Beat the egg yolks with the sugar until it forms a thick, frothy mass.
- Add the cold espresso and the orange liqueur.
- Then mix in the whipped fresh cream.
- Pour the mix into saucer champagne glasses or ordinary.
- Put the champagne glasses in the freezer.
(^* : Remember, over-indulgence in alcohol is bad for the health.)

KRUPS
ESPRESSERIA AUTOMATIC

BEREIDING MET STOOM 7
OPSCHUIMEN VAN MELK
AUTO-CAPPUCINO-SET XS6000
ONDERHOUD VAN UW APPARAAT 8
LEGEN VAN DE KOFFIEDIK-OPVANGBAK, DE KOFFIELADE EN
HETLEKBAKJE
SCHOONSPOELEN VAN HET KOFFIE CIRCUIT
REINIGINGSPROGRAMMA
ONTKALKINGSPROGRAMMA 10
LANG SPOELPROGRAMMA
ALGEMEEN ONDERHOUD 12
TRANSPORT VAN HET APPARAAT
PROBLEMAS E SOLUÇões
INPINTHN INPQTH XPHSH 3
MToPOnTnC OkAnpTnTaC Tou Vepou
KaoTα Claris - Aqua Filter System (Σuστημα)
PuOmuoi 4
Puθμlon tnc oλnpTntac tou vερou
Puθμlon TnC θερμokpασiατou kaΦ
Tou diokou oulloync uypov
E□AuaTou ouotnauTOCpoetoumaoiac Tou ka
Póγαμα καθαρισου
PpOpypaumaxaXaALaTawonC 10
H PYOMIEH IPEI E NA AAAA EI KATA THN IOPEIA TOY AAEEMATO. NOTE MH IYPNATE TO DIAKONTH PYOMIEH T H AENTOTHTA TOY AAEEMATO ME DYNAMH.

Houkeun pooipietal a bkaelotuka kal vov yia xpon kkwv kaq
OraV xpnoo oie Te oukeun yia pwn npopa n eav dev xetx npouo binae tn ouokeun ia apket XPOVIKblaotma n dev xetkavei kaapaiou kal apalatwoon yia 0lu kau p Aiyoc atu c kal zet vep Byaivei a to akpouo atou.
Eav ta oTma ekpon's Tou kaepival puoumuva blu yna oxetikac tou yecoc twv phltzavovac, Opei va oac toulioel o kapc n va kaeite.
IPOETOIMA ZIA TOY ESPRESSO (20 EΩΣ 70 ML)
H 0oTnTa Tou vepou yia va espresso 1u va eival a20 70 ml.
EKKVJOTn λeITOUPYIA TIOU KOAOBwTAC TA BnIaTIOU NEPlypaoVTAO NTN PAATAVW TAPyPPO.
OTAV kataaekuaotc Eapncc 0oTnta aqpaYalou....

...Eava 1atnote to kou KAL OTaumote Tov KUKAO Ipoox, n diaokotn Tou Kukou dev eiva aueon.

TgmyEaLWnTwv
VEvEXmuovUxVWv
yalaTO aKoPouAo
BALVAdoeio a
kATOW KAL aTnote TO
KOUOi

Apoate tov atu va
peuyi yia touaXIoTov
10 deutepoTa kal gava
atnoTe to koui
yia va otuaatn eI
apaywn Tou atou


To akoipouo atou eivai apalpuveo yia v eivai duvato o kathetai.
Ooc oe baocto. Nuvete to me, vepo kal iyo um aeavtko atoppuavtko
TATWV XPOUOTDLWVTAC MU ABOPTOA. ENTUVETe KAL OTEywoTe To. TIPIV
TO eavabalete otn theon tou, beaowteite otl oontc elodou oepa dev
EXOUBV BAOwOEL AT TO KAATAOLTAou yaaKAcToc. EAV EIVAI ATAPaItnTO,
EeBouwote Tc me tnv TApexoeyn BeLova.Mnv PAevete To akoipouo
atou oTO PAAVtnplo nAtuw.

Tia to teaiwma tnc aleiouyia c nC apaywync Tou atou oTaVc va aTnOe eoiobTe Kouu Eav To akpocpuio evai Bouawmevo, eBouwote To me Tnv npexoevn Béovα.
Eav to akoppuio evai , kaapioTe to e uia
ZET AUTO-CAPPUCCINO XS 6000 (INQAEITAI XQPIIETA)
AutoTo E5aptnma autouatns taopokun katoivo dieukoluei Tnv Taopokun katoivo n kape aTe.
Uvdeote ta diaopox
EapntmaTa metao
Touc.
EiAeTe Tn 0en yia KaTouio n yla Kape lae oTo eIdko akpoquo.
Fepuote To doxieo yalaktoC kal toioBtneEva paitaVn eva ntnip kaw attoAOKpOPOAOUATOAPACKEUNKATOUTALVO.

NaTnote To Kountyva XeKluNoel KcIOTn Ovexela Vx Ota-μatnoel o kukao
TOnothe note to pAlitcaV LgacKATW ATTO TcEsoouc Kape KAI EKKVnOte Evav KUKAO Kapeplatpou /eotpeo.

- For domestic use only.
- CONTENTS
- PAGE
- DESCRIPTION 1
- BEFORE FIRST USE 3
- SETTING 4
- PREPARING ESPRESSO AND LONG COFFEEES 6
- PREPARING STEAM 7
- MAINTAINING YOUR APPLIANCE 8
- MOVING THE APPLIANCE
- ELECTRICAL OR ELECTRONIC PRODUCT AT END OF SERVICE LIFE
- TROUBLESHOOTING AND CORRECTIVE ACTIONS 13
- RECIPES 14
- accessories (sold separately)
- Dear Customer,
- Important: Safety instructions
- Limits to use
- BEFORE FIRST USE
- MEASURING WATER HARDNESS
- CLARIS - AQUA FILTER SYSTEM F 088 CARTRIDGE (SOLD SEPARATELY)
- SETTINGS
- Setting water hardness
- Setting the coffee temperature
- Setting the automatic electrical power supply cut-off (auto-off)
- PREPARING THE APPLIANCE
- NEVER PUT GROUND COFFEE IN THE COFFEE CONTAINER.
- RINSING OF CIRCUITS
- PREPARING THE GRINDER
- PREPARING ESPRESSO AND LONG COFFEEES
- PREPARING AN ESPRESSO (FROM 20 TO 70 ML)
- PREPARING A CUP OF COFFEE (FROM 80 TO 220 ML)
- 2-CUP FUNCTION
- PREPARING STEAM
- FROTHING MILK
- SETTING UP THE AUTO-CAPPUCCINO XS 6000 (SOLD SEPARATELY)
- MAINTAINING YOUR APPLIANCE
- RINSING OUT THE COFFEE CIRCUIT: SEE PAGE 5
- MACHINE CLEANING PROGRAM - TOTAL DURATION: ABOUT 20 MINUTES
- - Cleaning cycle
- - First rinsing
- - Second rinsing
- Your appliance will be ready for use again.
- SCALE REMOVAL PROGRAM - TOTAL DURATION: ABOUT 22 MINUTES.
- - Descaling cycle
- Your appliance is now ready for use again.
- LONG RINSING PROGRAM
- GENERAL MAINTENANCE
- TROUBLESHOOTING, CORRECTIVE ACTIONS
- Cappuccino
- Caffe Latte
- - Café Crème
- - Café correto*
- - Coffee liqueur*
- Italian style iced coffee
- Flambéed espresso*
- - Espresso parfait*
- KRUPS
- ESPRESSERIA AUTOMATIC
- BEREIDING MET STOOM 7
- ONDERHOUD VAN UW APPARAAT 8
- TRANSPORT VAN HET APPARAAT
- PROBLEMAS E SOLUÇões
- IPOETOIMA ZIA TOY ESPRESSO (20 EΩΣ 70 ML)
- ZET AUTO-CAPPUCCINO XS 6000 (INQAEITAI XQPIIETA)
Brand : TAURUS
Model : EA8010
Category : Coffee machine