
U8300 - TV receiver GIGABYTE - Free user manual and instructions
Find the device manual for free U8300 GIGABYTE in PDF.
| Product type | TV receiver (TV tuner) with VIVO software |
| Dimensions (approx.) | 120 x 80 x 20 mm |
| Weight (approx.) | 50 g |
| Power supply | Via USB port (5V) |
| Main functions | Digital TV reception (HDTV, H.264), analog TV, FM radio, scheduled recording, time shift, PIP/POP, multi-viewing, digital zoom 2X/3X/4X, screen and video capture, electronic program guide (EPG), teletext, subtitles, noise reduction, SAP, Composite/S-Video output |
| Recording formats | MPEG1, MPEG2, MPEG4, H.264, PSP, iPod, PS, TS |
| Connectivity | Antenna/cable input, Composite, S-Video, USB |
| Software compatibility | VIVO software (Windows) |
| Maintenance and cleaning | Use a soft, dry cloth. Do not use liquids. Unplug before cleaning. |
| Safety | Do not expose to moisture, extreme temperatures or shocks. Unplug during thunderstorms. |
| Spare parts and repairability | Contact Gigabyte customer service. Repair by a professional recommended. |
| General information | Brand Gigabyte, model U8300. Manual available in several languages. VIVO software included for TV and media management. |
Frequently Asked Questions - U8300 GIGABYTE
User questions about U8300 GIGABYTE
0 question about this device. Answer the ones you know or ask your own.
Ask a new question about this device
Download the instructions for your TV receiver in PDF format for free! Find your manual U8300 - GIGABYTE and take your electronic device back in hand. On this page are published all the documents necessary for the use of your device. U8300 by GIGABYTE.
USER MANUAL U8300 GIGABYTE
USB Hybrid TV Dongle
User's Manual
English
Deutsch
Français
Español
Русский
Türkçe
Polski
Česky
Português
Chapter 1 Introduction
Thanks for your purchasing. It is highly recommended that you check all the functions that the device supports carefully before using the program. This manual will guide you through the essential information of how to use this application program.
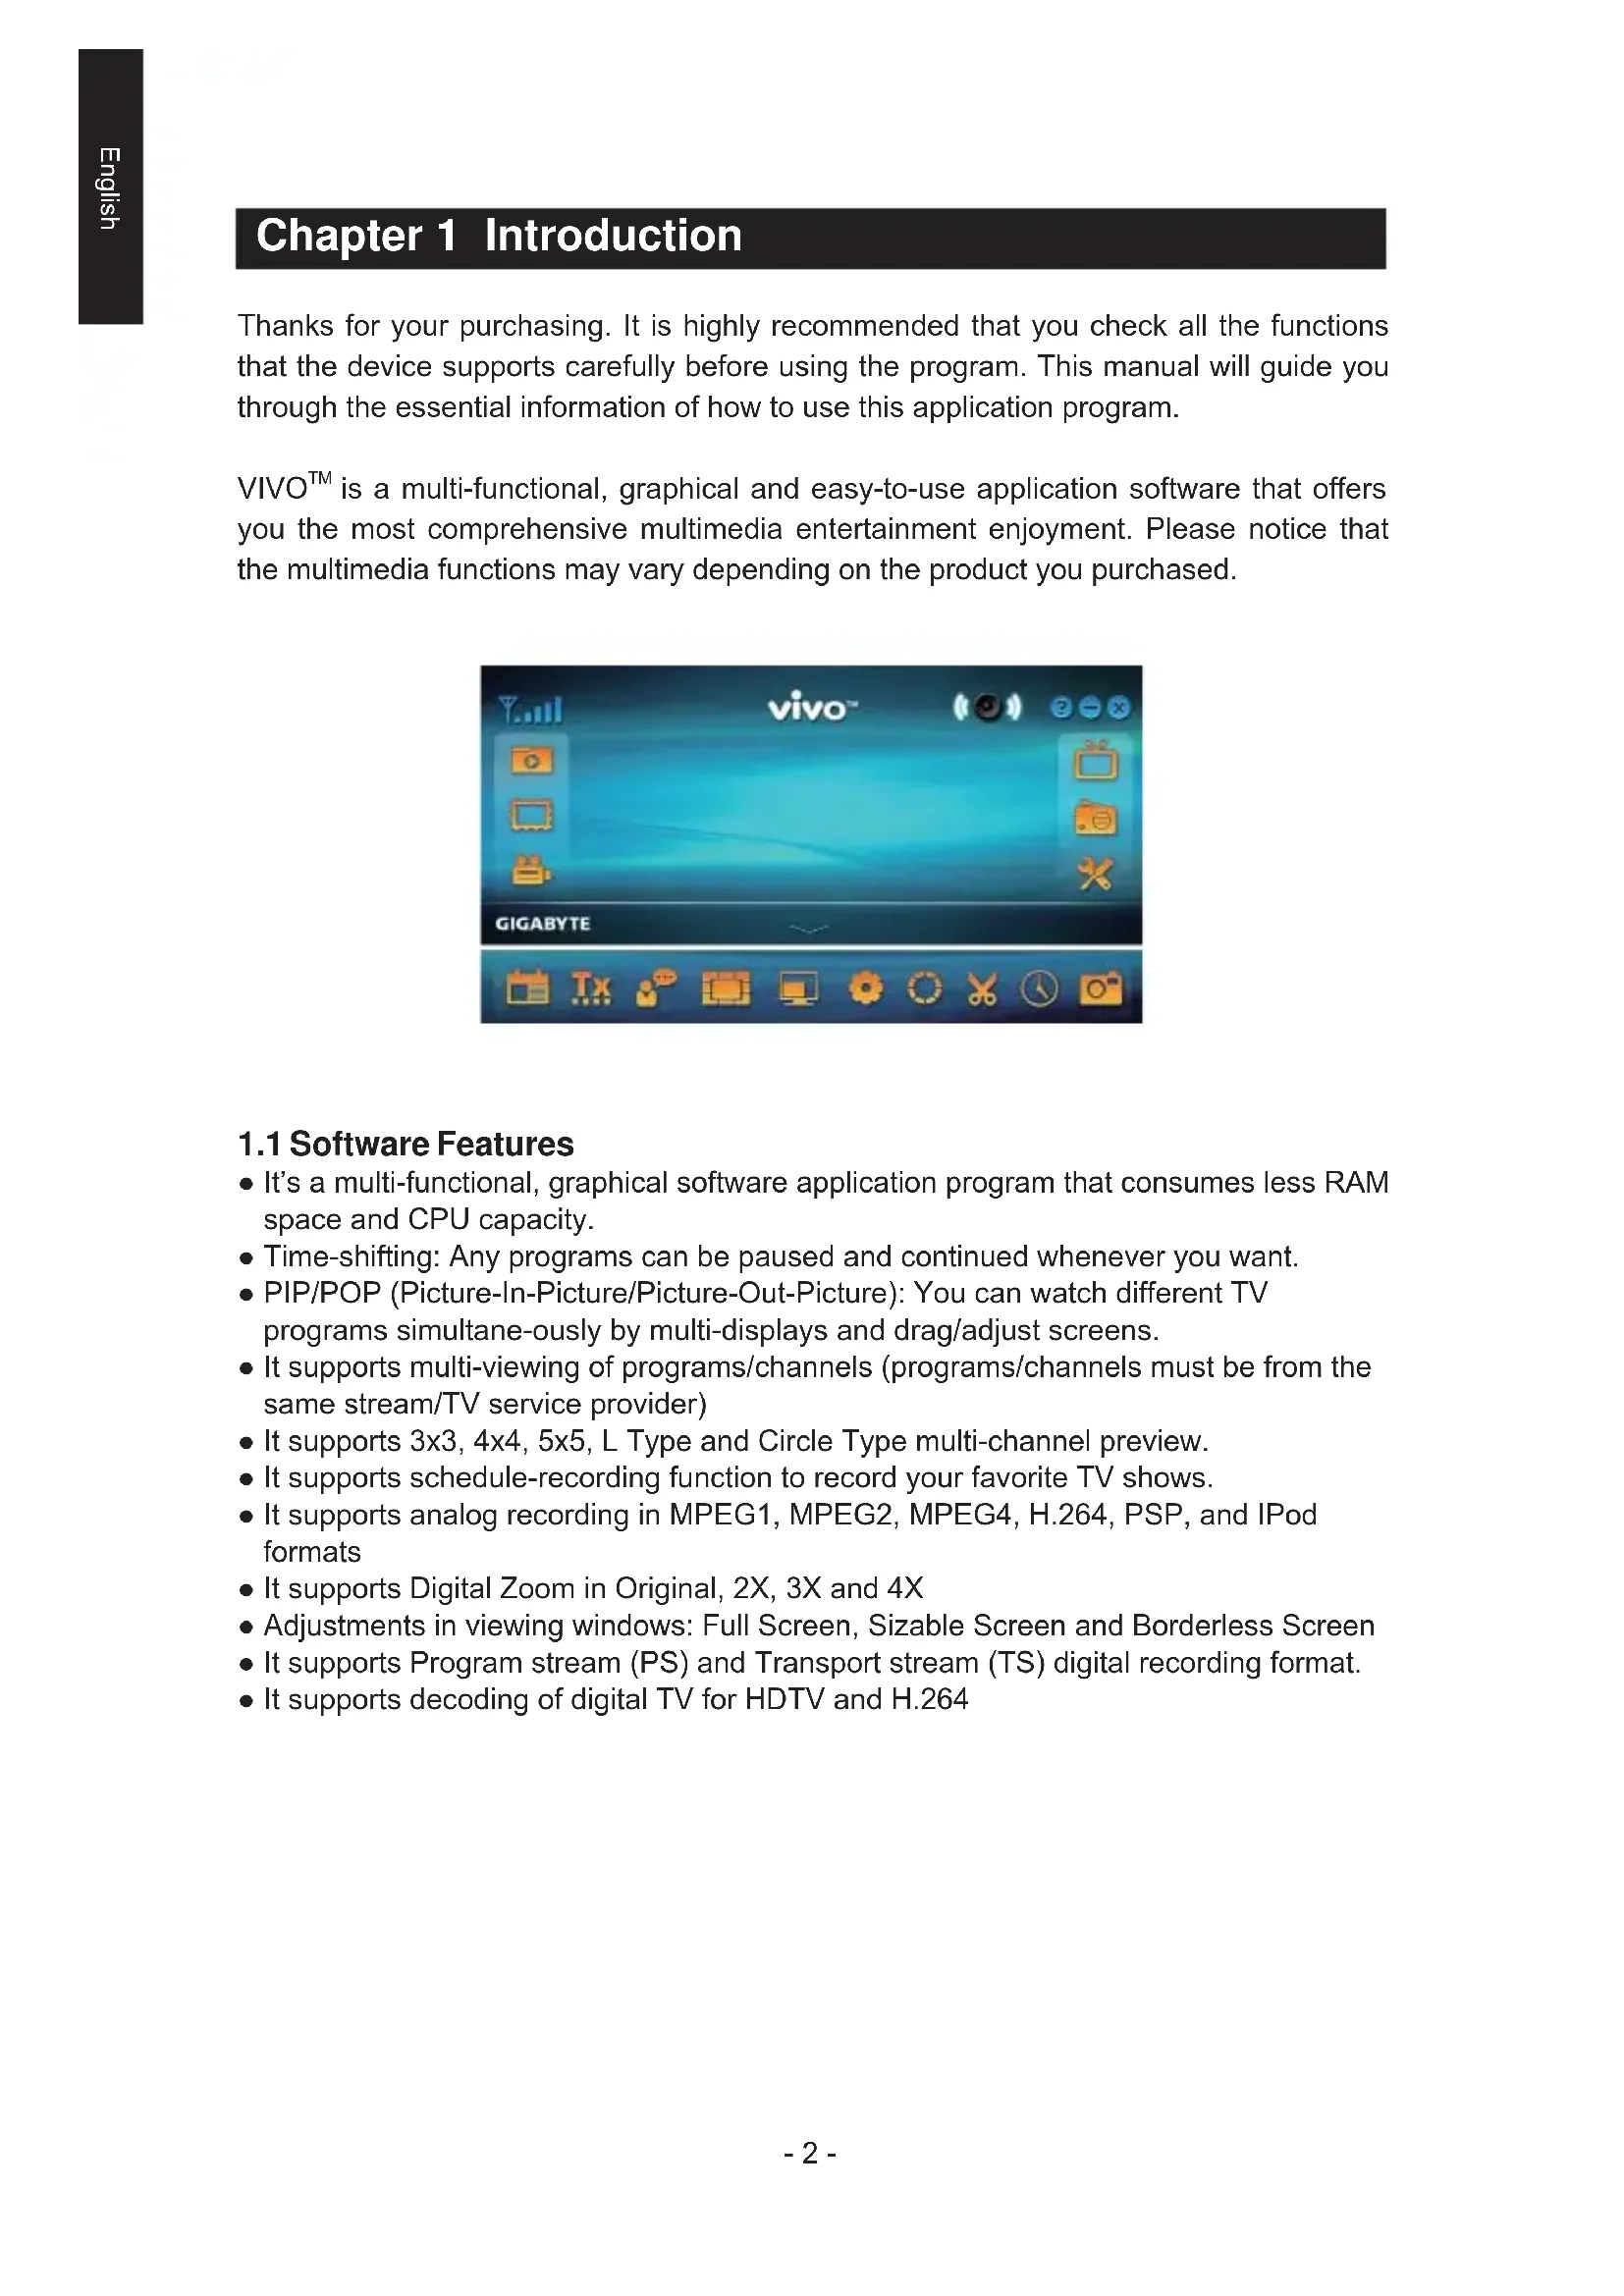
VIVO ^™ is a multi-functional, graphical and easy-to-use application software that offers you the most comprehensive multimedia entertainment enjoyment. Please notice that the multimedia functions may vary depending on the product you purchased.

text_image
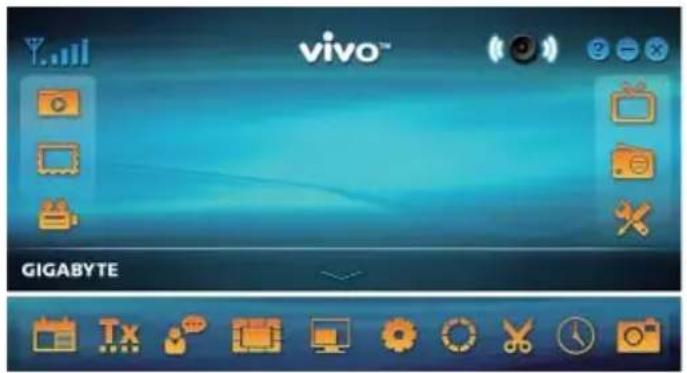
vivo™ GIGABYTE1.1 Software Features
- It's a multi-functional, graphical software application program that consumes less RAM space and CPU capacity.
- Time-shifting: Any programs can be paused and continued whenever you want.
- PIP/POP (Picture-In-Picture/Picture-Out-Picture): You can watch different TV programs simultaneously by multi-displays and drag/adjust screens.
- It supports multi-viewing of programs/channels (programs/channels must be from the same stream/TV service provider)
- It supports 3x3, 4x4, 5x5, L Type and Circle Type multi-channel preview.
- It supports schedule-recording function to record your favorite TV shows.
- It supports analog recording in MPEG1, MPEG2, MPEG4, H.264, PSP, and IPod formats
- It supports Digital Zoom in Original, 2X, 3X and 4X
- Adjustments in viewing windows: Full Screen, Sizable Screen and Borderless Screen
- It supports Program stream (PS) and Transport stream (TS) digital recording format.
- It supports decoding of digital TV for HDTV and H.264
1.2 TV Setup
1.2.1 Channel Scanning
When you run VIVO ^™ for the first time, the system will guide you through the necessary steps of chan-nel scanning.

text_image
Select Device Hybrid Devices Next Exit- Please select the device type (e.g. digital, analog or hybrid) you purchased and click "Next".

text_image
Source Input Analog Text Back Exit- Select the signal source (the signal strength may vary depending on the product you purchased and the area you live), and click "Next".
text_image
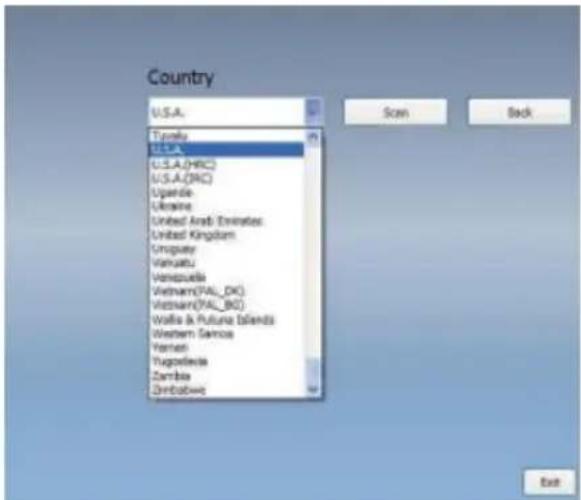
Country U.S.A. Typical U.S.A. U.S.A.(HRC) U.S.A.(DRC) Uganda Ukraine United Arab Emirates United Kingdom Uruguay Vanuatu Venezuela Vietnam(FAL_DK) Vietnam(FAL_BK) Wallis & Futuna Islands Western Samoa Yemen Yugoslavia Zambia Zimbabwe Scan Back Exit- Please select the country you live and then click "Channel Scan".
text_image
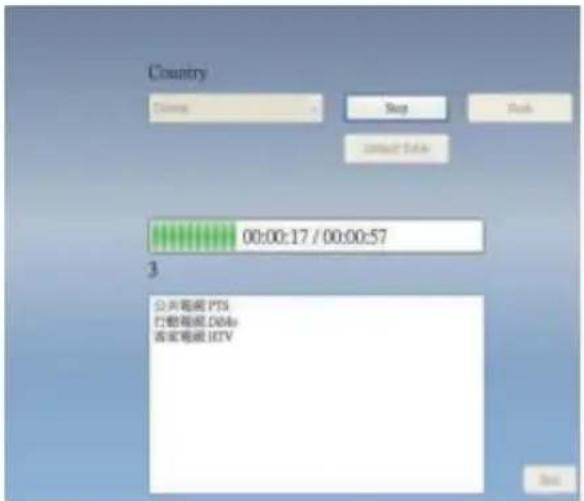
Country Down Stop Back content Data 00:00:17 / 00:00:57 3 公共電話 PTS 行動電話 DB/s 客家電話 IOTV- Click "Exit" to finish the setup after the scanning is completed.
Note you may load default channel list to watch TV without the waiting time for channel scanning.
1.2.2 Source Input
text_image
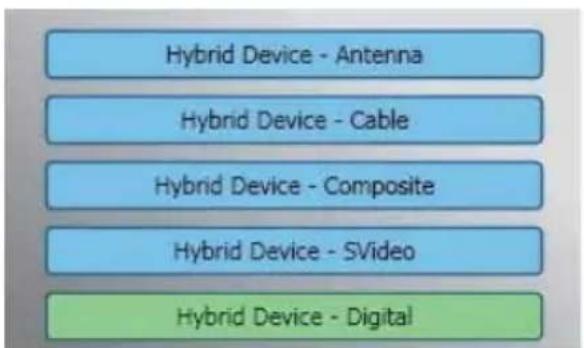
Hybrid Device - Antenna Hybrid Device - Cable Hybrid Device - Composite Hybrid Device - SVideo Hybrid Device - Digital- Select your device and signal source such as Digital, Analog (Cable or Antenna), Video (Composite, S-Video). VIVO™ will import the signal source you select. It is recommended that you select the signal source that your device supports.
Antenna TV: If you choose Antenna TV, please make sure your antenna (for analog TV reception) is properly installed and is able to receive signals.
Cable TV: If you want to watch Cable TV, please ensure that you have properly plugged your analog (cable) TV cord to the wall outlet of your cable TV.
Video: If you want to watch DVD videos, it's available through the additional Composite, S-Video input. Please check if the device you have supports this function.
- IF you'd like to listen to FM radio, please click FM button directly. Please make sure that the product you purchased supports this function.
You can watch live Digital TV with VIVO ^TM Once you have done your initial setup (source input and channel scan), you can enjoy watching and recording TV program with this multi-functional software application.
Make sure your device supports digital signal in order to watch digital TV.
2.1 Main Panel
Buttons
| Exit | Minimize | About | Source Input |
| FM Mode | Setup | Playback | Photo |
| Schedule Recording | Open Bar | Audio Mode/ Mute | Mute Mode/ Audio |
| Left Audio | Right Audio |
Hotkey Bar
| EPG | Teletext | Subtitle | Channel preview |
| Display Ratio | OSD | Default Color | Capture |
| Time Shifting | Snapshot |
2.2 TV Panel

natural_image
Landscape view of a park with trees and a small structure, captured in an outdoor setting (no visible text or symbols)Control Buttons

Capture

Time-Shifting

Snapshot

Channel Preview

EPG

SAP

Display Ratio

Channel Down

Channel Up

Volume Down

Volume Up

Audio Mode/Mute
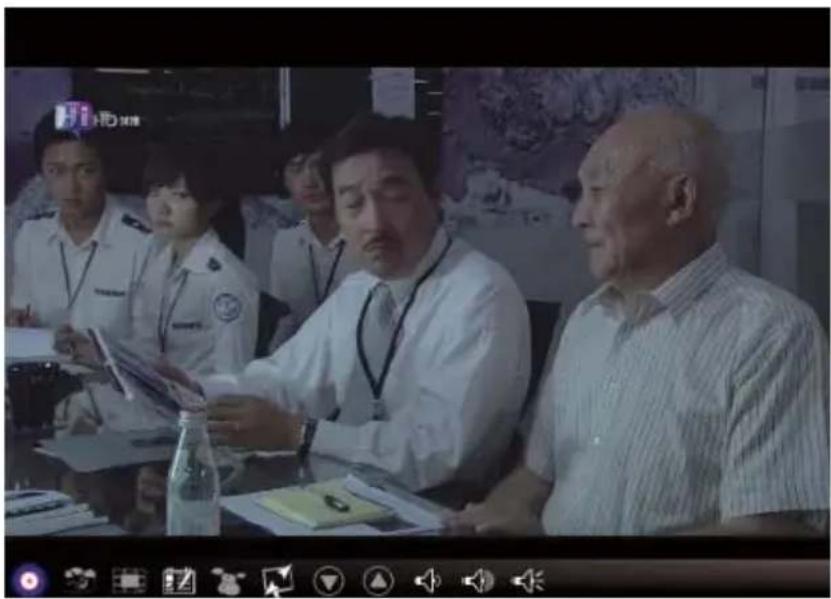
Capture: Click to capture the scenes you like. Once you capture the scene, it is saved in your Video Path.
natural_image
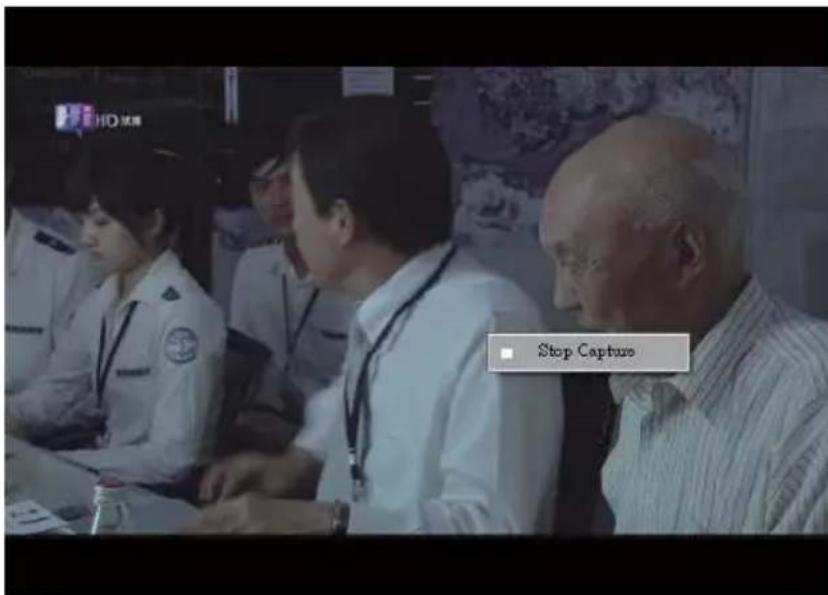
Group of people in a meeting setting, including uniformed officers and civilians, seated at tables with documents (no visible text or symbols)If you'd like to stop capture, click caption button again or right click on the screen and then enable "Stop Capture".
text_image
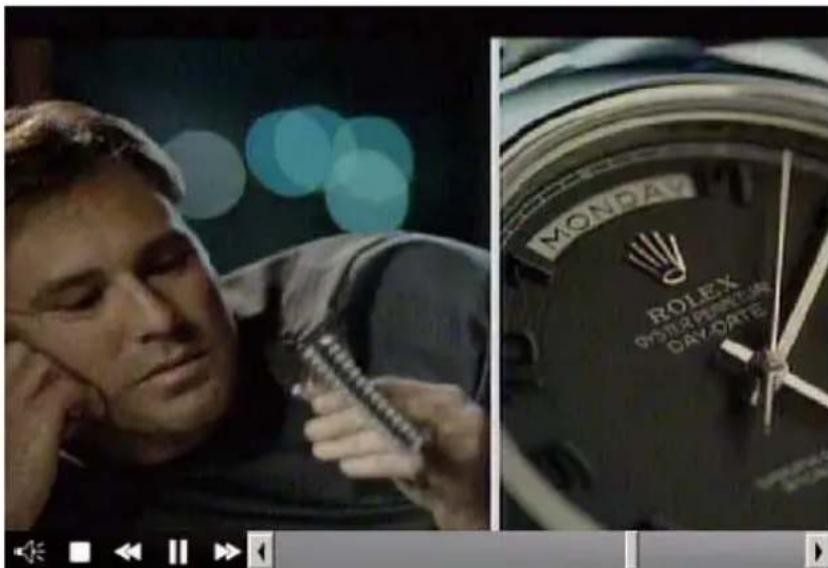
Stop CaptureTime Shifting: This icon enables Time-shifting function once clicked. Time Shifting function records the TV program you are currently watching.
text_image
MONDAY ROLEX POTTER POINT OF DAVORATEThis function enables you to pause/fast-forward/rewind TV shows so you won't miss any part when you left the show for something else. Control buttons define as table below.

Audio Mode/Mute

Stop

Backward

Pause

Forward
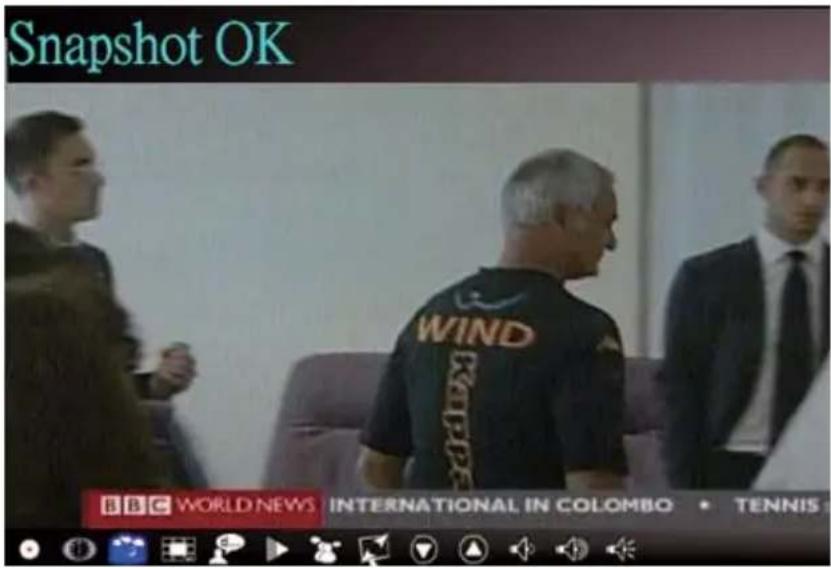
Snapshot: You can click the "Snapshot" icon to take snapshots. When the screen shows "Snapshot OK", it means the image has been successfully taken into your file folder as picture files.
text_image
Snapshot OK WIND INTERNATIONAL IN COLOMBO • TENNISChannel-preview: Channel list preview from the beginning. You can set preview format and interval in Setup page (Refers to Chapter 6).
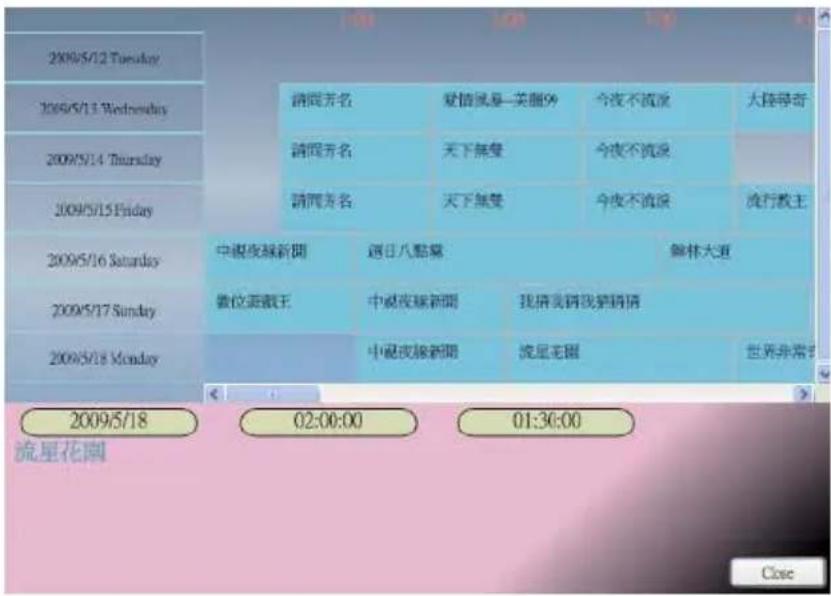
EPG: You can receive and view information of TV programs of each digital TV channel with this function.
SAP: Turn On/Off SAP sound (Depends on TV program provider)
Display Ratio: Change ratio base on a routine setting. (Free/4:3/16:9/Base on source)
Channel Down/UP: Select previous or next channel.
Volume Down/UP: Adjust TV volume to be loud or quiet
Audio/Mute Mode: Turn TV volume on or off.
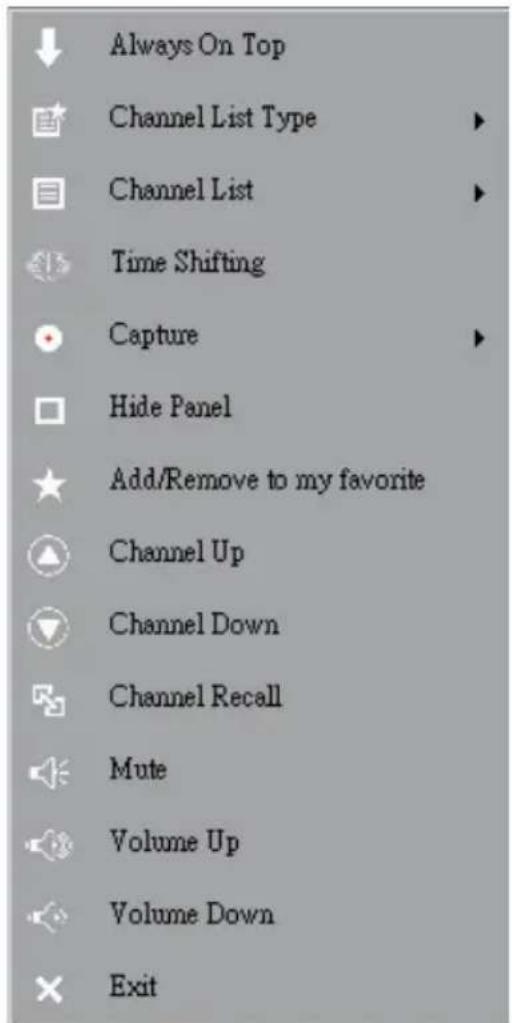
2.3 The Tool Menu
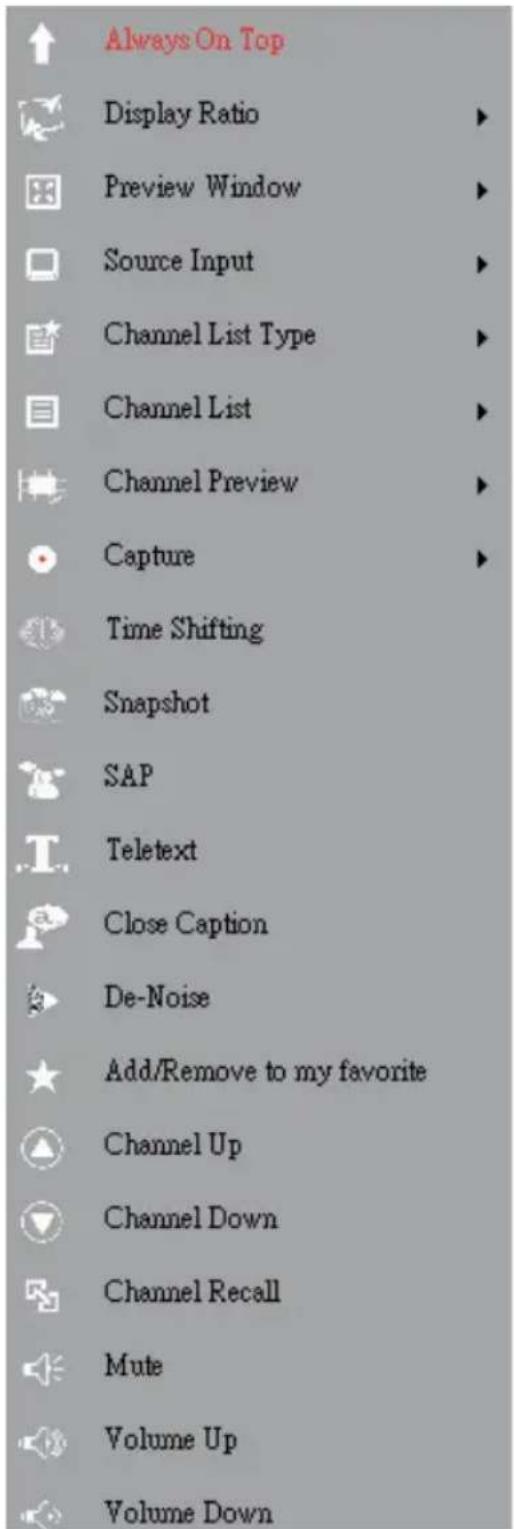
While you are watching digital TV on VIVO™, you can enable the Tool Menu with a mouse right-click. The Tool Menu allows you to access and activate functions of VIVO™, which provides you another option besides the icons on the interface.

text_image
Always On Top Display Ratio Preview Window Channel List Type Channel List Channel Preview Capture Time Shifting Snapshot Multi-View EPG SAP Add/Remove to my favorite Channel Up Channel Down Channel Recall Mute Volume Up Volume Down Hide Panel ExitAlways On Top: Enables VIVO™ to remain on top of all other application windows. It is the same if you click on the “Always On Top” at the upper right corner of the regular TV mode window.
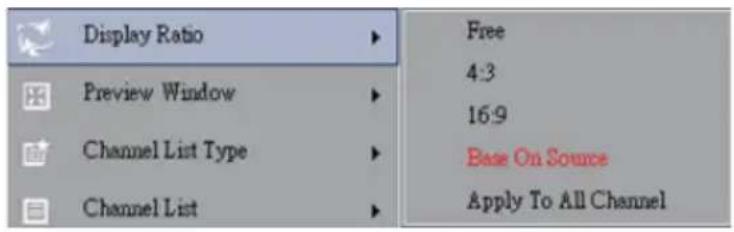
Display Ratio: You can adjust your display ratio when you move your mouse cursor to the arrow at the -as you click on the Display Ratio function icon on the interface.
text_image
Display Ratio Preview Window Channel List Type Channel List Free 4:3 16:9 Base On Source Apply To All ChannelFree: The initial ratio when you start VIVO ^TM and you can adjust it by dragging the edge of the VIVO ^TM window.
Base On Source: The display ratio will be based on the signal source.
Apply To All Channels: If you select this option, the adjusted display ratio will be applied to all of your available channels.
Preview Window: You can change your TV viewing screen to Full Screen, Sizable Screen or Borderless Screen.

text_image
Preview Window Channel List Type Full Screen Sizable Screen Borderless ScreenChannel List Type: There are two types of Channel List Type – Normal or My Favorite. You can select which type to load your channel list. It is the same as you do in the Channel Setting page. The default is Normal.

text_image
Channel List Type Channel List Normal My FavoriteChannel List: Displays your available channels. It's the same as you open the Channel Setting.

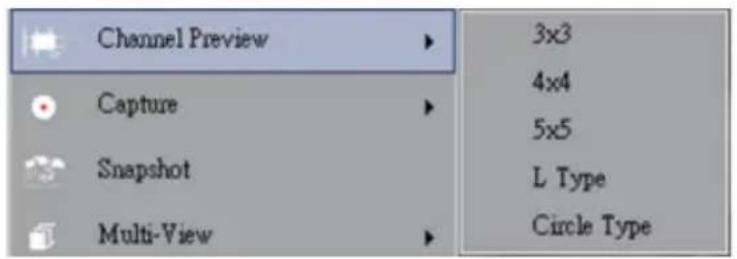
Channel Preview: You can decide which type of channel preview - 3x3, 4x4, 5x5, L Type or Circle Type.
text_image
Channel Preview Capture Snapshot Multi-View 3x3 4x4 5x5 L Type Circle TypeCapture: You can choose to capture the TV scenes in TS or PS formats.

text_image
Capture Snapshot TS PSTime Shifting: Enable Time Shifting mode. It is the same as you click on the Time Shifting icon on the main interface.
Snapshot: Activate Snapshot function to take the Snapshot. You can also do the same if you click on the Snapshot icon on the main interface.
Multi-view: Allows you to multi-view channels/programs. Once you move your mouse cursor to the er-ror at the right, you can select "Start Multi-view". You can then watch multiple channels/programs that are from the same signal frequency at the same time.

text_image
Multi-View EPG Start Multi-View TV WallStart Multi-view: When you activate Multi-view by selecting "Start Multi-view", notice that two other viewing screens appear within the main TV screen.

text_image
YANKEES YES DRESS JOTW 03 JOHNNY SANDON 12 NICK SWITCHER 13 ASR BODRIVER 29 HEDDY MATUR 00 ROBINSON CAND 09 MILLY CARRERA 07 ERIC HINSEE 07 JIME BOUNA 00 BANK OF CHINA BBC WORLD NEWSNote You can then drag the sub screens that were in the main viewing screen out. Those sub screens that were dragged out can be enlarged and relocated up to your viewing demands.

text_image
Multi-View EPG P.O.P. P.I.P. Stop Multi-ViewP.I.P/P.O.P: Once you activate Multi-view, you can enable multi-view in Picture-in-Picture/Picture-out-Picture mode.
Stop Multi-view: Select this option to stop Multi-view. Once you selected it, the two sub screens will go off.
EPG: The same as main panel.
SAP: The same as main panel.
Add/Remove to my favorite: Add a channel to My Favorite or remove a channel from My Favorite.
Channel Up: Go to the next channel on the channel list.
Channel Down: Go to the last channel on the channel list.
Channel Recall: Return to the previously accessed channel
Mute On: Enable/disable the mute function
Volume Up: Increase the volume
Volume Down: Decrease the volume
Hide Panel: Hide or show the control panel (the VIVO™ interface)
Exit: Close/Exit VIVO™ window
Chapter 3 Analog TV
You can watch live Analog TV with VIVO™. Once you have done your initial setup (source input and channel scan), you can enjoy watching and recording TV program with this multi-functional software ap-plication.
Note Make sure your device supports analog signal in order to watch analog TV.
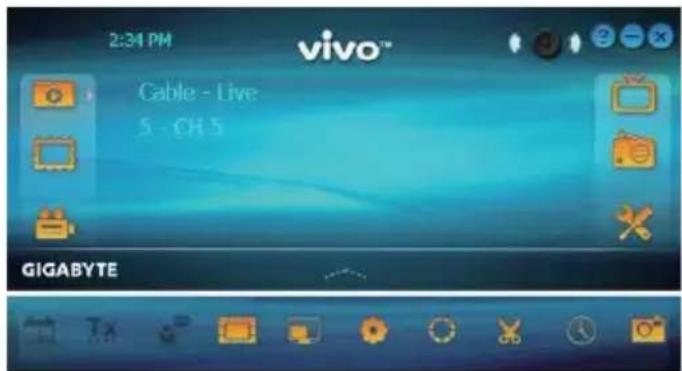
3.1 Main Panel

text_image
2:34 PM vivo™ Cable - Live 5 CH 5 GIGABYTEButtons

Exit

Minimize

About

Source Input

FM Mode

Setup

Playback

Photo

Schedule Re-cording

Open Bar

Audio Mode/Mute

Mute Mode/Audio

Left Audio

Right Audio
Hotkey Bar

EPG(Disable)

Teletext (Disable)

Subtitle (Disable)

Channel Pre-view

Display Ratio

OSD

Default Color

Capture

Time Shifting

Snapshot
3.2 TV Panel

text_image
BBC WORLD NEWS OF POWER TENNIS AS SHE DEMOLISHES HUNGControl Buttons

Capture

Time-Shifting

Snapshot

Channel Preview

Close Caption

De-Noise SAP

Volume Down

Display Ratio

Channel Down

Channel Up

Volume Down

Volume Up

Audio Mode/Mute
Capture: Please refer to item 2.2 in Chapter 2.
Time Shifting: Please refer to item 2.2 in Chapter 2.
Snapshot: Please refer to item 2.2 in Chapter 2.
Channel-preview: Please refer to item 2.2 in Chapter 2.
Close Caption: Enable to turn on close caption.
De-Noise: To enable De-Noise function to make much clear Analog TV reception.
SAP: Please refer to item 2.2 in Chapter 2.
Display Ratio: Please refer to item 2.2 in Chapter 2.
Channel Down/UP: Please refer to item 2.2 in Chapter 2.
Volume Down/UP: Please refer to item 2.2 in Chapter 2.
Audio/Mute Mode: Please refer to item 2.2 in Chapter 2.
3.3 The Tool Menu
Please refer to item 2.3 in Chapter 2. There are few different between Digital TV and Analog TV mode.
text_image
Always On Top Display Ratio Preview Window Source Input Channel List Type Channel List Channel Preview Capture Time Shifting Snapshot SAP Teletext Close Caption De-Noise Add/Remove to my favorite Channel Up Channel Down Channel Recall Mute Volume Up Volume DownClose Caption: Helps you watch Analog TV with close caption assistance. This function will depend on TV program provider.
De-Noise: You can enable De-Noise function to enhance Analog TV quality.
Note Analog TV doesn't support Multi-View function due to the TV standard limitation.
Chapter 4 FM Radio
You can listen to live FM radio with VIVO™ Once you have done your initial setup (source input and channel scan), you can enjoy listening and recording radio program with this multi-functional software application.
Note Make sure your device supports analog signal in order to watch analog TV.
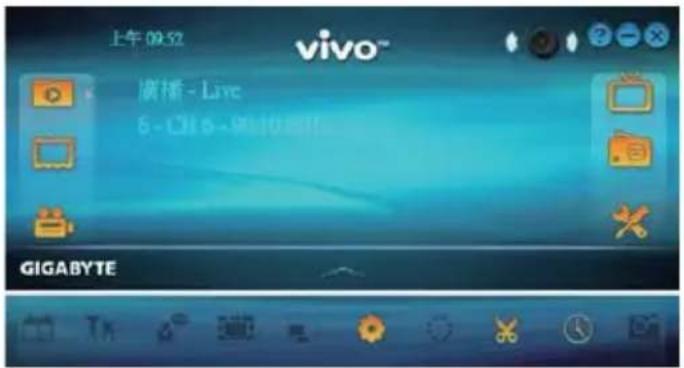
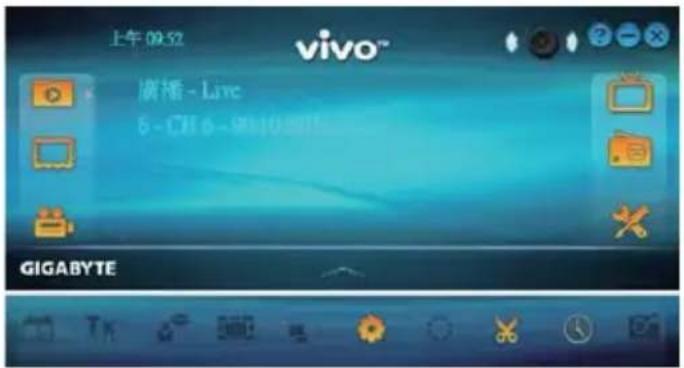
4.1 Main Panel
text_image
上午 09:52 vivo™ 广播 - Live 6 - Clip 5 - 9:10:11 GIGABYTEButtons

Exit

Minimize

About

Source Input

FM Mode

Setup

Playback

Photo

Schedule Re-cording

Open Bar

Audio Mode/Mute

Mute Mode/Audio

Left Audio

Right Audio
Hotkey Bar

EPG(Disable)

Teletext (Disable)

Subtitle (Disable)

Channel Preview(Disable)

natural_image
Illustration of a speaker with musical notes and microphone on a blue gradient background (no text or symbols)Control Buttons

Capture

Time-Shifting

Reduce Fre- quency

Add Frequency

Channel Down

Channel Up

Volume Down

Volume Up

Audio Mode/Mute
Capture: Please refer to item 2.2 in Chapter 2.
Time Shifting: Please refer to item 2.2 in Chapter 2.
Reduce Frequency: Adjust radio frequency in minus.
Add Frequency: Adjust radio frequency in plus.
Channel Down/UP: Please refer to item 2.2 in Chapter 2.
Volume Down/UP: Please refer to item 2.2 in Chapter 2.
Audio/Mute Mode: Please refer to item 2.2 in Chapter 2.
4.3 The Tool Menu
Please refer to item 2.3 in Chapter 2. There are fewer options than TV mode and all functions remainder are the same.
text_image
Always On Top Channel List Type Channel List Time Shifting Capture Hide Panel Add/Remove to my favorite Channel Up Channel Down Channel Recall Mute Volume Up Volume Down ExitChapter 5 Video Input
You can import additional Video source to VIVO ^TM through Composite Video, S-Video input. Once you connect your device, Video source and PC together, VIVO ^TM will auto-detect source category. You can easily enjoy DVD or other multi-media by VIVO ^TM even record to your PC or laptop directly.
Note Make sure your device supports video input.
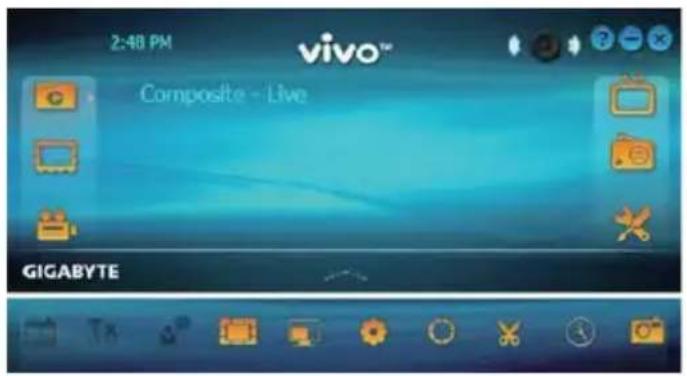
5.1 Main Panel

text_image
2:48 PM vivo™ Composite - Live GIGABYTEButtons

Exit

Minimize

About

Source Input

FM Mode

Setup

Playback

Photo

Schedule Re-cording

Open Bar

Audio Mode/Mute

Mute Mode/Audio

Left Audio

Right Audio
Hotkey Bar

EPG(Disable)

Teletext (Disable)

Subtitle (Disable)

Channel Preview

Display Ratio

OSD

Default Color

Capture

Time Shifting

Snapshot
5.2 Video Panel
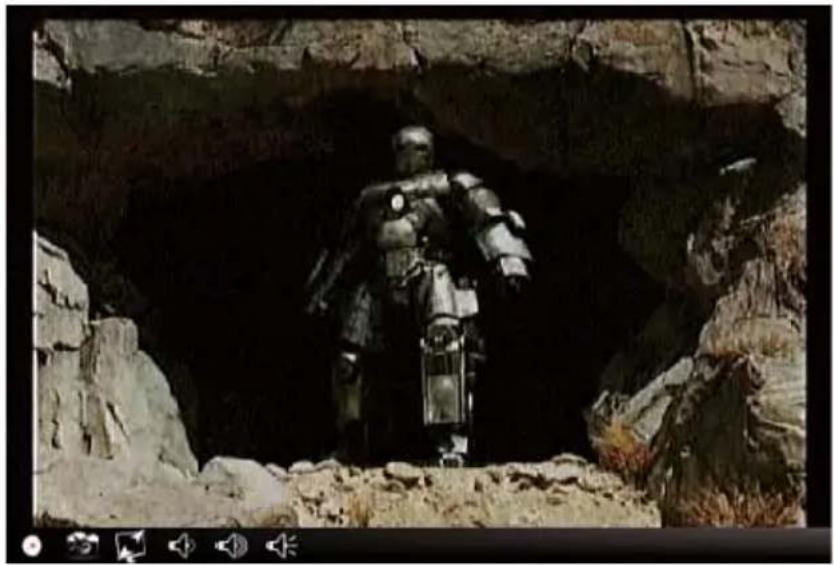
natural_image
Human figure standing inside a cave with rocky terrain (no visible text or symbols)Control Buttons

Capture

Time-Shifting

Reduce Fre- quency

Volume Down

Volume Up

Audio Mode/Mute
Capture: Please refer to item 2.2 in Chapter 2.
Snapshot: Please refer to item 2.2 in Chapter 2.
Display Ratio: Please refer to item 2.2 in Chapter 2.
Volume Down/UP: Please refer to item 2.2 in Chapter 2.
Audio/Mute Mode: Please refer to item 2.2 in Chapter 2.
5.3 The Tool Menu
Please refer to item 2.3 in Chapter 2. There are fewer options than TV mode and all functions remainder are the same.
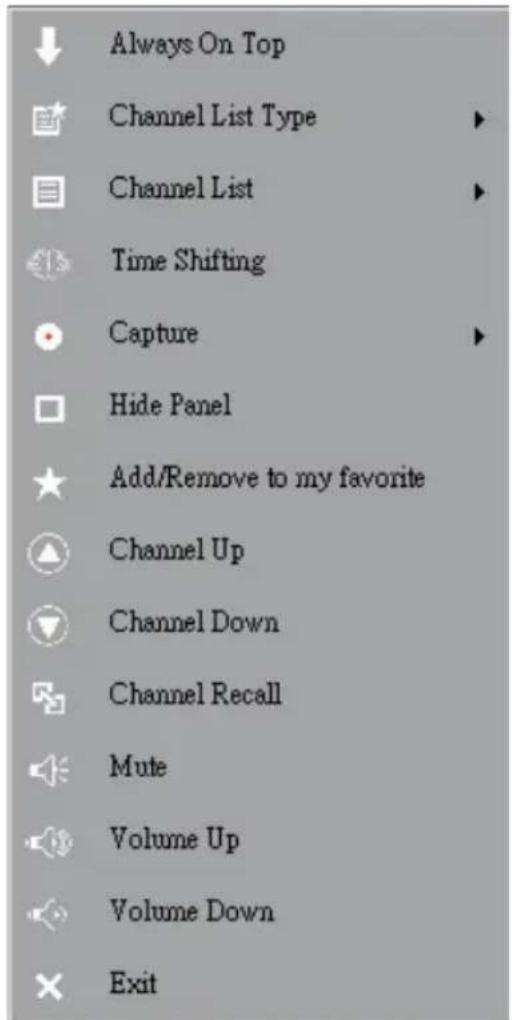
text_image
Always On Top Channel List Type Channel List Time Shifting Capture Hide Panel Add/Remove to my favorite Channel Up Channel Down Channel Recall Mute Volume Up Volume Down ExitChapter 6 Playback
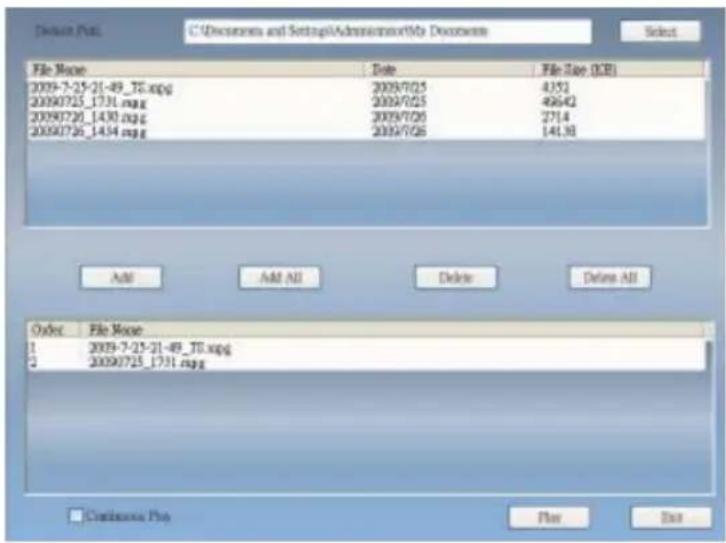
When you click on this icon, you can choose a recorded file for playback or a file from folders in your PC.
Note continuous fi le playback is available
text_image
C:\Documents and Settings\Administrator\My Documents File Name Date File Size (GB) 2009-7-25-21-49_TB.xpg 2009/7/25 4351 2009/7/25_1731.xpg 2009/7/25 48642 2009/7/26_1430.xpg 2009/7/26 2714 2009/7/26_1434.xpg 2009/7/26 141.38 Add AM All Delete Delete All Order File Name 1 2009-7-25-21-49_TB.xpg 2 2009/7/25_1731.xpg Continuous Plus Plan ExitAdd: add a selected file to the playlist at the bottom half of the window
Add All: add all the files to the playlist
Delete: delete a fi le from the playlist
Delete All: delete all the files on the playlist
Play: play the selected file that are on the playlist at the bottom half of Playback
Exit: exit Playback
When you selected a fi le for playback, VIVO™ will plays the video for you in another screen as illustrated below.
6.1 Control Buttons for Playback Mode:

text_image
MINES QSI IP MINES WITNESS TO SURVIVAL
Backward

Play

Pause

Forward

Stop

Previous File

Next File

Repeat (on)

Repeat (off)

Display Ratio

Audio

Volume Up

Volume Down

Control Slide for Playback
Chapter 7 Setup
In VIVO ^™ , you can simply make settings as your favorite in Setup page. Since VIVO ^™ has been launched, click Setup button to access Setup page.

text_image
vivo™ GIGABYTE7.1 General Setting
You can find Sleep Timer, Scan Setting, User Interface and Other, 4 options, in Setup page. Those can help you to improve your power saving, scanning adjustment, colorful UI and language and location.
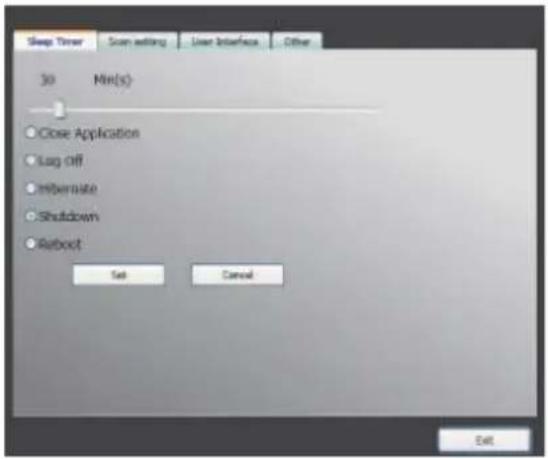
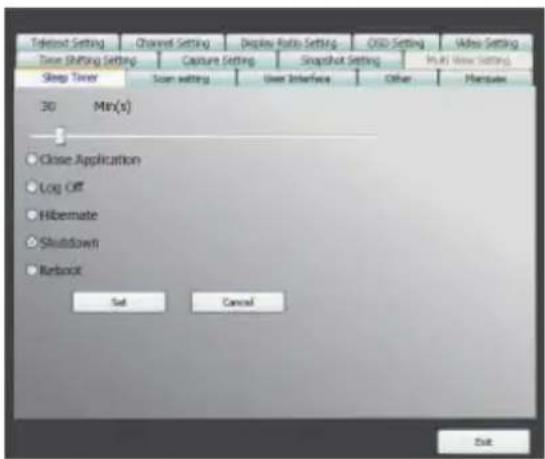
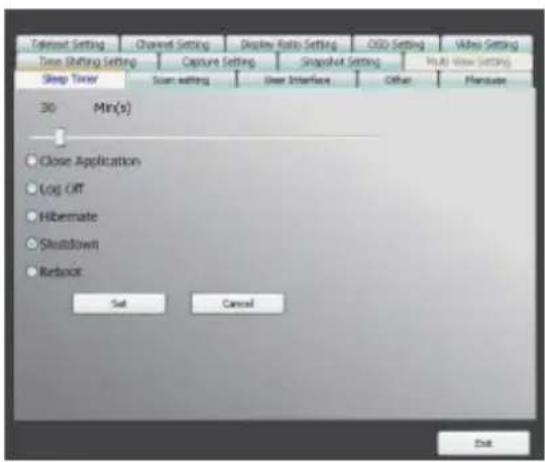
7.1.1 Sleep Timer
text_image
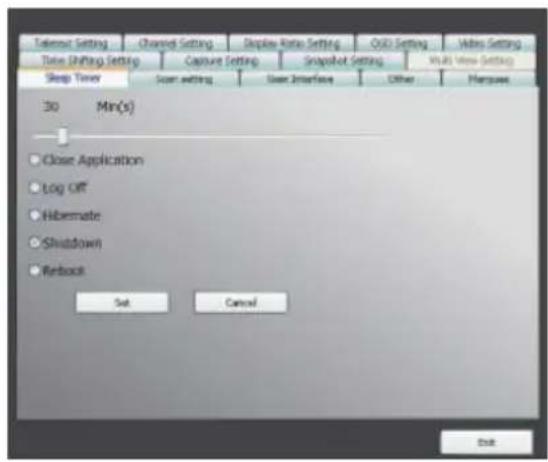
Sleep Timer Scan editing User Interface Other 30 Min(s) Close Application Log off Intermate Shutdown Reboot Set Cancel ExitYou might watch TV but get sleepy after minutes later or leave your TV for emergency. For any specific reason, you would like to ask VIVO™ to help you on something. There are 5 options, Close Application, Log off, Hibernate, Shutdown, and Reboot, for setting. Besides, you can move time shuttle left or right to adjust time period.
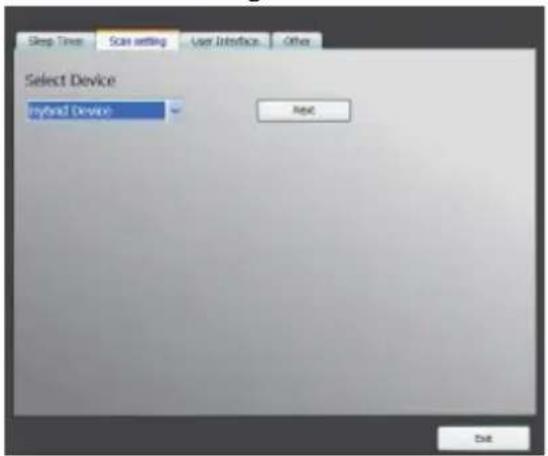
7.1.2 Scan Setting
text_image
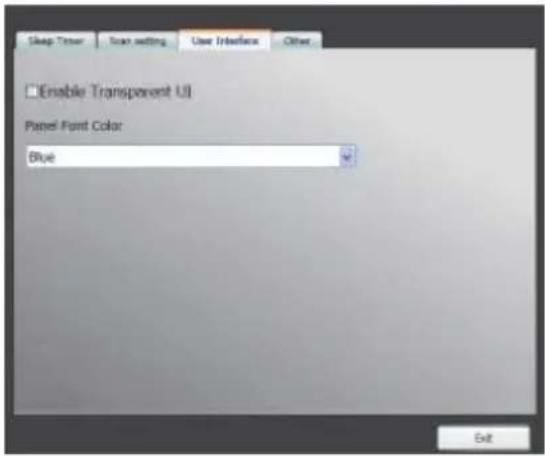
Sleep Time Scan setting User Interface Other Select Device Myriad Device Next Exit7.1.3 User Interface
text_image
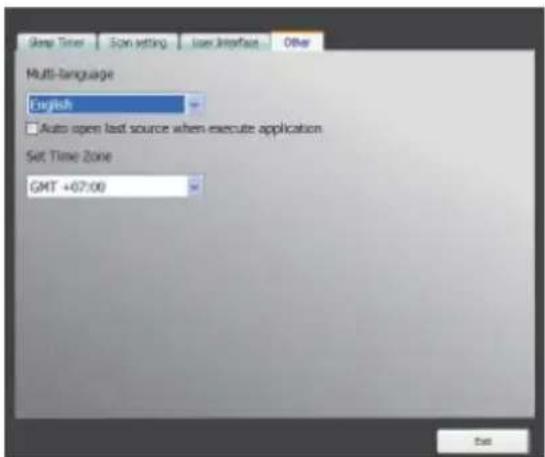
Sleep Timer Scan setting User Interface Other Enable Transparent UI Panel Font Color: Blue7.1.4 Other
text_image
Sleep Timer Scan setting User Interface Other Multi-language English Auto open last source when execute application Set Time Zone GMT +07:00 box7.2 Advanced Setting
You can not only find Sleep Timer, Scan Setting, User Interface and Other but Marquee, Time Shifting Setting, Capture Setting, Snapshot Setting, Multi View Setting, Teletext Setting, Channel Setting, Dis-play Ratio Setting, OSD Setting and Video Setting.

text_image
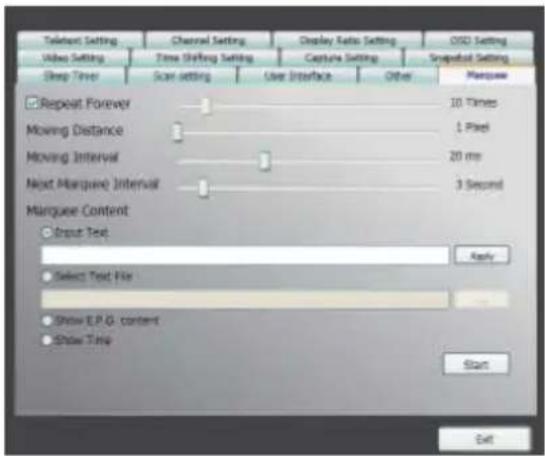
Timeout Setting Time Shifting Setting Sleep Timer Channel Setting Capture Setting Slow setting Display Ratio Setting Snapshot Setting Slow Interface Other Multi-View Setting Manpower 30 Min(s) Close Application Log Off Hibernate Shutdown Retouch Set Cancel Exit7.2.1 Marquee Setting
Here we can set the properties of the marquee such as moving distance, interval, the content, and so on.
text_image
Twinent Setting Video Setting Sleep Timer Channel Setting Time Shifting Setting Scan setting Use Interface Capture Setting Use Interface Other 10 Times 1 Pixel 20 ms Next Marquee Interval 3 Second Marquee Content Input Text Apply Select Text File Show E.P.G. content Show Time Start Exit7.2.2 Time Shifting Setting
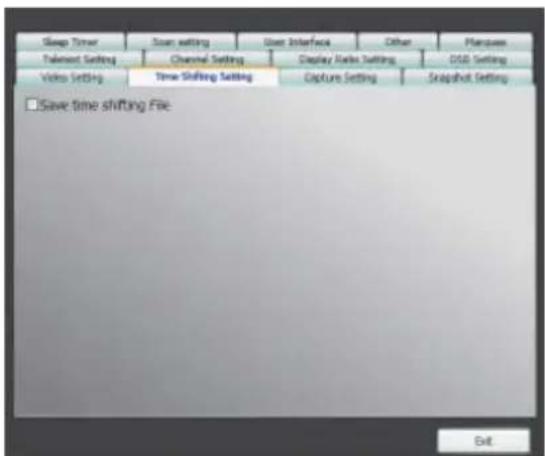
Here we can decide to save the fi le or not.
text_image
Sleep Timer Tahmest Setting Video Setting Save time shifting File Scan setting Channel Setting Time Shifting Setting User Interface Display Links Setting Capture Setting Other Database GDB Setting Snapshot Setting Exit7.2.3 Capture Setting
Here we can set where to save the file, the captured file name, or set the capture stream type.

text_image
Sleep Timer Scan setting User Interface Other Phanyase TubeSize Settings Channel Settings Display Ratio Setting CIDI Setting Video Setting Time Shifting Setting Capture Setting Snapshot Setting Video Path C:\Documents and Settings\View\My Documents Capture Home (Setting) ● Data-time format (systemmail_drmr) ○ User define Capture Format MPS32 Air Capture Filter 1000 fps Capture Resolution 720x490 Air Exit7.2.4 Snapshot Setting
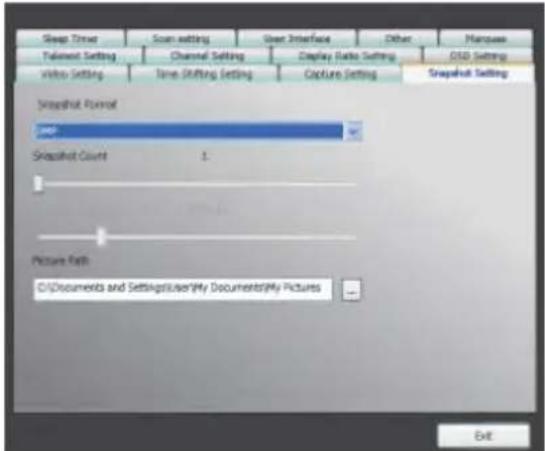
Here we can set the snapshot file format, where to save the pics, and the how many pics will be saved when using the snapshot function.
text_image
Sleep Timer Scan setting User Interface Other Mouse Talent Setting Channel Setting Display Ratio Setting GSS Setting Video Setting Time Shifting Setting Capture Setting Snapshot Setting Snapshot Format 100 Snapshot Count L Picture Path C:\Documents and Settings\User\My Documents\My Pictures Exit7.2.5 Teletext Setting
Here we can input the teletext main page and sub page, or use the color button to switch teletext page.

text_image
Video Setting Sleep Tower Text-based Setting Time Shifting Setting Scan setting Channel Setting Capture Setting User Interface Display Audio Setting Other OLED Setting Snapshot Setting Macquint Main Page Sub Page Set Text-based Page Transparent Exit7.2.6 Channel Setting
Here we can set the channel preview type, preview interval, channel group, and channel management.

text_image
Video Setting Sleep Timer Tailout Settings Time Shifting Setting Scan setting Channel Setting Capture Setting User Interface Display Ratio Setting Other OISD Settings Channel Preview Format Circle Type S-Video Video Standard NTSC Channel Preview Interval Composite Video Standard 3 Sec(x) NTSC Select Channel Group Normal Number Lock Forward Lock Parent Lock Channel Name Frequency(H) Video Standard Audio 77250000 NTSC_M None 6 CH 6 83250000 NTSC_M None 7 CH 7 175250000 NTSC_M None 8 CH 8 181250000 NTSC_M None 9 CH 9 187250000 NTSC_M None OK7.2.7 Display Ratio Setting
Here we can set the display ratio and apply to all channels.

text_image
Video Setting Sleep Timer Tailnet Setting Time Shifting Setting Scan setting Channel Setting Capture Setting Show Interface Display Ratio Setting Other Other USB Setting Display Ratio Free 4x1 16.9 Apply To All Channel Exit7.2.8 OSD Setting
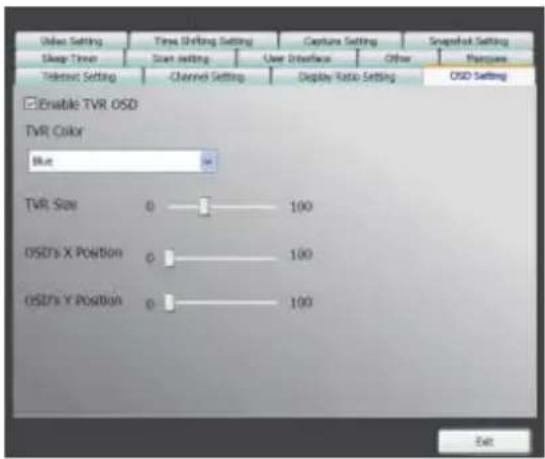
Here we can set the OSD color, show or not, and adjust the position, the font color.
text_image
UIV6 Setting Sleep Time Time Shifting Setting Start setting User Interface Other Pharques Takeout Setting Channel Setting Display Ratio Setting OSD Setting Enable TVR OSD TVR Color Blue TVR Size 0 —— 100 OSD's X Position 0 —— 100 OSD's Y Position 0 —— 100 Exit7.2.9 Video Setting
Here we can adjust the brightness, blue, red, contrast, saturation, the VMR type, and enable DxVA or not.
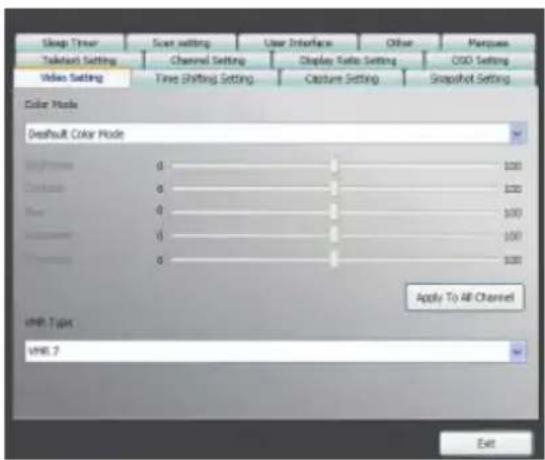
text_image
Sleep Timer User Interface Other Margins Telephone Setting Channel Setting Display Ratio Setting CSD Setting Video Setting Time Shifting Setting Capture Setting Snapshot Setting Color Mode Default Color Mode High: 6 100 Low: 6 100 Base: 6 100 None: 6 100 Apply To All Channel VHRL Type: VHRL 7 Exittext_image
Select Device Hybrid Devices Next Exitnatural_image
Landscape view of a park with trees and grass, no visible text or symbolsnatural_image
Group of people in a meeting setting, including uniformed officers and civilians, seated at a table with documents (no visible text or symbols)text_image
Stop Capturetext_image
Always On Top Display Ratio Preview Window Channel List Type Channel List Channel Preview Capture Time Shifting Snapshot Multi-View EPG SAP Add/Remove to my favorite Channel Up Channel Down Channel Recall Mute Volume Up Volume Down Hide Panel Exittext_image
Display Ratio Preview Window Channel List Type Channel List Free 4:3 16:9 Base On Source Apply To All Channeltext_image
Preview Window Channel List Type Full Screen Sizable Screen Borderless Screentext_image
Channel List Type Channel List Normal My Favoritetext_image
Channel Preview Capture Snapshot Multi-View 3x3 4x4 5x5 L Type Circle Typetext_image
Multi-View Start Multi-View EPG TV Walltext_image
Multi-View EPG P.O.P. P.I.P. Stop Multi-Viewtext_image
Always On Top Display Ratio Preview Window Source Input Channel List Type Channel List Channel Preview Capture Time Shifting Snapshot SAP Teletext Close Caption De-Noise Add/Remove to my favorite Channel Up Channel Down Channel Recall Mute Volume Up Volume Downnatural_image
Illustration of a speaker with musical notes and microphone on a blue gradient background (no text or symbols)text_image
Always On Top Channel List Type Channel List Time Shifting Capture Hide Panel Add/Remove to my favorite Channel Up Channel Down Channel Recall Mute Volume Up Volume Down Exitnatural_image
Human robot standing inside a rocky cave or tunnel, no visible text or symbolstext_image
Always On Top Channel List Type Channel List Time Shifting Capture Hide Panel Add/Remove to my favorite Channel Up Channel Down Channel Recall Mute Volume Up Volume Down Exittext_image
Sleep Timer Scan editing User Interface Other 30 Min(x) Close Application Log off Alternate Shutdown Reboot Set Cancel Exit7.1.1 Sleep Timer
text_image
Sleep Timer Scan setting User Interface Other Select Device Hybrid Device Next Exittext_image
Sleep Timer Scan setting User Interface Other Enable Transparent UI Panel Front Color Blue Exittext_image
Sleep Timer Scan setting User Interface Other Multi-language English Auto open last source when execute application Set Time Zone GMT +07:007.1.4 Andere

text_image
Tokenset Setting Channel Setting Display Ratio Setting QOLI Setting Video Setting Time Shifting Setting Capture Setting Snapshot Setting In-Alt View Setting Sleep Timer Scan setting User Interface Other Phenixes 30 Min(s) Close Application Log Off Hibernate Shutdown Netboot Set Cancel Exittext_image
Video Setting Channel Setting Display Ratio Setting OSO Setting Video Setting Time Setting Capture Setting Snapshot Setting Sleep Time Scan setting Use Interface Other Marquee Repeat Forward 10 Times Moving Distance 1 Pixel Moving Interval 20 ms Next Marquee Interval 3 Second Marquee Content Input Text Apply Select Text File Show E.P.G. content Show Time Start Exittext_image
Sleep Timer User setting User Interface Other Manpower Latent Setting Channel Setting Display Audio Setting GSSD Setting Video Setting Time Shifting Setting Capture Setting Snapshot Setting Save time shifting File Exit7.2.2 Time Shift Einstellung
text_image
Sleep Timer Scan setting User Interface Other Mouse Translation Setting Channel Setting Display Ratio Setting GSD Setting Video Setting Case Shifting Setting Capture Setting Snapshot Setting Voice Path C:\Documents and Settings\View\My Documents Capture Frame Setting ● Date-First format (systemmail_1.html) ○ User define Capture Format PRES2 Capture Strate 2000 fps Capture Resolution 720x480 Exittext_image
Sleep Timer Scan editing Scan Interface Other Pliances Tabulink Setting Channel Setting Display Ratio Setting DSS Setting Video Setting Time Shift Setting Capture Setting Snapshout Settings Snapshot Format Snapshot Count 1 Picture Path C:\Documents and Settings\User\My Documents\My Pictures Exittext_image
Video Setting Sleep Turner Tailtest Setting Time Shifting Setting Scan setting User Interface Other Pharmant Channel Setting Display Ratio Setting OISD Setting Main Pages Sub Pages Sub Tailtest Pages Transparent Sub7.2.5 Teletext Einstellung
text_image
Video Setting Sleep Timer Takeout Setting Display Ratio Free 4x3 16/9 Apply To All Channel Time Shifting Setting Scan Setting Scan Interface Other OSS Setting Capture Setting Snapshot Setting Horizontal Harpoon Channel Setting Display Ratio Setting OKtext_image
Video Setting Time Shifting Setting Capture Setting Snapshot Setting Sleep Timer Scan setting User Interface Other Harpoon Texted Setting Channel Setting Display Ratio Setting OSD Setting Enable TVR OSD TVR Color Blue TVR Size 0 —— 100 USD's X Position 0 —— 100 USD's X Position 0 —— 100 Settext_image
Sleep Timer Tobetest Setting Video Setting Scan setting Channel Setting Time Shifting Setting Display Ratio Setting Capture Setting COS Setting Snapshot Setting Color Mode Default Color Mode High: Low: None: None: Apply To All Channel VMI Type VMI 7 Exit7.2.9 Video Setting
Here we can adjust the brightness, blue, red, contrast, saturation, the VMR type, and enable DxVA or not.
text_image
Select Device Hybrid Devices Next Exitnatural_image
Outdoor scene with trees and a bridge, no visible text or symbolsBoutons de contrôle

Enregistrement

Décalage temporel

Capture d'écran

text_image
Photo of a meeting with officials and staff, one person speaking while others listen; visible Chinese text '好情' in top-left corner.text_image
Stop Capturetext_image
Always On Top Display Ratio Preview Window Channel List Type Channel List Channel Preview Capture Time Shifting Snapshot Multi-View EPG SAP Add/Remove to my favorite Channel Up Channel Down Channel Recall Mute Volume Up Volume Down Hide Panel Exittext_image
Display Ratio Preview Window Channel List Type Channel List Free 4:3 16:9 Base On Source Apply To All Channeltext_image
Preview Window Channel List Type Full Screen Sizable Screen Borderless Screentext_image
Channel List Type Channel List Normal My Favoritetext_image
Channel Preview Capture Snapshot Multi-View 3x3 4x4 5x5 L Type Circle Typetext_image
Multi-View Start Multi-View EPG TV Walltext_image
YANKEES YES EXCLUSIVE Chris "I'm too busy withness of what I'll be" HEDD: MATTER ON ROBINSON CAND ON RAILAY CABBRA ON ERIC PINSKS ON JOSE WOLINA ON 2018.7.43 BBC WORLD NEWStext_image
Multi-View EPG P.O.P. P.I.P. Stop Multi-Viewtext_image
Always On Top Display Ratio Preview Window Source Input Channel List Type Channel List Channel Preview Capture Time Shifting Snapshot SAP Teletext Close Caption De-Noise Add/Remove to my favorite Channel Up Channel Down Channel Recall Mute Volume Up Volume Downnatural_image
Illustration of a speaker with musical notes and microphone on a blue gradient background (no text or symbols)Boutons de contrôle

Enregistrement

Décalage temporel

text_image
Always On Top Channel List Type Channel List Time Shifting Capture Hide Panel Add/Remove to my favorite Channel Up Channel Down Channel Recall Mute Volume Up Volume Down Exitnatural_image
Human robot standing inside a cave with rocky terrain (no visible text or symbols)Boutons de contrôle

Enregistrement

Capture d'écran

Format d'affi chage

Volume -

Volume +

Mode Audio/Silence
text_image
Always On Top Channel List Type Channel List Time Shifting Capture Hide Panel Add/Remove to my favorite Channel Up Channel Down Channel Recall Mute Volume Up Volume Down ExitChapitre 6 Lecture
text_image
Sleep Timer Scan setting User Interface Other 30 Min(s) Close Application Lag Off Alternate Shutdown Reboot Set Cancel Exittext_image
Sleep Timer Scan setting User Interface Other Select Device Hybrid Device Next Exittext_image
Sleep Timer Scan setting User Interface Other Enable Transparent UI Panel Feet Color Blue Exittext_image
Sleep Timer Scan setting User Interface Other Multi-language English Auto open last source when execute application Set Time Zone GMT +07:00 that7.1.4 Autre

text_image
Tokenoid Setting Chisel Setting Display Ratio Setting OGD Setting Video Setting Time Shifting (setting) Capture Setting Snapshot Setting Multi View Setting Sleep Timer Zoom setting Share Interface Other Maximize 30 Min(s) Close Application Log Off Hibernate Shutdown Reboot Set Cancel Exittext_image
Token Setting Channel Setting Display Ratio Setting OISD Setting Video Setting Time Shifting Setting Capture Setting Snapchat Setting Deep Timer Scan setting Use Interface Other Marquee Repeat Forever 10 Times Moving Distance 1 Pixel Moving Interval 20 mm Next Marquee Interval 3 Second Marquee Content Input Text Apply Select Text File Show E.P.G. content Show Time Start Exittext_image
Sleep Timer User setting User Interface Other Manpower Latent Setting Channel Setting Display Audio Setting GSSD Setting Video Setting Time Shifting Setting Capture Setting Snapshot Setting Save time shifting File Exittext_image
Snapset Timer Scan editing User Interface Other Pharatus Takeout Setting Channel Setting Display Paths Setting O3D Setting Video Setting Time Shifting Setting Capture Setting Snapboot Setting Snapshot Format Snapshot Count 1 Picture Path C:\Documents and Settings\User\My Documents\My Pictures Exittext_image
Video Setting Sleep Timer Tidelet Setting Time Shifting Setting Scan setting Channel Setting Capture Setting Users Interface Display Radio Setting Capture Setting Other Phancysen CISD Setting Main Pages Sub Tracks Sub Tidesheet Pages Transporttext_image
Video Setting Sleep Timer Takeout Setting Display Ratio Free 4x3 16/9 Apply To All Channel Time Shifting Setting Scan Setting Scan Interface Other OSS Setting Capture Setting Snapshot Setting Horizontal Harpoon Channel Setting Display Ratio Setting OKtext_image
Video Setting Time Shifting Setting Capture Setting Snapshot Setting Sleep Timer Scan setting User Interface Other Harpoon Texterl Setting Channel Setting Display Ratio Setting OSD Setting Enable TVR OSD TVR Color Blue TVR Size 0 —— 100 USD's X Position 0 —— 100 USD's Y Position 0 —— 100 Set7.2.8 Réglages OSD
text_image
Select Device Hybrid Devices Next Exitnatural_image
Landscape view of a park with trees and a small bridge, no visible text or symbolsBotones de control

Captura

natural_image
Group of people in a meeting setting, including uniformed officers and civilians, seated at a table with documents (no visible text or symbols)text_image
Stop Capturetext_image
Always On Top Display Ratio Preview Window Channel List Type Channel List Channel Preview Capture Time Shifting Snapshot Multi-View EPG SAP Add/Remove to my favorite Channel Up Channel Down Channel Recall Mute Volume Up Volume Down Hide Panel Exittext_image
Display Ratio Preview Window Channel List Type Channel List Free 4:3 16:9 Base On Source Apply To All Channeltext_image
Preview Window Channel List Type Full Screen Sizable Screen Borderless Screentext_image
Channel List Type Channel List Normal My Favoritetext_image
Channel Preview Capture Snapshot Multi-View 3x3 4x4 5x5 L Type Circle Typetext_image
Multi-View Start Multi-View EPG TV Walltext_image
Multi-View EPG P.O.P. P.I.P. Stop Multi-Viewtext_image
Always On Top Display Ratio Preview Window Source Input Channel List Type Channel List Channel Preview Capture Time Shifting Snapshot SAP Teletext Close Caption De-Noise Add/Remove to my favorite Channel Up Channel Down Channel Recall Mute Volume Up Volume Downnatural_image
Illustration of a speaker with musical notes and microphone on a blue gradient background (no text or symbols)Botones de control

Capturar

text_image
Always On Top Channel List Type Channel List Time Shifting Capture Hide Panel Add/Remove to my favorite Channel Up Channel Down Channel Recall Mute Volume Up Volume Down Exitnatural_image
Human robot standing inside a cave with rocky terrain (no visible text or symbols)Botones de control

Capturar

Foto instantánea

text_image
Always On Top Channel List Type Channel List Time Shifting Capture Hide Panel Add/Remove to my favorite Channel Up Channel Down Channel Recall Mute Volume Up Volume Down Exittext_image
Sleep Timer Scan editing User Interface Other 30 Min(s) Close Application Log Off Hitemate Shutdown Reboot Set Cancel Exittext_image
Sleep Timer Scan setting User Interface Other Select Device hybrid Device Next Exittext_image
Sleep Timer Start setting User Interface Other Enable Transparent UI Panel Font Color Blue Exittext_image
Sleep Timer Scan setting User Interface Other Multi-language English □ Auto open last source when execute application Set Time Zone GMT +07:007.1.4 Otro
text_image
Timeout Setting Time Shifting Setting Sleep Timer Channel Setting Capture Setting Scan setting User Interface Snapshot Setting Other Video Setting In All New Setting Pharmate 30 Min(s) Close Application Log Off Hibernate Shutdown Linkout Set Cancel Exittext_image
Trivalent Setting Channel Setting Display Rate Setting CISD Setting Video Setting Time Shifting Setting Capture Setting Snapshot Setting Sleep Timer Scan setting Use Interface Other Marquee Repeat Forward 10 Times Moving Distance 1 Pixel Moving Interval 20 mm Next Marquee Interval 3 Second Marquee Content Input Text Apply Select Text File Show E.P.G. content Show Time Start Exittext_image
Sleep Timer Zoom setting User Interface Other Manpower Telehost Setting Channel Setting Display Marks Setting OSS Setting Video Setting Time Shifting Setting Capture Setting Snapshot Setting Save time shifting File Exittext_image
Sleep Timer Scan setting User Interface Other Pharmate Tuboot Setting Channel Setting Display Ratio Setting OED Setting Video Setting Time Shifting Setting Capture Setting Snapshot Setting Video Path C:\Documents and Settings\Show\My Documents Capture Name Setting Date-Site format (overhead01.html) Layer define: Capture Format MPT52 2000 fps Capture Mode 2000 fps Capture Resolution 720x480 Exittext_image
Sleep Timer Scan setting Scan Interface Other Planctues Tobust Settings Channel Setting Display Rate Setting DVD Setting Video Setting Time Shifting Setting Capture Setting Snapshot Setting Snapshot Format: SNAP Snapshot Count 1 Picture Path: C:\Documents and Settings\My Documents\My Pictures Exittext_image
Video Setting Stage Ticker Textend Setting Time Shifting Setting Scan setting Channel Setting Capture Setting Uses Interface Display Ratio Setting Capture Setting Other Harpoon OISD Setting Main Page Sub Page Sub Textend Page Transparenttext_image
Video Setting Sleep Timer Takout Setting Time Shifting Setting Scan setting Channel Setting Capture Setting User Interface Display Ratio Setting Other OIS Setting Channel Preview Format Circle Type S-Video Video Standard Channel Preview Interval Sec(x) Composite Video Standard Select Channel Group Normal Number Lock Parent Lock Channel Name Frequency(1) Video Standard Audio 0 1 2 3 4 5 6 7 8 9 CH.1 01250000 NTSC_M Mono CH.2 01250000 NTSC_M Mono CH.3 01250000 NTSC_M Mono CH.4 01250000 NTSC_M Mono CH.5 01250000 NTSC_M Mono CH.6 01250000 NTSC_M Mono CH.7 01250000 NTSC_M Mono CH.8 01250000 NTSC_M Mono CH.9 01250000 NTSC_M Mono OKtext_image
Video Setting Sleep Timer Takeout Setting Display Ratio Free 4x3 16/9 Apply To All Channel Time Shifting Setting Scan Setting Scan Interface Other OSS Setting Capture Setting Snapshot Setting Harpoon Chancet Setting Display Ratio Settingtext_image
Video Setting Time Shifting Setting Capture Setting Snapshot Setting Sleep Timer Scan setting User Interface Other Harpoon Texted Setting Channel Setting Display Ratio Setting OSD Setting Enable TVR OSD TVR Color Blue TVR Size 0 —— 100 USD's X Position 0 —— 100 USD's X Position 0 —— 100 Settext_image
Sleep Timer Tolerance Setting Video Setting Scan setting Channel Setting Time Shifting Setting User Interface Display Ratio Setting Capture Setting Other COSD Setting Snapshot Setting Color Mode Default Color Mode High: 0 Low: 0 High: 0 Low: 0 Apply To All Channel VH8 Type VH8 7 Exittext_image
Select Device Hybrid Devices Next Exitnatural_image
Outdoor scene with trees and a paved path, no visible text or symbolsКнопки управления

Захват

Сдвиг во Времени

Снимок

Предпросмотр

EPG

SAP

Размер экрана

Предыдущий канал

Следующий канал

Уменьшить звук

Увеличить звук

natural_image
Group of people in a meeting setting, including uniformed officers and civilians, seated at a table with documents (no visible text or symbols)text_image
Stop Capturetext_image
Always On Top Display Ratio Preview Window Channel List Type Channel List Channel Preview Capture Time Shifting Snapshot Multi-View EPG SAP Add/Remove to my favorite Channel Up Channel Down Channel Recall Mute Volume Up Volume Down Hide Panel Exittext_image
Display Ratio Preview Window Channel List Type Channel List Free 4:3 16:9 Base On Source Apply To All Channeltext_image
Preview Window Channel List Type Full Screen Sizable Screen Borderless Screentext_image
Channel List Type Channel List Normal My Favoritetext_image
Channel Preview Capture Snapshot Multi-View 3x3 4x4 5x5 L Type Circle Typetext_image
Multi-View Start Multi-View EPG TV Walltext_image
Multi-View EPG P.O.P. P.I.P. Stop Multi-ViewHide Panel: Hide or show the control panel (the VIVO™ interface)
Exit: Close/Exit VIVO ^TM window
text_image
Always On Top Display Ratio Preview Window Source Input Channel List Type Channel List Channel Preview Capture Time Shifting Snapshot SAP Teletext Close Caption De-Noise Add/Remove to my favorite Channel Up Channel Down Channel Recall Mute Volume Up Volume Downnatural_image
Illustration of a speaker with musical notes and microphone on a blue gradient background (no text or symbols)Кнопки управления

Захват

Сдвиг во Времени

Уменьшить частоту

Увеличить частоту

Предыдущий канал

Следующий канал

Уменьшить звук

Увеличить звук

text_image
Always On Top Channel List Type Channel List Time Shifting Capture Hide Panel Add/Remove to my favorite Channel Up Channel Down Channel Recall Mute Volume Up Volume Down Exitnatural_image
Human robot standing inside a cave with rocky terrain (no visible text or symbols)Кнопки управления

Захват


text_image
Sleep Timer Scan setting User Interface Other 30 Min(s) Close Application Log off Alternate Shutdown Reboot Set Cancel Exit7.1.1 Таймер Сна
text_image
Sleep Timer Scan setting User Interface Other Select Device Hybrid Device Next Exittext_image
Sleep Timer Scan setting User Interface Other Enable Transparent UI Panel Font Color Blue Exittext_image
Sleep Timer Spin-setting User Interface Other Multi-language English Auto open last source when execute application Set Time Zone GMT +07:007.1.4 Прочее

text_image
Timeout Setting Time Shifting Setting Sleep Timer Channel Setting Capture Setting Scan setting Display Ratio Setting Snapshot Setting Use Interface Other Video Setting Multi-View Setting Hexose 30 Min(s) Close Application Log Off Hibernate Shutdown Runboot Set Cancel Exittext_image
Telephone Setting Channel Setting Display Ratio Setting CISD Setting User Setting Time Shifting Setting Capture Setting Snapshot Setting Sleep Timer Scan setting User Interface Other Marquee Repeat Forever 10 Times Moving Distance 1 Pixel Moving Interval 20 ms Next Marquee Interval 3 Second Marquee Content Input Text Apply Select Test File Show E.P.G. content Show Time Start Exittext_image
Sleep Timer Scan setting User Interface Other Manusset Relament Setting Channel Setting Display Audio Setting GSSD Setting Video Setting Time Shifting Setting Capture Setting Snapshot Setting Save time shifting File Exittext_image
Sleep Timer Scan setting User Interface Other Pharque Timeout Setting Channel Setting Display Ratio Setting OGD Setting Video Setting Time Shifting Setting Capture Setting Snapshot Setting Video Path C:\Documents and Settings\Users\My Documents Capture Name Setting ● Data-size format (commonwith_fithrs) ○ User define: Capture Format MPES2 Capture Image 2000 fps Capture Resolution 720x490 Exittext_image
Snap Timer User setting User Interface Other Pliances Talabout Setting Channel Setting Display Ratio Setting GSD Setting Video Setting Time Shifting Setting Capture Setting SnapShot Settings SnapShot Format SnapShot Count 1 Picture Path: C:\Documents and Settings\User\My Documents\My Pictures Exittext_image
Video Setting Sleep Timer Takeout Setting Display Ratio Free 4x3 16/9 Apply To All Channel Time Shifting Setting Scan Setting Scan Interface Other OSS Setting Capture Setting Snapshot Setting Horizontal Harpoon Channel Setting Display Ratio Setting OKtext_image
Video Setting Time Shifting Setting Capture Setting Snapshot Setting Sleep Timer Scan setting User Interface Other Harpoon Texterl Setting Channel Setting Display Ratio Setting OSD Setting Enable TVR OSD TVR Color Blue TVR Size 0 —— 100 USD's X Position 0 —— 100 USD's X Position 0 —— 100 Set7.2.8 Настройка OSD
text_image
Sleep Timer Tobetest Setting Video Setting Scan setting Channel Setting Time Shifting Setting User Interface Display Ratio Setting Capture Setting Other CSD Setting Snapshot Setting Color Mode Default Color Mode High: 0 Low: 0 High: 0 Low: 0 Apply To All Channel v48. Type v48. 7 Exittext_image
Select Device Hybrid Devices Next Exitnatural_image
Landscape view of a park with trees and grass, no visible text or symbolsKontrol Düğmeleri

Yakala

Zaman Kaydırma

Ekran Resmi

Kanal Önizleme

EPG

SAP

Görüntü Oranı

Önceki Kanal

Sonraki Kanal

Sesi Kıs

Sesi Aç

Ses Açık/ Ses Kapalı
text_image
Street photo with visible store signboards and people in uniform during a meeting or interviewtext_image
Stop Capturetext_image
Always On Top Display Ratio Preview Window Channel List Type Channel List Channel Preview Capture Time Shifting Snapshot Multi-View EPG SAP Add/Remove to my favorite Channel Up Channel Down Channel Recall Mute Volume Up Volume Down Hide Panel Exittext_image
Display Ratio Preview Window Channel List Type Channel List Free 4:3 16:9 Base On Source Apply To All Channeltext_image
Preview Window Channel List Type Full Screen Sizable Screen Borderless Screentext_image
Channel List Type Channel List Normal My Favoritetext_image
Channel Preview Capture Snapshot Multi-View 3x3 4x4 5x5 L Type Circle Typetext_image
Multi-View Start Multi-View EPG TV Walltext_image
Multi-View EPG P.O.P. P.I.P. Stop Multi-Viewtext_image
Always On Top Display Ratio Preview Window Source Input Channel List Type Channel List Channel Preview Capture Time Shifting Snapshot SAP Teletext Close Caption De-Noise Add/Remove to my favorite Channel Up Channel Down Channel Recall Mute Volume Up Volume Downnatural_image
Illustration of a speaker with musical notes and microphone on a blue gradient background (no text or symbols)Kontrol Düğmeleri

Yakala

Zaman Kaydırma

Frekansı Azalt

Frekansı Arttir

Önceki Kanal

Sonraki Kanal

Sesi Kıs Sesi Aç


Ses Açık/ Ses Kapalı
text_image
Always On Top Channel List Type Channel List Time Shifting Capture Hide Panel Add/Remove to my favorite Channel Up Channel Down Channel Recall Mute Volume Up Volume Down Exitnatural_image
Human robot standing inside a cave with rocky terrain (no visible text or symbols)Kontrol Düğmeleri

Yakala


text_image
Always On Top Channel List Type Channel List Time Shifting Capture Hide Panel Add/Remove to my favorite Channel Up Channel Down Channel Recall Mute Volume Up Volume Down ExitBölüm 6 Oynatma
text_image
Sleep Timer Scan editing User Interface Other 30 Min(s) Close Application Lag off Intermate Shutdown Reboot Set Cancel Exit7.1.1 Uyku Zaman Ayari
text_image
Sleep Timer Scan setting User Interface Other Select Device Hybrid Device Next Exit7.1.2 Tarama Ayari

text_image
Sleep Timer Start setting User Interface Other Enable Transparent UI Panel Font Color Blue Exittext_image
Sleep Time Scan setting User Interface Other Multi-language English Auto open last source when execute application Set Time Zone GMT +07:00 set7.1.4 Diğer
text_image
Tasket Setting Close Shifting Setting Sleep Timer Channel Setting Capture Setting Scan settings View Setting Display Audio Setting Snapshot Setting Other Multi-View Setting Phenixte 30 Min(s) Close Application Log Off Hibernate Shutdown Redock Set Cancel Exittext_image
Transient Setting Channel Setting Display Rate Setting OSS Setting User Setting Time Shifting Setting Capture Setting Snapshot Setting Sleep Timer Scan setting User Interface Other Marquee Repeat Forward 10 Times Moving Distance 1 Pixel Moving Interval 20 mm Next Marquee Interval 3 Second Marquee Content Input Text Apply Select Text File Show E.P.G. content Show Time Start Exittext_image
Sleep Timer User setting User Interface Other Phenotype Tailment Setting Channel Setting Display Marks Setting CISD Setting Video Setting Time Shifting Setting Capture Setting Snapshot Setting Save time shifting File Exittext_image
Sleep Timer Scan setting User Interface Other Pharque Tubbot Setting Channel Setting Display Ratio Setting OGD Setting Video Setting Time Shifting Setting Capture Setting Snapshot Setting Video Path C:\Documents and Settings\User\My Documents Capture Name Setting ● Determine format (document1_fithin) ○ User define Capture Format MPS2 Capture Frames 2000 fps Capture Resolution 720x490 Exit7.2.3 Yakalama Ayarı
text_image
Sleep Timer Scan setting User Interface Other Plancture Referent Setting Channel Setting Display Pulse Setting O3D Setting video-Setting Time-Shifting Setting Capture Setting Snapshot Format Snapshot Count 1 Picture Path: C:\Documents and Settings\User\My Documents\My Pictures Exittext_image
Video Setting Sleep Timer T elevated Setting Time Shifting Setting Scan setting Channel Setting Capture Setting User Interface Display Radio Setting Capture Setting Other Handset CISD Setting Main Pages Sub Pages Sub T elevated Pages Transport7.2.5 Teletext Ayari
text_image
Video Setting Sleep Timer Takeout Setting Display Ratio Free 4x3 16/9 Apply To All Channel Time Shifting Setting Scan Setting Scan Interface Other OSS Setting Capture Setting Snapshot Setting Horizontal Harpoon Channel Setting Display Ratio Setting OKtext_image
Video Setting Time Shifting Setting Capture Setting Snapshot Setting Sleep Timer Scan setting User Interface Other Harpoon Texterl Setting Channel Setting Display Ratio Setting OSD Setting Enable TVR OSD TVR Color Blue TVR Size 0 —— 100 USD's X Position 0 —— 100 USD's X Position 0 —— 100 Settext_image
Sleep Timer Tobetest Setting Video Setting Scan setting Channel Setting Time Shifting Setting Display Ratio Setting Capture Setting COSD Setting Snapshot Setting Color Mode Default Color Mode High: Low: None: Apply To All Channel VMI Type VMI 7 Exit7.2.9 Video Ayarı
text_image
Select Device Hybrid Devices Next Exitnatural_image
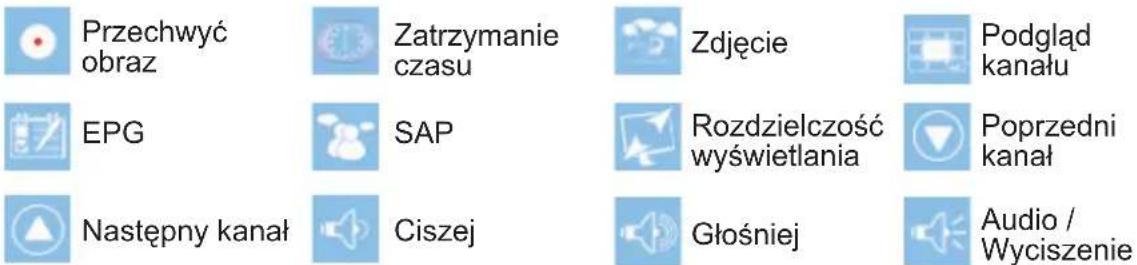
Outdoor scene with trees and a paved path, no visible text or symbolsPrzyciski kontrolne
natural_image
Group of people in a meeting setting, including uniformed officers and elderly men, seated at a table with documents (no visible text or symbols)text_image
Stop Capturetext_image
2009/5/12 Tuesday 2009/5/13 Wednesday 2009/5/14 Thursday 2009/5/15 Friday 2009/5/16 Saturday 2009/5/17 Sunday 2009/5/18 Monday 2009/5/18 02:00:00 01:30:00 流星花园 Circtext_image
Always On Top Display Ratio Preview Window Channel List Type Channel List Channel Preview Capture Time Shifting Snapshot Multi-View EPG SAP Add/Remove to my favorite Channel Up Channel Down Channel Recall Mute Volume Up Volume Down Hide Panel Exittext_image
Display Ratio Preview Window Channel List Type Channel List Free 4:3 16:9 Base On Source Apply To All Channeltext_image
Preview Window Channel List Type Full Screen Sizable Screen Borderless Screentext_image
Channel List Type Channel List Normal My Favoritetext_image
Channel Preview Capture Snapshot Multi-View 3x3 4x4 5x5 L Type Circle Typetext_image
Multi-View EPG Start Multi-View TV Walltext_image
Multi-View EPG P.O.P. P.I.P. Stop Multi-Viewtext_image
Always On Top Display Ratio Preview Window Source Input Channel List Type Channel List Channel Preview Capture Time Shifting Snapshot SAP Teletext Close Caption De-Noise Add/Remove to my favorite Channel Up Channel Down Channel Recall Mute Volume Up Volume Downnatural_image
Illustration of a speaker with musical notes and strings on a blue background (no text or symbols)Przyciski kontrolne

Przechwyć obraz

Zatrzymanie czasu

text_image
Always On Top Channel List Type Channel List Time Shifting Capture Hide Panel Add/Remove to my favorite Channel Up Channel Down Channel Recall Mute Volume Up Volume Down Exitnatural_image
Human figure standing inside a dimly lit cave with rocky walls (no visible text or symbols)Przyciski kontrolne

Przechwyć obraz

Zdjęcie

text_image
Always On Top Channel List Type Channel List Time Shifting Capture Hide Panel Add/Remove to my favorite Channel Up Channel Down Channel Recall Mute Volume Up Volume Down Exittext_image
Sleep Timer Start setting User Interface Other 30 Min(s) Close Application Lag Diff Intensate Shutdown Reboot Set Cancel Exit7.1.1 Sleep Timer
text_image
Sleep Timer Scan setting User Interface Other Select Device Hybrid Device Next Exit7.1.2 Scan Setting

text_image
Sleep Timer Scan setting User Interface Other Enable Transparent UI Panel Feet Color Blue Exit7.1.3 User Interface
text_image
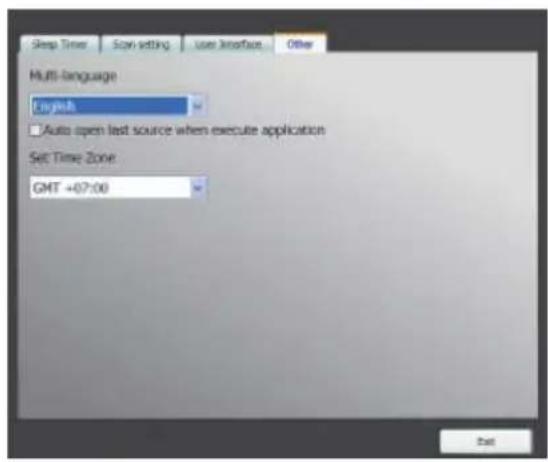
Sleep Timer Spin setting User Interface Other Multi-language English □ Auto open last source when execute application Set Time Zone GMT +07:00 Exit7.1.4 Other

text_image
Talentoid Setting Channel Setting Display Ratio Setting GOLD Setting Video Setting Time Shifting Setting Capture Setting Snapshot Setting Multi-View Setting Sleep Timer Scan setting User Interface Other Placebox 30 Min(s) Close Application Log Off Hibernate Shutdown Reboot Set Cancel Endtext_image
Takeout Setting Channel Setting Display Rate Setting CISD Setting User Setting Time Setting Capture Setting Snapshot Setting Sleep Timer Scan setting Use Interface Other Marquee Repeat Forward 10 Times Moving Distance 1 Pixel Moving Interval 20 ms Next Marquee Interval 3 Second Marquee Content Input Test Apply Select Test File Show E.P.G. content Show Time Start Exittext_image
Sleep Timer Zoom setting User Interface Other Manpower Takeout Setting Channel Setting Display Marks Setting OSS Setting Video Setting Time Shifting Setting Capture Setting Snapshot Setting Save time shifting File Exittext_image
Sleep Timer Scan editing User Interface Other Plantimes Takeout Setting Channel Setting Display Marks Setting DSSB Setting video Setting Time Shifting Setting Capture Setting Snapshot Setting Snapshot Format: Snap Snapshot Count 1 Picture Path: C:\Documents and Settings\user\My Documents\My Pictures Exittext_image
video Setting Sleep Timer Textlet Select Main Pages Sub-Page Sub Textlet Select Transparent Capture Setting User Interface Display Marks Setting Other Phlegium DGB Setting Video Setting Time Shifting Setting Capture Setting Snapshot Setting Screen setting Scan setting Display Interface Other Phlegium Textlet Select Channel Setting Display Marks Setting DVD Setting7.2.5 Ustawienia teletextu - Teletext Setting
text_image
Video Setting Sleep Timer Takout Setting Time Shifting Setting Scan setting Channel Setting Capture Setting User Interface Display Ratio Setting Other OIS Setting Channel Preview Format Circle Type S-Video Video Standard Channel Preview Interval Sec(x) Composite Video Standard Select Channel Group Normal Number Lock Parent Lock Channel Name Frequency(Y) Video Standard Audio 0 1 2 3 4 5 6 7 8 9 CH.1 NTSC_M Mono CH.2 NTSC_M Mono CH.3 NTSC_M Mono CH.4 NTSC_M Mono CH.5 NTSC_M Mono CH.6 NTSC_M Mono CH.7 NTSC_M Mono CH.8 NTSC_M Mono CH.9 NTSC_M Mono CH.10 NTSC_M Mono Chtext_image
Video Setting Sleep Timer Takeout Setting Display Ratio Free 4x3 16/9 Apply To All Channel Time Shifting Setting Scan Setting Scan Interface Other OSS Setting Capture Setting Snapshot Setting Horizontal Harpoon Channel Setting Display Ratio Setting OKtext_image
Video Setting Time Shifting Setting Capture Setting Snapshot Setting Sleep Timer Scan setting User Interface Other Harpoon Texterl Setting Channel Setting Display Ratio Setting OSD Setting Enable TVR OSD TVR Color Blue TVR Size 0 —— 100 USD's X Position 0 —— 100 USD's X Position 0 —— 100 Set7.2.8 Ustawiania OSD – OSD Setting
text_image
Sleep Timer Tobetest Setting Video Setting Scan setting Channel Setting Time Shifting Setting Display Ratio Setting Capture Setting COSD Setting Snapshot Setting Color Mode Default Color Mode High: Low: None: Apply To All Channel VMI Type VMI 7 Exit7.2.9 Ustawienia Video - Video Setting
text_image
Select Device Hybrid Devices Next Exitnatural_image
Landscape view of a park with trees and grass, no visible text or symbolsOvládací tlačítka

Nahrát a uložit

Posun času

Okamžitý snímek

Přehrávání kanálu

EPG

SAP

Zobrazení poměru

O jeden kanál dolů

natural_image
Group of people in a meeting setting, including uniformed officers and elderly men, seated at a table with documents (no visible text or symbols)text_image
Stop Capturetext_image
Always On Top Display Ratio Preview Window Channel List Type Channel List Channel Preview Capture Time Shifting Snapshot Multi-View EPG SAP Add/Remove to my favorite Channel Up Channel Down Channel Recall Mute Volume Up Volume Down Hide Panel Exittext_image
Display Ratio Preview Window Channel List Type Channel List Free 4:3 16:9 Base On Source Apply To All Channeltext_image
Preview Window Channel List Type Full Screen Sizable Screen Borderless Screentext_image
Channel List Type Channel List Normal My Favoritetext_image
Channel Preview Capture Snapshot Multi-View 3x3 4x4 5x5 L Type Circle Typetext_image
Multi-View EPG Start Multi-View TV Walltext_image
Always On Top Display Ratio Preview Window Source Input Channel List Type Channel List Channel Preview Capture Time Shifting Snapshot SAP Teletext Close Caption De-Noise Add/Remove to my favorite Channel Up Channel Down Channel Recall Mute Volume Up Volume Downnatural_image
Illustration of a speaker with musical notes and strings on a blue background (no text or symbols)Ovládací tlačítka

Nahrát a uložit

Posun času

Snížení frekvence

Zvýšení frekvence

O jeden kanál dolů

text_image
Always On Top Channel List Type Channel List Time Shifting Capture Hide Panel Add/Remove to my favorite Channel Up Channel Down Channel Recall Mute Volume Up Volume Down ExitKapitola 5 Video vstup
natural_image
Human figure standing inside a dimly lit cave with rocky walls (no visible text or symbols)Ovládací tlačítka

Nahrát a uložit

Okamžitý snímek

Zobrazení poměru

Snížení hlasitosti

Zvýšení hlasitosti

text_image
Always On Top Channel List Type Channel List Time Shifting Capture Hide Panel Add/Remove to my favorite Channel Up Channel Down Channel Recall Mute Volume Up Volume Down Exittext_image
Sleep Timer Scan setting User Interface Other 30 Min(x) Close Application Log Off Alternate Shutdown Reboot Set Cancel Exittext_image
Sleep Times Scan setting User Interface Other Select Device hybrid Device Next Exittext_image
Sleep Timer Scan setting User Interface Other Multi-Language English □ Auto open last source when execute application Set Time Zone GMT +07:007.1.4 Ostatní
text_image
Takeout Setting Time Shifting Setting Sleep Timer Channel Setting Capture Setting Scanout Setting Scan setting User Interface Other Video Setting Multi View Setting Harpus 30 Min(s) Close Application Log Off Hibernate Shutdown Reboot Set Cancel Exittext_image
Takeout Setting Video Setting Sleep Timer Channel Setting Time Shifting Setting Scan setting User Interface Display Ratio Setting Capture Setting Other OCD Setting Snapshot Setting Matchbox Repeat Forever 10 Times Moving Distance 1 Plot Moving Interval 20 ms Next Marquee Interval 3 Second Marquee Content Input Text Apply Select Text File Show E.P.G. content Show Time Start Exittext_image
Sleep Timer Screen setting Use Interface Other Manpower Relevant Setting Channel Setting Display Marks Setting DVD Setting Video Setting Time Shifting Setting Capture Setting Snapshot Setting Save time shifting File Exittext_image
Sleep Timer Scan setting User Interface Other Mouse Video Setting Channel Setting Display Ratio Setting OCD Settings Video Setting Time Shifting Setting Capture Setting Snapshot Setting Video Path C:\Documents and Settings\Screen\My Documents Capture Frame Setting Date-Size format (Superviziatic_Hrms) User define Capture Format MPSS2 in Capture Strate 1000 fps Capture Synculation 720x480 in Exittext_image
Sleep Timer User setting User Interface Other Planpass Palestine Setting Channel Setting Display Ratio Setting CAS Setting Video Setting Time Shifting Setting Capture Setting Snapshot Settings Snapshot Format Snapshot Count 1 Picture Hash C:\Documents and Settings\User\My Documents\My Pictures Exittext_image
Video Setting Deep Tree Telebird Setting Time Shifting Setting Scan setting Channel Setting Capture Setting Uses Interface Display Rank Setting Capture Setting Other Phoncet OSO Setting Main Pages Sub Pages Sub Telebird Pages Transporttext_image
Video Setting Sleep Timer Takeout Setting Display Ratio Free 4x3 16/9 Apply To All Channel Time Shifting Setting Scan Setting Scan Interface Other OSS Setting Capture Setting Snapshot Setting Horizontal Harpoon Channel Setting Display Ratio Setting OKtext_image
Video Setting Time Shifting Setting Capture Setting Snapshot Setting Sleep Timer Scan setting User Interface Other Harpoon Texterl Setting Channel Setting Display Ratio Setting OSD Setting Enable TVR OSD TVR Color Blue TVR Size 0 —— 100 USD's X Position 0 —— 100 USD's X Position 0 —— 100 Settext_image
Sleep Timer Tobetest Setting Video Setting Scan setting Channel Setting Time Shifting Setting User Interface Display Ratio Setting Capture Setting Other COSD Setting Snapshot Setting Color Mode Default Color Mode High: 0 Low: 0 High: 0 Low: 0 Apply To All Channel VMI Type VMI 7 Exittext_image
Select Device Hybrid Devices Next Exit2.1 Painel Principal
text_image
vivo™ GIGABYTEBotões

Sair

Minimizar

Sobre

Entrada Fonte

Modo FM

Confi guração

Playback

Foto

natural_image
Outdoor scene with trees and a bridge, no visible text or symbolsBotões Controle

Captura

Troca de Horário

Instantâneo

Apresentação Canal

EPG

SAP

Relação Exibição

Canal para baixo

Canal para cima

Diminuir Volume

Aumentar volume

Modo áudio/ Mudo
natural_image
Group of people in a meeting setting, including uniformed officers and civilians, seated at a table with documents (no visible text or symbols)text_image
Stop Capturetext_image
Always On Top Display Ratio Preview Window Channel List Type Channel List Channel Preview Capture Time Shifting Snapshot Multi-View EPG SAP Add/Remove to my favorite Channel Up Channel Down Channel Recall Mute Volume Up Volume Down Hide Panel Exittext_image
Display Ratio Preview Window Channel List Type Channel List Free 4:3 16:9 Base On Source Apply To All Channeltext_image
Preview Window Channel List Type Full Screen Sizeable Screen Borderless Screentext_image
Channel List Type Channel List Normal My Favoritetext_image
Channel Preview Capture Snapshot Multi-View 3x3 4x4 5x5 L Type Circle Typetext_image
Multi-View Start Multi-View EPG TV Walltext_image
Multi-View EPG P.O.P. P.I.P. Stop Multi-View3.1 Painel Principal
text_image
2:34 PM vivo™ Cable - Live 5 - CH 5 GIGABYTEBotões

Sair

Minimizar

Sobre

Entrada Fonte

Modo FM

Confi guração

Playback

Foto

text_image
Always On Top Display Ratio Preview Window Source Input Channel List Type Channel List Channel Preview Capture Time Shifting Snapshot SAP Teletext Close Caption De-Noise Add/Remove to my favorite Channel Up Channel Down Channel Recall Mute Volume Up Volume Down4.1 Painel Principal
text_image
上午 09:52 vivo™ 廣播 - Live 6 - CH6 - 9810.5017 GIGABYTEBotões

Sair

Minimizar

Sobre

Entrada Fonte

Modo FM

Confi guração

Playback

Foto

natural_image
Illustration of a speaker with musical notes and microphone on a blue background (no text or symbols)Botões Controle

Capturar

Troca de Horário

Reduzir Frequência

text_image
Always On Top Channel List Type Channel List Time Shifting Capture Hide Panel Add/Remove to my favorite Channel Up Channel Down Channel Recall Mute Volume Up Volume Down Exit5.1 Painel Principal
text_image
2:48 PM vivo™ Composite - Live GIGABYTEBotões

Sair

Minimizar

Sobre

Entrada Fonte

Modo FM

Confi guração

Playback

Foto

natural_image
Human figure standing inside a cave with rocky terrain (no visible text or symbols)Botões Controle

Capturar

Instantâneo

text_image
Always On Top Channel List Type Channel List Time Shifting Capture Hide Panel Add/Remove to my favorite Channel Up Channel Down Channel Recall Mute Volume Up Volume Down ExitCapítulo 6 Playback
text_image
Sleep Timer Scan editing User Interface Other 30 Min(s) Close Application Log Off Intermate Shutdown Reboot Set Cancel Exittext_image
Sleep Time Scan setting User Interface Other Select Device Hybrid Device Next Exittext_image
Sleep Timer Scan setting User Interface Other Enable Transparent UI Panel Font Color Blue Exittext_image
Sleep Time Scan setting User Interface Other Multi-language English Auto open last source when execute application Set Time Zone GMT +07:00 box7.1.4 Outro
