
U7300 - TV receiver GIGABYTE - Free user manual and instructions
Find the device manual for free U7300 GIGABYTE in PDF.


| Product type | Digital TV receiver |
| Brand | Gigabyte |
| Model | U7300 |
| Dimensions (W x D x H) | 200 mm x 150 mm x 40 mm |
| Weight | 0.5 kg |
| Power supply | 5 V DC / 1 A (power adapter included) |
| Main functions | DTT and satellite reception (DVB-T2 / DVB-S2), HDMI output, USB port for recording and media playback, parental control |
| Maintenance and cleaning | Clean with a soft, dry cloth. Do not use abrasive products or solvents. |
| Safety | Do not expose the device to moisture, heat sources or shocks. Disconnect during storms. |
| Spare parts and repairability | Remote control, power adapter, HDMI cable. Professional repair recommended. |
| General information | Brand Gigabyte, model U7300, high-definition digital TV receiver. 2-year warranty. |
Frequently Asked Questions - U7300 GIGABYTE
User questions about U7300 GIGABYTE
0 question about this device. Answer the ones you know or ask your own.
Ask a new question about this device
Download the instructions for your TV receiver in PDF format for free! Find your manual U7300 - GIGABYTE and take your electronic device back in hand. On this page are published all the documents necessary for the use of your device. U7300 by GIGABYTE.
USER MANUAL U7300 GIGABYTE
Thanks for your purchasing. It is highly recommended that you check all the functions that the device supports carefully before using the program. This manual will guide you through the essential information of how to use this application program.
VIVO ™ is a multi-functional, graphical and easy-to-use application software that offers you the most comprehensive multimedia entertainment enjoyment. Please notice that the multimedia functions may vary depending on the product you purchased.

1.1 Software Features
- It's a multi-functional, graphical software application program that consumes less RAM space and CPU capacity.
- Time-shifting: Any programs can be paused and continued whenever you want.
- PIP/POP (Picture-In-Picture/Picture-Out-Picture): You can watch different TV programs simultaneously by multi-displays and drag/adjust screens.
- It supports multi-viewing of programs/channels (programs/channels must be from the same stream/TV service provider)
- It supports 3x3, 4x4, 5x5, L Type and Circle Type multi-channel preview.
- It supports schedule-recording function to record your favorite TV shows.
- It supports analog recording in MPEG1, MPEG2, MPEG4, H.264, PSP, and IPod formats
- It supports Digital Zoom in Original, 2X, 3X and 4X
- Adjustments in viewing windows: Full Screen, Sizable Screen and Borderless Screen
- It supports Program stream (PS) and Transport stream (TS) digital recording format.
- It supports decoding of digital TV for HDTV and H.264
1.2 TV Setup
1.2.1 Channel Scanning
When you run VIVO ™ for the first time, the system will guide you through the necessary steps of chan-nel scanning.

- Please select the device type (e.g. digital, analog or hybrid) you purchased and click "Next".
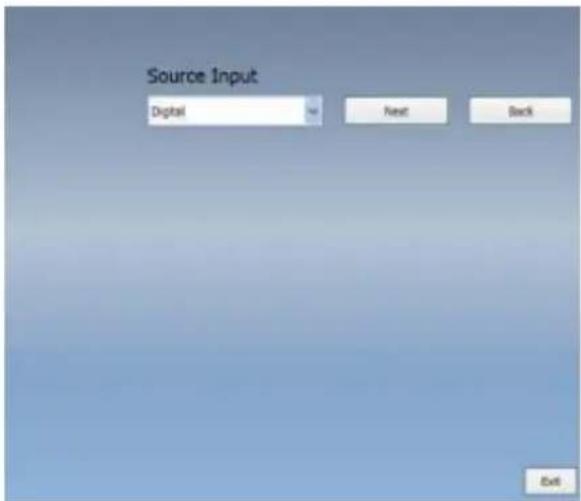
- Select the signal source (the signal strength may vary depending on the product you purchased and the area you live), and click "Next".

- Please select the country you live and then click "Channel Scan".

- Click "Exit" to finish the setup after the scanning is completed.
Note you may load default channel list to watch TV without the waiting time for channel scanning.
1.2.2 Source Input

- Select your device and signal source such as Digital, Analog (Cable or Antenna), Video (Composite, S-Video). VIVO™ will import the signal source you select. It is recommended that you select the signal source that your device supports.
Antenna TV: If you choose Antenna TV, please make sure your antenna (for analog TV reception) is properly installed and is able to receive signals.
Cable TV: If you want to watch Cable TV, please ensure that you have properly plugged your analog (cable) TV cord to the wall outlet of your cable TV.
Video: If you want to watch DVD videos, it's available through the additional Composite, S-Video input. Please check if the device you have supports this function.
- IF you'd like to listen to FM radio, please click FM button directly. Please make sure that the product you purchased supports this function.
Chapter 2 Digital TV
You can watch live Digital TV with VIVO™ Once you have done your initial setup (source input and channel scan), you can enjoy watching and recording TV program with this multi-functional software ap-plication.
Note Make sure your device supports digital signal in order to watch digital TV.
2.1 Main Panel

Buttons

Exit

Minimize

About

Source Input

FM Mode

Setup

Playback

Photo

Schedule Recording

Open Bar

Audio Mode/Mute

Mute Mode/Audio

Left Audio

Right Audio
Hotkey Bar

EPG

Teletext

Subtitle

Channel preview

Display Ratio

OSD

Default Color

Capture

Time Shifting

Snapshot
2.2 TV Panel
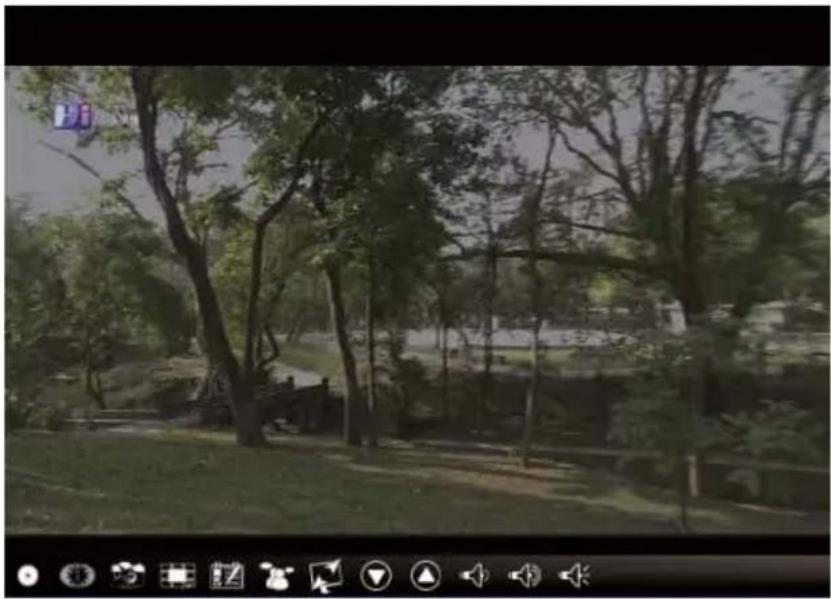
natural_image
Outdoor scene with trees and a small building, no visible text or symbolsControl Buttons

Capture

Time-Shifting

Snapshot

Channel Preview

EPG

SAP

Display Ratio

Channel Down

Channel Up

Volume Down

Volume Up

Audio Mode/Mute
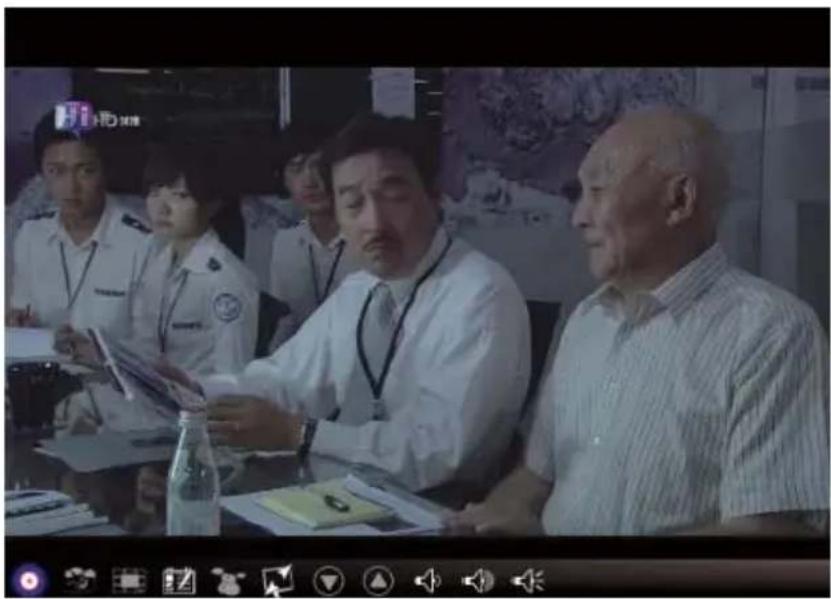
Capture: Click to capture the scenes you like. Once you capture the scene, it is saved in your Video Path.
natural_image
Group of people in a meeting setting, including uniformed officers and civilians, seated at a table with documents (no visible text or symbols)If you'd like to stop capture, click caption button again or right click on the screen and then enable "Stop Capture".
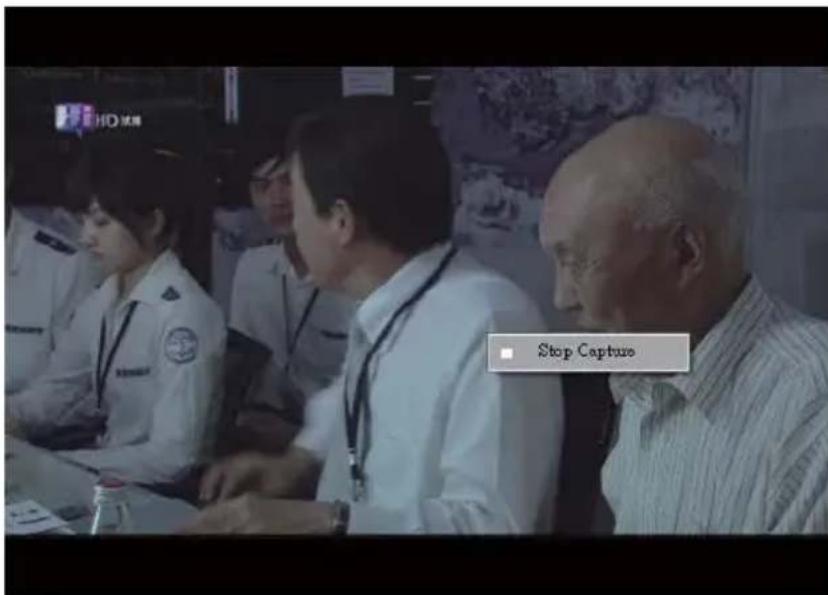
Time Shifting: This icon enables Time-shifting function once clicked. Time Shifting function records the TV program you are currently watching.
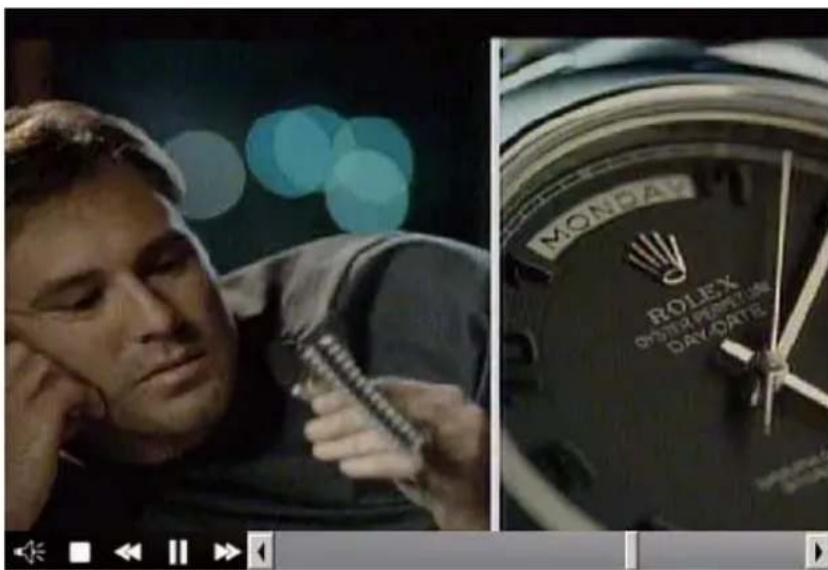
This function enables you to pause/fast-forward/rewind TV shows so you won't miss any part when you left the show for something else. Control buttons define as table below.

Audio Mode/Mute

Stop

Backward

Pause

Forward
Snapshot: You can click the "Snapshot" icon to take snapshots. When the screen shows "Snapshot OK", it means the image has been successfully taken into your file folder as picture files.

Channel-preview: Channel list preview from the beginning. You can set preview format and interval in Setup page (Refers to Chapter 3).
EPG: You can receive and view information of TV programs of each digital TV channel with this function.

SAP: Turn On/Off SAP sound (Depends on TV program provider)
Display Ratio: Change ratio base on a routine setting. (Free/4:3/16:9/Base on source)
Channel Down/UP: Select previous or next channel.
Volume Down/UP: Adjust TV volume to be loud or quiet
Audio/Mute Mode: Turn TV volume on or off.
2.3 The Tool Menu
While you are watching digital TV on VIVO ™ , you can enable the Tool Menu with a mouse right-click. The Tool Menu allows you to access and activate functions of VIVO ™ , which provides you another option besides the icons on the interface.

Always On Top: Enables VIVO™ to remain on top of all other application windows. It is the same if you click on the "Always On Top" at the upper right corner of the regular TV mode window.
Display Ratio: You can adjust your display ratio when you move your mouse cursor to the arrow at the -as you click on the Display Ratio function icon on the interface.

Free: The initial ratio when you start VIVO TM and you can adjust it by dragging the edge of the VIVO TM window.
Base On Source: The display ratio will be based on the signal source.
Apply To All Channels: If you select this option, the adjusted display ratio will be applied to all of your available channels.
Preview Window: You can change your TV viewing screen to Full Screen, Sizable Screen or Borderless Screen.

Channel List Type: There are two types of Channel List Type – Normal or My Favorite. You can select which type to load your channel list. It is the same as you do in the Channel Setting page. The default is Normal.

Channel List: Displays your available channels. It's the same as you open the Channel Setting.

Channel Preview: You can decide which type of channel preview - 3x3, 4x4, 5x5, L Type or Circle Type.
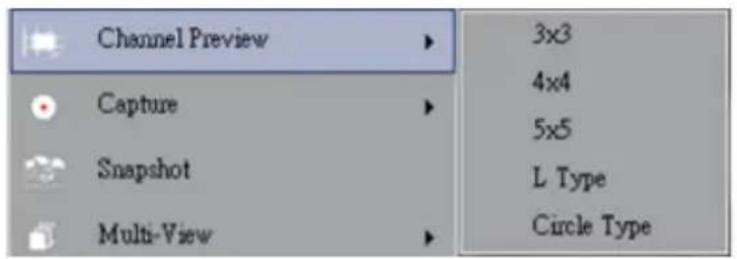
Capture: You can choose to capture the TV scenes in TS or PS formats.

Time Shifting: Enable Time Shifting mode. It is the same as you click on the Time Shifting icon on the main interface.
Snapshot: Activate Snapshot function to take the Snapshot. You can also do the same if you click on the Snapshot icon on the main interface.
Multi-view: Allows you to multi-view channels/programs. Once you move your mouse cursor to the er-ror at the right, you can select "Start Multi-view". You can then watch multiple channels/programs that are from the same signal frequency at the same time.

Start Multi-view: When you activate Multi-view by selecting "Start Multi-view", notice that two other viewing screens appear within the main TV screen.

Note You can then drag the sub screens that were in the main viewing screen out. Those sub screens that were dragged out can be enlarged and relocated up to your viewing demands.

P.I.P/P.O.P: Once you activate Multi-view, you can enable multi-view in Picture-in-Picture/Picture-out-Picture mode.
Stop Multi-view: Select this option to stop Multi-view. Once you selected it, the two sub screens will go off.
EPG: The same as main panel.
SAP: The same as main panel.
Add/Remove to my favorite: Add a channel to My Favorite or remove a channel from My Favorite.
Channel Up: Go to the next channel on the channel list.
Channel Down: Go to the last channel on the channel list.
Channel Recall: Return to the previously accessed channel
Mute On: Enable/disable the mute function
Volume Up: Increase the volume
Volume Down: Decrease the volume
Hide Panel: Hide or show the control panel (the VIVO™ interface)
Exit: Close/Exit VIVO™ window
Chapter 3 Playback
When you click on this icon, you can choose a recorded file for playback or a file from folders in your PC.
Note continuous fi le playback is available
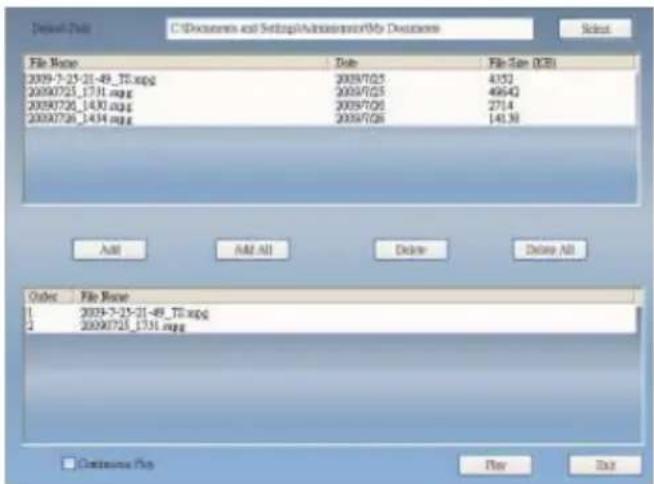
Add: add a selected file to the playlist at the bottom half of the window
Add All: add all the files to the playlist
Delete: delete a fi le from the playlist
Delete All: delete all the files on the playlist
Play: play the selected file that are on the playlist at the bottom half of Playback
Exit: exit Playback
When you selected a fi le for playback, VIVO ™ will plays the video for you in another screen as illustrated below.
3.1 Control Buttons for Playback Mode:


Backward

Play

Pause

Forward

Stop

Previous File

Next File

Repeat (on)

Repeat (off)

Display Ratio

Audio

Volume Up

Volume Down


Control Slide for Playback
Chapter 4 Setup
In VIVO™, you can simply make settings as your favorite in Setup page. Since VIVO™ has been launched, click Setup button to access Setup page.

4.1 General Setting
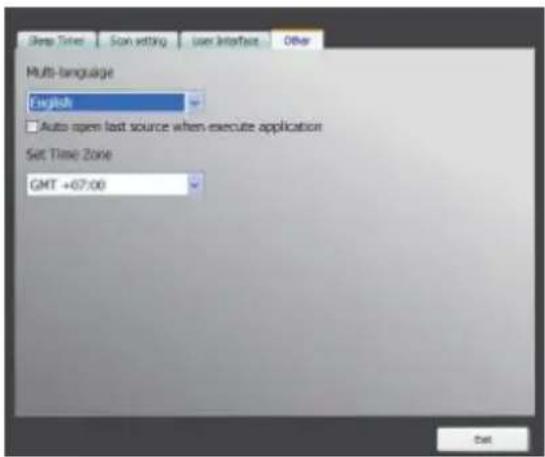
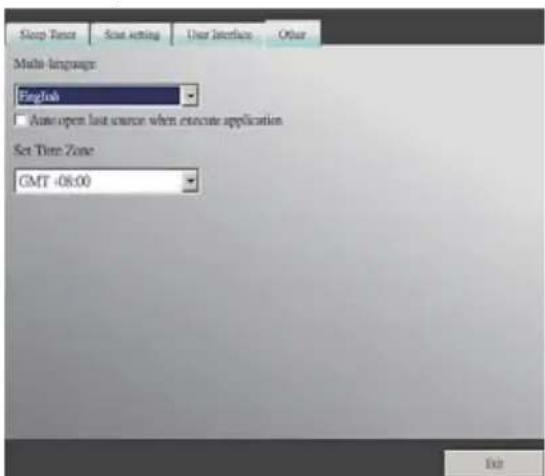
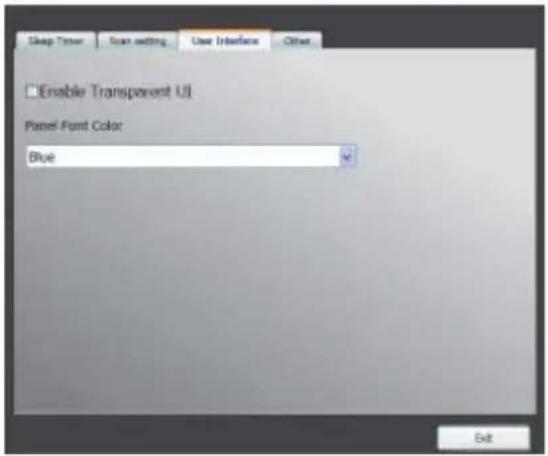
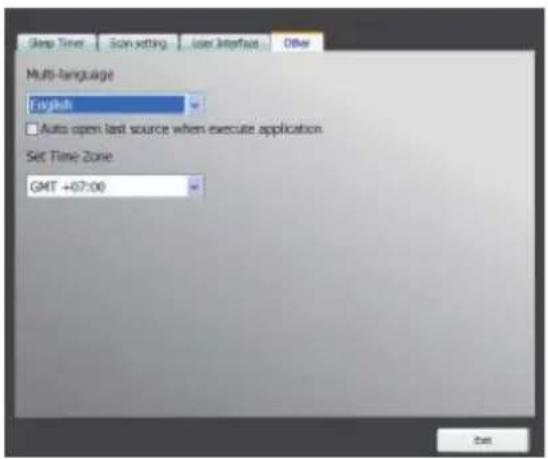
You can find Sleep Timer, Scan Setting, User Interface and Other, 4 options, in Setup page. Those can help you to improve your power saving, scanning adjustment, colorful UI and language and location.
4.1.1 Sleep Timer

You might watch TV but get sleepy after minutes later or leave your TV for emergency. For any specific reason, you would like to ask VIVO™ to help you on something. There are 5 options, Close Application, Log off, Hibernate, Shutdown, and Reboot, for setting. Besides, you can move time shuttle left or right to adjust time period.
4.1.2 Scan Setting

4.1.3 User Interface

4.1.4 Other
4.2 Advanced Setting
You can not only find Sleep Timer, Scan Setting, User Interface and Other but Marquee, Time Shifting Setting, Capture Setting, Snapshot Setting, Multi View Setting, Teletext Setting, Channel Setting, Dis-play Ratio Setting, OSD Setting and Video Setting.
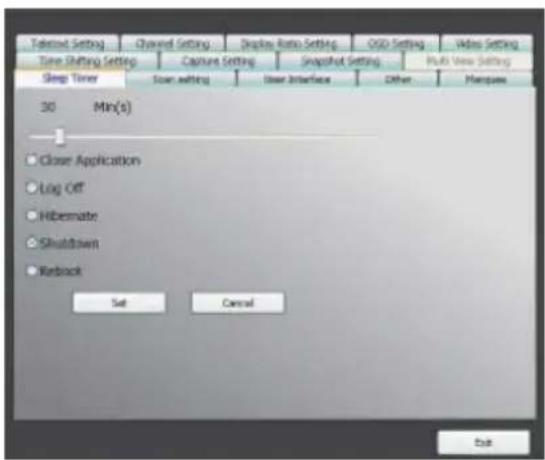
4.2.1 Marquee Setting
Here we can set the properties of the marquee such as moving distance, interval, the content, and so on.

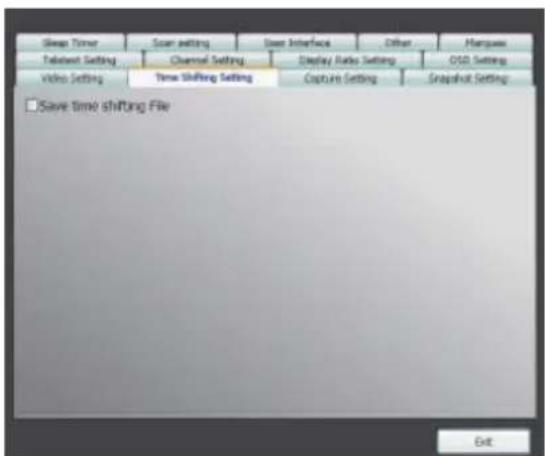
4.2.2 Time Shifting Setting
Here we can decide to save the fi le or not.
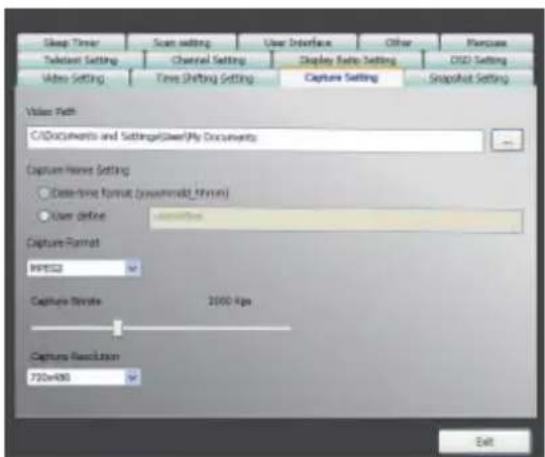
4.2.3 Capture Setting
Here we can set where to save the file, the captured file name, or set the capture stream type.
4.2.4 Snapshot Setting
Here we can set the snapshot file format, where to save the pics, and the how many pics will be saved when using the snapshot function.

4.2.5 Teletext Setting
Here we can input the teletext main page and sub page, or use the color button to switch teletext page.

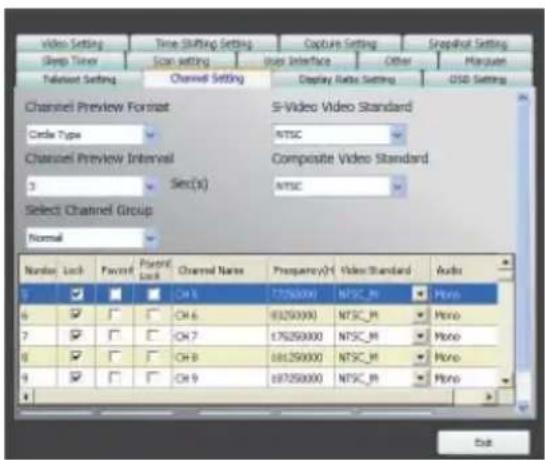
4.2.6 Channel Setting
Here we can set the channel preview type, preview interval, channel group, and channel management.
4.2.7 Display Ratio Setting
Here we can set the display ratio and apply to all channels.
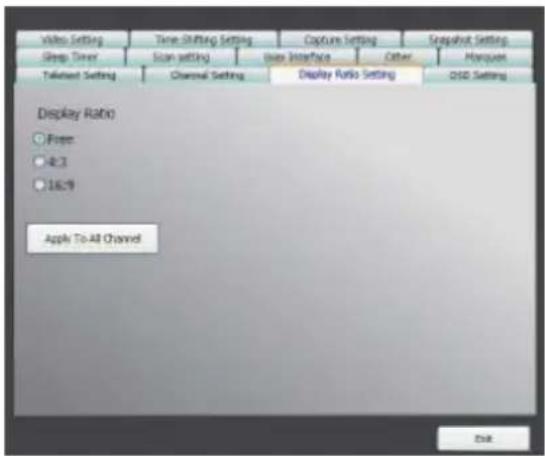
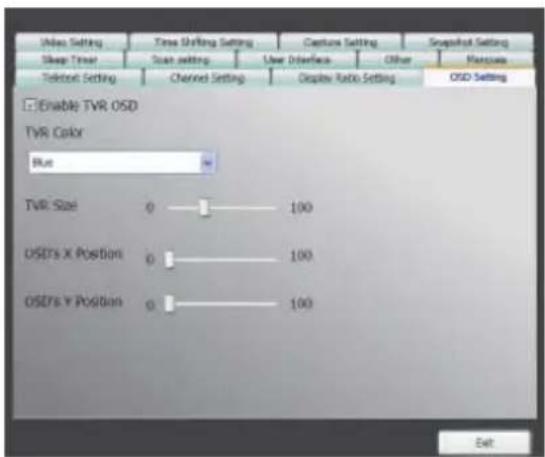
4.2.8 OSD Setting
Here we can set the OSD color, show or not, and adjust the position, the font color.
4.2.9 Video Setting
Here we can adjust the brightness, blue, red, contrast, saturation, the VMR type, and enable DxVA or not.

natural_image
Landscape view of a park with trees and grass, no visible text or symbolsnatural_image
Group of people in a meeting setting, including uniformed officers and civilians, seated at a table with documents (no visible text or symbols)4.2.5 Teletext Einstellung
4.2.9 Video Setting
Here we can adjust the brightness, blue, red, contrast, saturation, the VMR type, and enable DxVA or not.

natural_image
Outdoor scene with trees and a small structure, no visible text or symbolsBoutons de contrôle

Enregistrement

Décalage temporel

Capture d'écran

natural_image
Landscape view of a park with trees and a small bridge, no visible text or symbolsBotones de control

Captura

natural_image
Group of people in a meeting setting, including uniformed officers and civilians, seated at a table with documents (no visible text or symbols)Часть 1. Введение
natural_image
Outdoor scene with trees and a paved path, no visible text or symbolsКнопки управления

Захват

Сдвиг во Времени

Снимок

Предпросмотр

EPG

SAP

Размер экрана

Предыдущий канал

Следующий канал

Уменьшить звук

Увеличить звук

natural_image
Group of people in a meeting setting, including uniformed officers and civilians, seated at a table with documents (no visible text or symbols)Hide Panel: Hide or show the control panel (the VIVO™ interface)
Exit: Close/Exit VIVO™ window
4.1.4 Прочее
Bölüm 1 Tanıtım
natural_image
Landscape view of a park with trees and a small bridge, no visible text or symbolsKontrol Düğmeleri

Yakala

Zaman Kaydırma

Ekran Resmi

Kanal Önizleme

EPG

SAP

Görüntü Oranı

Önceki Kanal

Sonraki Kanal

Sesi Kıs

Sesi Aç

Ses Açık/ Ses Kapalı
4.2.5 Teletext Ayarı
4.2.9 Video Ayarı
Rozdział 1 Wstęp
natural_image
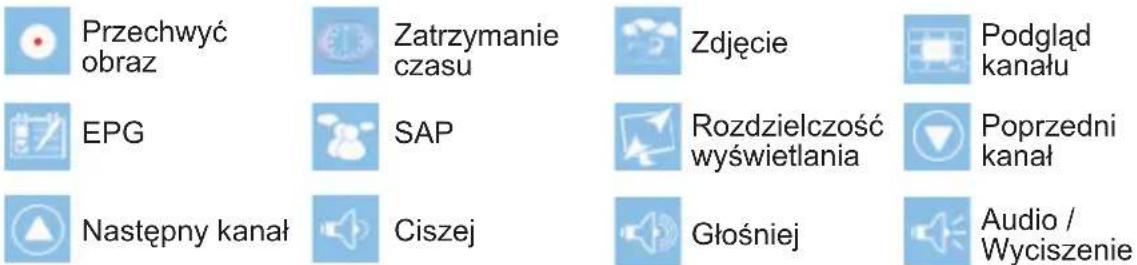
Outdoor scene with trees and a paved path, no visible text or symbolsPrzyciski kontrolne
natural_image
Group of people in a meeting setting, including uniformed officers and elderly men, seated at a table with documents (no visible text or symbols)4.1.3 User Interface
4.1.4 Other
4.2.5 Ustawienia teletextu - Teletext Setting
4.2.9 Ustawienia Video - Video Setting
natural_image
Landscape view of a park with trees and grass, no visible text or symbolsOvládací tlačítka

Nahrát a uložit

Posun času

Okamžitý snímek

Přehrávání kanálu

EPG

SAP

Zobrazení poměru

O jeden kanál dolů

natural_image
Group of people in a meeting setting, including uniformed officers and elderly men, seated at a table with documents (no visible text or symbols)2.1 Painel Principal

Botões

Sair

Minimizar

Sobre

Entrada Fonte

Modo FM

Confi guração

Playback

Foto

natural_image
Landscape view of a park with trees and a bridge, no visible text or symbolsBotões Controle

Captura

Troca de Horário

Instantâneo

Apresentação Canal

EPG

SAP

Relação Exibição

Canal para baixo

Canal para cima

Diminuir Volume

Aumentar volume

Modo áudio/ Mudo
natural_image
Group of people in a meeting setting, including uniformed officers and civilians, seated at a table with documents (no visible text or symbols)
- Software Features
- TV Setup
- Channel Scanning
- Source Input
- Chapter 2 Digital TV
- Main Panel
- Buttons
- Hotkey Bar
- TV Panel
- Control Buttons
- The Tool Menu
- Chapter 3 Playback
- Control Buttons for Playback Mode:
- Chapter 4 Setup
- General Setting
- Sleep Timer
- Scan Setting
- User Interface
- Other
- Advanced Setting
- Marquee Setting
- Time Shifting Setting
- Capture Setting
- Snapshot Setting
- Teletext Setting
- Channel Setting
- Display Ratio Setting
- OSD Setting
- Video Setting
- Teletext Einstellung
- Boutons de contrôle
- Botones de control
- Часть 1. Введение
- Кнопки управления
- Прочее
- Bölüm 1 Tanıtım
- Kontrol Düğmeleri
- Teletext Ayarı
- Video Ayarı
- Rozdział 1 Wstęp
- Ustawienia teletextu - Teletext Setting
- Ustawienia Video - Video Setting
- Ovládací tlačítka
- Painel Principal
- Botões
- Botões Controle
Brand : GIGABYTE
Model : U7300
Category : TV receiver