PCVK 1134 - Vacuum packaging machines PROFICOOK - Free user manual and instructions
Find the device manual for free PCVK 1134 PROFICOOK in PDF.
| Product type | Vacuum packaging machine |
| Brand | ProfiCook |
| Model | PCVK 1134 |
| Power | 120 W |
| Input voltage | 220-240 V ~ 50/60 Hz |
| Protection class | II |
| Net weight | 2.4 kg |
| Main functions | Vacuumizing, heat sealing, sealing only |
| Vacuum modes | Normal (fragile items) and Turbo (resistant items) |
| Humidity modes | Dry and Moist for dry or juicy foods |
| Included accessories | 5 bags 22x30 cm, 5 bags 28x40 cm, 1 film roll 20x200 cm |
| Compatible film type | Structured film (grooved, honeycomb, rhombic) |
| Roll holder | Yes, with integrated cutter |
| Sealing wire temperature | High (beware of burns) |
| Child safety | Do not allow children to play with the films (risk of suffocation) |
| Cleaning | Exterior and interior with a slightly damp cloth; do not immerse |
| Maintenance | Clean regularly; check the cord |
| Reparability | Entrust to an approved specialist; do not repair yourself |
| Storage life under vacuum (refrigerator) | Raw meat: 8-9 days; Fish: 4-5 days; Vegetables: 7-10 days |
| Storage life under vacuum (freezer) | Meat, fish: over 12 months |
| Warranty | Refer to the provided warranty card |
Frequently Asked Questions - PCVK 1134 PROFICOOK
User questions about PCVK 1134 PROFICOOK
0 question about this device. Answer the ones you know or ask your own.
Ask a new question about this device
Download the instructions for your Vacuum packaging machines in PDF format for free! Find your manual PCVK 1134 - PROFICOOK and take your electronic device back in hand. On this page are published all the documents necessary for the use of your device. PCVK 1134 by PROFICOOK.
USER MANUAL PCVK 1134 PROFICOOK
natural_image
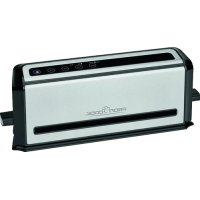
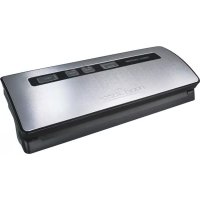
Black and silver electronic device with control buttons and 'PROFIT BOOK' branding (no readable text beyond branding)Vakuumierer PC-VK 1134
Vacuum sealer • Soudeuse sous vide • Envasadora al vacío • Sigillatore sottovuoto Vacuum sealer • Urządzenie do pakowania próżniowego • Vákuumos fóliahegesztő Прибор для вакуумной упаковки • جهازغلق المحكم بتقريف الهواء
CE
Bedienungsanleitung
Thank you for choosing our product. We wish you great pleasure with this device.
Symbols in this manual
Important notes regarding your safety notes are specially marked. Observe these instructions
In order to avoid accidents and damage to the device:

WARNING:
Warns of danger to your health and indicates a possible risk of injury.

CAUTION:
Indicates possible hazards for the device or other objects.

NOTE:
Highlights important tips and confirmations for you.
Content
Overview of the Components 3
General Information 39
Special Safety Instructions 39
Intended Use....40
Instructions for Food Storing....40
Distribution Package....41
Unpacking the Device....42
Overview of the Components 42
Function of Switches....42
Application Notes 42
Operation 42
Cleaning 43
Storage....43
Troubleshooting 44
Technical Data....44
Disposal 44
General Information
Before using this device, please read this manual carefully and keep it in a safe place, together with the warranty voucher, the receipt, and, if possible, the carton with the inner packaging. If you hand the device to a third party, please distribute the operating manual as well.
- Use this device only for private and the intended purpose. This device is not intended for commercial use.
- Do not use the device outdoors. Keep it away from heat, direct sunlight, moisture (do not submerge in liquids) and sharp edges. Do not use the device with wet hands. If the device gets wet or is wet, pull the mains plug immediately.
- Switch off the device and pull the plug from the socket (pull on the plug, not on the cable), if you do not use the device, have to add accessories or in case of cleaning or a fault.
- Do not leave the device unattended when in operation. If you leave the room, always turn of the device. Pull the plug from the socket.
- The device and the power cord have to be inspected regularly for any signs of damage. If damage is detected, the device should no longer be used.
- Use only original accessories.
- To ensure the safety of your children, please keep any packing parts (plastic, card board, polystyrene etc) out of their reach.

WARNING:
Do not allow small children to play with the foil.
Suffocation may occur!
Special Safety Instructions
WARNING: Risk of burns!
During and immediately after operation, the temperature of the welding wire is very high. For this reason, you find the label "CAUTION: HOT SURFACE" displayed above the bar.
- Do not intend to repair the device yourself, but rather consult an authorised expert. If the mains supply cord of the device is damaged, it must be replaced by the manufacturer or its customer service or a similarly qualified person in order to avoid potential hazards.
- This device may be used by children over 8 years of age as well as by persons with reduced physical, sensory or mental capabilities or a lack of experience and knowledge, when supervised or properly instructed regarding the safe use of the equipment and the resulting danger.
• Children may not play with the device. - Cleaning and user maintenance must not be carried out by children without supervision.
Intended Use
This device is used for sucking air and heat seaming of structured foil bags and foil rolls.
It may only be used in the manner described in this manual. Do not use the device for commercial purposes.
Any other use is considered to be non-intended and can lead to material damage or even personal injury.
The manufacturer accepts no liability for damage caused by improper usage.
Instructions for Food Storing
Vacuuming, i.e. air suction from the packaging, is a proven method to extend the storage time of food.
With the PC-VK 1134, you have chosen a product that enables you to quickly and practically use the advantages of air-tight packaging. Our food quickly loses its fresh taste and quality due to atmospheric oxygen. The air-tight packaging prevents this.
Approx 90% of the air is removed from the seal pouches. Compared to conventional storage methods, the storage time of vacuumed and heat sealed food is therefore extended by a factor of five. Freezer burn is prevented. Ready-to-serve meals can be portioned as required and packaged.
Also, cooking of the food is possible in the vacuum packaging. During the so called “sous vide cooking” (vacuum cooking) nutrients and natural taste are preserved even better.
In addition to solid foods such as nuts or beans, non-consumable objects, that are sensitive to moisture, such as coins, silver jewelry, clothes or matches for the next canoe trip, can also be protected.
The following rules and notes will assist you, especially if you have never had a vacuum sealer before.
- Wash your hands and clean the accessories before you begin the work.
- The bag should be approx. 8 centimeters longer than the goods to be inserted.
- Do you have loose items like herbs, and would like to cut open and re-seal the bag? In that case, add another 2 centimeters of material.
- Add another 5 centimeters in length if you want to freeze the product, since water-containing fluids can expand under the cold influx.
- To create a vacuum, use only sheets with a structure, for example a rib, honeycomb or rhombic structure. Optimal results can be achieved with the diagonal ribbed foil included in the distribution package.
-
Keep the area of the weld seam dry and clean. Avoid creases, as the seam may start leaking in such places.
-
Fruits and vegetables last longer in vacuum when they have been peeled beforehand.
- Cabbages, such as broccoli and cauliflower, must be blanched beforehand as they emit gases when packaged raw.
- Various goods, such as meat, contain moisture. Place these items in the bag, together with a kitchen paper.
- If there are sharp edges that could damage the bag(e.g. bones), wrap the product into kitchen paper beforehand.
- Liquids in the bag can only be heat sealed, not vacuumed, as liquid could be sucked in. Press the air out of the bag beforehand.
- The vacuum pump can be used to suck in liquids. Use only the SEAL function when heat sealing liquids.
- Once the food is packaged, it must either be stored in a cool place or frozen.
- Products that are likely to freeze together, such as pies or pieces of meat, should be separated by wax or parchment paper.
- Place food to be frozen into the freezer/freezer compartment immediately after packing. Use the shock-freezing function where necessary.
-
Do you want to freeze liquid foods, such as soup, in a vacuum bag? Freeze the liquid in a bowl. Remove the tray and put the product in a foil bag.
-
Do you want to open the bags again? Cut with a scissors along the welding seam.
- You can heat up the bags in a cooking pot. Do not exceed a temperature of 80°C.
-
When heating up the bags in the microwave, please take note of the following:
-
Most liquids expand during heating. Stick into the bags beforehand, using a fork.
- Place the bags in a microwave dish or bowl
- Heat up the bags with a maximum of 50% of the microwave output.
- Heat up the bags only at low or medium temperature.
- Never heat it using the grill or hot air.
- Dispose of bags used for storage of raw meat, fish or greasy products. Other bags can be rinsed by hand and reused.
Bags are available in the sizes 22 x 30 or 28 x 40 centimeters.
Foil rolls are available in the size 28 x 600 centimeters.
Table – Guidelines for Preservation
| Storage Foods | Storage temperature | Conventional storage | Vacuum packed | |
| congelato | Raw meat 5±3 °C 2 ~ 3 Days 8 ~ 9 Days | |||
| Fresh fish or seafood | 5±3 °C | 1 ~ 3 Days | 4 ~ 5 Days | |
| Cooked meat 5±3 °C 4 ~ 6 Days 10 ~ 14 Days | ||||
| Vegetables 5±3 °C 3 ~ 5 Days 7 ~ 10 Days | ||||
| Fruit | 5±3 °C | 5 ~ 7 Days | 14 ~ 20 Days | |
| Eggs | 5±3 °C | 10 ~ 15 Days | 30 ~ 50 Days | |
| frozen | Meat | -16 ~ -20°C | 3 ~ 5 Months | >12 Months |
| Fish/Seafood | -16 ~ -20°C | 3 ~ 5 Months | >12 Months |
i NOTE:
The figures contained in the table are guide values. The actual storage time depends on the quality of the food.
Distribution Package
1 Vacuum sealer
5 Professional airtight bags á 22 x 30 centimeter
5 Professional airtight bags á 28 x 40 centimeters
1 Professional foil roll á 20 x 200 centimeters
Unpacking the Device
- Remove the device from its packaging.
- Remove all packaging material, such as film, filler, cord holder and carton packaging.
- Check the content for completeness.
i NOTE:
The device may still contain dust or particles generated during production. We recommend that you clean the device as described under "Cleaning".
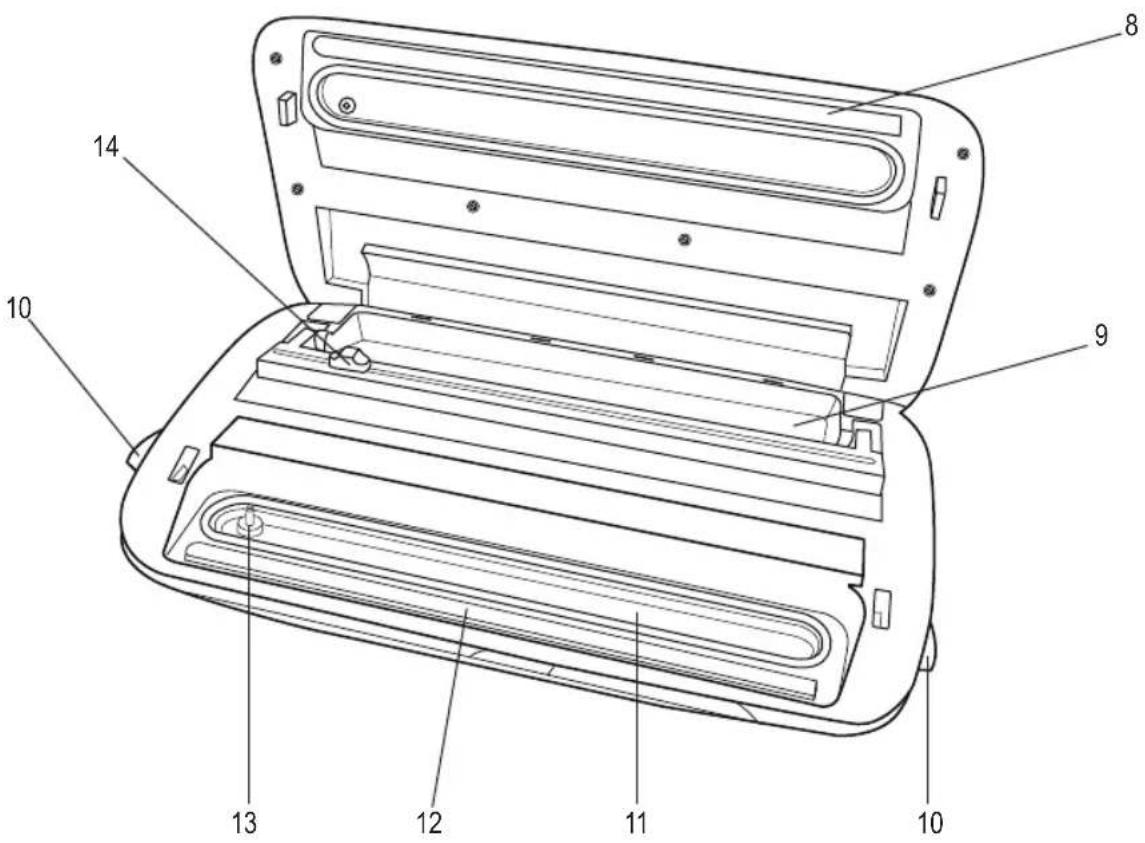
Overview of the Components
1 TURBO button
2 NORMAL button
3 DRY button
4 MOIST button
5 VAC SEAL button
6 SEAL button
7 STOP button
8 Welding wire
9 Roll foil tray
10 Release
11 Vacuum chamber
12 Sealing
13 Air intake
14 Cutting knife
Function of Switches
NORMAL / TURBO
Choose between the functions NORMAL and TURBO. The control light indicates the selected function.
- The function NORMAL is suitable for soft, pressure sensitive goods.
- To increase the power of the vacuum pump, select the TURBO function.
DRY / MOIST
Choose between the functions MOIST and DRY. For example, choose MOIST for meat that contains a lot of meat juice and choose DRY for a peeled apple.
The control light indicates the selected function.
VAC SEAL
Vacuuming and heat sealing are performed in one operation.
SEAL
The foil is only heat sealed.
- Use this function with liquids if you want to heat seal 42
without vacuum.
- Press the button, to prematurely abort a pumping operation, triggered by the VAC SEAL function to be able to heat seal straight away.
STOP
Press the button to cancel the entire operation.
Application Notes
Location
Place the device on a non-slip, flat surface. Make sure that the ventilation slots at the bottom of the device are not concealed.
Power Cord
Completely unwind the power cord from the back. Insert the cable into the cable guide so that the device cannot tilt.
Electrical Connection
- Check whether the device is suitable for the existing mains voltage. The relevant information can be found on the type plate.
- Connect the power cord to a properly installed earthing contact outlet.
i NOTE:
Operate the device with dry hands only, to prevent the electronic touch panel from failing.
Operation
Create a Bag From Yard Goods of the Roll.
Foil can also be purchased as yard goods.
i NOTE:
The foil should have a special structure so that the air can be extracted well! You can use rib, honeycomb or rhombic structure foil.
To make a bag from yard goods, please follow the steps below:
- Open the device by pressing the release buttons (10) on the left as well as the right side.
- Place the roll in the designated tray (9).
- Measure the desired length of the foil.
- Use the cutting knife (14) to separate the foil with a straight cut.
-
Place the wrap foil on the front sealing (12). Press down the cover evenly and firmly, until it snaps into place on both sides with an audible click.
-
Press the SEAL button. After approx 5 minutes, the white light above the button goes out and the seam is heat sealed.
- Press the release buttons (10) on both sides to open the cover.
- You have now created a bag. In case you are using a foil without a prefabricated weld seam, repeat the steps until the pouch is created.
Vacuum and Heat Seal a Pouch
You can now package the goods into the pre-fabricated bag.
i NOTE:
- Please also note the "Instructions for storing food" and the chapter "Functions of the switch".
i NOTE:
- Bags with liquids should be sealed only! The liquid could be sucked in. Select the function SEAL only.
- Open the device by pressing the release buttons (10) on the left as well as the right side.
-
Place the goods in the bag.
-
Place the open end of the bag into the vacuum chamber (11). The air intake (13) may not be covered.
- Avoid creases! Smooth out the foil.
- Press down the cover, until is snaps into place of both sides with an audible click.
- Select NORMAL / TURBO and DRY / MOIST as needed.
- Press the VAC SEAL button. Once the lights above the VAC SEAL and SEAL buttons go out, the operation is completed.
i NOTE:
- To cancel the entire operation, press the STOP button.
-
To abort a pumping process to immediately carry on with heat sealing, press the SEAL button.
-
Press the release buttons (10) on both sides to open the cover.
Stop Operation
- Pull the plug from the socket.
- Allow the device to cool down for 5 minutes before packing it away.
Cleaning
WARNING:
- Always pull the plug before cleaning. Wait until the unit has cooled down.
- Never submerge the device into water as this could cause an electric shock or fire.
CAUTION:
- Do not use a wire brush or other abrasive materials.
- Do not use harsh or abrasive detergents.
The housing can be wiped from the inside and the outside with a slightly damp cloth.
Storage
- Clean the device as described.
- You can wind up the power cable at the back of the unit.
- We recommend that you clean the device well and keep it in its original packaging if you do not intend to use it for a longer period of time.
- Always store the device in a well-ventilated and dry place, out of reach of children.
Troubleshooting
| Malfunction | Possible Cause Solution | |
| The device is not working. | No power is supplied to the device. | Check the function of the socket, using a different device. |
| Insert the plug correctly. | ||
| Check the main fuse. | ||
| The device is faulty. | Contact our service center or a specialist. | |
| The bag is not tight. | There are faults in the seam. | Straighten out the foil beforehand. |
| Goods are clamped in the seam. | Check the seams. | |
| The seam was damp. | Keep the seam free and dry. | |
| The bag is damaged at the seam or elsewhere. | If the bag is damaged, please replace it. | |
| The bag is not completely emptied. | There was too much air in the bag which could not be sucked out in time. | Squeeze out excessive air from the bag beforehand. |
| Choose the TURBO function. | ||
| You have used foil without a structure. | Use foil with a rib, honeycomb or diamond structure for vacuuming. | |
| The bag is damaged. | Use a new bag. | |
Technical Data
Model: PC-VK 1134
Power supply: 220 - 240 V\~50/60 Hz
Power consumption: 120 W
Protection category:
Net weight: 2,4 kg
The right to make technical and design modifications in the course of continuous product development remains reserved.
This device has been tested according to all relevant current CE guidelines, such as electromagnetic compatibility and low voltage directives, and has been constructed in accordance with the latest safety regulations.
Disposal
Meaning of the "Dustbin" Symbol

Protect our environment: do not dispose of electrical equipment in the domestic waste.
Protect our environment: do not dispose of electrical equipment in the domestic waste.
This helps avoid the potential effects of
incorrect disposal on the environment and human health.
This will contribute to the recycling and other forms of re-utilisation of electrical and electronic equipment.
Information concerning where the equipment can be dis-posed of can be obtained from your local authority.
Instrukcja obsługi
CTC Clatronic Sp. zo.o.
Ul. Brzeska 1
45-960 Opole
Usuwanie
Downloaded from www.vandenborre.be
Downloaded from www.vandenborre.be
Downloaded from www.vandenborre.be
Downloaded from www.vandenborre.be
GARANTIEKARTE
warranty card · garantiekaart · carte de garantie · scheda di garanzia · tarjeta de garantía · cartão de garantia · garantikort · karta gwarancyjna · záruční list · kartica jamstva · carte de garanție · Гаранционна карта · záručný list · garancijski list · garanciajegy · гарантійнийформуляр · Гарантийный талон ·
بطاقة ضمان
PC-VK 1134
24 Monate Garantie gemäß Garantieerklärung · 24 months warranty according to warranty declaration · 24 maanden garantie volgens garantieverklaring · 24 mois de garantie selon la déclaration de garantie · 24 mesi di garanzia secondo la dichiarazione di garanzia · 24 meses de garantía de acuerdo con la declaración de garantía · 24 meses de garantia, de acuerdo com a declaração de garantia · 24 mäneders garanti i henhold til garantibetingelsene · 24 miesiące gwarancji na podstawie oświadczenia gwarancyjnego · záruka 24 mêsíců podle prohlásení o záruce · 24 mjesečno jamstvo u skladu s jamstvenom deklaracijom · 24 luni garantie conform declarației de garantie · 24 месеца гаранция в съответствие с гаранционната декларация · 24-mesačná záruka podla vyhlásenia o záruke · 24-mesečna garancija, skladno z garancijsko izjavo · 24 hónap garancia a garanciafeltételekben leírtak szerint · гаранțия на 24 місяці відповідно заяві про гаранțію · Гарантия 24 месяца согласно заявленным гарантийным правилам · «мостан» тонда 24 شови «нара» відповідно
Kaufdatum, Händlerstempel, Unterschrift - date of purchase, dealer stamp, signature - aankoopdatum, dealerstempel, handtekening - date d'achat, tampon du concessionnaire, signature - data di acquisto, timbro del rivenditore, firma - fecha de compra, sello del distributor, firma - data de compra, carimbo de distributor, assinatura - kjapsdata, forhandlerstempel, signatur - data zakupu, pieczęg sprzedawcy, podpis - datum zakoupeni, razitko prodejce, podpis - datum kupovine, zig trgovca, podpis - data de achizije, tampila furnizerului, seminatura - Data la onykymkara, Plechat na Pródavaca. Подпис - datum nákupu, pečitaka obchodnika/prejacycu, podpis - datum nakupa, zig trgovca, podpis - vásarlas dátuma, kereskedő belyegzője, alářás - data придbания, печatka prodavcia, podпис - Data priобретения, Štamičn prodavza. Подпись - telegiho zhebného, oškogih oškogih oškogih oškogih oškogih oškogih oškogih oškogih oškogih oškogih oškogih oškogih oškogih oškogih oškogih oškogih oškogih oškogih oškogih oškogih oškogij
PROFI COOK®
www.proficook-germany.de
PROFI COOK
Internet: www.proficook-germany.de
Made in P.R.C.