
WN34A190 - Tumble drier SIEMENS - Free user manual and instructions
Find the device manual for free WN34A190 SIEMENS in PDF.

| Product type | Washer-dryer (integrated dryer) |
| Brand | Siemens |
| Model | WN34A190 |
| Drying type | Heat pump condensation |
| Washing capacity | 7 kg (estimated) |
| Drying capacity | 4 kg (estimated) |
| Dimensions (H x W x D) | 85 x 60 x 60 cm (estimated) |
| Weight | 75 kg (estimated) |
| Power supply | 220-240 V, 10 A, 50 Hz |
| Energy class | A+++ (estimated) |
| Main functions | Washing programs (cotton, synthetics, delicates) and drying (ready to iron, easy iron) |
| Maintenance and cleaning | Regular cleaning of the lint filter and condensation water tank |
| Safety | Child safety, automatic stop when door is open, water leak protection |
| Available spare parts | Base cover, front panel, door, door seal, door hinge |
| Repairability | High repairability index (repair manual provided) |
| General information | User manual and repair guide available in PDF |
Frequently Asked Questions - WN34A190 SIEMENS
User questions about WN34A190 SIEMENS
0 question about this device. Answer the ones you know or ask your own.
Ask a new question about this device
Download the instructions for your Tumble drier in PDF format for free! Find your manual WN34A190 - SIEMENS and take your electronic device back in hand. On this page are published all the documents necessary for the use of your device. WN34A190 by SIEMENS.
USER MANUAL WN34A190 SIEMENS
natural_image
Diagram of a speaker with visible sound waves and internal components (no text or symbols)- Откачете маркуча.
- Свалете винтовете.
- Освободете крепежния елемент.
- Свалете капака на основата.
natural_image
Cross-sectional view of a washing machine showing internal components and housing (no text or labels visible)natural_image
Close-up of a mechanical component with two labeled parts (1 and 2), no visible text or symbols beyond labelsnatural_image
Interior view of a washing machine showing internal components and mounting points (no text or labels visible)natural_image
3D rendering of a mechanical component with concentric rings and mounting flanges (no visible text or symbols)natural_image
Cross-sectional view of a mechanical device with internal components (no visible text or symbols)natural_image
Diagram of a camera lens assembly with no visible text or symbols- Izrežite crijevo.
- Uklonite vijke.
- Otpustite zahvatni element.
- Uklonite poklopac baze.
4.1.2 Postavljanje poklopca baze
▶ Postavite obratnim redoslijedom.

Popravak
natural_image
Interior view of a washing machine showing internal components and mounting points (no text or labels visible)- Uklonite prednju ploču.
4.2.2 Postavljanje prednje ploče
▶ Postavite obratnim redoslijedom.

Popravak
4.3 Zamjena vrata
Zahtjev:
Uredaj je isključen iz napajanja.
Uređaj je isključen iz priključka za dovod vode.
natural_image
Close-up of a mechanical component with two labeled parts (1 and 2), no visible text or symbols beyond labels4.3.2 Postavljanje vrata
▶ Postavite obratnim redoslijedom.
Popravak
4.4 Zamjena brtve vrata


Oštri rubovi kućišta!
Porezotine
▶ Nosite zaštitne rukavice.


Opasnost od padanja dijelova zbog otpuštenih vijaka!
natural_image
Interior view of a washing machine showing internal components and casing (no text or labels visible)-
Otpustite vijke na stražnjoj strani uređaja.
-
Uklonite radnu ploču.
-
Otpustite zahvatne elemente ploče s gornje i desne strane.
-
Uklonite ploču.
-
Uklonite držač svjetla bubnja na vrhu.
-
Otpustite vijke kućišta dozatora.
8.

POZOR! Opasnost od oštećene površine Površina uređaja može se izgreba ► Koristite samo plastični alat
Uklonite zatezni prsten s brtve s pomoću plastičnog alata.
- Otpustite brtvu vrata s prednje ploče.
- Otpustite priključak kabela s brave vrata.
- Uklonite prednju ploču.

Popravak
natural_image
3D rendering of a mechanical component with concentric rings and mounting flanges (no visible text or symbols)- Uklonite brtvu vrata.
natural_image
Cross-sectional view of a mechanical device with internal components (no visible text or symbols)4.5.2 Postavljanje zgloba vrata
▶ Postavite obratnim redoslijedom.
natural_image
Diagram of a camera lens assembly with no visible text or symbolsnatural_image
Cross-sectional diagram of a washing machine showing internal components and casing (no text or labels)natural_image
Close-up of a mechanical component with two labeled parts (1 and 2), no visible text or symbols beyond labels4.3.2 Montáž dvířek
natural_image
Interior view of a washing machine showing internal components and ventilation ducts (no text or labels visible)natural_image
3D rendering of a mechanical component with concentric rings and mounting flanges (no visible text or symbols)natural_image
Cross-sectional view of a mechanical device with internal components (no visible text or symbols)natural_image
Close-up of a mechanical device with concentric circular components and red warning labels (no readable text or symbols)natural_image
Cross-sectional view of a washing machine showing internal components and casing (no text or labels visible)- Fjern frontpanelet.
4.2.2 Montering af frontpanel
natural_image
Close-up of a mechanical component with two labeled parts (1 and 2), no visible text or symbols beyond labelsnatural_image
Interior view of a washing machine showing internal components and mounting points (no text or labels visible)natural_image
3D rendering of a mechanical component with concentric rings and mounting flanges (no visible text or symbols)- Fjern dørpakningen.
natural_image
Cross-sectional view of a mechanical device with internal components (no visible text or symbols)natural_image
Diagram of a camera lens assembly with no visible text or symbolsnatural_image
Interior view of a washing machine showing internal components and mounting points (no text or labels visible)natural_image
Close-up of a mechanical component with two labeled parts (1 and 2), no visible text or symbols beyond labels4.3.2 Deur monteren
natural_image
Interior view of a washing machine showing internal components and mounting points (no text or labels visible)natural_image
3D rendering of a mechanical component with concentric rings and mounting brackets (no visible text or symbols)natural_image
Cross-sectional view of a mechanical device with internal components (no visible text or symbols)4.5.2 Deurscharnier monteren
1.2 Explanation of symbols 58
1.2.1 Danger levels....58
1.2.2 Hazard symbols 58
1.2.3 Structure of the warnings....59
1.2.4 General symbols....59
Safety....60
2.1 General Safety instructions 60
2.1.1 All domestic appliances 60
Tools and aids....61
Repair 62
4.1 Replacing base cover 62
4.1.1 Removing base cover 62
4.1.2 Installing base cover 62
4.2 Replacing front panel....63
4.2.1 Removing front panel 63
4.2.2 Installing front panel 63
4.3 Replacing door 64
4.3.1 Removing door 64
4.3.2 Installing door 64
4.4 Replacing door seal....65
4.4.1 Removing door seal 65
4.4.2 Installing door seal 66
4.5 Replacing door hinge....67
4.5.1 Removing door hinge 67
4.5.2 Installing door hinge 67
i Concerning this document
1.1 Important information
1.1.1 Purpose
These repair hints support consumer to repair appliances by himself according to the applicable eco-design regulation (as of 03/2021).
They contain information how to exchange defined spare parts including warnings and risks.
In case of questions, please contact our customer service. We will only be liable for damages if the repair hints have been followed properly.
1.2 Explanation of symbols
1.2.1 Danger levels
The warning levels consist of a symbol and a signal word. The signal word indicates the severity of the danger.
| Warning level Meaning | ||
| Danger | Non-observance of the warning message will result in death or serious injuries. | |
| Warning | Non-observance of the warning message could result in death or serious injuries. | |
| Caution | Non-observance of the warning message could result in minor injuries. | |
| Notice | Non-observance of the warning message could result in damage to property. | |
Table 1: Danger levels
1.2.2 Hazard symbols
Hazard symbols are symbolic representations which give an indication of the kind of danger.
The following hazard symbols are used in this document:
| Hazard symbol Meaning | ||
 | General warning message | |
 | Danger from electrical voltage | |
 | Risk of explosion | |
 | Danger of cuts | |
 | Danger of crushing | |
i Concerning this document
| Hazard symbol Meaning | ||
 | Danger from hot surfaces | |
 | Danger from strong magnetic field | |
 | Danger from non-ionizing radiation | |
Table 2: Hazard symbols
1.2.3 Structure of the warnings
Warnings in this document have a standardised appearance and a standardised structure.

Type and source of danger!
Possible consequences of ignoring the danger / warning.
▶ Measures and prohibitions for preventing the danger.
The following example shows a warning that warns against electric shock due to live parts. The measure for avoiding the danger is mentioned.

Risk of electric shock due to live parts!
Death by electrocution
- Disconnect appliances from electrical supply at least 60 seconds before starting repairs.
1.2.4 General symbols
The following general symbols are used in this document:
| Gen. symbol Meaning | |
| Identification of a special tip (text and/or graphic) | |
| Identification of a simple tip (only text) | |
| Identification of a link to a video tutorial |
| Gen. symbol Meaning | |
| Identification of required tools | |
| Identification of required preconditions | |
| Identification of a condition (if ..., then ...) | |
| Identification of a result | |
| StartIdentification of a key or button | |
| [00123456] Identification of a material number | |
| StatusIdentification of displayed text / window(in the appliance's display) | |
Table 3: General symbols
Safety
2.1 General Safety instructions
2.1.1 All domestic appliances
Risk of electric shock due to live parts!
- Errors by repairs involving electrical components can lead to electrical shock!
■ Disconnect the appliance from the mains for at least 60 seconds before starting work.
■ After the repair have a safety test according VDE 0701 or country-specific regulations performed.
Risk of injury from sharp edges!
■ Wear protective gloves.
Risk of crushing during repair, maintenance, troubleshooting and service due to heavy and moving components
■ Wear protective shoes.
■ Secure heavy components from falling down.
■ Do not stick body parts into moving components.
Risk to the appliance's safety / function!
■ Only use original spare parts.
Risk of damage to electrostatically sensitive components (ESDs)!
- Do not touch the modules, including connections and conductor paths.

Tools and aids
| Designation Details Images | ||
| Auxiliary tool[15000155] | Tool for loosening out of plastic parts | 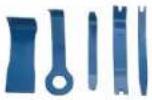 |
| Screwdriver TorxT20 with bore hole[00340764] | 100 mm, for screws with safety pin |  |
| Torque spanner[15000441] | Torque spanner 20 - 100 Nm | |
| Slot screwdriver[00340854] | Blade 3.5 mm x 0.6 mm x100 mm, Protective Insulation1000 V AC |  |
| Slot screwdriver[00340855] | Blade 5.5 mm x 1.0 mm x125 mm, Protective Insulation1000 V AC |  |
| Needle-nose pliers,angled pattern[00341269] | Length 200 mm | 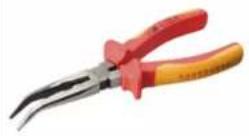 |
| Side-cutting pliers[00342182] | Length: 200 mm | 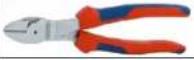 |
| Designation Details Images | ||
| Combination wrench[00340811] | Wrench size 10°mm, M6 | 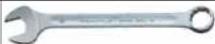 |
| Combination wrench[00340814] | Wrench size 13°mm, M8 | 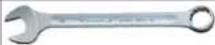 |
| Combination wrench[00340817] | Wrench size 17 mm, M10 | 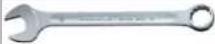 |
| Combination wrench[15000459] | Wrench size 16°mm, M10 | 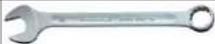 |

Repair
4.1 Replacing base cover
Prerequisite:
√ Appliance is disconnected from power supply.
√ Appliance is disconnected from water supply.
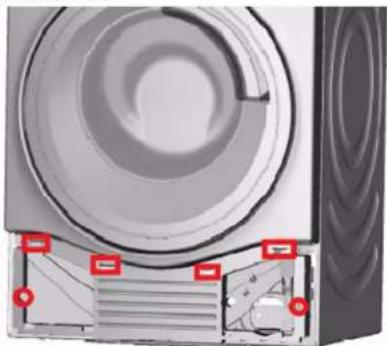
4.1.1 Removing base cover
- Remove drain hose.
- Remove drain cover.
- Remove base cover.
natural_image
Diagram of a camera lens assembly with no visible text or symbols- Clip out hose.
- Remove screws.
- Release catch element.
- Remove base cover.
4.1.2 Installing base cover
▶ Install in reverse order.

Repair
4.2 Replacing front panel
Prerequisite:
√ Appliance is disconnected from power supply.
√ Appliance is disconnected from water supply.
√ Detergent drawer has been removed.
√ Fascia panel has been removed.
√ Door has been removed.
√ Door seal has been removed.
√ Base cover has been removed.→ Page 62
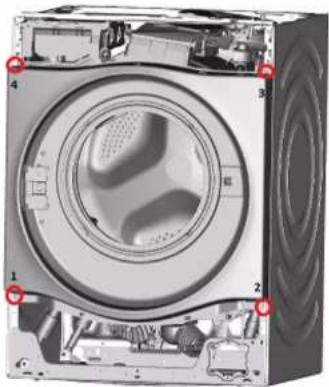
4.2.1 Removing front panel

Caution
Sharp housing edges!
Cut injuries
Wear protective gloves.
1.

Caution
Risk of falling parts due to released screws!
Injury because of falling parts.
▶ Secure component from falling down.

Notice
Risk of falling parts due to released screws!
Damage to other parts of the appliance or at customers home e.g. bottom.
- Secure component from falling down.
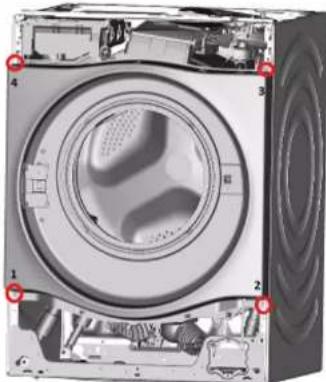
Remove screws from in following order (1-2-3-4).
natural_image
Cross-sectional view of a washing machine showing internal components and casing (no text or labels visible)- Remove front panel.
4.2.2 Installing front panel
▶ Install in reverse order.

Repair
4.3 Replacing door
Prerequisite:
√ Appliance is disconnected from power supply.
√ Appliance is disconnected from water supply.
4.3.1 Removing door
▶ 1. Remove two screws (1).
2. Release catch elements with slotted screwdriver (2).

natural_image
Close-up of a mechanical component with two labeled parts (1 and 2), no visible text or symbols beyond labels▶ Install in reverse order.
Repair
4.4 Replacing door seal


Sharp housing edges!
Cut injuries
▶ Wear protective gloves.


Risk of falling parts due to released screws!
Injury because of falling parts.
- Secure component from falling down.


Risk of falling parts due to released screws!
Damage to other parts of the appliance or at customers home e.g. bottom.
- Secure component from falling down.
Prerequisite:
√ Appliance is disconnected from power supply.
√ Appliance is disconnected from water supply.
√ Detergent drawer has been removed.
√ Door has been removed.
√ Base cover removed.→ Page 62
4.4.1 Removing door seal
1.

Risk of falling parts due to released screws!
Injury because of falling parts.
- Secure component from falling down.
Notice

Risk of falling parts due to released screws!
Damage to other parts of the appliance or at customers home e.g. bottom.
▶ Secure component from falling down.
Remove screws from in following order (1-2-3-4).
natural_image
Interior view of a washing machine showing internal components and casing (no text or labels visible)-
Release screws at back of appliance.
-
Remove worktop.
-
Release catch elements of fascia panel at top and on right side.
-
Remove fascia panel.
-
Remove drum light holder at top.
-
Release screws of dispenser housing.
8.

Notice
Risk of damaged surface!
Surface of appliance can be scratched by using wrong tools.
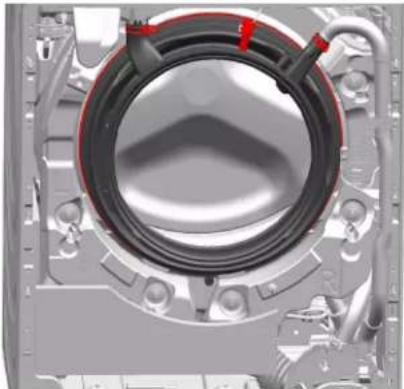
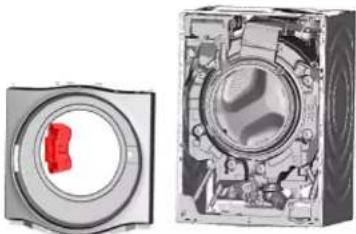
▶ Only use plastic tools to replace the tension ring.
Remove tension ring from gasket with a plastic tool.
- Release door seal from front panel.
- Release cable connector from door lock.
- Remove front panel.

Repair
- Release all hose connections.
natural_image
3D rendering of a mechanical component with concentric rings and mounting flanges (no visible text or symbols)- Remove door seal.
▶ Install in reverse order.

Repair
Finger crushing / entrapment
▶ Do not reach into the hinge area.
▶ Wear protective gloves.
Prerequisite:
√ Appliance is disconnected from power supply.
√ Appliance is disconnected from water supply.
√ Detergent drawer has been removed.
√ Door has been removed.
√ Door seal has been removed.
√ Base cover removed.→ Page 62
√ Front panel has been removed.
- Remove two screws.
- Remove door hinge.
natural_image
Technical illustration of a mechanical component with cross-sectional view (no text or symbols)▶ Install in reverse order.
Remonditeave - Kuivatiga pesumasin
i Selle dokumendiga seoses 69
natural_image
Diagram of a camera lens assembly with no visible text or symbolsnatural_image
Cross-sectional view of a washing machine showing internal components and casing (no text or labels visible)- Eemaldage esipaneel.
4.2.2 Esipaneeli paigaldamine
▶ Paigaldage vastupidises järjekorras.

Remont
4.3 Ukse vahetamine
Nõue:
natural_image
Close-up of a mechanical component with two labeled parts (1 and 2), no visible text or symbols beyond labels4.3.2 Ukse paigaldamine
▶ Paigaldage vastupidises järjekorras.

Remont
natural_image
Interior view of a washing machine showing internal components and casing (no text or labels visible)natural_image
3D rendering of a mechanical component with concentric rings and mounting flanges (no visible text or symbols)natural_image
Cross-sectional view of a mechanical device with internal components (no visible text or symbols)4.5.2 Ukse hinge paigaldamine
▶ Paigaldage vastupidises järjekorras.
natural_image
Diagram of a camera lens assembly with no visible text or symbolsnatural_image
Interior view of a washing machine showing internal components and mounting points (no text or labels visible)- Poista etupaneeli.
4.2.2 Etupaneelin asentaminen
natural_image
Close-up of a mechanical component with two labeled parts (1 and 2), no visible text or symbols beyond labelsnatural_image
Interior view of a washing machine showing internal components and casing (no text or labels visible)natural_image
3D rendering of a mechanical component with concentric rings and mounting flanges (no visible text or symbols)- Poista luukun tiiviste.
natural_image
Technical illustration of a mechanical component with cross-sectional view (no text or symbols)natural_image
Diagram of a speaker with visible sound waves and internal components (no text or symbols)natural_image
Interior view of a washing machine showing internal components and ventilation slots (no text or labels visible)natural_image
Close-up of a mechanical component with two labeled parts (1 and 2), no visible text or symbols beyond labelsnatural_image
Cross-sectional view of a washing machine showing internal components and casing (no text or labels visible)natural_image
3D rendering of a mechanical component with concentric rings and mounting flanges (no visible text or symbols)- Retirer le joint de porte.