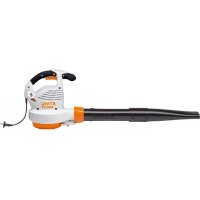
BGE 81 - Vacuum Cleaner STIHL - Free user manual and instructions
Find the device manual for free BGE 81 STIHL in PDF.



| Product type | Electric blower and vacuum shredder |
| Brand | STIHL |
| Model | BGE 81 |
| Dimensions (L × H × D) | 210 mm × 334 mm × 330 mm |
| Weight | 3.3 kg |
| Power | 1400 W |
| Voltage / Frequency | 230 V / 50 Hz (or 230-240 V) |
| Rated current | 6.1 A |
| Recommended fuse | 10 A |
| Protection class | II (double insulation) |
| Max air flow (blowing) | 750 m³/h |
| Max air flow (vacuuming) | 650 m³/h |
| Air speed (blowing) | 76 m/s |
| Sound pressure level (blowing) | 89 dB(A) |
| Sound pressure level (vacuuming) | 88 dB(A) |
| Sound power level (blowing) | 103 dB(A) |
| Vibration right handle (blowing) | 4.1 m/s² |
| Vibration right/left handle (vacuuming) | 2.6 / 5.6 m/s² |
| Functions | Blowing and vacuuming with shredding (optional kit) |
| Included nozzle type | Round nozzle (mounted) and flat nozzle |
| Optional accessories | Vacuum kit, gutter cleaning kit, curved flat nozzle |
| Maintenance | Regular cleaning of cooling vents, visual inspection before each use |
| Repairability | Original STIHL spare parts recommended, repairs by authorized dealer |
| Compliance standards | CE, IEC 60335, EN 55014, ISO 9001 |
Frequently Asked Questions - BGE 81 STIHL
User questions about BGE 81 STIHL
0 question about this device. Answer the ones you know or ask your own.
Ask a new question about this device
Download the instructions for your Vacuum Cleaner in PDF format for free! Find your manual BGE 81 - STIHL and take your electronic device back in hand. On this page are published all the documents necessary for the use of your device. BGE 81 by STIHL.
USER MANUAL BGE 81 STIHL
STIHL BGE 61, 71, 81, SHE 71, 81
Gebrauchsanleitung
Instruction Manual
Notice d'emploi
natural_image
Product photo of two StiHL BSE 81 electric blower tools, one with a black handle and the other a white cover (no visible text or symbols on the devices themselves)Skötselanvisning
Käyttöohje
Istruzioni d'uso
BGE 61, BGE 71, BGE 81, SHE 71, SHE 81
deutsch
natural_image
Line drawing of a person using a handheld tool on a tiled floor, with no visible text or symbolsnatural_image
Line drawing of a person using a long-handled tool to clean grass, wearing protective gear (no text or symbols)BGE 61, BGE 71, SHE 71
Motor BGE 71 / SHE 71
Ausführung 120 V
Motor BGE 81 / SHE 81
Ausführung 230 V
Guide to Using this Manual 22
Safety Precautions and Working
Techniques 22
Assembling the Blower 27
Assembling the Vacuum Shredder 28
Connecting to Power Supply 30
Switching On 30
Switching Off 31
Storing the Machine 31
Maintenance and Care 32
Minimize Wear and Avoid Damage 33
Main Parts 34
Specifications 35
Special Accessories 36
Maintenance and Repairs 37
Disposal 37
EC Declaration of Conformity 37
Quality Certification 38
Dear Customer,
Thank you for choosing a quality engineered STIHL product.
This machine has been built using modern production techniques and comprehensive quality assurance. Every effort has been made to ensure your satisfaction and troublefree use of the machine.
Please contact your dealer or our sales company if you have any queries concerning your machine.
Your
Han Pete Wu
Hans Peter Stihl
CE
STIHL®
BGE 61, BGE 71, BGE 81, SHE 71, SHE 81
English
Guide to Using this Manual
Pictograms
All the pictograms attached to the machine are shown and explained in this manual.
Symbols in text

Warning where there is a risk of an accident or personal injury or serious damage to property.

Caution where there is a risk of damaging the machine or its individual components.
Engineering improvements
STIHL's philosophy is to continually improve all of its products. For this reason we may modify the design, engineering and appearance of our products periodically.
Therefore, some changes, modifications and improvements may not be covered in this manual.
Safety Precautions and Working Techniques

Special safety precautions must be observed when working with this power tool. The power supply is a particular source of danger.

It is important you read and understand the instruction manual before first use and keep the manual in a safe place for future reference. Non-observance of the safety precautions may result in serious or even fatal injury.
Observe all applicable local safety regulations, standards and ordinances.
If you have not used this power tool model before: Have your dealer or other experienced user show you how to operate your power tool or attend a special course in its operation.
Minors should never be allowed to use the power tool.
Keep bystanders, especially children, and animals away from the work area.
When the power tool is not in use, shut if off so that it does not endanger others. Secure it against unauthorized use, disconnect the plug from the power supply.
The user is responsible for avoiding injury to third parties or damage to their property.
Do not lend or rent your power tool without the instruction manual. Be sure that anyone using your power tool understands the information contained in this manual.
The use of noise emitting power tools may be restricted to certain times by national or local regulations.
Unsuitable extension cords can be extremely dangerous. Use only extension cords that are approved for outdoor use, marked accordingly and have an adequate wire cross section (gauge).
Never touch the mains plug, power cord, extension cord or electrical connections with wet hands.
Before each use, check that your power tool is in good condition. Pay special attention to the power cord, mains plug and safety devices.
Do not operate your power tool if any of its components are damaged.
Before carrying out any work on the power tool: Disconnect the plug from the power supply.
Do not use a pressure washer to clean the power tool. The solid jet of water may damage parts of the power tool.
Do not spray the power tool with water.
Accessories and Spare Parts
Only use parts and accessories that are explicitly approved for this power tool by STIHL or are technically identical. If you have any questions in this respect, consult a servicing dealer. Use only high
quality parts and accessories in order to avoid the risk of accidents and damage to the power tool.
STIHL recommends the use of genuine STIHL replacement parts. They are specifically designed to match your model and meet your performance requirements.
Never attempt to modify your power tool in any way since this may increase the risk of personal injury. STIHL excludes all liability for personal injury and damage to property caused while using unauthorized attachments.
Physical Condition
To operate the power tool you must be rested, in good physical condition and mental health.
If you have any condition that might be aggravated by strenuous work, check with your doctor before operating a power tool.
Do not operate the power tool if you are under the influence of any substance (drugs, alcohol) which might impair vision, dexterity or judgment.
Applications
The blower is designed for blow-sweeping leaves, grass, paper and similar materials, e.g. in gardens, sports stadiums, car parks and driveways.
The vacuum shredder is designed for picking up dry leaves and other lightweight, loose and non-combustible materials.
Do not blow-sweep or vacuum hazardous materials.
Do not operate your power tool indoors.
It must not be used for any other purpose because of the increased risk of accidents and damage to the power tool itself. Never attempt to modify the power tool in any way since this may result in accidents or damage to the power tool.
Operating Conditions

Do not operate your power tool in damp or wet conditions or in snow.
Clothing and Equipment
Wear proper protective clothing and equipment.
Clothing must be sturdy but allow complete freedom of movement. Wear snug-fitting clothing, an overall and jacket combination, do not wear a work coat.
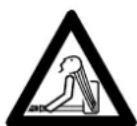
Avoid any clothing, scarves, neckties, jewellery or anything that could get into the air intake. Tie up and confine long hair (e.g. with a hair net, cap, hard hat, etc.).
Wear sturdy shoes with non-slip soles.

Wear safety glasses and hearing protection, e.g. earplugs or ear muffs.
STIHL offers a comprehensive range of personal protective clothing and equipment.
Before Starting Work
Inspect the power tool.
To reduce the risk of accidents and personal injury, do not operate your power tool if it is not properly assembled and in good condition.
- Switch/trigger must move easily to STOP or 0
- The switch/trigger must be on STOP or 0.
- The blower tubes must be properly assembled.
- Handles must be clean and dry, free from oil and dirt, for safe control.
- Check condition of impeller wheel and impeller housing – see chapter on "Using the Vacuum Shredder".
A worn impeller housing (cracks, nicks, chips) may result in an increased risk of injury from thrown foreign objects. If the impeller housing is damaged, consult your dealer – STIHL recommends you contact a STIHL servicing dealer.
Never attempt to modify the controls or the safety devices in any way.
Electrical connection.
Reduce the risk of electric shock:
English
- Voltage and frequency of the machine (see rating plate) and the voltage and frequency of your power supply must be the same.
- Check the connecting cord, plug and extension cord for damage. Never use damaged cords, couplings and plugs or connecting cords that do not comply with regulations.
- Always connect the power tool to a properly installed wall outlet.
- Check that the insulation of the power cord, extension cord, plug and coupling is in good condition.
Position the connecting and extension cords correctly:
- Check minimum cross section of wires (wire gauge) – see "Connecting to Power Supply".
- To reduce the risk of stumbling, position and mark the connecting cord so that it cannot be damaged or endanger others.
- The extension cord's plug and coupling must be splash-proof or positioned in such a way that they do not come into contact with water
- do not immerse in water.
- Do not chafe on edges, pointed or sharp objects
- Do not squeeze through gaps in doors or windows
- If cords are twisted – unplug the power tool and straighten them out
- Always unwind the extension cord completely from the cable drum to reduce the risk of fire from overheating.
Using the Blower
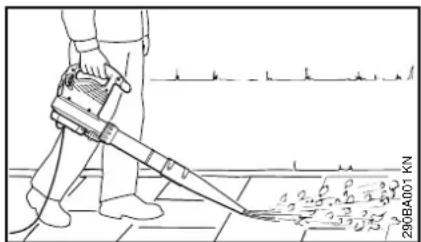
Your blower is designed for one-handed operation. It can be carried by the control handle in either the right or left hand.
Always hold the power tool firmly in your hand.
Walk slowly forwards as you work – observe the nozzle outlet at all times – do not walk backwards – risk of stumbling.
To reduce the risk of injury, operate the unit only with a properly mounted blower tube.
The round nozzle is particularly suitable for use on uneven surfaces (e.g. fields and lawns).
The fan nozzle (either included with power tool or available as special accessory) produces a broad and powerful airstream at ground level. It can be aimed and controlled very accurately. This nozzle is highly effective for blow-sweeping sawdust, leaves, grass cuttings, etc. on flat surfaces.
Using the Vacuum Attachment
For specific assembling instructions, see appropriate chapter in this manual.
natural_image
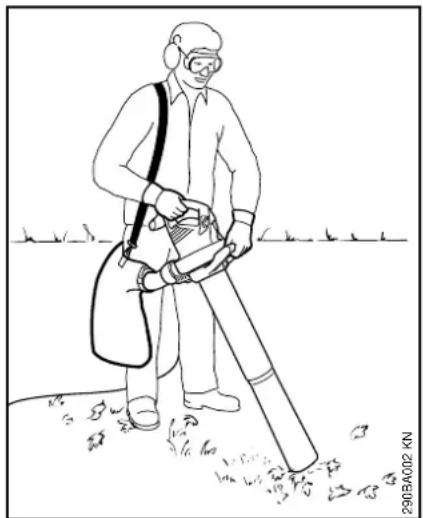
Line drawing of a person using a long-handled tool to clean grass, wearing protective gear (no text or symbols)Your vacuum shredder is designed for two-handed operation. Hold and operate the power tool with your right hand on the control handle and your left hand on the assist handle (union nut).
Wear the catcher bag shoulder strap over your right shoulder, not across your chest. This enables you to quickly remove the power tool and catcher bag in an emergency.
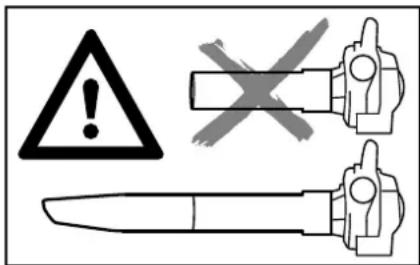
To reduce the risk of injury, operate your power tool only with a properly mounted suction tube and closed catcher bag.

Vacuuming abrasive material (such as grit, stone chips, etc.) causes the impeller wheel and impeller housing to wear at a rapid rate. This results in a considerable loss of suction power. In such a case you should contact your dealer. STIHL recommends a STIHL servicing dealer.
Take particular care when vacuuming wet leaves since they may block the impeller wheel and elbow.

To reduce the risk of personal injury from fire, never attempt to pick up hot or burning substances (e.g. smoldering ashes, glowing cigarettes).
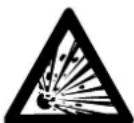
To reduce the risk of fatal injury from fire or explosion, never attempt to pick up combustible fluids (e.g. gasoline) or materials soaked in combustible fluids.
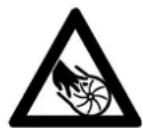
Switch off the engine before opening the intake screen. The intake screen must always be closed and secured when the suction tube is not mounted to reduce the risk of injury from contact with rotating components. This can also result in damage to the engine.
During Operation
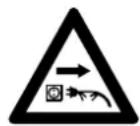
If the power cord is damaged, immediately disconnect the plug from the power supply to avoid the risk of electrocution.
Avoid damage to the power supply cord. Do not drive over it, pinch or tug it.
Never jerk the power cord to disconnect it from the wall outlet. To unplug, grasp the plug, not the cord.
Be sure your hands are dry before touching the plug or power cord.
Never spray down electric appliances with water – risk of short circuit!
In case of imminent danger or in an emergency, move the trigger/switch to STOP or 0.
Your power tool is designed to be operated by one person only. Do not allow other persons in the work area.
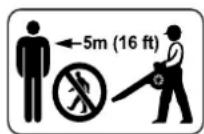
To reduce the risk of injury from thrown objects, do not allow any other persons within a radius of 5 meters of your own position.
To reduce the risk of damage to property, also maintain this distance from other objects (vehicles, windows).
Do not direct the air blast towards bystanders or animals since the air flow can blow small objects at great speed.
When blow-sweeping and vacuum shredding (in open ground and gardens), watch out for small animals to avoid harming them.
Never leave a running machine unattended.
Do not leave the machine outdoors in the rain.
Take care in splippery conditions on slopes and uneven ground.
Watch out for obstacles: Be careful of refuse, tree stumps, roots and ditches which could cause you to trip or stumble.
Never work on a ladder or any other insecure support.
Be particularly alert and cautious when wearing hearing protection because your ability to hear warnings (shouts, alarms, etc.) is restricted.
Work calmly and carefully – in daylight conditions and only when visibility is good. Stay alert so as not to endanger others.
English
To reduce the risk of accidents, take a break in good time to avoid tiredness or exhaustion.

Never work with the power tool in the rain or in wet or very damp locations.
Static electricity may build-up while blow-sweeping large quantities of very dusty material and suddenly discharge in certain unfavorable conditions (e.g. very dry work area).
If dust levels are very high, always wear a suitable respirator.
Vacuuming unsuitable materials may block the impeller wheel. Switch off the unit immediately and disconnect the plug from the power supply. Then clear the blockage.
Never attempt to insert objects into the impeller housing through the intake screen or the nozzle. They may be expelled at very high speed by the impeller – risk of injury.
If there is a noticeable change in running behavior (e.g. higher vibrations), stop work and rectify the cause of the problem.
If your power tool is subjected to unusually high loads for which it was not designed (e.g. heavy impact or a fall), always check that it is in good condition before continuing work – see also "Before Starting Work". Make sure the safety devices are working properly. Do not continue operating your power tool if it is damaged. In case of doubt, have the machine checked by your servicing dealer.
Before leaving the power tool unattended: Switch off the motor and disconnect the plug from the power supply.
After Finishing Work
Disconnect the plug from the wall outlet.
Never jerk the power cord to disconnect it from the wall outlet. To unplug, grasp the plug, not the cord.
Always clean dust and dirt off the power tool – do not use any grease solvents for this purpose.
Vibrations
Prolonged use of the power tool may result in vibration-induced circulation problems in the hands (whitefinger disease).
No general recommendation can be given for the length of usage because it depends on several factors.
The period of usage is prolonged by:
- Hand protection (wearing warm gloves)
- Work breaks
The period of usage is shortened by:
– Any personal tendency to suffer from poor circulation (symptoms: frequently cold fingers, tingling sensations).
– Low outside temperatures.
- The force with which the handles are held (a tight grip restricts circulation).
Continual and regular users should monitor closely the condition of their hands and fingers. If any of the above symptoms appear (e.g. tingling sensation in fingers), seek medical advice.
Maintenance and Repairs
Before carrying out any work on the power tool: Disconnect the plug from the power supply.
Service the machine regularly. Do not attempt any maintenance or repair work not described in the instruction manual. Have all other work performed by a servicing dealer.
STIHL recommends that you have servicing and repair work carried out exclusively by an authorized STIHL servicing dealer. STIHL dealers are regularly given the opportunity to attend training courses and are supplied with the necessary technical information.
Only use high-quality replacement parts in order to avoid the risk of accidents and damage to the machine. If you have any questions in this respect, consult a servicing dealer.
STIHL recommends the use of genuine STIHL replacement parts. These parts are specifically designed to match your machine model and meet your performance requirements.
To reduce the risk of serious injury, have repairs to the unit (e.g. replacing the power supply cord) performed by an authorized electrician.
Clean plastic components with a cloth. Do not use aggressive detergents. They may damage the plastic.
Clean cooling air inlets in motor housing as necessary.
Assembling the Blower
●Disconnect the plug from the power supply.
Mounting the Blower Tube (BGE 61)

●Line up the recesses. The arrow (2) must be on the top of the blower tube (1).
●Push the blower tube (1) into the fan housing stub (3) as far as the stop.
●Push the union nut (4) over the fan housing stub (3) and turn it in the direction of the arrow until the tab (5) engages the opening (6) in the union nut.
Mounting the Blower Tube (BGE 71, BGE 81)
Your blower can be switched on only when the blower tube is properly mounted. The union nut activates a switch which closes the circuit to allow the motor to be switched on.
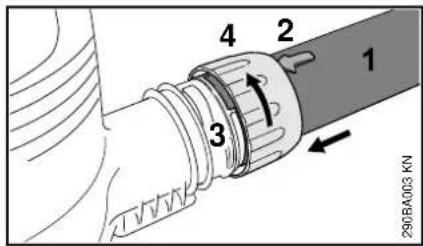
●Line up the recesses. The arrow (2) must be on the top of the blower tube (1).
●Push the blower tube (1) into the fan housing stub (3) as far as the stop.
●Push the union nut (4) over the fan housing stub (3) and turn it in the direction of the arrow as far as the stop. You will hear the safety switch being activated.
Mounting the Nozzle
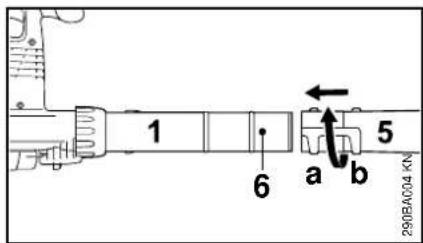
●Push the nozzle (5) onto the blower tube (1) as far as lug (6), position (a) (long) or position (b) (short), and rotate the nozzle in the direction of the arrow to it lock in position.
English
Removing the Blower Tube (BGE 61)
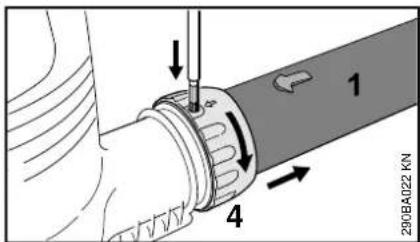
●Switch off the motor.
- Insert a suitable tool through the opening in the union nut to press down the tab.
- Rotate the union nut (4) in the direction of the arrow as far as the stop.
- Remove the blower tube (1).
Removing the Blower Tube (BGE 71, BGE 81)
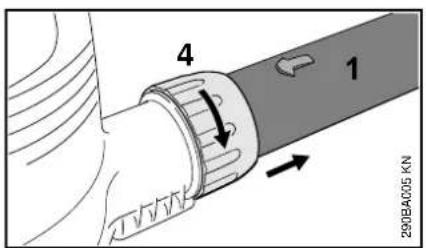
●Switch off the motor.
- Rotate the union nut (4) in the direction of the arrow as far as the stop.
- Remove the blower tube (1).
Assembling the Vacuum Shredder
Your vacuum shredder can be switched on only when the elbow and suction tube are properly mounted. The union nuts activate a switch which closes the circuit to allow the motor to be switched on.
●Disconnect the plug from the power supply.
Mounting the Elbow
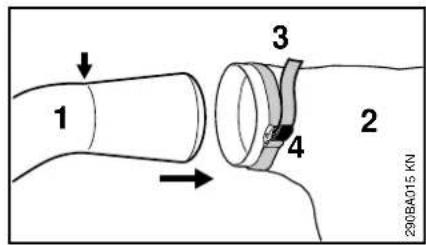
●Push the elbow (1) into the catcher bag (2) as far as the mark (smaller arrow).
●Tighten strap (3) on catcher bag and press down the tab (4).
Make sure the zipper on the catcher bag is closed.
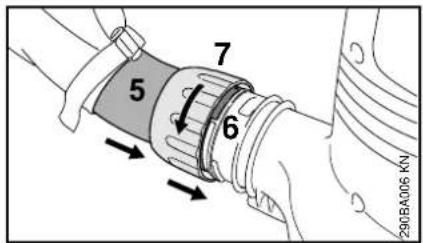
●Line up the recesses.
●Push the elbow (5) into the fan housing stub (6) as far as stop.
●Push the union nut (7) over the fan housing stub (6) and turn it in the direction of the arrow as far as the stop. You will hear the safety switch being activated.
Assembling the Suction Tube
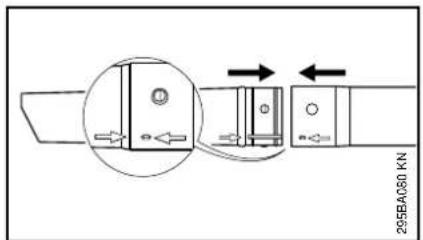
●Line up the arrows on the suction tube and extension tube. Push together and lock in position.
Mounting the Suction Tube
●Switch off the motor.
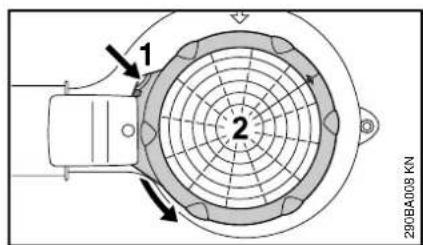
●Press tab (1) towards fan housing, rotate intake screen (2) in direction of arrow as far as the stop, and lift it away.
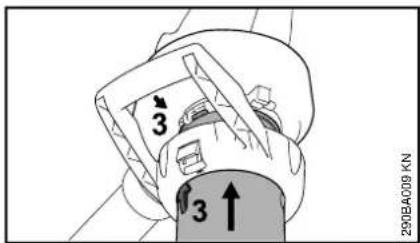
●Line up the arrows (3).
●Push the suction tube into the intake opening as far as the stop.
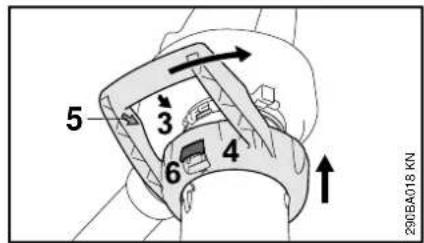
●Push the union nut (4) over the intake opening.
●Line up the arrows (3 and 5).
- Rotate the union nut (4) in direction of arrow until the lever (6) engages audibly on the fan housing.
Removing the Elbow
●Switch off the motor.
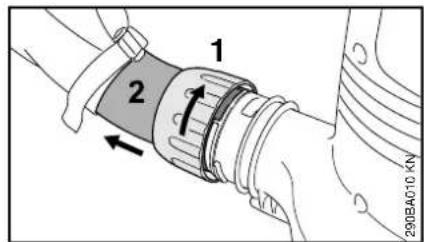
- Rotate the union nut (1) in the direction of the arrow as far as the stop.
- Remove the elbow (2).
Removing the Suction Tube
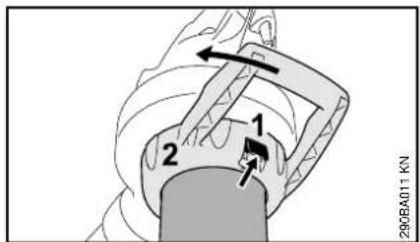
●Switch off the motor.
●Operate the lever (1), rotate the union nut (2) in direction of arrow as far as the stop and remove together with the suction tube.
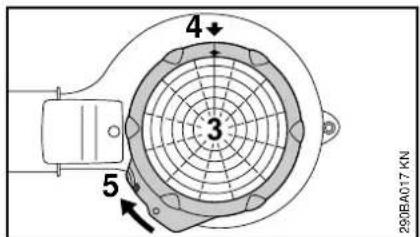
●Position the intake screen (3) on the intake opening.
●Line up the arrows (4).
- Rotate the intake screen nut (3) in direction of arrow until the lever (5) engages audibly on the fan housing.
English
Connecting to Power Supply
The voltage and frequency of the machine (see rating plate) must match the voltage and frequency of the power connection.
The minimum fuse protection of the power connection must comply with the specifications – see "Specifications".
The machine must be connected to the power supply via an earth-leakage circuit breaker to disconnect the power supply if the differential current to earth exceeds 30 mA.
The power connection must correspond to IEC 60364 and relevant national regulations.
Depending on the supply voltage and cord length, the minimum conductor cross section of the extension cord must be as follows:
Cord length Minimum cross section
| 220 V – 240 V: | |
| up to 20 m 1.5 mm | ^2 |
| 20 m to 50 m 2.5 mm | ^2 |
| 100 V – 120 V: | |
| up to 10 m 2.0 mm | ^2 |
| 10 m to 30 m 3.5 mm | ^2 |
Strain Relief (Cord Retainer)
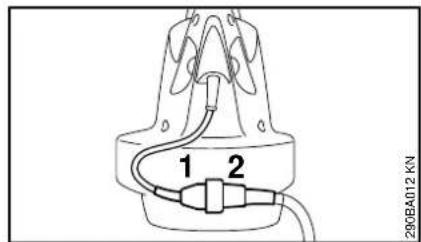
●Insert the appliance plug (1) into the extension cord coupling (2).
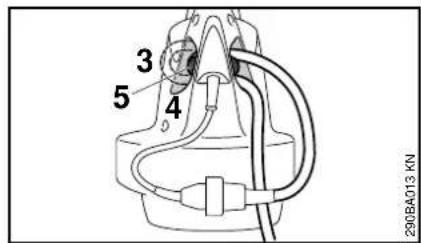
●Make a loop in the extension cord.
●Pass the loop (3) through the opening (4).
●Slip the loop over the hook (5) and pull it tight.
Connecting to Wall Outlet
Make sure your machine is switched off before you connect it to the power supply – see "Switching Off".
- Connect the extension cord plug to a properly installed wall outlet.
Switching On
●Make sure you have a secure and balanced footing.
●Hold the unit in the normal working position.
BGE 61, BGE 71, SHE 71
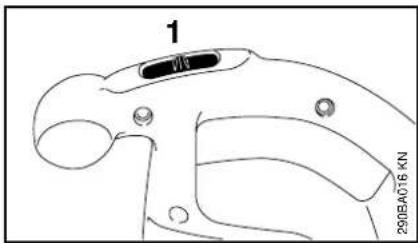
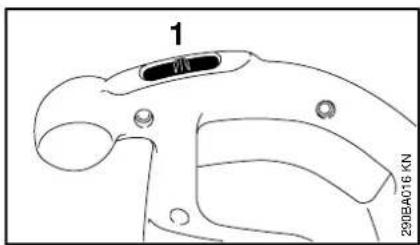
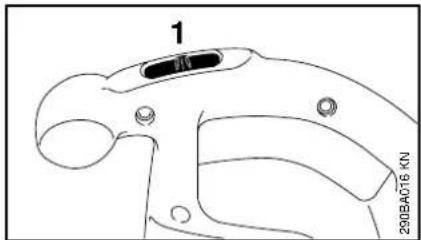
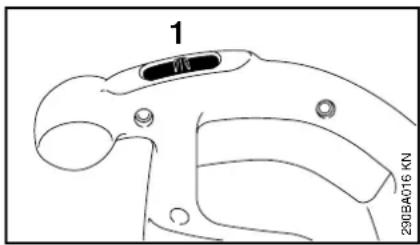
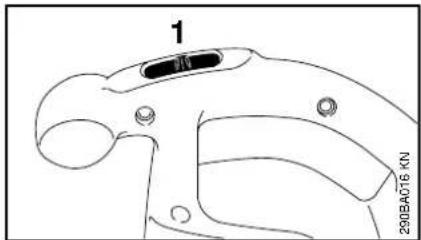
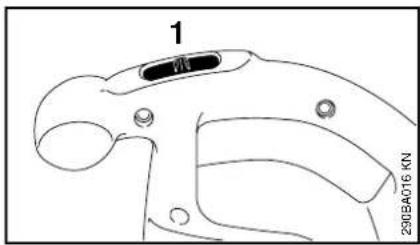
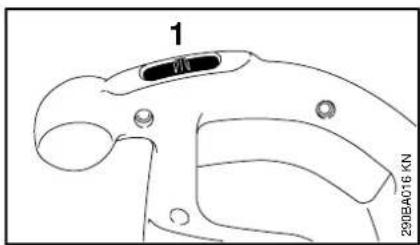
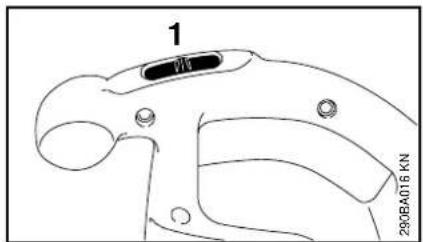
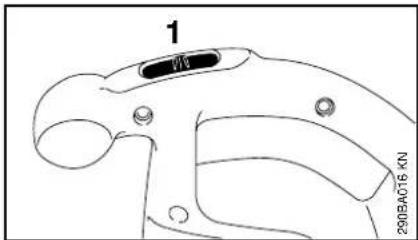
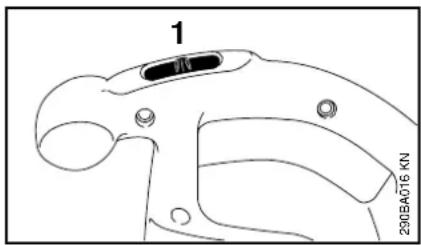
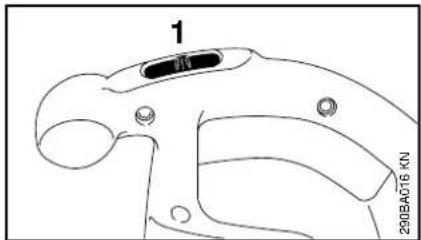
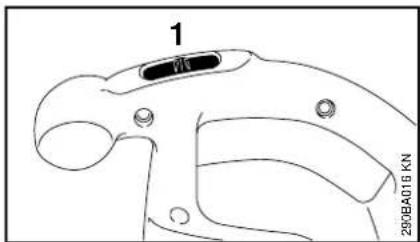
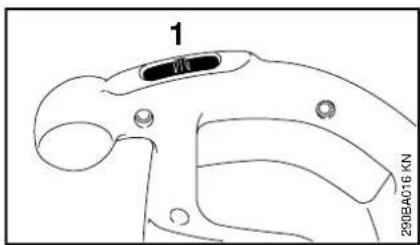
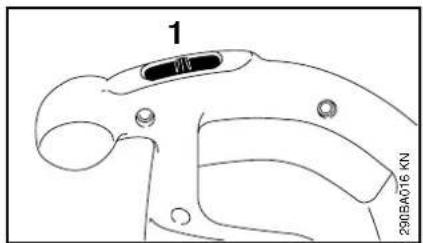
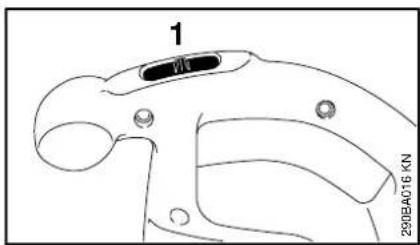
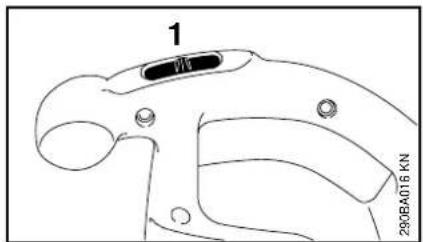
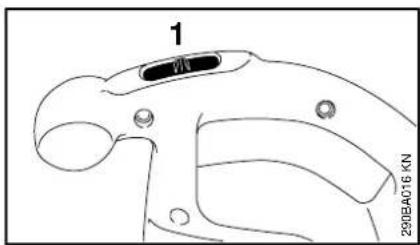
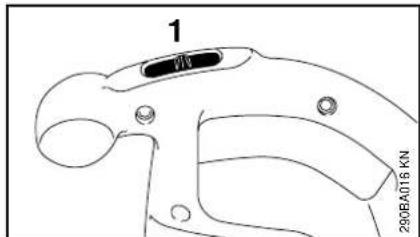
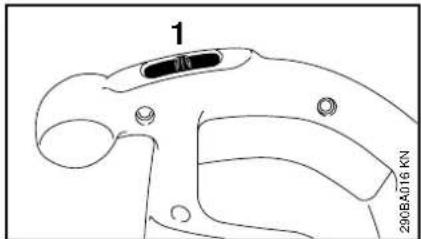
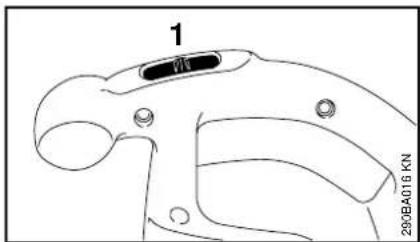
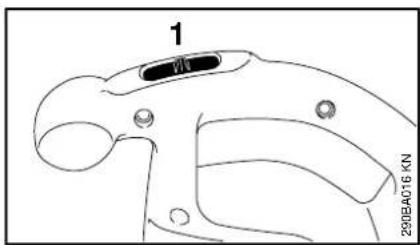
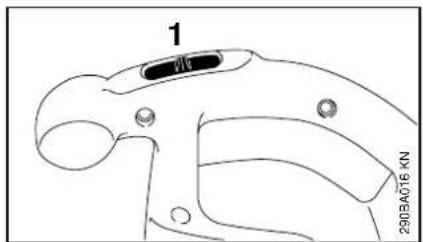
- Move switch (1) to I or II (position II depends on model).
Units with single switch setting (I):
I = full power
Units with two switch settings (I and II):
I = half power
II = full power
BGE 81, SHE 81
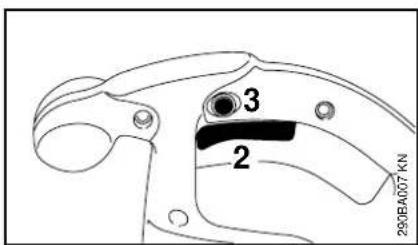
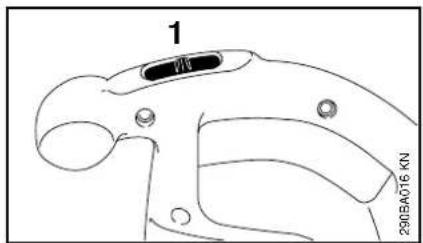
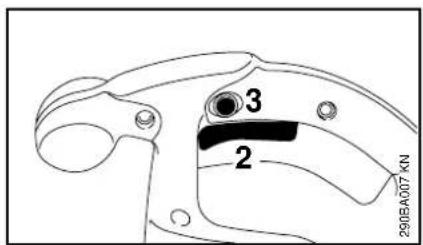
●Squeeze trigger switch (2) on control handle.
Blowing and suction power are infinitely variable.
Press in the lock button (3) to lock the trigger switch (2) in the maximum power position in the blower and vacuum modes.
Switching Off
During long work breaks – disconnect the plug from the power supply.
When the machine is not in use, shut it off so that it does not endanger others.
Secure it against unauthorized use.
BGE 61, BGE 71, SHE 71
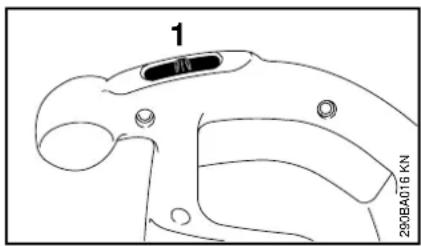
●Move the switch (1) to 0
BGE 81, SHE 81
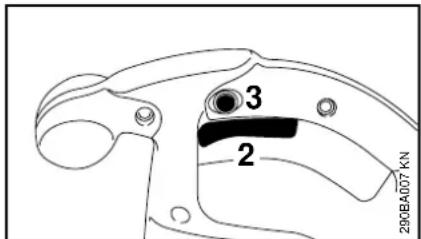
●Release trigger switch (2) on control handle.
If the lock button (3) is engaged, squeeze the trigger switch briefly and let it go.
Storing the Machine
●Thoroughly clean the machine.
●Store the machine in a dry, high or locked location, out of the reach of children and other unauthorized persons.
Maintenance and Care
| The following intervals apply to normal operating conditions only. If your daily working time is longer or operating conditions are difficult (very dusty work area, etc.), shorten the specified intervals accordingly. | before starting work | after finishing work or daily | weekly | monthly | yearly | if problem | if damaged | if required | |
| Complete machine | Visual inspection (condition) x | ||||||||
| Clean x | |||||||||
| Control handle Check operation x | |||||||||
| Cooling inlets Clean x | |||||||||
| Safety labels Replace x | |||||||||
Minimize Wear and Avoid Damage
Observing the instructions in this manual helps reduce the risk of unnecessary wear and damage to the power tool.
The power tool must be operated, maintained and stored with the due care and attention described in this instruction manual.
The user is responsible for all damage caused by non-observance of the safety precautions, operating and maintenance instructions in this manual. This includes in particular:
– Alterations or modifications to the product not approved by STIHL.
- Using tools or accessories which are neither approved or suitable for the product or are of a poor quality.
- Using the product for purposes for which it was not designed.
- Using the product for sports or competitive events.
– Consequential damage caused by continuing to use the product with defective components.
Maintenance Work
All the operations described in the "Maintenance Chart" must be performed on a regular basis. If these maintenance operations cannot be performed by the owner, they should be performed by a servicing dealer.
STIHL recommends that you have servicing and repair work carried out exclusively by an authorized STIHL
servicing dealer. STIHL dealers are regularly given the opportunity to attend training courses and are supplied with the necessary technical information.
If these maintenance operations are not carried out as specified, the user assumes responsibility for any damage that may occur. Among other things, this includes:
- Damage to the motor due to neglect or deficient maintenance (e.g. not cleaning cooling air inlets).
- Damage due to incorrect electrical connection (voltage, inadequately rated connecting cords).
– Corrosion and other consequential damage resulting from improper storage.
– Damage to the product resulting from the use of poor quality replacement parts.
Parts Subject to Wear and Tear
Some parts of the power tool are subject to normal wear and tear even during regular operation in accordance with instructions and, depending on the type and duration of use, have to be replaced in good time. Among other parts, this includes:
- Fanwheel
- Catcher bag
Main Parts
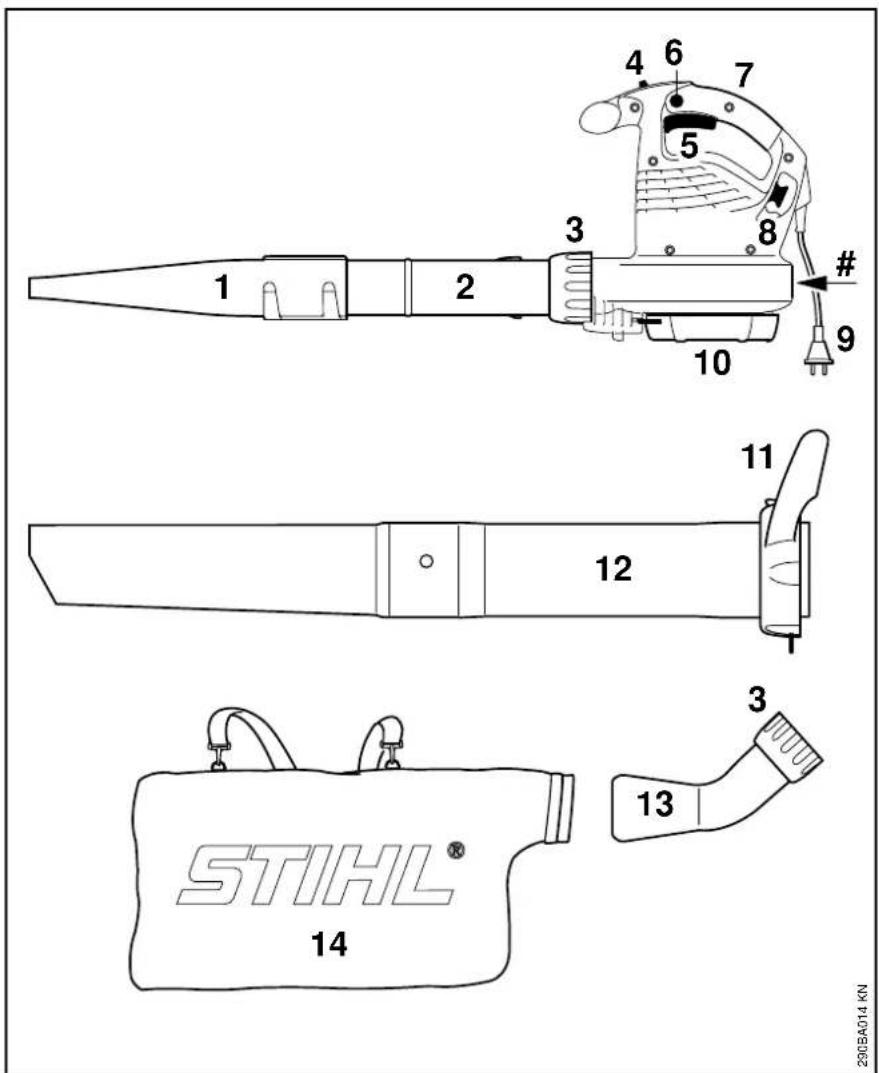
1 Fan nozzle
2 Blower tube
3 Union nut
4 Switch (BGE 61, BGE 71, SHE 71 only)
5 Trigger switch (BGE 81, SHE 81 only)
6 Lock button (BGE 81, SHE 81 only)
7 Control handle
8 Strain relief hook (cord retainer)
9 Appliance plug
10 Intake screen
11 Union nut with handle*
12 Suction tube*
13 Elbow*
14 Catcher bag*
Serial number
Specifications
Motor (BGE 61)
120V version
Power supply 120 V, 60 Hz, 9.2 A
Fuse 15 A
Rating 1100 W
Insulation II
240V version
Power supply 240 V, 50 Hz, 4.8 A
Fuse 10 A
Rating 1100 W
Insulation II
Motor (BGE 71 / SHE 71)
120V version
Power supply 120 V, 60 Hz, 9.2 A
Fuse 15 A
Rating 1100 W
Insulation II
230V version
Power supply 230 V, 50 Hz, 4.8 A
Fuse 10 A
Rating 1100 W
Insulation II
230V - 240V version
Power supply 230 V - 240 V, 50 Hz, 4.8 A
Fuse 10 A
Rating 1100 W
Insulation II
Motor (BGE 81 / SHE 81)
230V version
Power supply 230 V, 50 Hz, 6.1 A
Fuse 10 A
Rating 1400 W
Insulation II
230V - 240V version
Power supply 230 V - 240 V, 50 Hz, 6.1 A
Fuse 10 A
Rating 1400 W
Insulation II
Maximum air flow rate
| Vacuum | ||
| Blower mode | mode | |
| BGE 61 670 m | ^3/h --- | |
| BGE 71 670 m | ^3/h 580 m | ^3/h |
| BGE 81 750 m | ^3/h 650 m | ^3/h |
| SHE 71 670 m | ^3/h 580 m | ^3/h |
| SHE 81 750 m | ^3/h 650 m | ^3/h |
Air velocity with nozzle
Blower mode
BGE 61 66 m/s
BGE 71 66 m/s
BGE 81 76 m/s
SHE 71 66 m/s
SHE 81 76 m/s
Dimensions
Width 210 mm
Height 334 mm
Depth 330 mm
Weight
BGE 61 3.0 kg
BGE 71 3.0 kg
BGE 81 3.3 kg
SHE 71 4.1 kg
SHE 81 4.4 kg
Noise and Vibration Data
Noise and vibration data are determined on the basis of the rated maximum speed.
For further details on compliance with Vibration Directive 2002/44/EC see www.stihl.com/vib/
English
Continuous sound pressure level L_p to ISO 11201
Vacuum
Blower mode mode
BGE 71 85 dB(A) 85 dB(A)
BGE 81 89 dB(A) 88 dB(A)
SHE 71 85 dB(A) 85 dB(A)
SHE 81 89 dB(A) 88 dB(A)
Sound power level L_w to ISO 3744
Vacuum
Blower mode mode
BGE 71 100 dB(A) 101 dB(A)
BGE 81 103 dB(A) 103 dB(A)
SHE 71 100 dB(A) 101 dB(A)
SHE 81 103 dB(A) 103 dB(A)
Vibration measurement ahv to ISO 20643
Blower mode
Handle, right
BGE 71 1 m/s ^2
BGE 81 4.1 m/s ^2
SHE 71 1 m/s ^2
SHE 81 4.1 m/s ^2
Vacuum mode
Handle, right Handle, left
BGE 71 0.8 m/s ^2 1.2 m/s ^2
BGE 81 2.6 m/s ^2 5.6 m/s ^2
SHE 71 0.8 m/s ^2 1.2 m/s ^2
SHE 81 2.6 m/s ^2 5.6 m/s ^2
The K-factor in accordance with
Directive 2006/42/EC is 2.5 dB(A) for
the sound pressure level and sound
power level; the K-factor in accordance with Directive 2006/42/EC is 2.0 m/s ^2 for the vibration measurement.
REACH
REACH is an EC regulation and stands for the Registration, Evaluation, Authorisation and Restriction of Chemical substances.
For information on compliance with the REACH regulation (EC) No. 1907/2006 see www.stihl.com/reach.
Special Accessories
- Vacuum attachment (BGE 71, BGE 81 only)
– Gutter cleaning attachment - Curved fan nozzle
Contact your STIHL dealer for more information on these and other special accessories.
Maintenance and Repairs Disposal EC Declaration of
Users of this machine may only carry out the maintenance and service work described in this user manual. All other repairs must be carried out by a servicing dealer.
STIHL recommends that you have servicing and repair work carried out exclusively by an authorized STIHL servicing dealer. STIHL dealers are regularly given the opportunity to attend training courses and are supplied with the necessary technical information.
When repairing the machine, only use replacement parts which have been approved by STIHL for this power tool or are technically identical. Only use high-quality replacement parts in order to avoid the risk of accidents and damage to the machine.
STIHL recommends the use of original STIHL replacement parts.
Original STIHL parts can be identified by the STIHL part number, the STIHL logo and the STIHL parts symbol G_e (the symbol may appear alone on small parts).
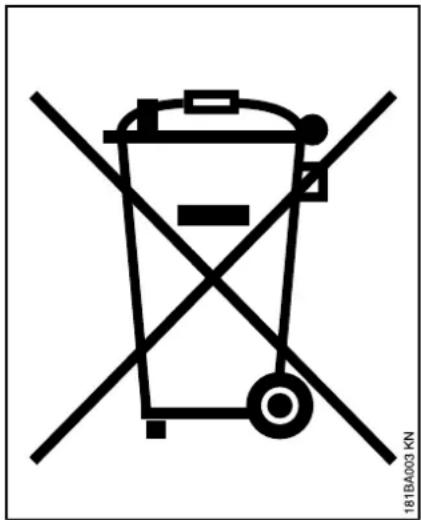
Electrical appliances must not be disposed of as household refuse. Machine, accessories and packaging must be collected and recycled in an environmentally beneficial manner.
Conformity
confirms that the product described below
Category: Electric blower Electric shredder vacuum
Make: STIHL
Type: BGE 61
BGE 71
BGE 81
SHE 71
SHE 81
Serial
identification: 4811
conforms to the specifications of Directives 2006/42/EC, 2000/14/EC and 2004/108/EC and has been developed and manufactured in compliance with the following standards:.
IEC 60335-2-100, EN 55014-1,
EN 55014-2, EN 60335-1,
EN 61000-3-2, EN 61000-3-3
The measured and guaranteed sound power levels were determined according to Directive 2000/14/EC, Annex V, using the ISO 11094 standard.
Measured sound power level
BGE 71: 98 dB(A)
BGE 81: 101 dB(A)
SHE 71: 98 dB(A)
SHE 81: 100 dB(A)
English
Guaranteed sound power level
BGE 71: 100 dB(A)
BGE 81: 103 dB(A)
SHE 71: 100 dB(A)
SHE 81: 102 dB(A)
Technical documents deposited at:
The year of manufacture and serial number are applied to the product.
Done at Waiblingen, 09.07.2010
Director Group Product Management
Quality Certification

All STIHL products comply with the highest quality standards.
An independent organization has certified that all products manufactured by STIHL meet the strict requirements of the ISO 9001 standard for quality management systems in terms of product development, materials purchasing, production, assembly, documentation and customer service.
Table des matières
BGE 61, BGE 71, BGE 81, SHE 71, SHE 81
français
Chère cliente, cher client,
natural_image
Line drawing of a person using a handheld tool to clean or spray the floor, with an ECG waveform in the background (no text or symbols)natural_image
Line drawing of a person in protective gear using a long-handled tool near grass (no text or symbols)BGE 61, BGE 71, SHE 71
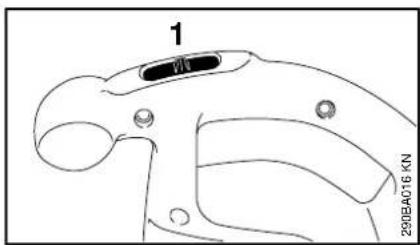
BGE 61, BGE 71, SHE 71
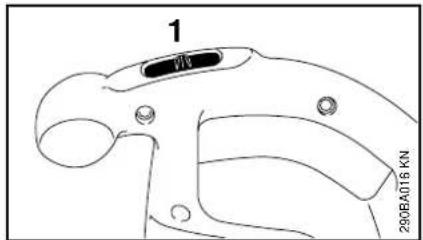
BGE 61, BGE 71, BGE 81, SHE 71, SHE 81
español
natural_image
Line drawing of a person using a handheld tool on a tiled floor, with no visible text or symbolsnatural_image
Line drawing of a person using a long-handled tool to clean grass, wearing protective gear (no text or symbols)BGE 61, BGE 71, SHE 71
BGE 61, BGE 71, SHE 71

●Poner el interruptor (1) en 0
BGE 81, SHE 81
Motor BGE 71 / SHE 71
Ejecución de 120 V
Motor BGE 81 / SHE 81
Ejecución de 230 V
BGE 61, BGE 71, BGE 81, SHE 71, SHE 81
Bäste kund,
natural_image
Line drawing of a person using a handheld tool on a tiled floor, with no visible text or symbolsnatural_image
Line drawing of a person using a long-handled tool to clean grass, wearing protective gear (no text or symbols)BGE 61, BGE 71, SHE 71
BGE 61, BGE 71, SHE 71
Motor BGE 71 / SHE 71
Utförande 120 V
Nätanslutningsdata 120 V, 60 Hz, 9,2 A
Säkring 15 A
Effekt 1100 W
Skyddsklass II
Utförande 230 V
Nätanslutningsdata 230 V, 50 Hz, 4,8 A
Säkring 10 A
Effekt 1100 W
Skyddsklass II
Motor BGE 81 / SHE 81
Utförande 230 V
Nätanslutningsdata 230 V, 50 Hz, 6,1 A
Säkring 10 A
Effekt 1400 W
Skyddsklass II
BGE 61, BGE 71, BGE 81, SHE 71, SHE 81
suomi
Käyttöohje
Kuvasymbolit
natural_image
Line drawing of a person using a long-handled tool to clean grass, wearing protective gear (no text or symbols)BGE 61, BGE 71, SHE 71
BGE 61, BGE 71, SHE 71
BGE 71 85 dB (A) 85 dB (A)
BGE 81 89 dB (A) 88 dB(A)
SHE 71 85 dB (A) 85 dB (A)
SHE 81 89 dB (A) 88 dB(A)
BGE 71 100 dB (A) 101 dB (A)
BGE 81 103 dB(A) 103 dB(A)
SHE 71 100 dB (A) 101 dB (A)
SHE 81 103 dB(A) 103 dB(A)
BGE 61, BGE 71, BGE 81, SHE 71, SHE 81
italiano
Egregio cliente,
natural_image
Line drawing of a person using a handheld tool on a tiled floor, with no visible text or symbolsnatural_image
Line drawing of a person using a long-handled tool to clean grass, wearing safety gear (no text or symbols)BGE 61, BGE 71, SHE 71
BGE 61, BGE 71, SHE 71
Motor BGE 71 / SHE 71
Versione 120 V
BGE 61, BGE 71, BGE 81, SHE 71, SHE 81
dansk
- Fare for at snuble!
BGE 61, BGE 71, SHE 71
BGE 61, BGE 71, SHE 71
Motor BGE 71 / SHE 71
Udførelse 120 V
Nettilslutningsdata 120 V, 60 Hz, 9,2 A
Sikring 15 A
Effekt 1100 W
Beskyttelsesklasse II
Udførelse 230 V
Nettilslutningsdata 230 V, 50 Hz, 4,8 A
Sikring 10 A
Effekt 1100 W
Beskyttelsesklasse II
Motor BGE 81 / SHE 81
Udførelse 230 V
RL 2006/42/EF = 2,5 dB(A); for
RL 2006/42/EF = 2,0 m/s ^2 .
REACH
BGE 61, BGE 71, BGE 81, SHE 71, SHE 81
norsk
Om denne bruksanvisningen
Ikoner
natural_image
Line drawing of a person using a handheld tool on a tiled floor, with no visible text or symbolsnatural_image
Line drawing of a person using a long-handled tool to clean grass, wearing protective gear (no text or symbols)BGE 61, BGE 71, SHE 71
BGE 61, BGE 71, SHE 71
Motor BGE 71 / SHE 71
120 V-modell
Strømtilkoblingsdata 120 V, 60 Hz, 9,2 A
Sikring 15 A
Effekt 1100 W
Beskyttelsesklasse II
230 V-modell
Strømtilkoblingsdata 230 V, 50 Hz, 4,8 A
Sikring 10 A
Effekt 1100 W
Beskyttelsesklasse II
230–240 V-modell
Strømtilkoblingsdata 230 V til 240 V, 50 Hz, 4,8 A
Sikring 10 A
Effekt 1100 W
Beskyttelsesklasse II
Motor BGE 81 / SHE 81
230 V-modell
Strømtilkoblingsdata 230 V, 50 Hz, 6,1 A
Sikring 10 A
Effekt 1400 W
Beskyttelsesklasse II
230–240 V-modell
Strømtilkoblingsdata 230 V til 240 V, 50 Hz, 6,1 A
Sikring 10 A
Effekt 1400 W
Beskyttelsesklasse II
BGE 61, BGE 71, BGE 81, SHE 71, SHE 81
magyar
Tisztelt vevönk,
natural_image
Line drawing of a person using a handheld tool on a tiled floor, with no visible text or symbolsnatural_image
Line drawing of a person using a long-handled tool to clean grass, wearing protective gear (no text or symbols)BGE 61, BGE 71, SHE 71
BGE 61, BGE 71, SHE 71
Motor BGE 71 / SHE 71
Kivitel 120 V
Motor BGE 81 / SHE 81
Kivitel 230 V
BGE 61, BGE 71, BGE 81, SHE 71, SHE 81
português
Estimados clientes,
natural_image
Line drawing of a person using a handheld tool on a tiled floor, with no visible text or symbolsnatural_image
Line drawing of a person using a long-handled tool to clean grass, wearing protective gear (no text or symbols)BGE 61, BGE 71, SHE 71
BGE 61, BGE 71, SHE 71
Motor BGE 71 / SHE 71
Execução 120 V
Motor BGE 81 / SHE 81
Execução 230 V
BGE 61, BGE 71, BGE 81, SHE 71, SHE 81
natural_image
Line drawing of a person using a handheld tool on a tiled floor, with no visible text or symbolsnatural_image
Line drawing of a person using a long-handled tool to clean grass, wearing protective gear (no text or symbols)BGE 61, BGE 71, SHE 71
BGE 61, BGE 71, SHE 71
BGE 61, BGE 71, BGE 81, SHE 71, SHE 81
Αγαπητέ πελάτη,
natural_image
Line drawing of a person using a long-handled tool to clean grass, wearing protective gear (no text or symbols)BGE 61, BGE 71, SHE 71
BGE 61, BGE 71, SHE 71
BGE 61, BGE 71, BGE 81, SHE 71, SHE 81
Szanowni klienci,
natural_image
Line drawing of a person using a long-handled tool to clean grass, wearing protective gear (no text or symbols)BGE 61, BGE 71, SHE 71
BGE 61, BGE 71, SHE 71
0458-290-9921-A
- STIHL BGE 61, 71, 81, SHE 71, 81
- Motor BGE 71 / SHE 71
- Ausführung 120 V
- Motor BGE 81 / SHE 81
- Ausführung 230 V
- Guide to Using this Manual
- Pictograms
- Symbols in text
- Engineering improvements
- Safety Precautions and Working Techniques
- Accessories and Spare Parts
- Physical Condition
- Applications
- Operating Conditions
- Clothing and Equipment
- Before Starting Work
- Inspect the power tool.
- Electrical connection.
- English
- Using the Blower
- Using the Vacuum Attachment
- During Operation
- After Finishing Work
- Vibrations
- Maintenance and Repairs
- Assembling the Blower
- Mounting the Blower Tube (BGE 61)
- Mounting the Blower Tube (BGE 71, BGE 81)
- Mounting the Nozzle
- Assembling the Vacuum Shredder
- Connecting to Power Supply
- Connecting to Wall Outlet
- Switching On
- Switching Off
- Storing the Machine
- Minimize Wear and Avoid Damage
- Maintenance Work
- Parts Subject to Wear and Tear
- Main Parts
- Serial number
- Specifications
- Motor (BGE 61)
- 120V version
- 240V version
- Motor (BGE 71 / SHE 71)
- 230V version
- 230V - 240V version
- Motor (BGE 81 / SHE 81)
- Maximum air flow rate
- Air velocity with nozzle
- Blower mode
- Dimensions
- Weight
- Noise and Vibration Data
- Continuous sound pressure level L_p to ISO 11201
- Sound power level L_w to ISO 3744
- Vibration measurement ahv to ISO 20643
- Vacuum mode
- REACH
- Special Accessories
- Maintenance and Repairs Disposal EC Declaration of
- Conformity
- Measured sound power level
- Guaranteed sound power level
- Table des matières
- Ejecución de 120 V
- Ejecución de 230 V
- Utförande 120 V
- Utförande 230 V
- Käyttöohje
- Kuvasymbolit
- Egregio cliente,
- Versione 120 V
- - Fare for at snuble!
- Udførelse 120 V
- Udførelse 230 V
- Om denne bruksanvisningen
- Ikoner
- V-modell
- V-modell
- 230–240 V-modell
- Kivitel 120 V
- Kivitel 230 V
- Execução 120 V
- Execução 230 V
- Αγαπητέ πελάτη,
- BGE 61, BGE 71, SHE 71
Brand : STIHL
Model : BGE 81
Category : Vacuum Cleaner