
A 120 - Laminating machine OLYMPIA - Free user manual and instructions
Find the device manual for free A 120 OLYMPIA in PDF.
| Product type | Laminating machine (laminator) |
| Brand | Olympia |
| Model | A 120 |
| Dimensions (L x H x D) | 345 x 96 x 67 mm |
| Weight | 770 g |
| Power supply | 220-240 V, 50 Hz, 0.5 A |
| Power | 115 W |
| Max. lamination width | 230 mm (A4 format) |
| Lamination film thickness | 80 to 125 microns |
| Maximum document + film thickness | 0.5 mm |
| Lamination speed | 300 mm/min |
| Lamination temperature | 110-130 °C |
| Preheat time | 3 to 5 minutes |
| Cooling time | Approximately 30 minutes |
| Protection class | II (double insulation) |
| Main functions | Hot lamination, automatic feed, power indicator (red) and ready indicator (green), anti-jam button (ABS) |
| Safety | Overheat protection, manual shutdown recommended, power cable with plug |
| Intended use | Indoor, non-professional use, lamination of documents with suitable films |
| Housing maintenance | Soft, dry, lint-free cloth; no cleaning products or solvents |
| Roller cleaning | Run a blank sheet of paper after a jam or if adhesive residue remains |
| Package contents | 1 laminator, 5 A4 lamination sheets, 1 user manual |
| Country of manufacture | Germany (GO Europe GmbH) |
| Warranty | Statutory warranty, return in original packaging with receipt |
| Disposal | Appliance and cables recyclable; dispose at recycling center or store |
Frequently Asked Questions - A 120 OLYMPIA
User questions about A 120 OLYMPIA
0 question about this device. Answer the ones you know or ask your own.
Ask a new question about this device
Download the instructions for your Laminating machine in PDF format for free! Find your manual A 120 - OLYMPIA and take your electronic device back in hand. On this page are published all the documents necessary for the use of your device. A 120 by OLYMPIA.
USER MANUAL A 120 OLYMPIA
natural_image
Two white and gray electronic devices with buttons, one labeled 'OLYMPA' (no additional text or symbols visible)GO Europe GmbH
Zum Kraftwerk 1
45527 Hattingen
Germany
www.go-europe.com
V 1.16
06/2025
ID: 3118 / 3119
Fragen und Service
Lieber Kunde,
We are delighted that you have chosen this equipment. In the case of a defect, please return the device together with the receipt and original packing material to the point of sale.
Intended use
The laminating machine is used for laminating laminating foils with a thickness of 80 mic to 125 mic. Any other use is considered improper use. Unauthorised modifications or conversions that are not described in these operating instructions are not permitted and will result in damage to this product. Proper installation and observance of and compliance with the instructions in this operating manual are prerequisites for the intended use of the device.
Table of contents
Warranty 9
Intended use....9
Important safety instructions....9
Instructions for use 10
Installation site 10
Scope of delivery 10
Product overview 11
Notes on the material 11
Notes on laminating film 11
Notes on the laminating process ..... 11
Laminating 12
Release jammed laminating film....13
Cleaning 13
Troubleshooting 14
Notes on disposal....14
Technical data....14
Technical changes 15
GS mark 15
Symbols 15
Declaration of Conformity....15
Manufacturer 15
Important safety instructions
Danger! Danger of electric shock! Never open or repair the appliance yourself. Never touch bare contacts with metal objects. Never handle the product with wet hands. Do not operate the product if it is damaged.

Danger! Choking hazard due to small parts, packaging materials and protective film! Keep children away from the product and its packaging.

Warning! Risk of tripping due to improperly laid cable! Lay cables so that nobody can trip over them. Lay cables in such a way that no damage can occur to the cable/accessories.

Warning! Danger from harmful vapours! Harmful vapours may be produced during operation (lamination). Ensure adequate ventilation.
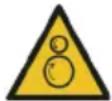
Warning! Risk of injury due to automatic retraction! Do not reach into the automatic feeder! Keep loose objects (e.g. hair, ties, scarves, jewellery, etc.) away from the automatic feeder.
Warning! Danger due to unexpected start-up! Make sure that the appliance is switched off before connecting it to the mains.
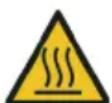
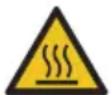
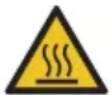
Caution! Risk of burns due to hot appliance surface! Do not touch the surface of the appliance during or immediately after operation.

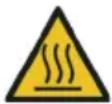
Caution! Risk of burns from hot laminating film! The laminating film is very hot immediately after lamination. When removing the laminating film, only touch the cooled end.
Caution! Risk of burns due to hot residues! The paper used for cleaning may contain hot residues. The paper is very hot immediately after cleaning. When removing the paper, only touch the cooled end.

Attention! Material damage due to improper operation! Remove all staples and paper clips before laminating or cutting.

Attention! Material damage due to improper operation! Only use paper and laminating films that fulfil the requirements under Technical data.

Attention! Material damage possible! If the product exhibits unusual characteristics such as noise, odour or smoke, disconnect the power supply immediately.

Attention! Material damage possible! It cannot be ruled out that some varnishes, plastics, or furniture care products may attack and soften the material of the non-slip feet. To avoid marks on furniture, consider placing a non-slip mat under the appliance if necessary.
Instructions for use

Please read these operating instructions before connecting and using the product. Keep these operating instructions for future reference. Hand over all documents when passing the product on to third parties.
- Protect the product from direct sunlight, naked flames, heat sources, moisture, humidity and dust.
- Do not cover the product during operation.
- The product is not intended for commercial use.
- The product may only be used indoors.
- Connect the device only to a properly installed and easily accessible power outlet. Observe the information under Technical data.
- Only use accessories that fulfil the requirements under Technical data.
- Disconnect the appliance from the power supply when not in use to prevent accidental operation.
- Do not leave the appliance unattended during operation.
- Ensure that the appliance is not used unsupervised by children or persons with reduced physical, sensory or mental capabilities.
- The appliance is not suitable for continuous operation.
- The appliance does not have an automatic switch-off function. Switch off the appliance after the laminating process, disconnect the mains plug from the socket and allow the appliance to cool down.
Installation site
Place the appliance on a stable, level surface near a power socket.
Scope of delivery
1 Laminating device 5 Laminating Pouches A4
1 Operating instructions
Product overview
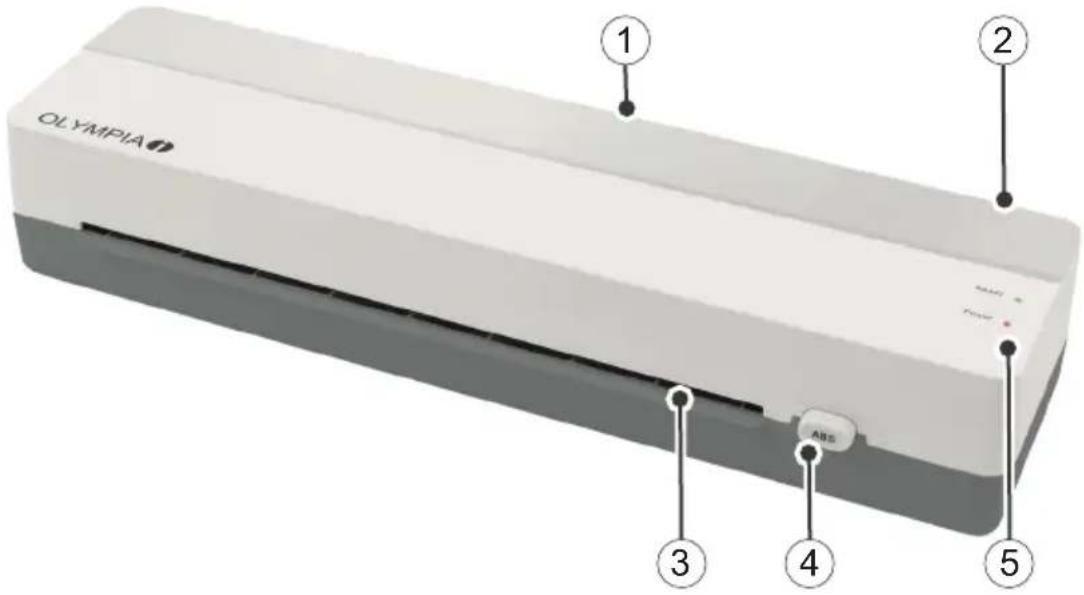
1 Output area 4 Anti-lock button (ABS)
2 Switch (On / Off) 5 Indicators (Power / Ready)
3 Catchment area for laminating
Notes on the material
- Do not laminate metallic, wet or uneven materials.
- Do not laminate heat-sensitive materials (e.g. thermal paper, ultrasound images).
• The material to be laminated together with the laminating film must not be thicker than 0.5 mm. - Laminate thin and soft materials with a stronger lamination film.
- Do not use several small pieces of material per film.
Notes on laminating film
- Only use film types intended for lamination.
- Other types of film, such as transparent film, are expressly not suitable for lamination.
- Select the size of the laminating film to suit the material to be laminated.
- Do not adjust laminating foils to size before laminating.
Notes on the laminating process
- Do not insert laminating film without contents into the feed area (front) of the laminator.
- Do not insert the laminating film rolled up into the feed area (front) of the laminator.
- Do not insert the laminating film on one side into the feed area (front) of the laminator.
- Always insert the laminating film with the closed side first - centred and in a straight line - into the feed area (front) of the ready-to-use laminator.
- Do not pull the laminating film out of the output side (reverse side) during lamination.
Laminating
Warning! Danger due to unexpected start-up! Make sure that the appliance is switched off before connecting it to the mains.
1 Connect the power plug to a properly installed socket.
2 Switch the device on (ON) using the switch.
3 The indicator light Power is glowing red. The device is not yet ready for operation. The appliance heats up.

Caution! Risk of burns due to hot appliance surface! Do not touch the surface of the appliance during or immediately after operation.
Note: Wait until the appliance is fully heated up. Do not insert the laminating film beforehand, as this will prevent it from fusing properly.
4 Place the document to be laminated in the laminating film. Make sure that there is a gap of approx. 3 - 5 mm to the edge of the film on all sides.

Attention! Material damage possible! Only use laminating films that are suitable for hot lamination.
5 After 3 to 5 minutes, the LED display Ready lights up green and the device is ready for operation.

Attention! Material damage possible! Never insert the lamination foil into the feed area at an angle.

Attention! Material damage possible! Always insert the closed end of the laminating film into the feed area of the laminator first.
Note: Make sure that the laminating film can be dispensed from the back of the device.
6 Guide the laminating film with the closed side straight into the feed area until the laminating film is caught by the transport rollers.
7 The laminating film is automatically pulled through the device.
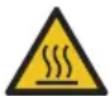
Caution! Risk of burns due to hot appliance surface! Do not touch the surface of the appliance during or immediately after operation.
Caution! Risk of burns from hot laminating film! The laminating film is very hot immediately after lamination. When removing the laminating film, only touch the cooled end.
8 Remove the laminating film at the cooled end.
Tip: To flatten the laminated document, place a book or similar heavy, flat object on top of it.
9 Switch the device off using the switch (OFF).
Note: Allow the laminating film to cool before further use.
Release jammed laminating film
You can use the anti-jamming button (ABS) to release jammed or incorrectly inserted film.
1 Turn off the device using the switch (OFF) and unplug the power cord from the socket.
2 Press and hold the ABS button.
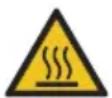
Caution! Risk of burns due to hot appliance surface! Do not touch the surface of the appliance during or immediately after operation.
Caution! Risk of burns from hot laminating film! The laminating film is very hot immediately after lamination. When removing the laminating film, only touch the cooled end.
3 Hold the laminator in a suitable position and pull the laminating film out of the feed area.
4 Release the ABS button.
5 Then clean the transport rollers. Follow the instructions under Cleaning.
Cleaning
Housing
Clean the outside of the appliance with a soft, dry, lint-free cloth. Do not use any cleaning agents or solvents.
Transport rollers
Clean the transport rollers if you have removed a jammed laminating film or if the output laminating film contains adhesive residue.
1 Switch the device on (ON) using the switch.
2 The indicator light Power is glowing red. The device is not yet ready for operation. The appliance heats up.
3 After 3 to 5 minutes, the LED display Ready lights up green and the device is ready for operation.
4 Feed a sheet of paper straight into the feed area until the paper is caught by the transport rollers.
5 The paper is automatically pulled through the device. Adhesive residue on the transport rollers is absorbed by the paper.

Caution! Risk of burns due to hot residues! The paper used for cleaning may contain hot residues. The paper is very hot immediately after cleaning. When removing the paper, only touch the cooled end.
6 Remove the paper at the cooled end.
7 Repeat the process with a clean sheet of paper until there are no more adhesive residues on it.
8 Switch the device off using the switch (OFF).
Troubleshooting
Malfunction Solution
The device does not start Check that the mains plug is plugged in correctly.
The appliance does not heat (any more) If the temperature is too high, the overheating protection function switches on automatically. Allow the appliance to cool down sufficiently.
The device does not laminate or does not laminate correctly Check if the laminating film used is suitable for the device. Clean the transport rollers.
The laminated foil is not completely transparent. Laminate the same film again to improve the result.
Notes on disposal

Find out about the options for taking back old appliances free of charge from your dealer.

The packaging is made from environmentally friendly materials that can be disposed of at local recycling centres. Ask your local authority about the options for correct disposal.

Observe the labelling of the packaging material when separating waste; these are marked with abbreviations (b) and numbers (a) with the following meaning: 1–7: Plastics / 20-22: Paper and cardboard / 80-98: Composite materials.
The adjacent symbol means that old electrical and electronic appliances must be disposed of separately from household waste in accordance with legal regulations. Dispose of your appliance at the collection point of your municipal waste disposal organisation.
Technical data
LA 120 A4 LA 130 A3
Laminating max. 230 mm wide max. 320 mm wide
Laminating film 80 - 125 Microns 80 - 125 Microns
Laminating speed 300 mm/min. 300 mm/min.
Laminating temperature 110 - 130 °C 110 - 130 °C
| Maximum capacity 0,5 mm | 0,5 mm | |
| Warm-up time | 3 - 5 minutes 3 - 5 minutes | |
| Cooling time | approx. 30 minutes | approx. 30 minutes |
| Input voltage | 220 - 240 V, 50 Hz, 0.5 A | 220 - 240 V, 50 Hz, 0.74 A |
| Performance | 115 W | 170 W |
| Weight | 770 g | 1040 g |
| Dimensions (W x H x D) | 345 x 96 x 67 mm | 435 x 105 x 71 mm |
Technical changes
These operating instructions are for information purposes only. Their content is not the subject matter of the contract. All data shown are only nominal values. The equipment and options described may vary depending on the country-specific requirements.
GS mark

The "Tested Safety" seal (GS mark) certifies that the product fulfils the requirements of the German Product Safety Act (ProdSG). The GS mark indicates that the safety and health of the user are not endangered when the labelled product is used as intended and in the event of foreseeable misuse. This is a voluntary safety mark issued by a suitable testing institute.
Symbols
The following symbols can be found on the packaging or the device itself. In this section, you will find out what each of these symbols means.

The symbol indicates that the product's design corresponds to protection class II (double insulation). A safety connection to the electrical ground (earth) is not required.

Only use the product indoors.
Declaration of Conformity

The CE mark on the device confirms conformity. The Declaration of Conformity can be found at: www.go-europe.com
Manufacturer
GO Europe GmbH
Zum Kraftwerk 1
45527 Hattingen, Germany
www.go-europe.de
service@go-europe.de
FR
Garantie
Cher client,
Modifications techniques 22
Label GS....22
Symboles 22