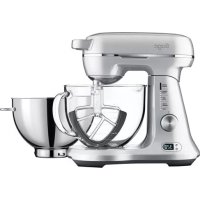
the Bakery Boss SEM825 - Food Processor SAGE - Free user manual and instructions
Find the device manual for free the Bakery Boss SEM825 SAGE in PDF.



| Product Type | Stand mixer (food mixer) |
| Brand | Sage |
| Model | the Bakery Boss SEM825 |
| Power Supply | 220–240 V ~50 Hz, 1200 W |
| Glass Bowl Capacity | 4.7 L |
| Stainless Steel Bowl Capacity | 3.8 L |
| Number of Speeds | 12 settings |
| Main Functions | Mix, whip, knead, scrape |
| Included Accessories | Flat beater, whisk, dough hook, scraper beater, splash guard, 4.7 L glass bowl, 3.8 L stainless steel bowl |
| Timer | Yes, with countdown and LCD display |
| Technologies | Load detection, task indicator, bowl light |
| Care and Cleaning | Stainless steel bowl, flat beater, scraper beater, dough hook: dishwasher safe. Glass bowl and whisk: hand wash recommended. Head and base: wipe with damp cloth. |
| Safety | Automatic shutdown in case of overload or overheating (codes E1, E2), stop if head is raised, resettable thermal protection |
| Warranty | 2 years parts, 5 years motor (household use) |
| Dimensions (approx.) | Approximately 40 × 30 × 40 cm |
| Weight (approx.) | Approximately 10 kg |
| Customer Service | Toll-free numbers by country (e.g., France 0800 903 235) |
Frequently Asked Questions - the Bakery Boss SEM825 SAGE
User questions about the Bakery Boss SEM825 SAGE
0 question about this device. Answer the ones you know or ask your own.
Ask a new question about this device
Download the instructions for your Food Processor in PDF format for free! Find your manual the Bakery Boss SEM825 - SAGE and take your electronic device back in hand. On this page are published all the documents necessary for the use of your device. the Bakery Boss SEM825 by SAGE.
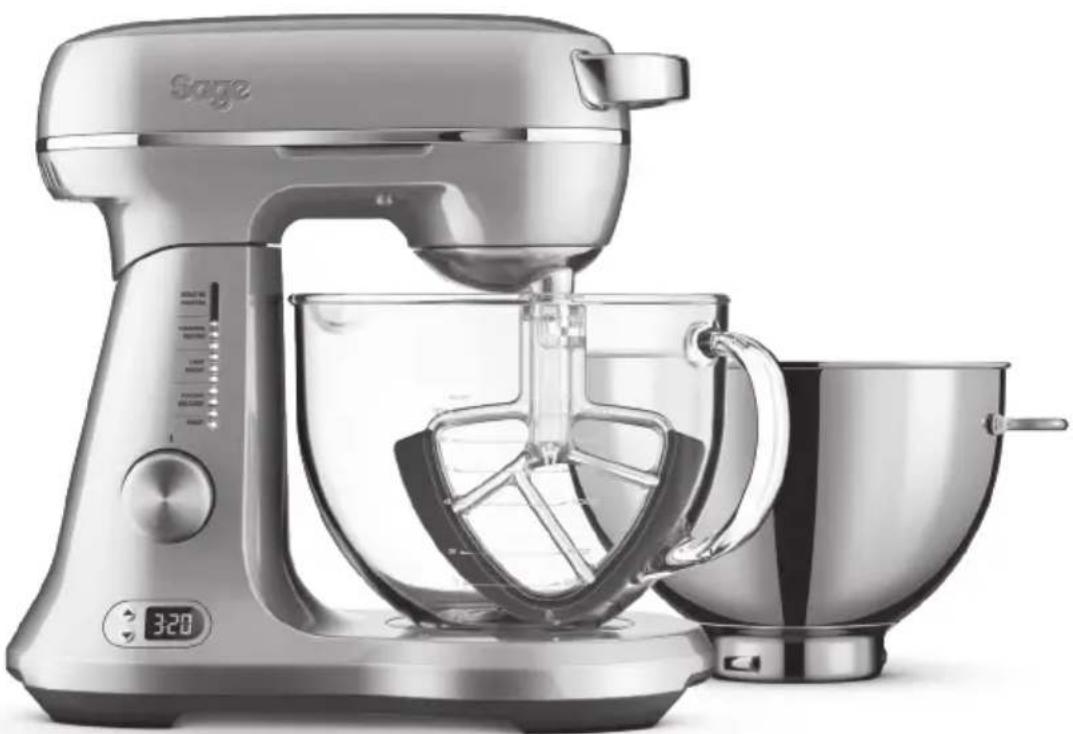
USER MANUAL the Bakery Boss SEM825 SAGE
natural_image
Modern kitchen stand mixer with digital display and side bowl (no visible text or symbols)ENUSER GUIDE
FRGUIDE UTILISATEUR
ITMANUALE UTENTE
PTMANUAL DO UTILIZADOR
DEHANDBUCH
NLHANDLEIDING
ESGUÍA DEL USUARIO
PLINSTRUKCJA OBSŁUGI

Contents
2 Important Safeguards
5 Components
7 Assembly
8 Functions
9 Care & Cleaning
9 Troubleshooting
11 Guarantee
SAGE® RECOMMENDS SAFETY FIRST
At Sage® we are very safety conscious. We design and manufacture consumer products with the safety of you, our valued customer, foremost in mind. In addition we ask that you exercise a degree of care when using any electrical appliance and adhere to the following precautions.
IMPORTANT SAFEGUARDS
READ ALL INSTRUCTIONS BEFORE USE AND SAVE FOR FUTURE REFERENCE
- A downloadable version of this document is also available at sageappliances.com
- Before using for the first time ensure your electricity supply is the same as shown on the label on the underside of the appliance.
- Remove and safely discard any packaging materials before first use.
• To eliminate a choking hazard for young children, safely discard the protective cover fitted to the power plug. - This appliance is for household use only. Do not use the appliance for anything other than its intended use. Do not use in moving vehicles or boats. Do not use outdoors. Misuse may cause injury.
- Fully unwind the power cord before operating.
- Position the appliance on a stable, heat resistant, level, dry surface away from the edge and do not operate on or near a heat source such as a hot plate, oven or gas hob.
- Vibration during operation may cause the appliance to move.
- Do not let the power cord hang over the edge of a bench or table, touch hot surfaces or become knotted.
• Always ensure the appliance is turned OFF, unplugged at the power outlet and has been allowed to cool before cleaning, attempting to move or storing.
• Always turn the appliance to the off position, switch off at the power outlet and unplug at the power outlet when the appliance is not in use.
- Do not use the appliance if the power cord, plug, or appliance becomes damaged in any way. If damaged or maintenance other than cleaning is required, please contact Sage Customer Service or go to sageappliances.com
- Any maintenance other than cleaning should be performed by an authorised Sage® service centre.
• Children should not play with the appliance.
- Cleaning of the appliance should not be carried out by children unless they are 8 years or older and supervised.
- The appliance and its cord should be kept out of reach of children aged 8 years and younger.
- The installation of a residual current safety switch is recommended to provide additional safety when using all electrical appliances. Safety switches with a rated operating current not more than 30mA are recommended. Consult an electrician for professional advice.
• Always ensure the appliance is properly assembled before use.
The appliance will not operate unless properly assembled.
- Do not use the appliance on a sink drain board.
- Keep hands, fingers, hair, clothing as well as spatulas and other utensils away from moving or rotating parts during operation.
- Do not use the appliance for anything other than food and / or beverage preparation.
- In order to avoid the possible hazard of the appliance starting by itself due to inadvertent resetting of the overload protection, do not attach an external switching device (such as a timer) or connect the appliance to a circuit that can regularly switch the appliance on and off.
- Carefully read all instructions before operation and save for future reference.
- The appliance can be used by persons with reduced physical or mental capabilities or a lack of experience and knowledge, only if they have been given supervision or instruction concerning use of the appliance in a safe way and understand the hazards involved.
- This appliance shall not be used by children.
- Do not leave the appliance unattended when in use.
- Do not move the appliance whilst in operation.
- Do not place any part of the appliance in the microwave oven.
- Do not operate the appliance continuously on heavy loads for more than 3 minutes.
- Should an object such as a spoon or spatula fall into the bowl while mixing, immediately ensure the speed control dial is in the OFF position, turn the appliance off, unplug at the power outlet and remove the object.
-
Ensure the motor and beater, whisk or dough hook have completely stopped before disassembling.
• Always remove the beater, whisk or dough hook from the appliance before cleaning. -
Ensure the speed control dial is in the OFF position, the appliance is switched off at the power outlet and unplugged before unlocking the mixer motor head and moving into the upright position. The beater, whisk or dough hook should be released from the mixer motor head before removing the processed food from the mixer bowl and the beater, whisk or dough hook.
- Ensure the mixer motor head is locked into the horizontal (closed) position when not in use and before storing.
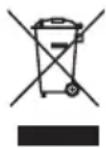
The symbol shown indicates that this appliance should not be disposed of in normal household waste. It should be taken to a local authority waste collection centre designated for this purpose or to a dealer providing this service. For more information, please contact your local council office.

To protect against electric shock, do not immerse the or plug, cord or appliance in or any liquid.
SAVE THESE INSTRUCTIONS
Components
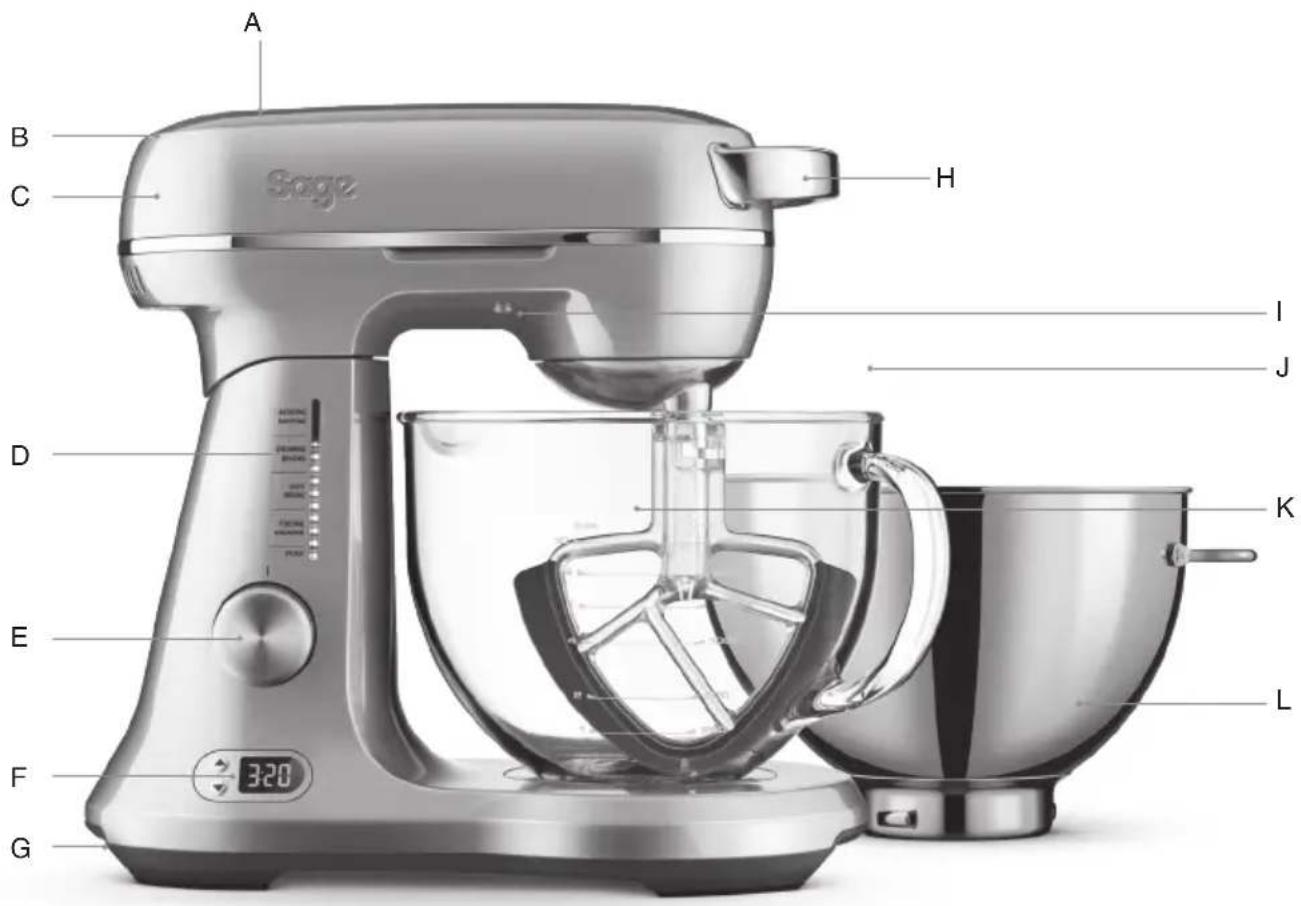
A. Tilt-release button
B. Motor head
C. Load sensing technology
D. Mixing task indicator band
E. 12 speed control dial
F. LCD timer
G. Internal cord storage
H. Sage® Assist™ handles
I. Handy bowl illumination
J. Splash Guard
K. Glass mixing bowl - 4.7 litre
L. Stainless steel mixing bowl - 3.8 litre
M. Sealing lid (not shown)
N. Spatula (not shown)
natural_image
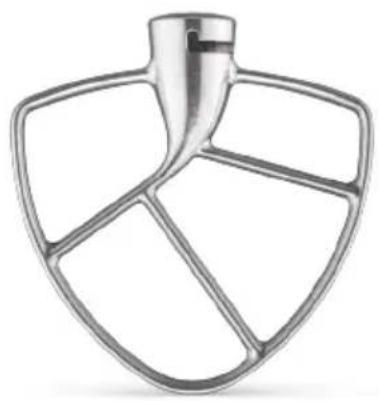
Metallic kitchen fan or blender with five panes and a handle (no text or symbols)Flat beater for normal to heavy mixtures (Speed 1–9):
- Heavy cake batters and biscuit doughs
- Pastry
- Mashed potatoes
natural_image
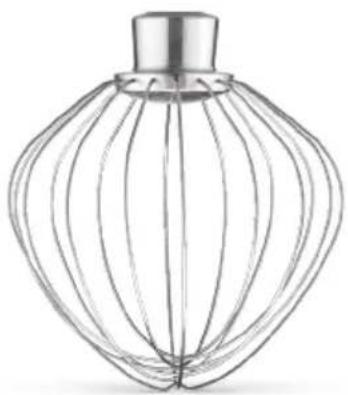
Line drawing of a wire mesh ball (no text or symbols)Wire whisk for incorporating air into mixtures (Speed 10–12):
- Eggs
- Egg whites
- Cream
– Sponge, chiffon or angel food cakes
– Meringues and pavlova
– Sauces and dressings

natural_image
Metal hook-shaped object with a circular top and curved handle, no visible text or symbolsDough hook for mixing and kneading yeast doughs (Speed 1–3):
- Breads
- Rolls
- Pizza
- Focaccia
- Yeast-raised cakes and sweet buns
natural_image
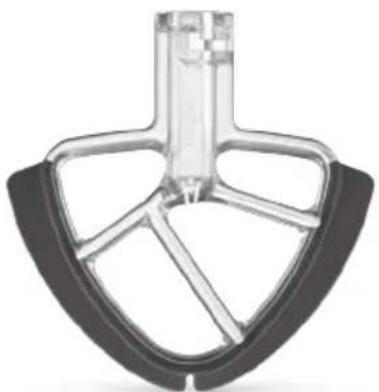
Close-up of a transparent plastic mechanical component with curved and rectangular arms (no text or symbols visible)Scraper beater for creaming butter & sugar, mixing sticky ingredients or folding whipped egg whites into mixtures (Speed 1–9):
- Frosting and icing
- Cheesecakes
- Flavoured butters
- Muffin batters
- Creaming butter and sugar, mascarpone cheese, cream cheese, sour cream
– Light cake batters and biscuit doughs

Assembly
Before first use
Before using your mixer for the first time, remove any packaging material and promotional labels. Ensure the speed control dial is in the OFF position, the mixer is switched off at the power outlet and the power cord is unplugged.
Wash bowl and mixing tools in warm soapy water with a soft cloth. Rinse and dry thoroughly.
The bowl and the attachments may be washed in the dishwasher.
When first using your appliance, you may notice an odour coming from the motor.
This is normal and will dissipate with use.
Attaching the bowl
- Place the mixer on a level, dry bench top. The mixer motor head should be in the horizontal (closed) position when moving.
- When lowering or lifting the mixer, always support the motor head with your other hand to prevent it from free-falling.
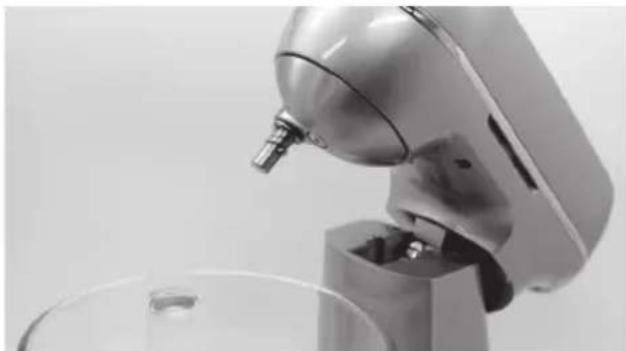
- To remove or insert the mixing bowl, the mixer motor head must be raised and locked into the open position. Raise the mixer motor head by pressing the RELEASE button.
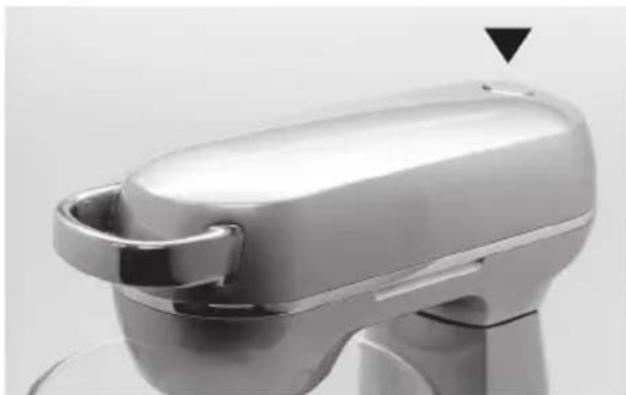
natural_image
Close-up of a modern electric shaver with a black triangular warning symbol (no text or symbols on the device itself)- Lift the motor head up until it tilts back and locks into the open position.
natural_image
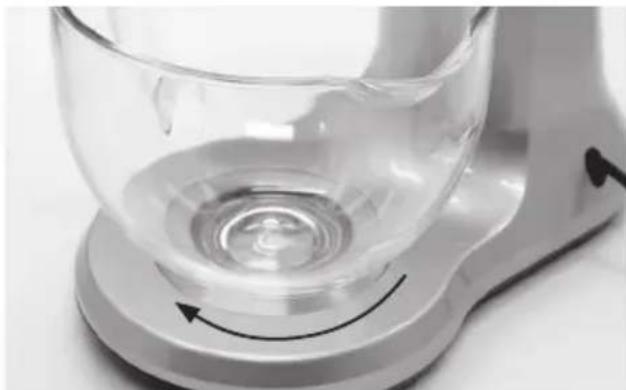
Close-up of a kitchen mixer with a glass bowl on the side (no visible text or symbols)- Insert the bowl into the bowl locking recess and turn clockwise until the bowl locks securely into place.
natural_image
Close-up of a transparent glass water dispenser with a circular vent, mounted on a base (no text or symbols visible)Attaching mixing and whisking tools
- Raise the motor head by pressing the RELEASE button.
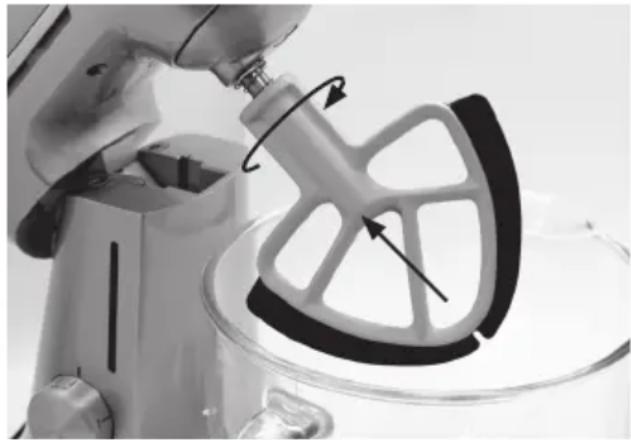
- Align the groove in the top of the mixing attachment with the locking pin on the spindle extending down from the mixer motor head.
- Push the attachment upwards and turn clockwise until it locks securely onto the locking pin on the spindle. Push up and turn anti-clockwise to remove.
natural_image
Close-up of a robotic kitchen mixer with rotating blade and handle mechanism (no text or symbols visible)- Lower the motor head by pressing the RELEASE button and gently lowering until it locks into the closed position.
- Raise the head of the mixer and slide the splash cover between the mixer head and the beater. Lower the mixer head and position the slash cover on top edge of the bowl.

WARNING
Avoid contact with beater / dough hook / whisk during operation. Keep hands, hair, clothing, spatulas and other utensils out of the way to prevent personal injury or damage to the mixer.

Functions
OPERATING THE MIXER
- Ensure the power cord is unplugged and the speed control dial is in the OFF position.
- Assemble the bowl and mixing / whisking tool, as noted in the previous section.
- Unwind the power cord completely and insert the power plug into a grounded wall outlet.
- Always begin mixing by selecting a low speed setting on the speed control dial. Starting on a low speed will prevent ingredients splattering. Increase the speed as suited to the mixing task. The speed setting can be adjusted during operation. If necessary, stop the mixer during operation and scrape any food mixture down the sides of the mixing bowl with a spatula.
- Do not turn the mixer on with the scraper beater in place if the mixing bowl is empty. This will cause the scraper beater to make a loud noise as it scrapes the bowl.
- Under heavier loads or extended mixing time, the motor head may become warm. This is normal and should not cause concern.
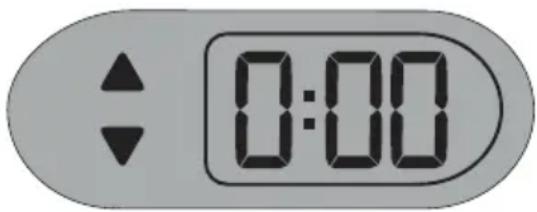
Count-up and down timer
The timer is for gauging mixing time, making it easier to repeat the results.
Set the timer using the arrow buttons beside the LCD.

Care & Cleaning
Motor head and mixer base
Do not wash or immerse the mixer motor head or mixer base in water. Do not allow water or other liquids to enter the gear system, as this may result in damage.
Wipe clean with a soft, damp cloth then dry thoroughly. Wipe any excess food particles from the power cord.
Cleaning agents
Do not use abrasive scouring pads or cleaners on the mixing bowl, flat beater, dough hook or whisk, as they may scratch the surface. Use only warm soapy water with a soft cloth.
Also do not soak attachments for extended periods of time, for example several hours or overnight, as this may damage the finish.
Bowl and attachments
Wash the bowl and attachments (beater, scraper beater, whisk and dough hook) with warm soapy water and a soft cloth or a soft bristled brush. Rinse and dry thoroughly. Avoid abrasive scouring pads or cleaners, as they may damage the surfaces.
Dishwasher
Stainless Bowl, Beater, Scraper Beater & Dough Hook can be washed in the dishwasher on a standard wash cycle. Place Scraper beater on the top shelf only. Sage® recommends hand washing only of the Glass Bowl and Whisk.

Troubleshooting
Motor head safety cut-off
The mixer is equipped with a motor head safety cut-off. If the mixer head is lifted up at any time while the mixer motor is switched on, the safety cut-off will automatically switch the motor off and set the mixer into standby mode.
To restart the motor within 5 minutes, lower the mixer head into the horizontal (closed) position, and turn the dial away then back to the required speed setting. This will resume mixing and the timer will resume counting.
To restart the motor after 5 minutes or more, lower the mixer head and turn the dial to OFF then back to the required speed. The timer will start from 0.
To turn the mixer off (instead of restarting), turn the dial to OFF, and unplug from the wall.
PROBLEM EASY SOLUTION
| Machine will not work when switched ON | ·Always ensure the speed control dial is in the OFF position before starting.·The temperature overload protection (thermal cut-off) device has not been reset automatically, allow more time for the motor to cool down. |
| Cannot set the time on the count-down timer | ·Always ensure the speed control dial is in the OFF position before trying to set the count-down time. |
| Mixer suddenly switches off during mixing | ·The mixer has been stressed by overloading or stalling. The mixer will automatically activate the overload protection device and the unit will switch itself off. If this happens, check the timer display for an error code and see below for further details of the cause. |
| “E1” error message is flashing on the count-up / down timer display | ·The mixer will automatically stop operating if the motor is stalled. If this occurs, the ‘E1’ error message will flash on the count-up / down timer display. This is an electronic safety feature. This is normally a result of too much ingredients being processed at one time. Try removing some of the ingredients from the bowl. To continue mixing, turn the speed control dial to the off position and unplug the mixer from the power outlet. Then plug the mixer into the power outlet and use as normal. |
| “E2” error message is flashing on the count-up / down timer display | ·This may indicate that the motor has been stressed by overheating with excessive load. The mixer is fitted with a self-resetting safety device which safeguards against overheating on the motor with excessive loads. If overheating occurs, the mixer will automatically activate the overheating protection device and the motor will switch itself off. When the overheating protection is activated, unplug the mixer from the power outlet for at least 15 minutes to allow the unit to cool. Turn the speed control dial to the OFF position then plug the mixer into the power outlet and use as normal. |
| Noise is heard when scraper beater is mixing | ·When ingredients are in the mixing bowl, the scraper beater may make a slight noise as it scrapes the sides and bottom of the bowl. This is normal and should not cause concern. Do not turn the mixer on with the scraper beater in place if the mixing bowl is empty. This will cause the scraper beater to make a loud noise as it scrapes the bowl. |

Guarantee
2 YEAR LIMITED GUARANTEE AND 5 YEAR LIMITED MOTOR GUARANTEE
Sage Appliances guarantees this product for domestic use in specified territories for 2 years for all parts of the product and 5 years for the product's motor from the date of purchase against defects caused by faulty workmanship and materials. During this guarantee period Sage Appliances will repair, replace, or refund any defective product (at the sole discretion of Sage Appliances).
All legal warranty rights under applicable national legislation will be respected and will not be impaired by our guarantee. For full terms and conditions on the guarantee, as well as instructions on how to make a claim, please visit www.sageappliances.com.

Notes
the Bakery Boss TM
natural_image
Modern kitchen stand mixer with digital display and side bowl (no visible text or symbols)DEHANDBUCH
Sage®

Inhalte
natural_image
Metallic kitchen mixer blade diagram with no text or symbolsnatural_image
Line drawing of a wire-wound mixing bowl (no text or symbols)natural_image
Close-up of a metallic hook-shaped object with a circular top (no text or symbols visible)natural_image
Close-up of a metallic mechanical component with a curved, triangular body and internal slots (no text or symbols visible)natural_image
Close-up of a white electronic device with a black triangular pointer on the top (no visible text or symbols)natural_image
Close-up of a kitchen mixer with a bowl on the side (no visible text or symbols)natural_image
Close-up of a transparent glass water dispenser with a circular vent, mounted on a base (no text or symbols visible)natural_image
Close-up of a robotic kitchen mixer with a rotating blade and directional arrows indicating motion (no text or symbols)natural_image
Modern kitchen stand mixer with digital display and side bowl (no visible text or symbols)FRGUIDE UTILISATEUR
Sage®

Table des matières
natural_image
Metallic kitchen fan or blender with five panes and a handle (no text or symbols)natural_image
Line drawing of a wire mesh ball (no text or symbols)natural_image
Metal hook-shaped object with a circular top and curved handle, no visible text or symbolsnatural_image
Close-up of a metallic mechanical component with curved and straight sections (no text or symbols visible)natural_image
Close-up of a modern white electric shaver with a black triangular pointer (no text or symbols visible)natural_image
Close-up of a robotic kitchen mixer with a glass bowl on the side (no visible text or symbols)natural_image
Close-up of a transparent glass water dispenser with a circular arrow indicating rotation (no text or symbols visible)natural_image
Close-up of a robotic arm holding a mechanical component with directional arrows indicating motion (no text or symbols visible)natural_image
Modern kitchen stand mixer with digital display and side bowl (no visible text or symbols)NLHANDLEIDING
Sage®

Inhoud
natural_image
Metallic kitchen fan or blender with a handle and four panes (no text or symbols visible)natural_image
Line drawing of a wire-wrested mixing bowl (no text or symbols)natural_image
Metal hook-shaped object with a circular top and curved handle, no visible text or symbolsnatural_image
Close-up of a mechanical component with transparent cylindrical body and curved base (no visible text or symbols)natural_image
Close-up of a modern electric shaver with a black triangular warning symbol (no text or symbols on the device itself)natural_image
Close-up of a kitchen mixer with a glass bowl on the side (no visible text or symbols)natural_image
Close-up of a transparent glass water dispenser with a circular vent, mounted on a base (no text or symbols visible)natural_image
Close-up of a robotic kitchen mixer blending a white mixing bowl with a black handle (no text or symbols visible)natural_image
Modern kitchen stand mixer with digital display and side bowl (no visible text or symbols)ITMANUALE UTENTE
Sage®

Sommario
natural_image
Metallic kitchen mixer blade diagram with no text or symbolsnatural_image
Line drawing of a wire-wrapped kitchen mixer (no text or symbols)natural_image
Metal hook-shaped object with a circular top and curved handle, no visible text or symbolsnatural_image
Close-up of a transparent plastic mechanical component with curved and rectangular arms (no text or symbols visible)natural_image
Close-up of a silver robotic device with a black triangular pointer (no visible text or symbols)natural_image
Close-up of a robotic kitchen mixer with a metallic tool, no visible text or symbolsnatural_image
Close-up of a transparent glass water dispenser with a circular arrow indicating rotation (no text or symbols visible)natural_image
Close-up of a kitchen mixer blending a white bowl with a black handle, showing mechanical components and motion arrows (no text or symbols)natural_image
Modern kitchen stand mixer with digital display and side bowl (no visible text or symbols)ES
GUÍA DEL USUARIO
Sage®

Índice
natural_image
Metallic kitchen mixer blade diagram with no text or symbolsnatural_image
Line drawing of a wire-wrapped kitchen mixer (no text or symbols)natural_image
Close-up of a metallic hook-shaped object with a circular top (no text or symbols visible)natural_image
Close-up of a mechanical component with a transparent cylindrical body and three curved arms (no text or symbols visible)natural_image
Close-up of a modern electric shaver with a black triangular pointer (no text or symbols visible)natural_image
Close-up of a kitchen mixer with a metallic bowl and metal fittings (no visible text or symbols)natural_image
Close-up of a transparent glass water dispenser with a circular arrow indicating rotation (no text or symbols visible)natural_image
Close-up of a robotic kitchen mixer with a rotating blade and handle mechanism (no text or symbols visible)natural_image
Modern kitchen stand mixer with a digital display and control panel (no visible text or symbols)PTMANUAL DO UTILIZADOR
Sage®

Índice
natural_image
Metallic kitchen fan or blender with five panes and a handle (no text or symbols)natural_image
Line drawing of a wire mesh ball (no text or symbols)natural_image
Metal hook-shaped object with a circular top and curved handle, no visible text or symbolsnatural_image
Close-up of a transparent plastic mechanical component with curved and rectangular arms (no text or symbols visible)natural_image
Close-up of a white electric shaver with a black triangular warning symbol (no text or symbols on the device itself)natural_image
Close-up of a kitchen mixer with a bowl of liquid (no visible text or symbols)natural_image
Close-up of a transparent glass water dispenser with a circular arrow indicating rotation (no text or symbols visible)
Funções
natural_image
Close-up of a robotic kitchen mixer with rotating blade and handle mechanism (no text or symbols visible)natural_image
Modern kitchen stand mixer with digital display and side bowl (no visible text or symbols)PLINSTRUKCJA OBSŁUGI
Sage®

Spis treści
natural_image
Metallic kitchen fan or blender with five panes and a handle (no text or symbols)natural_image
Line drawing of a wire mesh ball (no text or symbols)natural_image
Metal hook-shaped object with a circular top and curved handle, no visible text or symbolsnatural_image
Close-up of a metallic mechanical component with curved and straight sides (no text or symbols visible)natural_image
Close-up of a modern electric shaver with a black triangular pointer (no text or symbols visible)natural_image
Close-up of a kitchen mixer with a bowl of liquid (no visible text or symbols)natural_image
Close-up of a transparent glass water dispenser with a circular vent, mounted on a base (no text or symbols visible)Założenie nasadki
natural_image
Close-up of a robotic kitchen mixer with rotating blade and blade assembly (no visible text or symbols)BRG Appliances Limited
Unit 3.2, Power Road Studios,
114 Power Road, London, W4 5PY
Freephone (UK Landline): 0808 178 1650
Mobile Calls (National Rate): 0333 0142 970
DEU
Sage Appliances France SAS
www.sageappliances.com
Registered in England & Wales No. 8223512
Registered in Germany No. HRB 81309 (AG Düsseldorf)
Registered in France No. 879 449 866 RCS
EN Due to continued product improvement, the products illustrated or photographed in this document may vary slightly from the actual product.
Copyright BRG Appliances 2023


- Contents
- SAGE® RECOMMENDS SAFETY FIRST
- IMPORTANT SAFEGUARDS
- READ ALL INSTRUCTIONS BEFORE USE AND SAVE FOR FUTURE REFERENCE
- SAVE THESE INSTRUCTIONS
- Components
- Flat beater for normal to heavy mixtures (Speed 1–9):
- Wire whisk for incorporating air into mixtures (Speed 10–12):
- Dough hook for mixing and kneading yeast doughs (Speed 1–3):
- Scraper beater for creaming butter & sugar, mixing sticky ingredients or folding whipped egg whites into mixtures (Speed 1–9):
- Assembly
- Before first use
- Attaching the bowl
- Attaching mixing and whisking tools
- WARNING
- Functions
- OPERATING THE MIXER
- Count-up and down timer
- Care & Cleaning
- Motor head and mixer base
- Cleaning agents
- Bowl and attachments
- Dishwasher
- Troubleshooting
- Motor head safety cut-off
- Guarantee
- YEAR LIMITED GUARANTEE AND 5 YEAR LIMITED MOTOR GUARANTEE
- Notes
- the Bakery Boss TM
- Inhalte
- Table des matières
- Inhoud
- Sommario
- Índice
- Funções
- Spis treści
- Założenie nasadki
- DEU
Brand : SAGE
Model : the Bakery Boss SEM825
Category : Food Processor