CDX-C5000R - Car stereo SONY - Free user manual and instructions
Find the device manual for free CDX-C5000R SONY in PDF.

User questions about CDX-C5000R SONY
0 question about this device. Answer the ones you know or ask your own.
Ask a new question about this device
Download the instructions for your Car stereo in PDF format for free! Find your manual CDX-C5000R - SONY and take your electronic device back in hand. On this page are published all the documents necessary for the use of your device. CDX-C5000R by SONY.
USER MANUAL CDX-C5000R SONY
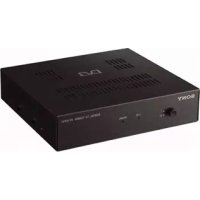
FM/MW/LW Compact Disc Player
Operating Instructions GB
For installation and connections, see the supplied installation/connections manual.
Thank you for purchasing the Sony Compact Disc Player. This unit lets you enjoy a variety of features using the following controller accessories:
Optional accessories
Rotary commander RM-X4S
Card remote commander RM-X91
In addition to the CD playback and radio operations, you can expand your system by connecting optional CD/MD units*1. When you operate this unit or a connected optional CD unit with the CD TEXT function, the CD TEXT information will appear in the display when you playback a CD TEXT disc*2.
1 You can connect MD changers, CD changers, MD players, or CD players.
^2 A CD TEXT disc is an audio CD that includes information such as the disc name, artist name and track names.
This information is recorded on the disc.
Precautions
CLASS 1
LASER PRODUCT
This label is located on the bottom of the chassis.
CAUTION—INVISIBLE LASER RADIATION WHEN OPEN DO NOT STARE INTO BEAM OR
VIEW DIRECTLY WITH OPTICAL INSTRUMENTS
This label is located on the drive unit's internal chassis.
- If your car was parked in direct sunlight resulting in a considerable rise in temperature inside the car, allow the unit to cool off before operating it.
- If no power is being supplied to the unit, check the connections first. If everything is in order, check the fuse.
- If your car is equipped with a power aerial, it will extend automatically while the unit is operating.
If you have any questions or problems concerning your unit that are not covered in this manual, please consult your nearest Sony dealer.
Moisture Condensation
On a rainy day or in a very damp area, moisture may condense on the lenses inside the unit. Should this occur, the unit will not operate properly. In such a case, remove the disc and wait for about an hour until the moisture has evaporated.
To maintain high quality sound
If you have drink holders near your audio equipment, be careful not to splash juice or other soft drinks onto the unit and CD. Sugary residues on the unit or CD may contaminate the lenses inside the unit, reduce the sound quality, or prevent sound reproduction altogether.
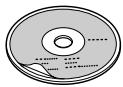
Notes on CDs
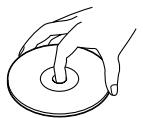
A dirty or defective disc may cause sound dropouts while playing. To enjoy optimum sound, handle the disc as follows. Handle the disc by its edge. To keep the disc clean, do not touch the surface.
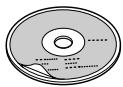
Do not stick paper or tape on the disc.

Do not expose the discs to direct sunlight or heat sources such as hot air-ducts, or leave them in a car parked in direct sunlight where there can be a considerable rise in temperature inside the car.

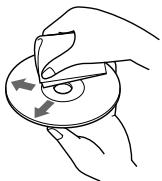
Before playing, clean the discs with an optional cleaning cloth. Wipe each disc from the center out.
Do not use solvents such as benzine, thinner, commercially available cleaners, or antistatic spray intended for analog discs.
Notes on discs
If you use the discs explained below, the sticky residue can cause the CD to stop spinning and may cause malfunction or ruin your discs.
Do not use second-hand or rental CDs that have a sticky residue on the surface (for example, from peeled-off stickers or from ink, or glue leaking from under the stickers).
There are paste residue. Ink is sticky.

Do not use rental CDs with old labels that are beginning to peel off.
Stickers that are beginning to peel away, leaving a sticky residue.

Do not use your CDs with labels or stickers attached.
Labels are attached.
Notes on CD-R discs
- You can play CD-Rs (recordable CDs) on this unit. However depending on the conditions of the recording equipment or the CD-R disc itself, some CD-Rs cannot be played on this unit.
- You cannot play a CD-R that is not finalized (Finalization is necessary for a recorded CD-R disc to be played on the audio CD player).
- You cannot play CD-RWs (rewritable CDs) on this player.
When you play 8 cm (3 in.) CDs
Use the optional Sony compact disc single adaptor (CSA-8) to protect the CD player from damage.
Table of Contents
Location of controls 5
Getting Started
Resetting the unit 7
Detaching the front panel 7
Turning the unit on/off 8
How to use the menu 8
Setting the clock 8
CD Player
CD/MD Unit (optional)
Listening to a CD 9
Playing tracks repeatedly
— Repeat Play 11
Playing tracks in random order Shuffle Play 11
Labelling a CD
— Disc Memo* 12
Locating a disc by name -List-up* 13
Selecting specific tracks for playback Bank* 14
- Functions available with optional CD/MD unit
Radio
Memorising stations automatically
— Best Tuning Memory (BTM) 15
Memorising only the desired stations 15
Receiving the memorised stations 16
RDS
Overview of the RDS function 17
Displaying the station name 17
Retuning the same programme automatically -Alternative Frequencies (AF) 17
Listening to traffic announcements 18
Preseting the RDS stations with the AF and TA data 19
Locating a station by programme type 20
Setting the clock automatically 21
Other Functions
Labelling the rotary commander (optional) ... 21
Using the rotary commander (optional) 22
Adjusting the sound characteristics 23
Attenuating the sound 24
Changing the sound and display settings.....24
Boosting the bass sound D-bass 25
Additional Information
Maintenance 25
Dismounting the unit 26
Specifications 27
Troubleshooting guide 28
Location of controls
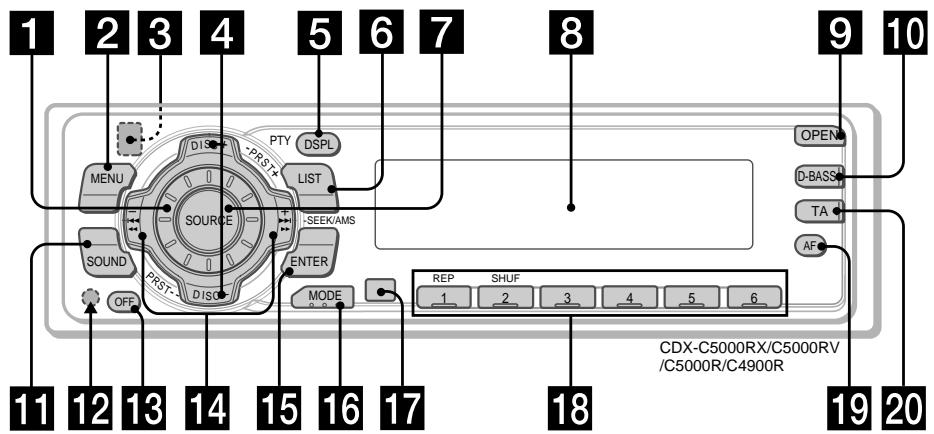
Refer to the pages listed for details.
1 Volume control dial 19
2 MENU button 8, 10, 12, 13, 14, 15, 16, 18, 19, 21, 24
3 (eject) button (located on the front side of the unit behind the front panel) 9
4 DISC/PRST + / - (cursor up/down) buttons 8,10,12,13,14,15,16,18,19,20,21,24 During CD/MD playback: Disc change 10,13 During radio reception: Preset stations select 16
5 DSPL/PTY (display mode change/programme type) button 9, 10, 12, 17, 20
6 LIST button 12 List-up 13
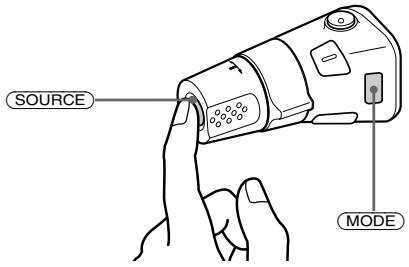
7 SOURCE (TUNER/CD) button 8,9,10,13,15,16,19
8 Display window
9 OPEN button 7, 9, 26
10 D-BASS button 25
11 SOUND button 23
12 Reset button (located on the front side of the unit behind the front panel) 7
13 OFF button* 7, 8, 9
14 SEEK/AMS - / + (cursor left/right) buttons 8,10,12,14,15,16,18,19,21,23,24 Automatic Music Sensor 10,14 Manual Search 10 Seek 15,16,18
15 ENTER button 8, 10, 12, 13, 14, 15, 16, 18, 19, 20, 21, 24
16 MODE button 19 During CD or MD playback: CD/MD unit select 9, 13 During radio reception: BAND select 15, 16
17 Receptor for the card remote commander
18 Number buttons During radio reception: Preset number select 15, 16, 18, 19 During CD/MD playback: ① REP 11 ② SHUF 11
19 AF button 17, 18, 19
20 TA button 18, 19
- Warning when installing in a car without ACC (accessory) position on the ignition key switch Be sure to press OFF on the unit for two seconds to turn off the clock display after turning off the engine. When you press OFF only momentarily, the clock display does not turn off and this causes battery wear.
Location of controls
Card remote commander RM-X91 (optional)
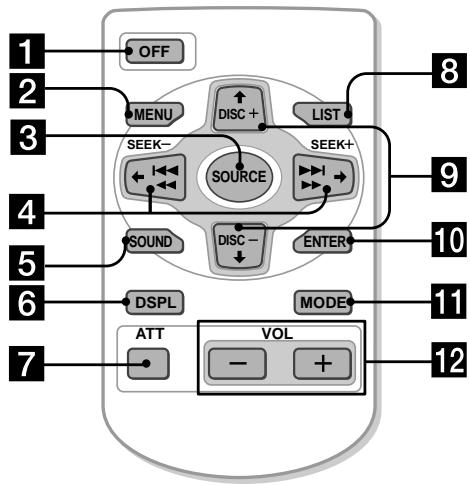
The corresponding buttons of the card remote commander control the same functions as those on this unit.
1 OFF button
2 MENU button
3 SOURCE button
4 SEEK/AMS buttons
5 SOUND button
6 DSPL (DSPL/PTY) button
7 ATT button
8 LIST button
9 DISC/PRST buttons
10 ENTER button
11 MODE button
12 VOL buttons
Notes
- A unit turned off by pressing (OFF) for two seconds cannot be operated with the card remote commander unless (SOURCE) on the unit is pressed, or a disc is inserted to activate the unit first.
- Do not leave the card remote commander where it can be exposed to direct sunlight such as on a dashboard or the steering wheel, etc. The card remote commander may be deformed by the heat.
- The unit may not operate properly with the card remote commander in direct sunlight. In such a case, hold the card remote commander close to the unit's receptor.
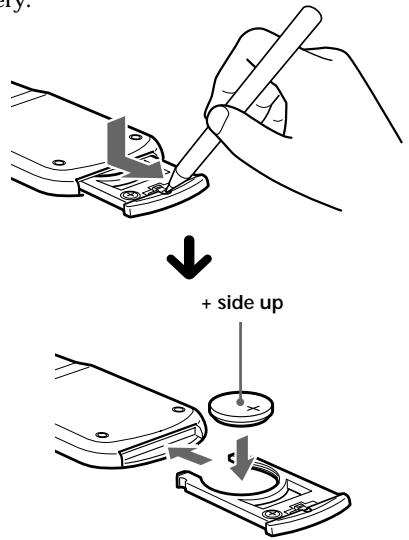
Replacing the lithium battery
When the battery becomes weak, the range of the card remote commander becomes shorter. Replace the battery with a new CR2025 lithium battery.
Notes on lithium battery
- Keep the lithium battery out of the reach of children. Should the battery be swallowed, immediately consult a doctor.
- Wipe the battery with a dry cloth to assure a good contact.
- Be sure to observe the correct polarity when installing the battery.
- Do not hold the battery with metallic tweezers, otherwise a short-circuit may occur.
WARNING
Battery may explode if mistreated.
Do not recharge, disassemble, or dispose of in fire.
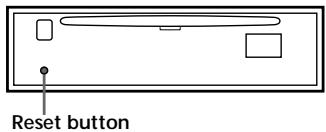
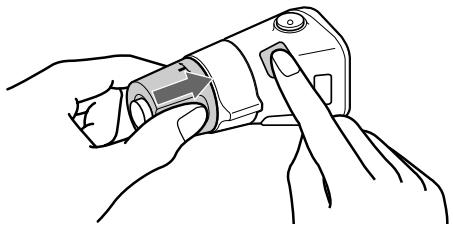
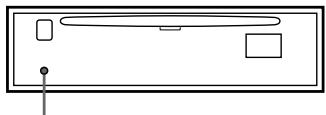
Resetting the unit
Before operating the unit for the first time or after replacing the car battery, you must reset the unit.
Remove the front panel and press the reset button with a pointed object, such as a ball-point pen.
Note
Pressing the reset button will erase the clock setting and some memorised functions.
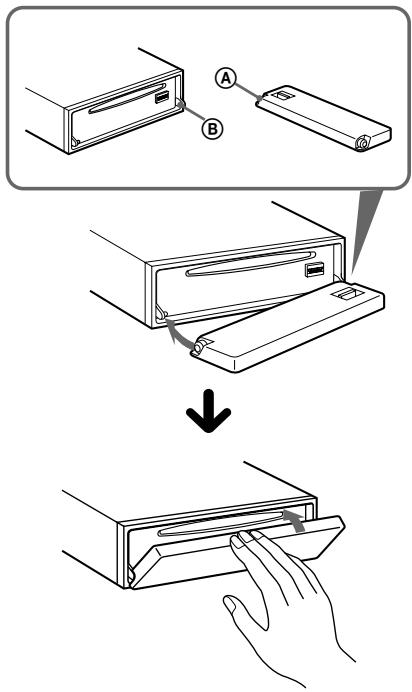
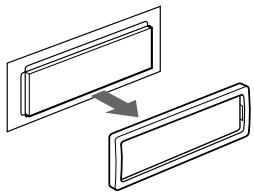
Detaching the front panel
You can detach the front panel of this unit to protect the unit from being stolen.
1 Press OFF
2 Press (OPEN), then slide the front panel to the right side, and pull out the left side of the front panel.
Notes
- Do not put anything on the inner surface of the front panel.
- Be sure not to drop the panel when detaching it from the unit.
- If you detach the panel while the unit is still turned on, the power will turn off automatically to prevent the speakers from being damaged.
- When carrying the front panel with you, use the supplied front panel case.
Attaching the front panel
Place the hole A in the front panel onto the spindle 8 on the unit as illustrated, then push the left side in.
Notes
- Be careful not to attach the front panel upside down.
- Do not press the front panel too hard against the unit when attaching it.
- Do not press too hard or put excessive pressure on the display window of the front panel.
- Do not expose the front panel to direct sunlight or heat sources such as hot air ducts, and do not leave it in a humid place. Never leave it on the dashboard of a car parked in direct sunlight or where there may be a considerable rise in temperature.
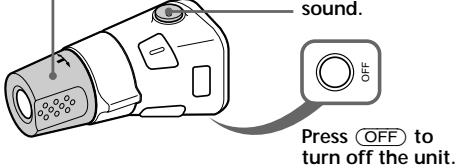
Caution alarm
If you turn the ignition key switch to the OFF position without removing the front panel, the caution alarm will beep for a few seconds. If you connect an optional power amplifier and do not use the built-in amplifier, the beep sound will be deactivated.
Turning the unit on/off
Turning on the unit
Press (SOURCE) or insert a CD in the unit. For details on operation, refer to page 9 (CD/MD) and page 15 (radio).
Turning off the unit
Press OFF to stop CD/MD playback or radio reception (the key illumination and display remains on).
Press OFF for two seconds to completely turn the unit off.
Note
If your car has no ACC position on the ignition key switch, be sure to turn the unit off by pressing OFF for two seconds to avoid car battery wear.
How to use the menu
This unit is operated by selecting items from a menu.
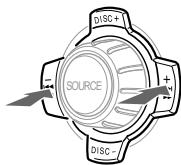
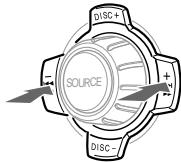
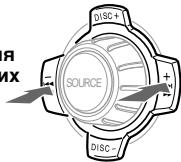
To select, first enter the menu mode and choose up/down ((+) / (-) of DISC/PRST), or choose left/right ((-) / (+) of SEEK/AMS).

DISC/PRST
(+) : to select upwards
(-): to select downwards
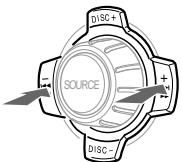
SEEK/AMS
(-): to select leftwards
(+) : to select rightwards
Note
In Menu mode the "▲" in the left of the display indicates the selectable buttons of DISC/PRST and SEEK/AMS.
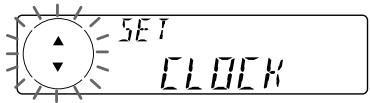
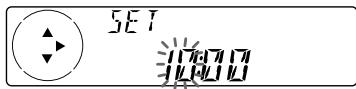
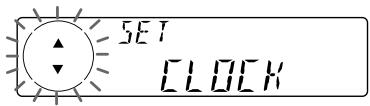
Setting the clock
The clock uses a 24-hour digital indication.
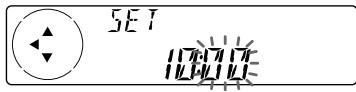
Example: To set the clock to 10:08
1 Press (MENU), then press either side of DISC/PRST repeatedly until "CLOCK" appears.
1 Press ENTER

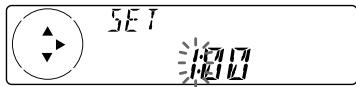
The hour indication flashes.
Press either side of DISC/PRST to set the hour.
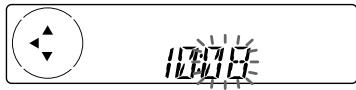
Press the (+) side of (SEEK/AMS).

The minute indication flashes.
Press either side of DISC/PRST to set the minute.
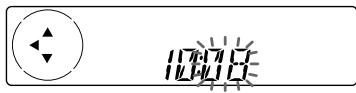
2 Press ENTER

The clock starts.
After the clock setting is completed, the display returns to normal play mode.
Tip
You can set the clock automatically with the RDS feature (see page 17).
Note
When the D.INFO mode is set to ON, the time is always displayed, provided that the M.DSPL is set to OFF (page 24).
CD Player CD/MD Unit (optional)
In addition to playing a CD with this unit alone, you can also control external CD/MD units.
If you connect an optional CD unit with the CD TEXT function, the CD TEXT information will appear in the display when you play a CD TEXT disc.
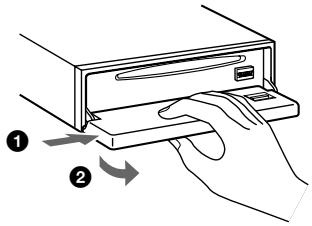
Listening to a CD
(with this unit only)
1 Press and insert the CD.
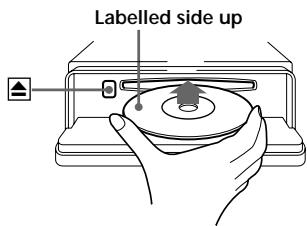
2 Close the front panel.
Playback starts automatically.
If a CD is already inserted, press SOURCE repeatedly until "CD" appears to start playback.
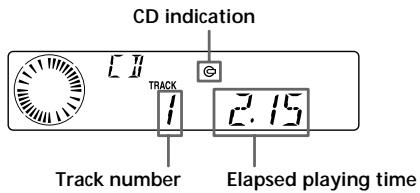
When the last track on the CD is over
The track number indication returns to "1," and playback restarts from the first track of the CD.
| To | Press |
| Stop playback | OFF |
| Eject the CD | OPEN then▲ |
Playing a CD or MD (with an optional CD/MD unit)
1 Press SOURCE repeatedly to select "CD" or "MD."
2 Press MODE until the desired unit appears.
CD/MD playback starts.
All the discs in the current CD/MD unit is played from the top.
Changing the display item
Each time you press DSPL/PTY during MD, CD, or CD TEXT disc playback, the item changes as follows:

1 While an optional CD/MD unit is connected.
2 If you have not labelled the CD or CD TEXT disc ("Labelling a CD" on page 12), or if there is no disc name prerecorded on the MD, "DISC" and "NO NAME" appear in the display.
3 If you play a CD TEXT disc, the artist name appears in the display after the disc name. (Only for CD TEXT discs with the artist name.)
4 If the track name of a CD TEXT disc or MD is not prerecorded, "TRACK" and "NO NAME" appear in the display.
*5 While the AF/TA function is activated.
After you select the desired item, the display will automatically change to the Motion Display mode after a few seconds. In the Motion Display mode, all the items are scrolled in the display one by one in order.
Note
If you use personalised labels, they will always take priority over the original CD TEXT information when such information is displayed.
Tip
The Motion Display mode can be turned off. (See "Changing the sound and display settings" on page 24.)
Automatically scrolling a disc name — Auto Scroll
If the disc name, artist name, or track name on an MD or a CD TEXT disc exceeds 8 characters and the Auto Scroll function is on, information automatically scrolls across the display as follows:
- The disc name appears when the disc has changed (if the disc name is selected as the display item).
- The track name appears when the track has changed (if the track name is selected as the display item).
- The disc or track name appears depending on the setting when you press SOURCE to select an MD or CD TEXT disc.
If you press DSPL/PTY to change the display item, the disc or track name of the MD or CD TEXT disc is scrolled automatically whether you set the function on or off.
1 During playback, press (MENU).
2 Press either side of DISC/PRST repeatedly until "A.SCR-Off" appears.
3 Press the (+) side of SEEK/AMS to select "A.SCRL-ON."
4 Press ENTER.
To cancel Auto Scroll, select "A.SCRL-OFF" in step 3.
Note
For some CD TEXT discs with very many characters, the following cases may happen:
Some of the characters are not displayed.
Auto Scroll does not work.
Locating a specific track
Automatic Music Sensor (AMS)
During playback, press either side of (SEEK/AMS) momentarily for each track you want to skip.
To locate preceding tracks
To locate succeeding tracks
Locating a specific point in a track - Manual Search
During playback, press and hold either side of SEEK/AMS. Release when you have found the desired point.
To search backward
To search forward
Note
If "L...L... L...L..." or "..." appears in the display, you have reached the beginning or the end of the disc and you cannot go any further.
Locating a disc
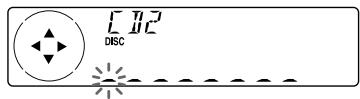
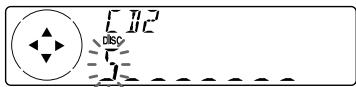
Disc Selection
When an optional CD/MD unit is connected, press either side of DISC/PRST to select the desired disc. The desired disc in the current optional CD/MD unit begins playback.
Playing tracks repeatedly
— Repeat Play
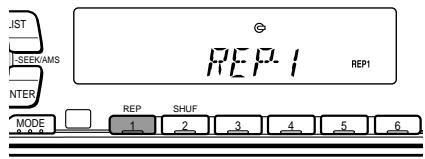
The CD in the main unit will automatically repeat itself when it reaches the end. As repeat play, you can select:
- REP-1 - to repeat a track.
- REP-2 - to repeat a disc in the optional CD/ MD unit.
During playback, press ① (REP) repeatedly until the desired setting appears in the display.

- "REP-2" is only available when you connect one or more optional CD units, or when you connect two or more optional MD units.
Repeat Play starts.
To return to normal play mode, select "REP-OFF."
Playing tracks in random order — Shuffle Play
You can select:
- SHUF-1 — to play the tracks on the current disc in random order.
- SHUF-2 — to play the tracks in the current optional CD/MD unit in random order.
- SHUF-ALL — to play all the tracks in all the optional CD/MD units in random order.
During playback, press (2) (SHUF) repeatedly until the desired setting appears in the display.

- "SHUF-2" and "SHUF-ALL" are only available when you connect one or more optional CD units, or when you connect two or more optional MD units.

Shuffle Play starts.
To return to normal play mode, select "SHUF-OFF."
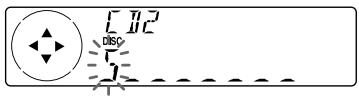
Labelling a CD — Disc Memo (For a CD unit with the CUSTOM FILE function)
You can label each disc with a personalised name. You can enter up to 8 characters for a disc. If you label a CD, you can locate the disc by name (page 13) and select the specific tracks for playback (page 14).
1 Start playing the disc you want to label.
2 Press (MENU), then press either side of DISC/PRST repeatedly until "NAME EDIT" appears.
3 Press ENTER.
Nameeditmode
The unit will repeat the disc during the labelling procedure.
4 Enter the characters.
Press the (+) side of DISC/PRST repeatedly to select the desired characters.
$$ \begin{array}{l} (A \rightarrow B \rightarrow C \rightarrow \dots Z \rightarrow 0 \rightarrow 1 \rightarrow 2 \rightarrow \ \dots 9 \rightarrow + \rightarrow - \rightarrow^ {*} \rightarrow / \rightarrow \backslash \rightarrow > \rightarrow < \ \rightarrow \cdot \rightarrow_ {-}) \ \end{array} $$
If you press the (-) side of DISC/PRST repeatedly, the characters will appear in reverse order.
If you want to put a blank space between characters, select " _" (underbar).
Press the (+) side of (SEEK/AMS) after locating the desired character.
The next character flashes.
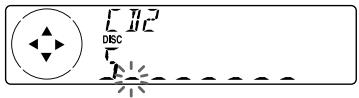
If you press the (-) side of (SEEK/AMS), the previous character flashes.
Repeat steps 1 and 2 to enter the entire name.
5 To return to normal CD play mode, press ENTER.
Tips
To erase or correct a name, enter " _ " (under-bar) for each character.
- There is another way to start labelling a CD. Press (LIST) for two seconds instead of steps 2 and 3. You can also complete the operation by pressing (LIST) for two seconds instead of step 5.
- You can label CDs on a unit without the CUSTOM FILE function if that unit is connected along with a CD unit that has the function. The disc name will be stored in the memory of the CD unit with the CUSTOM FILE function.
Displaying the disc memo
Press DSPL/PTY during CD or CD TEXT disc playback.

Each time you press DSPL/PTY during CD or CD TEXT disc playback, the item changes as follows:

1 While an optional CD unit is connected.
2 If you connect an optional CD unit with the CD TEXT function, the CD TEXT information will appear in the display when you play a CD TEXT disc.
*3 While the AF/TA function is activated.
Erasing the disc memo
1 Press (SOURCE) repeatedly to select "CD."
2 Press MODE repeatedly to select the CD unit with the CUSTOM FILE function.
3 Press (MENU), then press either side of DISC/PRST repeatedly until "NAME DEL" appears.
4 Press ENTER.
5 Press either side of DISC/PRST repeatedly to select the disc name you want to erase.
6 Press ENTER for two seconds. The name is erased. Repeat steps 5 and 6 if you want to erase other names.
7 Press (MENU) twice. The unit returns to normal CD play mode.
Notes
- To erase the disc memo, play a CD on the CD unit in which the disc memo you want to erase is stored.
- When a personalised label for a CD TEXT disc is erased, the original CD TEXT information will appear on the display.
Locating a disc by name
List-up (For a CD unit with the CD TEXT function/CUSTOM FILE function, or an MD unit)
You can use this function for discs that have been assigned custom names or for CD TEXT discs.
You can locate the disc by
- its custom name: when you assign a name for a CD or an MD using a CD unit with the CUSTOM FILE function or an MD unit. (For information on disc names, see "Labelling a CD" on page 12).
- the CD TEXT information: when you play a CD TEXT disc on a CD unit with the CD TEXT function.
1 Press (LIST).
The name assigned to the current disc appears in the display.
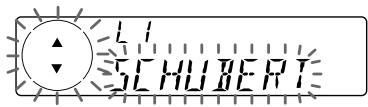
When you assign a disc memo name to a CD TEXT disc, it takes priority over the original CD TEXT information.
2 Press either side of DISC/PRST repeatedly until you find the desired disc.
3 Press ENTER to play the disc.
Notes
- When using the card remote commander, press (LIST) to return to normal play mode. When operating just by the unit's button, the display returns to normal play mode after 5 seconds.
- The track names are not displayed during MD or CD TEXT disc playback.
- If there are no discs in the CD/MD unit, "NO DISC" appears in the display.
- If a disc has not been assigned a custom name, "****" appears on the display.
- Some letters cannot be displayed during MD or CD TEXT disc playback.
- If the disc information has not been read yet by the unit, "NOT READ" is displayed.
Selecting specific tracks for playback
— Bank
(For a CD unit with the custom file function)
If you label the disc, you can set the unit to skip or play the tracks of your choice.
1 Start playing the disc you want to label.
2 Press (MENU), then press either side of DISC/PRST repeatedly until "BANK SEL" appears.
3 Press ENTER.
Bank edit mode
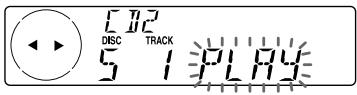
4 Label the tracks.
Press either side of (SEEK/AMS) repeatedly to select the track you want to label.
Press ENTER repeatedly to select "PLAY" or "SKIP."
5 Repeat step 4 to set "PLAY" or "SKIP" for all the tracks.
6 Press (MENU) twice.
The unit returns to normal CD play mode.
Notes
- You can set "PLAY" and "SKIP" for up to 24 tracks.
- You cannot set "SKIP" for all the tracks on a CD.
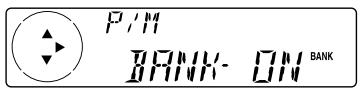
Playing specific tracks only
You can select:
- "BANK-ON" — to play the tracks with the "PLAY" setting.
- "BANK-INV" (Inverse) — to play the tracks with the "SKIP" setting.
1 During playback, press (MENU), then press either side of (DISC/PRST) repeatedly until "BANK-ON", "BANK-INV", or "BANK-OFF" appears.
2 Press the (+) side of (SEEK/AMS) repeatedly until the desired setting appears.

3 Press ENTER.
Playback starts from the track following the current one.
To return to normal play mode, select "BANK-OFF" in step 2.
Memorising stations automatically
Best Tuning Memory (BTM)
The unit selects the stations with the strongest signals and memorises them in the order of their frequencies. You can store up to 6 stations on each band (FM1, FM2, FM3, MW, and LW).
Caution
When tuning in stations while driving, use Best Tuning Memory to prevent accidents.
1 Press (SOURCE) repeatedly to select the tuner.
Each time you press (SOURCE), the source changes as follows:

- If the corresponding optional equipment is not connected, this item will not appear.
2 Press MODE repeatedly to select the band.
Each time you press MODE, the band changes as follows:

3 Press (MENU), then press either side of DISC/PRST repeatedly until "BTM" appears.
4 Press ENTER.
The unit stores stations in the order of their frequencies on the number buttons.
A beep sounds when the setting is stored.
Notes
- The unit does not store stations with weak signals. If only a few stations can be received, some number buttons will retain their former setting.
- When a number is indicated in the display, the unit starts storing stations from the one currently displayed.
- If a CD is not in the unit, only the tuner band appears even if you press (SOURCE).
Memorising only the desired stations
You can preset up to 18 FM stations (6 each for FM1, FM2, and FM3), up to 6 MW stations, and up to 6 LW stations in the order of your choice.
1 Press (SOURCE) repeatedly to select the tuner.
2 Press MODE repeatedly to select the band.
3 Press either side of (SEEK/AMS) to tune in the station that you want to store on the number button.
4 Press the desired number button (① to ⑥) for two seconds until "MEM" appears.
The number button indication appears in the display.
Note
If you try to store another station on the same number button, the previously stored station will be erased.
Receiving the memorised stations
1 Press (SOURCE) repeatedly to select the tuner.
2 Press MODE repeatedly to select the band.
3 Press the number button (1 to 6) on which the desired station is stored.
Tip
Press either side of DISC/PRST to receive the stations in the order they are stored in the memory (Preset Search Function).
If you cannot tune in a preset station
Press either side of (SEEK/AMS) to search for the station (automatic tuning).
Scanning stops when the unit receives a station. Press either side of (SEEK/AMS) repeatedly until the desired station is received.
Note
If the automatic tuning stops too frequently, press (MENU), then press either side of DISC/PRST repeatedly until "LOCAL" (local seek mode) is displayed. Then press the (+) side of SEEKAMS to select "LOCAL-ON." Press ENTER.
Only the stations with relatively strong signals will be tuned in.
Tips
- When you select the "LOCAL-ON" setting, "L.SEEK" appears while the unit is searching for a station.
- If you know the frequency of the station you want to listen to, press and hold either side of (SEEK/AMS) until the desired frequency appears (manual tuning).
If FM stereo reception is poor
— Monaural Mode
1 During radio reception, press (MENU), then press either side of (DISC/PRST) repeatedly until "MONO-OFF" appears.
2 Press the (+) side of (SEEK/AMS) until "MONO-ON" appears.
The sound improves, but becomes monaural ("ST" disappears).
3 Press ENTER.
To return to normal mode, select "MONO-OFF" in step 2.
Overview of the RDS function
Radio Data System (RDS) is a broadcasting service that allows FM stations to send additional digital information along with the regular radio programme signal. Your car stereo offers you a variety of services. Here are just a few: retuning the same programme automatically, listening to traffic announcements, and locating a station by programme type.
Notes
- Depending on the country or region, not all of the RDS functions are available.
- RDS may not work properly if the signal strength is weak or if the station you are tuned to is not transmitting RDS data.
Displaying the station name
The name of the current station lights up in the display.
Select an FM station (page 16).
When you tune in an FM station that transmits RDS data, the station name appears in the display.
| F M I | D-BASS |
| H L C | F I |
Note
The * indication means that an RDS station is being received.
Changing the displayed item
Each time you press DSPL/PTY, the item changes as follows:
Station Name (Frequency) PTY data
After you select the desired item, the display will automatically change to the Motion Display mode after a few seconds.
In the Motion Display mode, all the items are scrolled in the display one by one in order.
Tip
The Motion Display mode can be turned off. (See "Changing the sound and display settings" on page 24.)
Note
"NO NAME" appears if the received station does not transmit RDS data.
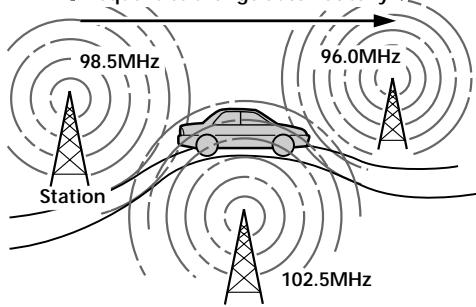
Retuning the same programme automatically
Alternative Frequencies (AF)
The Alternative Frequencies (AF) function automatically selects and retunes the station with the strongest signal in a network. By using this function, you can continuously listen to the same programme during a long-distance drive without having to retune the station manually.
Frequencies change automatically.
1 Select an FM station (page 16).
2 Press AF repeatedly until "AF-ON" appears.
The unit starts searching for an alternative station with a stronger signal in the same network.
Notes
- When there is no alternative station in the area and you do not need to search for an alternative station, turn the AF function off by pressing (AF) repeatedly until "AF-OFF" appears.
- When "NO AF" and the station name flash alternately, it means that the unit cannot find an alternative station in the network.
- If the station name starts flashing after selecting a station with the AF function on, this indicates that no alternative frequency is available. Press either side of (SEEK/AMS) while the station name is flashing (within eight seconds). The unit starts searching for another frequency with the same PI (Programme Identification) data ("PI SEEK" appears and no sound is heard). If the unit cannot find another frequency, "NO PI" appears, and the unit returns to the previously selected frequency.
Listening to a regional programme
The "REG-ON" (regional on) function lets you stay tuned to a regional programme without being switched to another regional station. (Note that you must turn the AF function on.) The unit is factory preset to "REG-ON," but if you want to turn off the function, do the following.
1 During radio reception, press (MENU), then press either side of (DISC/PRST) repeatedly until "REG" appears.
2 Press the (+) side of (SEEK/AMS) until "REG-OFF" appears.
3 Press ENTER.
Note that selecting "REG-OFF" might cause the unit to switch to another regional station within the same network.
To return to regional on, select "REG-ON" in step 2.
Note
This function does not work in the United Kingdom and in some other areas.
Local link function (United Kingdom only)
The Local Link function lets you select other local stations in the area, even if they are not stored on your number buttons.
1 Press a number button that has a local station stored on it.
2 Within five seconds, press the number button of the local station again.
3 Repeat this procedure until the desired local station is received.
Listening to traffic announcements
The Traffic Announcement (TA) and Traffic Programme (TP) data lets you automatically tune in an FM station that is broadcasting traffic announcements even if you are listening to other programme sources.
Press repeatedly until "TA-ON" appears.
The unit starts searching for traffic information stations. "TP" appears in the display when the unit finds a station broadcasting traffic announcements. When the traffic announcement starts, "TA" flashes. The flashing stops when the traffic announcement is over.
Tip
If the traffic announcement starts while you are listening to another programme source, the unit automatically switches to the announcement and goes back to the original source when the announcement is over.
Notes
- "NO TP" flashes for five seconds if the received station does not broadcast traffic announcements. Then, the unit starts searching for a station that broadcasts it.
- When "EON" appears with "TP" in the display, the current station makes use of broadcast traffic announcement of other stations in the same network.
To cancel the current traffic announcement
Press TA, SOURCE or MODE.
To cancel all traffic announcements, turn off the function by pressing until "TA-OFF" appears.
Preseting the volume of traffic announcements
You can preset the volume level of the traffic announcements beforehand so you won't miss the announcement. When a traffic announcement starts, the volume will be automatically adjusted to the preset level.
1 Turn the volume control dial to adjust the desired volume level.
2 Press for two seconds.
"TA" appears and the setting is stored.
Receiving emergency announcements
If an emergency announcement comes in while you are listening to the radio, the programme will be automatically switched to it. If you are listening to a source other than the radio, the emergency announcements will be heard if you set AF or TA to ON. The unit will then automatically switch to these announcements no matter which source you are listening to at the time.
Presetting the RDS stations with the AF and TA data
When you preset RDS stations, the unit stores each station's data as well as its frequency, so you don't have to turn on the AF or TA function every time you tune in the preset station. You can select a different setting (AF, TA, or both) for individual preset stations, or the same setting for all preset stations.
Presetting the same setting for all preset stations
1 Select an FM band (page 15).
2 Press AF and/or TA to select "AF-ON" and/or "TA-ON."
Note that selecting "AF-OFF" or "TA-OFF" stores not only RDS stations, but also non-RDS stations.
3 Press (MENU), then press either side of DISC/PRST repeatedly until "BTM" appears.
4 Press the (+) side of (SEEK/AMS) until "BTM" flashes.
5 Press ENTER.
Presetting different settings for each preset station
1 Select an FM band, and tune in the desired station (page 16).
2 Press AF and/or TA to select "AF-ON" and/or "TA-ON."
3 Press the desired number button until "MEM" appears. Repeat from step 1 to preset other stations.
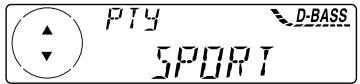
Locating a station by programme type
You can locate the station you want by selecting one of the programme types shown below.
| Programme types | Display |
| News | NEWS |
| Current Affairs | AFFAIRS |
| Information | INFO |
| Sports | SPORT |
| Education | EDUCATE |
| Drama | DRAMA |
| Culture | CULTURE |
| Science | SCIENCE |
| Varied | VARIED |
| Popular Music | POP M |
| Rock Music | ROCK M |
| Easy Listening | EASY M |
| Light Classical | LIGHT M |
| Classical | CLASSICS |
| Other Music Type | OTHER M |
| Weather | WEATHER |
| Finance | FINANCE |
| Children's Programmes | CHILDREN |
| Social Affairs | SOCIAL A |
| Religion | RELIGION |
| Phone In | PHONE IN |
| Travel | TRAVEL |
| Leisure | LEISURE |
| Jazz Music | JAZZ |
| Country Music | COUNTRY |
| National Music | NATION M |
| Oldies Music | OLDIES |
| Folk Music | FOLK M |
| Documentary | DOCUMENT |
| Not specified | NONE |
Note
You cannot use this function in some countries where no PTY (Programme Type selection) data is available.
1 Press (DSPL/PTY) during FM reception until "PTY" appears.
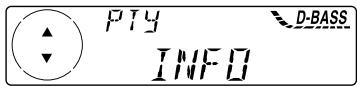
The current programme type name appears if the station is transmitting the PTY data. "---" appears if the received station is not an RDS station, or if the RDS data has not been received.
2 Press DISC/PRST repeatedly until the desired programme type appears.
The programme types appear in the order shown in the above table. Note that you cannot select "NONE" (Not specified) for searching.
3 Press ENTER.
The unit starts searching for a station broadcasting the selected programme type.
Setting the clock automatically
The CT (Clock Time) data from the RDS transmission sets the clock automatically.
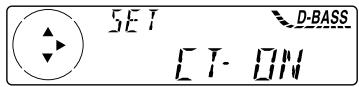
1 During radio reception, press (MENU), then press either side of (DISC/PRST) repeatedly until "CT" appears.
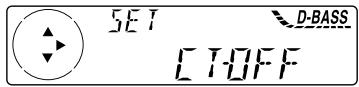
2 Press the (+) side of (SEEK/AMS) repeatedly until "CT-ON" appears. The clock is set.
3 Press ENTER to return to the normal display.
To cancel the CT function
Select "CT-OFF" in step 2.
Notes
- The CT function may not work even though an RDS station is being received.
- There might be a difference between the time set by the CT function and the actual time.
Other Functions
You can also control the unit with a rotary commander.
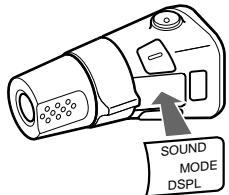
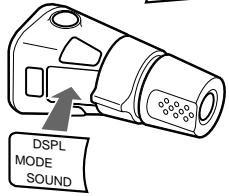
Labelling the rotary commander (optional)
Depending on how you mount the rotary commander, attach the appropriate label as shown in the illustration below.
Using the rotary commander (optional)
The rotary commander works by pressing buttons and/or rotating controls. You can also control an optional CD/MD unit with the rotary commander.
By pressing buttons (the SOURCE and MODE buttons)
Each time you press SOURCE, the source changes as follows:
Tuner CD MD*
- If the corresponding optional equipment is not connected, this item will not appear.
Pressing MODE changes the operation in the following ways:
- Tuner: FM1 → FM2 → FM3 → MW → LW
- CD unit*: CD1 → CD2 → ...
-
MD unit*: MD1 → MD2 → ...
-
If the corresponding optional equipment is not connected, these items will not appear.
By rotating the control (the SEEK/AMS control)
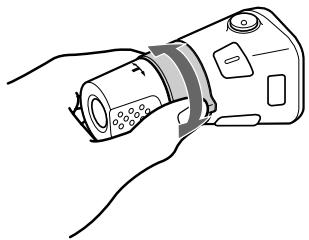
Rotate the control momentarily and release it to:
- Locate a specific track on a disc. Rotate and hold the control until you locate the specific point in a track, then release it to start playback.
- Tune in stations automatically. Rotate and hold the control to find a specific station.
By pushing in and rotating the control (the PRESET/DISC control)
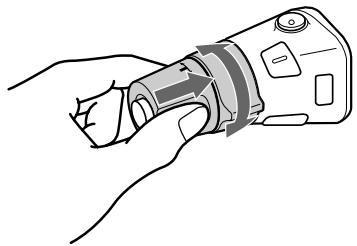
Push in and rotate the control to:
- Receive the stations memorised on the number buttons.
- Change the disc.
Other operations
Rotate the VOL control to adjust the volume.
Press ATT to attenuate the sound.

Tip
If your car has no ACC (accessory) position on the ignition key switch, be sure to press OFF for two seconds to turn off the clock indication after turning off the engine.
Changing the operative direction
The operative direction of controls is factory-set as shown below.
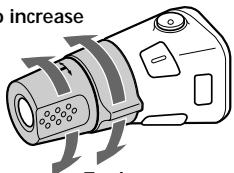
To increase
To decrease
If you need to mount the rotary commander on the right hand side of the steering column, you can reverse the operative direction.
Press (SOUND) for two seconds while pushing the VOL control.
Tip
You can also change the operative direction of these controls with the unit (see "Changing the sound and display settings" on page 24).
Adjusting the sound characteristics
You can adjust the bass, treble, balance, and fader.
You can store the bass and treble levels independently for each source.
1 Select the item you want to adjust by pressing SOUND repeatedly.
Each time you press (SOUND), the item changes as follows:
BAS (bass) TRE (treble) BAL (left-right) FAD (front-rear)
2 Adjust the selected item by pressing either side of (SEEK/AMS).
When adjusting with the rotary commander, press (SOUND) and rotate the VOL control.
Note
Adjust within three seconds after selecting the item.
Attenuating the sound
(With the rotary commander or the card remote commander-optional)
Press ATT on the rotary commander or card remote commander.
"ATT-ON" flashes momentarily.
To restore the previous volume level, press ATT again.
Tip
When the interface cable of a car telephone is connected to the ATT lead, the unit decreases the volume automatically when a telephone call comes in (Telephone ATT function). (CDX-C5000RX/ C5000RV/C5000R only)
Changing the sound and display settings
The following items can be set:
SET (setting)
CLOCK (page 8)
- CT (Clock Time) (page 21)
- BEEP — to turn the beeps on or off.
- RM (Rotary Commander) — to change the operative direction of the controls of the rotary commander.
- Select "NORM" to use the rotary commander as the factory-set position.
- Select "REV" when you mount the rotary commander on the right side of the steering column.
DIS (display)
AMBER/GREEN - to change the illumination colour to amber or green. (CDX-C5000R/C4900R only)
D INFO (Dual Information) to display the clock and the play mode at the same time ON).
- DIMMER — to dim the display (ON) or not (OFF). (CDX-C5000RV only)
M.DSPL (Motion Display) — to turn the motion display on or off.
A.SCRL (Auto Scroll) (page 10)
Note
If you connect an optional power amplifier and do not use the built-in amplifier, the beep sound will be disabled.
1
Press
2 Press either side of (DISC/PRST) repeatedly until the desired item appears.
Each time you press the (-) side of DISC/PRST, the item changes as follows:
CLOCK CT BEEP RM AMBER/ GREEN*1 D.INFO DIMMER*2 M.DSPL A.SCRL*3
1 CDX-C5000R/C4900R only
2 CDX-C5000RV only
*3 When no CD TEXT disc or MD is playing, this item will not appear.
Note
The displayed item will differ depending on the source.
Tip
You can easily switch among categories ("SET", "DIS", "P/M" (play mode), and "EDT" (edit mode)) by pressing either side of DISC/PRST for two seconds.
3 Press the (+) side of SEEK/AMS to select the desired setting (Example: ON or OFF).
4 Press ENTER.
After the mode setting is completed, the display returns to normal play mode.
Boosting the bass sound
D-bass
You can enjoy a clear and powerful bass sound.
The D-bass function boosts the low and high frequency signal with a sharper curve than conventional bass boost.
You can hear the bass line more clearly even while the vocal volume remains the same. You can emphasize and adjust the bass sound easily with the D-BASS button.

Adjusting the bass curve
Press D-BASS repeatedly until the desired bass level (1, 2, or 3) appears in the display.

To cancel, select "D.BASS-OFF."
Note
If the bass sound becomes distorted, select a less effective setting of "D.BASS" or adjust the volume.
Additional Information
Maintenance
Fuse replacement
When replacing the fuse, be sure to use one matching the amperage rating stated on the original fuse. If the fuse blows, check the power connection and replace the fuse. If the fuse blows again after replacement, there may be an internal malfunction. In such a case, consult your nearest Sony dealer.

Warning
Never use a fuse with an amperage rating exceeding the one supplied with the unit as this could damage the unit.
Cleaning the connectors
The unit may not function properly if the connectors between the unit and the front panel are not clean. In order to prevent this, open the front panel by pressing (OPEN), then detach it and clean the connectors with a cotton swab dipped in alcohol. Do not apply too much force. Otherwise, the connectors may be damaged.
Main unit

Back of the front panel
Notes
- For safety, turn off the engine before cleaning the connectors, and remove the key from the ignition switch.
- Never touch the connectors directly with your fingers or with any metal device.
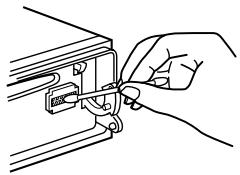
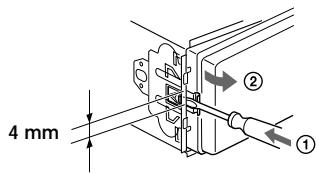
Dismounting the unit
1 After taking off the front panel, press the clip inside the front cover with a thin screwdriver, and gently pry the front cover free.
2 Repeat step 1 for the right side. The front cover is removed.
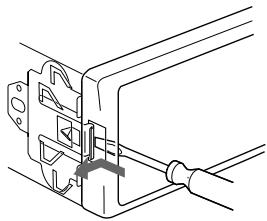
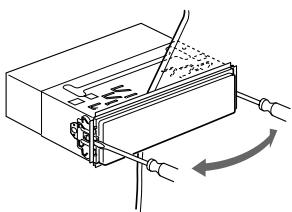
3 Use a thin screwdriver to push in the clip on the left side of the unit, then pull out the left side of the unit until the catch clears the mounting.
4 Repeat step 3 for the right side.
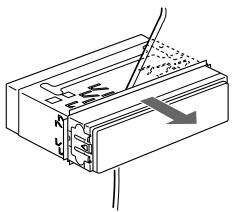
5 Slide the unit out of its mounting.
Specifications
CD player section
Signal-to-noise ratio 90 dB Frequency response 10 - 20,000Hz Wow and flutter Below measurable limit
Tuner section
FM
Tuning range 87.5 - 108.0 MHz
Aerial terminal External aerial connector
Intermediate frequency 10.7 MHz/450 kHz
Usable sensitivity 8 dBf
Selectivity 75 dB at 400 kHz
Signal-to-noise ratio 66 dB (stereo), 72 dB (mono)
Harmonic distortion at 1 kHz
0.6 % (stereo), 0.3 % (mono)
Separation 35 dB at 1 kHz
Frequency response 30 - 15,000 Hz
MW/LW
Tuning range MW:531-1,602 kHz LW:153-279 kHz
Aerial terminal External aerial connector
Intermediate frequency 10.7 MHz/450 kHz
Sensitivity MW: 30~ V LW: 40~ V
Power amplifier section
Outputs Speaker outputs (sure seal connectors)
Speaker impedance 4-8 ohms
Maximum power output 50W× 4 at 4 ohms
General
| Outputs | Audio outputs*1 Power aerial relay control lead Power amplifier control lead Telephone ATT control lead*2 |
| Tone controls | Bass ±9 dB at 100 Hz Treble ±9 dB at 10 kHz |
| Power requirements | 12 V DC car battery (negative ground) |
| Dimensions | Approx. 178 × 50 × 183 mm (w/h/d) |
| Mounting dimensions | Approx. 182 × 53 × 162 mm (w/h/d) |
| Mass | Approx. 1.2 kg |
| Supplied accessories | Parts for installation and connections (1 set) Front panel case (1) |
| Optional accessories | Rotary commander RM-X4S Card remote commander RM-X91 BUS cable (supplied with an RCA pin cord) RC-61 (1 m), RC-62 (2 m) |
| Optional equipment | CD changer (10 discs) CDX-828, CDX-737 MD changer (6 discs) MDX-65 Source selector XA-C30 |
^1 Equipped with front and rear outputs: CDX-C5000RX/C5000RV/C5000R only
Equipped with rear outputs: CDX-C4900R ^2 CDX-C5000RX/C5000RV/C5000R only
Design and specifications are subject to change without notice.
Troubleshooting guide
The following checklist will help you remedy the problems you may encounter with your unit. Before going through the checklist below, check the connection and operating procedures.
General
| Problem | Cause/Solution |
| No sound. | ·Cancel the ATT function. ·Set the fader control to the centre position for two-speaker system. ·Rotate the dial clockwise to adjust the volume. |
| The contents of the memory have been erased. | ·The power cord or battery has been disconnected. ·The reset button has been pressed. →Store again into the memory. |
| Indications do not appear in the display. | Remove the front panel and clean the connectors. See “Cleaning the connectors” (page 26) for details. |
| No beep sound. | ·The beep sound is cancelled (page 24). ·If you connect an optional amplifier and do not use the built-in amplifier, the beep sound will be deactivated. |
CD/MD playback
| Problem | Cause/Solution |
| A disc cannot be loaded. | • Another CD is already loaded. • The CD is forcibly inserted upside down or in the wrong way. |
| Playback does not begin. | Defective MD or dirty CD. |
| A disc is automatically ejected. | The ambient temperature exceeds 50°C. |
| CD will not be ejected. | You have closed the front panel or pushed the disc forcibly into the unit while the unit was ejecting the disc after you pressed ⋆. →Press the reset button. |
| The operation buttons do not function. | Press the reset button. |
| The sound skips due to vibration. | • The unit is installed at an angle of more than 60°. • The unit is not installed in a sturdy part of the car. |
| The sound skips. | A dirty or defective disc. |
| Cannot turn off the “……” indication. | You cannot label CDs unless you connect a CD unit with the custom file function. →Press LIST for two seconds. |
Radio reception
| Problem | Cause/Solution |
| Preset tuning is not possible. | • Store the correct frequency in the memory. • The broadcast signal is too weak. |
| The stations cannot be received. The sound is hampered by noises. | Connect a power aerial control lead (blue) or accessory power supply lead (red) to the power supply lead of a car's aerial booster. (Only when your car has built-in FM/MW/LW aerial in the rear/side glass.) |
| Automatic tuning is not possible. | The broadcast signal is too weak. → Use manual tuning. |
| The “ST” indication flashes. | • Tune in the frequency accurately. • The broadcast signal is too weak. → Set to the MONO mode (page 16). |
RDS
| Problem | Cause/Solution |
| The SEEK starts after a few seconds of listening. | The station is non-TP or has weak signal. →Press (AF) or (TA) repeatedly until “AF-OFF” or “TA-OFF” appears. |
| No traffic announcements. | • Activate “TA.” • The station does not broadcast any traffic announcements despite being TP. →Tune to another station. |
| PTY displays “NONE.” | The station does not specify the programme type. |
The following indications will flash for about five seconds, and an alarm sound will be heard.
Error displays (when an optional CD/MD unit is connected)
| Display | Cause | Solution |
| NO MAG | The disc magazine is not inserted in the CD/MD unit. | Insert the magazine in the CD/MD unit. |
| NO DISC | No disc is inserted in the CD/MD unit. | Insert discs in the CD/MD unit. |
| NG DISCS | A CD/MD cannot play because of some problem. | Insert another CD/MD. |
| ERROR*1 | A CD is dirty or inserted upside down.*2 | Clean or insert the CD correctly. |
| An MD does not playback because of some problem.*2 | Insert another MD. | |
| BLANK*1 | No tracks have been recorded on an MD.*2 | Play an MD with recorded tracks on it. |
| RESET | The CD/MD unit cannot be operated because of some problem. | Press the reset button on the unit. |
| NO READY | The lid of the MD unit is open or the MDs are not inserted properly. | Close the lid or insert the MDs properly. |
| HI TEMP | The ambient temperature is more than 50°C. | Wait until the temperature goes down below 50°C. |
1 When an error occurs during playback of an MD or CD, the disc number of the MD or CD does not appear in the display.
2 The disc number of the disc causing the error appears in the display.
If the above-mentioned solutions do not help improve the situation, consult your nearest Sony dealer.
;Bienvenido!
CAUTION—INVISIBLE LASER RADIATION WHEN OPEN
DO NOT STARE INTO BEAM OR
VIEW DIRECTLY WITH OPTICAL INSTRUMENTS
Pulse TA, SOURCE o MODE.
CAUTION—INVISIBLE LASER RADIATION WHEN OPEN
DO NOT STARE INTO BEAM OR
VIEW DIRECTLY WITH OPTICAL INSTRUMENTS
Den har etiketten finner du pa enchetens interna chassi.
19 AF-knapp 17, 18, 19
20 TA-knapp 18, 19
Satta fast frontpanelen
Colocar o paine frontal
2 Carregue no lado (+) de (SEEK/AMS)进驻 in the area, where you can find a lot of shops.
CLASS 1 LASER PRODUCT
3Ta 3TNKeTka HaxOДNTcB HIXHHeJ YactN Waccn.
CAUTION—INVISIBLE LASER RADIATION WHEN OPEN DO NOT STARE INTO BEAM OR VIEW DIRECTLY WITH OPTICAL INSTRUMENTS
3Ta 3TNKeTka HaxoJntcHa BHyTpEHem
Waccn npBNOHorO yCTpoiCTBa.
Bcnyae ecn Baaw abTomobnl 6bln 3anapkoBAn Ha coHnueNeke,B pe3yIbTaTe yero npOn3oUNo 3HaHTeJIbHOE NOBbIeHne TempeaTypb I erO caNoHe, daTe npOnrPbIbATEJIO OCTbTb, npExde cem HaunHbT erO 3KcNlyaTaUIO.
Bcnyae ecn Ha npomrpbIbATEnb He noctynaet nTahne, nepBbIM denOM npOBepbTe KOHTaKtbl. Ecn Bce B noPapKe, npOBepbTe pIaNkBN pEdoxpaHITeb.
B cnyuae ecnn Baaw abTOMo6nIb ochauen 3neKtpnpnBOHDn aHTEHNO,TO npn 3kCnpyaun annpapaOn OHa bdyet BblBnraTcBnAABOTMaTHeCKN.
B clyae Bo3nKnHOBeHna y Bac kaKnx-JIb6 BO nnpocob nnn npo6nem, C8Ba3aHHbIX c Ba7nIM npOnrpbIbATEJEM n He paccmOTpeHHbIX B daHOM PykoBOCTBe NO kCkNpyatauNN, 06paTInTeCb, NOxanyIcTa, 3a KOHCyIbTaIeNe K 6bnXaIeMу dInepy fnpMbI Sony.
KoHdEHaCaunBlau
BdoxndnBbI Deh bIIN B yCNoBnx NOBbIeHHoB BlaXHoCTn Ha IIN3ax B aIappaTe MoKet cKaIINBaTcBaNara. Ee noRbIeHne HApuAeT HopMaJIbHOe fYHKUOnHPOBaHne annpaTa. EcIn TaKoe npO3oJET, n3BLeKnTE dNCK INoDoxNTe npImepHO nONcAca, nOKa Bnara He nCnapITcra.
I03a60tBTeCb o COxpaHeHn BbICOKO KaYeCTBa 3ByuHaHn
Ecnn pRdcm C BaWee ayDnOaannapaTypoB B CaNoHe CMOHTnpoBaHbI DePkaTeN CTaKaHOB, 6yDbTe OCTOpoxKnbl, YTObI He npOIuTb Ha Hne H Na KOMNaKT-DnCKn COK Nn KaKOJ-Ni60 DpyroCnAkn HAnITOK.CaxapHbI HaNET Ha annapate Nn KOMNaKT-DnCKe MOKeT npINBeCTN K3arpra3HeHIO LnH3 BNYTpN npOnrpbIbATEJI, YTO Bbl3OBet yXyDmeHne KaueCTBa 3Byka Nn BOo6e CdeJaet HEBO3MOXhBIM BOCpON3BeDeHne 3Byka.
HeNoIb3yITeCbB3rTbIMnHappOKaT KOMnAKT-IMCKaMn CO CTapbIMn,HaayabuIMN OTKJIeNBaTbCRA TNIKeTKaMn.
Haayabuine OTKlenBaTbcr 3TKeTK, OCTaBJIIOUne JINIKN CNeI Ha NUCke.

He noIb3yIteCb CBOIMN KOMnAaKT-ДИCKAMN, Na KOtOpbl HaJIePJIeHbI 3TNIKeTKn IIN NaKJIeNKI.
HaKneeHbI 3TuKETKn.
PonpbrBaTeJIb CD/MD (B KOMnJIeKT He BXoIIT)
PpocnyuBbAHe CD 9
Повторное Воспpon3Вedeнhoe Дорожек - Повтор Воспpon3Вedeня ..... 11
Bocnpo3BeHne Iopoxek B cIyauHOM npaKe -IpeTeacOBaHHoe Bocnpo3BeHne ...11
PpncboeHne Ha3BaHnA CD -PporgpaMMHa nMaTb CD* 12
HaxoKdHeHne DnCKa nO Ha3BaHnIO -ФункцЯ npOINCTbIbAHnA* 13
Bb6op onpeJeHbIX dopOxek dIa BocnpoIN3BeHnA -BaHK* 14
- IMeHouIeNcFyHKLUNCOTdJIbHo npNo6peTaembIM annapaTOM CD/MD.
PapnoonpneMnK
ABTOMaTuYeCKoe 3aHeceHne cTaHcIbB nAmrTb -ФyHKJIЯ nAmrTn OToHmAlbHoJ NaCTpOiKn Ha cTaHcIIN (BTM) 15
3aHeceHHe B NaMaTb ToJIbKO HxKhBix BaM CTaHcH. 15
PpneM 3aHeceHHbIX B nAmrTb cTaHcui 16
RDS
Ob3op cyHKui RDS 17
UHdkaun Ha3BaHnCTaHcnn 17
AВТOMATИЧЕСКАпелегастюка на Туж
программ
IcnoJIb3OBAHnne NOBOPoTHoro
INCTaHcUHOHOrO INepeKlnOuHaTeJIa
(B KOMJIeKT He BxOJNT) 22
IpoicTroka xapaKTepeNCTnK 3Byka 23
Pprrnnyuene 3Byka 24
U3MeHHe 3aHaHHbIX npaMeTPOB 3ByKa n DnCInJe 24
YcHHeHHe Hn3KoOaCTOTHBIX 3ByKOB -D-bass 25
DOnOpHnTeJIbHaN HΦopMaζη
Texnuecknyxod 25
Демонтах поирравATEн.. 26
Texnueckne xapaKTepeNCTIKN 27
HnCTpykCmno ycTaPHeHIO HeNoIaOK .... 28
PacnoJoxKeHne opraHOB ynpabJeHnA

3a noDpo6HocTAMM oBpaaauTeCb K COOTBeTCTByIOUIM yKaa3AHbIM CTpaHncaM.
1 Peryntop rpoMkoCTn 19
2 KlaBnSha MENU 8,10,12,13,14,15,16,18,19,21,24
3 Khonka (n3BJeHne DnCKa) (pacnoJIOKeHa B npeDHey qactn annapata 3a nepeDHey naheIbO) 9
4 KlaBnHn DISC/PRST +/- (Kypcop BBepx/BHN3) 8,10,12,13,14,15,16,18,19,20,21,24
Pn npocnyuBaHn CD/MD: cMeHa Dnca 10,13
Pn npne Me padnopepa: BBbOp npedBapntelbHo 3aIporpamMnpoBaHbIX CTAHn 16
KJablinsa DSPL/PTY (u3mehenepexkma dncjpey/Bbl6op Tnporpammbi) 9,10,12,17,20
6 KlaBmua LIST 12 List-up 13
7 KlaBnua SOURCE (BbI6Op nCTOHyKa) (TUNER/CD) 8,9,10,13,15,16,19
8 OkoiKo DnCnJIeR
9 KnaBn7a OPEN 7, 9, 26
10 KlaBnua D-BASS 25
11 KlaBnua SOUND 23
12 Khonka nepeyuctaOBKn(pacnoIooXeHa B nepedHeuactn annpapata 3a nepedne nnheIbI0)7
13 KnaBnsa OFF* 7,8,9
14 KlaBnS NSEEK/AMS -/+ (Kypcop BJIeBO/Bnpabo) 8,10,12,14,15,16,18,19,21,23,24 ABTOMaTnueckm My3bIkaJIbHbI ceHCOP 10,14
PruHoi nonck 10
PiOnck 15, 16, 18
15 KnaBnua ENTER 8,10,12,13,14,15,16,18,19,20,21,24
16 KlaBnHa MODE 19
Pn npocnyuBaHm KOMNaKT-/MHNiDnCKa:
BbI6Op npouRpbIbATEeY CD/MD 9, 13
Pn npneMe padNopepa:
BbI6Op dHaana3OHa (BAND) 15, 16
17 CeHcOp dIa IpiHaMa CnHana OTo 6ecnpoBODHOrO npbTa DnCTaHcUOnHOrO ynpabJIeHNr
18 Homiche KnaBnH
Pnp npnepe padnopepa:
Bb6op npedctaHOBHeHHoro Hmepa
15,16,18,19
Pnp npocnyuBaHn CD/MD: ① REP (noBtOp) 11 ② SHUF ("pepTaocOBaHHoe" Bocnpo3BeDeHne) 11
19 KnaBnua AF 17, 18, 19
20 KnaBnua TA 18, 19
*PpeOCTepeXeHne OTHOCHTbHO annapaTpybl, yCTaHOBJIeHNHO B aBTOMo6nIe, 3AMOK 3axnraHHN B KOtOpom He HmeeT OTdJIbHOro noLOXeHHN (ACC) dIra OTKIOUeHHN noOcEOEINHeHHo annapaTpybl PocLe BbIKNoeHHN DBrATeJIr He 3a6bIBaIte HaxaTb Ha DBe CeKYDbI KONky OFFHa anapate, C TEm YTO6bl OKKnUHTb Ufep6nat YacOB. PnCNIuKOM KpaTKOM HxKaTIN OFF cΦep6nT He OTKIOUaETC, YTO BeTe K pa3pHJKe aKKyMyJTAOPHO 6BaTapei.
PacnoJoxeHne opraHOB ynpaBJIeHnA
He nbitaTecb ee nepe3apAunb nn pa3o6paTb n He 6pocai Te eB orohb.
IpeyeCTaHOBKa napameTpOB aannapaTa
Ipeep nepBbIM nCIOJIb3OBAHMe annapaTa
nII nOcIe 3aMeHbI aBTOMOBINbHOro
aKKymyIaTopa Bam cNe dyET npOn3BeCTn
nepeyCTaHOBV KAnOKeHHbIX B NaMRTb
npOnrpbIBaTeNnaPamEtPOB.
CHnMMTE nepeDHOIO naHeIb N HaxKMITE
KONKny peyeCTaHOBV C NOMOUsIO
3aoCTpeHHORo pPeDMeta, HApNIMep,
7apNKOBoi pyuKn.
Khonka nepeyctaHOBKn
PpmeaHne
HaKMMTe OFFI JIry OCTaHOBKn BOCpOn3BeDeHnIy CD/MD IINI npEma paAnIOCTaHcIM (OCHOBnA IOCDBETKa I DCNPeI coXpaHrIOTc).
HaxmaiTe OFF B TeueHne DByx CekyndIraNoJHO RoBbIKNIOUeHnAnnapata.
PnmeuHne
EcnHa 3aMKe 3axnraHn Bauei MaunHbI HeT noJooEnHAC,He 3a6yDbTe BBykInuHTb AnnapaT hKaatMeH OFFB TeueHne DByx CekyHd BO n36exHanpepa3pRKnakkyMnyTopa
Kak noJIb30BaTbcr MEHIO
YacbI daHHoro annapaTa IMeHOT 24-ycobyIO HnDnKaUIO.
Приимер: установka уасов на 10:08
1 Haxmnte KnaBnuy (MENU), 3aTeM NocJeDoBaTeIbHo HaxmMaIte HaJIIObYIO CTOPOHy KnaBnIN DISC/PRST DO NOBJIeHnHa DnCnJee HaDnNCN "CLOCK".
1 Haxmnte ENTER.
Haunhaet MuraTb HnDnKaTOp Yaca.
HakimaiTe JIO6yO CTOpOHy KJIaBnIu DISC/PRST DnA yCTaHOBKn Yaca.

HaxMMTe Ha NOMEeHHyU 3HaKOM (+) CTOPHY KJIaBnIIN (SEEK/AMS).
Haunhaet MngtaB nHnKaTOp MNHT.
HakimaiTe JIO6yO CTOPOHy KJIaBnIu DISC/PRST IJNA YCTaHOBKN MNHYtbl.
2 HaxMMTe (ENTER).

Yacbi nown.
ПО OKOHANY yCTaHOBKU YACOB DmCnJIeI B03BpaJaueTcB O6bUHbI PexKIM INdNKaUNI BOCPON3BeDeHIN.
Cobet
BbMOKeTe yCTaHOBHTb BpEm aBTOMaTHueCKN C nOMOsbIO fYHKUNR DRS (CM. cTp. 17).
PpmeaHne
KaKHe-TO 3HaKOB Ha dncnnee He NOBbTc.
-ФункцЯ Auto Scroll pa6oTaT he 6yTeT.
HaxoKeHeNe HxKHOI DOpOxKn - ABTOMaTnueckn My3bIkaJIbHbI ceHCop
Bo BpemBocnpn3BeHnKpaTko haxmaiteHaIIO6yOCTOpOHy KlaBnSi (SEEK/AMS) -IO ONDOMy pa3y Ha KaJkyoDopOxKy, KOtOpyO Bbl XOTNe npOnycTntb.
A
HaxoJdeHnnapebIdyuXnDopoxek
A
HAXOJ.DEHNNA NOcneJeUoNx Dopoxek
HaxoKeHne HxKHO MeCTa Ha dopOxke -pyHoi nonCK
YCTPOICTBO6yTeT UKJIuYeCKN BOCnPOn3BOoNTb IINCK BO BPemB BBOda Ha3BaHnA.
4 BBeIe3HaKIM.
1 NocleIobateNbHO HaXnMaHa NaHOMeUHHyO 3HaKOM (+) CTOPOHy KNaBnSiN DISC/PRST), BbI6epIne HYHXHbIe 3HaKn.
$$ \begin{array}{l} (A \to B \to C \to \dots Z \to 0 \to 1 \to 2 \to \dots 9 \ \rightarrow + \rightarrow - \rightarrow^ {*} \rightarrow / \rightarrow \backslash \rightarrow > \rightarrow < \rightarrow . \rightarrow_ {-}) \ \end{array} $$
Пи NOСLEДОВАТБHOM HaЖаТИН HA NOMeUeHHYIO 3нAKOM (-) CTOPOH YKLABINI DISC/PRST 3нAKIn NOBIAOTCRHa DnCnJIe B OбРТOM NOPdKe.
EcnBbXoTnTe cdeNaTb np6eI mExNy 3HaKaMn, Bb6epnte " (HnxKHee Tpe).
2 HaJHa HUxHbI 3HaK, HaxMnTe Ha nOmeeHHyU 3HaKOM (+) CTOPOHy KlaBnUIN (SEEK/AMS).
HaHnHaet MmraTb CneDyUoN 3HaK.
EcIn HaKaTb Ha NomeeHHyo 3HaKOM (-) cTOpOHy KlaBnUs of (SEEK/AMS), Ha DnCnJIee HauHeT MnRaTb npEdIyuN 3HaK.
Повторе onepaци 1 n 2 Дд Ввда BCero Ha3BaHЯ.
5ДЯВОЗВРашЕняКобИЧOMу ржIMy BOCПОНЗБЕDEнЯHAЖМITE ENTER.
COBeTbI
ДагTORO YTO6bI CtepeTb/NCpBaNTb H3aBHaHne, BBeDIne “_(HnKHee Tpe)ДЯ KaKDoRIO NCpABNHEMO 3HaKa.
Haayatb npocecc HauMeHOBaHnIaNCKa MoxHo n no-dpyrOmy: BmecTo OOncaHHbIX Bblwe Opeaun 2n3 haxMITE Ha DBe cekyHdbI KnaBnU (LIST). Bbl taKxe MOpTe 3aBepuHTb 3OT npOeCC, Haxab Ha DBe cekyHdbI (LIST) BmecTO ocYueCTBHeHNI Opeaun 5.
BbMOKeTe npCBAuBaT ha3BaHnKOMNaKT- DnCKAM Ha npOurpbIaTeNe He IMeIOUeM FyHKuIN ABTOPCKOro HAmHeMOHOBaHmФaJNoB,ecnOH NODcoEHN K npOurpbIaTeNlO CD,IMeIOUeM 3Ty FyHKuIO. MfA DnCKA BBODITcB NaMaTb yCTPOICTBa IJa KOMNAKT-DnCKOB C FyHKuNE ABTOPCKOro HAmHOHOBaHmФaJNoB.
BbIbOHa nucnnei 3anporpamMnpoBaHHbIXnapaMeTppoB
Bo BpemBocnpOn3BeDeHnC D nIh CD TEXT-ДиСka HaxMnte DSPL/PTY.

4 PnpCBOEHHe Ha3BaHnI DOpOxKaM.
IocneIOBaTeJIbHbIM HaxKaTnEM HaJIIO6yO CTOpOHy KJIaBUNI (SEEK/AMS)BbI6epnte DopoXkKy, KOtOpO XOTnTePpNCBOITb Hax3BaHHe.
10ncJeIOBaTeIbHbIM HaKaTneM ENTER Bbl6epnte "PLAY" nnn "SKIP".
5 YTO6bI yCTaHOBnTb "PLAY" nnn "SKIP", NOBTOpnte onepaunu 4.
6ДвждынжмITE (MENU).
PpOuRpbIbATEJIb BO3BpaUaTcB O6bIHybIpeXIMBOCpOn3BeDeHnCD.
PnmuMeaHn
- Bы можete установь памерп "PLAY"и "SKIP" He bojee yem dans 24 dopoжek.
- Napametpr "SKIP" He moKet 6bItb yctaHOBneH dIy BcexdoopokekHa CD.
Bocnpoun3BeDeHne ToJIbKO HUxHbIX Bam dopoxke
BbIMoKeTe BbIbpaTb:
Pn3aHecEHn CTaHcN IN NaMrtb pa3daetc 3BykoBOn CnHaJ.
PpmeaHn
Annapat He 3aHocnt B namrBt cTaHmN CO CnabMnCnHAmO.Ecn ydaetc HAcTPONTbCnMb Ha OprAHueHHoe YncNo CTaHm,3a HEKOpToBIMN HomePbHe KnaBnAMm CoXpaHrTC paHee 3akpennHeHbte CTaHm.
EcnHnHaDcNneBbIeDeHKaOoi-NIOHOmep, annapat3aHocHTbOBIECTaHUNBnAmrTb, NaHnHaC 3TOr HOmepa.
B cnyuae ecn n bpnoirpbIbATEne HcD,Ha nncnnee noaIeTcra NMb o603haeHne dnaana3oHaBoHH, daKe ecn Bbl haxmmaete KnaBnU (SOURCE).
3aHeceHne B NaMaTb TOnbKO HxKhBix Bam CTaHcIe
BbMOxTe 3aHcTb Do 18 cTaHcN FM (No 6 cTaHcN Ha KaKdIu3 noDnAna3oHOB FM1,FM2 u FM3), Do 6 cTaHcN MW u Do 6 cTaHcN LW B IIO6oNocJeDoBaTeJbHOCTn No CBOeMy BbIbOpy.
1 NocJeIOBATEbHbIM HaxaTneM KnaBnWI SOURCE Bbl6epNTe KaueCTBe nCTOuHnKa CunHaJa paAnOpnpemHnK.
2 NocJeIOBaTeIbHbIM HaJaTHeM KnaBnIe MODE BbI6epNte Dmana3OH BOINH.
3 Haximma Ha IIO6yO CTOpOHy KlaBnSh (SEEK/AMS),HacTpoINTeCb Ha BOJHy CTAHm, KOtOpYIO XOTInTe 3aHeCTN B NaMrtb NOd DaHHoH HOMepHOI KlaBnSei.
4 Haxmnte Ha DBe cekyHdbi COOTBEcTBYIOUHOHomepHyIO KlaBnuy (c 1 no 6) DO NOBJIeHnHa dncJee HauNciN "MEM".
Ha dncnnee 3aropaeTcH Omeep daHHoN KJIaBmI.
PpmeaHne
Ecnn Bbl 3aHocnTe B namrTb HObyo cTaHnIO NOHomePHO KNABNIe, 3a KOtOpu yKe 3aKPeIeNHeApyra CTAHn, To MecTo paHee 3aHeceHHoB NnAMrTb CTAHn 3aMeT HOBa CTAHn.
Ecnn Bbl He MoXeTe HacTpOnTbcr Ha npdeUcTaHOBLeHHyIO CTaHcNIO
YtO6bI NaHaTb NOnCK HUxHoi CToAunn, HaxMMTe Ha LiO6yIO CTOpOHy KJaNbUnn (SEEK/AMS) (aBtOMaTHuecka HactpOikKa).
CkaHnPOBaHHe npeKpaaaeTcra, KOrda annapat HaxOaNT KaKYIO-HNbYb cTAHcIIO. IocneIobaTeBHO HaxMmaTe Ha NIObYIO cTOPOHy (SEEK/AMS), NOKa He NoIMaeTe CnHrAn HyxHcHb Bam cTAHcIIN.
PpmeaHne
Ecnn aBtOMaTnuecka HAcTPOKa
OCTaHbINBaTeCnIuKoM YAcTO, HAnMNTe
(MENU), 3aTeM NocJeIOBaTeNbHO HaKImaTe Ha
NIObYIO CTOPOHY (DISC/PRST), NOKa HA DCNpEE He
NoBHTCnHaNDmCb "LOCAL" (peXHM NOKaNBHO
NONCKA). Pocne 3ToR HoKAtMe H NaOMeHEny H2AKOM (+) CTOPOHY KNaBUNs (SEEK/AMS)
BbIbePIne "LOCAL-ON" n HaxMNTe (ENTER).
HAcTPOKa 6bEt npOn3BODInbCt NtBko
CTAHU C OTHOCHTeNbHO CNbHBIM CnIRHaNOM.
COBeTbI
KoJa BbI bIb6pnn napaMeTp "LOCAL-ON"Ha nCnIe, noKa anapat BeTeT nonck taHcN, BuHna HauNncB "L.SEEK".
- EcnB Bam n3BecTHa pa6OuaY qAcTota cTaHUn, nepedayu KOTOpB Bb XOTnE cLyWaTb, To HAKMITE Ha KaOe-To BpEma Ha IIObUc CTOpOHy KNaBnUs (SEEK/AMS), Noka Ha DmCnIe He NOBnTc3Ta YAcTota (pyHnaH NaCTpoJa).
PnCna6bom npHeMe cTepeonporpam FM -MOHOFOHueckn peXm
1 Bo Времприема радионередун НжмITE (MENU), 3aTeM NOCEДОВATEЛьно НжмайтЕ на Лобую CTOPОЧУ КлавшИ DISC/PRST), NOKA на ДИСПЛЕЕ He NOЯВИТСЕ Надиис "MONO-OFF".
2 HaximaiTe Ha NomeeHny 3HaKOM (+) CTOpOHy KJIaBmU (SEEK/AMS), Noka Ha dmCnIee He NoRbNTc HApNc6b "MONON".
3ByuHHe yIyUHITcA, Ho 6yJeT MOHOΦOHHueckm ("ST" Ncye3HET C dIcnpJIe).
3 Haxmte ENTER.
YtobbBepHyTcKaKobHOMypeKmUy,Bopeaun2Bb6epnte“MONO-OFF”.
063opФункциRDS
CnCTema nepeDAu paIIOaHbIX (RDS)- 3TO TpaHCJIauONHHa CnyX6a, KOtopa nO3B0JAEr CTAHUAM FM nepeDaBaTb DOIOnHnTeJbHyU cHpOByU INHcpOpMaHIO BMeTE C O6bUHbIM paIIOcHAnOM. Ba7a aBTOMo6HbHaN CnCTema npDeOCTaBnEe Bam MHOxEcTBo BO3MOxHOcte. Bot NlMb HeKOTOpBle HNx: aBTOMaTHuecka nepeHaCTpoKa Ha Ty Je pOrpamMy, PnocLyuBaHme DOpOXhIx CoO6UeHm I hAXoXJeHHe CTaHcMn IO TIny pePeDaBaemoe EIO pOrpammbl.
PpmeaHn
B 3aBnCmOCTN O CTpaHbI n peHNoHa MOrY 6bItb DoCTyHbI He BCE fynKlunR RDS.
CnCTemaRDSMOKETHe cpa60TaTbDOnJHbIM
OBa30AM,ecnnpepeBaAeMbIcHnANcNtUkOM
cna6nncn ctaHnA,baONHyKOTOpO Bbl
NaCTponNNbc,hepepeaTeDaHHbXRDS.
Инд�示ацnia Ha3BaHnA CTaHcNt
Ha3BaHne pInHnMaemO B daHHbIMoMeHT CTaHcIN BBICBeuHBaETcHa DCnPlee.
Bb6epnte ctaunio FM (cm. ctp. 16). Ecn Bn Hacptponinbc Ha ctaunio FM, KOTOPa nepedaet daHbIe RDS, To na3BaHne 3Toi cTaunz 3aropaeTcHa dncnnee.

PpmeaHne
Инданаць ".*" O3начаET, УТО пиинmaетс сгнан CTанци RDS.
U3meHHe noka3aHm dncnIeA
При Кадом Нахати Bamклавшн DSPL/PTY nOKa3aHnДИСПЛЕМEHЯЮТС CLEdIyUOuMm O6pa3OM:
Ha3BaHne cTaHcHn (YacToT) DaHHbIe PTY
Iocne Bb6opa HxHoro npaMeTpa DnCnpei abTomatueckn nepexoNTB pexm Motion Display (DbuxuicnDnCnne) uee3 HeckOJIbKO cekyHd.
BpeXmme DnKxuimcra DncPleB BCE npaMeTpbl npokpyuBaIOrTa Ha DncPlee OINH 3a dpyrrn NooUepedNo.
Cobet
Pexhm Motion Display Moxho OTKIouHb. (CM, pa3delen "I3MeHeHne 3aJaHHbIX npapaMeTPOB 3Byka n DcNnE" Ha ctp. 24.)
PpmeaHne
B cnyuae ecnn CTAnu, ha BonHy KOTopoR Bbl Nahtponncb, he npedeaet daHbIx RDS, hAdnCnne 3arOpaeTc Hndncb "NO NAME".
-AlbTePHaTnBhble YacToTbI (AF)
ФункцяальТернathьхчacToT (AF) abTomatueckn BbIbnpaet BOHу cHaHboJIe cnJIbHbIM CnIHaON M BaHHO paIIOrTaHcNIAIOHNO HcTeN nepeHaCTpanBaETcHa He He. BlaarOapra 3ToI ΦyHKUIN Bbl MoKeTe BO BPEMa dAnbHnx POe3dOK HENpepbIBHO CnyuATb OdHy n Ty JKe npOrpammy, He IcNbITbIBaR Heo6xOdmocTb BpyHyIO nepeHaCTpanBaTb pIneMHNK cOdHOBOLHb Ha DpyryIO.

CmeHa yactot OcyuectBJIaETcABTOMaTHueckn.
1 BbIbePHTe cTAnuFM (cm. cTp. 16).
2 NocJeIOBATEbHO HaxmMaTe AF DO NOBJIeHn Ha dncJIee HAdnscn "AF-ON".
Annapat NaHnHaET nonck pa6oTaUoIeRo Ha aJIbTePHaTINBHO B0JIne dpyrOro nepeDaTnKA c 6OJee CINlbHbIM CINrHaNOM B3ToJ Xe paDIOtPaHCJNUOHHO CTN.
PpmeaHn
- EcnB daHmPaiHOHe HET aIbTePhaTHBOHOro nepeMaTnKHaNcBam Heo6xoMocTn erO nckaTB,OTKnIOHTe FyHKuHIO AF nocneDobatbHbM HauKaTne KnaBmU (AF)do noRbJIeHnA hucnIee hauNcN "AF-OFF".
EcnHa niscnnee nonepemehNO mraIOT "NO AF" nHa3BaHHe cTaHnU, 3To O3Naayet, 7To aInnapat He MoKeT hAHTn pa6OtaUoCero Ha anbTepeHtBHO BOnHe pyrOro nepeDaTnka B daHHo TpAHCnLIOOHNo CTeN. - Ecnn Ha3BaHne cTaHcHm HauHnae t Mnratb Nocne ee Bbl6opa npr BkIIOUeHHo fynHKuW AF, 3to yka3bAeT h OTCyTCTBn e aIbTePHaTNBHO qACTOTbl.
IokaHa dncnlee(BteueHne BOCbMn CekyHd) MURAET Ha3BaHHe CTAnUHn,HaXMnTe Ha1o6yUc STOPOHy KnaBnUs (SEEK/AMS). Annapat Hauhet NONCK dyRouy qactotb c Temn Jx deAHHbIMPi (npOrpAmmHaJeHTNfKaUa) (Ha dncnnee noBnTcRaHnncb "PI SEEK" n 3Byk He cnbluEn). Ecn npHemnHKe MoJcet haTn dpTyIO qactOTy,Ha dncnnee noBnTcRaHnncb "NO PI" annapat Bo3BpauaeTcK paAhee bIb6paHHo qactOTE.
PpocnyuBaanpe pernoHaJIbHOn nporpaMMbl
ФункцЯ“REG-ON”(pernohaibna
Функця)daHHOro npneMHnka no3BOJnEeT
Bam ocTaBaTbCra hAcTpoEHhbIM Ha
pernoHaJIbHyO nporpaMMy 6e3
nepeKIOUeHry Ha dupyIoo pernoHaJIbHyIO
ctaHcNIO.(3aMeTbTe,TO npu 3tOM Bbl
doJKNbI BKIIIOHTb pfHKUIO AF.)
IVROTOBNTeMe npneMnIK yCTaHOBJEN Ha
"REG-ON”,Ho eCIn Bbl XOTnte OKJIIOHTb
3Ty pfHNKcHIO,CdeJaTe CneJeIOoee.
1 Bo Врема рпема радионерачи
навхмпe TE (MENU), 3aTeM
последова teльно нахимаи Te
лобуюстору Клавиши (DISC/PRST),
пoka на диспjee He повту ся надпсь
"REG".
2 HaximaiTe Ha NomeeHny 3naKOM (+) CTOPOHy KnaBmN (SEEK/AMS)do NOBJIeHnHa dncJIee HaIINcN "REG-OFF".
3 Haxmte ENTER. YHTnTe,TO npBbIKNoeHHo peHOnaIbHO fYHKcHn (noLoXeHne "REG-OFF") npHeMnK MoKeT nepeKnIOuOaTbCHa Ha DpyrUo peHOnaIbHyO CTaHcIO B ToJ Ke paAnOTpaHCJIaONHO cETN.
ДЯТTOROчTOбыВHOBБВКЛЮЧИТБpernoHaJIbHyUФуNKсИМ,ВВblIeONMCaHHOnonepaun2Вbl6epuTe“REG-ON”.
PpmeuHne
Даннагфункпг He paobotaetВ CoeINHeHHOM KoponeBCTBe nВ HeKToTOpbIXdpYnX cTpaHax.
PpneM ue3BbIaHbIX COo6eHn
EcIn BO BpeMa npocnyuBaHnra paAnonepeDaun noCTynaeTpe3BbUaHnoe COo6ueHne, nporpaMma aBTOMaTneceKn nepeKIOuOaETcHa Hrero.EcIn Je Bbl cLyuaTe He npmeHMnK, a DpyroN iCTOuHnK, ue3BbIauHbIe COo6UeHNs 6yDyT CbIuHbToIbKO pRn BVKnUoyenHo fynKcN AF nIN TA B noJIoKeHN ON. B TAKOM clyuae annapat abTOMaTuYeCKn peKEIOUaTeCn Ha 3TN COo6UeHN, He3abNCmO OT TOR, KaKo INCTOChNK Bbl npocnyuBaTe B daHHbIMOMeHT.
- ECNI COOTBETCTBYOUIAN,ДОПONHITeJIbHAI annapatypa He NOJKNIOYeha,DAHNAI NOIuHnA Ha DiNCNIIe He NORBNTC.
Haxkatae KlaBnUn MODE n3MeHReT cyHKUIO CJeDyUOUM 6pa30M:
- Ппемнник: FM1 → FM2 → FM3 → MW → LW
- Празимрьватей BC*: CD1 → CD2 → ...
- Понирьвateлb MD*: MD1 → MD2 → ...
- ECIN COOTBETCTBYKUOaJI DONOHNHTeHnA Hannapatya He noKnKIOHe, daHHbIe no3uHn Ha nDcPiHne He noRABRIOTCH.
3aBODCKaYcTaHOBKa pa6oeryo HnnpaBLeHnpeyIaTOpOB nok3aHa Ha npBODIMOM HnKe pncyHke.
Bb mokeTe 3aDaTb cIeDyUOuNe npaMeTpbl: SET (ycTaHOBka)
- CLOCK (Yacbi) (CTp. 8)
- CT (Время) (Стр. 21)
BEEP-BKJIIOUeHHe/ByIKJIIOUeHHe 3BYKOBOrO CnHaJa. - RM (noBOpOTbI dInCTaHcIOHHbI nepeKJIIOUaTeJI) -ДЯ n3MeHeHnRA pa6oHero hAnpaBNeHnR peYnAToPob NOBOPTOHorO nepeKJIIOUaTeJI.
-BbI6epnTe "NORM"ДЯИСПОЛБЗOBAHNY NOBOPOTHOrO nepeKNIuOaTeNBA NOLOXKeHIN, ONpeDEJIeHHom N3ROTOBHTeNeM.
BbIbepnTe“REV”BcnyaeMOHTaxa nOBOpOThOroNepeKIOUChaTeJIHa npaBoi CTOpOHepyeBOI KOIOHKn.