
STWA 1364 CB - Croque monsieur clip BOMANN - Free user manual and instructions
Find the device manual for free STWA 1364 CB BOMANN in PDF.
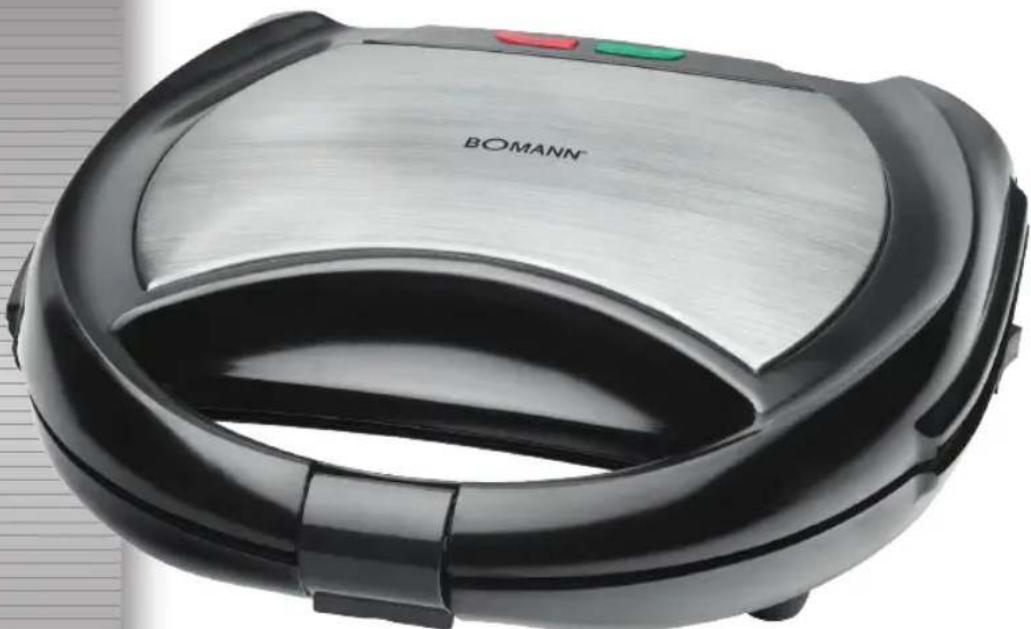
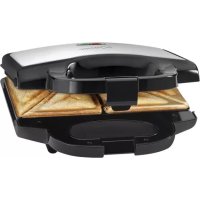
| Product type | Multifunction cooking appliance (sandwiches, waffles, grilling) |
| Brand | Bomann |
| Model | STWA 1364 CB |
| Power supply | 230 V ~, 50/60 Hz |
| Power | 650 W |
| Net weight | Approximately 1.55 kg |
| Dimensions (L x D x H) | Approximately 24 x 24 x 10 cm |
| Plate material | Non-stick |
| Included accessories | Sandwich plates (A), waffle plates (B), grilling plate (C) |
| Number of interchangeable plates | 3 sets |
| Indicator lights | Red (power), green (ready) |
| Locking system | With release button |
| Functions | Cooking sandwiches, waffles, grills |
| Safety | Hot surface (caution burns), do not immerse, use under supervision |
| Maintenance and cleaning | Clean plates while still warm with a damp cloth, chassis with a damp cloth, lightly oil after drying |
| Spare parts and repairability | Repairs by professional only, power cable replaceable by manufacturer or authorized service |
| General information | Protection class II, household use only, do not use outdoors |
Frequently Asked Questions - STWA 1364 CB BOMANN
User questions about STWA 1364 CB BOMANN
0 question about this device. Answer the ones you know or ask your own.
Ask a new question about this device
Download the instructions for your Croque monsieur clip in PDF format for free! Find your manual STWA 1364 CB - BOMANN and take your electronic device back in hand. On this page are published all the documents necessary for the use of your device. STWA 1364 CB by BOMANN.
USER MANUAL STWA 1364 CB BOMANN
MULTIGRILL ST/WA1364CB
Multifunctionele grill • Gril à usages multiples • Plancha multiusos • Griglia multiuso • Multi-purpose grill Grill wielofunkcyjny • Multifunkciós grill • Baratočyн��ионьнурпь • Yневерсаньнурпь
jol jol sannia jol
WAARSCHUWING: Risk of burns!
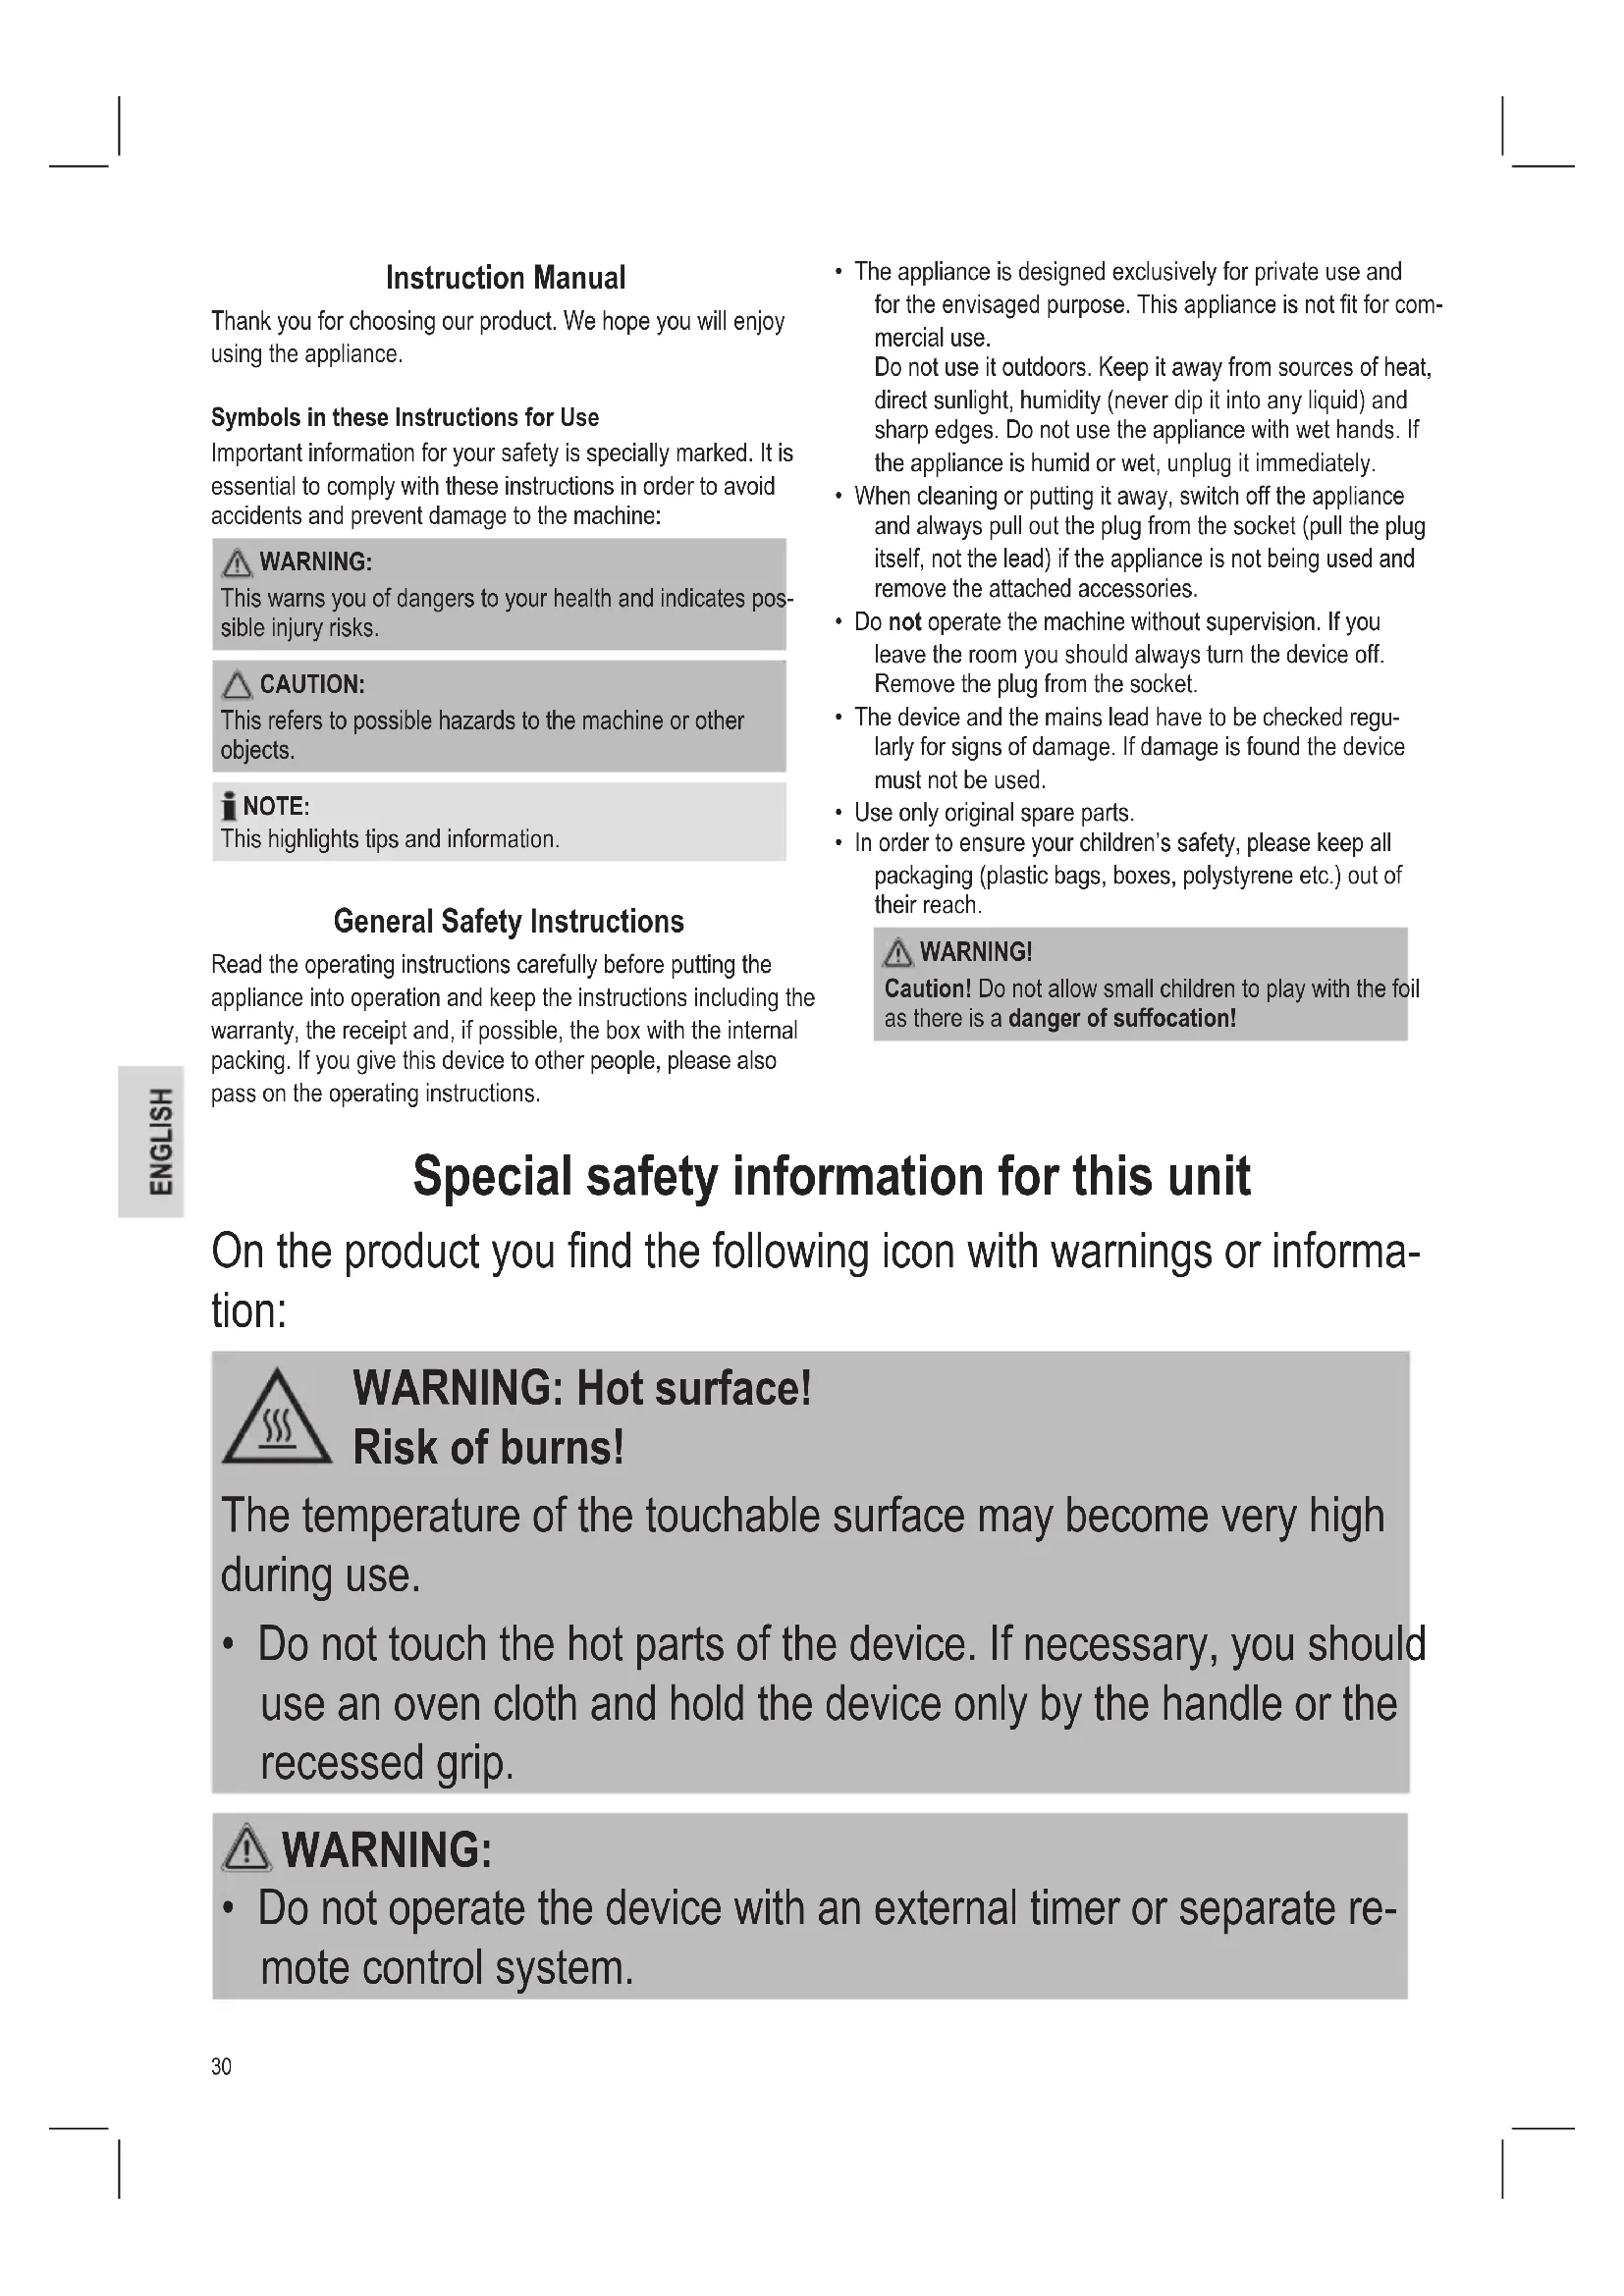
Thank you for choosing our product. We hope you will enjoy using the appliance.
Symbols in these Instructions for Use
Important information for your safety is specially marked. It is essential to comply with these instructions in order to avoid accidents and prevent damage to the machine:

WARNING:
This warns you of dangers to your health and indicates possible injury risks.

CAUTION:
This refers to possible hazards to the machine or other objects.

OTE:
This highlights tips and information.
General Safety Instructions
Read the operating instructions carefully before putting the appliance into operation and keep the instructions including the warranty, the receipt and, if possible, the box with the internal packing. If you give this device to other people, please also pass on the operating instructions.
- The appliance is designed exclusively for private use and for the envisaged purpose. This appliance is not fit for commercial use. Do not use it outdoors. Keep it away from sources of heat, direct sunlight, humidity (never dip it into any liquid) and sharp edges. Do not use the appliance with wet hands. If the appliance is humid or wet, unplug it immediately.
- When cleaning or putting it away, switch off the appliance and always pull out the plug from the socket (pull the plug itself, not the lead) if the appliance is not being used and remove the attached accessories.
- Do not operate the machine without supervision. If you leave the room you should always turn the device off. Remove the plug from the socket.
- The device and the mains lead have to be checked regularly for signs of damage. If damage is found the device must not be used.
- Use only original spare parts.
- In order to ensure your children's safety, please keep all packaging (plastic bags, boxes, polystyrene etc.) out of their reach.

WARNING!
Caution! Do not allow small children to play with the foil as there is a danger of suffocation!
Special safety information for this unit
On the product you find the following icon with warnings or information:
WARNING: Hot surface!
Risk of burns!
The temperature of the touchable surface may become very high during use.
- Do not touch the hot parts of the device. If necessary, you should use an oven cloth and hold the device only by the handle or the recessed grip.

WARNING:
- Do not operate the device with an external timer or separate remote control system.

WARNING:
- Beware of any steam coming out of the sides of the device during the baking process and when opening the baking surfaces. Danger of burns!

CAUTION:
- Place the unit on a flat and heat-resistant surface. In the case of sensitive surfaces please place a heat-resistant board under the device.
- In order to prevent heat from building up, do not put the unit directly underneath a cupboard. Ensure that there is enough space all around!
- Do not move the device when it is working.
- Bread is combustible. Therefore the device should never be used in the vicinity of or below curtains and other combustible materials.
- Please ensure that the mains lead does not come into contact with the hot sections of the device.
-
Allow the device to cool down before cleaning it and putting it away.
-
Do not try to repair the appliance on your own. Always contact an authorized technician. To avoid the exposure to danger, always have a faulty cable be replaced only by the manufacturer, by our customer service or by a qualified person and with a cable of the same type.
-
This appliance can be used by children aged from 8 years and above and persons with reduced physical, sensory or mental capabilities or lack of experience and knowledge if they have been given supervision or instruction concerning use of the appliance in a safe way and understand the hazards involved.
Children shall not play with the appliance. -
Cleaning and user maintenance shall not be made by children unless they are older 8 years and supervised.
- Keep the appliance and its cord out of reach of children less than 8 years.
Overview of the Components
1 Lid
2 Red control lamp
3 Green control lamp
4 Release button
5 Locking device
6 Power switch
A Sandwich plates
B Waffle plates
C Grill plates
Starting-up the unit
Instructions for Use
Before you make the first sandwiches for consumption:
- Remove any packaging that is still present. Unwind the mains lead completely.
- Clean the housing and the baking surfaces with a damp cloth.
Non-stick coating
- Lightly grease the baking surfaces before the unit is used for the first time.
- Use the appliance for about 10 minutes with the toasting surfaces closed (see "Using the unit").
- Remove the mains plug from the socket and allow the device to cool down.
- Bake 3-4 sandwiches as a test.
i NOTE:
- Any smoke or smells produced during this procedure are normal. Please ensure sufficient ventilation.
- Do not eat sandwiches/waffles or grilled food prepared during first-time operation!
After the device has cooled down, wipe the baking surfaces off with a paper towel.
Electrical connection
- Check whether the mains voltage that you want to use matches the one of the device. You will find the information about this on the type plate.
- Insert the plug in a duly installed protective contact socket. The red control lamp will light up.
Switching the appliance on/off
- Set the power switch (6) to the "I" position to turn on the appliance.
- To turn off the appliance, set the power switch to the "O" position and unplug the appliance.
Using the unit
Inserting/changing of the cooking plates
Make sure that the plug is not inserted when inserting or changing the cooking plates.
WARNING:
The machine and the baking plates must have cooled down completely!
- Release the unlocking system (5) and fold the lid (1) upwards.
- If baking plates have already been inserted into the device, press down the release buttons (4) on the insides of the handles in order to release the baking plates. Then remove the plates.
- Now insert the desired baking plates until they lock in place. Please note the pins on the edge of the baking plates. The device is supplied with one set of baking plates each for sandwiches (A), wafers (B) and for grilling (C).
- Close the appliance again.
General operating instructions
- Keep the baking surfaces closed while heating.
- When the warm up phase has ended, the green control lamp will light up.
- The red control lamp remains on to show that the device is working.
- The green control lamp switches on and off during baking in order to maintain the baking temperature.
- The baking section should always be closed in the intervals between baking.
CAUTION:
Do not use pointed or sharp objects for removing sandwiches/waffles or grilled food in order not to damage the cooking surfaces.
Toasting sandwiches
NOTE:
Lightly spread the outside of the bread (the side coming into contact with the toasting surfaces) with butter or margarine. That way your sandwich can be easily removed afterwards from the sandwich toaster.
- Release the lid catch and fold the lid up until it remains open.
- Insert a double sandwich into each side.
- Gently close the lid. Close the lid catch.
NOTE:
The baking time depends on your individual taste. The longer the sandwiches remain in the device, the greater the level of browning.
- Open the lid catch carefully and then fold up the lid.
- Remove the toasted sandwiches with a wooden fork or similar item.
- Lightly grease the baking surfaces again as required after each baking process.
Baking waffles
- Loosen the lid lock (5).
- Open the lid (1) and add a dipper of dough onto the center of the lower cooking surface. The dough should be filled in quickly as otherwise the wafers will not brown evenly. Please ensure that you measure in the quantity of dough correctly, as excess dough runs over the edges and soils the device. Gently close the cover. Do not press the handles together.
NOTE:
The baking time depends on your personal preferences. The longer you keep the waffles in the grill, the darker they get.
- Please proceed as described under "Toasting Sandwiches", points 4 to 6.
Recipe for waffles
5 egg yolks, 5 dessertspoons of hot water, 100g sugar and 1 grated lemon peel should be mixed together until frothy and then a mixture of 1/2 teaspoon baking powder and 150g flour should be stirred in. Beat the 5 egg whites stiff and fold them into the batter.
You can find further recipes in our recipe books or else you can use a ready-made baking mix.
Grilling
NOTE:
- Rinse the meat before grilling.
-
Dry the meat with a paper towel and season as desired.
-
Release the lid catch and fold the lid up until it remains open.
-
Place the food to be grilled on the lower grilling plate and then close the lid. Please do not press the handles together. The cooking time depends on your individual taste.
- After approx. 2-3 minutes check if there is gravity on the lower grill plate. If necessary, remove the gravity with a paper towel.

WARNING: Risk of burns!
The grill plates are very hot!
- Once the food has been grilled enough, remove it with a wooden fork. Do not use any pointed, sharp or cutting objects.
Switching Off
If you would like to interrupt operation or switch the device off, remove the plug from the socket. The red control lamp goes off.
Cleaning
WARNING:
Always pull out the plug from the mains socket before cleaning and wait until the unit has cooled down.
- Do not immerse the device in water! It could result in an electric shock or fire.
CAUTION:
- Do not use any wire brush or other abrasive objects.
- Do not use any acidic or abrasive detergents.
Baking Surfaces
- Remove any food residues while they are still warm with a damp cloth or paper towel.
- Wash off the baking surfaces with a soft sponge and soapy water; then wipe with clean water and dry thoroughly with a soft cloth. After drying please apply a thin film of edible oil to the surface.
Housing
Clean the housing after use with a slightly damp cloth.
Technical Data
Model: ST/WA 1364 CB
Power supply: 230 V~, 50/60 Hz
Power consumption: 650 W
Protection class:
Net weight: approx. 1.55 kg
The right to make technical and design modifications in the course of continuous product development remains reserved.
This device has been tested according to all relevant current CE guidelines, such as electromagnetic compatibility and low voltage directives, and has been constructed in accordance with the latest safety regulations.
Disposal
Meaning of the "Dustbin" Symbol
Protect our environment: do not dispose of electrical equipment in the domestic waste.
Please return any electrical equipment that you will no longer use to the collection points provided for their disposal.
This helps avoid the potential effects of incorrect disposal on the environment and human health.
This will contribute to the recycling and other forms of reutilisation of electrical and electronic equipment.
Information concerning where the equipment can be disposed of can be obtained from your local authority.
Instrukcja obslugi
CTC Clatronic Sp. z 0.o.o
He KopnctyIteca roctpmm npedMeTam nIa BmMaHHaCAnDbivB/BApeJIb a6o npOdykTIB, npriroTOBneHnx Ha rpiJI,06 He noWkoJNTn nobepxHi JnCTIB.
PiicmaxyBaHHcaHdbiH
I P N I M I T K A.
Hamactitb 30BHIHII 6IK xIi6a (noBepxHIO, kA topKaTMMeTbcra NobepxoHb IJI BnIKaHHa) MacIOM YI MaprapHOM. Toi nicra BnIKaHHa 6yTebpod JERKO BnIMaTMeTbc3 TocTepa.
- BiDkpniTe 3amok KpwnKn Ta BiDkpniTe npnaIad, po3Knab-
- POKnaiTb 3 KoxHoro 60ky no noDbiHOMy 6yTeP6pOy.
3.ObepexKHO 3akpiTe npnla.D.3akpiTe 3amok KpnuKn.
ITPIMITKA.
Yac BnikahH3aIeXHTBaIIMOCO6NCTM CMAKOM. Ym DoBwe 6yTePbOOn 3aIIuHaTMyTbC8B PnJaDi, Tmpy'MHIiUMN BOH CTaBATmyTb.
4.ObepexHo BIDKpInTe 3aMOK KpINsKn Ta BIDKpInTe KpINsKy.
5.Binmitb niicmaxkehi bytepe6pOu n depeB'raHO BndeJIkoH 1n noi6HIM iHCTpyMeHTOM.
6. Μερα3 tpxn 3maactitb nobepxhi dπa BnɪkɑnH. Lc cnid poBntu no 3akihueHHI KOKHOrO BnɪkɑnH.
BunikannBaepenb
- Po36nokyuTe KpuuKy (5).
- BiKpnIe KpnKy (1) Ta HAIInTe Yepnak TicTa B cHTp HIXKnBoi NOBepxHi IINBnIaHnHa. Ticto CnId HAIuBaTu WbNko, IHAKWe BaPnI 3acMaKaTbcn HEPiBHomipHo. YneB HiBCr y npAunBnHi KInBKOci TicTa, OCKInk 3aBe TICTo npePnIeTcR cepE3 KpaT a 3abpydnHtbpnnaD. ObepexHo 3akpiNe KpnKy. He npntncKe pUKN oHa do Ondoi.
I P N I M I T K A.
Yac BnikahHnaJaeKntb BiD ocobctnx Bnoo6aHb. Ym DOBwe TpMaTn BaPnI, Tm TemHiue BOH CTaOtB.
3.卍6 npoObKNTn,nepeiDiTbdo nyHKTIB4-6 po3diy“PiCMAkzyBaHHcaHDbiv"
Peuen m eaeben
Bi3bmit5 8eHnx XOBTKIB, 5 DecepTHNX loxok rapyoi BODn, 100 ruykpy Ta 1 Hatepy zepny JIMMOHa. Bce nepemiyTe, DOKn He yTBopntbc nHa, Notim DoaaiTe 1/2 yaHoi loxkn
po3nyuBaHa Ta 150 r 6opoUHa i 3HOby nepemiuAaTe BCE ue. DdaIte 5 6iNkB Ta 36nIte Ticto.
Y haui Kn3i peuertt Bn 3moxe t3aHti n Hsi peuentn a6o MOKHa BNkOpNCTOBYaTN FOTOBY Cmii DnBnikAHH.
PnpirotyBaHHHa rpiJl
IPIIMITKA.
-Перед поатkom споночь m'ясо.
Bucyitb m'co panepobm pyuHnKOM i 3a notpe6n do-daIte npnpabn.
- Biikpnite 3amok kpiuKn Ta Biikpnite npnna, po3knab- nio.
-
Poklaɪt b npódykT ha HnKhi rplIb-lnti 3akpniTe kpiKу. He npɪtnickaɪte pyuKn OJHa do OJHOi. Yac BnɪkaHHa 3anexkɪt b BiD oOcbNCTX BnOdo6aHb.
-
Пиблзно Урета 2-3 XВИПИН поЕБИРTe, ч CTIK CIC 3 M'Яса на НИЖИ NOВЕРХИ. 3a Notpe6n BДДАЛТь сeй CIC nAnepobIMpyшнkom.
PONEPEDXEHHA.Pn3K onikib! Nobepxhi rpnna dyke rapa!
- Kojn npodykTN DoCTaTHbO niCmaxKnIncb, BnMItb IIx DepeB'raHO BUndEkoIO. He KopncTyntecra roctpmm npeiMetamn.
BIMKHeHH
Kaio nopti6ho nepeBaTu po6Otu Yn BmKHyTu npucTpi, Bu- mItb BnKy 3 po3EtKn. YepBoHa KOHTpoJIbHa JAmNoUka 3raCHe.
UH
A NOPEPEKHEHH.
-ПередчишенимзавдиВИТЯгУTe BUNKу 3po3eTkn KINBЛЕннТа YeKaIte,пOKи пплад OCTURHe.
He 3aHpyIe npnla y Body! Lc moKe npn3BecTn do ypaXeHH eNktpuHm Ctpymom Nn NoKexi.
YBAGA.
He KopnyTeca npToHOO uTkoH Yu iHmM a6pa3nB-HmN npEmdetamn.
HeKOpNCTyITEcRAJODHMMKNICJIOTHMMa6pa3NBHN MmHmM3acO6amn.
Pobepxhi dny BnikanHH
BONOROIO TKAHINHOU YI napePOBOIO cepBeTKOIO yCyHbTe 3aIIuKNI iKi, IOKN BOHN TEJI.
- PpOMnTe NOBepxHi DnB BUNiKaHHa M'RAKO H y6KOHO, 3MOeHO B MInbHi, a nOtIM y uCTiB BoDi; peTeNbHO npoTpIb Ix cyXIO TKAHNHO, 106 BOH 6yNl NOBHCIO CyMN. PicnBa BucNXaHHa HaHeCtB Ha NOBepxHi dN BUNiKaHHa ToHKm Iap xapOBOoi OII.
Kopnyc
Yka3bIbaeT Ha BO3MOxHyO ONaCHOCTb IJI N3DeJIIMN I dpynx OKpyxaIOxu npEIMTeOB.

ПОНМЕЧАЙ:
DaetcoBebu INHOpMaunIO.
06uye yka3aHnno TeXnke 6e3onacHOCTn
IpeepHaayanom 3KcNpyaTaun npn6opa BHNMaTeBbHO npouHTaTe npnnaRaemyu HnCTpykCIO NO 3KcNpyaTaun n COxpaHNTe ee B HaDeXHom MeTe, BMeTe C rapaHTnHBIM TaHOOM,KaccOBbIM YeKOM I,NO BO3MOXHOCTN,KAPTOHHO KoPobKOc yNAKOBOUHbIM MaTepnaIOM.Ecn DaTe KOMy-Pl6o
nonoIb3OBAtbc npn6opom, o8a3ateJIbHO daTe Bnpndauy daHHyIOHCTpyKUIO NO 3KcNpyatauIN.
PnroToBka np6opa Ka6oTe
Hnctpykunno 3Kcnnyataun
PpexdyeBb npiroTOBnTe dnyynoTpe6nHnB nniuy nepBbie caHDbu..
- YdaJIte yyaKOBky, ecNI taKOBa IMeETc. POnHocTbO pa3MOTaIe cTeBOI shHyp.
- PpOtpnTe KOpNc n NekyUne noNyΦopMbblBnaXHOB TpAknKoN.
HenoDropaMaNoBepxHocTb
- Pn nepBOM nOJIb3OBaHm CMAKbTe NOBepXHOCTn NOJyΦoPm KInpOM.
BKnIOuHTe npn6Op c 3akpbItbIMn NOIobNHkAMn npm. Ha 10 mHyT (cm. 3KcNpyataa/npaDOK pa60tbl). - BbIbTe ceTeBOI uTeKepe n3 po3eTKn I daIte np6bopy OCTbITb.
- IcneKeIte Ha npo6y 3-4 caHdBvHa.
I P N I M E U A H N A:
-ПОЯВЛЕНЕ ПЕКORO ДБИМА И NOCTOPOHHERO 3ANAXA
при зтои пицEDуpeяВЛЕнE HOPMaJIbHoe.ОБс-
пeчыTe DOCTaTOUHyI BENTINJRAU NOMeUHeHЯ.
He ynoTpe6nIte B nIy caHbNHyBaΦn INn XapeHbI Ha rPnIN IPOyKTB1, ecNn OHn 6bln npiroTOBJIeHbI BO Bpemr NepBOrIOcNOJb3OBAHn annapata!
- Pocne toro, kak npnbop octbI, npotpnte nekyuine nolyfopmb6ymaxho caTko.
IopKJIIOUeHne K cetn
- Поверп, COOTBeTCTByeTЛи сеТоБе HanpЯжене HOMHaJIbHOMy HanpЯжени npi6opa.Инфopmaцяо 6. ATOM CODEPЖNTcR Ha TINOBОТ TaIInuKe.
- BCTaBbTe cTeBvU BnIky B po3eTky C hAnpJxHHeM CeTH, OCHaUeHHyU 3aUHTbIMN KOHTAKTAMN U yCTaHOBJIeHHYU B COOTBeTCTBmC ppeDnncAHnMn. 3arOpNTcR KpaCha R KOHTPOlbHa JAmna.
BkIIOueHHe/BbIKIOueHHe annapaTa
- YTO6bI BKNIOUHTb aannapaT, yCTAHOBIne BbIKIOHAteJIb 3NEKTPoINrTaHnR (6)B noJooKeHne "I".
- YTO6bI BbIKIOHITb annapat, yCTaHOBITE BbIKIOUATEJIb 3NEKTPoNITAHnB NIOJXeHHe "O" IN OTKIOHITe BUNIKy 5HypaOT cETn.
3Kcnnyataun/npaokpa60TbI
BctabneHHe/3aMeHa nOlyΦoPm
Ipeep BCTabJIeHmE mIIN 3aMeHOJ nOlycOpM y6eIITecbB TOM, YTO CeTeBaBnKAbBbHyTa n3 p03ETKn.

IPEyIPEXDEHNE:
DaiTe N3dEJIIO IIINTKAM NONHOCTbO OCTbIT!
- Pa36nokpyuTe CnCTeMy (5) n OTKINbTe KpbIaKy (1) BBepx.
- EcnipMbpIgnpnB np6ope yke yctahOBneHbI, HaxmTe, noxaynta, Ha KhoNp pa36nKpOBoKn (4) Ha BHTpeHHe CTOpHe pyEe, YTO6bI pa36nKpOBoTa bΦopMbI dIg npJy. Y6epInTeΦopMbI dIg npJy.
- BCTaBbTe Heo6xOdmyu foOpMy dIy BblneKn,do 0Kcaun. O6paTnte BHMaHne Ha BblcTynbHa KpOMkax 0pm. N3dEInne yKOMJIeKToBaHo pa3NHyBMn fOpMaMn DnBbIeKn: dIra caHDbUeY (A), BaFeIb (B) n dIy noJXkapNBaHna Ha rPnne (C).
- 3akpoTe np6op.
067aHnctpykunno3cknyatau
BoBpempa3oRpeBaDepKHTeNoIyΦopMbBaΦeIbHnCb3aKpbITbIMN.
-ПоЗавершенифа3ыharpeванязагорпсязelenог
КOHТрОЛьноглamма.
- Kpacna KOHTpOJIbHnJaAMNoUc KaCBETTcA JaIbWe n CnHaJIN3npyEt rTOBHOCTb np6opa.
3eHeHAR KOHTpObHAR JIaMIOUcK BKNIOuHaTeCn N BbIKHOaEcTcB BO BpeMa pa6oTb, YTO6bl NOdEprXaTb yCTaHOJIeHHyIO TEMnepaTyPy BblneKn.
B nay3ax depknte npdyopmbi Bcerda 3akpbItbIM.

BHIMAHHE:
He nCnoJb3yIte ocTpokoHne HnOcTpblpe npedMeTbI IaI N3BLeueHn CaIbUeH/BaΦeN bIi JapeHbIX Ha rPInE npoDyKTOB, YTo6bl He nobpeNTb JapOuHbIe NOBepxHOCTn.
PojdkapnBaHne caHDbuyei

IPIMEYAHNA:
HamaxkTe BHeHIO CTOpOHy caHBuHa (CTOpOHy, KOtOpa BOIeT B KOHTAKTC NOnyΦopMo) CINBOUHbIM MacnOM IIN MaprapHOM. 3To No3BOJNT BnOcNeDCTBn 6e3 Tpyda OTDeIITb CaHBuHOTΦoMpbl.
- OTKpoIteФнкcatopКpbIiKInи NOdHmMaIte KpbIiKByBBePxДоТexNOp,ПОКаОHa He OCTaHOBITcB OTKpbITOMNOJIOKeHn.
2.ПОLOXINTEВΚAKDyHnФOPMпр�TOBJIeHHbI 6yTeP6- pOДСнаннКоМжdy2TOCTAMN.
3.ПлавноЗakpoиTe кршky.ЗakpoиTe ФнкcaTOp кршк.

IPIMMEAHNA:
BpemByIeKnIeNoPiHOro Bkyca.EmDolbWe CaHDbNvHaxOuNTcB Neu,TeM TemHei OH NOpJkapnBaETc.
- Octopokho OTKpOHTe pKcTOp KpbIuKN N OTKINbTe KpbIuKy BBepx.
-
TocTbI BbIHMaTe DepeBraHHoB BuNKo NIN Yem-Hu6yDb noDo6HbIM.
-
Nocne KaKDoRo npoxoJa, no nOTope6HocTn, cIeRka Cma3blBaIte nOlyΦopMbI MaCnOM.
BbinekaBaepelb
1.Ocbo6oJnte3aueJkyKpbIuKn5.
2. OTKpoIte KpbIshky (1) n do6abBe TnpuHIO TecTa B ceHTp HIXKHeJ kapOCHNo NOBepxHocTn. HanBaTb Heo6XoIMo 6bICTpo, mHaue BaФIn He nOlyuAT paBHomepHyU, KopuHc HEBYIO OKpacky. Do3pyTe TcTO npaBnIbHo, n3nIuKn TcTa 6byT BblDaBHeHb 3a KpaN n 3arp3HrT n3dEIne. PJIaBHO 3akPoITe KpbIshky. PyKn pN tOM He cKImaHTe
ITPIMEYAHNA:
BpemnojkapnBaHn3aBncntOTBaunxNnHybIX npednoTuHn. YemdoJbSe Bbl6ydeTe depXaTb BaФnB rpnE,tem TemHee OOn 6ydyT.
- NocTynaTe, KaK 3To 6bIIO onncaHO B noDnyHkTaX 4-6 rnaBbl "NopJkapnBaHne caHDbVHe."
Peuenbuckbumhbxeaefelb
CmeaIte n B36eTe Do neHbI: 5 rNHyIx JKeIKNOB, 5 CT. IooK eRopayeB OoBi, 100 r caxapa n npOTepyIO uKypKy IImMOHa, 3aTEM 3aMeCITE TcTe co 150 r MyKn i 1/2 yaiHOI NOKKn NPOoSHA dIy BblneuKn. XopoIo B36eTe 5 rNHyIx 6eIKOB n 3aMeCITE IN B TcTeO.
Dpyrme peeentb Bbl hainTe BpeeTpyhbx cnpaBOHnKax nIIN pImeHnTe roTOBbI cMecn, PpeNlaraemble TropOBnei.
PdKapNBaHneHa rpnne
IINPIMEYAHNIA:
-Опοлочи Te Mropeяд Зарков.
- BbicyuTe Mco 6ymaxKbIM NOnoTeHcEm I NocbInbTe CneunrMn NO BKcy.
- OTKpoIe ΦnKcATOp KpbIuKIn I NOHmMaIe KpbIuKy BBepx Do Tex Nop, Noka OHa He OCTaHOBITcR B OTKpbITOM NOJIOXeHN.
- Pa3mecTne npOdykTbHa HnKHe nIyOpme n ocToPoxH0 3akpoTe KpbIuKy.PyKn BmecTe He CkMaTb. Bpemr noJkapnBaHn INDINBHyaNbHoe.
3.Ппмерно uepe3 2-3MHHytblnpOBepbTe,poBnncraN COK B HxHKeH qactn rpnI. PpH Heo6xOdMocT ydaJInte BblIINBUnsCOK bMyaxHbIM NOnOTeHcEM.

INPEUYIPEXKDEHNE:OnachocTB noJyehniorob!
PnB ouH CnBHO HarpBaetc!
- KOrda npOdykTbI DoCTaTOUHO npOxapAITcA, CHMnTe nX C cOpMbI pRn NOMoU IN DepeBraHHOB BVILKn. He nOlb3y- Tecb IINr 3TORO OCTpbIMN, 3aTOUeHHbIMN INn peKyuImN INpeDmetAmN.
BbIKJIOueHne
Дя Вькюецни пибopa ИИп néрьва в paobTe Bbytaцп Te Bnky n3 po3eTKI cETN. KpacHа KoHTponbHЯ JAmnoUka NOTyxHET.
UNTKa
IPEyIPEXDEHNE:
- Pered YnCTKoi BceIa BbIHMaIe BeBNIky n3 po3ETKn I XnTe Noka npnbop octbHET.
- He norpykaite npibop B body! 3to moKet npnbectn K npapKeHIO 3neKTpuHeckm TOKOM JINI NOkapy.
BHIMAHINE:
He npimehnIte npoBOIOUHbIe IcETKN NIN npedMeTbIC a6pa3nBbIM NOKpbITnEM.
- He npimEnHnTe CnIbHbIe Nnn a6pa3nBbIe MoIOuIe cpeDCTBa.
Tekyune npyofopmbi
- PnropeBwne K cTeHKam CKOBOpObl octaTkn nIuIN Heo6XoIMo ydaJrTB eue B TeNlOM COCTOHN npn NOMOuBnaKHO TpAKn INI bymaxHoH canfeKn.
- Пекушип полуфорmbi BBIMоITE ry6koC MblHBIM pactbopor, npOTpTe ry6koC qHCTOи BODОИ TuaTeNBHO BbITPte Hacyxo MЯrkOТ prIKNo. Iocne NOHOrO npocbixaHЯн HaTpTe NOBepxHOCt b CKBOPoDbI NIIeBbIM MacIOM.
Kopnyc
IIO OKHuaHn pa6oTbI npOtpnte Kopnyc cneRka BnaXhoi TpIKNo.
TexHnueckne daHHbIe
MoeB: ST/WA 1364CB
Iotpe6nemar moHocb: 650 BaTT
Klacc 3aunrbl:
Bec HETTO: npMepno.1,55 K
CoxpaheNo npabo Ha Texnueckne N KOHCTpykUHOHbIe N3MeHeHnB pamkax npoJOnJaIOuSeIcra p3pa6Otkn npOyKTA.
3To n3deneHne npoHIO BCE Heo6xOaMbIe n aKtYaNbHbIe npOBepKn, npedncaHbIe dInpeKTHBOI CE, K npm. Ha 3NeKTpOMaHTHyO COBMeCTUMOCb I COOTBeTCTBVe Tpe6OBaHnM K H3KOBJbTHoI TEXHKe, OHO 6bJIo TaKKe CkOHCTpyuPoBaHO n NoCTpoEHO C yYeTOM NocJeDHNX Tpe6OBaHn I NO TEXHKe 6e3OnacHOCTN.
pJ 3-2.3
a 1
AaBaa
1.3a
111
4
Aabla 1 1 1 1 1 1 1 1 1 1 1 1
j j j j j j j j j j j
Jaaal
品
y = - 12x + 3 BC//l
yj j 1
aiee eae aee
ABC 为等腰三角形
aBILS 190
abis gl aianas 1 yba 5 piaa
jill chai
jiaabaiaiu jy gao palaal laiy allj y
1110a 2
Lgaii jyogw gao aai iiaai jaiil cai
y j yqill ay, auii iiaai aaii laai iiai ciay
aalil aollll yj jullll
y
ayaii ciagai
ST/WA 1364 CB.
60/50 230
650
如果
1.55
yglill jg aayaaoya yiaeclj 1j g jalb
lilipid jiuail
Jia dai all aill CE 1i jil
pLs jiaiaial 111111111111111111
aullg 12
S_ OBC = S_ COD + S_ BOC
jll jll jll jll jll jll jll jll jll jll jll jll jll jll jll jll jll jll jll jll jll jll jll jll jll jll jll jll jll jll jll jll jll jll jll jll jll jll jll jll jll jll jll jll jll jll jll jll jll jll jll
1
J 2
:
jibill cllb lks. gaiiill dllinai jiall ci, da
olbllgjyaiayieobillablaa 4
a 5
jglj jz
(5)
a 1 2
1 1 1
1 1
1 1
1 1
1 1
1 1
1 1
ED = 1
ks jz lks. 1aai gill ay jal g jai jai jai jai jai jai jai jai jai jai jai jai jai jai jai jai jai jai jai jai jai jai jai jai jai jai jai jai jai jai jai jai jai jai jai
Jaa, g a 1a 8a Ls 1g bll Eai .3 64 Jao Balaill."
jgl 0 j
J 100, ailll 2/1 J 150
iSg jIy gbl k s ciaagll jz jall jz jdi Sj
g
:
jglll jiai"1" 6) jaiill iia baii . "O" aai gie jaiil iai baii. jaiil jaiii
0111 1
(1)
a
:
llalai jali gai sall
a jz g a bjj jgl jgll
J 1
j 1
.
a 8 n nn
aai jn nn nnnn nn nnnnnnnnnnnnnnnnnnnnnnnnnnnnnnnnnnnnnnnnnnnnnnnnnnnnnnnnnnnnnnnnnnnnnnnnnnnnnnnnnnnnnnnnnnnnnnnnnnnnnnn
4g j g jj 1
J 1
J 1
J 1
J 1
J 1
J 1
J 1
J 1
J 1
J 1
J 1
J 1
J 1
J 1
J 1
J 1
J 1
J 1
J 1
J 1
J 1
J 1
J 1
J 1
J 1
J 1
L
jaiy jaii i jia jia jie all
p#
g lalai Laiai aiei ciaeall oia g ciao ci pi
ei 2 e g , i jilil ciaiill oial jilai y wailn jao .dio
jglil glll
:
aaleal aywulil
Lai clall bai jall Jai liy Jai lll 1j
s y sall jssll, jol 11, g xil Jai Jai all g
g y jai jali jali Ile cIe! iie. illd sall ie
Jai ll clai jlc lii pcc
jglglaalaaaalaaalaa
i 1
!gag
1 1 1 1 1 1 1 1 1 1 1 1 1 1 1 1 1 1 1 1 1 1 1 1 1 1 1 1 1
:
-
1


-
1
- WAARSCHUWING: Risk of burns!
- Symbols in these Instructions for Use
- WARNING:
- CAUTION:
- OTE:
- General Safety Instructions
- WARNING!
- Special safety information for this unit
- WARNING: Hot surface!
- Risk of burns!
- Overview of the Components
- Starting-up the unit
- Instructions for Use
- Non-stick coating
- i NOTE:
- Electrical connection
- Switching the appliance on/off
- Using the unit
- Inserting/changing of the cooking plates
- General operating instructions
- Toasting sandwiches
- NOTE:
- Baking waffles
- Grilling
- WARNING: Risk of burns!
- Switching Off
- Cleaning
- Baking Surfaces
- Housing
- Technical Data
- Disposal
- Meaning of the "Dustbin" Symbol
- Instrukcja obslugi
- PiicmaxyBaHHcaHdbiH
- I P N I M I T K A.
- ITPIMITKA.
- BunikannBaepenb
- Peuen m eaeben
- PnpirotyBaHHHa rpiJl
- IPIIMITKA.
- PONEPEDXEHHA.Pn3K onikib! Nobepxhi rpnna dyke rapa!
- BIMKHeHH
- UH
- A NOPEPEKHEHH.
- YBAGA.
- Pobepxhi dny BnikanHH
- Kopnyc
- ПОНМЕЧАЙ:
- 06uye yka3aHnno TeXnke 6e3onacHOCTn
- PnroToBka np6opa Ka6oTe
- Hnctpykunno 3Kcnnyataun
- HenoDropaMaNoBepxHocTb
- I P N I M E U A H N A:
- IopKJIIOUeHne K cetn
- BkIIOueHHe/BbIKIOueHHe annapaTa
- 3Kcnnyataun/npaokpa60TbI
- BctabneHHe/3aMeHa nOlyΦoPm
- IPEyIPEXDEHNE:
- 067aHnctpykunno3cknyatau
- BHIMAHHE:
- PojdkapnBaHne caHDbuyei
- IPIMEYAHNA:
- IPIMMEAHNA:
- BbinekaBaepelb
- ITPIMEYAHNA:
- Peuenbuckbumhbxeaefelb
- PdKapNBaHneHa rpnne
- IINPIMEYAHNIA:
- INPEUYIPEXKDEHNE:OnachocTB noJyehniorob!
- BbIKJIOueHne
- UNTKa
- BHIMAHINE:
- Tekyune npyofopmbi
- TexHnueckne daHHbIe
- 品
- ayaii ciagai
- S_ OBC = S_ COD + S_ BOC
- :
- jglj jz
- ED = 1
- 1
- :
- L
- aaleal aywulil
- jglglaalaaaalaaalaa
- !gag
Brand : BOMANN
Model : STWA 1364 CB
Category : Croque monsieur clip