
SSC 200 A1 - Saucepan SILVERCREST - Free user manual and instructions
Find the device manual for free SSC 200 A1 SILVERCREST in PDF.
| Product type | Slow cooker |
| Brand | SilverCrest |
| Model | SSC 200 A1 |
| Ceramic pot capacity | Approx. 3.5 litres |
| Maximum filling quantity | Approx. 3.3 litres |
| Mains voltage | 220 - 240 V ~, 50/60 Hz |
| Power consumption | 200 W |
| Pot material | Ceramic |
| Lid material | Glass |
| Cooking levels | 3 settings: keep warm (60-75 °C), low (80-90 °C), high (90-100 °C) |
| Functions | Slow cooking, keep warm |
| Intended use | Domestic use, food cooking |
| Cleaning | Pot and lid dishwasher safe; base cleaned with a damp cloth |
| Safety | Do not immerse the base; do not operate without the pot; hot surface |
| Warranty | 3 years |
| Included accessories | Appliance base, ceramic pot, glass lid, instruction manual |
Frequently Asked Questions - SSC 200 A1 SILVERCREST
User questions about SSC 200 A1 SILVERCREST
0 question about this device. Answer the ones you know or ask your own.
Ask a new question about this device
Download the instructions for your Saucepan in PDF format for free! Find your manual SSC 200 A1 - SILVERCREST and take your electronic device back in hand. On this page are published all the documents necessary for the use of your device. SSC 200 A1 by SILVERCREST.
USER MANUAL SSC 200 A1 SILVERCREST
Operating instructions
NL BE
SLOW COOKER
Gebruiksaanwijzing
CZ
HRNEC NA POMALE VARENÍ
Návod k obsluze
IAN 336973_2001

DE AT CH
Before reading, unfold the page containing the illustrations and familiarise yourself with all functions of the device.
FR BE
KOMPERNASS HANDELS GMBH
BURGSTRASSE 21
44867 BOCHUM
DEUTSCHLAND
www.kompernass.com
Rezepte
HINWEIS
Introduction 24
Intended use 24
Safety information 25
Check the package contents 28
Appliance description 28
Function 28
Preparations 29
Before first use 29
Setting up the appliance 29
Preparing ingredients 30
Operation 31
Tips 31
Cooking times 31
Adjusting the cooking settings 32
Cooking food 32
Cleaning 33
Storage 34
Troubleshooting 34
Disposal 34
Disposal of the appliance 34
Disposal of the packaging 35
Attachment 35
Technical data 35
Kompernass Handels GmbH warranty 36
Service 37
Importer 37
Recipes 38
Pea soup 38
Chicken soup 39
Pulled pork 40
Braised beef brisket 42
Bread pudding 43
Fruitcrumble 44
Introduction
Congratulations on the purchase of your new appliance!
You have chosen a modern, high-quality product. These operating instructions are part of the product. They contain important information about safety, usage and disposal. Before using the product, please familiarise yourself with all operating and safety instructions. This product may only be used as described and for the purposes indicated. Please also pass these operating instructions on to any future owner.
Intended use
WARNING! RISK OF INJURY!
Danger if not used as intended!
The appliance can be hazardous if used for any other purpose and/or in any other manner than the one intended.
- Use the appliance only for its intended purpose.
Observe the procedures described in these operating instructions.
This appliance is intended exclusively for cooking food in private households. Do not use the appliance for commercial or industrial purposes.
Only use the appliance in dry indoor areas. Never use it outdoors.
The appliance is not intended for any other purpose nor for use beyond the scope described.
Safety information

RISK OF ELECTRIC SHOCK!

ever immerse the base, power cord or plug in water or other liquids, do not place the base near water and do not clean it under running water.
- Never allow the power cord to become wet or damp during operation. Route it so that it cannot be trapped or damaged in any way.
- Arrange for defective power plugs and/or cords to be replaced as soon as possible by a qualified technician or by our Customer Service Department to avoid the risk of injury.

the appliance only in dry indoor areas, not outdoors.
- Do not pour any water or other liquids into the metal container on the base of the appliance!

WARNING! RISK OF INJURY!
This appliance may be used by children aged 8 years and above and by persons with limited physical, sensory or mental capabilities or lack of experience and knowledge, provided that they are under supervision or have been told how to use the appliance safely and are aware of the potential risks.
- Cleaning and user maintenance may not be carried out by children unless they are 8 years of age or older and are supervised.
Do not allow children to play with the appliance.
The device and its connecting cable must be kept away from children younger than 8 years old.
WARNING! RISK OF INJURY!
- Set up the appliance as close as possible to an electrical power socket. Ensure that the power plug is quickly reachable in case of danger, and also that there is no danger of tripping over the cable.
Always disconnect the plug from the mains power socket after use, before cleaning or before moving the appliance. - Place the appliance on a level, stable and heat-resistant surface.
- Do not place the appliance under or near flammable objects such as curtains or wall appliances.
- Do not operate the appliance if it has been dropped or is damaged in any way. Have the appliance checked and/or repaired by qualified technicians if necessary.
- All repairs must be carried out by authorised specialist companies or by the Customer Service department. Improper repairs may put the user at risk. It will also invalidate any warranty claims.
- Never open the appliance housing. There are no user-serviceable or replaceable components inside the appliance.

Caution! Hot surface!
Parts of the appliance get very hot during use. Allow the appliance to cool down sufficiently before touching these areas to avoid burns.
- Hold and carry the appliance or ceramic pot only by the handles on the sides. Wear pot gloves if necessary.
- Do not lift the ceramic pot out of the appliance during operation.
Hot steam may be released during cooking, especially when you lift the glass lid. Keep a safe distance away from the steam.
WARNING! RISK OF INJURY!
- During operation, touch the glass lid only on the handle.
After use, the surfaces of the heating elements will still have some residual heat. - Make sure that the base of the appliance, the power cord or plug does not come into contact with hot sources such as hot plates or naked flames.
- Do not use an external timer switch or a separate remote control system to operate the appliance.
Never leave the appliance unattended while it is being used. - Operate the appliance only with the original accessories supplied.
- Use the appliance only for its intended purpose. There is a risk of injury if the appliance is misused!
CAUTION! PROPERTY DAMAGE!
- Do not switch on the appliance if there are no ingredients in the ceramic pot.
- Do not switch on the appliance if the ceramic pot is not inserted into the base of the appliance.
If you want to place the appliance under the cooker extractor hood on top of the cooker, make sure that the cooker is switched off. - Allow the ceramic pot and glass lid to cool sufficiently before immersing them in water for cleaning. Otherwise, they may crack due to the temperature difference.
- Do not use the ceramic pot other than as described in this manual. Do not use it in the oven, on the stove or in the microwave and do not put it in the freezer.
Check the package contents
The appliance is supplied with the following components as standard:
- Appliance base
- Ceramic pot
Glass lids - Operating instructions
DANGER!
- Do not allow children to play with packaging materials. There is a risk of suffocation.
Remove all parts of the appliance and the operating instructions from the carton.
Remove all packaging materials and any protective film from the appliance.
NOTE
Check the package for completeness and signs of visible damage.
If any items are missing or damaged as a result of defective packaging or transportation, contact the service hotline (see section "Service").
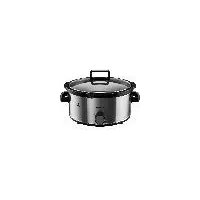
Appliance description
(See fold-out page for illustrations)
Glass lid
2 Ceramic pot
3 Appliance base
4 Control lamp
5 Dial
Function
The slow cooker is used to cook food slowly over a long period of time at temperatures below boiling point (100^) .
The cooking time with this type of preparation is usually considerably longer than with simple cooking or frying. The gentle preparation preserves more vitamins, nutrients and flavour in the food and prevents the food from burning. Meat does not dry out and remains juicy and tender.
Preparations
Before first use
Before the first use, you should thoroughly clean all parts to remove any production residues. Proceed as described below:
Clean all parts as described in the section "Cleaning".
Place the appliance base 3 on a level, stable and heat-resistant surface close to an easily accessible power outlet.
Insert the ceramic pot 2 into the appliance base 3.
Make sure that the dial is set to " and plug the power plug into a wall outlet.
Fill the ceramic pot 2 with 0.5 litres of water.
Place the glass lid 1 on the ceramic pot 2.
Set the dial 5 to "SSS". The control lamp 4 lights up, the appliance starts to heat up.
NOTE
- During initial use, a small amount of smoke and a slight odour may occur due to production residue. This is normal and dissipates after a short time. Ensure sufficient ventilation, for example, by opening a window.
Switch off the appliance after 60 minutes by turning the dial ⑤ back to "O".
Remove the plug from the mains power socket.
Allow the appliance to cool down sufficiently, pour the water away and clean all parts again as described in the section "Cleaning".
Setting up the appliance
NOTE
If you are using the appliance for the first time, proceed as described in the section "Before first use".
Place the appliance base 3 on a level, stable and heat-resistant surface close to an easily accessible power outlet.
Insert the ceramic pot 2 into the appliance base 3.
Make sure that the dial is set to " and plug the power plug into a wall outlet.
The appliance is now ready for use.
Preparing ingredients
Do not add more than 3.3 litres of ingredients including liquid.
The ingredients should contain at least 200ml of liquid. Note, however, that very dry ingredients may require more liquid and very moist ingredients less.
■ Allow frozen food to thaw completely before use.
- Chop the ingredients into evenly sized, preferably not-too-large pieces to shorten their cooking time. The larger the pieces, the longer the cooking time.
You can fry meat in spices for a more intense flavour before adding it to the ceramic pot 2. This also has the advantage that the fat content of the meat and the entire dish is reduced, as you do not continue to cook with the used fat.
If you want to precook or sauté ingredients before cooking, use a separate saucepan or pan. Browning or precooking is not possible with this appliance.
If you do not fry the meat in advance, you should remove excess fat from the meat, as it does not break down during gentle cooking.
- Raw red beans contain toxins that are only neutralized by high temperatures. Cooking with this appliance is not sufficient! Cook red beans in boiling water for at least 10 minutes before using them.
Soak dried, unpeeled legumes overnight and pour away the water. Use fresh water for the preparation.
Operation
Tips
The highest cooking temperature is at the bottom of ceramic pot 2. Add larger pieces or the ingredients with the longer cooking time first and the rest on top.
- Refrain from lifting the glass lid ① off the appliance during operation, as this will allow heat to escape each time and prolong the cooking process.
The longer the food is cooked, the softer the vegetables become and the tenderer the meat becomes.
If there is too much liquid in the ceramic pot 2 towards the end of the cooking time, remove the glass lid 1. Let the food continue to cook without the glass lid 1 until sufficient liquid has evaporated.
Cooking times
The table below gives an overview of the various possible ingredients and their approximate cooking times. However, the values are for guidance purposes only. In addition to your personal taste, the actual cooking time depends on various other factors, such as the initial temperature, consistency, size and quantity of the ingredients or the amount of liquid added.
Most meat and vegetable dishes require a cooking time of about 5-8 hours at "SS" and about 3-5 hours at "SSThe longer the food is cooked, the softer the vegetables become and the tenderer the meat becomes. So it does not depend on the exact minutes.
| Food Qty. | Cooking time"%" | Cooking time"%" | |
| Joint of beef | 1000 g | approx. 6-8 hours approx. 4-5 hours | |
| Pork fillet 500 g approx. | 5-6 hours approx. | 4-5 hours | |
| Chicken breast 650 g approx. | 5-6 hours approx. | 4-5 hours | |
| Minced meat 500 g approx. | 4-5 hours approx. | 2-4 hours | |
| Solid vegetables (potatoes, carrots, celery etc.) | 300 g approx. | 4-6 hours approx. | 2.5-4 hours |
| Courgettes 300 g approx. | 4-5 hours approx. | 2.5-4 hours | |
| Green peas 500 g approx. | 5-6 hours approx. | 4-5 hours | |
| Red lentils 500 g approx. | 2-4 hours approx. | 1.5-2 hours | |
Adjusting the cooking settings
You can use the dial 5 to select from four settings:
| Position Function | |
| "0" | Device switched off |
| Keep warm (approx. 60-75°C) | |
| Low cooking temperature (approx. 80-90°C) | |
| $ | High cooking temperature (approx. 90-100°C) |
Cooking food
WARNING! RISK OF INJURY!
Parts of the appliance get very hot during use! Allow the appliance to cool down sufficiently before touching these areas to avoid burns.
- Hold and carry the appliance base ③ or the ceramic pot ② by the side handles only. Wear pot gloves if necessary.
Hot steam may be released during cooking, especially when you open the glass lid ①. Keep a safe distance away from the steam.
CAUTION! PROPERTY DAMAGE!
- Do not switch on the appliance if there are no ingredients in the ceramic pot ②.
NOTE
- Lift the glass lid ① off the appliance as little as possible, as this will allow heat to escape each time and thus prolong the cooking process.
The appliance is not suitable for frying food.
The appliance is not suitable for reheating cold food.
If you have not already done so, carry out all the preparations as described in the section "Preparations". Please also observe the notes in the section "Tips".
If necessary, remove the glass lid 1 from the ceramic pot 2 and add the ingredients to be cooked including the liquid.
Replace the glass lid 1.
Set the dial 5 to the desired position (see the section "Adjusting the cooking settings"). The control lamp 4 lights up, the appliance starts to heat up.
Allow the ingredients to cook for the recommended time (see e.g. section "Cooking times"). Check the cooking progress of the ingredients regularly.
NOTE
The ceramic pot 2 stores enough heat to keep the cooked ingredients warm for about 30 minutes. If the food is to be kept warm for an extended period of time, set the dial 5 to "S" for as long as necessary.
When the ingredients are cooked and no longer need to be kept warm, set the dial 5 to "0" and unplug the power cord.
You can now carefully decant the food or serve it directly from the ceramic pot 2. Please note that the ceramic pot 2 may be very hot! Use oven gloves to remove it and place it on a heat-resistant surface.
Allow the appliance to cool sufficiently and clean all parts as described in the "Cleaning" section.
Cleaning

RISK OF ELECTRIC SHOCK!
- Pull out the plug from the mains power socket before cleaning the appliance.
Never immerse the appliance base 3 and the connection cable under water.

WARNING! RISK OF INJURY!
- Allow all parts to cool sufficiently before cleaning.
CAUTION! PROPERTY DAMAGE!
- Do not use caustic or abrasive cleaning agents. These can damage the surfaces of the appliance.
- Allow the ceramic pot ② and glass lid ① to cool sufficiently before immersing them in water for cleaning. Otherwise, they may crack due to the temperature difference.
Clean the housing and the interior of the appliance base 3 with a damp cloth. If necessary, apply a mild washing-up liquid to the cloth. Afterwards, wipe off with a cloth moistened only with water to ensure that no detergent remains on the appliance.
Clean the ceramic pot 2 and the glass lid 1 in warm water with a mild detergent. Rinse off all parts afterwards with plenty of fresh water.
NOTE

The ceramic pot 2 and the glass lid 1 are also suitable for cleaning in the dishwasher.
Dry all parts thoroughly before reusing or storing them.
Storage
Clean all parts as described in the section "Cleaning".
Store the appliance with the ceramic pot 2 in place and the glass lid 1 closed in a dust-free and dry place.
Troubleshooting
| Problem Possible causes Possible solutions | ||
| The appliance is not working. | The appliance is not connected to a mains power socket. | Connect the appliance to a mains power socket. |
| The appliance is damaged. | Contact the Customer Service department. | |
| Dial ⑤ is set to "0". | Select a suitable cooking setting. | |
If the malfunction cannot be corrected with the above suggestions, or if you have determined that the malfunction may have other causes, please make contact with our Customer Service.
Disposal
Disposal of the appliance

Never dispose of the appliance in your normal domestic waste. This product is subject to the provisions of the European Directive 2012/19/EU (Waste Electrical and Electronic Equipment).
Dispos of the appliance through an approved disposal facility or your municipal waste facility. Please comply with all applicable regulations. Please contact your waste disposal facility if you are in any doubt.

Your local community or municipal authorities can provide information on how to dispose of the worn-out product.

The product is recyclable, subject to extended producer responsibility and is collected separately.
Disposal of the packaging

The packaging protects the appliance from damage during transport. The packaging materials have been selected for their environmental friendliness and ease of disposal and are therefore recyclable.
Returning the packaging to the material cycle conserves raw materials and reduces the amount of waste that is generated. Dispose of packaging materials that are no longer needed in accordance with applicable local regulations.

Dispose of the packaging in an environmentally friendly manner. Note the labelling on the packaging and separate the packaging material components for disposal if necessary. The packaging material is labelled with abbreviations (a) and numbers (b) with the following meanings:
1-7: plastics, 20-22: paper and cardboard, 80-98: composites.
Attachment
Technical data
| Power supply 220-240 V ~ (AC), 50/60 Hz | |
| Power consumption 200 W | |
| Capacity ceramic pot ② approx. 3.5 litres | |
| Maximum filling quantity ceramic pot ② | approx. 3.3 litres |
| All parts of this appliance which come into contact with food are food-safe. | |
| protective earth | |
This appliance has a 3-year warranty valid from the date of purchase. If this product has any faults, you, the buyer, have certain statutory rights. Your statutory rights are not restricted in any way by the warranty described below.
Warranty conditions
The warranty period starts on the date of purchase. Please keep your receipt in a safe place. This will be required as proof of purchase.
If any material or manufacturing fault occurs within three years of the date of purchase of the product, we will either repair or replace the product for you or refund the purchase price (at our discretion). This warranty service requires that you present the defective appliance and the proof of purchase (receipt) within the three-year warranty period, along with a brief written description of the fault and of when it occurred.
If the defect is covered by the warranty, your product will either be repaired or replaced by us. The repair or replacement of a product does not signify the beginning of a new warranty period.
Warranty period and statutory claims for defects
The warranty period is not prolonged by repairs effected under the warranty. This also applies to replaced and repaired components. Any damage and defects present at the time of purchase must be reported immediately after unpacking. Repairs carried out after expiry of the warranty period shall be subject to a fee.
Scope of the warranty
This appliance has been manufactured in accordance with strict quality guidelines and inspected meticulously prior to delivery.
The warranty covers material faults or production faults. The warranty does not extend to product parts subject to normal wear and tear or to fragile parts which could be considered as consumable parts such as switches, batteries or parts made of glass.
The warranty does not apply if the product has been damaged, improperly used or improperly maintained. The directions in the operating instructions for the product regarding proper use of the product are to be strictly followed. Uses and actions that are discouraged in the operating instructions or which are warned against must be avoided.
This product is intended solely for private use and not for commercial purposes. The warranty shall be deemed void in cases of misuse or improper handling, use of force and modifications / repairs which have not been carried out by one of our authorised Service centres.
Warranty claim procedure
To ensure quick processing of your case, please observe the following instructions:
Please have the till receipt and the item number (e.g. IAN 123456_7890) available as proof of purchase.
■ You will find the item number on the type plate on the product, an engraving on the product, on the front page of the operating instructions (below left) or on the sticker on the rear or bottom of the product.
If functional or other defects occur, please contact the service department listed either by telephone or by e-mail.
You can return a defective product to us free of charge to the service address that will be provided to you. Ensure that you enclose the proof of purchase (till receipt) and information about what the defect is and when it occurred.

You can download these instructions along with many other manuals, product videos and installation software at www.lidl-service.com.
This QR code will take you directly to the Lidl service page (www.lidl-service.com) where you can open your operating instructions by entering the item number (IAN) 336973_2001.
Service
GB Service Great Britain
Tel.: 0800 404 7657
E-Mail: kompernass@lidl.co.uk
IE Servicelreland
Tel.: 1890 930 034
(0,08 EUR / Min., (peak))
(0,06 EUR / Min., (off peak))
E-Mail: kompernass@lidl.ie
IAN 336973_2001
Importer
Please note that the following address is not the service address. Please use the service address provided in the operating instructions.
KOMPERNASS HANDELS GMBH
BURGSTRASSE 21
44867 BOCHUM
GERMANY
www.kompernass.com
Recipes
NOTE
These recipes are provided without guarantee. All information regarding ingredients and preparation is provided as guide values. Modify the suggested recipes to suit your personal taste.
Pea soup
Preparation time: 30 min
Cooking time approx.: 4 hrs-4 hrs 30 min
Level of difficulty: medium
Portions: 6
500 g green peas, dried
2 onions
1/2 bunch soup greens
300 g Kasseler neck
2 smoked meat sausages
1 bay leaf
1 tsp. marjoram, dried
300 g potatoes
2 Vienna sausages
Salt, pepper, stock granules
A little vinegar
1.5 litres of water
1) Peel and dice the potatoes and onions. Clean and dice the greens.
2) Add the peas, onions, potatoes, bay leaf and greens to the ceramic pot.
NOTE
Unpeeled peas must be soaked overnight before use! They also require a longer cooking time!
3) Place the meat and sausages on top.
4) Add 1.5 litres of hot water until all ingredients are just covered.
5) Season to taste with salt, pepper, vinegar, marjoram and a few stock granules.
6) Put the lid on and cook for 4 to 4.5 hours on the setting "
7) Carefully take out the meat and, if necessary, remove the fat and bone from the meat. Dice the meat.
8) Cut the sausages into slices.
9) Depending on the consistency, puree part of the soup in a separate container.
10) Put the soup, meat and sausage slices back into the ceramic pot and stir well.
11) If necessary, season to taste again with salt and pepper.
Chicken soup
Preparation time: 15 min.
Cooking time approx.: 5 hrs
Level of difficulty: easy
Portions: 6
2 chicken drumsticks
1-1.5 litres of water
2 carrots
1/4 celery root (celeriac)
2 parsley roots
1/2 leek
1 tbsp. salt
1 tsp. lovage,dried
1 tsp. black pepper, ground
1 bay leaf
1 tsp. ginger root, chopped
1 bunch parsley, curly
1) Cut the leek into slices and dice the remaining vegetables.
2) Put the chicken drumsticks in the ceramic pot.
3) Spread the diced vegetables and all the spices (except the parsley) over the chicken.
4) Pour the water over the mixture. Cook for 5 hours on the setting
5) At the end of the cooking time, remove the drumstick from the stock, take the meat off the bones, cut or pluck it into bite-sized pieces and replace in the ceramic pot.
6) Allow the meat to heat up again for a few minutes.
7) Chop the parsley and add.
Pulled pork
Preparation time: 30 min
Minimum cooking time: 7 hrs
Level of difficulty: easy
Portions: 6-8
1.4 kg boneless pork (neck)
1 onion
400 ml ginger ale or root beer
For the spice mixture:
2 tbsp. paprika powder (hot)
2 tbsp. brown sugar
2 tsp. salt
1 / 2 tsp.mustard seeds
2 pinches of black pepper
4 pinches of garlic powder
2 pinches of oregano
1 tsp. ground coriander seeds
2 pinches of chilli flakes
For the BBQ sauce:
2 onions
2 tbsp. cooking oil
4 garlic cloves
1 tbsp. honey
1 splash of vinegar (e.g. raspberry or apple vinegar)
150 ml apple juice
150 ml tomato ketchup
2 splashes of Worcestershire sauce
2 splashes of soy sauce
2 pinches of chilli powder
2 pinches of pepper
2 pinches of smoked salt
1) Rinse the pork and dab dry.
2) Prepare the spice mixture for the meat. Mix the paprika powder with sugar, salt, mustard seeds, pepper, garlic powder, oregano, coriander seeds and chili flakes in a small bowl.
3) Rub the meat all over with the spice mixture.
4) Peel two onions and cut them into rings.
5) Put half of the onions in the ceramic pot.
6) Place the meat on the onion bed and cover with the remaining rings.
7) Pour on the ginger ale/root beer, cover and cook everything on the setting "SSS" for 6 hours. Turn the meat after about half of the cooking time.
8) For the BBQ sauce: peel and finely dice the third onion. Peel the garlic cloves.
9) Heat the oil in a pan, sauté the onions until they become translucent.
10) Press in the garlic and stew briefly.
11) Add the honey and deglaze with fruit vinegar and apple juice. Add ketchup, Worcestershire, soy sauce and spices.
12) Mix well with a whisk and let the sauce thicken a bit. If necessary, add a little extra seasoning.
13) Puree the BBQ sauce with a hand blender until it is smooth.
NOTE
Instead of making your own BBQ sauce, you can also use a bottle of ready-made BBQ sauce (250 ml).
14) Remove the soft meat and set it to one side.
15) If necessary, remove the excess fat from the meat and then pull it apart with two forks to get the typical pulled pork effect.
16) Add the onions to the meat and pour the stock from the ceramic pot into another container.
17) Put the pork and onions back into the slow cooker together and add the BBQ sauce.
18) If necessary, add a little more stock and mix with the meat.
19) Cover and cook for 1 more hour on the setting "S".
Serve the pulled pork on its own, in a bread roll, as a burger or sandwich, with BBQ sauce and coleslaw.
Braised beef brisket
Preparation time: 30 min
Marinating time approx.: 30 min
Cooking time approx.: 7 hrs
Level of difficulty: easy
Portions: 4
1 kg beef brisket
Salt
Pepper
1 carrot
100 g celery
1 bay leaf
750 ml beef stock
150 ml red wine
1 tsp. paprika powder
6 juniper berries
1 small sprig of thyme
1) Season the beef brisket with salt and pepper and rub in. Allow to stand for 30 minutes and then add to the ceramic pot.
2) Wash and dice the carrot.
3) Wash and dice the celery.
4) Add everything together with the stock, the red wine, spices and thyme to the meat, put the lid on and stew for about 7 hours on the setting "SS".
5) Remove the meat, cut into slices across the fibre and arrange on plates.
Bread pudding
Preparation time: 15 min.
Cooking time approx.: 1.5 hrs-2 hrs
Level of difficulty: easy
Portions: 8
4 tbsp. butter
400g white bread, from the day before
120 g raisins
600 ml milk
200 ml cream
6 eggs
160 g sugar
1 tsp. ground cinnamon
12 tsp. vanilla essence
Ground nutmeg
1 pinch salt
1) Grease the ceramic pot with butter.
2) Cut the bread into approx. 2.5cm cubes.
3) Melt the butter in a frying pan and fry the bread cubes (in portions) on all sides, remove and put them into a ceramic pot with the raisins.
4) Whisk the milk with the cream, eggs, 100 g sugar, cinnamon, vanilla essence, nutmeg and salt.
5) Pour over the bread cubes.
6) Carefully mix everything again, sprinkle with the remaining sugar and cover with a lid and cook on the setting "S" for about 2 hours. Stir occasionally.
We recommend serving the bread pudding with vanilla ice cream.
Fruit crumble
Preparation time: 30 min
Cooking time approx.: 3 hrs
Level of difficulty: easy
6 portions
1 kg mixed fruit (e.g. apples, pears, plums, strawberries, blueberries, etc.)
1 tbsp. lemon juice
3-4 tbsp. white sugar
150 ml apple juice (or white wine)
15 g cornflour
150 g flour
65 g oat flakes (coarse)
135 g brown sugar
135 g soft butter
A pinch of salt
A pinch of cinnamon
1) Wash and clean the fruit (depending on the type of fruit, remove the core, peel etc.).
2) Cut the fruit into bite-sized pieces and place in a bowl.
3) Add the lemon juice, apple juice and cornflour.
4) Depending on the ripeness of the fruit and your own taste, add 3-4 tbsp. of sugar and mix well.
5) For the crumble, mix the flour, oat flakes, brown sugar, soft butter, a pinch of cinnamon and a pinch of salt. Knead with a hand mixer to make a crumble dough.
6) Pour the fruit mixture into the ceramic pot. Spread the crumble over it.
7 Put on the lid and cook for 3 hours on the setting
We recommend serving the fruit crumble with vanilla custard.
Table des matieres
Introduction 46
Chere cliente, cher client,
Chere cliente, cher client,
KOMPERNASS HANDELS GMBH
BURGSTRASSE 21
44867 BOCHUM
ALLEMAGNE
www.kompernass.com
Recettes
REMARQUE
WAARSCHUWING! LETSELGEVAAR!
WAARSCHUWING! LETSELGEVAAR!
WAARSCHUWING! LETSELGEVAAR!
WAARSCHUWING! LETSELGEVAAR!
WAARSCHUWING! LETSELGEVAARI!
WAARSCHUWING! LETSELGEVAAR!
KOMPERNASS HANDELS GMBH
BURGSTRASSE 21
44867 BOCHUM
DUITSLAND
www.kompernass.com
Recepten
OPMERKING
KOMPERNASS HANDELS GMBH
BURGSTRASSE 21
44867 BOCHUM
NIEMCY
www.kompernass.com
Przepisy
WSKAZÖWKA
POZORI HMOTNÉ SKODY!
KOMPERNASS HANDELS GMBH
BURGSTRASSE 21
44867 BOCHUM
NEMECKO
www.kompernass.com
Recepty
UPOZORNÉNÍ
KOMPERNASS HANDELS GMBH
BURGSTRASSE 21
44867 BOCHUM
NEMECKO
www.kompernass.com
Recepty
UPOZORNENIE
- Recepty bez záruky. Vsetky udaje o prisadach a priprave su orientacné. Doplhte si fieto nárvhy receptov o svoje vlastné skúsenosti.
Hrachová polievka
Cas pripravy: 30 min.
Cas dusenia cca: 4 h - 4 h 30 min
Náročnost: stredná
Porcie: 6
KOMPERNASS HANDELS GMBH
BURGSTRASSE 21
44867 BOCHUM
GERMANY
www.kompernass.com


- SLOW COOKER
- HRNEC NA POMALE VARENÍ
- DE AT CH
- FR BE
- Rezepte
- HINWEIS
- Introduction
- Intended use
- WARNING! RISK OF INJURY!
- Danger if not used as intended!
- Safety information
- RISK OF ELECTRIC SHOCK!
- Caution! Hot surface!
- CAUTION! PROPERTY DAMAGE!
- Check the package contents
- DANGER!
- NOTE
- Appliance description
- Function
- Preparations
- Before first use
- Setting up the appliance
- Preparing ingredients
- Operation
- Tips
- Cooking times
- Adjusting the cooking settings
- Cooking food
- Cleaning
- Storage
- Troubleshooting
- Disposal
- Disposal of the appliance
- Disposal of the packaging
- Attachment
- Technical data
- Warranty conditions
- Warranty period and statutory claims for defects
- Scope of the warranty
- Warranty claim procedure
- Service
- Importer
- Recipes
- Pea soup
- Chicken soup
- Pulled pork
- Braised beef brisket
- Bread pudding
- Fruit crumble
- Table des matieres
- Recettes
- REMARQUE
- WAARSCHUWING! LETSELGEVAAR!
- WAARSCHUWING! LETSELGEVAARI!
- Recepten
- OPMERKING
- Przepisy
- WSKAZÖWKA
- POZORI HMOTNÉ SKODY!
- Recepty
- UPOZORNÉNÍ
- UPOZORNENIE
- Hrachová polievka
Brand : SILVERCREST
Model : SSC 200 A1
Category : Saucepan