
PD7060 - Projector Planar - Free user manual and instructions
Find the device manual for free PD7060 Planar in PDF.
| Brand | Planar |
| Model | PD7060 |
| Product Type | DLP Projector |
| Display Technology | DLP (Digital Light Processing) |
| Native Resolution | Not specified in the manual (estimated: XGA or WXGA) |
| Brightness | Not specified in the manual |
| Contrast | Adjustable via remote control and OSD |
| Main Functions | Multifunction remote control, keystone correction, optical zoom, manual focus, multiple inputs (HDMI, DVI-D, Component, PC, Video/S-Video), display modes (16:9, Letterbox, 4:3, Native), gamma and framing adjustments |
| Connectivity | HDMI, DVI-D (via included adapter for PD4010), Component, PC (VGA), Video/S-Video |
| Remote Control | Yes, with supplied AAA batteries, user shortcut keys, image settings |
| Keystone Correction | Yes, adjustable via remote control or OSD |
| Maintenance and Cleaning | Clean the lens with a soft cloth; replace the lamp when worn out |
| Safety | Compliant with FCC Class B, UL, c-UL, CE, TUV-GS, CCC; WEEE compliant recycling |
| Spare Parts and Repairability | Replacement lamp available; Planar technical support |
| Power Supply | Power cable supplied (depending on country), standard wall outlet |
| Dimensions | Not specified in the manual |
| Weight | Not specified in the manual |
| General Information | Manual available in multiple languages; online and phone support |
Frequently Asked Questions - PD7060 Planar
User questions about PD7060 Planar
0 question about this device. Answer the ones you know or ask your own.
Ask a new question about this device
Download the instructions for your Projector in PDF format for free! Find your manual PD7060 - Planar and take your electronic device back in hand. On this page are published all the documents necessary for the use of your device. PD7060 by Planar.
USER MANUAL PD7060 Planar
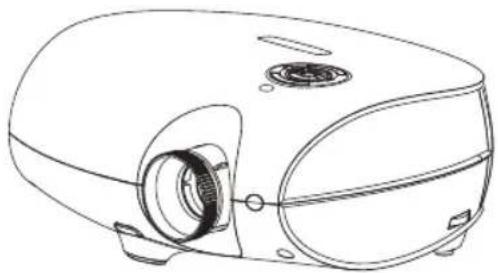
natural_image
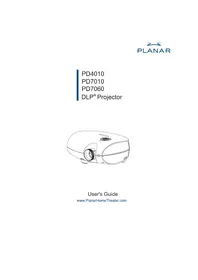
Line drawing of a portable electronic device with a circular vent and mechanical components (no text or symbols)User's Guide
www.PlanarHomeTheater.com
English
Planar Systems, Inc.
Corporate Headquarters
1195 NW Compton Drive
Beaverton, OR 97006-1992
Planar Customer Support
Telephone: US: 1-866-PLANAR1 (866) 752-6271
Outside US: (503) 748-5799
E-mail: PlanarSupport@planar.com
Online Technical Library: http://www.planar.com/support
Hours: M-F, 8am - 8pm ET, 12pm - 12am GMT
Deutsch
Planar Systems, Inc.
Planar Systems, Inc.
Sede corporativo
1195 NW Compton Drive
Beaverton, OR 97006-1992, USA
Apoyo de cliente
Planar Systems, Inc.
Cooperar Quartel-general
1195 NW Compton Drive
Beaverton, OR 97006-1992, USA
Planar Systems, Inc.
Maison mère
1195 NW Compton Drive
Beaverton, OR 97006-1992, USA
Support technique Planar
Telephone: en Anglais: 1-866-PLANAR1 (866) 752-6271
Planar Systems, Inc.
Sede
1195 NW Compton Drive
Beaverton, OR 97006-1992, USA
Planar Systems, Inc.
Huvudkontor
1195 NW Compton Drive
Beaverton, OR 97006-1992, USA
Planar Kundsupport
Telefon: US: 1-866-PLANAR1 (866) 752-6271
Internationellt: +1 (503) 748-5799
E-post: PlanarSupport@planar.com
On-line tekniska bibliotek: http://www.planar.com/support
Öppet: Mån-fre 8.00-20.00 ET, 12.00-24.00 GMT
繁體中文
Planar Systems, Inc.
Корпоративный Штаб
1195 NW Compton Drive, USA
Beaverton, OR 97006-1992
This publication, including all photographs, illustrations and software, is protected under international copyright laws, with all rights reserved. Neither this manual, nor any of the material contained herein, may be reproduced without written consent of the author.
© Copyright October, 2006
About this User's Guide
This User's Guide is intended for end users and describes how to quickly install and operate the DLP projector. For detailed information, refer to the User's Guide on the CD or on the manufacturer's website.
Trademark Recognition
Kensington is a U.S. registered trademark of ACCO Brand Corporation with issued registrations and pending applications in other countries throughout the world.
All other product names used in this guide are the properties of their respective owners and are acknowledged.
Important Recycle Instructions

Lamp(s) inside this product contain mercury. This product may contain other electronic waste that can be hazardous if not disposed of properly. Recycle or dispose in accordance with local, state, or federal Laws.
For more information, contact the Electronic Industries Alliance at WWW.EIAE.ORG.
For lamp specifi c disposal information check WWW.LAMPRECYCLE.ORG.
Disposal of old Electrical & Electronic Equipment (Applicable throughout the European Union and other European countries with separate collection programs).

This symbol found on your product or on its packaging, indicates that this product should not be treated as household waste when you wish to dispose of it. Instead, it should be handed over to an applicable collection point for the recycling of electrical and electronic equipment. By ensuring this product is disposed of correctly, you will help prevent potential negative consequences to the environment and human health, which could otherwise be caused by inappropriate disposal of this product. The recycling of materials will help to conserve natural resources. This symbol is only valid in the European Union. If you wish to discard this product, please contact your local authorities or dealer and ask for the correct method of disposal.
Regulatory Warnings
Before installing and using the projector, read the regulatory notices in the "Regulatory Compliance" section on page 45 of the User's Manual.
Register Your Planar Product Today
Thank you for choosing Planar. To assure you receive all the benefits of your Planar product and services, register your Planar product today. Visit our website: http://www.planar.com/support/product_registration.html
Cables, Replacement Lamps and Accessories
To find cables, replacement lamps and accessories for your Planar projector, LCD monitor, touchscreen, or other Planar products, visit our online store: http://www.PlanarOnlone.com or find other stores that stock Planar products at http://www.planar.com/howtobuy.
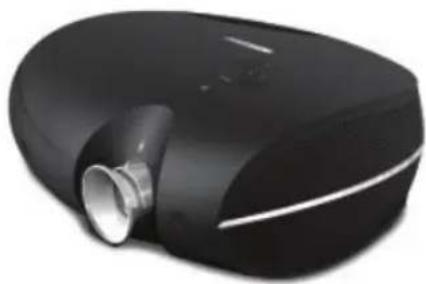
PACKING CHECKLIST
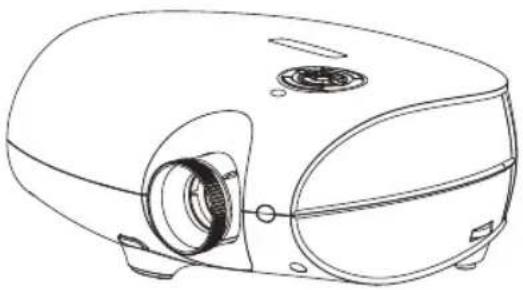
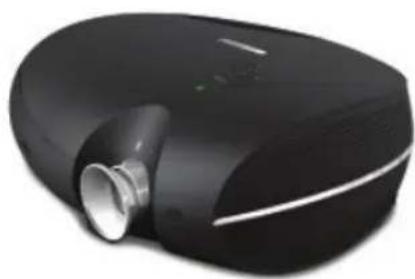
Carefully unpack the projector and check that the following items are included.
natural_image
Close-up of a black, oval-shaped object with a metallic cylindrical port and white reflective surface (no text or symbols visible)DLP Projector

natural_image
Black remote control with two cylindrical batteries (no text or symbols visible)Remote Control (with two AAA batteries)

DVI to HDMI Adaptor (PD4010 only)

natural_image
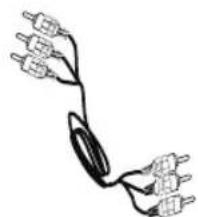
Line drawing of a coiled cable or connector with a terminal connector (no text or symbols)Power Cord (By country)

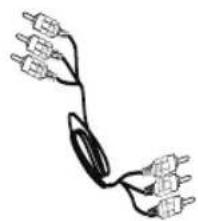
natural_image
Pure electrical circuit lines without any symbolsComponent Video Cable
CD-ROM (This User's Manual)
User's Guide
Contact your dealer immediately if any items are missing, appear damaged, or if the unit does not work.
REMOTE CONTROL FUNCTIONS
ITEM LABEL DESCRIPTION
| 1 Power On Turns projector power on | |
| 2 Power Off Turns projector power off | |
| 3 Source 1 User confi gurable (Default: HDMI) | |
| 4 Source 2 User confi gurable (Default: Component) | |
| 5 Source 3 User confi gurable (Default: DVI-D) | |
| 6 Source 4 User confi gurable (Default: PC) | |
| 7 Source 5 User confi gurable (Default: Video) | |
| 8 Up cursor Navigates and changes settings in the OSD | |
| 9 Left cursor | |
| 10 Enter Changes settings in the OSD | |
| 11 Right cur-sor Navigates and changes settings in the OSD | |
| 12 Down cur-sor | |
| 13 Exit Exits OSD menus or menu selection fi elds | |
| 14 Menu Opens the OSD | |
| 15 Hot Key 1 User memory setting 1 | |
| 16 Hot Key 2 User memory setting 2 | |
| 17 Hot Key 3 User memory setting 3 | |
| 18 Contrast Adjusts screen contrast | |
| 19 Brightness Adjusts screen brightness | |
| 20 Aspect ratio Toggles aspect ratio: 16:9 → Letterbox → 4:3 → Native | |
| 21 Gamma Toggles gamma: Film → Video → Cinema → PC → Photo | |
| 22 Overscan Toggles overscan: Off → Crop → Zoom | |
| 23 Keystone Adjusts keystone | |
| 24 Auto Automatically synchronizes display settings in RGB mode | |
| 25 Blank Makes the screen blank | |
| 26 LED Turns back LED light on and off | |

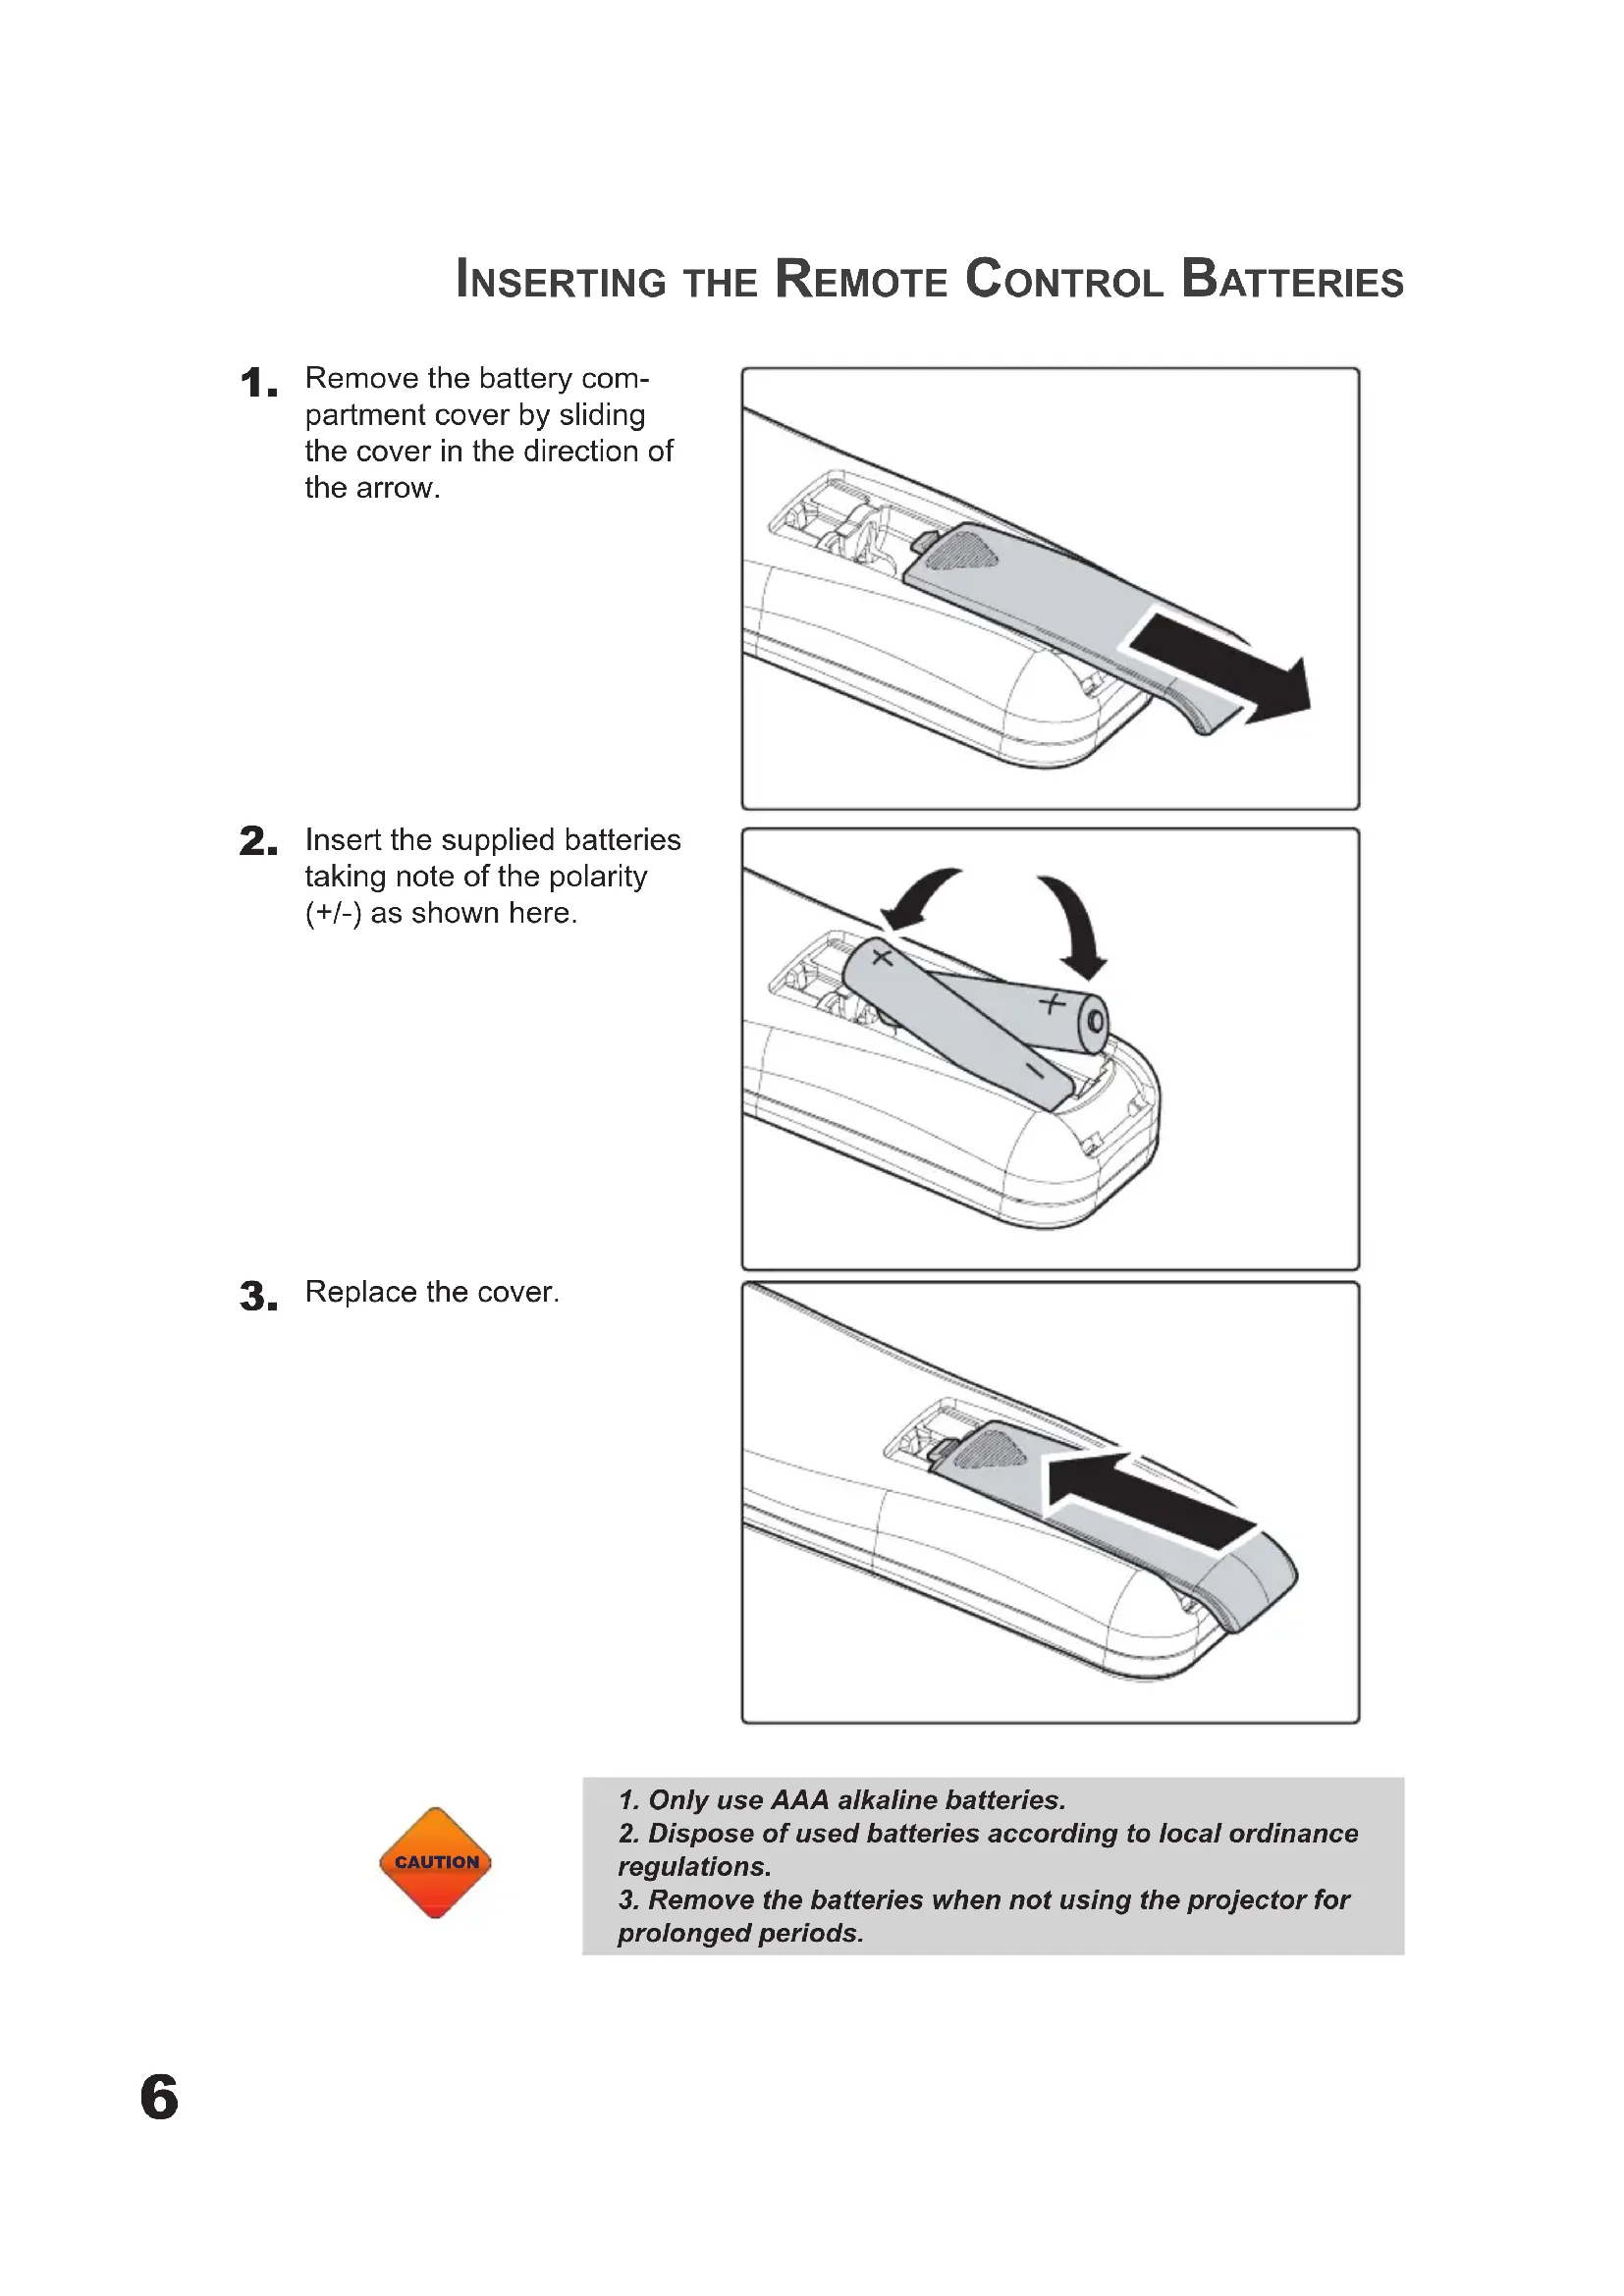
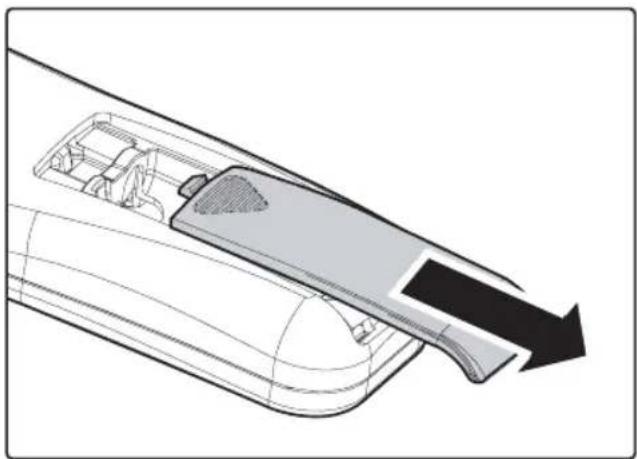
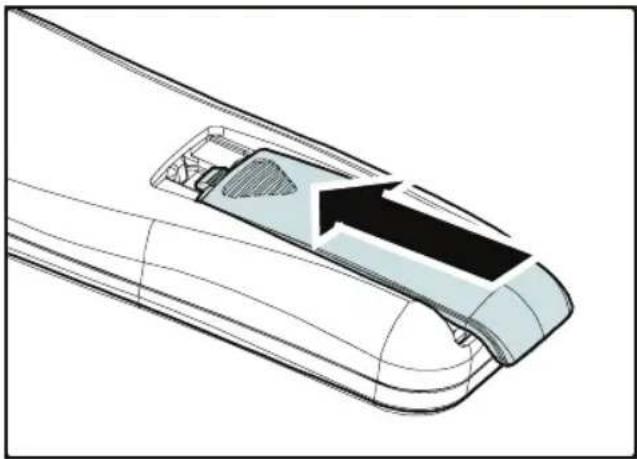
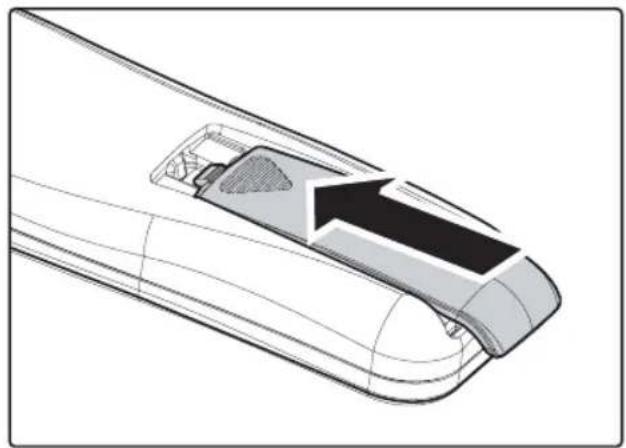
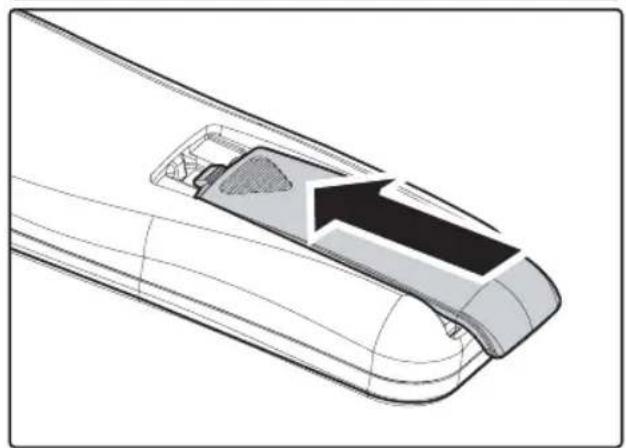
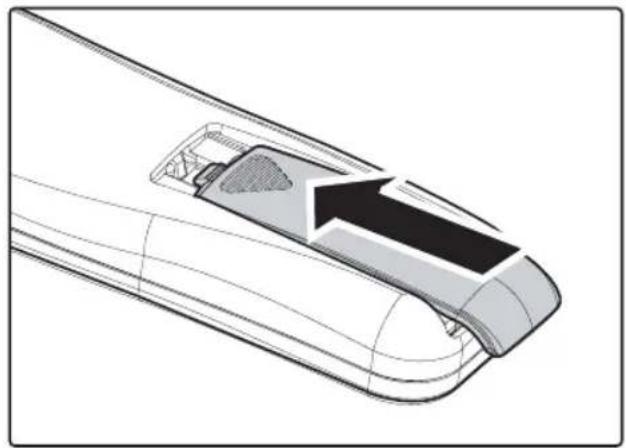
INSERTING THE REMOTE CONTROL BATTERIES
- Remove the battery compartment cover by sliding the cover in the direction of the arrow.
natural_image
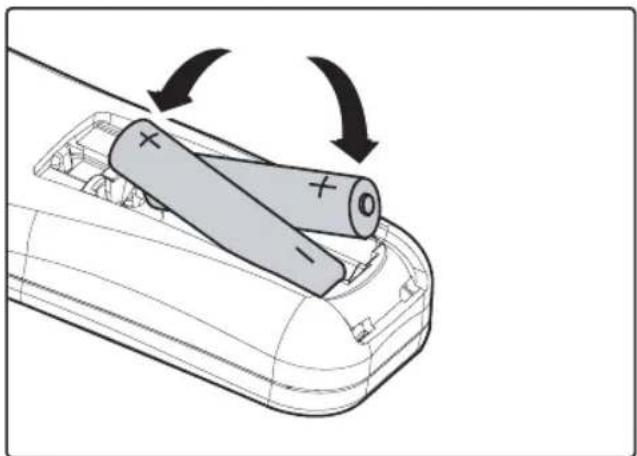
Technical diagram of a mechanical component with internal structure and directional arrow (no text or symbols)- Insert the supplied batteries taking note of the polarity (+/-) as shown here.
natural_image
Diagram of a car's internal battery casing with two cylindrical batteries and one open, showing rotation arrows (no text or symbols)- Replace the cover.

natural_image
Technical diagram of a mechanical component with an arrow indicating direction (no text or symbols present)
- Only use AAA alkaline batteries.
- Dispose of used batteries according to local ordinance regulations.
- Remove the batteries when not using the projector for prolonged periods.
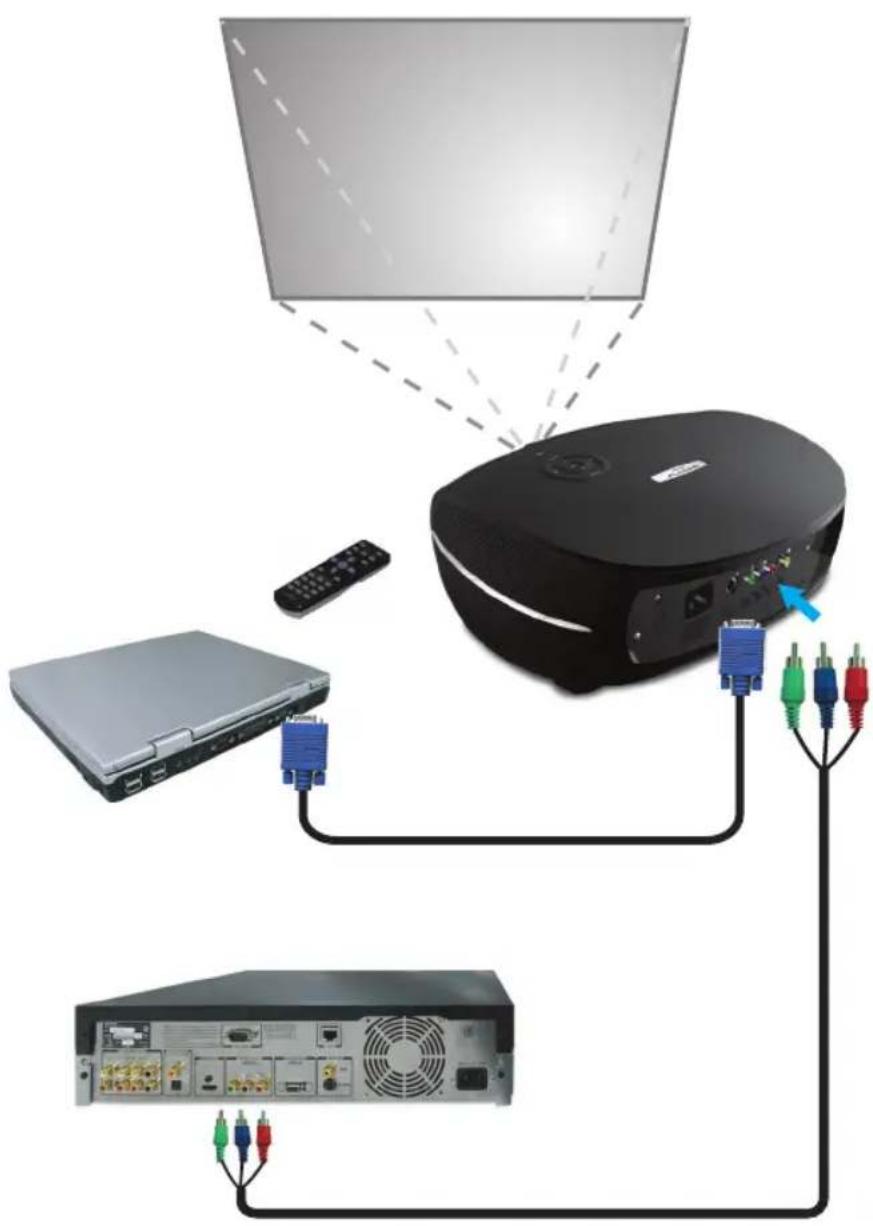
CONNECTING INPUT DEVICES
A PC or notebook computer as well as video devices can be connected to the projector at the same time. Video devices include DVD, VCD, and VHS players, as well as movie camcorders, digital still cameras and high definition sources. Check the User's Manual of the connecting device to confirm it has the appropriate output connector.
natural_image
Diagram showing connections between a computer monitor, remote control, and server rack (no text or symbols present)STARTING AND SHUTTING DOWN THE PROJECTOR
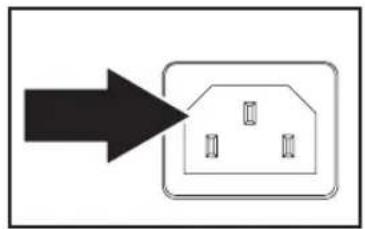
- Remove the lens cover.
- Connect the power cord to the projector. Connect the other end to a wall outlet.
- Press the Power button. The Power LED on the projector turns on. Turn on the connected devices.
-
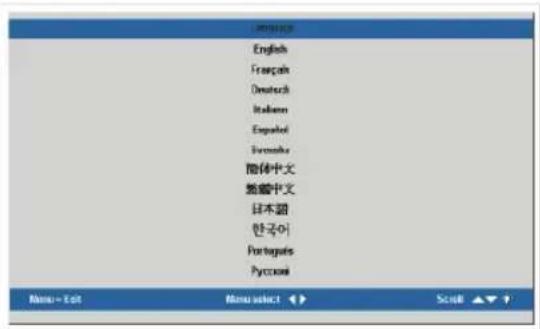
The language selection screen appears (Initial setup only). Select the desired language.
-
Press the cursor ▲▼button until Language is highlighted.
-
Press the cursor ◀▶ or Menu button to confirm the language, and close the OSD.
-
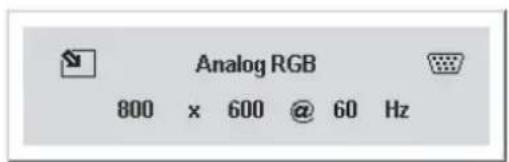
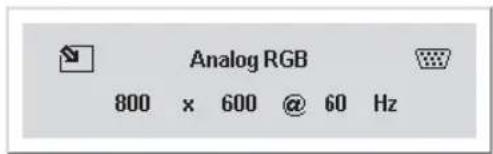
If more than one input device is connected, press the source bottom to search.
flowchart
graph TD
    A["Start"] --> B["Process Box"]
    B --> C["Intermediate compartments"]
    C --> D["Final Output"]
- Press the Power button to turn off the projector. The Powering Down screen appears.
Note: Pressing the Power button again within fi ve (5) seconds cancels powering down the projector.
- When the Power LED stops flashing, the projector goes on standby mode.


natural_image
Green circular button with white power symbol (no text or numbers)! WARNING
Do not unplug the power cord until the Ready LED stops fl ashing, indicating the projector has cooled down.
ADJUSTING THE FOCUS AND ZOOM
- Locate the image zoom and focus adjustment rings on the projector.

- Use the image zoom control to resize the projected image and screen size.
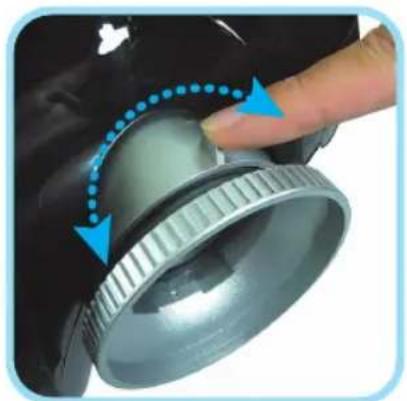
natural_image
Close-up of a hand pressing a metallic mechanical component with blue arrows indicating motion (no text or symbols)- Rotate the image focus control to sharpen the projected image.

natural_image
Close-up of a hand holding a cylindrical mechanical component with a blue arrow indicating rotation (no text or symbols visible)TROUBLESHOOTING
These guidelines provide tips to deal with problems you may encounter while using the projector. If the problem remains unsolved, contact your dealer for assistance.
Often after time spent troubleshooting, the problem is traced to something as simple as a loose connection. Check the following before proceeding to the problem-specific solutions.
- Use some other electrical device to confirm that the electrical outlet is working.
- Ensure the projector is turned on.
• Ensure all connections are securely attached.
• Ensure the attached device is turned on. - Ensure a connected PC is not in suspend mode.
- Ensure a connected notebook computer is configured for an external display. (This is usually done by pressing an Fn-key combination on the notebook.)
Common Problems and Solutions
Image Problems
Problem: No image appears on the screen
- Verify the settings on your notebook or desktop PC.
- Turn off all equipment and power up again in the correct order.
Problem: The image is blurred
- Adjust the Focus on the projector.
- Press the Auto button on the remote control or projector.
- Ensure the projector-to-screen distance is within the 10-meter (33-feet) specified range.
- Check that the projector lens is clean.
Problem: The image is wider at the top or bottom (trapezoid effect)
- Position the projector so it is as perpendicular to the screen as possible.
- Use the Keystone button on the remote control or projector to correct the problem.
Problem: The image is reversed or upside down
Check the Projection setting on the Utility menu of the OSD.
Problem: The image is streaked
- Set the Frequency and Tracking settings on the Utility menu of the OSD to the default settings.
- To ensure the problem is not caused by a connected PC's video card, connect to another computer.
Problem: The image is fl at with no contrast
Adjust the Contrast setting on the Image menu of the OSD.
Problem: The color of the projected image does not match the source image.
Adjust the Color Temperature and Gamma settings on the Image menu of the OSD.
Lamp Problems
Problem: There is no light from the projector
- Check that the power cable is securely connected.
- Ensure the power source is good by testing with another electrical device.
- Restart the projector in the correct order and check that the Power LED is green.
- If you have replaced the lamp recently, try resetting the lamp connections.
- Replace the lamp module.
- Put the old lamp back in the projector and have the projector serviced.
Problem: The lamp goes off
- Power surges can cause the lamp to turn off. Press the power button twice to turn off the projector. When the Ready LED is on, press the power button.
- Replace the lamp module.
- Put the old lamp back in the projector and have the projector serviced.
Remote Control Problems
Problem: The projector does not respond to the remote control
- Direct the remote control towards remote sensor on the projector.
- Ensure the path between remote and sensor is not obstructed.
- Turn off any fluorescent lights in the room.
- Check the battery polarity.
- Replace the batteries.
- Turn off other Infrared-enabled devices in the vicinity.
- Have the remote control serviced.
REGULATORY COMPLIANCE
FCC Warning
This equipment has been tested and found to comply with the limits for a Class B digital device pursuant to Part 15 of the FCC Rules. These limits are designed to provide reasonable protection against harmful interference when the equipment is operated in a commercial environment.
This equipment generates, uses, and can radiate radio frequency energy and, if not installed and used in accordance with the instruction manual, may cause harmful interference to radio communications. Operation of this equipment in a residential area is likely to cause harmful interference in which case the user will be required to correct the interference at his own expense.
Changes or modifications not expressly approved by the parties responsible for compliance could void the user's authority to operate the equipment.
Canada
This class B digital apparatus complies with Canadian ICES-003.
Safety Certifications
FCC Class B, UL, c-UL, CE, TUV-GS, CCC, PCT, MIC/EK
EN 55022 Warning
This is a Class B product. In a domestic environment, it may cause radio interference, in which case the user may be required to take adequate measures. The typical use is in a conference room, meeting room, or auditorium.
PLANAR
PD4010
PD7010
PD7060
DLP® Projecteur
natural_image
Line drawing of a portable electronic device with a circular vent and side-mounted ports (no text or symbols)Guide d'Utilisation
www.PlanarHomeTheater.com
English
Planar Systems, Inc.
Corporate Headquarters
1195 NW Compton Drive
Beaverton, OR 97006-1992
Planar Customer Support
Telephone: US: 1-866-PLANAR1 (866) 752-6271
Outside US: (503) 748-5799
E-mail: PlanarSupport@planar.com
Online Technical Library: http://www.planar.com/support
Hours: M-F, 8am - 8pm ET, 12pm - 12am GMT
Deutsch
Planar Systems, Inc.
Planar Systems, Inc.
Sede corporativo
1195 NW Compton Drive
Beaverton, OR 97006-1992, USA
Apoyo de cliente
Planar Systems, Inc.
Cooperar Quartel-general
1195 NW Compton Drive
Beaverton, OR 97006-1992, USA
Planar Systems, Inc.
Maison mère
1195 NW Compton Drive
Beaverton, OR 97006-1992, USA
Support technique Planar
Telephone: en Anglais: 1-866-PLANAR1 (866) 752-6271
Planar Systems, Inc.
Sede
1195 NW Compton Drive
Beaverton, OR 97006-1992, USA
Planar Systems, Inc.
Huvudkontor
1195 NW Compton Drive
Beaverton, OR 97006-1992, USA
Planar Kundsupport
Telefon: US: 1-866-PLANAR1 (866) 752-6271
Internationellt: +1 (503) 748-5799
E-post: PlanarSupport@planar.com
On-line tekniska bibliotek: http://www.planar.com/support
Öppet: Mån-fre 8.00-20.00 ET, 12.00-24.00 GMT
繁體中文
Planar Systems, Inc.
Корпоративный Штаб
1195 NW Compton Drive, USA
Beaverton, OR 97006-1992
natural_image
Close-up of a black and silver automotive air purifier with a metallic nozzle (no visible text or symbols)DLP Projecteur

natural_image
Black remote control with standard buttons (no text or symbols visible)natural_image
Line drawing of a coiled cable or wire with connectors (no text or symbols)Guide d'utilisation
natural_image
Technical line drawing of a mechanical component with a curved arrow indicating direction (no text or symbols)natural_image
Diagram of a remote control casing with two batteries and arrows indicating rotation (no text or symbols)- Replacez le couvercle.
natural_image
Technical diagram of a mechanical component with internal structure and an arrow indicating direction (no text or symbols)
natural_image
Simple diagram showing a black arrow pointing to a rectangular box with three small cutouts inside (no text or symbols)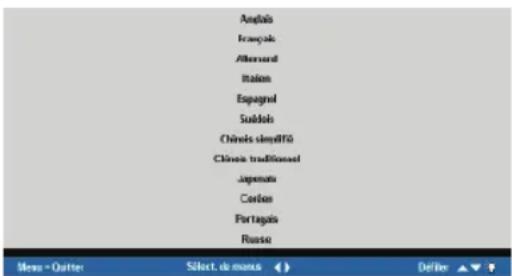
natural_image
Green circular button with white power symbol (no text or numbers)
ATTENTION
natural_image
Close-up of a metallic cylindrical component with flanged ends, shown in 3D perspective (no text or symbols visible)natural_image
Close-up of a hand pressing a button on a mechanical component, showing blue arrows indicating motion (no text or symbols)natural_image
Close-up of a hand holding a cylindrical mechanical component with a blue arrow indicating rotation (no text or symbols visible)RESOLUTION DE PROBLEMES
natural_image
Line drawing of a projector with visible internal components and mounting holes (no text or symbols)Planar Systems, Inc.
Corporate Headquarters
1195 NW Compton Drive
Beaverton, OR 97006-1992
Planar Customer Support
Telephone: US: 1-866-PLANAR1 (866) 752-6271
Outside US: (503) 748-5799
E-mail: PlanarSupport@planar.com
Online Technical Library: http://www.planar.com/support
Hours: M-F, 8am - 8pm ET, 12pm - 12am GMT
Deutsch
Planar Systems, Inc.
Planar Systems, Inc.
Sede corporativo
1195 NW Compton Drive
Beaverton, OR 97006-1992, USA
Apoyo de cliente
Planar Systems, Inc.
Cooperar Quartel-general
1195 NW Compton Drive
Beaverton, OR 97006-1992, USA
Planar Systems, Inc.
Maison mère
1195 NW Compton Drive
Beaverton, OR 97006-1992, USA
Support technique Planar
Telephone: en Anglais: 1-866-PLANAR1 (866) 752-6271
Planar Systems, Inc.
Sede
1195 NW Compton Drive
Beaverton, OR 97006-1992, USA
Planar Systems, Inc.
Huvudkontor
1195 NW Compton Drive
Beaverton, OR 97006-1992, USA
Planar Kundsupport
Telefon: US: 1-866-PLANAR1 (866) 752-6271
Internationellt: +1 (503) 748-5799
E-post: PlanarSupport@planar.com
On-line tekniska bibliotek: http://www.planar.com/support
Öppet: Mån-fre 8.00-20.00 ET, 12.00-24.00 GMT
繁體中文
Planar Systems, Inc.
Корпоративный Штаб
1195 NW Compton Drive, USA
Beaverton, OR 97006-1992
© Copyright October, 2006
natural_image
Black and white photo of a modern, curved electronic device with a metallic port (no visible text or symbols)DLP Projektor

natural_image
Black remote control with two cylindrical batteries (no text or symbols visible)natural_image
Line drawing of a coiled cable or plug with connectors (no text or symbols)natural_image
Simple line drawing of a cable with three connectors (no text or symbols)Teilvideokabel
natural_image
Technical illustration of a mechanical component with a downward arrow indicating motion or force (no text or symbols present)natural_image
Diagram of a remote control casing with two batteries, showing battery polarity and rotation arrows (no text or symbols)natural_image
Technical diagram of a mechanical component with internal structure and highlighted section (no text or symbols)
natural_image
Diagram showing connections between a monitor, remote control, and audio equipment (no text or symbols present)
WARNUNG
natural_image
Simple diagram showing a black arrow pointing to a rectangular box with three internal compartments (no text or symbols)

natural_image
Green circular button with white power symbol (no text or numbers)
WARNUNG
natural_image
Close-up of a hand pressing a metallic cylindrical component with blue arrows indicating motion (no text or symbols)
natural_image
Close-up of a hand holding a cylindrical mechanical component with a blue arrow indicating rotation (no text or symbols visible)FEHLERBESEITIGUNG
Safety Certifications
FCC Class B, UL, c-UL, CE, TUV-GS, CCC, PCT, MIC/EK
EN 55022 Warning
natural_image
Line drawing of a projector with visible internal components and mounting holes (no text or symbols)Guida per l'utente www.PlanarHomeTheater.com
English
Planar Systems, Inc.
Corporate Headquarters
1195 NW Compton Drive
Beaverton, OR 97006-1992
Planar Customer Support
Telephone: US: 1-866-PLANAR1 (866) 752-6271
Outside US: (503) 748-5799
E-mail: PlanarSupport@planar.com
Online Technical Library: http://www.planar.com/support
Hours: M-F, 8am - 8pm ET, 12pm - 12am GMT
Deutsch
Planar Systems, Inc.
Planar Systems, Inc.
Sede corporativo
1195 NW Compton Drive
Beaverton, OR 97006-1992, USA
Apoyo de cliente
Planar Systems, Inc.
Cooperar Quartel-general
1195 NW Compton Drive
Beaverton, OR 97006-1992, USA
Planar Systems, Inc.
Maison mère
1195 NW Compton Drive
Beaverton, OR 97006-1992, USA
Support technique Planar
Telephone: en Anglais: 1-866-PLANAR1 (866) 752-6271
Planar Systems, Inc.
Sede
1195 NW Compton Drive
Beaverton, OR 97006-1992, USA
Planar Systems, Inc.
Huvudkontor
1195 NW Compton Drive
Beaverton, OR 97006-1992, USA
Planar Kundsupport
Telefon: US: 1-866-PLANAR1 (866) 752-6271
Internationellt: +1 (503) 748-5799
E-post: PlanarSupport@planar.com
On-line tekniska bibliotek: http://www.planar.com/support
Öppet: Mån-fre 8.00-20.00 ET, 12.00-24.00 GMT
繁體中文
Planar Systems, Inc.
Корпоративный Штаб
1195 NW Compton Drive, USA
Beaverton, OR 97006-1992
Disposal of old Electrical & Electronic Equipment (Applicable throughout the European Union and other European countries with separate collection programs).

natural_image
Black and white photo of a modern, curved electronic device with a metallic port (no visible text or symbols)Proiettore DLP

natural_image
Black remote control with two cylindrical batteries beside it (no text or symbols visible)natural_image
Line drawing of a coiled cable or plug with connectors (no text or symbols)natural_image
Simple line drawing of a cable with three connectors (no text or symbols)Cavi video coassiale

Guida per l'utente
natural_image
Technical illustration of a mechanical component with a downward arrow indicating motion or force (no text or symbols present)natural_image
Diagram of a remote control casing with two batteries, showing battery polarity and rotation arrows (no text or symbols)natural_image
Technical diagram of a mechanical component with internal structure and highlighted section (no text or symbols)
natural_image
Diagram showing connections between a monitor, remote control, and network equipment (no text or symbols present)
AVVERTIMENTO
natural_image
Green circular button with white power symbol, no text or numbers present! AVVERTIMENTO
natural_image
Close-up of a hand pressing a metallic component with blue arrows indicating motion (no text or symbols)
natural_image
Close-up of a hand holding a cylindrical mechanical component with a blue arrow indicating rotation (no text or symbols visible)FCC Class B, UL, c-UL, CE, TUV-GS, CCC, PCT, MIC/EK
EN 55022 Avvertenze
natural_image
Line drawing of a projector with visible lens and ports (no text or symbols)Planar Systems, Inc.
Corporate Headquarters
1195 NW Compton Drive
Beaverton, OR 97006-1992
Planar Customer Support
Telephone: US: 1-866-PLANAR1 (866) 752-6271
Outside US: (503) 748-5799
E-mail: PlanarSupport@planar.com
Online Technical Library: http://www.planar.com/support
Hours: M-F, 8am - 8pm ET, 12pm - 12am GMT
Deutsch
Planar Systems, Inc.
Planar Systems, Inc.
Sede corporativo
1195 NW Compton Drive
Beaverton, OR 97006-1992, USA
Apoyo de cliente
Planar Systems, Inc.
Cooperar Quartel-general
1195 NW Compton Drive
Beaverton, OR 97006-1992, USA
Planar Systems, Inc.
Maison mère
1195 NW Compton Drive
Beaverton, OR 97006-1992, USA
Support technique Planar
Telephone: en Anglais: 1-866-PLANAR1 (866) 752-6271
Planar Systems, Inc.
Sede
1195 NW Compton Drive
Beaverton, OR 97006-1992, USA
Planar Systems, Inc.
Huvudkontor
1195 NW Compton Drive
Beaverton, OR 97006-1992, USA
Planar Kundsupport
Telefon: US: 1-866-PLANAR1 (866) 752-6271
Internationellt: +1 (503) 748-5799
E-post: PlanarSupport@planar.com
On-line tekniska bibliotek: http://www.planar.com/support
Öppet: Mån-fre 8.00-20.00 ET, 12.00-24.00 GMT
繁體中文
Planar Systems, Inc.
Корпоративный Штаб
1195 NW Compton Drive, USA
Beaverton, OR 97006-1992
natural_image
Close-up of a black and silver automotive electronic device with a metallic cylindrical port (no visible text or symbols)Proyector DLP

natural_image
Black remote control with two cylindrical batteries (no text or symbols visible)Control Remoto (Con dos pilas AAA)
natural_image
Line drawing of a coiled cable or plug with connectors (no text or symbols)
natural_image
Simple line drawing of a cable with three connectors (no text or symbols)natural_image
Technical illustration of a mechanical component with a downward arrow indicating motion or force (no text or symbols present)natural_image
Diagram of a remote control casing with two batteries, showing battery polarity and rotation arrows (no text or symbols)natural_image
Technical diagram of a mechanical component with internal structure and highlighted section (no text or symbols)

ADVERTENCIA
natural_image
Simple diagram showing a house inside a box with three windows, pointing to the right (no text or symbols)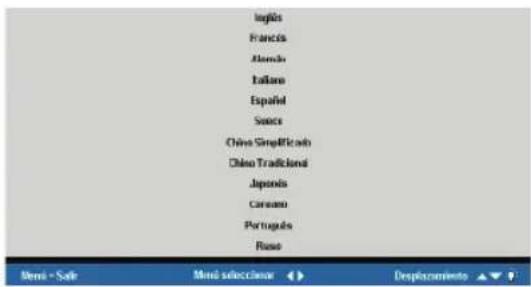
natural_image
Green circular button with white power symbol (no text or numbers)ADVERTENCIA
natural_image
Close-up of a hand pressing a metallic mechanical component with blue arrows indicating motion (no text or symbols)
natural_image
Close-up of a hand holding a cylindrical mechanical component with a blue arrow indicating rotation (no text or symbols visible)FCC Class B, UL, c-UL, CE, TUV-GS, CCC, PCT, MIC/EK
Aviso EN 55022
Planar Systems, Inc.
Sede corporativo
1195 NW Compton Drive
Beaverton, OR 97006-1992, USA
Apoyo de cliente
Teléfono:
EEUU: 1-866-PLANAR1 (866) 752-6271
Outside US: (503) 748-5799
E-mail: PlanarSupport@planar.com
Biblioteca Técnica Online: http://www.planar.com/support
Horas: M-F, 8am - 8pm ET, 12pm - 12am GMT
PD4010
PD7010
PD7060
DLP® Projektor
natural_image
Line drawing of a projector with visible internal components and mounting holes (no text or symbols)Planar Systems, Inc.
Corporate Headquarters
1195 NW Compton Drive
Beaverton, OR 97006-1992
Planar Customer Support
Telephone: US: 1-866-PLANAR1 (866) 752-6271
Outside US: (503) 748-5799
E-mail: PlanarSupport@planar.com
Online Technical Library: http://www.planar.com/support
Hours: M-F, 8am - 8pm ET, 12pm - 12am GMT
Deutsch
Planar Systems, Inc.
Planar Systems, Inc.
Sede corporativo
1195 NW Compton Drive
Beaverton, OR 97006-1992, USA
Apoyo de cliente
Planar Systems, Inc.
Cooperar Quartel-general
1195 NW Compton Drive
Beaverton, OR 97006-1992, USA
Planar Systems, Inc.
Maison mère
1195 NW Compton Drive
Beaverton, OR 97006-1992, USA
Support technique Planar
Telephone: en Anglais: 1-866-PLANAR1 (866) 752-6271
Planar Systems, Inc.
Sede
1195 NW Compton Drive
Beaverton, OR 97006-1992, USA
Planar Systems, Inc.
Huvudkontor
1195 NW Compton Drive
Beaverton, OR 97006-1992, USA
Planar Kundsupport
Telefon: US: 1-866-PLANAR1 (866) 752-6271
Internationellt: +1 (503) 748-5799
E-post: PlanarSupport@planar.com
On-line tekniska bibliotek: http://www.planar.com/support
Öppet: Mån-fre 8.00-20.00 ET, 12.00-24.00 GMT
ЯЯЯ
яяяяяяяяяяяяяяяяяяяяяяяяяяяяяяяяяяяяяяяяяяяяяяяяяяяяяяяяяяяяяяяяяяяяяяяяяяяяяяяяяяяяяяяяяяяяяяяяяяяя
美國總公司
1195 NW Compton Drive
Beaverton, OR 97006-1992, USA
ААААААААА
яяяяя 1-866-PLANARI (866) 752-6271
яяяя +1 (503) 748-5799
電子郵件信箱:PlanarSupport@planar.com
Planar Systems, Inc.
Корпоративный Штаб
1195 NW Compton Drive, USA
Beaverton, OR 97006-1992
natural_image
Black and white photo of a modern electronic device with a metallic port and lens (no visible text or symbols)DLP Projektor

natural_image
Black remote control with two cylindrical batteries on the right (no text or symbols visible)natural_image
Line drawing of a coiled cable or plug with connectors (no text or symbols)Nätsladd (Per land)

natural_image
Simple line drawing of a cable with three connectors and wires (no text or symbols)natural_image
Technical illustration of a mechanical component with a downward arrow indicating motion or direction (no text or symbols present)natural_image
Diagram of a remote control casing with two batteries, showing battery polarity and rotation arrows (no text or symbols)- Skjut tillbaka locket.

natural_image
Technical diagram of a mechanical component with internal structure and highlighted section (no text or symbols)

WARNING
natural_image
Simple diagram showing a house inside a box with three windows, pointing to an arrow (no text or symbols)

natural_image
Green circular button with white power symbol (no text or numbers)
WARNING
natural_image
Close-up of a hand pressing a metallic cylindrical component with blue arrows indicating motion (no text or symbols)
natural_image
Close-up of a hand holding a cylindrical mechanical component with a blue arrow indicating rotation (no text or symbols visible)PROBLEMLÖSNING
FCC Class B, UL, c-UL, CE, TUV-GS, CCC, PCT, MIC/EK
EN 55022 Varning
natural_image
Line drawing of a portable electronic device with ventilation slots and a central button (no text or symbols)用指南
www.PlanarHomeTheater.com
English
Planar Systems, Inc.
Corporate Headquarters
1195 NW Compton Drive
Beaverton, OR 97006-1992
Planar Customer Support
Telephone: US: 1-866-PLANAR1 (866) 752-6271
Outside US: (503) 748-5799
E-mail: PlanarSupport@planar.com
Online Technical Library: http://www.planar.com/support
Hours: M-F, 8am - 8pm ET, 12pm - 12am GMT
Deutsch
Planar Systems, Inc.
Planar Systems, Inc.
Sede corporativo
1195 NW Compton Drive
Beaverton, OR 97006-1992, USA
Apoyo de cliente
Planar Systems, Inc.
Cooperar Quartel-general
1195 NW Compton Drive
Beaverton, OR 97006-1992, USA
Planar Systems, Inc.
Maison mère
1195 NW Compton Drive
Beaverton, OR 97006-1992, USA
Support technique Planar
Telephone: en Anglais: 1-866-PLANAR1 (866) 752-6271
Planar Systems, Inc.
Sede
1195 NW Compton Drive
Beaverton, OR 97006-1992, USA
Planar Systems, Inc.
Huvudkontor
1195 NW Compton Drive
Beaverton, OR 97006-1992, USA
Planar Kundsupport
Telefon: US: 1-866-PLANAR1 (866) 752-6271
Internationellt: +1 (503) 748-5799
E-post: PlanarSupport@planar.com
On-line tekniska bibliotek: http://www.planar.com/support
Öppet: Mån-fre 8.00-20.00 ET, 12.00-24.00 GMT
繁體中文
Planar Systems, Inc.
Корпоративный Штаб
1195 NW Compton Drive, USA
Beaverton, OR 97006-1992
natural_image
Black and white photo of a modern, curved electronic device with a metallic port (no visible text or symbols)DLP 投影机

natural_image
Black remote control with two cylindrical batteries beside it (no text or symbols visible)遥控器
(附二颗 AAA 电池)
natural_image
Line drawing of a coiled cable or plug with connectors (no text or symbols)电源线
(依国家而定)

natural_image
Simple line drawing of a cable with multiple connectors (no text or symbols)模拟色差影像 连接线

光盘
(本用户手册)

用户指南
natural_image
Technical diagram of a mechanical component with internal structure and directional arrow (no text or symbols)natural_image
Diagram of a remote control casing with two batteries, showing battery polarity and rotation arrows (no text or symbols)- 将盖子放回。
natural_image
Cross-sectional diagram of a vehicle showing internal components and airflow direction (no text or labels)
natural_image
Diagram showing connections between a computer monitor, remote control, and server rack (no text or symbols present)
警告
natural_image
Green circular button with white power symbol, no text or numbers present
警告
natural_image
Close-up of a hand pressing a metallic cylindrical component with blue arrows indicating motion (no text or symbols)
natural_image
Close-up of a hand holding a cylindrical mechanical component with a black inner ring and blue arrow indicator (no text or symbols)故障排除
FCC Class B, UL, c-UL, CE, TUV-GS, CCC, PCT, MIC/EK
EN55022 警告
natural_image
Line drawing of a portable electronic device with ventilation slots and a central button (no text or symbols)使用指南
www.PlanarHomeTheater.com
English
Planar Systems, Inc.
Corporate Headquarters
1195 NW Compton Drive
Beaverton, OR 97006-1992
Planar Customer Support
Telephone: US: 1-866-PLANAR1 (866) 752-6271
Outside US: (503) 748-5799
E-mail: PlanarSupport@planar.com
Online Technical Library: http://www.planar.com/support
Hours: M-F, 8am - 8pm ET, 12pm - 12am GMT
Deutsch
Planar Systems, Inc.
Planar Systems, Inc.
Sede corporativo
1195 NW Compton Drive
Beaverton, OR 97006-1992, USA
Apoyo de cliente
Planar Systems, Inc.
Cooperar Quartel-general
1195 NW Compton Drive
Beaverton, OR 97006-1992, USA
Planar Systems, Inc.
Maison mère
1195 NW Compton Drive
Beaverton, OR 97006-1992, USA
Support technique Planar
Telephone: en Anglais: 1-866-PLANAR1 (866) 752-6271
Planar Systems, Inc.
Sede
1195 NW Compton Drive
Beaverton, OR 97006-1992, USA
Planar Systems, Inc.
Huvudkontor
1195 NW Compton Drive
Beaverton, OR 97006-1992, USA
Planar Kundsupport
Telefon: US: 1-866-PLANAR1 (866) 752-6271
Internationellt: +1 (503) 748-5799
E-post: PlanarSupport@planar.com
On-line tekniska bibliotek: http://www.planar.com/support
Oppet: Man-fre 8.00-20.00 ET, 12.00-24.00 GMT
繁體中文
Planar Systems, Inc.
Корпоративный Штаб
1195 NW Compton Drive, USA
Beaverton, OR 97006-1992
natural_image
Black and white photo of a modern, curved electronic device with a metallic port (no visible text or symbols)DLP 投影機

natural_image
Black remote control with two cylindrical batteries on the right (no text or symbols visible)遙控器
(附二顆 AAA 電池)
natural_image
Line drawing of a coiled cable or plug with connectors (no text or symbols)電源線
(依國家而定)

natural_image
Simple line drawing of a cable with three connectors and wires (no text or symbols)類比色差影像 連接線
光碟
(內含本使用手冊)

使用指南
natural_image
Technical diagram of a car interior showing airflow or exhaust flow direction (no text or symbols)natural_image
Diagram of a remote control casing with two batteries, showing battery polarity and rotation arrows (no text or symbols)- 將蓋子放回
natural_image
Technical diagram of a mechanical component with internal structure and an arrow indicating direction (no text or symbols)
natural_image
Diagram showing connections between a computer monitor, remote control, and server rack (no text or symbols present)
警告
natural_image
Green circular button with white power symbol (no text or numbers)警告
natural_image
Close-up of a hand pressing a metallic mechanical component with blue arrows indicating motion (no text or symbols)
natural_image
Close-up of a hand holding a cylindrical mechanical component with a blue dotted arrow indicating rotation (no text or symbols visible)疑難排解
natural_image
Line drawing of a portable projector with front and back views (no text or symbols)イガズド ユーザード
www.PlanarHomeTheater.com
English
Planar Systems, Inc.
Corporate Headquarters
1195 NW Compton Drive
Beaverton, OR 97006-1992
Planar Customer Support
Telephone: US: 1-866-PLANAR1 (866) 752-6271
Outside US: (503) 748-5799
E-mail: PlanarSupport@planar.com
Online Technical Library: http://www.planar.com/support
Hours: M-F, 8am - 8pm ET, 12pm - 12am GMT
Deutsch
Planar Systems, Inc.
Planar Systems, Inc.
Sede corporativo
1195 NW Compton Drive
Beaverton, OR 97006-1992, USA
Apoyo de cliente
Planar Systems, Inc.
Cooperar Quartel-general
1195 NW Compton Drive
Beaverton, OR 97006-1992, USA
Planar Systems, Inc.
Maison mère
1195 NW Compton Drive
Beaverton, OR 97006-1992, USA
Support technique Planar
Telephone: en Anglais: 1-866-PLANAR1 (866) 752-6271
Planar Systems, Inc.
Sede
1195 NW Compton Drive
Beaverton, OR 97006-1992, USA
Planar Systems, Inc.
Huvudkontor
1195 NW Compton Drive
Beaverton, OR 97006-1992, USA
Planar Kundsupport
Telefon: US: 1-866-PLANAR1 (866) 752-6271
Internationellt: +1 (503) 748-5799
E-post: PlanarSupport@planar.com
On-line tekniska bibliotek: http://www.planar.com/support
Öppet: Mån-fre 8.00-20.00 ET, 12.00-24.00 GMT
繁體中文
Planar Systems, Inc.
Корпоративный Штаб
1195 NW Compton Drive, USA
Beaverton, OR 97006-1992
natural_image
Black and white photo of a modern, curved electronic device with a metallic port (no visible text or symbols)DLPプロジェクト

natural_image
Black remote control with two cylindrical batteries beside it (no visible text or symbols)natural_image
Line drawing of a coiled cable or connector with connectors (no text or symbols)電源コード (国によって)
natural_image
Simple line drawing of a cable with multiple connectors (no text or symbols)コンポーネント ビデオケーブル

CD-ROM (ユーザーズマニュアル)

クイックスタートガイド
natural_image
Technical diagram of a car interior showing airflow or exhaust flow direction (no text or symbols)natural_image
Diagram of a remote control casing with two batteries and arrows indicating rotation (no text or symbols)- カバーを元に戻します。

natural_image
Technical illustration of a mechanical component with internal structure and highlighted section (no text or symbols)
natural_image
Diagram showing connections between a CD-ROM device, a laptop, remote control, and a server rack (no text or symbols present)警告
natural_image
Green circular button with white power symbol (no text or numbers)警告
natural_image
Close-up of a hand adjusting a metallic cylindrical component with blue arrows indicating rotation (no text or symbols visible)
natural_image
Close-up of a hand holding a cylindrical mechanical component with a blue arrow indicating rotation (no text or symbols visible)トラブル ルシューティング
FCC Class B, UL, c-UL, CE, TUV-GS, CCC, PCT, MIC/EK
EN55022警告
natural_image
Line drawing of a portable projector with front and back views (no text or symbols)사용자 안내서
www.PlanarHomeTheater.com
English
Planar Systems, Inc.
Corporate Headquarters
1195 NW Compton Drive
Beaverton, OR 97006-1992
Planar Customer Support
Telephone: US: 1-866-PLANAR1 (866) 752-6271
Outside US: (503) 748-5799
E-mail: PlanarSupport@planar.com
Online Technical Library: http://www.planar.com/support
Hours: M-F, 8am - 8pm ET, 12pm - 12am GMT
Deutsch
Planar Systems, Inc.
Planar Systems, Inc.
Sede corporativo
1195 NW Compton Drive
Beaverton, OR 97006-1992, USA
Apoyo de cliente
Planar Systems, Inc.
Cooperar Quartel-general
1195 NW Compton Drive
Beaverton, OR 97006-1992, USA
Planar Systems, Inc.
Maison mère
1195 NW Compton Drive
Beaverton, OR 97006-1992, USA
Support technique Planar
Telephone: en Anglais: 1-866-PLANAR1 (866) 752-6271
Planar Systems, Inc.
Sede
1195 NW Compton Drive
Beaverton, OR 97006-1992, USA
Planar Systems, Inc.
Huvudkontor
1195 NW Compton Drive
Beaverton, OR 97006-1992, USA
Planar Kundsupport
Telefon: US: 1-866-PLANAR1 (866) 752-6271
Internationellt: +1 (503) 748-5799
E-post: PlanarSupport@planar.com
On-line tekniska bibliotek: http://www.planar.com/support
Öppet: Mån-fre 8.00-20.00 ET, 12.00-24.00 GMT
繁體中文
Planar Systems, Inc.
Корпоративный Штаб
1195 NW Compton Drive, USA
Beaverton, OR 97006-1992
natural_image
Black and white photo of a modern, curved electronic device with a metallic port (no visible text or symbols)DLP 프로젝터

natural_image
Black remote control with two cylindrical batteries (no text or symbols visible)리모콘 (AAA 건전지 2개)
natural_image
Line drawing of a coiled cable or plug with connectors (no text or symbols)전원 코드 (나라 마다 다름)

natural_image
Pure electrical circuit lines without any symbols콤포넌트 비디오 케이블

CD-ROM (사용자 매뉴얼 포함)
natural_image
Technical diagram of a car interior showing airflow or exhaust flow direction (no text or symbols)natural_image
Diagram of a remote control casing with two batteries, showing battery polarity and rotation arrows (no text or symbols)- 커버를 다시 넓는다.

natural_image
Technical diagram of a mechanical component with internal structure and highlighted section (no text or symbols)

경고
natural_image
Green circular button with white power symbol, no text or numbers present
경고
natural_image
Close-up of a hand pressing down on a metallic mechanical component with blue arrows indicating motion (no text or symbols)
natural_image
Close-up of a hand holding a cylindrical mechanical component with a black inner ring and blue arrow indicator (no text or symbols)문제해결
FCC Class B, UL, c-UL, CE, TUV-GS, CCC, PCT, MIC/EK
EN 55022 경고
natural_image
Line drawing of a projector with visible internal components and mounting holes (no text or symbols)Guia do usuário
www.PlanarHomeTheater.com
English
Planar Systems, Inc.
Corporate Headquarters
1195 NW Compton Drive
Beaverton, OR 97006-1992
Planar Customer Support
Telephone: US: 1-866-PLANAR1 (866) 752-6271
Outside US: (503) 748-5799
E-mail: PlanarSupport@planar.com
Online Technical Library: http://www.planar.com/support
Hours: M-F, 8am - 8pm ET, 12pm - 12am GMT
Deutsch
Planar Systems, Inc.
Planar Systems, Inc.
Sede corporativo
1195 NW Compton Drive
Beaverton, OR 97006-1992, USA
Apoyo de cliente
Planar Systems, Inc.
Cooperar Quartel-general
1195 NW Compton Drive
Beaverton, OR 97006-1992, USA
Planar Systems, Inc.
Maison mère
1195 NW Compton Drive
Beaverton, OR 97006-1992, USA
Support technique Planar
Telephone: en Anglais: 1-866-PLANAR1 (866) 752-6271
Planar Systems, Inc.
Sede
1195 NW Compton Drive
Beaverton, OR 97006-1992, USA
Planar Systems, Inc.
Huvudkontor
1195 NW Compton Drive
Beaverton, OR 97006-1992, USA
Planar Kundsupport
Telefon: US: 1-866-PLANAR1 (866) 752-6271
Internationellt: +1 (503) 748-5799
E-post: PlanarSupport@planar.com
On-line tekniska bibliotek: http://www.planar.com/support
Öppet: Mån-fre 8.00-20.00 ET, 12.00-24.00 GMT
繁體中文
Planar Systems, Inc.
Корпоративный Штаб
1195 NW Compton Drive, USA
Beaverton, OR 97006-1992
natural_image
Black and white photo of a modern, curved electronic device with a metallic port (no visible text or symbols)Projetor DLP

natural_image
Black remote control with two cylindrical batteries beside it (no text or symbols visible)natural_image
Line drawing of a coiled cable or plug with connectors (no text or symbols)Corda (Pelo país)
natural_image
Simple line drawing of a cable with three connectors (no text or symbols)Cabo Video Componente

CD-ROM (Este manual do consumidor)

Guia do Usuário
natural_image
Technical illustration of a mechanical component with a downward arrow indicating motion or force (no text or symbols present)natural_image
Diagram of a remote control casing with two batteries, showing battery arrangement and rotation arrows (no text or symbols)- Repor a tampa.
natural_image
Technical illustration of a mechanical component with internal structure and highlighted section (no text or symbols)

CUIDADO
natural_image
Green circular button with white power symbol (no text or numbers)
CUIDADO
natural_image
Close-up of a hand pressing a button on a metallic mechanical component (no text or symbols visible)
natural_image
Close-up of a hand holding a cylindrical mechanical component with a blue dotted arrow indicating rotation (no text or symbols visible)FCC Class B, UL, c-UL, CE, TUV-GS, CCC, PCT, MIC/EK
natural_image
Line drawing of a projector with visible internal components and mounting holes (no text or symbols)Planar Systems, Inc.
Corporate Headquarters
1195 NW Compton Drive
Beaverton, OR 97006-1992
Planar Customer Support
Telephone: US: 1-866-PLANAR1 (866) 752-6271
Outside US: (503) 748-5799
E-mail: PlanarSupport@planar.com
Online Technical Library: http://www.planar.com/support
Hours: M-F, 8am - 8pm ET, 12pm - 12am GMT
Deutsch
Planar Systems, Inc.
Planar Systems, Inc.
Sede corporativo
1195 NW Compton Drive
Beaverton, OR 97006-1992, USA
Apoyo de cliente
Planar Systems, Inc.
Cooperar Quartel-general
1195 NW Compton Drive
Beaverton, OR 97006-1992, USA
Planar Systems, Inc.
Maison mère
1195 NW Compton Drive
Beaverton, OR 97006-1992, USA
Support technique Planar
Telephone: en Anglais: 1-866-PLANAR1 (866) 752-6271
Planar Systems, Inc.
Sede
1195 NW Compton Drive
Beaverton, OR 97006-1992, USA
Planar Systems, Inc.
Huvudkontor
1195 NW Compton Drive
Beaverton, OR 97006-1992, USA
Planar Kundsupport
Telefon: US: 1-866-PLANAR1 (866) 752-6271
Internationellt: +1 (503) 748-5799
E-post: PlanarSupport@planar.com
On-line tekniska bibliotek: http://www.planar.com/support
Öppet: Mån-fre 8.00-20.00 ET, 12.00-24.00 GMT
繁體中文
Planar Systems, Inc.
Корпоративный Штаб
1195 NW Compton Drive, USA
Beaverton, OR 97006-1992
Carefully unpack the projector and check that the following items are included.
natural_image
Black and white photo of a modern, curved electronic device with a metallic port (no visible text or symbols)DLP Проектор

natural_image
Black remote control with black buttons and a circular button (no text or symbols visible)natural_image
Technical line drawing of a mechanical component with internal structure and directional arrow (no text or symbols)natural_image
Diagram of a battery inside a remote control casing with arrows indicating rotation (no text or symbols)- Закройте крышку.

natural_image
Technical diagram of a mechanical component with internal structure and an arrow indicating direction (no text or symbols)
natural_image
Diagram showing connections between a monitor, remote control, and connected devices with colored cables (no text or symbols)
ПРЕДУПРЕЖДЕНИЕ
natural_image
Green circular button with white power symbol (no text or numbers)
ПРЕДУПРЕЖДЕНИЕ
natural_image
Close-up of a hand pressing down on a metallic cylindrical component with blue arrows indicating motion (no text or symbols)
natural_image
Close-up of a hand holding a cylindrical mechanical component with a blue dotted arrow indicating rotation (no text or symbols visible)Planar Systems, Inc.
Corporate Headquarters
1195 NW Compton Drive
Beaverton, OR 97006-1992
Planar Customer Support
Telephone:
US: 1-866-PLANAR1 (866) 752-6271
Outside US: (503) 748-5799
E-mail: PlanarSupport@planar.com
Online Technical Library: http://www.planar.com/support
Hours: M-F, 8am - 8pm ET, 12pm - 12am GMT
©2006 Planar Systems, Inc. Planar is a registered trademark of Planar System, Inc.
Other brands and names are the property of their respective owners.
Technical Information in this document is subject to change without notice.

- English
- Deutsch
- 繁體中文
- About this User's Guide
- Trademark Recognition
- Important Recycle Instructions
- Regulatory Warnings
- Register Your Planar Product Today
- Cables, Replacement Lamps and Accessories
- PACKING CHECKLIST
- REMOTE CONTROL FUNCTIONS
- INSERTING THE REMOTE CONTROL BATTERIES
- CONNECTING INPUT DEVICES
- STARTING AND SHUTTING DOWN THE PROJECTOR
- ! WARNING
- ADJUSTING THE FOCUS AND ZOOM
- TROUBLESHOOTING
- Common Problems and Solutions
- Image Problems
- Problem: No image appears on the screen
- Problem: The image is blurred
- Problem: The image is wider at the top or bottom (trapezoid effect)
- Problem: The image is reversed or upside down
- Problem: The image is streaked
- Lamp Problems
- Problem: There is no light from the projector
- Problem: The lamp goes off
- Remote Control Problems
- Problem: The projector does not respond to the remote control
- REGULATORY COMPLIANCE
- FCC Warning
- Canada
- Safety Certifications
- EN 55022 Warning
- PLANAR
- ATTENTION
- RESOLUTION DE PROBLEMES
- WARNUNG
- FEHLERBESEITIGUNG
- EN 55022 Avvertenze
- ADVERTENCIA
- Aviso EN 55022
- Planar Systems, Inc.
- Apoyo de cliente
- ЯЯЯ
- WARNING
- PROBLEMLÖSNING
- EN 55022 Varning
- 警告
- 故障排除
- EN55022 警告
- 疑難排解
- トラブル ルシューティング
- EN55022警告
- 문제해결
- EN 55022 경고
- CUIDADO
- Planar Customer Support
Brand : Planar
Model : PD7060
Category : Projector