
HESD4 WIFI - Cooker HOOVER - Free user manual and instructions
Find the device manual for free HESD4 WIFI HOOVER in PDF.
User questions about HESD4 WIFI HOOVER
0 question about this device. Answer the ones you know or ask your own.
Ask a new question about this device
Download the instructions for your Cooker in PDF format for free! Find your manual HESD4 WIFI - HOOVER and take your electronic device back in hand. On this page are published all the documents necessary for the use of your device. HESD4 WIFI by HOOVER.
USER MANUAL HESD4 WIFI HOOVER
By placing the CE C E mark on this product, we are confirming compliance to all relevant European safety, health and environmental requirements which are applicable in legislation for this product.
Safety Reminding and Maintenance:
- WARNING: The appliance and its accessible parts become hot during use. Care should be taken to avoid touching heating elements.
- Children under 8 Year of age must be kept away from the appliance unless they are continuously supervised.
- This appliance can be used by children aged from 8 years and above and persons with reduced physical, sensory or mental capabilities or lack of experience and knowledge if they have been given supervision or instruction concerning use of the appliance in a safe way and understand the hazards involved.
Children must not play with the appliance. - Cleaning and user maintenance shall not be made by children without supervision
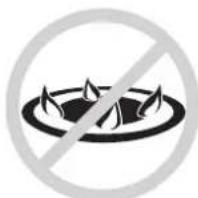
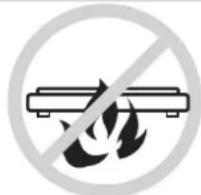
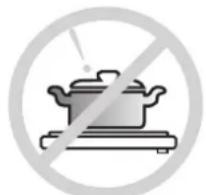
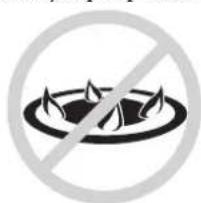
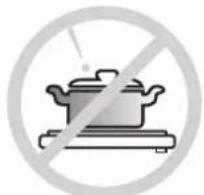
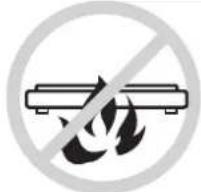
- WARNING: Unattended cooking on a hob with fat or oil can be dangerous and may result in fire.
- NEVER try to extinguish a fire with water, but switch off the appliance and then cover flame e.g. with a lid or a fire blanket.
-
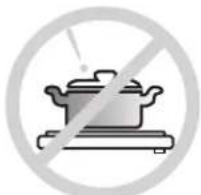
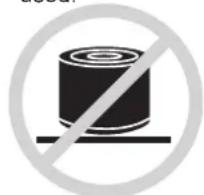
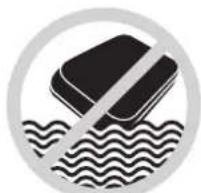
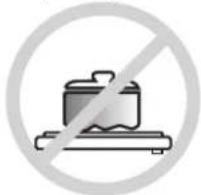
WARNING: Danger of fire: do not store items on the cooking surfaces.
-
WARNING: If the surface is cracked, switch off the appliance to avoid the possibility of electric shock.
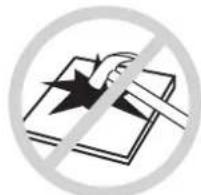
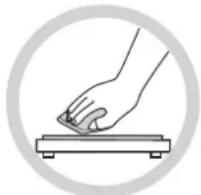
- Do not use a steam cleaner for cleaning operations
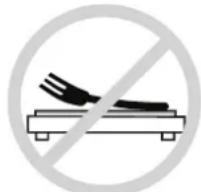
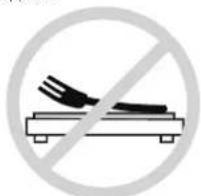
- Metallic objects such as knives, forks, spoons and sauce pan lids must not be placed on the hob surface as they can get hot. Any spillage should be removed from the lid before opening.
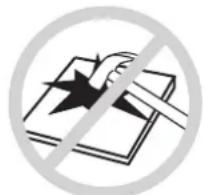
- The hob surface must be allowed to cool down before closing the lid.
- After use, switch off the hob element by its control. Do not rely on the pan detector.
- This appliance is not intended to be operated by means of an external timer or separate remote - control system.
- The means for disconnection must be incorporated in the fixed wiring in accordance with the wiring rules.
- The instructions state the type of cord to be used, taking into account the temperature of the rear surface of the appliance.
- If the supply cord is damaged, it must be replaced by the manufacturer, its service agent or similarly qualified persons in order to avoid a hazard.
- CAUTION: In order to avoid a hazard due to inadvertent resetting of the thermal cutout, this appliance must not be supplied through an external switching device, such as a timer, or connected to a circuit that is regularly switched on and off by the utility.
Dear Customer:
Thank you for purchases induction hob.
Please read this instruction manual carefully before using the hob and keep it in a s for future reference.
Product Introduction
The induction hob caters for all kind of cooking, with its electrokargneiones, micro-computerised controls and multi-functions, making it the idefor clas family.
Manufactured with specially imported materials, the induction hob is extremely durable and safe.
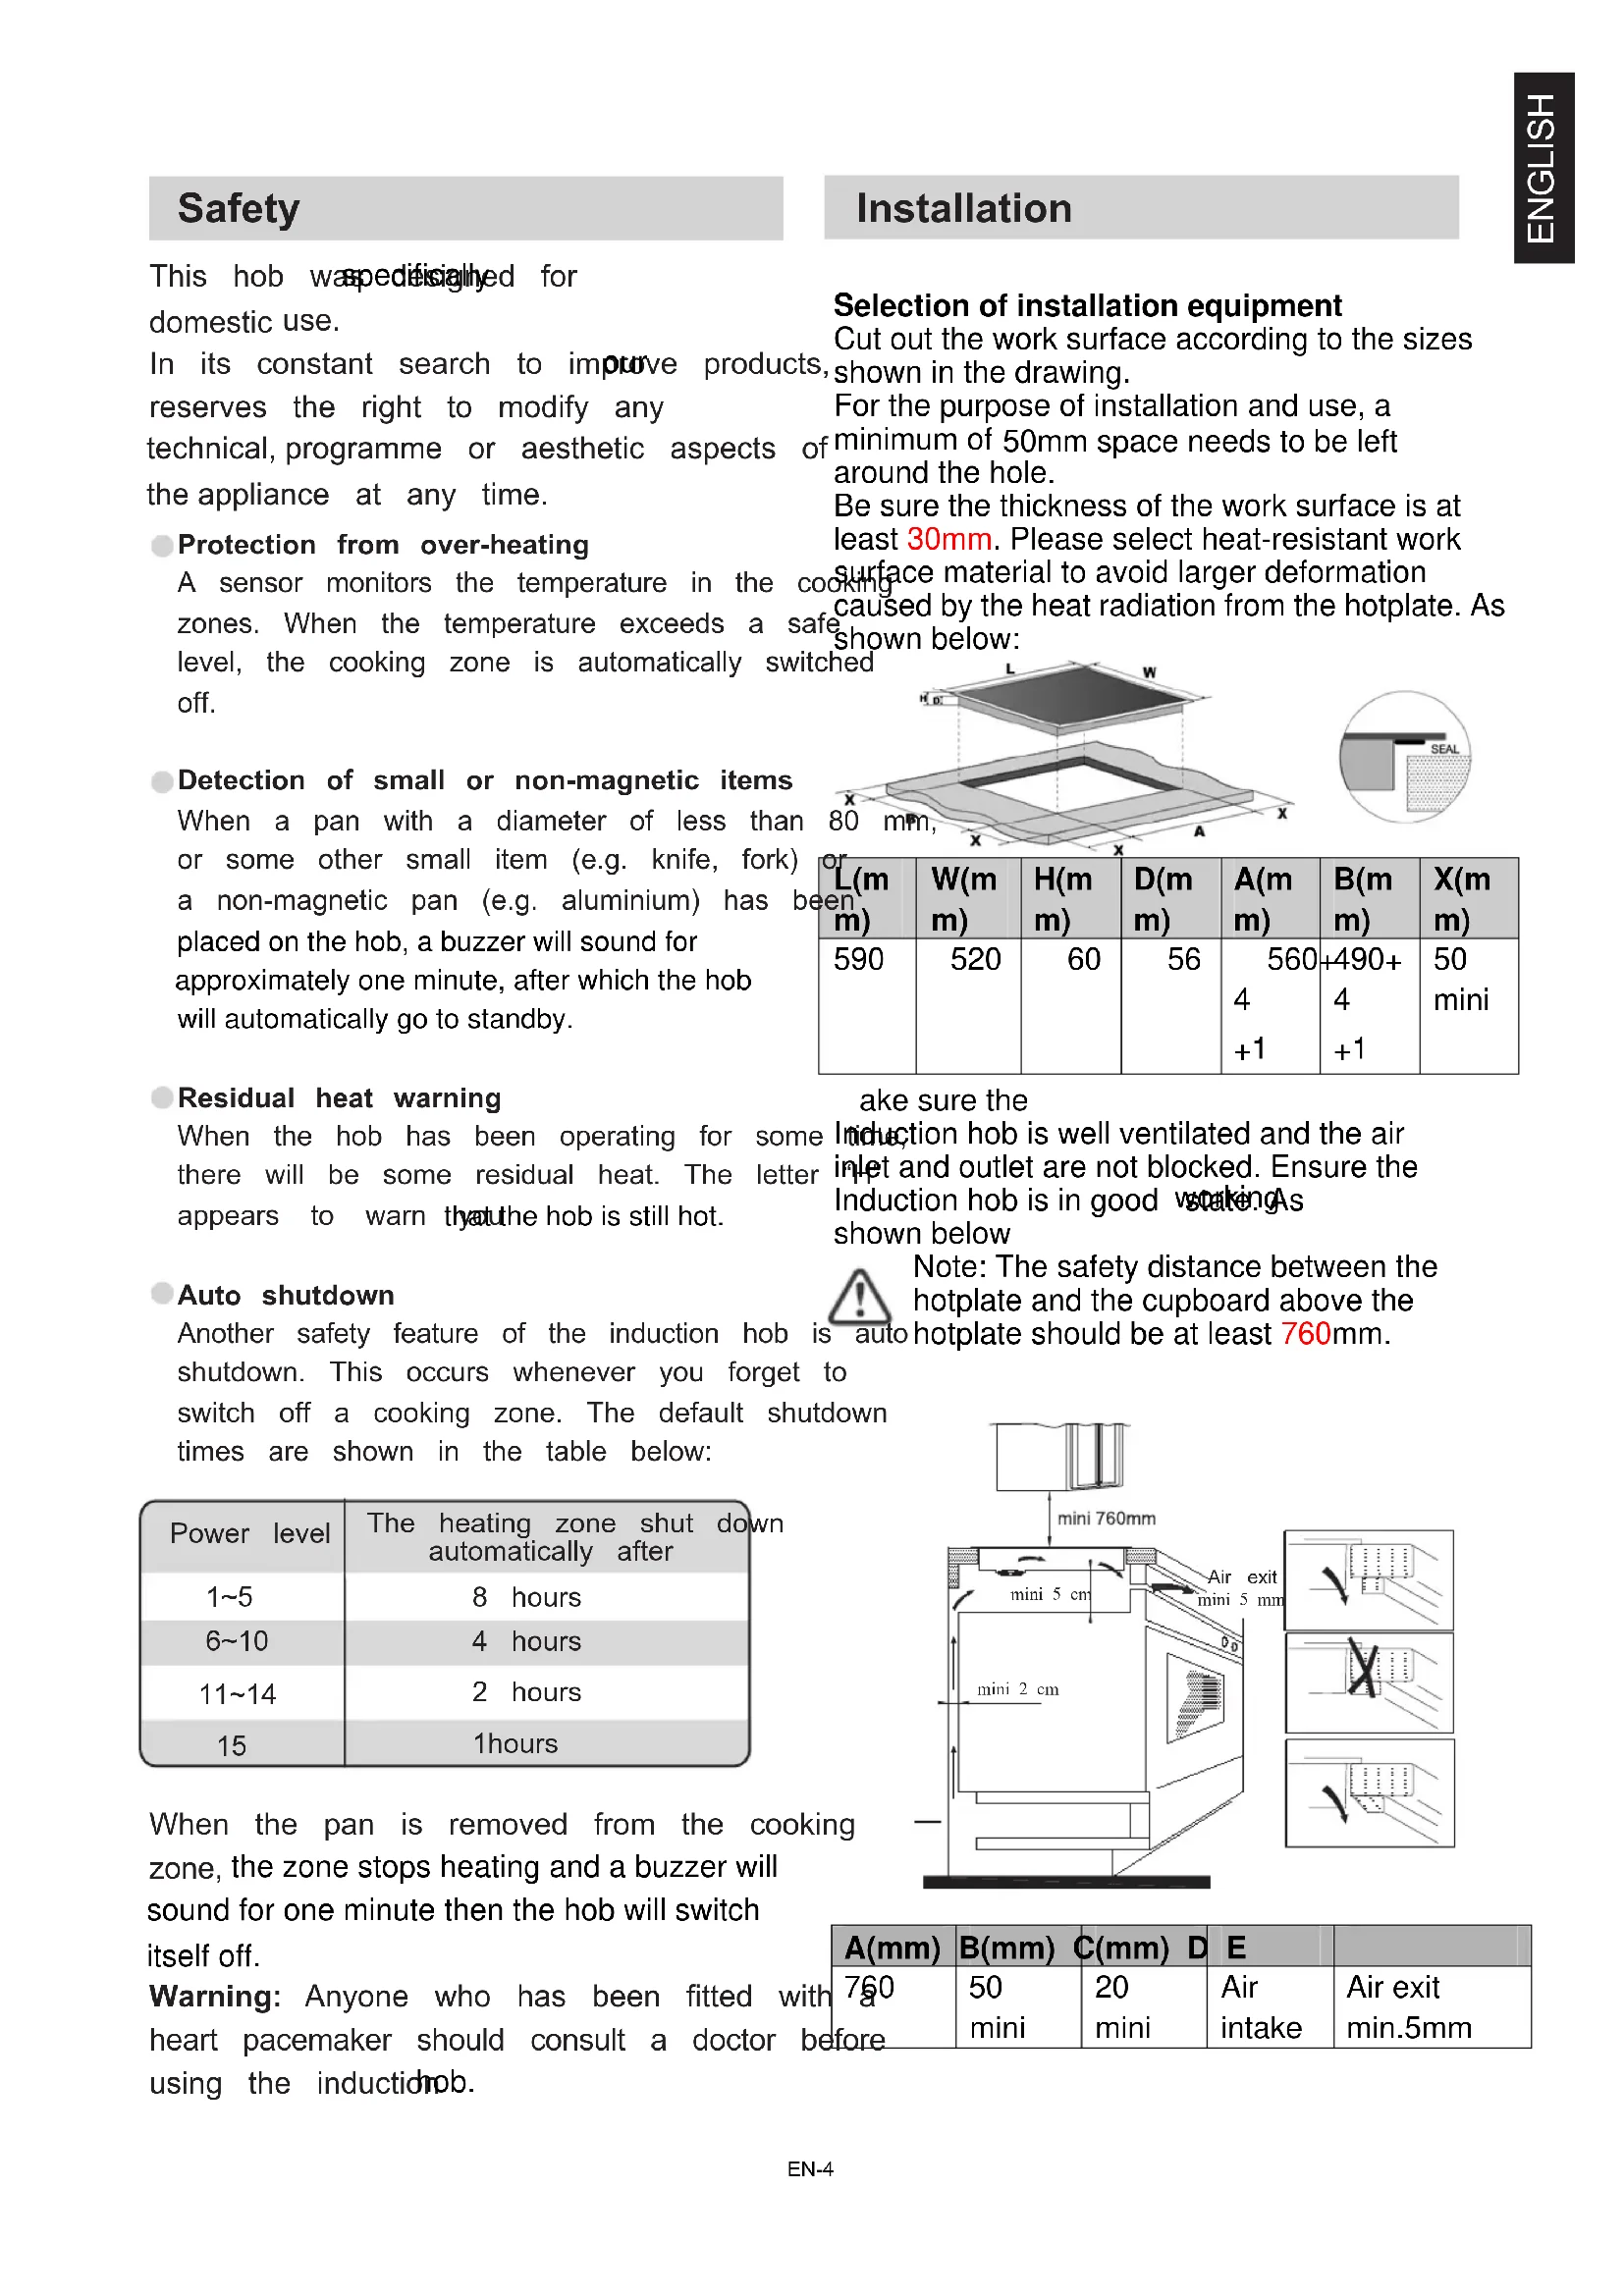
Working Principle
THIS INFORMATION IS IN ANOTHER INDUCITON HOB AND IS A BETTER EXPLANATION
INDUCTION
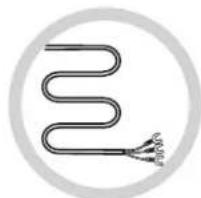
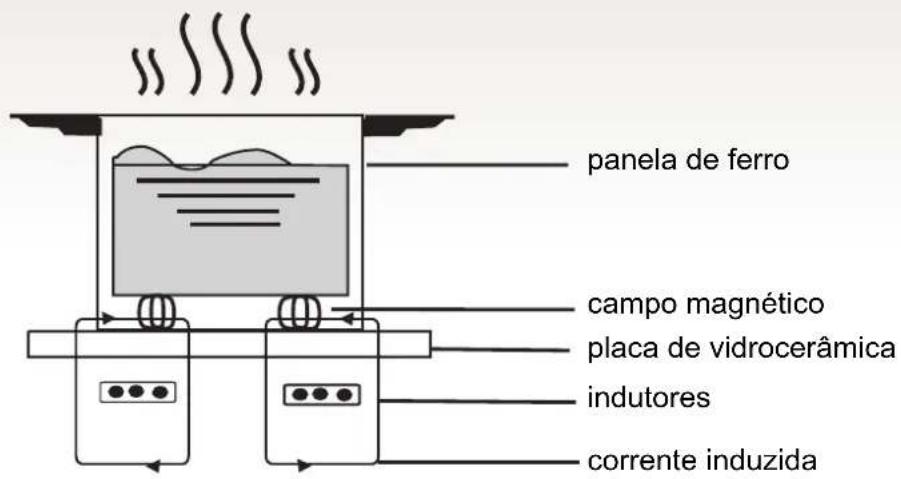
An electronic generator powers a coil located inside the appliance. This coil creates a magnetic field, so that when the pan is placed on the hob, it is permeated by the induction currents. These currents make the pan into a real heat transmitter, while the glass ceramic hob remains cold.
This system is designed for use with magnetic-bottomed pans.
Safety
Installation
This hob waspipedsigihed for domestic use.
In its constant search to improve products, reserves the right to modify any technical, programme or aesthetic aspects of the appliance at any time.
Protection from over-heating
A sensor monitors the temperature in the core zones. When the temperature exceeds a safe level, the cooking zone is automatically switc off.
Detection of small or non-magnetic items
When a pan with a diameter of less than or some other small item (e.g. knife, fork) a non-magnetic pan (e.g. aluminium) has be placed on the hob, a buzzer will sound for approximately one minute, after which the hob will automatically go to standby.
Residual heat warning
When the hob has been operating for some there will be some residual heat. The letter appears to warn that the hob is still hot.
Auto shutdown
Another safety feature of the induction hob is a shutdown. This occurs whenever you forget to switch off a cooking zone. The default shutdown times are shown in the table below:
| Power level | The heating zone shut down automatically after |
| 1~5 | 8 hours |
| 6~10 | 4 hours |
| 11~14 | 2 hours |
| 15 | 1hours |
When the pan is removed from the cooking zone, the zone stops heating and a buzzer will sound for one minute then the hob will switch itself off.
Warning: Anyone who has been fitted with heart pacemaker should consult a doctor be using the inductio.
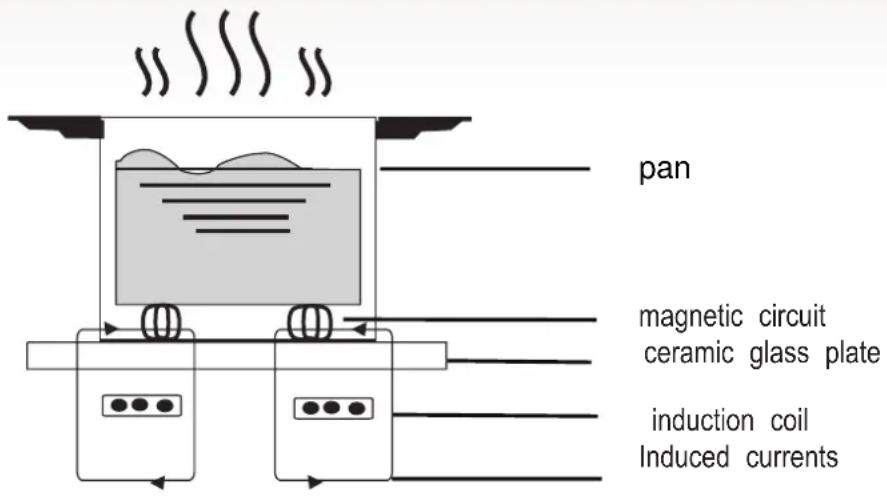
Selection of installation equipment
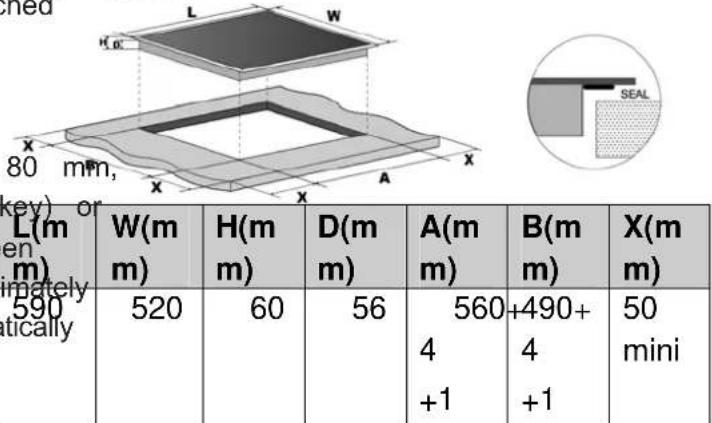
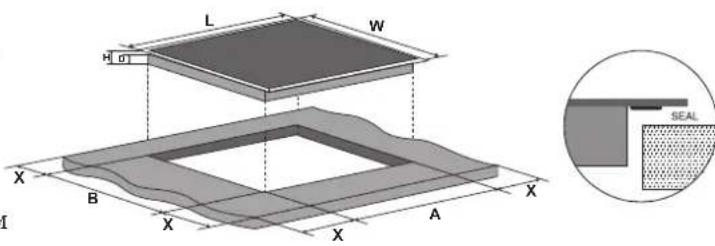
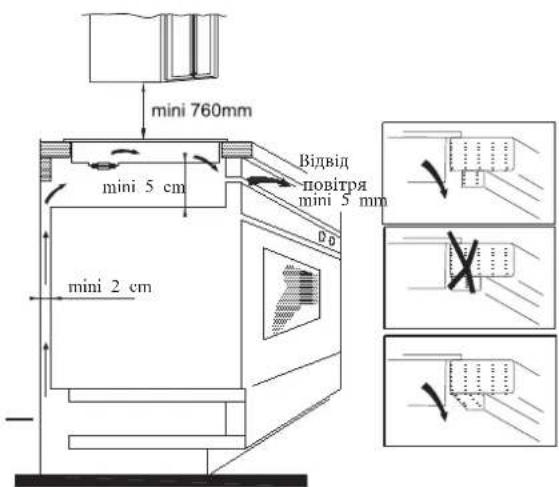
Cut out the work surface according to the sizes shown in the drawing.
For the purpose of installation and use, a minimum of 50mm space needs to be left around the hole.
Be sure the thickness of the work surface is at least 30mm . Please select heat-resistant work surface material to avoid larger deformation caused by the heat radiation from the hotplate. As shown below:
| L(m m) | W(m m) | H(m m) | D(m m) | A(m m) | B(m m) | X(m m) |
| 590 | 520 | 60 | 56 | 560 +1 | +490+ 4 +1 | 50 mini |
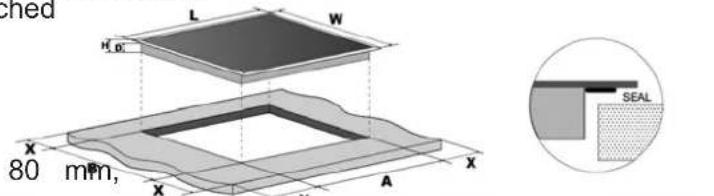
ake sure the
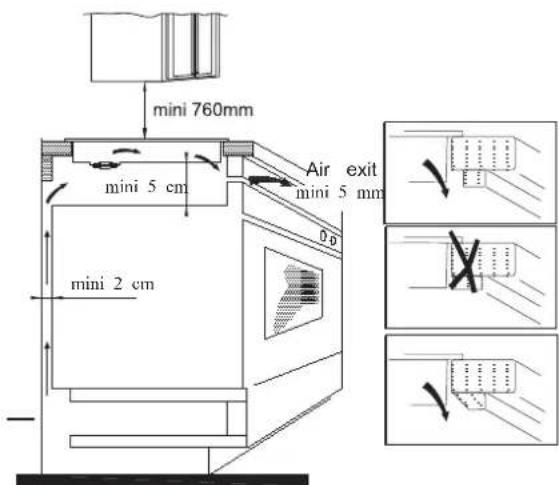
Induction hob is well ventilated and the air inlet and outlet are not blocked. Ensure the Induction hob is in good working as shown below
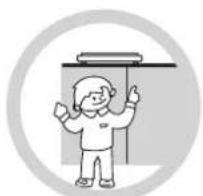
Note: The safety distance between the hotplate and the cupboard above the auto hotplate should be at least 760mm.
| A(mm) | B(mm) | C(mm) | D | E | |
| 760 | 50 | 20 | Air | Air exit | |
| before | mini | mini | intake | min.5mm |
Before you install the hob, make sure that
- the work surface is square and level, and no structural members interfere with space requirements
- the work surface is made of a heat-resistant material
- if the hob is installed above an oven, the oven has a built-in cooling fan
- the installation will comply with all clearance requirements and applicable standards and regulations
- a suitable isolating switch providing full disconnection from the mains power supply is incorporated in the permanent wiring, mounted and positioned to comply with the local wiring rules and regulations.
The isolating switch must be of an approved type and provide a 3mm air gap contact separation in all poles (or in all active [phase] conductors if the local wiring rules allow for this variation of the requirements)
- the isolating switch will be easily accessible to the customer with the hob installed
- you consult local building authorities and by-laws if in doubt regarding installation
- you use heat-resistant and easy-to-clean finishes (such as ceramic tiles) for the wall surfaces surrounding the hob.
When you have installed the hob, make sure that
- the power supply cable is not accessible through cupboard doors or drawers
- there is adequate flow of fresh air from outside the cabinetry to the base of the hob
- if the hob is installed above a drawer or cupboard space, a thermal protection barrier is installed below the base of the hob
- the isolating switch is easily accessible by the customer
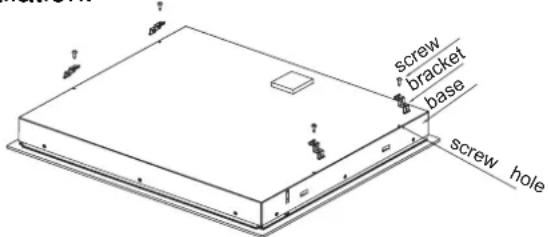
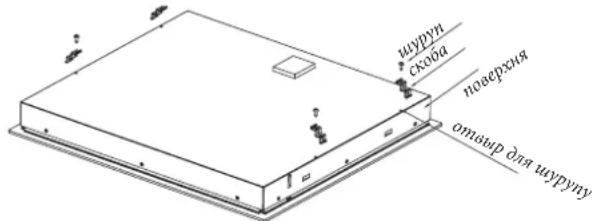
Before locating the fixing brackets
The unit should be placed on a stable, smooth surface (use the packaging). Do not apply force onto the controls protruding from the hob.
Adjusting the bracket position
Fix the hob on the work surface by screwing 4 brackets on the bottom of hob(see picture) after installation.
Cautions
- The induction hob must be installed by qualified personnel or technicians. Please never conduct the poeration by yourself.
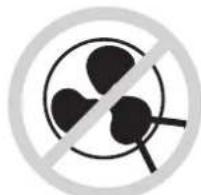
- The hob must not be installed directly above a dishwasher, fridge, freezer, washing machine or tumble dryer, as the humidity may damage the hobs electronics
- The induction hob should be installed in such a way that better heat radiation can be ensured to enhance its reliability.
- The wall and induced heating zone above the table surface shall withstand heat.
- To avoid any damage, the sandwich layer and adhesive must be resistant to heat.
Connecting the hob to the mains power supply
This hob must be connected to the mains power supply only by a suitably qualified person.
Before connecting the hob to the mains power supply, check that: 1. The domestic wiring system is suitable for the power drawn by the hob.
2. The voltage corresponds to the value given in the rating plate
3. The power supply cable sections can withstand the load specified on the rating plate.
Adapters, reducers or branching devices must not be used to connect the hob to the mains power supply, as they can cause overheating and fires.
The power supply cable must not touch any hot parts and must be positioned so that its temperature will not exceed 75^ at any point.
Check with an electrician whether the mastic wiring system is suitable without alterations. Any alterations must only be made by a domestic qualified electrician.
The power supply should be connected in compliance with the relevant standard, or a single-pole circuit breaker. The method of connection is shown below.
| Voltage&frequency | Wire connection | |||
| 400V 2-N | 1 2 | 3 4 | 5 | |
| 50/60Hz | L1 L2 | N | 1 | |
| Brown Black | Gray&Blue | Yellow/Green | ||
| 220-240V | 1 2 | 3 4 | 5 | |
| 50/60Hz | L | N | 1 | |
| Brown&Black | Gray&Blue | Yellow/Green | ||
- If the cable is damaged or to be replaced, the operation must be carried out by the after-sale agent with dedicated tools to avoid any accidents.
- If the appliance is being connected directly to the mains an omnipolar circuit-breaker must be installed with a minimum opening of 3mm between contacts.
- The installer must ensure that the correct electrical connection has been made and that it is compliant with safety regulations.
- The cable must not be bent or compressed.
- The cable must be checked regularly and replaced by authorised technicians only.
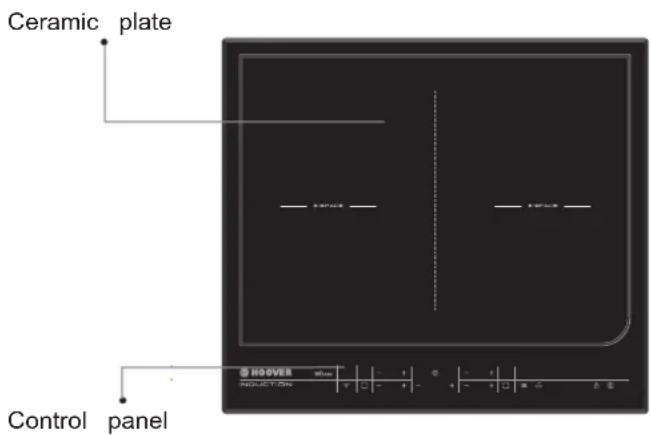
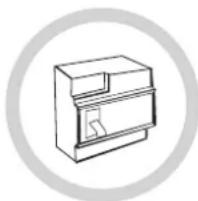
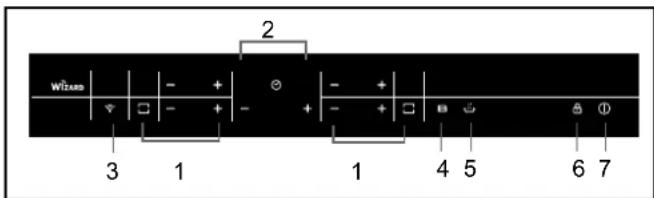
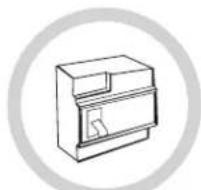
Diagram of induction hob:
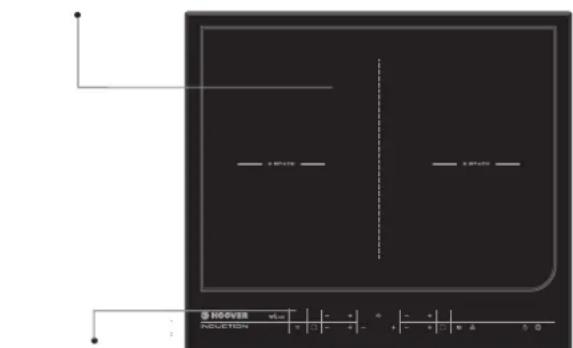
Ceramic plate
Control panel
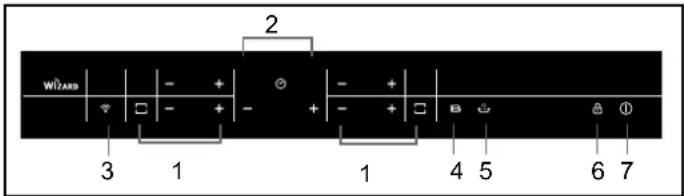
Schematic diagram of the control panel

- Power regular control
- Timer regular control
3.WIFI control - Booster control
- Keep warm control
- Lock/Inlock control
- On/Off control
Instructions for Use
When the power is switched on, the buzz and wind and all the indicators will come one second and then go off. The hob is now standby model the pan in the centre of the cooking zone.
Operating instructions
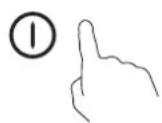
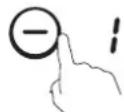
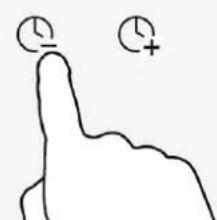
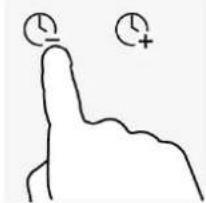
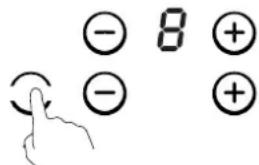
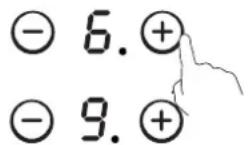
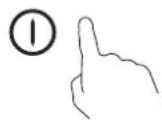
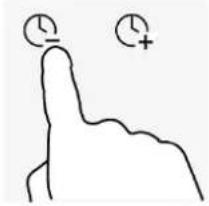
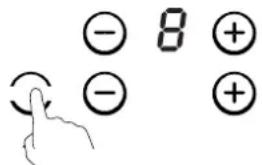
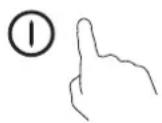
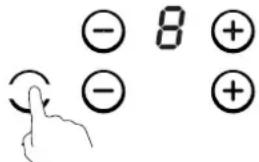
- Press the "①" control, all the indicators show "--".

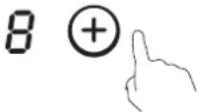
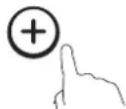
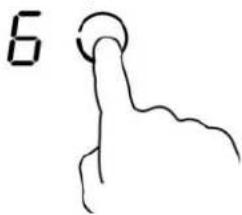
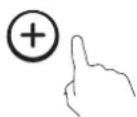
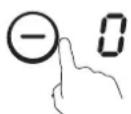
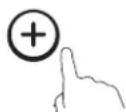
Select the power level by pressing the "+" or "-" control for the relevant cooking zone. To begin with the indicator shows "8" or "I" by pressing the "+" or "-" control. Adjust up or down by pressing the "+" or "-" control.


If you press the "+" and "-" controls simultaneously, the power setting returns to "0" and the cooking zone switches off.

NB: When the "①" control is pressed, the induction hob returns to standby mode if no other operation is carried out within one minute.
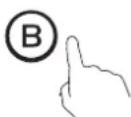
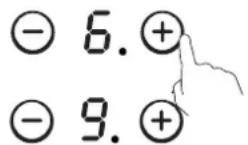
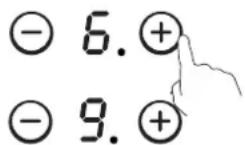
Boost function
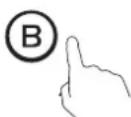
Press the" control, the power level indicator showing " b
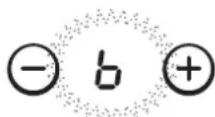
Warning:
- The boost function only operates for 5 minutes, after which the cooking zone will revert to its original setting.
- The boost function works on the all cooking zone.
- As the boost function of 1st or 3rd cooking zone is activated, the PRO zone is limited at level 2 automatically. Vice versa if the boost function of PRO cooking zone is activated, both the 1st and 3rd cooking zone are limited at level 2 automatically.
Cancelling the "BOOST" mode
Cancel the "Boost" mode by pressing the "+" or "-" control of the corresponding zone.


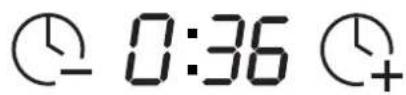
Using the Timer
You can use the timer in two different ways:
- You can use it as a minute minder. In this case, the timer will not turn any cooking zone off when the set time is up.
Instructions for Use
- You can set it to turn cooking zones off after the set time is up.
- You can set the timer for up to 9 hour and 59 minutes.
Using the Timer as a Minute Minder If you are not selecting any cooking zone
- Make sure the cooktop is turned on. Note: you can use the minute minder even if you're not selecting any cooking zone.
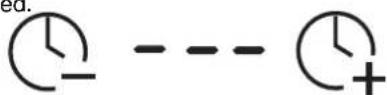
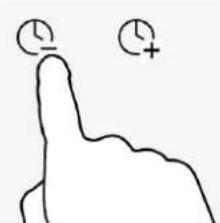
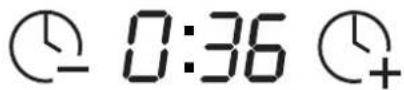
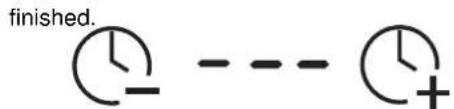
- Set the time by touching the " - " or "+" control of the timer
Hint: Touch the " - " or "+" control of the timer once to decrease or increase by 1 minute.
Hold the " - " r " + " control of the timer to decrease or increase by 10 minutes.
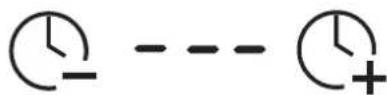
- Touching the " - " and " + " together, the timer is cancelled, and the"0:00" will show in the minute display.

- When the time is set, it will begin to count down immediately. The display will show the remaining time and the timer indicator will flash for 5 seconds.

- Buzzer will beep for 30 seconds and the timer indicator shows "--" when the setting time
finished.
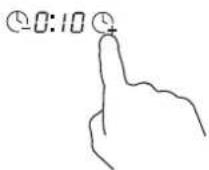
Setting the timer to turn cooking zones off If the timer is set on one zone:
- Touching the heating zone selection control that you want to set the timer for.
- Touch " - "or " + " control , The minder indicator will start flashing and "0:10" will show in the timer display.

- Set the time by touching the" - " or "+" control of the timer
Hint: Touch the " - " or "+" control of the timer once will decrease or increase by 1 minute.
Touch and hold the " - " or "+" control of the timer will decrease or increase by 10 minutes.
- Touching the " - " and + together, the timer is cancelled, and the" 00" will show in the minute display.

- When the time is set, it will begin to count down immediately. The display will show the remaining time and the timer indicator flash for 5 seconds.
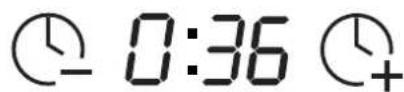
NOTE: The red dot next to power level indicator will illuminate indicating that zone is selected.

- When cooking time expires, the corresponding cooking zone will be switch off automatically.
Other cooking zone will keep operating if they are turned on previously.
Instructions for Use
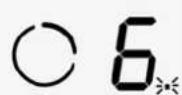
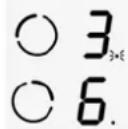
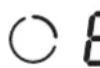
If the timer is set on more than one zone:
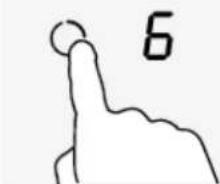
- When you set the time for several cooking zones simultaneously, decimal dots of the relevant cooking zones are on. The minute display shows the min. timer. The dot of the corresponding zone flashes.
0:15
3 6
(set to 15 minutes)
(set to 45 minutes)
- Once the countdown timer expires, the corresponding zone will switch off. Then it will show the new min. timer and the dot of corresponding zone will flash.

0:30

C
Using the Keep Warm function
Activated the Keep warm function
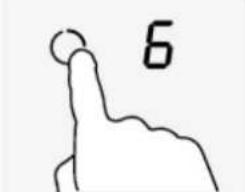
- Touching the heating zone selection control
- Touching the keep warm control, the zone indicator show "1
88
Cancel the keep warm function
Touch "-" or "+" control of the corresponding zone, then the cooking zone will revert to the level you select.
Safety mode
To ensure the safety of children, the induction hob is fitted with an safety lock.
Lock:
In working mode, press the " 品 " key, the hob then goes into the lock mode, timer will display "Loc" and the rest of the keys are disabled except the " ① "key.


In standby mode, press the "lock" key, the hob then goes into the lock mode, the timer shows "Loc" and the rest of the keys are disabled. The timer shows "Loc" for a while and then goes off.
If you press the ① control, "Ioc" will be displayed for a while.
Unlock:
Hold down the "Lock" key for 3 second, and the lock function will be deactivate.
WIFI FUNCTION
First of all, you should download Simply-Fy and install to your portable device. Then enroll your induction hob. Refer to annex for details.

To use the WIFI function, switch the hob on and press the WIFI control. The wifi LED will flash fast for 5 seconds which means the WIFI module is booting up. If the WIFI module connects to the router, the wifi LED will remain on all all the time. Otherwise, the WIFI LED will be flashing in cycles of 1 second on 1 second off.
When the connection is made, you can find numerous information on imply-Fy, e.g. Zone power, time remaining etc.
Instructions for Use
FLEXIBLE AREA
This area can be used as a single zone or as two different zones, accordingly to your cooking needs.
Flexible area is made of two independent inductors that can be controlled separately. When working as a single zone, the part that is not covered by cookware is automatically switched off after one minute.
To grant a correct pan detection and a even heat distribution, the cookware should be correctly placed:
- In the front or rear side of the flexible zone when the cookware is smaller than 22cm
- Anywhere with bigger cookware.
As large zone
To activate the flexible area as a single large zone, simply press the dedicated keys.
The power setting works as any other cooking zone.
If the pan is moved from the front to the rear part of the zone (or vice versa), the flexible area automatically detects the new position, keeping the same power.
Deactivation of the continuum zone
Resetting the power of the continuum zone or pressing the continuum key again
As two independent zones
To use the flexible area as two different zones with different power settings, press the dedicated controls.
The maximum power of cooking zones is as follows:
| Heating Zone | Normal | Boost |
| 1 | 1800 | 3000 |
| 2 | 1800 | 3000 |
| Flexible Area | 3000 | 4000 |
| 3 | 1800 | 3000 |
| 4 | 1800 | 3000 |
The above may vary according to the material it is made from
of the pan and
Selection of cooking vessels
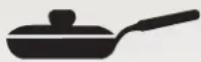
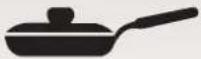
Iron oil frying pan
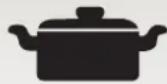
Stainless steel pot Iron

pan
Iron kettle

Enamel stainless steel kettle

Enamel cooking utensil

Iron plate
You may have a number of different cooking vessels
This induction hob can identify a variety of cooking vessels, which you can test one of the following methods:
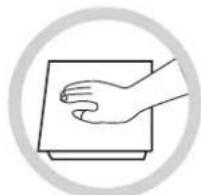
Place the vessel on the cooking zone. If the corresponding cooking zone display a power level, then the vessel is suitable for use with the induction hob.
2 Hold a magnet to the vessel. If the magnet is attracted to the vessel, it is subject for use with the induction hob.
NB: The base of the vessel must contain magnetic material.
It must have a flat bottom with a diameter of 14 more than cm.
3 Use pans whose diameter is as large as the graphic of the zone selected.
Using a pot a slightly wider energy will be used at its maximum efficiency. If you use smaller pot efficiency could be less than expected. Pot less than 140mm could be undetected by the hob.
Safety Reminding and Maintenance:

A dedicated power protection air switch must be used.
For indoor use only.
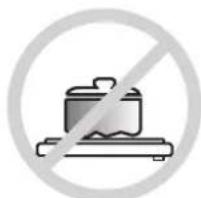
Never wash the induction directly with water.
h do not store detergents or flammable materials beneath the hob.
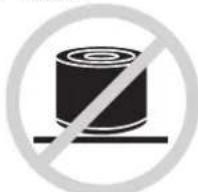
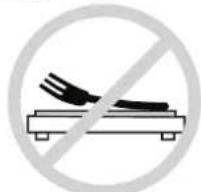
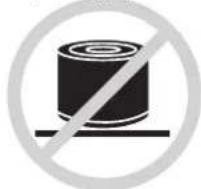
Always open sealed containers when a cooking zone has become time to time check that not leave metallic objects, such as cans, before heating for a long time the surface (e.g. glass, paper, etc.) as knives, forks, spoons them, otherwise they may remain hot for some time is obstructing the air intake and lids on the hobast they may explode. afterwards - so do not touch beneath the induction hob. get hot. the ceramic surface.
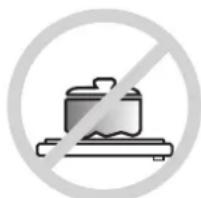
Never use the induction hobNever have the induction If the surface of the hob is not place rough or uneven near another appliance which hotplate to work without foodracked, switch off the vessels on the hob, as they generates a high temperature, inside, otherwise its operationappliance to avoid any may damage the ceramic such as a gas cooker or a performance may be affected possibility of electric shocks. surface. paraffin heater. and danger may happen.
Clean the induction hob Keep children or infirm persons the power cable is damaged regularly to stop foreign object away from the appliance. it should be replaced by our from getting into the fan Nander let them use it service agent or by another preventing the appliance fromunsupervised. suitably qualified person. working properly.
This appliance is not intended for use by persons (including children) with reduced physical, sensory or mental capabilities, or lack of experience and knowledge, unless they have been given supervision or instruction concerning use of the appliance by a person responsible for their safety.
Children should be supervised to ensure that they do not play with the appliance.
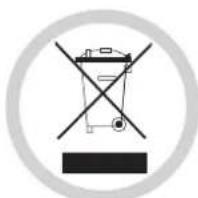
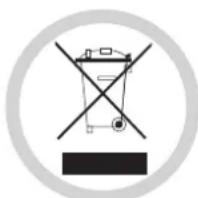
DISPOSAL: Do not dispose this product as unsorted municipal waste. Collection of such waste separately for special treatment is necessary.
This appliance is labelled in compliance with European directive for Waste Electrical and Electronic Equipment (WEEE). By ensuring that this appliance is disposed of correctly, you will help prevent any possible damage to the environment and to human health, which might otherwise be caused if were disposed of in the wrong way. The symbol on the product indicates that it may not be treated as normal household waste. It should be taken to a collection point for the recycling of electrical and electronic goods. This appliance requires specialist waste disposal. For further information regarding the treatment, recovery and recycling of this product please contact your local council, your household waste disposal service, or the shop where you purchased it.
For more detailed information about treatment, recovery and recycling of this product, please contact your local cit office, your household waste disposal service or the shop where you purchased the product.
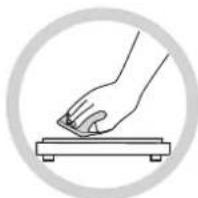
Cleaning and Maintenance
The surface of the induction hob may be easily cleaned in the following
| Type of contamination | Method of cleaning | Cleaning materials |
| Light Cleaning | The HEATER SHOULD NOT BE IMMERSED IN HOT WATER!!! | |
| Rings and lime scale | Apply white vinegar to the area, wipe a soft cloth or use a commercially available product | Special adhesive for ceramic glass |
| Food residue, melted aluminium or plastics | Use a special scraper for ceramic glass to remove residue (a silicon product best) | Special adhesive for ceramic glass |
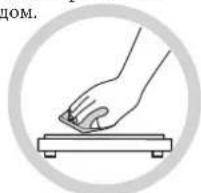
NB: Disconnect the power supply before cleaning.
Failure Display and Inspection
If any abnormality occurs, the induction hob will automatically go into protective mode and one of the following codes:
| Problem | Possible causes | What to do |
| F1-F6 | Temperature sensor failure | Please contact the supplier. |
| F9-FA | Temperature sensor of the IGBT failure. | Please contact the supplier. |
| FC | The connection between the display board and the main board has failed. | Please contact the supplier. |
| E1/E2 | Abnormal supply voltage Please | inspect whether power supply is normal. Power on after the power supply is normal. |
| E3/E4 | Temperature sensor of the ceramic glass plate is high | Please restart after the induction hob cools down. |
| E5 | Temperature sensor of the IGBT is high | Please restart after the induction hob cools down. |
The above table shows how to assess and check common faults.
Do not dismantle the appliance yourself, otherwise you may damage the induction hob.
Customer Care Service
If a fault should occur, before calling After Sales Service, please do the following:
-Check that the appliance is correctly plugged in
-Read the failure and display table above
If you are still unable to resolve the problem, switch off the appliance, do not try to and call
After Sales Service.
Special Declaration
The contents of this manual have been carefully checked. However, the company cannot be held responsible for any misprints or omissions. Also, any technical modifications may be included in a revised version of the manual without notice. The appearance and colour of the appliance in this manual may differ from the actual one.
0:15 3 (set to 15 minutes) 6. (set to 45 minutes)
| Voltage&frequency | Wire connection | |||
| 400V 2-N | 1 | 2 | 3 | 4 5 |
| 50/60Hz | L1 | L2 | N | 1 / = |
| Brown | Black | Gray&Blue | Yellow/Green | |
| 220-240V | 1 | 2 | 3 | 4 5 |
| 50/60Hz | L | N | 1 / = | |
| Brown&Black | Gray&Blue | Yellow/Green | ||
Thank you for purchasing the induction hob. We hope it will give manysware. of goc
Please read this instruction manual carefully before using the hob and keep it in a s for future reference.
Product Introduction
The induction hob caters for all kind of cooking ,with its electrokargatrices, and its micro-computerised controls and multi-functions, making it the ideal to choice family.
Manufactured with specially imported materials, the induction hob is extremely durable and safe.
Working Principle
The induction hob comprises a coil, a hotplate made of ferromagnetic material and a system. Electrical current generates a powerful magnetic field through the coil. This proves a large number of vortices which in turn generate heat which is then transmitted through cookingzone to the cooking vessel.
Safety
Installation
This hob was specially designed for domestic use.
In its constant search to improve its reserves the right to modify technical, programme or aesthetic aspectsthe appliance at any time.
Protection from over-heating
A sensor monitors the temperature in the cook zones. When the temperature exceeds a safe level, the cooking zone is automatically switched off.
Detection of small or non-magnetic items
When a pan with a diameter of less than 80 or some other small item (e.g. knife, fork, key) a non-magnetic pan (e.g. aluminium) has been left on the hob, a buzzer sounds for approxima one minute, after which the hob goes automatica on to standby.
Residual heat warning
When the hob has been operating for some there will be some residual heat. The letter appears to warn you to keep away from
Auto shutdown
Another safety feature of the induction hob is autism shutdown. This occurs whenever you forget to switch off a cooking zone. The default shutdown times are shown in the table below:
When the pan is removed from the cooking zone, it stops heating immediately and switches itself off after the buzzer has sounded for one minute.
Warning: Anyone who has been fitted with heart pacemaker should consult a doctor before using the induction hotplate.
Under any circumstances, make sure the Induction cooker hob is well ventilated and the air inlet and outlet are not blocked. Ensure the Induction cooker hob is in good work state. As shown below
Note: The safety distance between the hotplate and the cupboard above the auto hotplate should be at least 760mm.
| A(mm) | B(mm) | C(mm) | D | E | |
| 760 | 50 | 20 | Air | Air exit | |
| before | mini | mini | intake | min.5mm |
Before you install the hob, make sure that
- the work surface is square and level, and no structural members interfere with space requirements
- the work surface is made of a heat-resistant material
- if the hob is installed above an oven, the oven has a built-in cooling fan
- the installation will comply with all clearance requirements and applicable standards and regulations
- a suitable isolating switch providing full disconnection from the mains power supply is incorporated in the permanent wiring, mounted and positioned to comply with the local wiring rules and regulations.
The isolating switch must be of an approved type and provide a 3mm air gap contact separation in all poles (or in all active [phase] conductors if the local wiring rules allow for this variation of the requirements)
- the isolating switch will be easily accessible to the customer with the hob installed
- you consult local building authorities and by-laws if in doubt regarding installation
- you use heat-resistant and easy-to-clean finishes (such as ceramic tiles) for the wall surfaces surrounding the hob.
When you have installed the hob, make sure that
- the power supply cable is not accessible through cupboard doors or drawers
- there is adequate flow of fresh air from outside the cabinetry to the base of the hob
- if the hob is installed above a drawer or cupboard space, a thermal protection barrier is installed below the base of the hob
- the isolating switch is easily accessible by the customer
Before locating the fixing brackets
The unit should be placed on a stable, smooth surface (use the packaging). Do not apply force onto the controls protruding from the hob.
Adjusting the bracket position
Fix the hob on the work surface by screw 4 brackets on the bottom of hob(see picture) after installation.

Cautions
- The induction hotplate must be installed by qualified personnel or technicians. We have professionals at your service. Please never conduct the operation by yourself.
- The hob will not be installed directly above a dishwasher, fridge, freezer, washing machine or clothes dryer, as the humidity may damage the hob electronics
- The induction hotplate shall be installed such that better heat radiation can be ensured to enhance its reliability.
- The wall and induced heating zone above the table surface shall withstand heat.
- To avoid any damage, the sandwich layer and adhesive must be resistant to heat.
Connecting the hob to the mains power supply
This hob must be connected to the mains power supply only by a suitably qualified person.
Before connecting the hob to the mains power supply, check that:
-
the domestic wiring system is suitable for the power drawn by the hob.
-
the voltage corresponds to the value given in the rating plate
-
the power supply cable sections can withstand the load specified on the rating plate.
To connect the hob to the mains power supply, do not use adapters, reducers, or branching
devices, as they can cause overheating and fire.
The power supply cable must not touch any hot parts and must be positioned so that its temperature will not exceed 75^ at any point.
Check with an electrician whether the mastic wiring system is suitable without alterations. Any alterations must only be made by a qualified electrician.
The power supply should be connected in compliance with the relevant standard, or a single-pole circuit breaker. The method of connection is shown below.
| Voltage&frequency | Wire connection | |||
| 400V 2-N | 1 2 | 3 4 | 5 | |
| 50/60Hz | L1 L2 | N | 1 | |
| Brown Black | Gray&Blue | Yellow/Green | ||
| 220-240V | 1 2 | 3 4 | 5 | |
| 50/60Hz | L | N | 1 | |
| Brown&Black | Gray&Blue | Yellow/Green | ||
- If the cable is damaged or to be replaced, the operation must be carried out the by after-sale agent with dedicated tools to avoid any accidents.
- If the appliance is being connected directly to the mains an omnipolar circuit-breaker must be installed with a minimum opening of 3mm between contacts.
- The installer must ensure that the correct electrical connection has been made and that it is compliant with safety regulations.
- The cable must not be bent or compressed.
- The cable must be checked regularly and replaced by authorised technicians only.
Diagram of induction hob:
Schematic diagram of the control panel
- Power regular key
- Timer regular key
3.WIFI key - Booster key
- Keep warm key
- Lock/Inlock key
- On/Off key
Instructions for Use
When the power is switched on, the buzz and wind are all the indicators will come one second and then go out. The hob is almostly inside the pan in the centre of the cooking zone.
Operating instructions
- Press the " ① " key, all the indicators show "--".

Select the power level by pressing the "+" or "-" key for the relevant hotplate. To begin with the indicator shows "B" or "I" by pressing the "+" or "-" key. Adjust up or down by pressing the "+" or "-" key.


If you press the "+" and "-" keys simultaneously, the power setting returns to "0" and the cooking zone switches off.
NB: When the "①" key is pressed, the induction hob returns to standby mode if no other operation is carried out within one minute.
Boost function
Press the "B" key, the power level indicator showing "b"
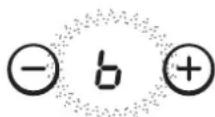
Warning:
- The boost function only operates for 5 minutes, after which the cooking zone will revert to its original setting.
- The boost function works on the all cooking zone.
- As the boost function of 1st or 3rd cooking zone is activated, the PRO zone is limited at level 2 automatically.
Vice versa if the boost function of PRO cooking zone is activated, both the 1st and 3rd cooking zone are limited at level 2 automatically.
Cancelling the "BOOST" mode
Cancel the "Boost" mode by pressing the "+" or "-" key of the corresponding zone.


Using the Timer
You can use the timer in two different ways:
- You can use it as a minute minder. In this case, the timer will not turn any cooking zone off when the set time is up.
Instructions for Use
- You can set it to turn cooking zones off after the set time is up.
- You can set the timer for up to 9 hour and 59 minutes.
Using the Timer as a Minute Minder If you are not selecting any cooking zone
- Make sure the cooktop is turned on. Note: you can use the minute minder even if you're not selecting any cooking zone.
- Set the time by touching the " - " or "+" control of the timer
Hint: Touch the " - " or "+" control of the timer once to decrease or increase by 1 minute.
Hold the " - " r " + " control of the timer to decrease or increase by 10 minutes.
- Touching the " - " and " + " together, the timer is cancelled, and the"0:00" will show in the minute display.

- When the time is set, it will begin to count down immediately. The display will show the remaining time and the timer indicator will flash for 5 seconds.
- Buzzer will beep for 30 seconds and the timer indicator shows " - - " when the setting time
Setting the timer to turn cooking zones off If the timer is set on one zone:
- Touching the heating zone selection control that you want to set the timer for.
- Touch " - "or " + " control , The milder indicator will start flashing and "0:10" will show in the timer display.
- Set the time by touching the"-"or "+" control of the timer
Hint: Touch the " - " or " + " control of the timer once will decrease or increase by 1 minute.
Touch and hold the " - " or " + " control of the timer will decrease or increase by 10 minutes.
- Touching the " - " and "+" together, the timer is cancelled, and the" 00" will show in the minute display.

- When the time is set, it will begin to count down immediately. The display will show the remaining time and the timer indicator flash for 5 seconds.
NOTE: The red dot next to power level indicator will illuminate indicating that zone is selected.
- When cooking timer expires, the corresponding cooking zone will be switch off automatically.

Other cooking zone will keep operating if they are turned on previously.
Instructions for Use
If the timer is set on more than one zone:
- When you set the time for several cooking zones simultaneously, decimal dots of the relevant cooking zones are on. The minute display shows the min. timer. The dot of the corresponding zone flashes.
0:15
(set to 15 minutes)
(set to 45 minutes)
- Once the countdown timer expires, the corresponding zone will switch off. Then it will show the new min. timer and the dot of corresponding zone will flash.

0:30

Using the Keep Warm function Activated the Keep warm function
- Touching the heating zone selection control

- Touching the keep warm control, the zone indicator show "1

Cancel the keep warm function
Touch "-" or "+" control of the corresponding zone, then the cooking zone will revert to the level you select.
Safety mode
To ensure the safety of children, the induction hob is fitted with an interlock device.
Lock:
In working mode, press the " 品 " key, the hob then goes into the lock mode, timer will display "Loc" and the rest of the keys are disabled except the " ① " key.


In standby mode, press the "lock" key, the hob then goes into the lock mode, the timer shows"Loc" and the rest of the keys are disabled. The timer shows"Loc" for a while and then goes out.
If you press the ① key, "Loc" will be displayed for a while.
Unlock:
Hold down the"Lock" key for 3 second, and the lock function will be deactivate.
WIFI FUNCTION
First of all, you should download Simply-Fy and install to your portable device. Then enroll your induction hob. Refer to annex for details.

To use the WIFI function, switch the hob on and press the WIFI key.The wifi LED flash fast for 5 seconds which means the WIFI module is booting.If the WIFI module connects the router,the wifi LED will remain on all the time.Otherwise,the WIFI LED will be flashing in cycles of 1 second on 1second off.
If connect correctly, you can find many hob information from Simply-Fy, e.g. Zone power, remaining heat time.
Instructions for Use
FLEXIBLE AREA
This area can be used as a single zone or as two different zones, accordingly to the cooking needs anytime.
Flexible area is made of two independent inductors that can be controlled separately. When working as a single zone, the part that is not covered by cookware is automatically switched off after one minute.
To grant a correct pan detection and a even heat distribution, the cookware should be correctly placed:
- In the front or rear side of the flexible zone when the cookware is smaller than 22cm
- Anywhere with bigger cookware
As big zone
To activate the flexible area as a single big zone, simply press the dedicated keys.
The power setting works as any other normal area.
If the pot is moved from the front to the rear part (or viceversa), the flexible area detects automatically the new position, keeping the same power.
Deactivation of the continuum zone
Resetting the power of the continuum zone or pressing the continuum key again
As two independent zones
To use the flexible area as two different zones with different power settings, press the dedicated keys.
The maximum power of cooking zones is as follows:
| Heating Zone | Normal | Boost |
| 1 | 1800 | 3000 |
| 2 | 1800 | 3000 |
| Flexible Area | 3000 | 4000 |
| 3 | 1800 | 3000 |
| 4 | 1800 | 3000 |
The above may vary according to the material it is made from
of the pan and
Selection of cooking vessels

Iron oil frying pan

Stainless steel pot Iron
pan
Iron kettle

Enamel stainless steel kettle
Enamel cooking utensil

Iron plate
You may have a number of different cooking vessels
This induction hob can identify a variety of cooking vessels, which you can test one of the following methods:
Place the vessel on the cooking zone. If the corresponding cooking zone display a power level, then the vessel is suitable for use with the induction hob.
2 Hold a magnet to the vessel. If the magnet is attracted to the vessel, it is su for use with the induction hob.
NB: The base of the vessel must contain magnetic material.
It must have a flat bottom with a diameter of 14 more than cm.
3 Use pans whose diameter is as large as the graphic of the zone selected.
Using a pot a slightly wider energy will be used at its maximum efficiency. If you use smaller pot efficiency could be less than expected. Pot less than 140 mm could be undetected by the hob.
Safety Reminding and Maintenance:
A dedicated power protection air switch must be used.
For indoor use only.
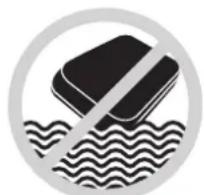
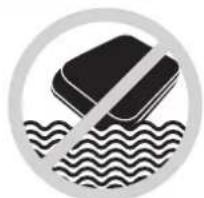
Never wash the induction directly with water.
Do not store detergents or flammable materials beneath the hob.


Always open sealed containers When a cooking zone has bEmo time to time check tD not leave metallic objects, such as cans, before heating for a long time the surfacting (e.g. glass, paper, etoh as knives, forks, spoons them, otherwise they may remains hot for some time is obstructing the air intakea nd id s on the h o b a st they may explode. afterwards - so do not toucheneath the induction hob. get hot. the ceramic surface.
Never use the induction hobNever have the induction If the surface of the hob iDo not place rough or uneven near another appliance whichhotplate to work without foodracked, switch off the vessels on the hob, as they generates a high temperature, inside, otherwise its operationalappliance to avoid any may damage the ceramic such as a gas cooker or a performance may be affectedpossibility of electric shocks. surface. paraffin heater. and danger may happen.
Clean the induction hob Keep children or infirm persons the power cable is damaged regularly to stop foreign object away from the appliance. it should be replaced by our from getting into the fan Nander let them use it service agent or by another preventing the appliance fromunsupervised. suitably qualified person. working properly.
This appliance is not intended for use by persons (including children) with reduced physical, sensory or mental capabilities, or lack of experience and knowledge, unless they have been given supervision or instruction concerning use of the appliance by a person responsible for their safety.
Children should be supervised to ensure that they do not play with the appliance.
DISPOSAL: Do not dispose this product as unsorted municipal waste. Collection of such waste separately for special treatment is necessary.
This appliance is labelled in compliance with European dizerias/for Waste Electrical and Electronic Equipment (WEEE). By ensuring that this appliance is disposed of correctly, you will help prevent any possi damage to the environment and to human health, which might otherwise be caused if were disposed of in the wrong way. The symbol on the product indicates that it may not be treated as normal household waste. It should be taken to a collection point for the recycling of electrical and electro goods. This appliance requires specialist waste disposal. For further information regarding the treatment, recovery and recycling of this product please contact your local council, your household waste disposal service, or the shop where you purchased it.
For more detailed information about treatment, recovery and recycling of this product, please contact your local cit office, your household waste disposal service or the shop where you purchased the product.
Cleanness and Maintenance
The surface of the induction hob may be easily cleaned in the following way:
| Type of contamination | Method of cleaning | Cleaning materials |
| Light Immersion | in hot water and wipe dry Cleaning | sponge |
| Rings and lime scale | Apply white vinegar to the area, wipe a soft cloth or use a commercially available product | Special adhesive for ceramic glass |
| Sweetmeat, melted aluminium or plastics | Use a special scraper for ceramic glass to remove residue (a silicon product best) | Special adhesive for ceramic glass |
NB: Disconnect the power supply before cleaning.
Failure Display and Inspection
If any abnormality occurs, the induction hob will automatically go into protective mode and one of the following codes:
| Problem | Possible causes | What to do |
| F1-F6 | Temperature sensor failure | Please contact the supplier. |
| F9-FA | Temperature sensor of the IGBT failure. | Please contact the supplier. |
| FC | The connection between the display board and the main board is fail | Please contact the supplier. |
| E1/E2 | Abnormal supply voltage Please | inspect whether power supply is normal. Power on after the power supply is normal. |
| E3/E4 | Temperature sensor of the ceramic glass plate Is high | Please restart after the induction hob cools down. |
| E5 | Temperature sensor of the IGBT Is high | Please restart after the induction hob cools down. |
The above table shows how to assess and check common faults.
Do not dismantle the appliance yourself, otherwise you may damage the induction hob.
Customer Care Service
If a fault should occur, before calling After Sales Service, please do the following:
-Check that the appliance is correctly plugged in
-Read the failure and display table above
If you are still unable to resolve the problem, switch off the appliance, do not try to and call
After Sales Service.
Special Declaration
The contents of this manual have been carefully checked. However, the company cannot be held responsible for any misprints or omissions. Also, any technical modifications may be included in a revised version of the manual without notice. The appearance and colour of the appliance in this manual may differ from the actual one.
IIaHOBnI nOKyu:
Ikyem0 3a npu6aHn iHyKuiHoi BapuibHOi IOBepxhi. CnoiBaemoc, daHn npuaipocnykntb Bam npotrOM IOBRX pOKiB.
ByIb-JaCkA IIpoUHTaTe yBaXHo IaHe KeipBHNITBO IIO ekCIIYaTaIi, IpeEi BnKOpNCTaHHM IIpIaIy. 36epeXitb IHy IHcTpyKciIO IJI IOJaalbIIHX KOHCyIbTaIi.
ПО ПИЛАД
IHyuiHa IIOBepxHЯ IIIXOHTb IJIpyrOryBaHHi BCix BniiB CTpaB. 3aBIAKN eIeKTPOMarHITHM 3OHAm Harpby, MIKPO-KOMI'OTepHomy yIIpaBIIHHIO Ta MyIbTHyHKIOHaJIbHOCTi - daHn IIpNiJaE iIdeaJIbHM BNo6Opom Ha cboOrDiHIHHi JeHb.
iHnykuiHa KOTyIIka iHnyKOBaHi CTPyMN
Bezneka
IaHn IIpuiIaIpo3po6JIeHn IJIa BnKOpNCaHHB DOMaIHIX yMObax.
Bnpo6HnK 3aJIINae 3a co6oIO npaBO BIOCKOHaIIIOBAtN JaHy MoJeIb, Ta BHOCHTN 3MiHN B 6a3OBi xapaKTepnCTIKN, He IOnpeJkaOuH npo ue 3a3JaIeITb.
3axnctBiPipeperpiBy
Cecop MOHITOPHTb TEMIepaTpy 30HN Harpby. KOn TMIIepaTpaIOcrae 6e3NEuHO pIBHa, 3OHa Harpby ABTOMATUHO BUMKAcTbcN.
Bn3HaueHnIIOcyuMaIoro IaIamepy Ta HemaRHTHOIO cydy
KIO Bn cTaBnTe Ha 3OHy Harpipy IOcyI IiaMeTpOM MeHIE 80MM, a6o IHsI dpi6Hi IpeIMeTu (Haip. HIX, BIIeIKy, KIOU) a6o HeMaTHHY CKOBOpIKy (Haip. AIOOMiHiEBy), IIPOTAROM OIHIEi XBUNHN IIPO3BYNTB 3ByKOBI CNHaI, IIcIa YOTo IOBepXnA BTONuHO IIpeJIe B peKM OUIKYBaHH.
IHNKATOP 3aIIHIOBOTO TEIIa
KoIIIOBepxHBAKOpNCTOByeTbC HPOTAROM
IeAKORO Yacy,30Ha IpiRTOyBaHHHaRPietbC B
IeAkiMiPi. 3arOpNTbcnItepa"H",aKa CIOBICTHTb,
IIO IOBepxH NIE rapya.
ABTomatnue BHMKHeHH
IIe OINHM 3axoJOM 6e3IeKNI INyKnHoiIOBepxHi e ABTOMATUHe BmKHeHHa. Bi HpNBOITbCBA IIIO, KOJIi Bu 3a6yBaTe BmKHyTN IOBepxHIO.
BIMKHeHHIPOXOHTbIIpH HAcTyHHNX NOKa3HNkA:
| Ровенnotукhoefti | Зона HarpiBy ВIMNKaЕТбаяпсля: |
| 1~5 | 8 Гдин |
| 6~10 | 4 Гдин |
| 11~14 | 2 Гдин |
| 15 | 1 Гдинha |
KoIIu Bn IIpIIMaTe IocyI 3 IOBepxHi, BOHa Oipa3y IIpIINHRe HarpiB, TaIOBHiCTU BmMkaeTbCg IIcIg 3ByKOBOrO CnIHany.
YBAGA!
KIO BV KOpNCTyTeCkApIOCTMMyIATOPOM, IpeB BnKOpNCTaHHm IOBepXHi Heo6xIHIO IIPOKOHcyJIbTyBaTncs3 Ikapem.
BcTaHOBJIeHHJ
Bupixitb OTBip B po6oii nobepxhi, BiINOBiHDo DO
po3MipB Bka3aHnx Ha MaIIOHky.
TnBAcHOBJIeHHra Ta BNKOpNCtAHHH, IOBKOJa OTBOPY
Mae 6yTu 3a3Op MBHBMym 5 cm.
PepekoHaTeCra, ITO TOBUHnHa po6oOoi NobepxHi
MinImym 30MM. Bn6paIte NOBepxHIO, aka e
TePMocTIkoH, U6 yHNKHyTN II DeΦopMaqii.
INBnCb HIXKHe:
| L (MM) | W (MM) | H (MM) | D (MM) | A (MM) | B (MM) | X (MM) |
| 590 | 520 | 60 | 56 | 560 +1 | +490+ 4 +1 | 50 Mih. |
B 6ydb-kaKOMy pa3i, nepekoHaTecr, 0o Bn 3a6e3neuHn HaneJHy BeHTnraIIO, 0o nobITp MoKe HOpMaJIbHO cnpKyIbOBaTI. PepekoHaTeCr, 0o BapInbHa NOBepxHb B cnpaBHomy CTahi.

Ybara:Be3neuHa BiDcTaHb MIX NOBepxHeTo Ta HAcIHO UafoIO, He MeHwe 760MM.
| A(MM) | B(MM) | C(MM) | D | E |
| 760 | 50 mini | 20 mini | 3a6ip nobiterpa | Biindii nobiterpa miH..5MM |
Ipeed BcTaHOBJIeHnM npHaJy, IpekeOnaTeC8 y TOMy, 0:
poboya nobepxH Kbaapatha Ta nacka, a TAKoK He Mae enemehTIB KOHCTpykuii, k6 BuCtynan 3a ra6apnTHi po3mipn OTbopy ni npna
- po6oHa NOBepxHb BnroToBnHeHa 3 TepMoCTiIKoro MaTepiany
- kuo BapnIbHa NoBepxHb BCTaHOBJIIOcTbCn HaD duXOBOIO wafoIO, Heo6XiHO, 0o6 dyXOBA waopa Mana BEHTNJLTop OXoONdKeHHN
- po3mipn npnaNy BiinnoBiaHToB ra6apuTHNM po3mipam OTbopy Ta ycim cTaNapTa m i HcTpkyLjiam
- NaBn BiNobHn 10JnHn po3'EDhyBa,
Kn 3a6e3neUc NOBHe BiKIOUeHHra BID
eNEKTPOXnBnEHn I cei po3'EDHyBa c actnoHO
NoCTIHOI nPoBOdKn, Ioro BCTaHOBeHO i 3OpiEHToBaHO
BiINOBiHO Do MicceBnx npabn Ta IHCTpyKci.
I30JIHn pO3'EDHyBaMc 6yTu 3aTBePKeHO 3pa3Ka i MaTn NOBITpAHN NpOMixKo, 10 DOpIBHIOE 3 MM MIX KOHTaKTAMN B YcIX N03uix (a60 IJNA BCIX AKTNBHX [fauHx] npOBiB, JkIo npabHna MiCueBOI npOBOKn nepeDbaAIOb TaKmPi3HOBNBUMor)
- i30JIHnPo3'EDHyBaayIerKoIOCTynHnIa nCNOXBaHa nicJbBcTaHOBNeHH npuJaDy
-3MiCueBIMN KOMTeHTHMN opraHaMn 3
6yDIBHNUCTBa Ta HOpMaMn y BInaKky BInHKHeHHc CymHiBb
UOdo BCTaHOBJIeHH npuNaNy - BV BUKOPNCOTOBYTe TepMocTi Ka NERKi 3 ORNAdy Ha YIeHnMaTepiAn (Ha npKna, KaxeJIb) NOKpTTTcTIN HABKOIO npNaLy.
IicnBcTaHOBHeHH npuLy, nepeKoHaTeecy y TOMy, 10
-do KaBeJIIO eJKeIeKToPoxNIBHeHn HEma DCCTyNy uepe3 DBepuTa WaΦ a6o WuxJa
- 3a6e3neyetybca BiDnOBiHn Notik CBIXoro nobITpr 330BHi i Bih o6dybae npuna
- JAKUO BAPINbHa NOBepXH BCTaHOBJIOETbcHnAD WuxyIaKOIO a6o Hiueo 7aΦn dnn Nocdy, Heo6xIDHO nepeD6aHTn wap i3 TepmoctiIKoro MaTepiany MIX 6a30IO Ta npnilaIOM
CNOXnBaMaeIeKmDocTynDoi3oJauHoro pO3'EDHyBaHa
Ipeepo3miueHHm KpinnJbHnx cko6
PnlaH Heo6xIDHO BCTaHOBHT Ha CTiKy, TnaDKy NOBepxHIO (MOXHa CkOpNCTaTnC MaTepiAnOM yNaKOBKn). Ondak, He HATnCKaIe Ha BnCTyNaUOi eJeMeHrN ynpabnHH npnady.
Bn6ip noJoxeHHcKo6n
3aikcyte BapnIbHy NOBepxHHa po6oHi NOBepxHi
Jnxom npkpyBaHHa Wypynam4 cKo6, kKi
BCtaHOBJIOITcB HnXHi YacTHHi pPnAdy (INB.
MaHOHK) nicra BCrABJIeHHN NOBepxHi y Hiwy.
PonepeJKeHHa
1.ИндукиHa Bapиьha NOBepxHЯ Mae
BCTaHOBJIIOBaTnCRA KBaIiΦIKOBaHm CneuiaNICTOM a60
TEXHikAMn. ПрОнHyEMO CKOpNCTaTnCЯ Nocnyramn
ABTOpN3OBAHnx cepBichnX ueHtpiB.БydJnacka, He
BCTaHOBJIOnTe BapINbHy NOBepxHyo cami.
2.Пилад He moxHa BCTaHOBJIOBaTu 6e3nocepEiHbO Ha nocydomnHy MaunHy, xoNoIbHnik, MOpO3nIbHy KaMepy, npaIbHy MaunHy a6o cyuINbHy MaunHy dIra OJry, aJxke NiDbNueHa BOIoricb MoXe cPnUHHIn T BnIXiD i3 IaNy eJeKtpOHk npiJaDy.
3. IHydkuiHa BapnIbHa NOBepxHMaEC BCTaHOBNIbOBAtncr TaKIM YINOM, 3o6 3a6e3neHTN kKomora KpaIe TcIIOBe BInpOMIHOBaHHr, 10 NiIDBnUHTb pIBeHb HadiHocTI.
4.CtHa Ta 30Ha HarpIb Hy Ad BapInbHOIO NOBepXHeO MaOTb BnTPmUyBaTn NiDbuIeHy TemnepaTypy.
5. 506 3anobirtn ukojdi, 6araTouapobi npoawapkn Ta kIeKn shap MaIOb BNTpIMyBaTN iDbnueHi TemnepaTyPi.
IiKluoyenH npuJady do oCHOBHoro eKeTPOXNBHeHH
LByBapnIbHa nobepxHnpiKlnHouaETbcra Do OCHOBHX DKepeI eNEkTpOncTaUaHHNne KBaJIΦIKOBAHM nepcoHaJOM.
Ppei niknueHm npnlaDy do ochoBHoro eNEKTOXNBENH, nepekoHaTeCra y TOMy, 00:
1.ДOMaHЯ eJekTpOpoBOKa BHTpMMye eJekTpUHe HabaHTaXeHHa, Heo6XiDHe dIra KINBJIeHHa npiJaY.
2. Hanpyra BiДnoBⅡaE BELIuHHi, 3a3HaueHi y Ta6JIuCi 3TexHiUHM DaHUMN
3. Biπi3κη Ka6eJIIO eJKeTPOXKNBHeHNe BnTpμmYIOb eJKeTpUHe HabaHTaKeHH, 3a3HaueHe y Ta6nui 3 TEXHcHIMN daHIMN.
IiiknueHn npuJdy do xKepeJa oCHOBHO eNeKtpoXnBHeHH, He KopncTyIeCra aanTepAMn, nepexiHnKaMn a60 po3raNyKyBaUAMn, aJxke BOHN MOxyb neperpiTcR, a ce, B CBOU, Yepry MoXe CTATN npuHNO noKexi.
Ka6enb eneKtpoxnBneHHe Mae TopkaTnc 6ydb-8kXuacTHN, kI HarpibaOTbcra I Mae po3TaWOByBaTnc TaKIMYHOM, uO6 NOro Tempepatya He nepeBnuyBana 75^ 3a 6yDb-8kX yMOB.
IpoKoHcyIbTyItecB eIeKtpika Ha npEiMeT BiINOBiIDHOCTI DOMaIHbOICNTeMn ENEKTPponpOBOkN, 06nepekoHaTcRy TOMy, 10 BOHa He MaC BiIXnJIeHb.
Будь-як BiДхиненЯ може BnpOBaJxByBaTи Лшe KBaIiФIKOBaHи eJIeKtpNK. EJIeKTPoXnBneHЯ NiДКПИчаETбс 3rdO 3 BiДNoBIHm CTaHApTOM a60 3a DonOMOrO OdHONOLIOCHORO pybNbHnka. MeToD NiДКПИчЕHЯ NOKa3aHO HIXue.
| Hарuya i чадота | Пденихая повдь |
| 400В 2-N 50/60 Г. | 1 2 3 4 5 . L1 L2 N Корочевий Сорный Синиж КовTN/Зелени |
| 220-240В 50/60 Г. | 1 2 3 4 5 ←→ L N Корочевий Сорный Синиж КовTN/Зелени |
- Ka6eB noKoJKeH a6o 3aMHeHO, c0 onepauio MaE BnKOHyBaTN npeCTaBHNK, kNn Hadae nicIaPdoaXHi nocnyr Ta MaE BiIDNoiDi HiCTpyMeHTu, o6 yHNKHyTm MoKJInBHX HeuaChNX BnnaKIB.
- RaKIO BapINbHa NOBepXHa NiDKJIHOaEcTbc8be3nOcepeDHBo Do dKepeNa eNeKTPoKINBJeHHN,Heo6XiHNo nepeD6aHTu 6araToOnIaPnABTOMaTHNBIUMKaU i3 MiHimaJIbHM IpomIXKOM MxKoHTaKTAMU, UO dopIBHo 3 MM.
- MoNTaXnK Mae 3a6e3neuHT HaJIiHe 3'EdHaHH eNEkTpnuHoi npOBdkn II BiIDNoBicHicTb npaBnAm TexhIKN 6e3neKn.
He 03BOJRAETbCra 3rHataa6o CTnCKaTn Ka6eJb.
-Пише уновьанжий Тхнік Мас паBOperулярно ORЯдати Kaбьт Ta 3amIHOBaTN Ioro.
Diarpama iHykiiHoiBapnIbHOI NOBepxHi:

Kepamiu naiinb
Панень управлийн.
Cxema IaHeJI yIpaBnIHn
- Khonka perynloBaHHpBHaHarpby
- Khonka peryriIOBAAHRA taimepa
3.WIFI-KHONKa - KhoNka nIDBnueHHn oTyXhOcTi (Booster)
- Khonka 3aunkoBoro tenna
- Khonka 6IokyBaHH naHeJI ynpabJIHHa
- KhoNka BKN./BUMK.
IInctpykii3 BnKOpncTaHHa
IIpN BkIOUeHHI KINBIEHn, IIPOyHae OINH CINHAI, 3acBITaTbC yci iHNKATOpN IpoTROM ckyHn, nICn YTO BOHN NOrachTy. IIpHnA Ipeepie B pexmOuyiYBaHH. IocTaBe KAcTppyIO yIeHTp 3OHn Harpipy.
Ihctpykci3 ekcnnyatauii
1.HaHCHiTb"①"Ha iHdNkaTopax 3aRopntbca"-".

06epiB pibEh hntyKHOCT, HATNCHyBUN KHNky "+" a6o "-"ДЯ BIDNOBiHoi KOHΦOpKn. CNoaTky iHnKaTOp nokaye "8" a6o "1 " npHa TnCKAHHI KONky "+" a6o "-" 3a DonomoroTO KONKn "+ " a6o"-". 3a DonomoroTO KONKn "+" a6o"-". 3a DonomoroTO KONKn "+" a6o"-". MoXHa NiDbuNTn abo 3Hn3HTn pibEh.


KaHtncHTn KhoN "i" OJHOaCHO, HanaTsyBaHHn NotyKHOCTI 6yde o6HyNEHO "0", a 3OHa BApKn BmMKeTbCra.
YBAGA:KaHnCHyN KONky" ① ,iHnyKuiHa BapnlbHa NOBepxHn NOBepTaEcTBcB R pexmOciKYBaHH,RAUo npOTrOM ODiHiet XBUNHH He BNKOHyOTCB ciHsi Opeaii.
- HatnchItb KhoNky Bn60py 30Hn HarpiBy

2.HaTnCHiTB KhoNkY3aHmKOBoro Tennla 3arOpnbTcra
BiDmHaФyHKu3aHmKOBORoTeNa
HaTnCHiB "-" a60 "+" KhONky ynpabJInHb BiNObiDHO 3OHOIO, nCJIy QTO 3OHa BApKN BCTaHOBITbcr Ha ToI pIBeH, kMn BN O6pann.
PeknM 6e3neKm
3 TMM, 306 3anobirn BKNIQUeHHIO 6yIb-RAKNX FyHKUIN DiTbMn, iHykuiHa BapInlbHa nobepxH MaE 6NOKyBaIbHn npCTpii.
O 3amok:
Bpo6oHOMypeKMI,HaTNCiTB" ^ 串 ,NOTIM NOBepxH3a6nokyETbcra,3aropntbcraIHdkaToploc iKHONKHe 6ydyb npaUOBaTN,Kpim ①


Y pexmi OuykBaHHaHATNCHTb KHOky "lock", cnpaobBye
pexim 6IokyBaHH BapnIbHOi NOBepXHi, TaMep BiObpaKaac
"LOCK", a peTt KaONOK DeAKTNByIObC. TaMep
BiObpaKaac "LOCK" neBnH yac, a notIM tyXHe.
Jaio Bu HATNCHe TcHONky, 6yde 6IImaTn "LOCK" neBnH yac.
BmmKanH6JokyBaIbHoro npncToPO:
HaTnCHiB Ta yTpmyTe KhoNky «BlokyBaHH» npOTrOm 3 ckyHd, cyHKsIg 6IoKvBaHH DeakTNBye BaWy IHdykuiHy BapuNbHy NOBepxHIO. DoaTKoBA iHΦopMaui 3a3HaYeHa y DoaTkY.
WIFI-ФУHKUЯ
Hacamnepei, Heo6xio 3aBaHTaxuTn Simply-Fy Ta BCTaHOBttn oro Ha BaWOM npuaDi. 3apecctpyTe BaUy iHykuiHy BapnlbHy nobepxHIO. DoataKOBa IHopmaui 3aHaueHa y doataKy.

Дя корисуванда уншію WIFl ybIMkhHtВ yapиьну nobерхию та натусіпь конку WIFl. Иndикатop WIFl LED почne webidko 6nmaTи npotЯrom 5 cekyн, to6To 3abantaxkyetbcra WIFl-moynb.Якso WIFl-moynb niKliouaetbcra do mappyTu3aTopa, Иndикатop WIFl LED 6yde noctiHo ybIMkHyTm. B iHsOmy pa3i, iNDinkaTOp WIFl LED 6yde 6nmaTи 3 nepioDnHiCtIO B 1 cekyHdy mixy ybIMKeHHam Ta BImKHeHHam.Якso niKJIIOUeHHa 3dIcHecHO KopeKTHO, 3'ABITbcra MOxKnBicTh otprMaHHa 3HaCHoi iHfopMaцii no bapnilbHi n nobepxhi 3doaTaKa Simply-Fy, hapniklaad iHfopMaцIO npo notyxHcIb KOHKpeTHoi 3OnH, BeJIuNHy Yacy HarpIBy, kkn 3aIIuNBCra.
FLEXI 3OHA
LIO 3OHy MoKHa BnKOpNCTaTn AOK ONDy A60 A60 DbPi p3Hi
3OHN, BiIDNOBIDHO Do TORO,CKINbKN Yacy Ha npIrTOyBaHn IxKi
NOTpIbHO y KoxHOMy KOHKpETHMo BYnAky.
ΦNeKci 3OHa CKNaDAeTBcR 3 DOX p3Hnx IHyKTOpIb, kI MOKHa
KoHTPOJIbATn OKPeMo. PnP dyHKUIOHYBaHHI kOJDA 3OHa, Ta
YactInHa, De HEmae KXYOHORO NocyDy, ABOTAMTHO
BmNKAcTbCnICr CNINBaHHr OndHc XBNINIH.
IIra 3a6e3neueHHKOPEKTHORo PO3ni3HaBaHHa KAcTpyni Ta
PIBHOMIPHoro HarpiBy, HeOBxIDHO KopeKTHO CTaBNTn NocyD h
BaPnblHy NOBepXHIO:
- Y nepeDiHn a60 3aHnI YacTHNI CEkTopy rHyKoro
FHyHKUIOHYBaHHN, AkiO diametp KAcTpyni He 6InbWe, HIX 22 cm
- Y 6yNb-RAOMy CeKToPi NOBepXHi npN 6InbWOMy
diametpi NOBepXHi.
Jk BeJIrk30Ha
ДяakTbauii cekTopy rhyKUOFOyHKUIOHyBaHHY ykoCTi OdHiE BeJIKoI 30Hn, npocTo HATNCHTb BiNOBIDHI KONKN.
HanaaHTyBaHH 3diIChHOETbCra TaK CaMO, RaIJa 6yDb- kOi iHooI cyHKui.
JaepnHnHaHnK i3 npedhboi 30Hn B 3aHIO (a6o HABNAK), 3OHa rHyKoro fYHKIOHYBaHHA bTOMATNUHO pO3nI3Ha c HOBE nIOXeHH, 3a6e3neuyuOn To camn pIBeH nOTyXHOCTI.
DeaktnBaucia noctiHoi 30HN
NoBtopHe HanaTsyBaHHn NoTyXHOcti NoCTIHoo 30HN a6o NobTopHe HaTnCKaHH KHOKN NoCTIHoo 30HN
Ak Dbi He3aJexKhi 30HN
BnKOpNCaHH30HnIHyKOrOyHKUIOHyBaHHrAKDpiPi3Hi30H3 p3HMm3HaueHHMaHaJauTyBaHHa,HaTNCHTbBiNObiDiKHONKn.
MaKcHmAlbHa notyXhIcTb 30H BapKn
Taka:
| Зona | harpiВ | Звачаиha | Бустер |
| 1 | 1800 | 3000 | |
| 2 | 1800 | 3000 | |
| Фл ekси Зona | 3000 | 4000 | |
| 3 | 1800 | 3000 | |
| 4 | 1800 | 3000 |
3a3haeHbBnue BENuHHM0KyTB BiPi3HHTNCBIBIOBIOHOpo3Mpy KActpyIi Ta MaTepiany, 3KOBOBa BNTOTOBHeHa.
Bn6ip nocuy
MeTaneBa ckOBopiKa
Kactpyna 3 Hepxabiooi ctaii
MeTaIeBaKaCTpyJIA
MetaJIeBn HainHnK

EmaIbOBAHn HApHnK 3 HepKaBIOoI cTani
EmalboBann HOCyI
MeTaJIeBa TapiIka
YBaC e MoKJIINBicTh BnKOpNCTOByBaHHaPi3HOMaHITHOrO IocuIy
1 1Ii iHnykuiHa BapnIbHa IIOBepxHa iJeHTnphiKyepi3Hi TINN IocuHy,IO MOKHa IpeBipInu Odnm i3 TaKnx cnOco6iB:PiomictiB IocyDnHy y 3OnHy BapKn. JIKIO BiIOBIDHa 3OHa BapKn BiO6paKae pBeHb IOTyKHOCTi, Ie O3Naue, IO IocyD BiIOBIDH.N. JIKIO 6JIIMae "U", ToIi IIIO IocyDnHy He MOXHa BIKOPNCTOBYBaTH NIIa IIpiroTByBaHH iKi Ha Ii HnykuiHb BapNlbHi IIOBepxHi.
22 IIpNKlaIb MaHIT IO NocyHN. JIIO MaHIT IpiNIIIOEbCJIO NocyHN, TOJI IO NocyINHy MOKHA BKNOPcTOBByBaTH IJIa IpiRTOYBaHHI iXi Ha IIi IHNyKIIH HApNbHi IIOBepxHi.
YBAGA: Heo6xio, Ho, Ha HxHn HOBepxHIO CucyHn MCTNBc MaHITN MaTepi. Heo6xio, Ho, HoocyHnMaIa IIacKy IOBepxHIO IaMeTpOM 6ilbHm 3a 14 cm. Ia KoxHO 30Hn KopCtTuTEcra TakoIO OocyHIO, IaMeTp Raoi 6ilbHm 3a 3O6paKeHHa IaMeTp a KOHOpKn Ha NOBepxHi. Pn KopCtUBaHHi KactpyeIO cnoKnBaetcbr Toxu 6ilbHe ehePi 3a6e3neHHMaKcHMaJIbHO iEeKTHBHOctI. JIKO JK BN BCE JK TaKN CKopNCtaTecra NocyHIO 3 IaMeTpOM MeHHM, HIX 3a3HaueHH, TO eEeKTHBHICTb 6yJe MeHHIO. Kactpyi IiaMeTpOM MeHHM 3a 140 MM MoKytb 6yTN He iJeHTnΦikOBaHI nplaqom.
HaRaIyBaHnI IIOIO 6e3IeKn eKcIIpyaTuaII Ta o6cIyTObYBaHHa:
Heo6xio KopcyBatnca HIIIe BiIOBIIINH NIOBITPNIH INPEMNKAqem 3axHy BId CTpyMy.
3aBxN BiKpBaHte ⅢIbHo 3akPiTi KOHTHePn, HApNKJaO, KOHcEpBHi 6aKn, nepEix HarpIBAHm, HaKIIe BOHO MoKyTb po3ipBaTHc.
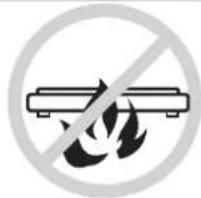
HikoIHeKOpNCTyTecn
HdykuHIOBapHBHO
NoBepxHcE6iHaHIOO pRnAyn,3
BnCOKOTeMIIepeATpyoIO,
HApRkNlAraOBHO IyXOBIO
IIafoIO a60 KepocHHm
PiNaJOM.
PeyIaHPO OunuAnie IInyKnnHy
BapnIbIy NOBepxNIO 3 MetoO
3AnobirAHH NoTpaIIHHIO 6yIb
kHN IIeDMTeY BENTHTOP, IIO
MOKe 3aBAHTTH KopeKTHOmy
fHKIOHYBaHHIO INpHaIy.
KopctyBaTncaIINIE BCEpeHHI pIMiHHeHH.

YBnAky BkOpHCTaHH 30HN BAPKn IPOTfOM TpHaIOrO Yacy, IOBEPXH3aJIHaeTbCraPapyOIO IPOITFOM NEbHOrO Yacy - TOMy HE TopKaItecKepamiuHoi IOBEPXHi.
HikoHn HE KIOUaHTe IHyKIIHy BapbIbHy IOBepxHIO 6e CMHOCTI 3 Ikeo H hi, IHAKIIIE II pO6oi XapaKtEPnCTNkoM KoKyTB 3MHINTHCA I pInaMOKe 3aBaNTHKOHN.
He 03BOIaIte aIIM a6O ocO6am,
KAI HcBNEHIEHO TpMABoTb
PIIBHOABy, HabiINKATNc DO
PiPnAly. IIKOHN He IO3BOIaIte
ITIM I TAKIM OC6AM
KOPHCytBaTHc HpHaIOM 6e3
IIaIpy.
HikonHe MHnTe iHyBapuIbHy NOBepxHO6e1IOcepeIbBO BOIOIO.

YacBnIyacypebipnye, HnHIO (HaunpKnaIaCkNIO, nannip i T.i) He nepekpBaE 3abipNH NOBITRPi NDykuHHO BapuNbHOIO IOBepxHe.

KIO HA BAPINIIOBEPXNI 3ABITcR TPIINHA, BIMKHITb npnaI, IO6 yHKNHYyDAPCYPOM.

YpasiIIOIKOJKeHHKa6eHIO, HORoMae3AMHTNoprA13aII, JKA 3JIiCHKcO6CbNyBOyBaHNr IINnAYdo6O6a, JKA MaE BiINOBiHy KBAIipikaiio.
He 36epiraTe MIOOi 3ac06n a6o 3aMnCTI MaTepiAn nI npuaanom.
He 3aHnHaiTe MetaneB1 HpeMeTn, HauPknKaIa, HoKl, BnEKN, NOxKn Ta KpnKn Ha BapuNbH NOBepxHi, TOMy IOBOH MoKyTB HarpITNC.
He crabe na Bapnblny
noBepxHIO noocy i3 rpyofo a60
hePiHO NOBepXHEO, TOMy IIO
bin MoKe IOIIKOHTN
kepaMiy NoBepxHIO.
He do3B0JraTbca KopncTyBaTnca npuaam Ooc6am (diTu BkIouHo) 3 o6mExKeHmN pizuHMMa 6o po3ymOBmN 3dioHocTAM, HeoJIikAm npraHIB yTTa 6paKOM DocBidy Ta 3HaHHaBOH N KOpCtYOTbc npuaDom iHaHJyDM a6o BkOHyOt b Bka3iBKn IIOHN, kA BiIOBIdae 3a ix 6e3neky. HeoXidno CTekntu, uob dtn He rpan 3 npuaDom.
YTNII3AIII: He yTNII3yIe
Ie IpnIaJ k 3BnuaHi
IO6yTOI BiXOu. Heo6xIDHO,
IO6 Ie IpnIaJ 6yB
IpepaHn Ha yTNl3aIIO
cneiaJIbHI cnyK6I.
IeH npnaB iDIOOBiAc BnMOram InepeKTHBn Ebponehcbkoro Co103y 2012/96/EC 00do BiipaaBoBaHoro eEeKtpuHoro n eEeKtpoHHoro o6naHaHHa
3a6e3neyuOnn BldnoBHy yTuHla3auo BiippaBbAoHO npna, Bu He 3aBdaTe IIKOHN HABKOLINHbOMy cepoOBuTu Ta 3IOPOBIO IHINX IIOJe, KI MOxYb 3a3HaTH INKOIN B IHIOOMy BnNaKy 3a HeKopeKTHOI yTuHla3auii.
Bka3aHn cHBOI O3Haue, 10 3 IIM BiIIpaIIbOBAHIM IIpIIaIOM He MoKHa IIOBOIHNTNcI K 3I 3BuaHm N6bYTOBHM BIXoAMu. Ioro Heo6XiHO nepeaTH Do BIIOBIBHO rHKrty 36opy Jn IOaJIbIoI yTNIi3aII eKeTPuHHX Ta eKeTPoHHX IIpIIaIb.
Ie npnlaMae 6tyuH13OBAHO BIIIOB1H0 Do npaBNI. 3a DuaTKOBoIO iHΦopMaieIO IIOIOHOJKeHH, BIIOHbIeHH Ta yTHIN3auii CBOI IO npnaIay, 6yNb lacka, 3BeprAraTecn do MicceBoI paN, MICeBOI cIyK6n 3 BnBO3y i TYH13auii BIXOIN, a6o Jo Mara3HHy, B KOMy BN npn6aHn npHIAI.
3aIOKlaIHIIOI HOpMaIeIO IIOIO IOBOIDKeHH, BIIHOBHeHH Ta yTNlIsaII IIbOIO pHnAHy, 6yIB NaCKa, 3BepTaITeca IO MyHIIHaiHoI CnyK6N, MicueBoI CnyK6N 3 BnBOsy I yTNlIsaII BIIxOIOB, a60 IO Mara3NHy, B JKOMy BN PpH6aAI pPnA
OuHHeHH Ta o6cIyTOByBaHH
IHyKuiHy BapnIbHy IOBepXHIO MOKHa IeTKO OYNCNTN TaKIM YINHOM:
| Вид збруdeenнna | Метод чшенинna | Очирно матерiatedи |
| Лerke | Занурпту у rapяч boю та пproteгtn haCyxo | Губka дя чшенинna |
| РозвODи та накип | HaheсiTь troxи 6iIoro ootу ha IIO 3oHy, IIprotriteь cuxOIO raHчIPKOIO a60 KopructuyITEcЯ спeцiaльнIM 3aocobom, NaYBnIM y IIpoДожу | Спeцiaльний клей дя КерамічНоу сКла |
| Рechовини, які залшения пися зорян, розлambileнny anTomii nI abo Плacrмacia | Схорstайтеся спeцiaльнIM 3kpe6kom дя Chuseigenia KepamічНоу сКла bId рechовини, які пишения пися 3roproHNHЯ(haikpɑшппспспспспспспспспспспспспспспспспспспспспспспспспспспспспспспспспспспспспспспспспспспспспспспспспспспСпспспспспспспспспспспспспспспспспспспспспспспспспспспспспспспспспспспспспспспспспспспспспспспспспспSа | Спeцiaльная пида рechовини dя Oчирно КерамічНоу сКла |
Awaria czujnika temperature IGBT.
Prosimy skontaktowac sie z serwisem.
FC