AS108VM - Drill Meister Craft - Free user manual and instructions
Find the device manual for free AS108VM Meister Craft in PDF.
| Product type | Cordless drill/driver |
| Brand | Meister Craft |
| Model | AS108VM |
| Dimensions (L × W × H) | 200 × 215 × 55 mm (with battery) |
| Weight | 1080 g (with battery) |
| Operating voltage | 10.8 V |
| Battery type | Lithium-ion, 3 cells, 1.3 Ah |
| Charger mains supply | 220 – 240 V, 50/60 Hz, 12 W |
| Charging time | Approx. 3 to 5 hours |
| No-load speed | 1st gear: 0-350 rpm; 2nd gear: 0-1,000 rpm |
| Max. torque | 15 Nm |
| Chuck capacity | Up to 10 mm |
| Drillable materials | Wood, metal, plastic |
| Functions | Drilling, screwdriving, reversible rotation direction, speed regulator, adjustable torque clutch (1-11 + drilling) |
| Sound pressure level (LpA) | 73 dB(A) (uncertainty K=3 dB) |
| Sound power level (LWA) | 84 dB(A) (uncertainty K=3 dB) |
| Vibration (drilling) | 1.49 m/s² (uncertainty K=1.5 m/s²) |
| Vibration (screwdriving) | 0.34 m/s² (uncertainty K=1.5 m/s²) |
| Maintenance | Clean ventilation slots with compressed air; housing with a dry cloth. Do not use liquids or abrasive products. |
| Repairability | Repair only by an authorized specialist; opening voids the warranty. |
| Safety | Read the complete instruction manual before use. Wear hearing protection and safety glasses. Do not expose to rain or moisture. |
| Max. ambient temperature | 50 °C |
| Protection class (charger) | II (double insulation) |
| Standards | Compliant with European directives, EN 60745 |
Frequently Asked Questions - AS108VM Meister Craft
User questions about AS108VM Meister Craft
0 question about this device. Answer the ones you know or ask your own.
Ask a new question about this device
Download the instructions for your Drill in PDF format for free! Find your manual AS108VM - Meister Craft and take your electronic device back in hand. On this page are published all the documents necessary for the use of your device. AS108VM by Meister Craft.
USER MANUAL AS108VM Meister Craft
... is herewith declared to conform with the following guidelines:
GB - The object of the declaration described above is in conformity with Directive 2011/65/EU of the European Parliament and of the Council of 8 June 2011 on the restriction of the use of certain hazardous substances in electrical and electronic equipment.
Obr. 4-5 (vlevo dole):
Text Vyznam
0-1.000 tours/minute
Meister... Informations du
fabricant
Operating instructions & safety hints

WARNING! To reduce the risk of injury, please read the operating instructions through carefully before using the device, and then store with the machine! When passing the device on to another user, these operating instructions must also be included!
Contents
1 - Understanding and using these operating instructions 41
Using the operating instructions correctly 41
Interpreting the icons 41
Pass on the operating instructions 42
2-Safety is key!42 General safety notes for handling power tools 42 Safety at work 42 Electrical safety 42 Personal safety 43 Power tool use and care 44 Service 44 Safety when handling rechargeable batteries 45 Safety requirements with regard to fire prevention 45 Special safety requirements for people with medical implants 45 Special safety measures when working with the rechargeable drill/ screwdriver 45
3 - Check the scope of delivery 46
1 - Understanding and using these operating instructions
Using the operating instructions correctly
Fold out the figure page so that you can see the associated figures whilst reading.
4 - Get to know your device 46 Intended purpose 46 Getting to know the operating elements 46 Interpreting the labels 46 Getting to know the technical data 47
5-Charging the rechargeable battery 48 Before using the device for the first time 49 In daily use 49
6-Drilling and screwing 50 Insert the drill bit or screwdriver blade 50 Select the direction of rotation 50 Set the torque limiter 50 Select the revolution range 50 Regulate the revolutions 50 Drilling and screwing 50
7 - Cleaning and maintenance 51
8 - Storage 51
9 - Repairs 51
10 - Disposal 51
11 - Service instructions 51
Interpreting the symbols
Warning notes

DANGER
Identifies an immediate threat of danger. If it is not prevented, death or serious injury will be the result.
WARNING
Identifies potential threat of danger. If it is not prevented, death or serious injury may be the result.
CAREFUL
Identifies potential threat of danger. If it is not prevented, light or minor injury may be the result.
CAUTION
Identifies potentially damaging situation. If it is not prevented, damages to the device or the vicinity may be the result.
Reading aids

Identifies information which will help you understand a function better

Identifies cross-references to other parts of the text

Identifies tips designed to make handling easier and improve results
Pass on the operating instructions
Pass the operating instructions on with the device to other users and to subsequent owners.
2 - Safety is key!
General safety notes for handling power tools
WARNING
- Read all safety notes and instructions. Failure to follow all safety notes and instructions may
result in electric shock, fire and/or serious injury.
- Store all safety notes and safety instructions for future reference.

The term "power tool" as used in the safety notes refers to mains-operated electrical tools (with power cables) and to battery-operated power tools (without mains cables).
Safety at work
- Keep your work space clean and well lit. Cluttered and dark areas invite accidents.
- Do not operate power tools in explosive atmospheres, such as in the presence of flammable liquids, gases or dust. Electrical tools create sparks, which may ignite dust or vapours.
- Keep children and uninvolved bystanders away while operating a power tool. Distractions can cause you to lose control of the device.
- Ensure sufficient ventilation. Stale, odour-intensive air can cause tiredness.
Electrical safety
- Power tool plugs must match the outlet. Never modify the plug in any way. Do not use an adapter plug in conjunction with protective-earth devices. Unmodified plugs and matching outlets reduce risk of electric shock.
- Avoid body contact with earthed or grounded surfaces such as pipes,
radiators, ranges and refrigerators. There is an increased risk of electric shock if your body is earthed or grounded.
- Do not expose power tools to rain and wet conditions. Water entering a power tool will increase the risk of electric shock.
- Do not misuse the cable by using it to carry the power tool, to hang it up or to pull the plug out of the socket. Keep the cable away from heat, oil, sharp edges and moving device parts. Damaged or entangled cords increase the risk of electric shock.
- When operating a power tool outdoors, only use an extension cord that is also suitable for outdoor use. The use of a suitable extension cord for outdoor use will reduce the risk of an electric shock.
- When operating a power tool in a damp location is unavoidable, use a residual current protective device (RCD). Use of an RCD reduces the risk of electric shock.
Personal safety
- This unit may not be used by people (including children) with reduced physical, sensory or mental capacities, with a lack of experience and without the appropriate knowledge, unless they are supervised by someone who is responsible for their safety or have been instructed by such a person with regard to how the unit is to be operated.
- Be careful and ensure that you pay attention to what you are doing and
make sure you are using the power tool sensibly. Do not use power tools when you are tired, or under the influence of drugs, alcohol or prescription drugs. A moment of inattention while operating power tools may result in serious personal injury.
- Use personal safety equipment and always wear goggles. Safety equipment such as a dust mask, non-slip safety shoes, hard hat or hearing protection, according to the type of power tool and the purpose, will reduce the risk of personal injuries.
- Avoid switching on accidentally. Ensure that the power tool is switched off before you connect it to the power supply/battery or carry it anywhere. Carrying power tools with your finger on the switch or plugging in power tools that have the switch on invites accidents.
- Remove any adjusting key or wrench before turning the power tool on. A wrench or a key left attached to a rotating part of the device may result in personal injury.
- Avoid unnatural body positions. Ensure that you are standing securely and keep your balance at all times. This enables better control of the power tool in unexpected situations.
-
Wear suitable clothing. Do not wear loose clothing or jewellery. Keep hair, clothing and gloves well away from moving parts. Loose clothes, jewellery or long hair can be caught in moving parts. Rubber gloves and non-slip footwear are recommended when working outdoors.
-
If facilities are provided for the connection of a dust extractor and collection facilities, ensure these are connected and properly used. Use of these mechanisms can reduce dust-related hazards.
- Do not remove or manipulate the safety mechanisms of the power tool.
- Do not make modifications to the power tool or to parts of the device.
- Only put down the power tool when it has been switched off and is at a standstill.
- Separate the power tool from the power supply when it is not in use.
Power tool use and care
- Do not overload the device. Use the appropriate power tool for the task in hand. The correct power tool will do the job better and safer in the power range for which it was designed.
- Do not use a power tool if the switch is defective. Any power tool that cannot be controlled with the switch is dangerous and must be repaired.
- Disconnect the plug from the power source and/or remove the rechargeable battery before making any adjustments, changing accessories, or storing the device. Such preventive safety measures reduce the risk of starting the power tool accidentally.
- Keep power tools that are not in use stored out of the reach of
children. Do not allow persons to operate the device who are not familiar with it, or who have not read these instructions. Power tools are dangerous in the hands of untrained users.
- Treat your power tools with care. Check for proper functioning of moving parts and that they do not jam, breakage of parts and any other damage that may affect the power tools operation. If damaged, have the power tool repaired before use. Have any damaged parts repaired before using the device. Many accidents are caused by poorly maintained power tools.
- Keep cutting tools sharp and clean. Properly maintained cutting tools with sharp cutting edges are less likely to jam and are easier to control.
- Use the power tool, accessories and other tools etc., in accordance with these instructions. Take account of the working conditions and the task to be carried out. Use of the power tool for purposes for which it was not intended may result in a hazardous situation.
- If you notice anything unusual: Switch the device off. Separate the device from the power supply. Have the device checked by authorised specialist personnel. Examples of unusual behaviour include: Noises, smells, vibrations etc.
Service
- Have your power tool serviced by a qualified repair person using only original replacement parts. This will ensure that the safety of the power tool is maintained.
Safety when handling rechargeable batteries
- When recharging a rechargeable battery, only use chargers that have been recommended by the manufacturer. With a charger that is designed for use with a particular type of rechargeable battery, there is a risk of fire if it is used with other rechargeable battery types.
- Only use the rechargeable batteries designed for use in the device. The use of other batteries may lead to injury and risk of fire.
- When not in use, keep the rechargeable battery away from paper clips, coins, keys, nails, screws or other small metallic objects that may bridge the contacts. A short-circuit between the rechargeable battery contacts can lead to burns or fire.
- Fluid may escape from the rechargeable battery if it is used incorrectly. Avoid all contact with this. In the event of accidental contact, rinse with water. If liquid should get into the eyes, get medical assistance. Leaking battery fluid may result in skin irritations or burns.
- Do not attempt to use the charger to recharge ordinary batteries. Ordinary batteries cannot be recharged. If you attempt to recharge ordinary batteries, they will become hot and may cause a fire.
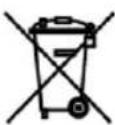
- Do not dispose of the rechargeable battery in the household waste.
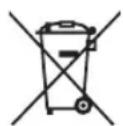
Send the rechargeable battery via a return system for recycling when it has come to the end of its lifetime.
Safety requirements with regard to fire prevention
- Keep a fire extinguisher at hand. For wood and paper fires: Powder fire extinguisher (fire class ABC) or foam fire extinguisher (fire class AB) for electrical fires: Carbon dioxide (CO_2) fire extinguisher (fire class B)
Special safety requirements for people with medical implants
Every power tool creates an electromagnetic field when used. Under certain unfavourable circumstances, this may affect the functionality of medical implants (e.g. pacemakers).
Before you use the rechargeable drill/ screwdriver:
- Consult your doctor.
- Ask the manufacturer of the implant.
Special safety measures when working with the rechargeable drill/screwdriver
- Use the charger cradle in dry indoor spaces only.
- When drilling and screwing, never touch the rotating chuck or inserted tool bit.
- When drilling and screwing, do not cover the ventilation slots of the drill-screwdriver.
- When drilling and screwing, pay attention to concealed cables and lines.
- Hold the device by the insulated protective handles when carrying out tasks during which the tool may
come into contact with hidden power cables. Contact with a power-carrying cable may also energise metal parts of the device and cause an electric shock.
3 - Check the scope of delivery
Check the scope of delivery for completeness and perfect condition.
In the event of missing or damaged parts:
- Do not operate the device.
- Make a claim to the dealer.
Figure 3-1: Scope of delivery
No. Description
1 Cordless screwdriver
2 Rechargeable battery
3 Charger cradle
4 Plug power supply
4 - Get to know your device
Intended purpose
The cordless screwdriver is designed to drill into wood, metal and plastic as well as to screw in and remove screws.
Any other type of use is inappropriate! The consequences of inappropriate use may be:
- Injury to the user or a bystander
- Damages to the device, the work piece or to objects in the vicinity of the device.
- Loss of guarantee, liability and insurance entitlements
Getting to know the operating elements
The operating elements of the cordless drill-screwdriver
Figure 4-1:
No. Description
1 Chuck
2 Locking collar
3 Torque limiter
4 Revolution range switch
5 Ventilation slots
6 Rotation direction switch
7 On/Off switch with revolution regulator
8 H a n d l e
9 Rechargeable battery
10 LED light
The operating elements of the rechargeable battery
Figure 4-2:
No. Description
1 Test button for the battery charge state
2 LED, red: Charge level is critical
3 LED, yellow: Charge level is weak
4 LED, green: Charge level is good
Operating elements of the charger cradle
Figure 4-3:
No. Description
1 Battery compartment
2 Connection socket for the plug power supply
The operating elements of the plug power supply
Figure 4-4:
No. Description
1 Power plug
2 Connection plug for charger cradle
Interpreting the labels
Icons on the type plates
Figures 4-5 through 4-8:
Icon
Meaning

Conformity with European safety norms

Recycle when the item has come to the end of its useful life

Do not introduce lithium-ion rechargeable batteries into the household waste.
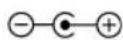
Polarisation of the connection plugs for the charger cradle.
Outside:Minus,
Inside:Plus

"Tested safety" seal

Housing is double insulated

Only for use in dry indoor spaces

Read the operating instructions

Ambient temperature, maximum of 50^

Do not throw the rechargeable battery into water

Do not allow the rechargeable battery to enter into the waste water system.

Do not throw the rechargeable battery into fire
On the type plate of the plug power pack
Figure 4-5 (top right):
Text
Meaning
network frequency, power consumption
Sek:
Output
voltage,
payload
Meister...
Manufacturer
specification
On the type plate of the charger cradle
Figure 4-5 (bottom left):
Text
Meaning
Ladestation Device name
LS108Lio
Model
designation
On the type plate of the rechargeable battery
Figure 4-6:
Text
Meaning
10.8 V Output voltage
1.3 Ah Battery capacity
BP108Lio
Model
designation
3ICMR18/65
designation of the
battery pack
On the type plate of the cordless drill-screwdriver
Figure 4-7 (right type plate):
Text
Meaning
AS108VM
Model
designation
Text Meaning
Nr. Item
Bj. Year of construction
SN Serial
10.8 V Operational voltage
Li-Ion Lithium-ion
n_0 I: Idle revolutions in first
gear: 0-350 rpm
n_0 II: Idle revolutions in
second gear:
0-1.000 rpm
Meister... Manufacturer
specification
Getting to know the technical data
Physical data
Cordless drill-screwdriver
Dimensions of the
cordless drill-screwdriver
with rechargeable battery
approximately 200× 215× 55mm
Weight with
rechargeable
battery 1.080 g
Tool receiving
socket
Chuck maximum
diameter 10 mm
Idle revolutions
First gear/ 0-350/min,
second gear 0-1.000/min
Torque
maximum 15 Nm
Electrical data
Cordless drill-screwdriver
Operational voltage 10.8 V
Battery type 3 x lithium-ion
Battery voltage 3 × 3.7 ~V =
Battery capacity 1.300 mAh
Ergonomic data
Cordless drill-screwdriver
number Sound level
number Sound power level
battery vibrations when drilling 1,49 m/s²
Vibrations when screwing 0,34m / s^2
Measuring inaccuracy K: 1,5 m/s²

Figure 4-8 (left type plate):
The measured vibration values were determined in accordance with EN 60745.
The specified vibration emission value was measured in accordance with a normed test procedure and can be used in order to compare one electrical tool with another.
The specified vibration emission value can also be used for an introductory evaluation of the influence.
The vibration emission value may fluctuate from the specified value during use of the electrical tool. These fluctuations will depend on the way in which the tool is used.
Safety measures must be taken in order to protect the operator. As a result, the evaluation of the influence must be made whilst taking account of the actual conditions of use. (All parts of the operating cycle must be taken into account for this purpose. This also includes times in which the tool is switched off and times in which it is switched on, but is running without load.)
Electrical data of plug power supply
Type
XR-DC120400A
Operational voltage
220...240 V
Network frequency
50/60 Hz
Power consumption 12 W
Output voltage 12 V
Capacity 400
Protection class II (dual insulation)
Protection class IP X0
5 - Charging the rechargeable battery
Before using the device for the first time

The battery is not completely charged when the item leaves the factory.
Figure 5-1: Connect the plug power supply and the charger cradle. Insert the rechargeable battery as far as it will go into the battery compartment.
The LEDs on the battery indicate the charging process:
LED LED LED Charging process Red Yellow Green


The charging process takes about 3 to 5 hours.
Remove the rechargeable battery from the charger cradle after you have finished charging it.

The rechargeable battery will attain its full performance
capability only after a number of charging cycles. mA
Figure 5-3: Insert the rechargeable battery as far as it will go into the handle of the cordless drill-screwdriver.
The cordless drill-screwdriver is ready for operation.
In daily use

In order to protect the rechargeable battery: Recharge the battery before it is completely discharged.
Figure 5-2: Check the battery charge state:
LED LED LED Charge state Red Yellow Green


Figure 5-4: Take the rechargeable battery out of the handle of the cordless drill-screwdriver.
Figure 5-1: Charge the rechargeable battery.
Figure 5-3: When the rechargeable battery has been charged, insert as far as it will go into the handle of the cordless drill-screwdriver.
The cordless drill-screwdriver is ready for operation.
6 - Drilling and screwing
Insert the drill bit or screwdriver blade

CAREFUL
Driven moving parts. Risk of injury if switched on unintentionally. Separate the device from the power supply.
Figure 5-4: Take the rechargeable battery out of the handle of the cordless drill-screwdriver.
Figure 6-1: Hold the locking collar (1) firmly and open the chuck (2). Insert the drill bit or screwdriver blade. Hold the locking collar (1) firmly and close the chuck (2).
Ensure that the jaws in the chuck grasp the tool and centre it.
Select the direction of rotation
Figure 6-2: Select the required direction of rotation. To drill: Always clockwise.
Set the torque limiter

The torque limiter is an adjustable friction clutch. When screwing, it prevents the screw heads from penetrating too far into the work piece.
Figure 6-3: Set the torque limiter:

For screwing screws into soft work pieces
to
50

For screwing screws into hard work pieces
For drilling (without torque limiter)

Select the revolution range
Figure 6-4: Select the revolution range:
First gear (low revolutions): 0...350/min

Second gear (high revolutions): 0...1,000/min
Regulate the revolutions

The revolutions are regulated using the On/Off switch.

See section on "Drilling and screwing", page 50.

Rule of thumb for drilling: The smaller the drill diameter, the higher the revolutions.
The harder the work piece material, the lower the revolutions.
Drilling and screwing
Figure 5-3: Insert the rechargeable battery again.

DANGER
Hidden power cables. Dangerous when starting to drill. Check the place you intend to drill with a cable detector.
Figure 6-5: Press the On/Off switch gently. The LED lamp lights. The cordless drill-screwdriver starts. To increase the revolutions: Press the On/Off switch further.
CAUTION
Heat development under load. Risk of device damage due to heat build-up. Keep the ventilation slots free.
To switch off: Release the On/Off switch.
7 - Cleaning and maintenance
After each use: Blow the ventilation slots clean using compressed air.
Clean the housing of the device with a dry cloth. Do not use liquids or aggressive or scouring cleaning agents.
8 - Storage
Take the rechargeable battery out of the cordless drill-screwdriver.
Store the device in a clean, dry location at a maximum of +40^ .
Charge the battery occasionally to maintain the capacity.
9 - Repairs
Have repairs carried out by authorised specialists only.
10 - Disposal
After the device has come to the end of its useful life: Ensure that it is sent for environmentally friendly recycling.
Dispose of the device according to regional regulations.
Do not put it in the household waste.
Do not dispose of the rechargeable battery in the household waste.
Send the rechargeable vbattery via a return system for recycling when it has come to the end of its lifetime.
11 - Service instructions
- Store the machine, operating instructions and where necessary the accessories in the original packaging. In this way you will always have all the information and parts ready to hand.
- Meister devices are to a large extent maintenancefree, a damp cloth being sufficient to clean the casing. Please note additional hints given in the operating instructions.
- Meister devices are subject to stringent quality control. If however a functional fault should occur, send the device to our servicing address. The repairs will be carried out in a short time.
-
A brief description of the defect speeds up the faulttracing and repair time. If within the guarantee period, please enclose the guarantee document and the proof of purchase.
-
In so far as a repair under guarantee is not concerned, we will charge the repair costs to your account.
- PLEASE NOTE! Opening of the device invalidates the guarantee claim!
- IMPORTANT! We point out expressly that in accordance with the Product Liability Act we do not take responsibility for any damage caused by our appliances, in so much that said damage is caused by improper repair, or original parts or parts released by us not being used when
parts are changed, or repairs not being conducted by Meister Werkzeuge GmbH, Customer Service or an authorised specialist! The same applies analogously to the accessories used.
- Pack the device well or use the original packaging in order to avoid transit damage.
- Even after the expiry of the guarantee period, we would like to help you and carry out any repairs at a favourable price.

- Elektrikli cihazin®,®,®,®,®,®,®,®,®,®,®,®,®,®,®,®,®,®,®,®,®,®,®,®,®,®,®,®,®,®,®,®,®,®,®,®,®,®,®,®,®,®,®,®,®,®,®,®,®,®,®,®,®,®,®,®,®,®,®,®,®,®,®,®,®,®,®,®,®,®,®,®,®,®,®,®,®,®,®,®,®,®,®,®,®,®,®,®,®,®,®,®,®,®,®,®,®,®,®,®,®.
- Degisirilmemelidir. Adaptör fişini, topraklı cihazlarla birlikte kullanmayın. Üzerinde degisiklik yapilmamış fişler ve uygün prizler, elektrik carpma riskinci azaltır.
Bataryayi suya atmayin

Bataryayi ate se atmayin
Elektrik adaptörünün tip levhasinda
Sek. 4-5 (sag ust):
Metin Anlami
Ladegerat Cihaz tanimi
Typ: Cihaz tipi
Prim: Sebeke voltaji, sebeke frekansi,cekilen guc
3ICMR18/65 Batarya hücresinin
tanimi
Akülu matkabin tip levhasinda
§ek. 4-7 (sag tip levhasi):
Metin Anlami
AS108VM Model tanimi
§ek. 4-8 (sol tip levhasi):
Metin Anlami
Nr. Ürún numarasi
Bj. Uretim yll
SN Seri numarasi
10,8 V Calisma voltaji
Li-Ion Lityum iyon batarya
n_0 I: 1. hizda rolanti devri:
0-350 devir/dakika
n_0 II: 2. hizda rolanti devri:
0-1.000 devir/dakika
Bataryali agiri1gi 1.080 g
Uyvasi
Mandren maks. 010 mm
Rolanti devri
- hiz/2. hiz 0-350/dak, 0-1.000/dak
Maks.tork.15Nm
Elektrik verileri
Akulu matkap
Calisma voltaj 10,8 V
Batarya tipi 3 × Li iyon
Batarya voltaji 3× 3,7V
Batarya