MPMB 1100 - Drill Meister Craft - Free user manual and instructions
Find the device manual for free MPMB 1100 Meister Craft in PDF.
Document temporarily unavailable
The manual is currently being transferred to our new server. It will be accessible again in a few hours. Thank you for your patience.
| Brand | Meister Craft |
| Model | MPMB 1100 |
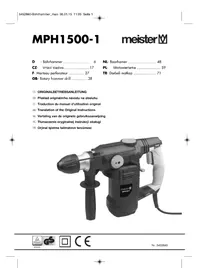
| Product type | Rotary hammer |
| Power supply | 230 V ~ / 50 Hz |
| Rated power input | 1100 W |
| No-load speed | 800 min⁻¹ |
| Impact rate (no load) | 3000 min⁻¹ / 3.5 J |
| Max. drill bit diameter (concrete/stone/granite) | 28 mm |
| Weight | 4.8 kg |
| Power cable length | 200 cm |
| Tool holder | SDS+ |
| Main functions | Drilling, hammer drilling, chiseling |
| Included accessories | Depth stop, auxiliary handle, dust collection box, chuck key, 2 chisels, 3 hammer drill bits, 2 replacement carbon brushes |
| Safety equipment | Auxiliary handle, dust protection, protective cap |
| Maintenance and cleaning | Clean the housing with a damp cloth, lubricate the gear after 5 hours of operation |
| Spare parts and repairability | Replacement carbon brushes included, repair by authorized service center |
| General information | Domestic use, CE compliant, subject to technical modifications |
Frequently Asked Questions - MPMB 1100 Meister Craft
User questions about MPMB 1100 Meister Craft
0 question about this device. Answer the ones you know or ask your own.
Ask a new question about this device
Download the instructions for your Drill in PDF format for free! Find your manual MPMB 1100 - Meister Craft and take your electronic device back in hand. On this page are published all the documents necessary for the use of your device. MPMB 1100 by Meister Craft.