FX8035 Duo - Phone Fysic - Free user manual and instructions
Find the device manual for free FX8035 Duo Fysic in PDF.
| Product type | DECT phone with answering machine |
| Brand | Fysic |
| Model | FX8035 Duo |
| Technology | DECT / GAP |
| Number of handsets | Up to 5 |
| Handset power supply | 2 rechargeable NiMH batteries 2.4 V |
| Base power supply | 6 V DC 450 mA adapter |
| Standby time | > 100 hours |
| Talk time | > 10 hours |
| Indoor range | Approximately 50 meters |
| Outdoor range | Approximately 300 meters |
| Frequency | 1.9 GHz |
| Power | < 20.5 dBm |
| Display | Screen with new call indicator |
| Functions | Digital answering machine (14 min), directory 150 names, intercom, call transfer, conference, alarm, keypad lock |
| Caller ID | DTMF and FSK, 29 memories |
| Operating temperature | 15 °C to 40 °C |
| Storage temperature | -20 °C to 60 °C |
| Maintenance | Clean with a damp cloth, no chemicals |
| Safety | Do not expose to moisture, use only the supplied adapter |
| Spare parts and repairability | Contact Fysic after-sales service (repair by qualified personnel) |
| General information | Complies with European directive 1999/5/EC |
Frequently Asked Questions - FX8035 Duo Fysic
User questions about FX8035 Duo Fysic
0 question about this device. Answer the ones you know or ask your own.
Ask a new question about this device
Download the instructions for your Phone in PDF format for free! Find your manual FX8035 Duo - Fysic and take your electronic device back in hand. On this page are published all the documents necessary for the use of your device. FX8035 Duo by Fysic.
USER MANUAL FX8035 Duo Fysic
5.4 NUMMERHERHALING:
"SORRY, WE CANNOT ANSWER YOUR CALL NOW, PLEASE
LEAVE YOURMESSAGE AFTER THE BEEP"
(SORRY, WIJ KUNNEN UW OPROEP NU NIET BEANTWOORDEN MAAR U KUNT NA DE BEEPTOON UW BERICHT ACHTERLATEN)
"SORRY, I CANNOT ANSWER YOUR CALL NOW, PLEASE CALL LATER"
(SORRY, IK KAN UW OPROEP NU NIET BEANTWOORDEN, BELT U LATER ALSTUBLIEFT TERUG)
11.6 ALARM (WEK) FUNCTIE:
13.10 GEHEUGENNAMES EN HANDSETNAAM:
stand-by: >100 aur
gebruik: >10 aur
Gebruiks temp.: 15^ C tot 40^ C
registercette mémoire
6.3 CORRIGER :

MODIFIER


Alimentation telephone: 6VDC, 450mA,
"SORRY, WE CANNOT ANSWER YOUR CALL NOW, PLEASE LEAVE YOURMESSAGE AFTER THE BEEP"
(“LEIDER KONNEN WIR IHREN ANRUF NICT ENTGEGENNEHMEN, BITTE HINTERLASSEN SIE EINE NACHRICH T NACH DEM PIEPTON”)
"SORRY, I CANNOT ANSWER YOUR CALL NOW, PLEASE CALL LATER"
(“LEIDER KANN ICH IHREN ANRUF DERZEIT NICT ENTGEGENHEMEN, BITTE VERSUCHEN SIE ES SPÄTER”)
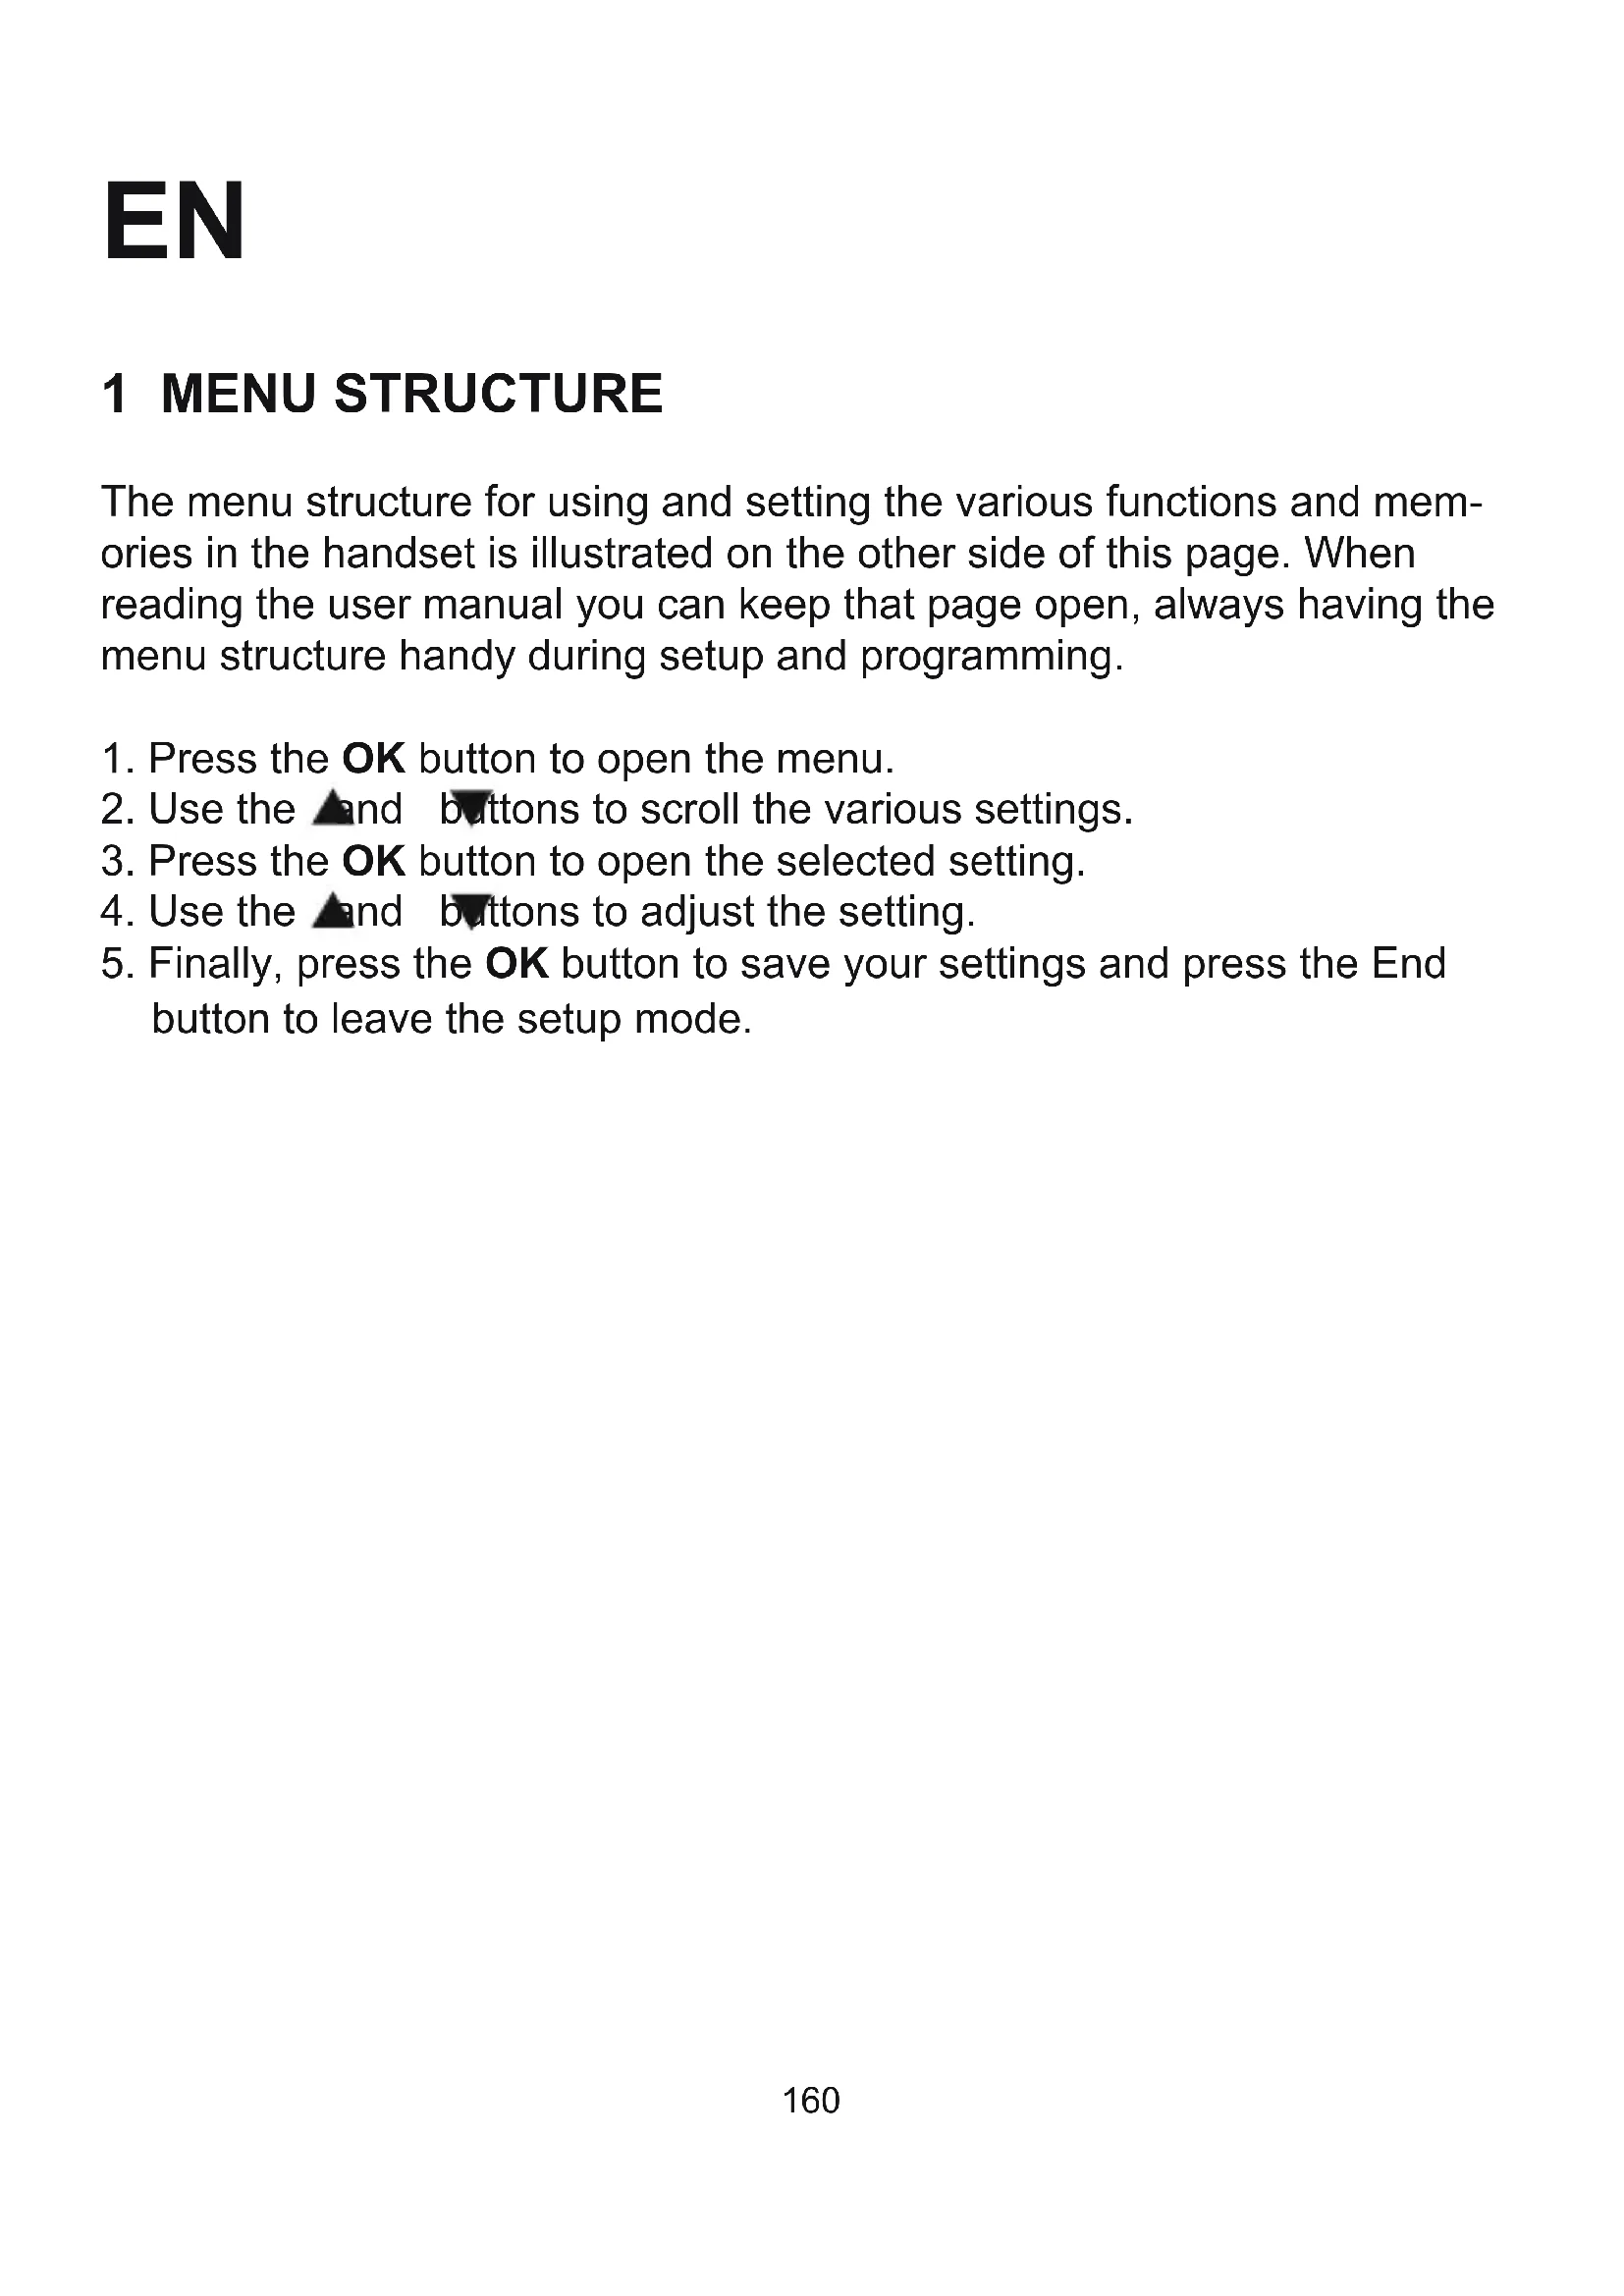
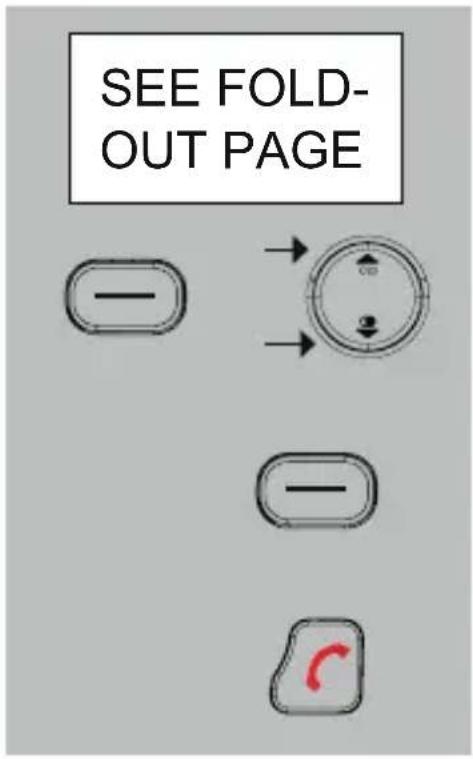
The menu structure for using and setting the various functions and memories in the handset is illustrated on the other side of this page. When reading the user manual you can keep that page open, always having the menu structure handy during setup and programming.
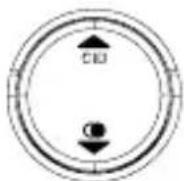
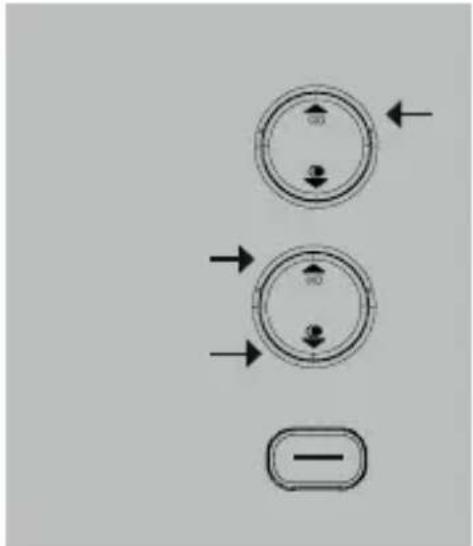
- Press the OK button to open the menu.
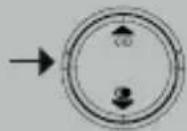
- Use the and buttons to scroll the various settings.
- Press the OK button to open the selected setting.
- Use the and buttons to adjust the setting.
- Finally, press the OK button to save your settings and press the End button to leave the setup mode.
2 GENERAL
2.1 ABOUT THE FX-8025:
The FX-8025 is a combination of a wired telephone and a wireless handset. The wired telephone contains the transmitter and receiver used for the connection of the wireless handset. You can connect multiple wireless handsets to the wired telephone; for this, see paragraph 12.2.
2.2 ABOUT THIS USER MANUAL:
This user manual describes the installation and functioning of the wireless handset. The wired telephone comes with its own user manual, which means you can consult an individual booklet for both the telephone and the wireless handset.
2.3 MAINS VOLTAGE & POWER OUTAGE:
The FX-8025 requires a mains voltage supply to function.
Telephone:
The telephone receives power through the supplied power adaptor. This adaptor should be connected at all times.
Wireless handset:
The wireless handset receives power from rechargeable batteries inserted into the handset. These batteries are charged as soon as and for as long as the wireless handset is put onto the charger. Of course, for this the charger must be connected to the mains via the adaptor.
In case of a power outage:
During a power outage, you can only make calls using the receiver of the telephone. The wireless handset and the speaker function of the telephone cannot be used, while the memory cannot be accessed (however, the memories will not be lost). During a power outage, incoming calls are indicated only on the telephone. In this case, the ringtone of the wireless handset will not function.
VERY IMPORTANT:
During a power outage, you can NO LONGER make calls with this wireless handset.
However, during a power outage you can still make calls using the wired telephone, but it will take about 5 seconds after picking up the receiver before you'll hear any sound.
This is the case for both incoming and outgoing calls.
2.4 TIME AND DATE:
In standby, the displays of the wireless handset and of the telephone will show the time and date and the day and time are registered when the answering machine records any messages. When playing the recorded messages, a voice will tell you this information.
For as long as you have not yet set the time and date, this information remains flashing in the displays and is NOT registered by the answering machine. Only after you've set the time and date according to the instructions in paragraph 10.2 of this user manual, the normal time will be displayed and also be registered when recording messages.
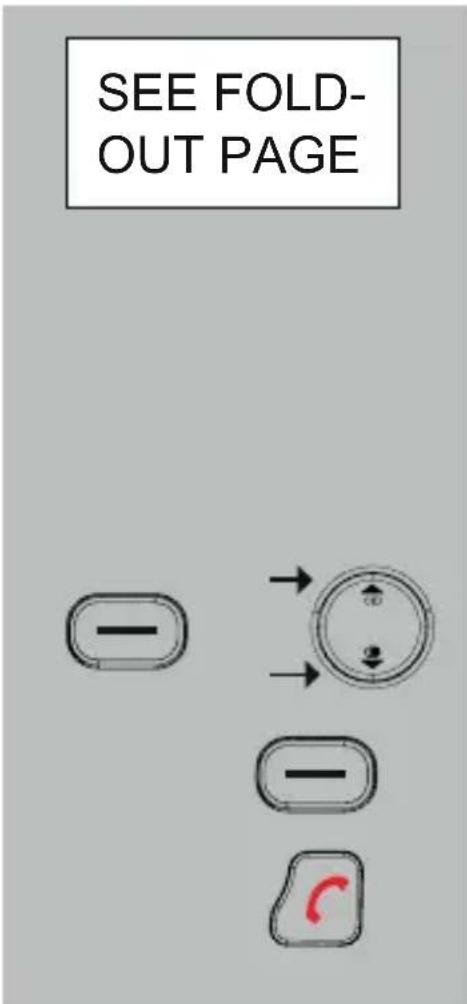
3 HANDSET OVERVIEW


To open the menu control To confirm your settings (OK button)

To turn off the microphone during a conversation (MUTE)
Intercom button, to make internal calls and to forward calls Return button (correction) during setup and programming

To open the phonebook memory

Call button: To start or answer calls

Press to switch the speaker function on/off

End button:
To disconnect a call
In standby: press and hold to switch off the handset

R button (flash), to activate telecom services
Also used as a delete button, to delete phonebook memories and messages from the answering machine
Redial button for last dialled number(s) In standby: to scroll the Caller-ID memory During a call: to set the reception volume During setup: to scroll the setup optionsR
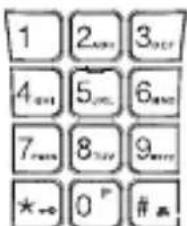
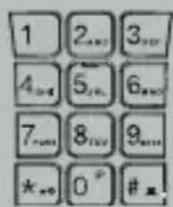
Keypad, for dialling phone numbers Also used for operating the answering machine While programming: to enter names and numbers
4 INSTALLATION
4.1 HANDSET CRADLE / CHARGER:
Insert the adaptor of the handset cradle / charger into a 230V wall socket.

ONLY CONNECT THE INCLUDED ADAPTER. CONNECTING OTHER ADAPTERS MAY RESULT IN DANGEROUS SITUATIONS OR MAY CAUSE DAMAGE TO THE ELECTRONICS OF
THE PHONE.
4.2 HANDSET:
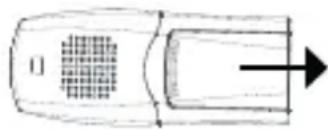
- Open the battery compartment of the handset, by sliding the battery cover down.
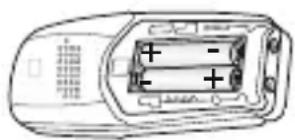
- Insert the batteries into the battery compartment; at this, pay attention to the polarity (+ and -).
- Slide the battery cover back onto the handset and place the handset on the base station.
- Leave the handset continuously during 15 hours on the base station, to charge the batteries properly.

the charge indicator will illuminate as soon as and for as long as the handset is placed onto the cradle / charger

INSERT ONLY RECHARGEABLE NiMH (NICKEL METAL HY-DRIDE) BATTERIES. THE USE OF NOT RECHARGEABLE BATTERIES MAY CAUSE DANGEROUS SITUATIONS OR EXPLO
SION HAZARD.
As soon as the batteries of the wireless handset are charged and the wired phone has been connected according to the related instructions, the wireless handset is ready for use.
5 CALLING
5.1 CALLING WITH THE HANDSET AGAINST YOUR EAR OR USING THE HANDS-FREE FUNCTION:
You can make calls holding the handset against your ear or you can use the speaker function allowing other household members to listen in or to keep your hands free for e.g. making notes.
during a call, press the Call button again to switch on the speaker function
- during a call, use the and buttons to adjust the volume; you can set the volume for calling via the handset or using the hands-free function separately, the selected setting will remain in the memory
press the Call button again to turn off the speaker function (the call will stay connected)
press the End button to disconnect your call
5.2 RECEIVING CALLS:
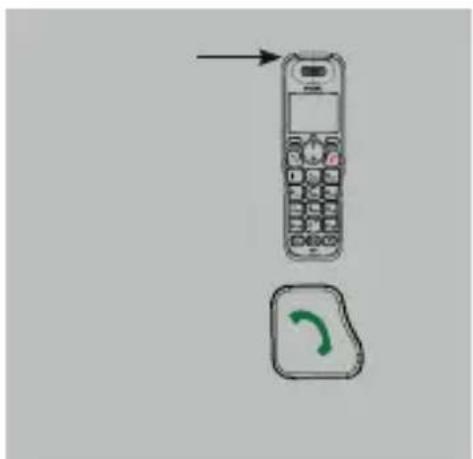
when you receive a call, a ringtone will be emitted while the call indicator illuminates
press the Call button to answer this call
- see paragraph 11.5 for answering calls by only picking up the receiver from the cradle / charger
5.3 DIALLING NUMBERS:
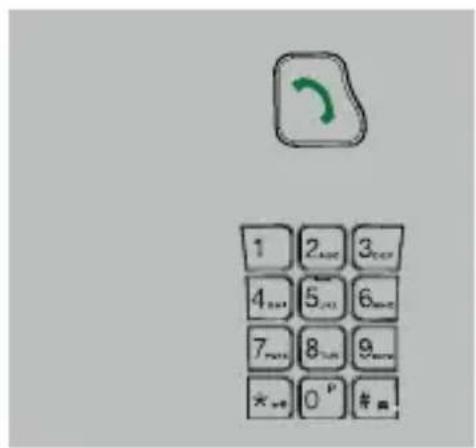
Direct dialing:
Press the phone-on key and wait for the dial tone.
Enter the phone number through the keyboard; this number will be dialed directly.

pre-dialling:
Enter the phone number through the keyboard.
-
hold the 0/P button to insert a dialling pause
-
press the C to delete any incorrect input
press the Call button to dial the number

dialling from the phonebook memory: press the phonebook button

search for the desired memory
press the Call button to dial the number

dialling from the Caller-ID memory: search for the desired memory

press the Call button to dial the number
5.4 RE-DIALLING:
The handset memorizes the 10 last dialled numbers. You can re-dial these numbers as follows:
press the button and the last number you've dialled will appear in the display
use the and buttons to select the desired last dialled number
press the Call button to dial the number
to delete last dialled numbers:
press the button and the last number you've dialled will appear in the display
use the and buttons to select the desired last dialled number
press the R/DEL button to directly delete the number
5.5 INTERCOM TO THE TELEPHONE:

press the INT button, the telephone will start ringing
pick up the receiver of the telephone or press the speaker button to answer the call
If you press the INT button during a call with the outside line, you can, as soon as the telephone answers, press the End button to forward the call.
See also paragraph 9.
5.6 TO MUTE THE MICROPHONE:
During a call, you can switch off the microphone allowing you to consult with other household members without having your call partner listening.

during a call, press the C button to switch off the microphone;
press the C again to switch the microphone back on
5.7 R/FLASH FUNCTION:
R/FLASH means you briefly interrupt the telephone connection. This function allows you to forward calls with certain home or office switchboards or activate telephone services such as 'Call waiting'.

during a call, press the R button to give a FLASH pulse
Some telephone service providers require you to press a numeric button after giving the FLASH pulse to use e.g. 'Call Waiting'; contact your provider for more information.
The interruption duration of the FLASH pulse can be adjusted; for this, see paragraph 10.4 (Flash interruption duration).
5.8 CALL DURATION:
During calls, the display of the handset will indicate the call duration.
The call duration will disappear from the display 5 seconds after you've disconnected the call.
6 PHONE BOOK MEMORY
6.1 INTRODUCTION:
The FX-8025 Wireless Handset has a phone book memory with a capacity of 50 phone numbers of at most 20 digits. You can program a name of at most 12 characters with each number.
The phone book memory in the handset is connected to the function Caller Identification. When you are called by somebody, whose name and number you have programmed in the memory, the name of this person is also displayed beside the number on the display of your handset.
Remark: the wired telephone also has its own phonebook memory with a capacity of 50 phone numbers with name. The memories of the telephone and of the wireless handset are NOT linked. Both the telephone and the wireless handset must be programmed separately.
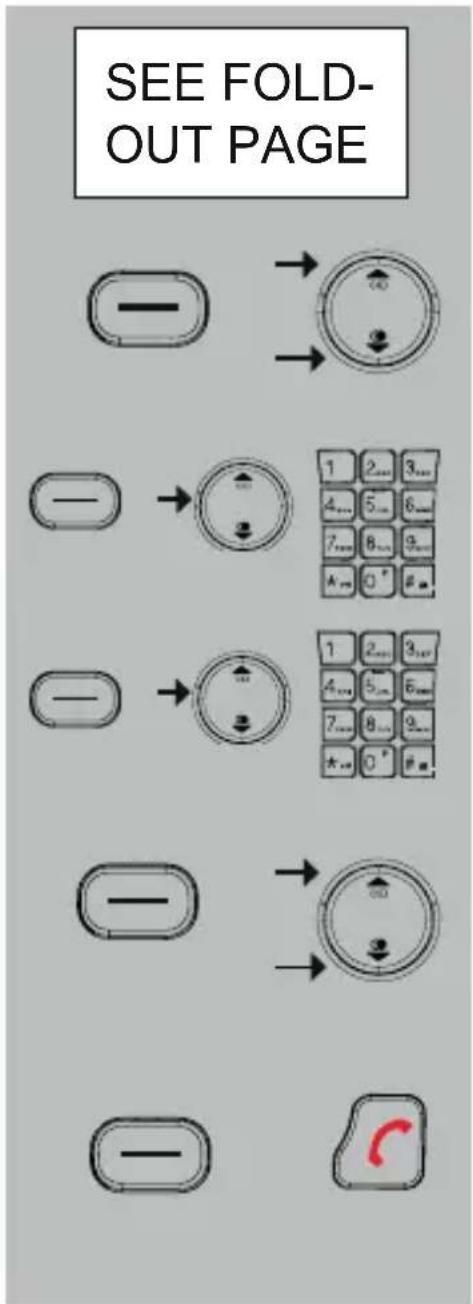
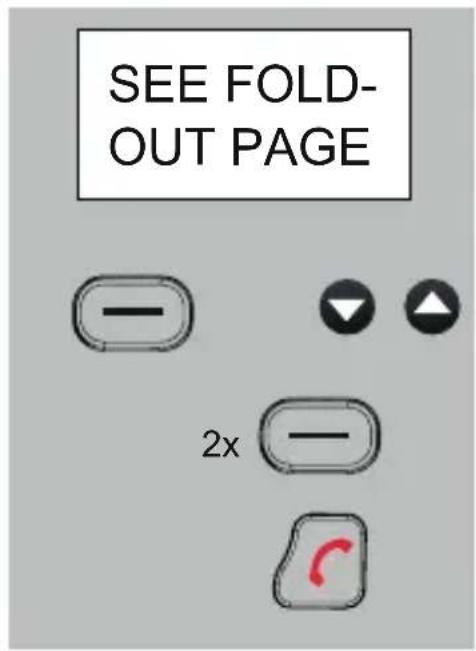
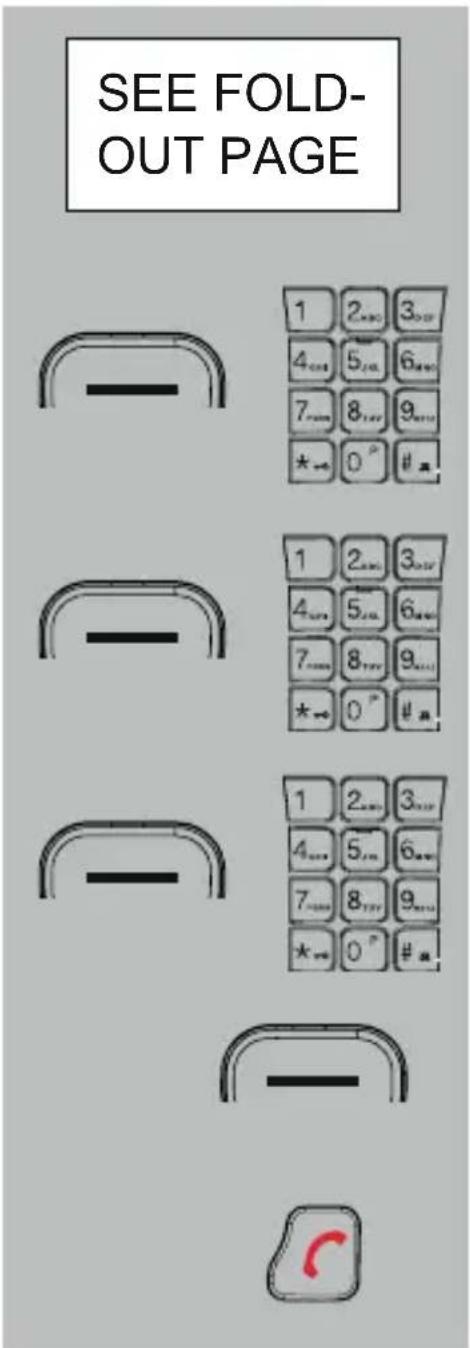
6.2 PROGRAMMING:
select the option:
ADD
press the OK button and use the keypad to enter the name
- see paragraph 13.10 regarding the available characters
- press the C button to delete any incorrect input
press the OK button and use the keypad to enter the phone number
- hold the 0/P button to insert a dialling pause
- press the C button to delete any incorrect input.
continued on the following page
press the OK button and use the and buttons to assign an individual (VIP) ringtone to this number
(the next time this subscriber calls you, the selected VIP ringtone will sound, provided you're subscribed to the Caller-ID service)
press the OK button and the End button to save the contact in the memory
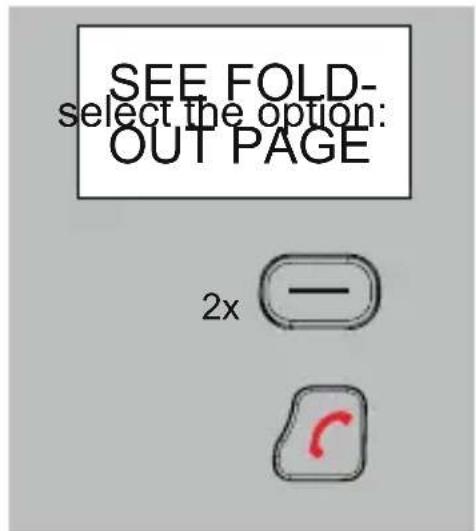
6.3 CORRECTING:
select the option:
EDIT
press the OK button and use the and buttons to search for the memory you'd like to correct
press the OK button, delete the old name and enter the corrected name
repeat this for the number
press the OK button and use the and buttons to assign a different ringtone to this number
press the OK button and the end button to leave the editing mode
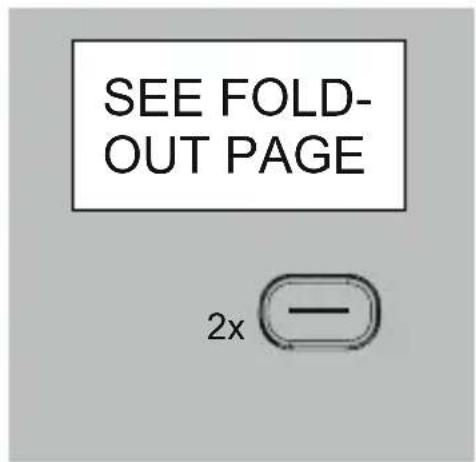
6.4 DELETING SINGLE MEMORIES:
select the option:
DELETE
press the OK button and use the and buttons to search for the memory you'd like to delete
2x
press 2 × the OK button to delete the number
press the End button to leave the deleting mode
6.5 DELETE ALL:
press 2x the OK button to delete the entire phonebook memory
press the End button to leave the deleting mode
6.6 MEMORY STATUS:
select the option:
PB STATUS
press the OK button
the display will now show how many of the 50 available memories you've programmed so far
7 CALLER IDENTIFICATION
7.1 INTRODUCTION:
If you have the service Caller Identification at your disposal, the number of the calling party is displayed on the display of your handset(s). You have programmed this number including name and the phone book memory of the handset, the name is also displayed on the display.
7.2 NEW CALL INDICATION:
The word NEW will appear in the display when the memory contains calls you haven't seen yet. Following the word NEW, the number of new calls you've received since the last time you checked the memory is shown.
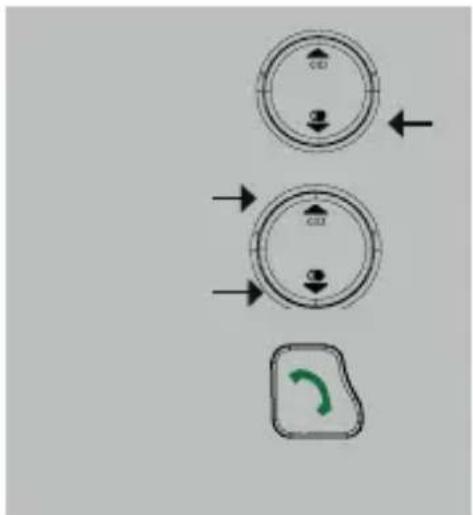
7.3 CHECKING THE MEMORY:

repeatedly press the and the Caller-ID memory
buttons to scroll
- in the upper right corner, after #, the number of this call is shown
- in the middle upper part of the display, the time and date of the call are shown
- if the word RPT appears while checking the memories, it means that this subscriber has called you multiple times since the last time you checked the memory (this indication only appears when the selected call a new call is, i.e. not yet read)

press the End button to leave the memory reading mode
7.4 CALLING BACK:

search for the desired call using the and buttons
press the Call button to call-back the selected number
7.5 COPYING TO THE PHONEBOOK MEMORY:
search for the desired call using the and buttons
press 2x the OK button and use the keypad to enter the name
* see paragraph 13.10 regarding the available characters
press 2x the OK button; the speaker will now play call melody 1
use the and buttons to assign an individual (VIP) ringtone to this number (the next time this subscriber calls you, the selected VIP ringtone will be played)
press the OK button to save your input in the memory
press the End button to return the handset to standby
7.6 DELETING (INDIVIDUAL CALLS):
search for the desired call using the and buttons
press the DEL button to directly delete the selected call
7.7 ADDITIONAL INFORMATION:
- The FX-8025 is suitable for both the DTMF system, offered by the Dutch PTT, and for the FSK system, offered by the Belgian PTT and by cable companies in The Netherlands and Belgium for as far as they provide telephone services.
- The Caller-ID function often requires an additional subscription, please ask your telephone service provider for more information.
- The FX-8025 handset has a memory for 29 calls.
-
Name display:
-
the DTMF doesn't send names; the name will only appear in the display when it's programmed in the memory of the handset
-
the FSK system does send names (contact your telephone service provider for more information)
-
If [UNKNOWN], [PRIVATE] or [0000000000] is shown in the display, it means that the subscriber has blocked sending his or her name and number.
- Also the names/numbers of the calls you've answered are saved.
- The memories in the telephone and in the wireless handset must be deleted separately.
8 ANSWERING MACHINE
8.1 INTRODUCTION:
The FX-8025 telephone is provided with a digital answering machine for answering calls when you're unavailable. A pre-programmed message of your personal message will be played and your caller can leave a message. The total memory capacity of the answering machine is 14 minutes.
The answering machine is built into the wired telephone, but operating the answering functions and listening to recorded messages can be done via the wireless handset.
Keep in mind that the handset must be within range of the wired telephone when setting and operating the answering machine and that you cannot currently be in a call.
8.2 NOTIFICATION TEXT:
2 notification texts, OGM-1 and OGM-2:
The answering machine allows callers to leave a message after playing the notification text or it can disconnect the call following the notification text. These functions have an individual notification text; in this manual the texts are called OGM-1 and OGM-2.
OGM-1: the notification text played when the caller is allowed to leave a message after the beep.
OGM-2: the notification text played when the call will be disconnected after the beep.
default notification texts:
the default OGM-1 notification text is:
"SORRY, WE CANNOT ANSWER YOUR CALL NOW, PLEASE LEAVE YOURMESSAGE AFTER THE BEEP"
the default OGM-2 notification text is:
"SORRY, I CANNOT ANSWER YOUR CALL NOW, PLEASE CALL LATER"
press the OK button and record your personal notification text after the beep by speaking into the microphone of the handset
- you could write down your notification text first and then read it out loud
- speak clearly and composed into the microphone of the handset
the recording will be ended after 60 seconds or you can press the OK button to stop the recording earlier
the notification text will be played back 1x for you to check
to check the notification text:
follow the above instructions, but instead of the option RECORD MSG, select the option PLAYBACK
press the OK button to start playback of the notification text.
to delete your personal notification text:
Use the base station to return to the standard notification text
- after deleting your personal notification text, the default English notification text will be used again for answering calls
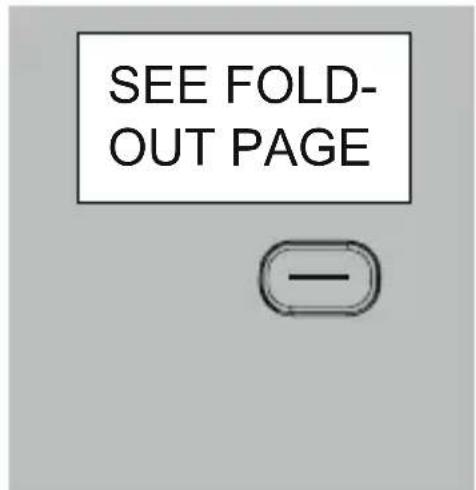
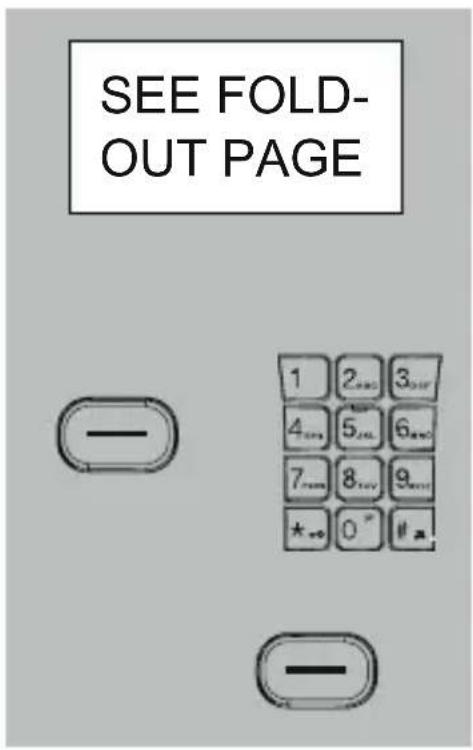
8.3 NUMBER OF RINGTONES:
You can set after how many ringtones the answering machine must answer incoming calls.
SEE FOLD-OUT PAGE


select the option:
ANSWER DELAY
press the OK button and use the and buttons to set the desired number of ringtones * see paragraph 11.3 in the user manual of the wired telephone regarding the setting 'TOLL Saver'
press the OK button; after a whistle tone, the number of ringtones will be saved
press the End button to leave the setup mode
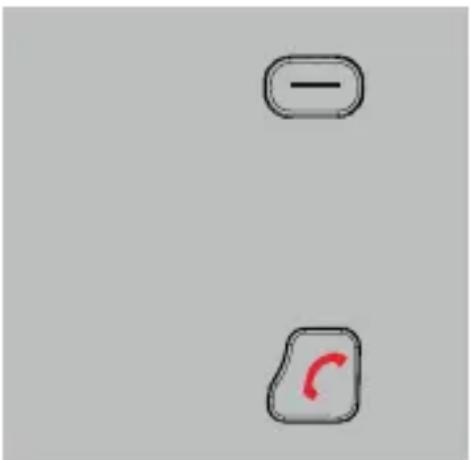
8.4 SWITCHING THE ANSWERING FUNCTION ON/OFF:
SEE FOLDOUT PAGE
select the option:
TAM ON/OFF

press the OK button and use the and buttons to switch the answering function on or off


press the OK button and use the and buttons to select the function OGM-1 or OGM-2
- OGM-1: answer + record message
OGM2: answer only

press the OK button; a whistle tone will sound and the answering function is switched on or off

Press the key phone-off to return to the idle mode of the handset.
8.5 TAKING OVER FROM THE ANSWERING MACHINE:
You can NOT use the wireless handset to listen in on the caller leaving a message (this is however possible using the wired telephone)

However, you can press the Call button to talk to your caller in person (the recording will then be stopped)
8.6 MEMO RECORDING:
A MEMO is a spoken message that you can leave in the answering machine for other household members.
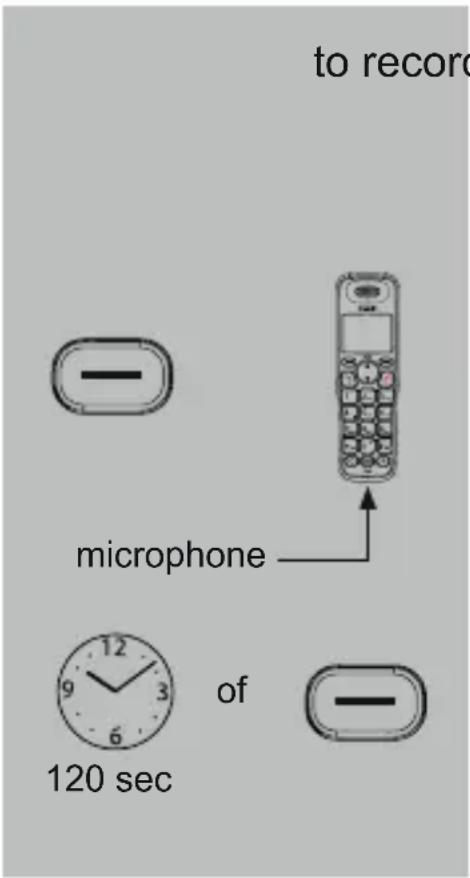
to record a MEMO message:x
select the option:
MEMO
press the OK button, wait for the beep and then record your memo message by speaking into the microphone of the handset
the recording will be ended after 120 seconds or you can press the OK button to stop the recording beforehand
- listening to and deleting recorded memo messages is done in the same way as for messages left by callers
8.7 ATTENTION SIGNAL:
When this function is enabled, the wired telephone will emit a signal each minute when a new message of memo message is recorded; this signal will stop after you've listened to that message.
8.8 NEWMESSAGE INDICATION &MESSAGE COUNTER:
The display will show the number of new messages and the total number of recorded messages:
15/25 MSGS = 15 new messages, 25 messages in total
8.9 PLAY, PREVIOUS, NEXT AND DELETE:

press and hold the 2/1 button for 2 seconds to start playback
- when new messages are registered, these will now be played first. Press the 2/1 button again to play all messages
- before each message, you'll be informed of the day and time of the recording

pause (press again to continue)

play the next message

press at the start of the message: play the previous message press halfway through the message: play the current message again

briefly press to delete the current message
8.10 DELETING ALL MESSAGES:
select the option:
DELETE ALL
press 2x the OK button to delete all messages * new messages cannot be deleted, you'll need to play those first
8.11 RESET SETTINGS:
You can reset the answering machine settings using the base station.
Factory settings of the answering machine:
- number of ringtones: 2
- answering function: OGM-1
*remote code:0000 - attention signal: off
8.12 MEMORY FULL:
As soon as the memory of the answering machine is full, each next call will be answered by the machine only after 15 ringtones and the OGM-2 notification text will be played, followed by:
SORRY, MEMORY FULL
You should now listen to all messages and delete them to free up space for new messages.
8.13 REMOTE CODE:
The user manual of the wired telephone describes how you can remotely listen to your messages. However, the PIN code required to do so (default is 0000) can be changed into your personal PIN code using the handset:
select the option:
CHANGE PIN
press the OK button and use the keypad to enter the new remote code
press the OK button; a whistle tone will sound and the new remote code is saved
press the End button to leave the setup mode
9 INTERCOM / CALL TRANSFER
9.1 INTRODUCTION:
The FX-8025 comes with one wired telephone and one wireless handset. You can make calls free-of-charge between your telephone and the wireless handset and you can transfer calls. You can also make a 3-way call (conference call) using the telephone, the wireless handset and the outside line.
Attention: this booklet describes the functions using the wireless handset. Consult the booklet of the wired telephone for operating these functions using the wired telephone.
See paragraph 11.1 for setting up individual ringtones for internal calls.
If multiple handsets are registered on the wired telephone, after pressing the button, you'll need to use the keypad to enter the number of the desired handset (press the 0 button for the wired telephone)
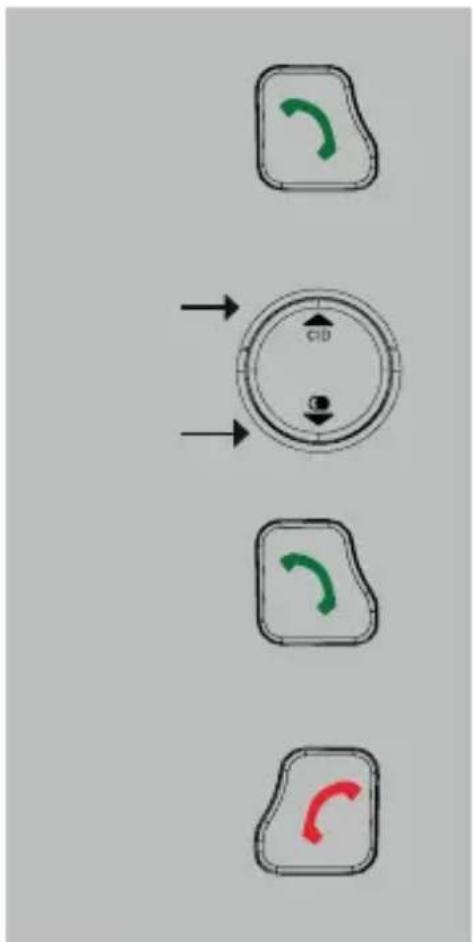
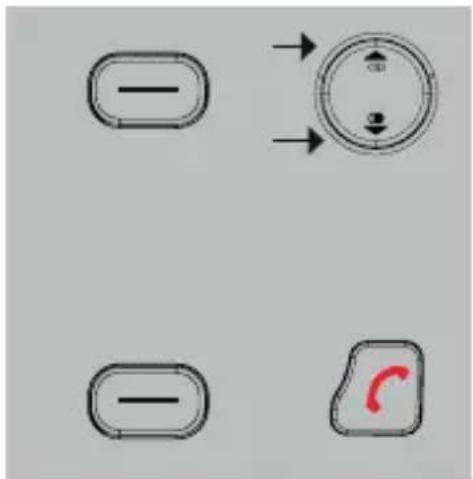
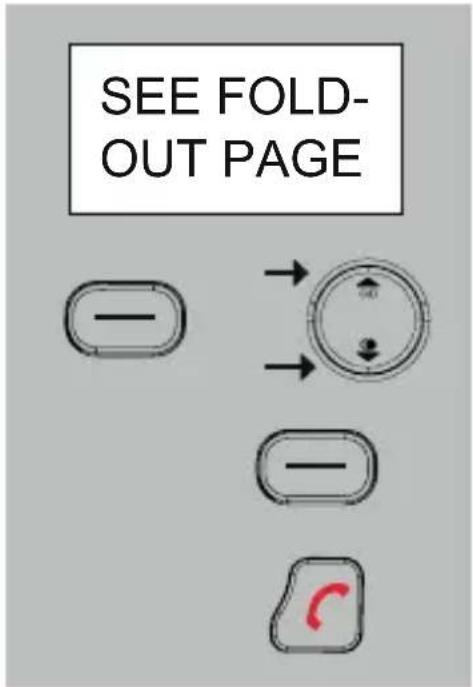
9.2 INTERCOM:
press the right button, the unit you're calling will now start ringing
as soon as the unit you're calling answers, you can start the internal conversation
press the End button to disconnect your call
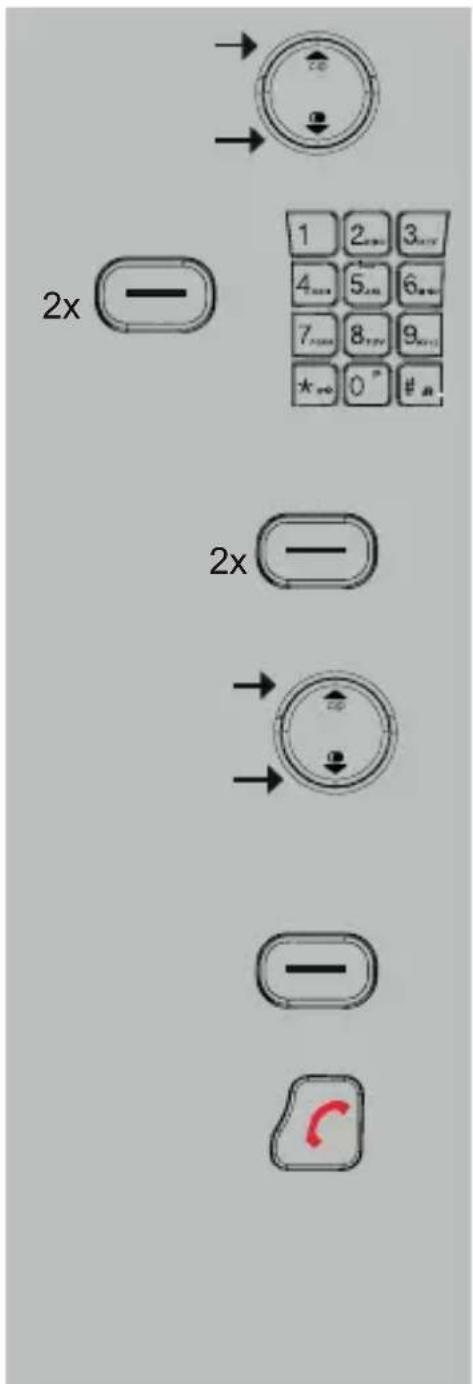
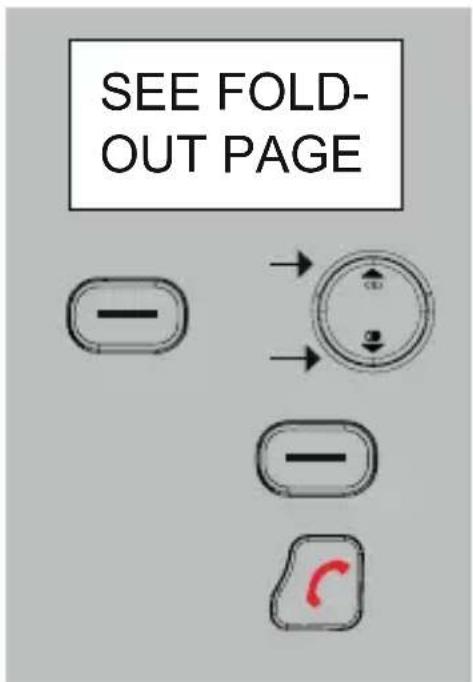
9.3 CALL TRANSFER:

during a call with the outside line, press the left button and select intercom; the unit you're calling will now start ringing
as soon as the call is answered, you can announce the outside line
- in case of no answer, press the button again to continue the outside line conversation
press the End button to transfer the outside line
9.4 CONFERENCE CALL:
during a call with the outside line, press the left按钮 and select intercom; the unit you're calling will now start ringing
as soon as the call is answered, you can announce the conference call
- in case of no answer, press the button again to continue the outside line conversation
press the * (asterisk) button to start the conference call
10 SYSTEM SETTINGS
10.1 INTRODUCTION:
The system settings are the settings regarding the general functioning of the FX-8025, i.e. not specifically for the wired telephone of wireless handset. You can use the wired telephone or wireless handset to fully customize these settings according to your preferences.
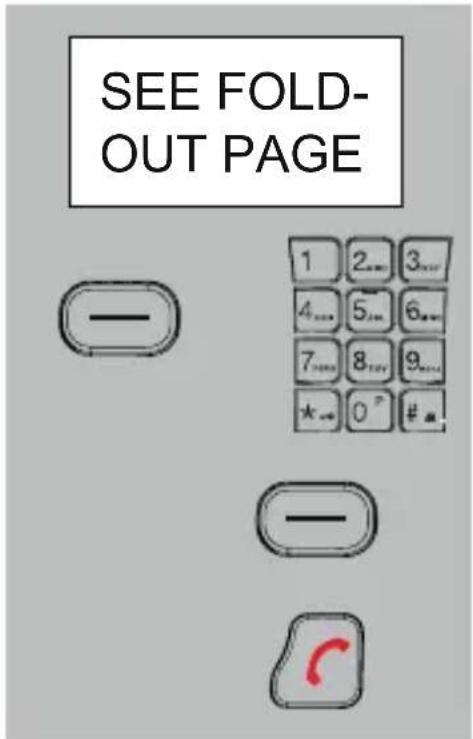
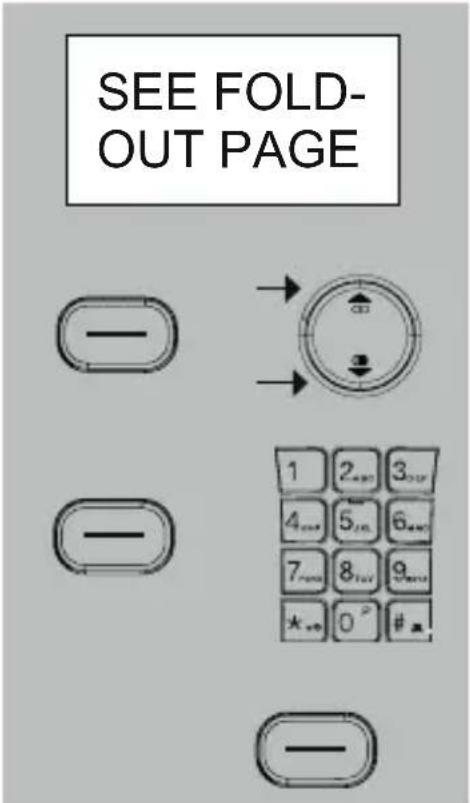
10.2 TIME AND DATE:
In standby, the display of the telephone and handset shows the time and date. In case of Caller-ID service and when recording messages in the answering machine, the time and day of the call are registered. You only need to program the time and date in the telephone or in the handset once.
Attention: when connected to a switchboard sending Caller-ID with FSK signals, you'll receive the time and date from that switchboard by simply waiting for a while until you receive an incoming call.
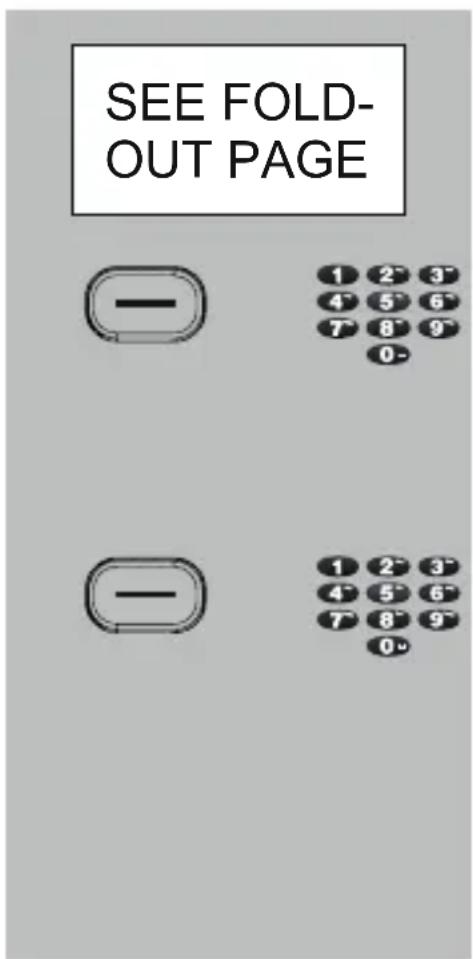
SEE FOLD-OUT PAGE


select the option:
press the OK button and use the and buttons to set the correct year
now repeat this instruction for the following:
the month
the date
the hours
the minutes
press the OK button; after a whistle tone, your settings are saved
press the End button to leave the setup mode
10.3 FLASH INTERRUPTION DURATION:
You can adjust the interruption duration of the FLASH pulse.
select the option:
press the OK button and use the and buttons to select 115, 250 or 600mS
press the OK button; after a whistle tone, your settings are saved
press the End button to leave the setup mode
Consult the user manual of your home or office switchboard for the most suitable interruption duration. The standardized interruption duration in the Benelux is 115mS, which is also set by the factory.
10.4 PIN CODE:
A PIN code is required for registering or de-registering additional handsets and for resetting the phone settings. The default factory PIN code is 100, but we recommend you to change this code into your personal code.
select the option:
CHANGE PIN
press the OK button and enter the current PIN code (0000 or your personal code if you've already changed the code before)
press the OK button and enter the new 4-digit PIN code
press the OK button again and enter the new PIN code
press the OK button; after a whistle tone, the new PIN code will be saved
press the End button to leave the programming mode
11 HANDSET SETTINGS
11.1 RINGTONES:
You can choose from 10 different melodies for the ringtone, set 5 different volume levels or select ringtone-off. You can set individual melodies and volumes for the ringtone for external and internal calls.
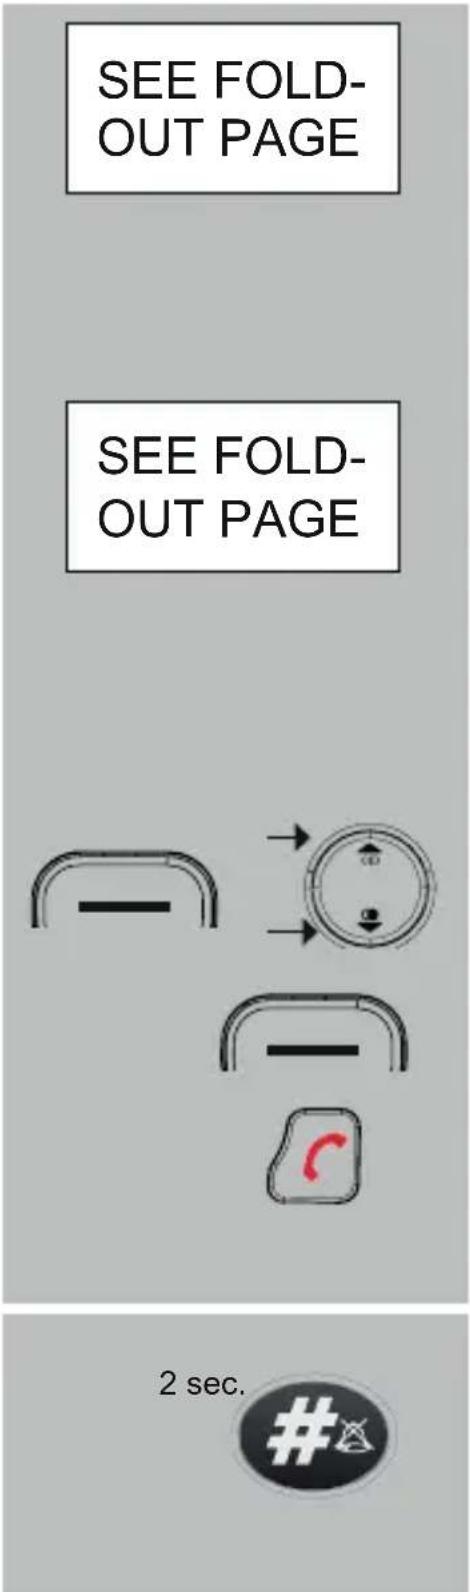
for the ringtones for intercom calls, select the options:
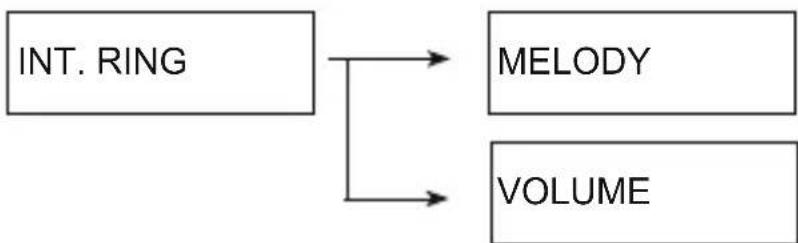
for the ringtones for calls from the outside line, select the options:
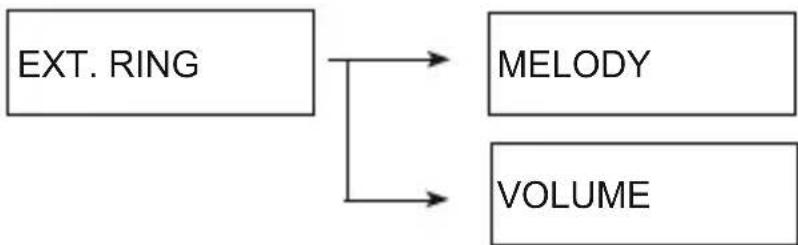
press the OK button and use the and buttons to set your preferences
press the OK button; after a whistle tone, your settings are saved
press the End button to leave the setup mode
Shortcut button ringtone-off:
press and hold the # button for 2 seconds to turn the ringtones off (press and hold again for 2 seconds to switch the ringtones back on)
11.2 HANDSET TONES:
You can switch the following handset tones on or off:
KEY TONE: these are the tones emitted when pressing a button
BATT EMPTY: these tones are emitted when the batteries are running empty and must be recharged
WEAK SIGNAL: these are the tones emitted when you're out of range from the wired telephone (also called 'base')
select the option:
KEY TONE
or:
BATTERY TONE
or:
OUT OF RANGE
press the OK button and use the and buttons to switch the corresponding tones on or off
press the OK button; after a whistle tone, your settings are saved
press the End button to leave the setup mode
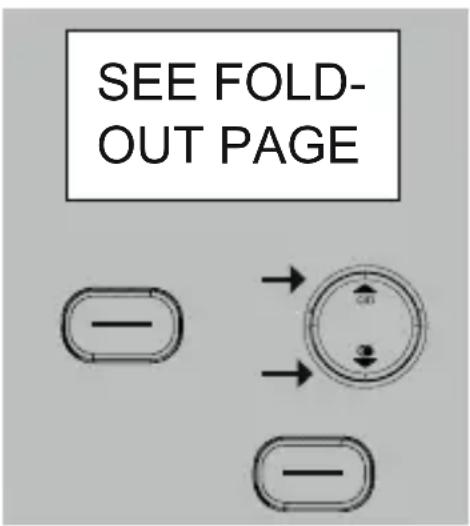
11.3 HANDSET NAME:
You can assign a personal name to the handset. When in standby, this name will be shown in the display of the handset.
SEE FOLD-OUT PAGE


select the option:
HS NAME
press the OK button and use the DEL button to delete any previous name
use the keypad to enter the new name (up to 10 characters)
press the OK button to save the name
press the End button to leave the programming mode
11.4 DISPLAY LANGUAGE:
The various instructions in the display can be shown in different languages.
select the option:
LANGUAGE
press the OK button and use the and buttons to select the desired language
press the OK button to save the selected language
press the End button to leave the programming mode
To restore a known language:
In case you've set a strange language and don't know how to restore a known language, do the following:
- press 1x the OK button
- press 3x the button
- press 1x the OK button
- press 3x the button
- press 1x the OK button
- use the and buttons to select the desired language and press the OK button to save it
11.5 AUTO ANSWERING:
When this function is enabled, you can answer calls by simply picking up the handset from its cradle / charger; this means you don't have to press the Call button.

select the option:
AUTO ANSWER
press the OK button and use the and buttons to select ON or OFF
press the OK button to save your setting
press the End button to leave the programming mode
11.6 ALARM (WAKE-UP) FUNCTION:
You can program an alarm or wake-up time in the handset. As soon as the set time is reached, an alarm signal will sound.
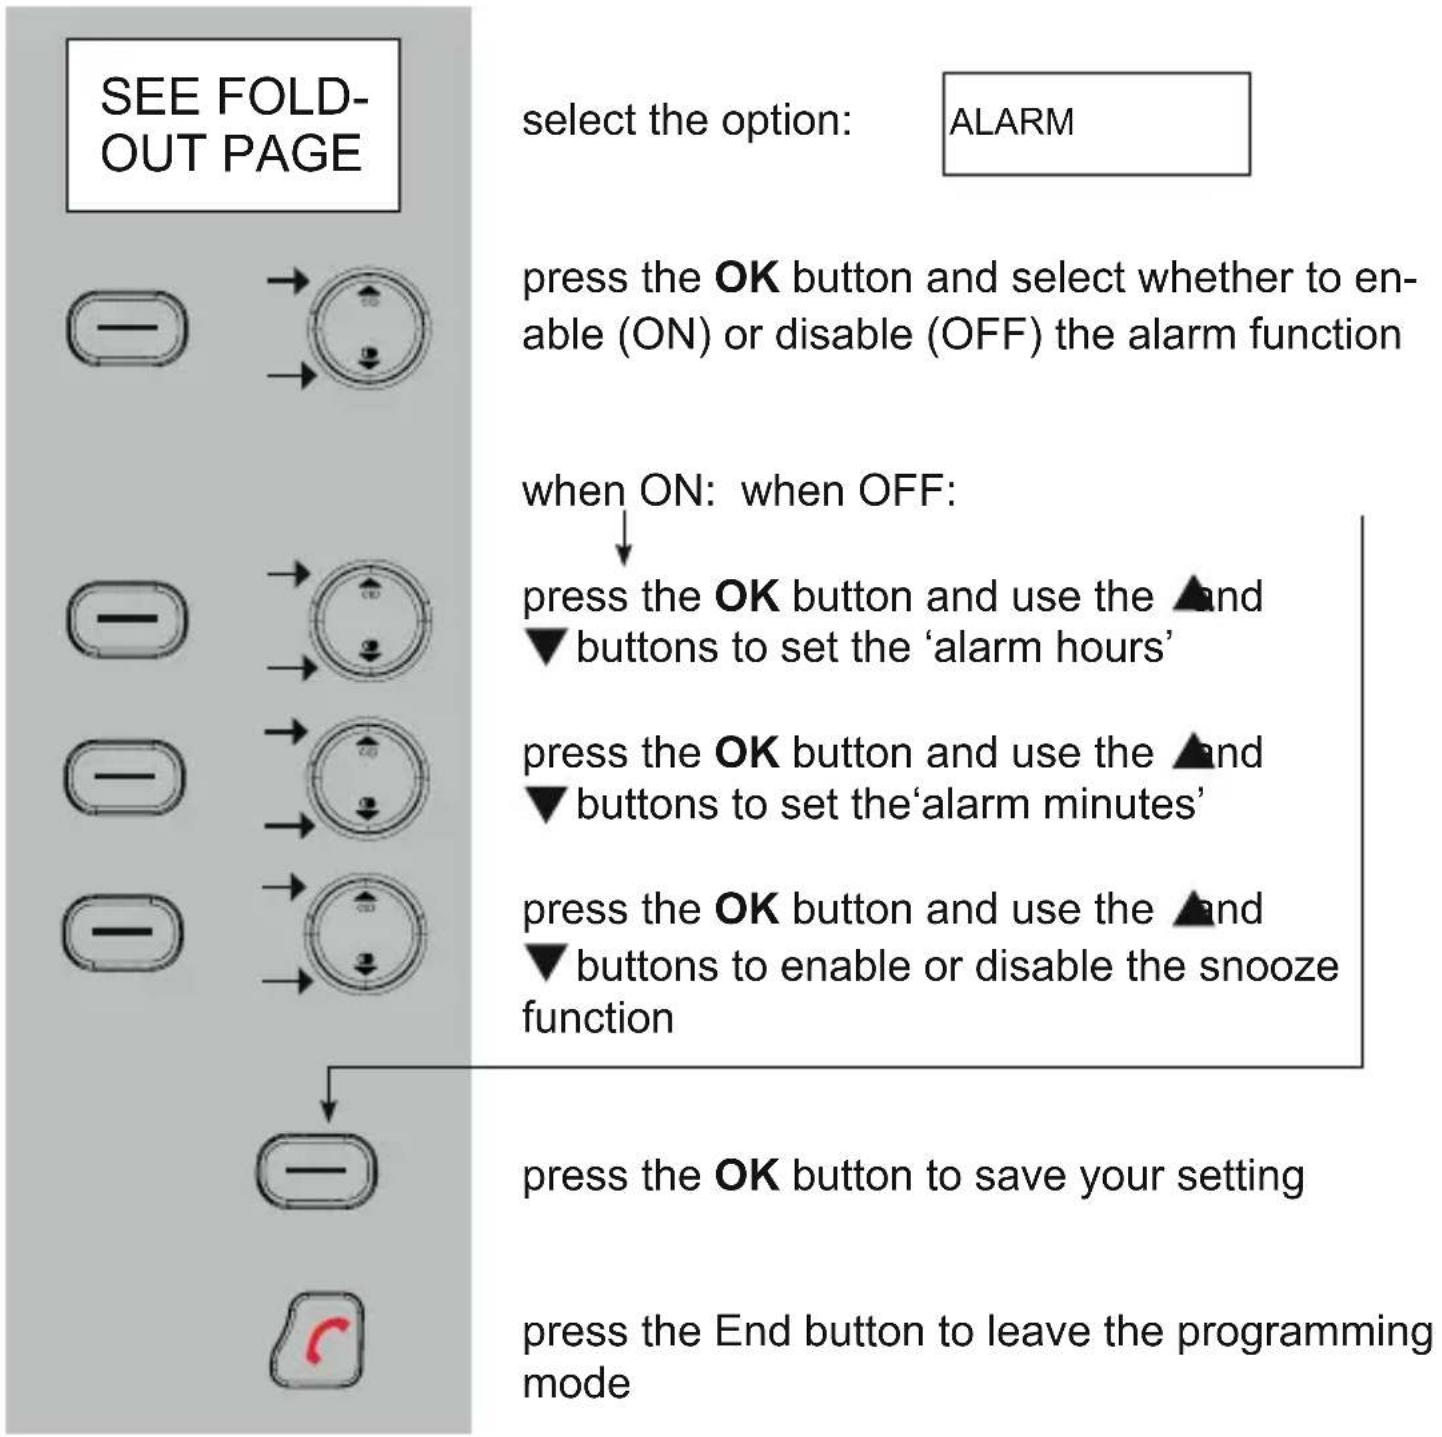
- When the alarm function is enabled, the handset will emit an alarm signal as soon as the set time is reached. This signal lasts for 45 seconds or you can press a random button to stop the signal beforehand.
- In case you have the snooze function enabled, the alarm will be repeated after 5 minutes.
- The alarm will sound daily until you disable it according to the above instructions.
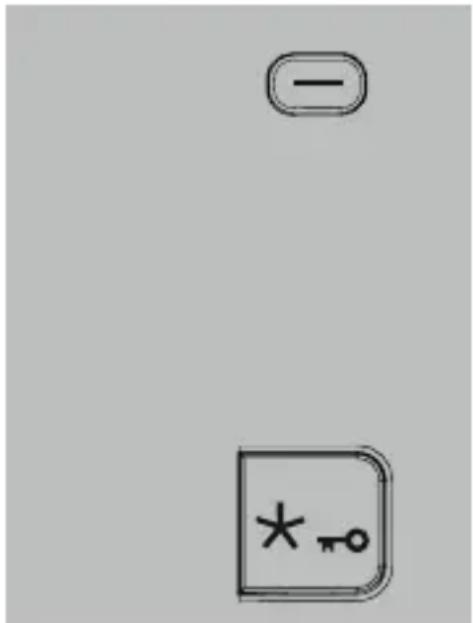
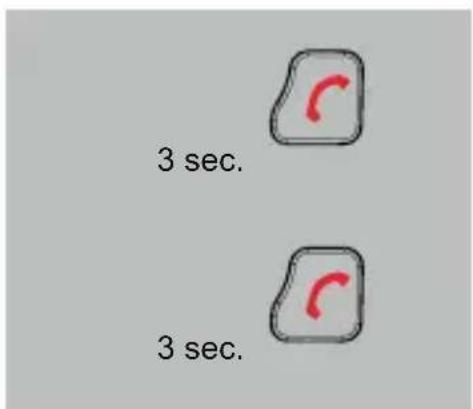
11.7 KEY-LOCK:
You can lock the keypad to prevent you from accidentally pressing buttons:
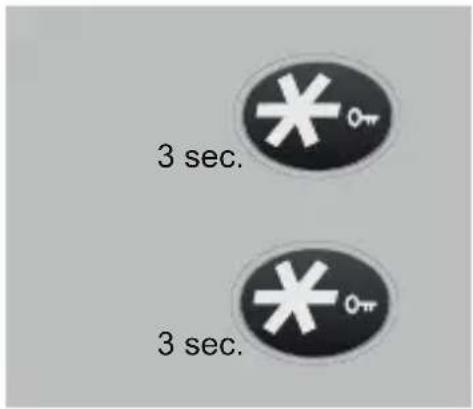
press and hold the * (asterisk) button for 3 seconds to lock the keypad
press and hold again for 3 seconds to unlock the keypad
11.8 SWITCHING OFF THE HANDSET:
You can switch off the handset completely to save battery power or in case you don't want to be disturbed:
press and hold the End button for 3 seconds; the handset will then be switched off completely
press and hold again for 3 seconds to unlock the keypad (of place the handset back onto the cradle/charger)
Keep in mind that you cannot make or receive calls when the handset is switched off. However, calls can still be made using the wired telephone.
11.9 HANDSET SETTINGS RESET:
You can reset the handset settings to the default factory settings as follows:
use the HS SETUP menu to select the option:

press the OK button and use the keypad to enter the PIN code (factory code 0000 or your personal code)
press the OK button; after a whistle tone, the handset settings will be reset
Factory settings of the phone:
- call volume internal: level 5
- call rhythm internal: melody 2
- call volume external: level 5
- call rhythm external: melody 1
- receiver volume: level 4
- speaker volume: level 4
- Flash interruption: 100mS
- PIN code: 0000
- language: Dutch
- key tone: on
- dialling: tone
- Caller-ID memory: empty
- last dialled number memory: empty
(the phonebook memory will not be deleted and all answering machine settings remain the same)
12 REGISTERING (EXTRA) HANDSET ON TELEPHONE
12.1 INTRODUCTION:
In case of a system error, you might have to register (re-register) the handset on the wired telephone. It's also possible to register the handset on other DECT telephones.
Keep in mind that these phones must be 'GAP COMPATIBLE' telephones; GAP means that handsets and base stations of different types and/or brands can be used with each other. Attention: the GAP protocol ensures that the handset can be used for making and receiving calls; other functions are not guaranteed.
12.2 REGISTERING:
select the option:
REGISTRATION
press the OK button and select on which base you'd like to register the handset (when using only one base, this will always be base-1)
press the OK button and use the keypad to enter the PIN code of the DECT telephone on which you're registering the handset
press the OK button
for registration on the FX-8025 telephone:
CONSULT THE USER MANUAL OF THE WIRED TELEPHONE (CHAPTER 15.2)
for registration on other DECT telephones:
CONSULT THE USER MANUAL OF THE OTHER DECT TELEPONE
12.3 BASE SELECTION:
When the handset is registered to multiple telephones (read: base stations), you can select the desired base as follows:
select the option:
REGISTRATION
press the OK button and which base(*) the handset must make contact
press the OK button
After several seconds, the handset will have found the selected base. Of course, this base must be switched on and be within range of the handset.
*: If selecting the "Auto" option, the handset will select the base with the best signal reception. Also when the handset (in standby) is out of range of the base, the handset will start searching for a base that can be reached. Attention: this only happens when the handset connection with a base is lost. It's not possible to switch base during calls.
12.4 DE-RESITERING WIRELESS HANDSETS:
Handsets that are faulty or lost should be de-registered.
select the option:
DELETE HS
press the OK button and use the and buttons to select the handset that must be de-registered
press the OK button; after a whistle tone, the selected handset will be de-registered
press the End button to leave the de-registration mode
Keep in mind that you can only de-register other handsets and not your own handset.
13 TIPS AND WARNINGS
13.1 GENERAL:
- Read the user manual carefully and follow all instructions.
- Never place or use the phone in a wet or moist room or environment.
- Take care of proper heat dissipation; never cover the phone and/or the power supply adapter(s), and do not place them directly beside a heat source.
- Use only the included adapter(s); connecting another type of adapter may cause damage to the electronics.
- Take care that the cable of the phone and the adapter do not get damaged, and prevent that they cause tripping or falling.
- Never disassemble the phone and the adapter(s). This may only be done by qualified personnel.
13.2 INSTALLATION:
- Connect or disconnect the cables of the phone and the power supply adapter only to the base station when the power supply adapter has been unplugged from the mains socket, and the phone connector has been disconnected from the phone socket.
- Do not install the phone during a lightning storm.
- Do not install a phone connection point in a wet or moist environment.
- Do not touch uninsulated phone or adapter cables, unless they are disconnected from the phone network or the mains power.
13.3 PLACEMENT:
- Preferably, do not place the device on surfaces that have been treated with cellulose; the rubber feet can leave traces on these.
- Do not place the phone in the direct vicinity of other phones or other electronic (medical) devices, TL tubes and other gas discharge lamps; the emitted radio waves of these (and other) wireless phone(s) may disrupt the functioning of the equipment, or the emitted signals of the equipment disrupt the functioning of the phone.
13.4 HEARING AIDS:
Users of older generation hearing aids always shall keep into account a possible uncomfortable buzzing tone when using DECT phones.
13.5 MEDICAL EQUIPMENT:
It is possible that enabled DECT phones interfere with sensitive medical equipment. When the phone is kept in the vicinity of the medical device, interference can occur. Do not place a DECT phone on or near a medical device, not even when it is in standby mode.
13.6 POWER FAILURE:
In case of a mains power outage, you can still make calls with the wired telephone by picking up the receiver (hands-free calls are unavailable during a power outage). Keep in mind that it can take up to 5 seconds after picking up the receiver before an effective connection is established. During a power outage, you can NOT make calls using the wireless handset.
13.7 EAVESDROPPING:
Eavesdropping on a DECT phone is virtually impossible. Not only shall one be within reach of the DECT phone, one also needs expensive equipment.
13.8 ENVIRONMENT:
-
The packaging of this telephone can be collected as old paper. However, we recommend you to save it, to adequately protect the phone during transport.
-
When replacing this telephone, please return it to the supplier to ensure environment-friendlyly processing.
13.9 MAINTENANCE:
- Clean the phone only with a moist cloth; do not use any chemical detergents.
- The adapter and the phone cable shall be disconnected before cleaning.
13.10 MEMORY NAMES AND HANDSET NAME:
Adding names to memory numbers and programming a handset name is done via the 0-9 buttons on the keypad.
For this, the following characters are available:
button: character after pressing .. x
| 1 | 2 | 3 | 4 | 5 | 6 | 7 | 8 | 9 | 10 | 11 | 12 | 13 | 14 | |
| 1 | 1 | ? | i | i | ! | ” | ( | : | ; | . | ||||
| 2 | A | B | C | 2 | à | á | à | ä | à | AE | ç | |||
| 3 | D | E | F | 3 | è | é | ê | ë | ||||||
| 4 | G | H | I | 4 | i | i | i | i | ||||||
| 5 | J | K | L | 5 | ||||||||||
| 6 | M | N | O | 6 | ñ | ó | ó | ô | ō | ö | ö | |||
| 7 | P | Q | R | S | 7 | |||||||||
| 8 | T | U | V | 8 | ù | ú | ú | ü | ||||||
| 9 | W | X | Y | Z | 9 | |||||||||
| 0 | sp | 0 | + | - | @ | = | / | \ | [ ] | |||||
| (sp = space) | ||||||||||||||
Press the C button to delete any incorrect input.
14 POSSIBLE PROBLEMS AND SOLUTIONS
14.1 PROBLEMS WITH OUTGOING CALLS:
-
There's no dialling tone.
-
The outside line is being used by (one of) the wireless handset(s). Wait until that call is finished and try again.
-
Check the connection between the base and your telephone connection (when in doubt, connect a different telephone to your telephone connection).
-
The power supply is lost.
-
Check whether the adaptor is plugged into the back of the phone and make sure the power adaptor is plugged into a wall socket marked with 230V (you can check this by e.g. connecting a floor lamp to that wall socket).
14.2 PROBLEMS WITH INCOMING CALLS:
-
No notification of incoming calls:
-
The bell is disabled; enable it. (see paragraph 11.1)
-
Check the connection between the phone and your telephone connection (when in doubt, connect another telephone to your telephone connection)
-
You are continuously busy:
-
Check whether you have a 2nd phone with its receiver next to the phone.
- Check whether (one of) the wireless handset(s) registered to your telephone is keeping the line busy.
- Connect another phone to your phone connection, and use this to check whether the malfunction originates from your connection or your carrier.
14.3 PROBLEMS DURING CALLING:
-
Beep tones during an intercom call:
-
You are called from outside during an intercom call; end this call, wait until the phone rings normally and answer the call.
14.4 PROBLEMS WITH CALLER IDENTIFICATION
- You do not receive Name or Caller Identification information on the display of your handset.
- Check whether your carrier transmits these signals (you shall subscribe to this service with some providers).
- You do receive the numbers on the display of your phone, but not the name.
- The carrier does not forward names; consult your carrier for this.
- The name has not been programmed in the memory of your handset; program it. (see paragraph 6.2)
- The name has been programmed in the memory, but the accompanying phone number has been programmed without area code; program the number including area code.
14.5 PROBLEMS WITH THE ANSWERING MACHINE:
-
No incoming messages are (no longer) being registered:
-
The answering function is disabled, please enable it (see paragraph 8.4)
-
The recording capacity is full (the light is flashing rapidly).
-
Listen to your messages and delete some of them (see paragraph 8.9 & 8.10)
-
No Memo message can be recorded:
-
The recording capacity is full (the light is flashing rapidly).
-
Listen to your messages and delete some of them (see paragraph 8.9 & 8.10)
-
The answering machine cannot be operated remotely:
-
You're entering an incorrect remote code. Check the remote code or program a new code (see paragraph 8.13)
- You're trying to listen to the answering machine using a pulse (rotary dial) phone. For operating the answering functions remotely, you can only use a DTMF phone (you'll hear key tones when pressing numeric buttons).
14.6 OTHER:
-
The wired telephone emits a beep tone every 60 seconds:
-
This is a notification to tell you that new messages are registered in the answering machine. After listening to these messages, the beep tone will stop. You can also disable this function according to the instructions in paragraph 8.7.
- The display stays blank:
-
The batteries are empty, please recharge them.
-
The handset is not connected with the telephone:
-
You're out of range from the telephone; move closer.
- The handset is switched off. Check and switch on.
- the handset is not (no longer) registered on the telephone; please register/re-register (see paragraph 12.2).
In case the failure has not been solved with aforementioned solutions:
- Remove the batteries from the handset, and unplug the power supply adapter and the phone connector from their sockets; connect everything again after several minutes.
You can also contact the Fysic service center on phone number +31 (0) 73 6411 355 of with the supplier of this phone.
15 DECLARATION OF CONFORMITY
This device meets the essential requirements and other relevant provisions as stipulated by the European Guideline 1999/5/EC.
The declaration of conformity is available on the website http://DOC.hesdo.com/FX-8025-DOC.pdf
16 SPECIFICATIONS
Protocol: DECT / GAP, 5 handsets
Call history:DTMF&FSK,29memories
Dialling:
TONE/PULSE
FLASH: 115, 250 & 600mS
Phonebook: 150 names with numbers in the telephone
150 names with numbers in the wireless handset
Telephone power supply: 6VDC, 450mA,
Cradle/charger power supply: 6VDC, 450mA
Handset power supply: 2x 1.2V NiMH battery pack
Range: 50 m indoors, 300 m outdoors
Wireless handset lifespan (with full batteries):
stand-by: >100 hours
Storage temperature: -20°C to 60°C
Answering machine: max. length of each notification text: 60 sec.
max. length of the MEMO message: 120 sec.
max. length of each incoming message: 120 sec.
total recording capacity: 14 min.
Frequency: 1.9GHz
Power: <20.5dBm
18 CONTENTS
1 MENU STRUCTURE 160
2 GENERAL
2.1 ABOUT THE FX-8025 161
2.2 ABOUT THIS USER MANUAL 161
2.3 MAINS VOLTAGE & POWER OUTAGE 161
2.4 TIME AND DATE 162
3 HANDSET OVERVIEW 163
4 INSTALLATION
4.1 HANDSET CRADLE / CHARGER 165
4.2 HANDSET 165
5 CALLING
5.1 CALLING WITH THE HANDSET AGAINST YOUR EAR OR USING THE HANDS-FREE FUNCTION 166
5.2 RECEIVING CALLS 166
5.3 DIALLING NUMBERS 167
5.4 RE-DIALLING 168
5.5 INTERCOM TO THE TELEPHONE 168
5.6 TO MUTE THE MICROPHONE 169
5.7 R/FLASH FUNCTION 169
5.8CALL DURATION 169
6 PHONE BOOK MEMORY
6.1 INTRODUCTION 170
6.2 PROGRAMMING 170
6.3 CORRECTING 171
6.4 DELETING SINGLE MEMORIES 172
6.5 DELETE ALL 172
6.6 MEMORY STATUS 172
7 CALLER IDENTIFICATION
7.1 INTRODUCTION 173
7.2 INTRODUCTION 173
7.3 CHECKING THE MEMORY 173
7.4 CALLING BACK 174
7.5COPYING TO THE PHONEBOOK MEMORY 174
7.6 DELETING 175
7.7 ADDITIONAL INFORMATION 175
8 ANSWERING MACHINE
8.1 INTRODUCTION 176
8.2 NOTIFICATION TEXT 177
8.3 NUMBER OF RINGTONES 179
8.4 SWITCHING THE ANSWERING FUNCTION ON/OFF 180
8.5 TAKING OVER FROM THE ANSWERING MACHINE 180
8.6 MEMO RECORDING 181
8.7 ATTENTION SIGNAL 181
8.8 NEWMESSAGEINDICATION&MESGAGECOUNTER.....182
8.9 PLAY, PREVIOUS, NEXT AND DELETE 182
8.10 DELETINGALLMESSAGEs 183
8.11 RESET SETTINGS 183
8.12 MEMORY FULL 184
8.13 REMOTE CODE 184
9 INTERCOM / CALL TRANSFER
9.1 INTRODUCTION 185
9.2 INTERCOM 185
9.3 CALL TRANSFER 186
9.4 CONFERENCE CALL 186
10 SYSTEM SETTINGS
10.1 INTRODUCTION 187
10.2 TIME AND DATE 187
10.3 FLASH INTERRUPTION DURATION 188
10.4 PIN CODE 189
11 HANDSET SETTINGS
11.1 RINGTONES 190
11.2 HANDSET TONES 191
11.3 HANDSET TONES 192
11.4 DISPLAY LANGUAGE 193
11.5 AUTO AANNEMEN 194
11.6 ALARM (WAKE-UP) FUNCTION 195
11.7 KEY-LOCK 196
11.8 SWITCHING OFF THE HANDSET 196
11.9 HANDSET SETTINGS RESET 197
11.10 BASE SETTINGS RESET 197
12 REGISTERING (EXTRA) HANDSET ON TELEPHONE
12.1 INTRODUCTION 198
12.2 REGISTERING 198
12.3 BASE SELECTION 199
12.4 DE-RESITERING WIRELESS HANDSETS 200
13 TIPS AND WARNINGS
13.1 GENERAL 201
13.2 INSTALLATION 201
13.3 PLACEMENT 201
13.4 HEARING AIDS 202
13.5 MEDICAL EQUIPMENT 202
13.6 POWER FAILURE 202
13.7 EAVESDROPPING 202
13.8 ENVIRONMENT 202
13.9 MAINTENANCE 202
13.10 MEMORY NAMES AND HANDSET NAME 203
14 MEMORY NAMES AND HANDSET NAME
14.1 PROBLEMS WITH OUTGOING CALLS 204
14.2 PROBLEMS WITH INCOMING CALLS 204
14.3 PROBLEMS DURING CALLING 204
14.4 PROBLEMS WITH CALLER IDENTIFICATION 205
14.5 PROBLEMS WITH THE ANSWERING MACHINE 205
14.6 OTHER 206
15DECLARATION OF CONFORMITY 206
16 SPECIFICATIONS 207
17 WARRANTY 208
18 CONTENTS 209
Service Help

Azielaan 12
's-Hertogenbosch

WWW.HESDO-SERVICE.NL
INFO@HESDO-SERVICE.NL

NL +31 (0) 73 6411 355
FR + 32 (0) 3 238 5666