TD016 - Turntable BIGBEN - Free user manual and instructions
Find the device manual for free TD016 BIGBEN in PDF.
| Product type | Turntable with FM tuner |
| Brand | Bigben |
| Model | TD016 |
| Power supply | 230 V ~ 50 Hz, 13 W |
| Playback speeds | 33, 45, 78 rpm |
| Radio functions | FM (87.5 – 108 MHz), auto scan, 20 presets |
| Auto stop | Yes, can be turned on/off |
| Bass boost | Yes, switchable |
| Built-in clock | Yes, 12/24 h display |
| Built-in speakers | Yes |
| Audio outputs | Line out (RCA), 3.5 mm headphone jack |
| Audio input | Aux (3.5 mm jack) |
| FM antenna | Wired, extendable |
| 45 rpm adapter | Included |
| Cartridge and stylus | Removable cartridge, protective cap |
| Standby consumption | Auto standby after inactivity |
| Maintenance | Clean with a soft, dry cloth; avoid liquids |
| Safety | Ground pin required, do not expose to water, repair by qualified personnel |
| Batteries (remote control) | Button cell included, do not swallow, keep out of reach of children |
| Dimensions | Not specified |
| Weight | Not specified |
Frequently Asked Questions - TD016 BIGBEN
User questions about TD016 BIGBEN
0 question about this device. Answer the ones you know or ask your own.
Ask a new question about this device
Download the instructions for your Turntable in PDF format for free! Find your manual TD016 - BIGBEN and take your electronic device back in hand. On this page are published all the documents necessary for the use of your device. TD016 by BIGBEN.
USER MANUAL TD016 BIGBEN
customerservice@bigben-interactive.be
ESPANA, sat@bigbeninteractive.es
ITALIA, support@bigbeninteractive.it
www/bigben.eu
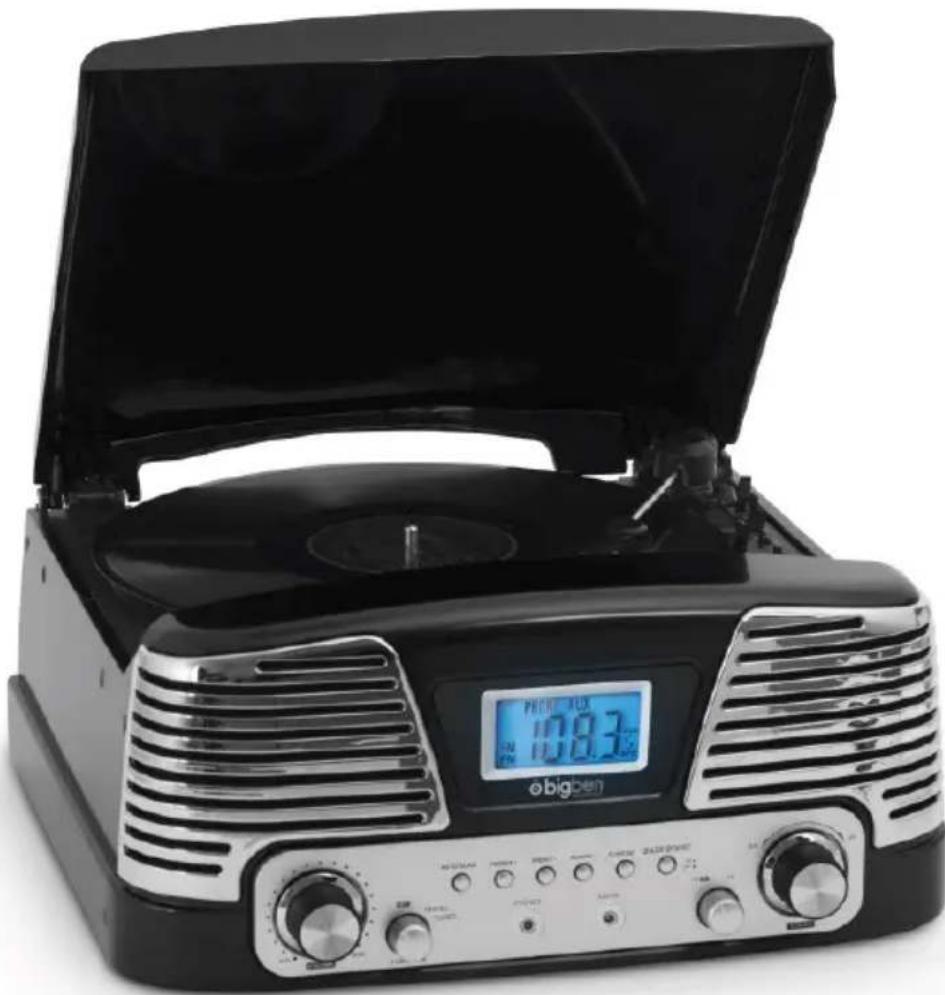
TURNTABLE - MODEL TD016
OPERATING INSTRUCTIONS
PLEASE READ OPERATING INSTRUCTIONS CAREFULLY BEFORE USE AND KEEP FOR FUTURE REFERENCE.
Important safety instructions
- Read these instructions.
- Keep these instructions.
Heed all warnings. - Follow all instructions.
Refer all servicing to qualified service personnel. - Do not expose the unit to dripping or splashing and make sure that no objects filled with liquids, such as vases, are placed on it.
Class I appliances must be connected to the mains socket outlet with a protective-earth connection. - The mains plug connects the device and should remain operable during use.
- To disconnect the unit from the mains, the plug should be fully disconnected from the mains socket outlet. The mains plug should not be obstructed and should be easily accessible during use.
- When a power indicator light is on, it indicates the unit is connected to the mains supply. When the light is off, it indicates the unit is fully disconnected from the mains supply.
INFORMATION ABOUT BATTERIES (applicable only if batteries included)
- Polarity must be respected when inserting batteries.
- The batteries should be inserted in such a way as to avoid any short circuit.
- Do not mix used and new batteries.
- Do not mix alkaline, standard (carbon-zinc) and rechargeable (nickel-cadmium) batteries.
- Do not expose the battery to excessive heat such as sunshine or fire.
- Remove the batteries when they have not been used for a long time.
- If the liquid contained in the batteries comes in contact with eyes or skin, immediately and carefully wash the affected area with clear water and consult a doctor.
- The product/remote control may contain a coin/b button type battery:
WARNING
Do not ingest the battery. Chemical burn hazard. This product contains a coin/burner cell battery. If the coin/burner cell battery is swallowed, it can cause severe internal burns in just 2 hours and can lead to death. Keep new and used batteries away from children. If the battery compartment does not close securely, stop using the product and keep it away from children. If you think batteries might have been swallowed or placed inside any part of the body, seek immediate medical attention.
CAUTION
Danger of explosion if battery is incorrectly replaced.
Replace battery only with the same or equivalent type.
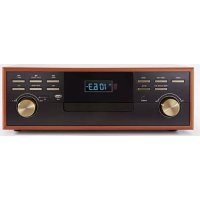
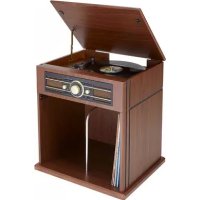
PARTS / BUTTONS
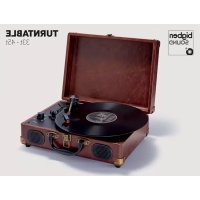
Before use, detach the stylus guard (white plastic cover) by pulling it straight off the front of the cartridge in the direction of the arrow.
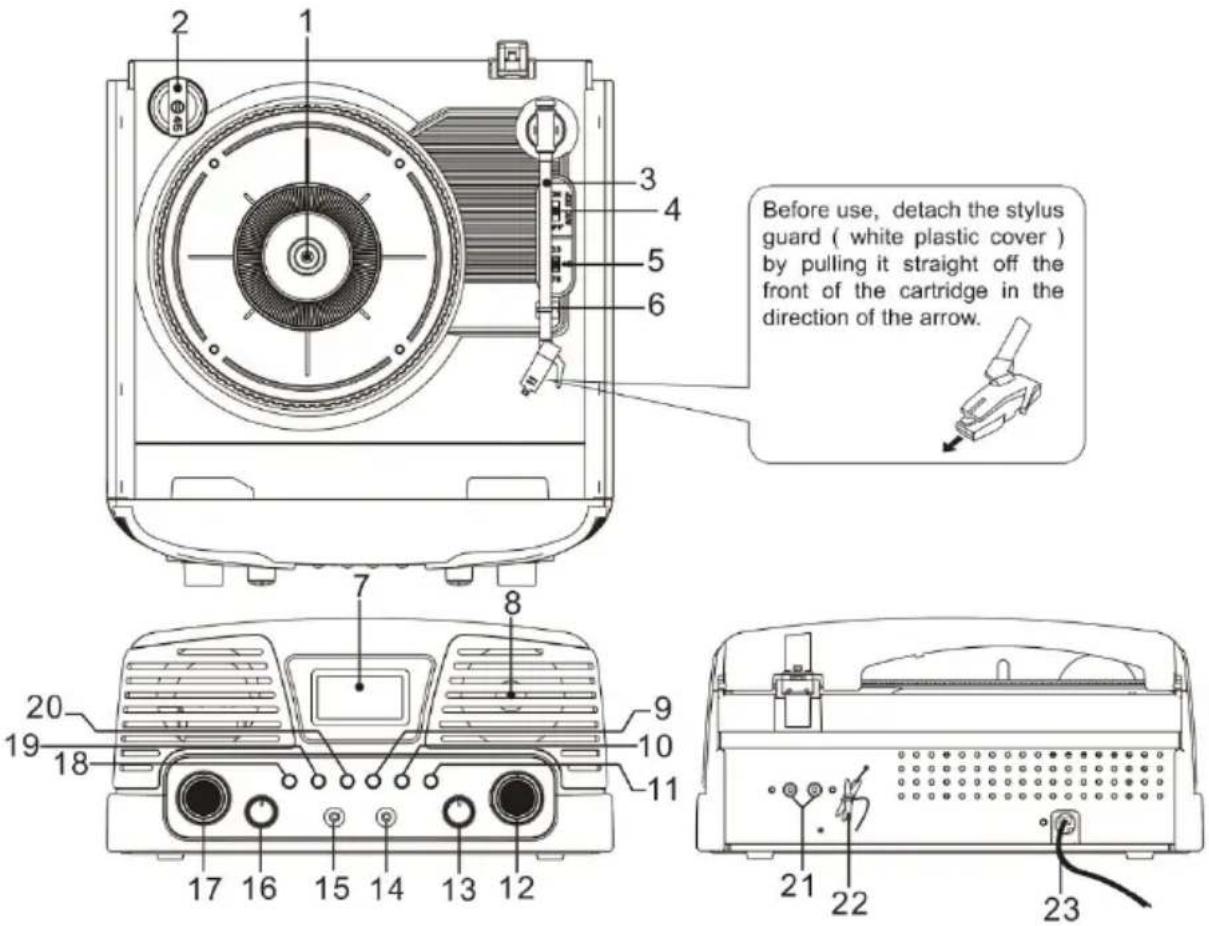
- Turntable platter
- 45 rpm adapter
- Tonearm
- Auto-stop (On/ Off)
- Speed selector (33, 45, 78 rpm)
- Tonearm rest
- Display
- Speakers
- Memory button
- Clock set
- Bass boost (On/ Off)
- Tuning control knob
- FM ST/FM
- Aux-in
- Headphone jack
- OFF/Phono/Tuner Function button
- Volume control (Min → Max)
- Auto scan
- Preset +
- Preset -
- Line out socket
- FM antenna
- AC power cord
- Set the FUNCTION button (16) to the TUNER position.
- Press AUTO SCAN (18) to automatically search for radio stations for 3 minutes. The screen displays the digits and station numbers. Once complete, the unit will store a maximum of 20 preset stations.
- Press PRESET + (19) and PRESET - (20) to listen to the desired station.
B) Tuning
- Set the FUNCTION button (16) to the TUNER position.
- Tune in to the desired radio station by turning the Tuning control knob (12).
- To adjust the radio signal, turn the Tuning control knob by 0.1 MHz and search for the next station.
- Adjust the VOLUME (17) to the desired level.
- Set the FUNCTION button to the OFF position to turn off the radio.
C) Storing stations in memory positions P01 to P20
- Set the FUNCTION button (16) to the TUNER position.
- Tune in to the desired station.
- Press the MEMORY button (9). The current position number will flash in the display, e.g. 'P01, P02... P20'.
- Press PRESET + or - (19, 20) to select the station number.
- Press the MEMORY button again to save.
- Press PRESET + (19) and PRESET - (20) to select and listen to a saved station.
ANTENNA
Extend the wire to obtain the best reception. You may need to turn or change the position of the unit to improve reception.
SETTING THE CLOCK
- Set the FUNCTION button (16) to OFF.
- Press the CLOCK SET button (10) and hold for 3 seconds.
- Press PRESET + or - (19, 20) to select the clock display format (12 hrs or 24 hrs). Press the CLOCK SET button to confirm the time format and set the hour.
- Press PRESET + or - to select the hour. Press the CLOCK SET button to confirm the hour and set the minutes.
- Press PRESET + or - to select the minutes and press CLOCK SET to confirm the minutes and finish setting the time.
Before use, please make sure to:
- Lift the dust cover.
- Release the tonearm clamp and remove the stylus protector.
A) Listening to records
- Set the FUNCTION button (16) to the PHONO position.
- Place a record on the turntable, over the central spindle. Place the EP adapter over the central spindle when playing 17cm EP records.
- Set the SPEEDD selector (5) to 33, 45 or 78 rpm depending on the record.
- Release the tonearm clamp and remove the stylus protector.
- Lift the tonearm from the tonearm rest by using the Lift lever.
- Place the tonearm on the desired position of the record.
- Gently lower the tonearm onto the record to start playing.
- When the record is finished the tonearm will automatically stop. Lift the tonearm from the record and put it back on the rest.
- To stop manually, lift the tonearm from the record and return it to the rest.
- Set the AUTO-STOP selector (4) to the ON position to use the auto-stop function.
- In the ON position, 33 rpm records will automatically stop when the end of the record is reached.
- 45 and 78 rpm records can play the whole song when the auto-stop function is OFF.
Note: Do not stop or turn the platter manually.
Moving or jarring the turntable without securing the tonearm clamp could result in damage to the tonearm. Replace the protective cap on the stylus when not in use.
B) Selecting the OFF / PHONO / TUNER function
Turn the OFF/ Phono/ Tuner Function button (16) and hold for 3 seconds to switch between OFF/ PHONO and TUNER.
LINE-OUT CONNECTION
You can connect the unit to external speakers (4 ohm) via the Speaker output L, R sockets (external speakers are not included).
Note: Sound will still come from the original built-in speakers even after the external speakers are connected.
HEADPHONES
You can plug stereo headphones (not included) equipped with a 3.5mm jack and impedance of 8 ohms or greater into the headphone jack (15). When using headphones, the speakers are automatically disconnected.
WARNING: USING HEADPHONES
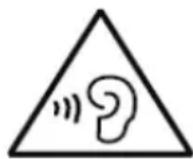
Please avoid extended play at a very high volume when using headphones.
If you experience ringing in your ears, reduce the volume or shut off your unit.
Excessive volume can result in damage to your eardrums and partial or permanent hearing impairment. If your ears hurt, please contact a doctor.
BASS BOOST
Press the BASS BOOST button (11) once to set it to the ON position, to enjoy a sound with more powerful bass.
SPECIFICATIONS
Power supply: AC 230V - 50Hz
Power consumption: 13W
Radio frequency coverage: FM 87.5 - 108 MHz
NOTE: When there is no sound output, the unit will automatically switch to standby mode after a while in order to save energy. It can be turned ON again by using the OFF/Phono/Tuner Function button.

Don't discard electrical and electronic appliances with regular waste.
- Take them to an official collection point.
- Some components may be hazardous to health and the environment.
Imported by BIGBEN INTERACTIVE SA
396, Rue de la Voyette
CRT2-FRETIN
CS 90414
59814 LESQUIN Cedex - France
www/bigben.eu
Made in China


customerservice@bigben-interactive.be
ESPANAsat@bigbeninteractive.es
ITALIA, support@bigbeninteractive.it
www/bigben.eu
TOCADISCOS - MODELO TD016

INSTRUCCIONES DE USO
customerservice@bigben-interactive.be
ESPANAsat@bigbeninteractive.es
ITALIA, support@bigbeninteractive.it
www/bigben.eu
customerservice@bigben-interactive.be
ESPANA, sat@bigbeninteractive.es
ITALIA, support@bigbeninteractive.it
www/bigben.eu
customerservice@bigben-interactive.be
ESPANA, sat@bigbeninteractive.es
ITALIA, support@bigbeninteractive.it
www/bigben.eu
customerservice@bigben-interactive.be
ESPANAsat@bigbeninteractive.es
ITALIA, support@bigbeninteractive.it
www/bigben.eu
PLATENSPELER - MODEL TD016

GEBRUIKSAANWIJZING
LEES DEZE GEBRUKSAANWIJZING ZORGVULDIG DOOR VOOR GEBRUK EN BEWAAR VOOR LATERE RAADPLEGING.
customerservice@bigben-interactive.be
ESPANA, sat@bigbeninteractive.es
ITALIA, support@bigbeninteractive.it
www/bigben.eu