
Aromafresh Therm - Coffee machine MELITTA - Free user manual and instructions
Find the device manual for free Aromafresh Therm MELITTA in PDF.
| Product type | Filter coffee maker with bean grinder |
| Brand | Melitta |
| Model | Aromafresh Therm |
| Power supply | Mains (check voltage on label) |
| Water tank capacity | Up to 10 cups |
| Coffee type | Coffee beans or ground coffee |
| Bean hopper | Allows 2 to 3 preparations of 10 cups |
| Grind setting | 3 levels (fine to coarse) |
| Coffee strength | 3 levels (mild, medium, strong) |
| Functions | Programmable start timer, automatic shut-off, anti-drip system |
| Carafe | Thermal with central valve lid |
| Descaling | Automatic (25 min) with indicator light |
| Water hardness setting | 4 hardness levels |
| Grinder cleaning | Brush included, removable bean hopper |
| Safety | Motor overload protection, automatic shut-off |
| Warranty | 3 years |
| Spare parts | None (exchangeable product) |
| Country of use | France, Belgium, Switzerland |
Frequently Asked Questions - Aromafresh Therm MELITTA
User questions about Aromafresh Therm MELITTA
0 question about this device. Answer the ones you know or ask your own.
Ask a new question about this device
Download the instructions for your Coffee machine in PDF format for free! Find your manual Aromafresh Therm - MELITTA and take your electronic device back in hand. On this page are published all the documents necessary for the use of your device. Aromafresh Therm by MELITTA.
USER MANUAL Aromafresh Therm MELITTA
A. Dazakang Kafaya, Hainanandung, Sanding for using good coffee (Pavamato pour l'Enfation de café mada) dans levrant pour malonafung (Laparque par levrant de laufa) dans levrant de laufa mada, dans levrant de malonafung) dans levrant pour malonafung (Laparque par levrant de laufa mada). Pour pala en lava mada, dans levrant pour malonafung (Laparque par levrant de laufa mada) dans levrant pour malonafung.
B CALC-Totus | CALC-Batter | npyr klnkner dHtratg | CALC-Box | Tota CALC - Bion CALC | CALC-Box | Calc-Batter | CALC-on | Calc-Box | Phyrmathemane (CALC) | Daiton CALC | Tc-Batter CALC
Brocking Kalkandrie. Scoring for carles scrogs [Furnishing] pour l'immater du cal. Indiclary
vor le Patteries [Impression] cet garo du cal. Ajure de la l'immater du cal. Indiclary et
kalkandrie. Indiclary be la l'immater du cal. Indiclary et la l'immater du cal.
Uranania many kmv. Nanswark d'hy kiv [Nanswark d'hy kiv
D
TPR5-Turé | TPR5-Guérrez | source de progravération (Kpn d'Kpn) | TPR5-Laroy | TPR5-TURÉ | Ravi: TPR5-2/2018 | TPR5-Knai | TPR5-Laroy | TPR5-Laroy | TPR5-Laroy | French TURÉ | TUR5-Laroy | TUR5-Laroy
E START-Taste | START human | asunces de rina en varden | START-kap | Start START - Janson NICO | START-kap | START inappare | START-kap | START - molar | Propend START | Inclade START | Initio
START
F. Changkung (Tuxenmuk). Settings for number of steps | Paravitroca pour le no vitr de nusset | Handelvop voor zandal kopper. Organizzazione par la variese di tava | A janes parcial variese da zona | Bruttling all zona kopper | Installinger för avial kopper | Installinger för avial kopper | Austekem hage en mittlile Ucravemäse Ester Föcker | Natronen politikäki | Natronen ochta Glas
G. In a few times, the in two times are an instance for them in a two times. It is a four times that has been a four times. The four times have been a four times. There is a four times. The four times have been a four times.
1. (day) stop up [in car of car up] day [day, stop up] stop down [day, stop down] (Never line)
1 Abworbare Vassmark [Dentschule vassmark (Maserer reus anshok [Umsenkur vassnavon] Sutakun aqun [Supplandag u deesmable] A##gj###kohler [A##gj ###d bilane] vankerbanu le immetra valni i [Tokyo# diber in m vode] Nidit na roca 'Vssenafu stird in roca
1. Montalatal, montalatal, montalatal, montalatal, montalatal, montalatal, montalatal, montalatal, montalatal, montalatal, montalatal, montalatal, montalatal, montalatal, montalatal, montalatal, montalatal, montalatal, montalatal, montalatal, montalatal, montalatal, montalatal, montalatal, montalatal, montalatal, Montalatal, Montalatal, Montalatal, Montalatal, Montalatal, Montalatal, Montalatal, Montalatal, Montalatal, Montalatal, Montalatal, Montalatal, Montalatal, Montalatal, Montalatal, Montalatal, Montalatal, Montalatal, Montalatal, Montalatal, Montalatal, Montalatal, Montalatal, Montalatal, Montalatal, Monatalatal, Monatalatal, Monatalatal, Monatalatal, Monatalatal, Monatalatal, Monatalatal, Monatalatal, Monatalatal, Monatalatal, Monatalatal, Monatalatal, Monatalatal, Monatalatal, Monatalatal, Monatalatal, Monatalatal, Monatalatal, Monatalatal, Monatalatal, Monatalatal, Monatalatal, Monatalatal, Monatalatal, Monatalatal, Monatual catalual catalual catalual catalual catalual catalual catalual catalual catalual catalual catalual catalual catalual catalual catalual catalual catalual catalual catalual catalual catalual catalual catalual catalual catalual catalual catalual catalual catalual catalual catalual catalual catalual catalual catalual catalual catalual catalual catalual catalual catalual catalual catalual catalual catalual catalual catalual catalual catalual catalual catalysts
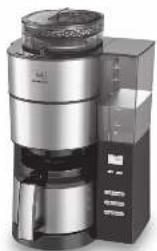
K. Dohrantolabs | Basta censilar | Tassovir l'grains de c1M | Damar masevir | Cemorrhoe de chlech | Ophocin 24 garam | Brundolabs | Riddellar | Rama masevir | Piquodis | Pejana 10 vort hay | Zizobri 20 vorten ar | Zizobri Mavoryth 21
L. Mietevichung: Streitening | Pernus ta ruedin | Ples aorking | Ancho de reconnaught | Are-do reuterio | Makringen | Kramé, al | Kvarning | Kabiraylenrega | Bensal reuter anurelia | Brang brodei | Orany arbok
M. Halkonnier, Gräder und der Börsstkär in resitz [Hollkomm] (Gewinnelte aufte) Canra del
lonsakti [Malajohnsast] (Konzmann) Konskonnier [Erfarybli eranis] (Gewinnelte) Mischkonniers [Hilca aerors
N Mahgradagiar | Grind level del | 36 accret de recuivre | Malgradagiar (mop | Solomore del gruce di riscutazioni) | Selatore del vizi di riscuta | Malgradagiar a ceyabu | Kermogrupe | Kermogrupe | salinza com schinen | Soglatire e su sordata (Chilia produttura) | Ermare in tanto svita
Subway define | swned line | aorten line warkle | vser define | 1.4 in one lane | Fritty jansin | hding of the way for hding un open linkable | vindak on lige Hambachone | Sardia apples kucukahes | Ushvee n filer | Widopri filer | Widopri far
F
Ingotrop (dro-nop) systeme anal-gourne) dpro-nop) a procetora unipocstolameno - Sisterna anjornena) dprupazopat (drosopazop) chyapazop) topakloz (Zerberkubaboglyc kupin) Drig-ana
Q
Kemagabogurand (Dienang brus) horto de reunogur; Kemagabogurand (Hansada e nis) dugla de Drig-ana (Jangar aghorana) Kergingaborana; Kergingaborana (Pulmukahara); Pizniak do cepuzonara) Cudal humal; Cuciusa lchi

AROMAFRESH Therm
DE Gebrauchanstructure
GB Operating instructions
EB Mode disapproval
NL Gebrukspanie
IT isovisioni duso
ES Inservuciones de Uso
DK Brugsansiving
SE Brulsarvaning
NO Bruktanvisning
PI Kaytoidine PI (incentive)
CZ. Nivod's obalure
SK Nivoc na obvahu
(2) 05011040


with Dark, red, and brown color. The following text
the work
We first was aware that the situation brought out frays, which went to him as he had
Bio-Gen1700 or 1800+ (20min)
g r h (s) e r b x
Lone a San Antonio del Seoul alia resorte und da
Bodler argine using voltendig durch. Jy Gehwer is vortenbä, kursen Söda Södalenje i ed.
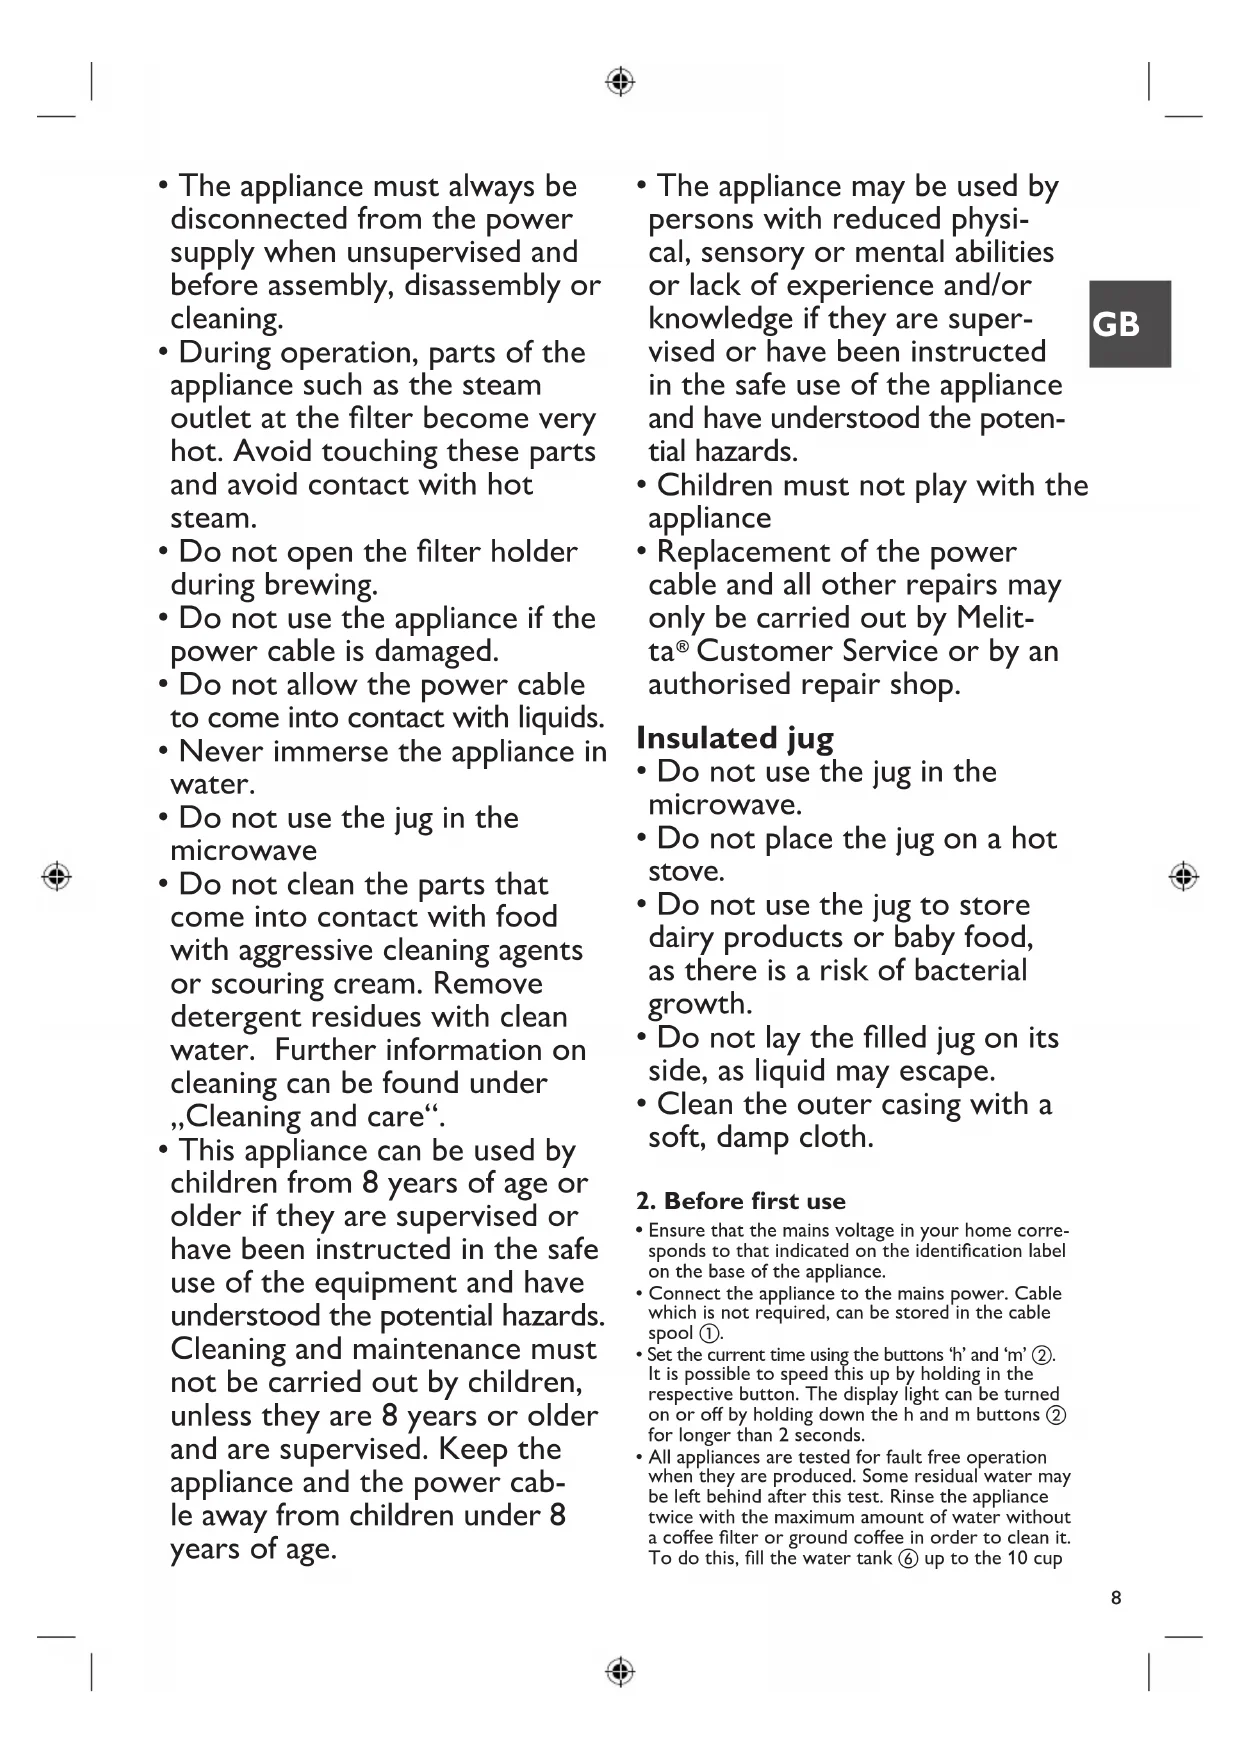
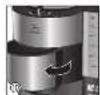
Thank you for buying our AromaFresh filter coffee maker. We hope you will be very happy with it.
If you need further information or if you have any questions please contact Melitta® or visit us on the Internet at www.melitta.co.uk
For your safety
CE The appliance complies with all valid European guidelines.
UK CA The appliance complies with all valid United Kingdom guidelines.
The appliance has been tested and certified by an independent test institute.
Please read the safety notes and the operating manual in full. To avoid danger you must pay attention to the safety and operating instructions. Melitta ^® is not liable for damage caused by ignoring these instructions.
1. Safety notice
This appliance is intended for use in households and similar areas, such as -
- in kitchens for employees in shops, offices and other commercial areas
• in agricultural establishments
• in motels, hotels and other residential facilities and bed and breakfast establishments
Any other use is considered to be improper use and may result in personal injury or damage to property. Melitta® is not liable for damage caused by improper use.
Please observe the following instructions to avoid injuries in case of misuse:
- The appliance must not be placed in a cupboard during operation.
-
Connect the appliance only to a properly installed earthed socket.
-
The appliance must always be disconnected from the power supply when unsupervised and before assembly, disassembly or cleaning.
- During operation, parts of the appliance such as the steam outlet at the filter become very hot. Avoid touching these parts and avoid contact with hot steam.
- Do not open the filter holder during brewing.
- Do not use the appliance if the power cable is damaged.
- Do not allow the power cable to come into contact with liquids.
- Never immerse the appliance in water.
- Do not use the jug in the microwave
- Do not clean the parts that come into contact with food with aggressive cleaning agents or scouring cream. Remove detergent residues with clean water. Further information on cleaning can be found under „Cleaning and care“.
-
This appliance can be used by children from 8 years of age or older if they are supervised or have been instructed in the safe use of the equipment and have understood the potential hazards. Cleaning and maintenance must not be carried out by children, unless they are 8 years or older and are supervised. Keep the appliance and the power cable away from children under 8 years of age.
-
The appliance may be used by persons with reduced physical, sensory or mental abilities or lack of experience and/or knowledge if they are supervised or have been instructed in the safe use of the appliance and have understood the potential hazards.
• Children must not play with the appliance - Replacement of the power cable and all other repairs may only be carried out by Melitta® Customer Service or by an authorised repair shop.
Insulated jug
- Do not use the jug in the microwave.
- Do not place the jug on a hot stove.
- Do not use the jug to store dairy products or baby food, as there is a risk of bacterial growth.
- Do not lay the filled jug on its side, as liquid may escape.
- Clean the outer casing with a soft, damp cloth.
2. Before first use
- Ensure that the mains voltage in your home corresponds to that indicated on the identification label on the base of the appliance.
- Connect the appliance to the mains power. Cable which is not required, can be stored in the cable spool ①.
- Set the current time using the buttons 'h' and 'm' ②. It is possible to speed this up by holding in the respective button. The display light can be turned on or off by holding down the h and m buttons ② for longer than 2 seconds.
- All appliances are tested for fault free operation when they are produced. Some residual water may be left behind after this test. Rinse the appliance twice with the maximum amount of water without a coffee filter or ground coffee in order to clean it. To do this, fill the water tank ⑥ up to the 10 cup
GB
level marker, then press the setting for using ground coffee ⑮ and turn the appliance on ④.
- The appliance has a variety of features for the best coffee enjoyment and ease of use. These features are explained below.
3. Set water hardness
Depending on water hardness lime scale may build up in the appliance. This increases the appliance's energy consumption as lime scale on the heating element can prevent the water heating effectively. To avoid damage the appliance must be descaled regularly. The descaling display helps you in this. If the CALC-button ③ is permanently lit this shows that the appliance needs to be descaled.
The appliance is pre-set for a high level of water hardness (level 4). You can find out the level of water hardness in your area by asking your local water provider or by using water hardness measuring strips available in the shops. For softer water the descaling display can be adjusted to descale less often.
- Hold down the CALC-button ③ and by briefly pressing the m-button ② set the desired level of water hardness. The hardness setting will then show in the display
- Once you have set the desired level of water hardness, let go of the CALC-button. Your settings are now saved.
- The settings and display are shown in the table.
| Hardness setting | I II III | IV | ||
| °dH | <7°dH | 7-14°dH | 14-21°dH | >21°dH |
| Display 2 | 1 | 2 3 4 |
Please note:
• Water hardness cannot be programmed while brewing.
- The last water hardness level chosen remains even after removing the power cable.
4. Coffee preparation
For aromatic coffee flavour and the best fit of your coffee filter in the filter holder we recommend using Melitta® coffee filters size 1x4®.
- Ensure that the power cable is plugged in.
- Open the lid on the water tank ⑤.
- Fill the water tank. The removable tank can be filled directly at the tap. Alternatively use the insulated jug to pour the water into the tank in the appliance ⑤. The required amount of water can be seen on the water level indicator on the tank.
- Close the water tank lid and place the insulated jug with closed lid in the appliance.
- Set the number of cups ⑦ to the amount of water in the water tank ⑥. The number of cups is shown in the display ②.
Note: Ensure that the selected number of cups corresponds to the amount of water in the water container ⑧. Please note that when making coffee all the water in the water tank is used. If the
number of cups and the amount of water do not correspond to each other then this can lead to you not getting the coffee flavour you would like.
4.1 Using coffee beans
- When the bean container is completely full, you can brew enough coffee for 10 cups 2 or 3 times. Roasted coffee beans lose their flavour. Only fill coffee beans in the container which will be used within a few days.
- Open the bean container lid and fill with coffee beans ⑨. Then close the lid.
Note: To ensure the grinder functions perfectly do not use caramelised coffee beans. Do not put ground coffee in the bean container.
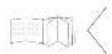
- Open the swivel filter ⑩ to the left.
- Fold a Melitta ^ 1x4 ^ coffee filter at the embossed seams and place it in the filter holder ⑪. Use your hand to press the filter in to ensure the best fit.
- Swivel the filter back into the appliance. An audible click indicates that the filter is in place.
- Turn the grind dial ⑫, to select the required grind level (from fine to coarse). The grind dial allows you to select from 3 different settings. Settings between the symbols are also possible. The 'fine' setting is for standard coffee. This setting may give the coffee a slightly bitter character. If a coarser setting is selected the coffee will be less bitter.
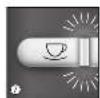
- Press the button to select coffee strength ⑬. The selected coffee strength is shown in the display ②. One coffee bean is for mild, two beans for medium and three beans for strong.
- Turn the appliance on using the start button ON/OFF ④. Coffee preparation begins and the green LED flashes.
- If you hear three warning tones when starting the grinding process or when programming the timer and the display shows three flashing beans, the bean container is not completely in place. If this happens please reinsert the bean container as described in point 7.
Note: The appliance has an overload safety function of the grinder, which protects the grinder against damage by foreign objects in the coffee beans. If you hear a loud chattering, unknown noise during the grinding process, switch the appliacne off ④ and clean the grinder as described in point 7.
- The drip stop ⑭ prevents coffee dripping when you remove the jug from the appliance.
- The used coffee filter can be disposed of simply and easily using the removable filter insert.
Additional note to clause 4.1
Melitta has no influence on possible foreign objects between the roasted coffee beans. As described in clause 4.1 of the manual the grinder is equipped with an overload protection. With this damages of the grinder due to foreign objects shall be avoided. Rarely the overload protection will not be activated. The motor stops and there is no grinding sound to hear after switch on. In this case the appliance must be switched off immediately. A repeated switch on should be avoided. Clean the grinder as described in clause 7. of the manual. After that the appliance is ready for use again.
4.2 Using ground coffee
• To use ground coffee select the ground coffee
setting ⑮.
- Open the swivel filter to the left ⑩.
- Fold a Melitta ^ 1x4 ^ coffee filter at the embossed seams and place it in the filter holder ^⑪ . Use your hand to press the filter in to ensure the best fit.
- Put the ground coffee in the coffee filter. The amount of coffee you use depends on your personal taste. We recommend using 6-8 g of ground coffee per cup.
- Swivel the filter back into the appliance. An audible click indicates that the filter is in place.
- Turn the appliance on using the start button ON/OFF ④. Coffee preparation begins and the green LED flashes.
- The drip stop ⑭ prevents coffee dripping when you remove the jug from the appliance.
- The used coffee filter can be disposed of simply and easily using the removable filter insert.
5. Using the insulated pot
- The brewed coffee flows through the central valve in the insulated lid of the pot.
• To pour coffee press down on the sealing lever. - Remove the lid simply by pressing the seals on the side while lifting the lid up ⑪.
6. Timer Feature
The appliance is equipped with a TIMER. This allows you to start brewing coffee automatically at the time you set.
- Prepare the appliance as described in point 4. 'coffee preparation' but without pressing the start button ON/OFF ④.
- To set the required start time, hold down the TIMER button ⑯. The first time you set it, the time indicator and the clock symbol will flash in the display ②. Set the required start time by repeatedly pressing the h and m buttons ②. It is possible to speed this up by holding in the respective button.
- Two seconds after you let go of the TIMER button the current time will be displayed again. The start time you selected is saved until a new time is selected or the appliance is removed from the power supply.
- Pressing the TIMER button ⑯ briefly activates the timer feature for automatic coffee preparation. The start time you set appears briefly in the display ②. The clock symbol in the display ② and the white LED are illuminated ⑯.
- The appliance starts preparing coffee automatically at the time you set.
- If you do not remove the appliance from the mains electricity or programme a new start time then the time previously set is saved.
- The TIMER feature can be deactivated at any time by pressing the TIMER button ⑯. The white LED ⑯ and the clock symbol ② are no longer illuminated.
7. Cleaning and care
External cleaning:
- The housing and the water tank can be cleaned with a soft, damp cloth.
For the best coffee flavour we recommend cleaning the bean container, the grinder and the ground coffee chute regularly. This is easiest when the bean container and the grinder are completely empty.
Remove bean container:
- Turn the bean container anti-clockwise until the triangular indicators are aligned ⑰.
- Remove the bean container from the appliance and empty it completely.
- Put the bean container in place:
- Align the triangular indicators ⑰.
- Lightly press down on the bean container and turn it clockwise until it clicks into place.
- Put a coffee filter in the filter holder ⑪.
• Empty the grinder completely:
- Set the appliance at 2 cups ⑦ and one coffee bean ⑬.
- Press the start button ON/OFF ④ and allow the appliance to grind until empty.
- After grinding use the ON/OFF button to turn the appliance off.
- Remove the bean container ⑰ again as described above.
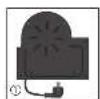
Clean the grinder:
- Turn the grind level dial to 'Open' ⑱.
- Lift up the bracket and pull the grinder ring out of the grinder ⑲.
- Clean the grinder with the cleaning brush provided ⑳.
- To completely remove ground coffee deposits we recommend using a vacuum cleaner.
- Open the swivel filter and dispose of the coffee filter ⑩.
Clean the ground coffee chute:
- Holding the appliance in both hands carefully lay it on its back.
- Now you can firstly clean the area above the swivel filter with the brush and a damp cloth.
- To open the ground coffee chute ^21 hold down the button for ground coffee ^15 for 5 seconds.
- The ground coffee chute flap opens and the chute can be cleaned with the brush.
- To close the flap on the ground coffee chute hold down the button for ground coffee ⑮ for 5 seconds.
- Put the swivel filter ⑩ back in place and stand the appliance up again.
- Put the grinder ring ⑲ back in place and close down the bracket again.
- Turn the grind level dial back into a grind position ⑱.
• Put the bean container in place again as described above.
Descaling:
Based on the water hardness you have set (see point 3) the appliance should be descaled soon after the CALC ③ indicator lights up.
- Measure out the descaling fluid according to the manufacturers instructions and pour it into the water tank. We recommend using Melitta® "Anti Calc Liquid for Filter Coffee & Aqua Machines".
- Briefly press the CALC button ③. The red LED starts to flash ③.
- The current time and 'CALC' appear alternately in the display ②.
- The descaling process runs automatically. To remove even heavy calcification the descaling process takes about 25 minutes.
- Attention: Only by running the complete descaling process can all limescale deposits be removed. Only then does the Calc LED ③ go off. Therefore the
descaling process should not be interrupted.
- After the descaling process has been completed the light in the CALC button ③ goes off. The appliance turns off automatically.
- To completely remove any deposits from descaling, the appliance must be rinsed twice with the maximum amount of water without coffee, after the descaling process has ended. Proceed as described in point 2.
FR
8. Note on disposal
- Appliances labelled with this symbol ✗ are subject to European guidelines for WEEE (Waste Electrical and Electronic Equipment).
- Electric appliances do not go in the household bin. Dispose of the appliance in an environmentally friendly way using suitable collection systems.
- Packaging materials are raw materials and can be recycled. Please recycle them.

Cher client, chère cliente,
WEEE (Waste Electrical and Electronic Equipment).
In addition to the legal guarantee claims, to which the end user is entitled relative to the seller, for this device, if it was purchased from a dealer authorized by Melitta ^® due to his consulting competence, we grant a manufacturer's guarantee under the following conditions:
- The guarantee period begins with the day the product was sold to the end user. The guarantee is 36 months. The purchase date of the device must be verified by a purchase receipt.
The device was designed and built for household use only. It is not dedicated for a commercial use. Guarantee performances lead neither to an extension of the guarantee period nor to a new beginning of the guarantee period for the device or installed spare parts. - Within the guarantee period we will correct all device defects that are based on material or manufacturing errors, through repair or replacement of the device at our discretion. Replace parts become the property of Melitta ^® .
- Defects that occurred due to improper connection, improper handling, or repair attempts by nonauthorized persons are not covered by the guarantee. The same applies for failure to comply with the use, care, and maintenance instructions as well for the use of consumables (e.g. cleaning and decalcifying agents or waterfilters) that do not correspond to the original specifications. Wear parts (e.g. seals and valves) and fragile parts like glass are excluded from the guarantee.
- Guarantee performances are processed via the Service Hotlines for the respective country (see information below).
- These guarantee conditions apply for devices purchased and used in UK If devices are purchased in foreign countries or brought into foreign countries, then guarantee performances will only be provided as specified in the guarantee conditions applicable for this country.
Melitta UK Ltd.
Hortonwood 45
Telford, Shropshire, TF1 7FA
United Kingdom
Tel: +44(0)800 0288002
www.melitta.co.uk

FR
Garantie Melitta®
Melitta Poland Sp. z o.o.
www.melitta.pl

BELS cz s.r.o.
Nuselská 307/110
140 00 Praha 4
Česká republika
Tel: +420 277 002 200

- For your safety
- Safety notice
- Insulated jug
- Before first use
- GB
- Set water hardness
- Please note:
- Coffee preparation
- Using coffee beans
- Additional note to clause 4.1
- Using ground coffee
- Using the insulated pot
- Timer Feature
- Cleaning and care
- External cleaning:
- Remove bean container:
- Clean the grinder:
- Clean the ground coffee chute:
- Descaling:
- FR
- Note on disposal
- Cher client, chère cliente,
- Melitta UK Ltd.
- Garantie Melitta®
Brand : MELITTA
Model : Aromafresh Therm
Category : Coffee machine