SMWC 700 B1 - Microwaves SILVERCREST - Free user manual and instructions
Find the device manual for free SMWC 700 B1 SILVERCREST in PDF.
| Product type | Microwave |
| Brand | SilverCrest |
| Model | SMWC 700 B1 |
| Output power | 700 W |
| Power consumption | 1150 W |
| Interior volume | 17 liters |
| Microwave frequency | 2450 MHz |
| Supply voltage | 230 V ~ 50 Hz |
| Protection class | I (grounded) |
| Noise level | Approx. 58 dB(A) |
| Number of power levels | 5 (140-700 W) |
| Automatic programs | 8 (popcorn, reheating, beverages, pizza, potatoes, vegetables, meat, fish) |
| Defrosting | Yes, by weight (3 programs: meat, poultry, seafood) |
| Timer | Yes, with delayed start |
| Sequence cooking | Up to 4 steps |
| Child safety | Yes, control panel lock |
| Turntable | Yes, diameter not specified |
| Display | Digital LED |
| Care and cleaning | Clean with a damp cloth; do not use steam cleaner |
| Warranty | 3 years |
Frequently Asked Questions - SMWC 700 B1 SILVERCREST
User questions about SMWC 700 B1 SILVERCREST
0 question about this device. Answer the ones you know or ask your own.
Ask a new question about this device
Download the instructions for your Microwaves in PDF format for free! Find your manual SMWC 700 B1 - SILVERCREST and take your electronic device back in hand. On this page are published all the documents necessary for the use of your device. SMWC 700 B1 by SILVERCREST.
USER MANUAL SMWC 700 B1 SILVERCREST
Operation and safety notes
FR BE
FOURÀMICRO-ONDES
GB/IE Operation and safety notes Page 21
Warnings and symbols used. 22
Introduction 22
Intended use. 22
Scope of delivery. 23
Description of parts 23
Technical data 23
Safety instructions. 23
Basic principles of microwave cookery 28
Using suitable cookware 29
Before first use. 29
Positioning the product. 29
Assembly 29
Operation.. 29
Standby mode 30
Setting the time. 30
Cancelling the input process 30
Child lock. Page 30
Cooking food. 30
Selecting the power level.. 30
Setting the cooking time. 31
Starting the cooking process . 31
Pausing/cancelling the cooking process 31
Quick start 1 . Page 31
Quick start 2 . Page 31
Setting the timer. 31
Multi-stage cooking 32
Defrosting. 32
Automatic menu.. 33
Cleaning and care 34
Troubleshooting 35
Disposal 36
Warranty 36
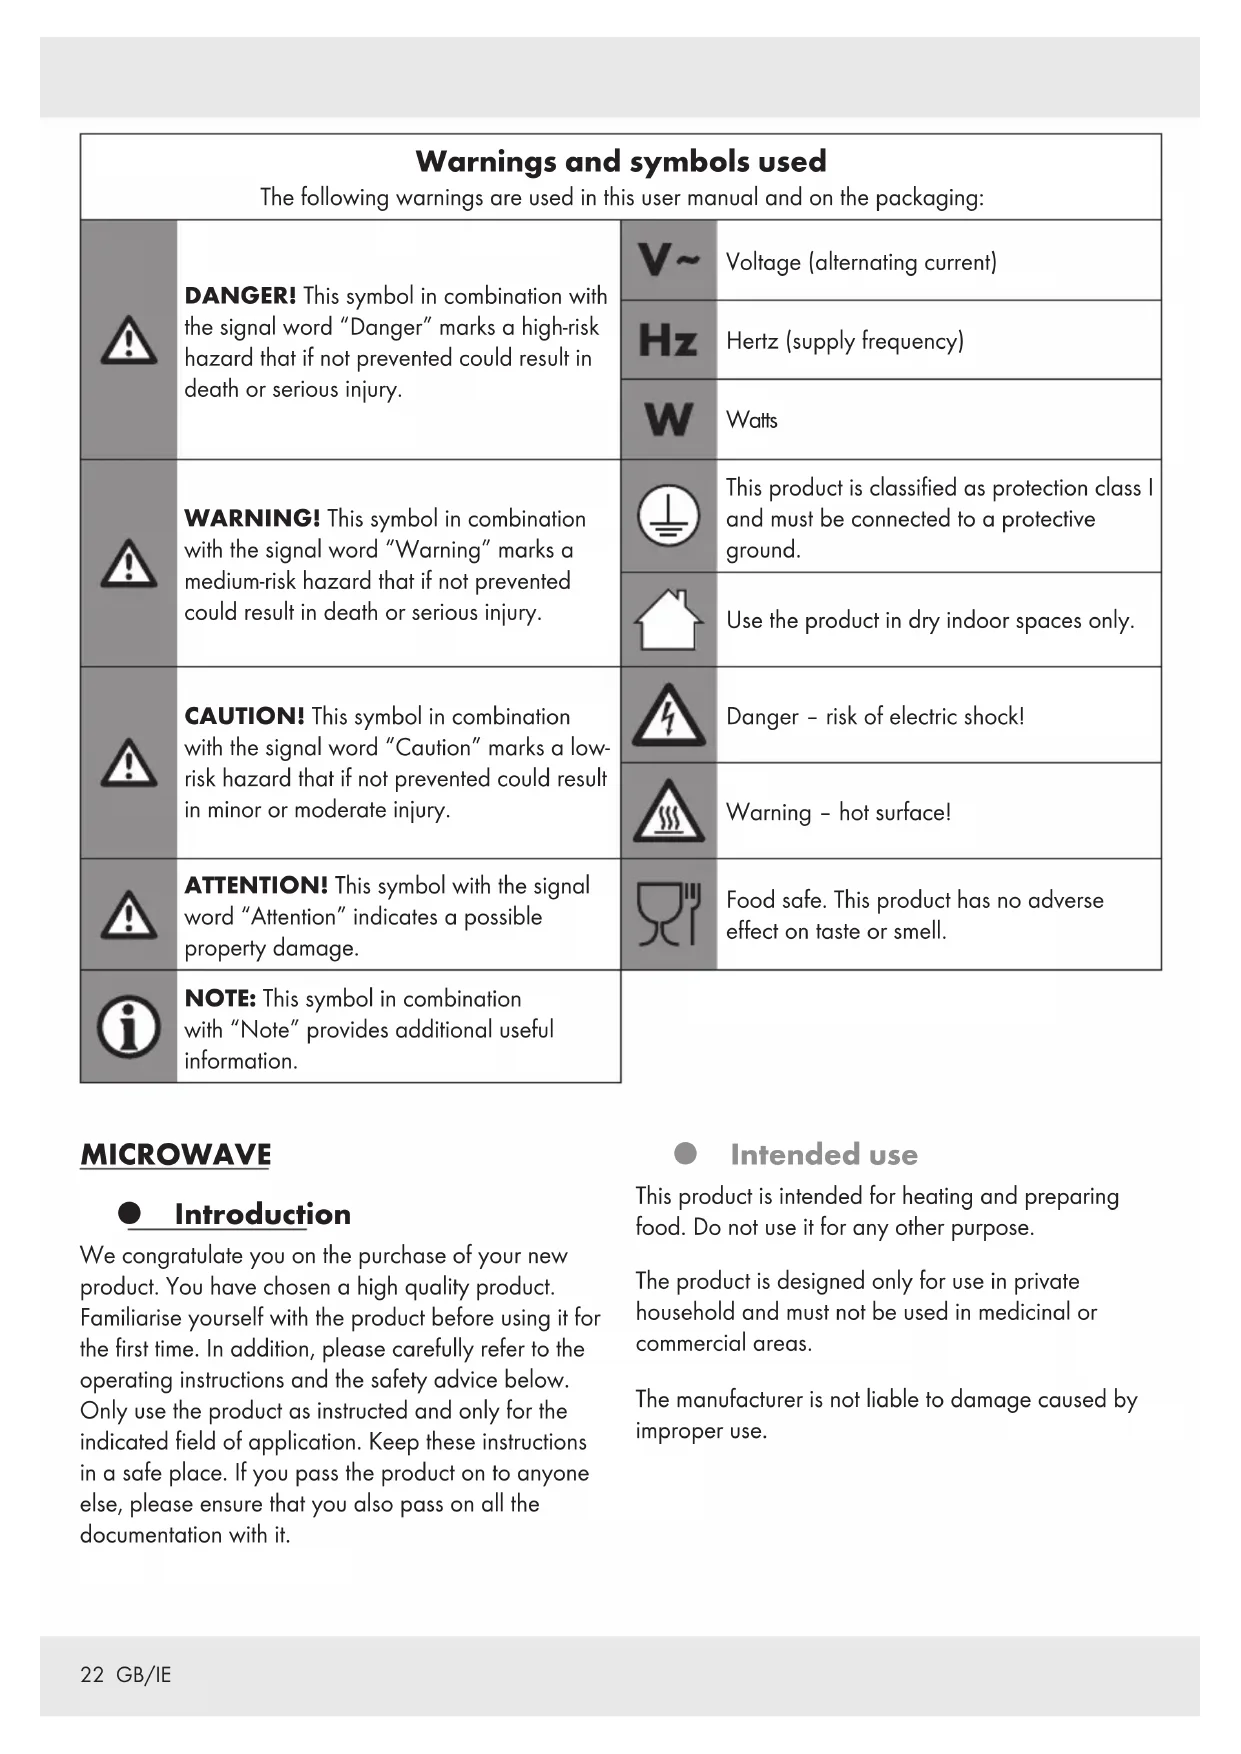
| Warnings and symbols used The following warnings are used in this user manual and on the packaging: | |||
| ! | DANGER! This symbol in combination with the signal word "Danger" marks a high-risk hazard that if not prevented could result in death or serious injury. | V~ | Voltage (alternating current) |
| Hz | Hertz (supply frequency) | ||
| W | Watts | ||
| ! | WARNING! This symbol in combination with the signal word "Warning" marks a medium-risk hazard that if not prevented could result in death or serious injury. | This product is classified as protection class I and must be connected to a protective ground. | |
| Use the product in dry indoor spaces only. | |||
| ! | CAUTION! This symbol in combination with the signal word "Caution" marks a low-risk hazard that if not prevented could result in minor or moderate injury. | Danger - risk of electric shock! | |
| Warning - hot surface! | |||
| ! | ATTENTION! This symbol with the signal word "Attention" indicates a possible property damage. | Food safe. This product has no adverse effect on taste or smell. | |
| i | NOTE: This symbol in combination with "Note" provides additional useful information. | ||
MICROWAVE
Introduction
We congratulate you on the purchase of your new product. You have chosen a high quality product. Familiarise yourself with the product before using it for the first time. In addition, please carefully refer to the operating instructions and the safety advice below. Only use the product as instructed and only for the indicated field of application. Keep these instructions in a safe place. If you pass the product on to anyone else, please ensure that you also pass on all the documentation with it.
Intended use
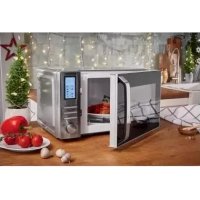
This product is intended for heating and preparing food. Do not use it for any other purpose.
The product is designed only for use in private household and must not be used in medicinal or commercial areas.
The manufacturer is not liable to damage caused by improper use.
Scope of delivery
After unpacking the product, check if the delivery is complete and if all parts are in good condition. Remove all packing materials before use.
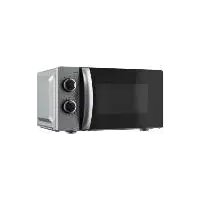
1x Microwave
1xTurntable
1x Rollers
1x Instruction manual
1x Quick start guide
Description of parts
Door with door handle and viewing window
2 Rollers
3 Cooking chamber
4 Turntable holder
5 Turntable
6 Power cord with power plug
7 Display
8 (Microwave button)
9 (Quick start button)
10 (Timer button)
Defrost/Clock button)
12 ①/(Dial+/-)
13 (Start button)
14 四 /四 (Stop/Child safety)
Technical data
Nominal voltage: 230V ,50Hz
Power consumption: 1150 W
Protection class: I
Standby power
consumption: < 1 W
Power output: 700 W
Microwave frequency: 2450 MHz
Noise emission: approx. 58 dB(A)
Cooking chamber
volume:approx.17 litres
Intertek / GS certified
This product fulfils the requirement of the European standard EN 55011.
In conformity with this standard, this product is classified as Group 2 Class B equipment.
Group 2 = The product intentionally generates radio-frequency energy in the form of electromagnetic radiation for the heat treatment of food.
Class B equipment = The product is suitable to be used in domestic establishments.

Safety instructions
BEFORE USING THE PRODUCT, PLEASE FAMILIARISE YOURSELF WITH ALL OF THE SAFETY INFORMATION AND INSTRUCTIONS FOR USE! WHEN PASSING THIS PRODUCT ON TO OTHERS, PLEASE ALSO INCLUDE ALL THE DOCUMENTS!
In the case of damage resulting from non-compliance with these operating instructions the warranty claim becomes invalid! No liability is accepted for consequential damage! In the case of material damage or personal injury caused by incorrect handling or non-compliance with the safety instructions, no liability is accepted!
IMPORTANT SAFETY
INSTRUCTIONS
READ CAREFULLY AND KEEP
FOR FUTURE REFERENCE
This product can be used by children aged from 8 years and above and persons with reduced physical, sensory or mental capabilities or lack of experience and knowledge if they have been given supervision or instruction concerning use of the product in a safe way and understand the hazards involved.
Children shall not play with the product.
Cleaning and user maintenance shall not be made by children without supervision.
WARNING! If the door or door seals are damaged, the product must not be operated until it has been repaired by a competent person.
WARNING! It is hazardous for anyone other than a competent person to carry out any service or repair operation that involves the removal of a cover which gives protection against exposure to microwave energy.
WARNING! Liquids and other foods must not be heated in sealed containers since they are liable to explode.
If the supply cord is damaged, it must be replaced by the manufacturer, its service agent or similarly qualified persons in order to avoid a hazard.
The product is intended to be used in household and similar applications such as:
- staff kitchen areas in shops, offices and other working environments;
- farm houses;
- by clients in hotels, motels and other residential environments;
- bed and breakfast type environments.
A minimum of 20~cm of free space must remain above the top surface of the product.
Only use utensils that are suitable for use in microwave ovens.
Metallic containers for food and beverages are not allowed during cooking with the product.
When heating food in plastic or paper containers, keep an eye on the product due to the possibility of ignition.
The product is intended for heating food and beverages. Drying of food or clothing and heating of warming pads, slippers, sponges, damp cloth and similar may lead to risk of injury, ignition or fire.
If smoke is emitted, switch off or unplug the product and keep the door closed in order to stifle any flames.
Microwave heating of beverages can result in delayed eruptive boiling, therefore care must be taken when handling the container.
The contents of feeding bottles and baby food jars shall be stirred or shaken and the temperature checked before consumption, in order to avoid burns.
- Eggs in their shell and whole hard-boiled eggs should not be heated in microwave ovens since they may explode, even after microwave heating has ended.
The product should be cleaned regularly and any food deposits removed.
Failure to maintain the product in a clean condition could lead to deterioration of the surface that could adversely affect the life of the product and possibly result in a hazardous situation.
The product shall not be cleaned with a steam cleaner.
The product is intended to be used freestanding. It must not be placed in a cabinet or in a similar environment.
ADDITIONAL SAFETY ADVICE
DANGER! Risk of burns!
People fitted with a heart pacemaker should consult their doctor about the possible risks of using his product before taking it into use.
During use the product gets hot.
Do not touch the product while in use nor immediately after use.
DANGER! Risk of electric shock! Do not immerse the product in water or other liquids. Never hold the product under running water.
DANGER! Risk of electric shock! Never use a damaged product. Disconnect the product from the power supply and contact your retailer if it is damaged.
The product is not to be used if it has been dropped, if there are visible signs of damage.
Before connecting the product to the power supply, check that the voltage and current rating corresponds with the power supply details shown on the product's rating label.
- Protect the power cord against damages. Do not let it hang over sharp edges, do not squeeze or bend it. Keep the power cord away from hot surfaces and open flames.
Positioning the product
ATTENTION! Do not install the product above a cooker or any other heat-generating device. Installation in such a location could cause damage to the product.
Operation
DANGER! Risk of fire!
Remove all metallic closures from the packaging of the food that you intend to heat.
Do not move the product while it is in operation.
Never operate the product when it is empty.
Do not place the product on hot plates (gas, electric, coal cooking range etc.). Operate the product on a level, stable, clean, heat-resistant and dry surface.
Do not place flammable materials close to the product.
The product is not intended to be operated by means of an external timer or separate remote control system.
Cleaning and care
WARNING! Risk of injury!
Disconnect the product from the power supply before cleaning work and when not in use.
- Do not pull the power plug out of the electrical outlet by the power cord.
Protect the product, its power cord and power plug against dust, direct sunlight, dripping and splashing water.

Do not remove the light grey mica cover plate, which is mounted inside the cooking chamber to protect the magnetron.
If the luminary inside the product needs replacing, have this done by a qualified specialist.
RADIO INTERFERENCE WITH OTHER DEVICES
The operation of the product may cause interference on your radio, television or similar devices. If such interference occurs, it can be reduced or corrected by the following remedial measures:
Clean the door and the door seals of the product.
Realign the aerial of your radio c television.
Keep the product and the receiver spatially separated.
Move the product away from the receiver.
Plug the product into another wall socket. The product and the receiver should be connected to different circuits.
SAFETY PRECAUTIONS FOR THE PREVENTION OF EXCESSIVE EXPOSURE TO MICROWAVE ENERGY
Do not try to operate the product while the door is open.
This can lead to you being exposed to a potentially harmful dose of microwave radiation.
It is also important not to break or manipulate the safety locks.
Do not jam anything between the door. Make sure that there is no food or cleaning agent residue left on the seals.
Basic principles of microwave cookery
Cooking time: Pay attention to the cooking time. Select the shortest possible stated cooking time and increase as required. Food that is cooked too long can begin to smoke or catch fire.
Food: Arrange the pieces of food evenly in the product. Cut the food into pieces of approximately the same size. Place the thickest pieces near the edges.
- Covering food: Cover the food during cooking with a lid suitable for microwave cookery. The lid prevents splashing and helps in the even cooking of the food.
Turning food: While cooking, turn the food in the product once so that items such as chicken or hamburgers are cooked more quickly. Large pieces of food, such as joints of meat, must be turned at least once.
Completely rearrange small food items, such as meatballs, after half the cooking time. Turn the meatballs and move them from the middle of the plate to the edge.
Food with skins: Puncture the skins of potatoes, sausages and similar food before cooking. Otherwise, they could explode.
Food with thick skins: Prick whole pumpkins, apples, chestnuts and similar food before cooking.
Fat or oil: Do not thaw frozen fat or oil in the product. Do not fry foods in the product. The fat or oil could ignite.
Beverages: When heating drinks with the product, bubbling may be delayed when the drink boils. Be careful when handling the container. To avoid sudden bubbling up:
If possible, place a suitable glass rod in the fluid for as long as it is being heated.
To avoid an unexpected bubbling up, leave the liquid to stand in the cooking chamber 3 for about 20 seconds after heating.
- Popcorn: Only microwaveable popcorn shall be used.
Using suitable cookware
The ideal material for use in a microwave oven is microwave-permeable, allowing the energy to penetrate the container to heat the food. Microwaves cannot penetrate metal. For this reason, metal containers and cookware should not be used.
When using the product for heating, do not use products made of recycled paper. These can contain minute fragments of metal, which can generate sparks and/or fires.
We recommend the use of round/oval cookware instead of square or oblong containers, as food in corner areas tends to overcook. The following list provides general hints to assist you in selecting the correct cookware.
| Cookware | Microwave |
| Heatproof glass Yes | |
| Non-heatproof glass No | |
| Heatproof ceramic Yes | |
| Microwave-suitable plastic dishes Yes | |
| Kitchen roll Yes | |
| Metal tray/plate No |
Aluminium foil and foil containers No
WARNING! Risk of fire! Never use metallic
objects when you are using the product. Metals reflect the microwave radiation and this leads to the generation of sparks. This can cause a fire and irreparably damage the product!
Before first use
WARNING! Risk of fire! Never operate the product when it is empty.
Remove the packaging material (including protection foils and transport protectors inside the cooking chamber 3). Check if all parts are complete.
Clean the product and its accessories (see "Cleaning and care").
Positioning the product
WARNING! Risk of fire! This product is not suitable for installation in a kitchen cabinet. In closed cabinets, the ventilation of the product is not sufficiently guaranteed. The product could then be damaged and there is a risk of fire!
Place the product on a flat surface that leaves enough space for ventilation:
A minimum of 10cm of free space must remain between the product and the adjacent walls. It must remain possible to fully open the door 1.
A minimum of 20~cm of free space must remain above the top surface of the product.
Assembly
Place the turntable roll on the running surface inside the cooking chamber 3.
Place the turntable on the roller 2 and on the turntable holder 4. The turntable must rest properly on the turntable holder.
Connect the power pl with a wall socket. The whole display 7 lights up 3 times. 01:00 is shown in the display then. A beep sounds.
Operation
NOTES:
There may be a faint odour the first time the product is used. Make sure there is sufficient ventilation in the area.
Each press of the controls is acknowledged by a beep.
- Standby mode
If no control is pressed for a longer time, the product automatically switches to standby mode. The current time is shown in the display 7
Setting the time
Connect the power pl6 with a wall socket. The whole display 7 lights up 3 times. 01:00 is shown in the display then. A beep sounds.
In standby mode: Press and hold for a few seconds.
The hour display is flashing. Use /12 to set the hours. Press 8 to confirm your selection.
The minute display is flashing. Use /12 to set the minutes. Press /11 to confirm your selection.
The time is set now.
Cancelling the input process
Press/14 The product switches to the standby mode.
Child lock
Activate this setting to prevent accidental activation by children and other persons not familiar with the operation of the product.
Activate child lock: Press and hold until a beep sounds and LOC is shown in the display. The buttons and the dial are now deactivated.
Deactivate child lock: Press and hold 14 until a beep sounds and LOC goes off in the display 7.
Cooking food
WARNING! Risk of fire! Never use metallic objects when you are using the product. Metals reflect the microwave radiation and this leads to the generation of sparks. This can cause a fire and irreparably damage the product!
① NOTES:
During the cooking process, press 8. The current power level is shown for a few seconds in the display 7.
The cooking time can be amended during the cooking process. Rotate 1 / 2 to the left or to the right:
| Time setting (Cooking time) | Time increments |
| less than 5 minutes | 10-second increments |
| from 5 to 10 minutes | 30-second increments |
| from 10 to 60 minutes | 1-minute increments |
Selecting the power level
Pre 8.100P (100% power level) is shown in the display 7.
Each time 8 is pressed, the power level is lowered by 20P:
| Power level | Watt (W) |
| 100P | 700 |
| 80P | 560 |
| 60P | 420 |
| 40P | 280 |
| 20P | 140 |
① NOTE: After 20P, 100P is displayed again.
Setting the cooking time
After choosing the power level, use 12 to set the desired cooking time:
Time setting (Cooking time)
Time increments
less than 5 minutes 10-second increments
from 5 to 10 minutes 30-second increments
from 10 to 60 minutes 1-minute increments
Starting the cooking process
Once you have set the power level and the cooking time, you can start cooking:
Start cooking: Press Cooking begins. The time is counted down.
When the set time has elapsed: End is shown in the display 7.3 beeps sound.
Press or open the door. The product switches to the standby mode. If you do nothing, there will be a further 3 beeps every 3 minutes.
- Pausing/cancelling the cooking process
You can pause or stop cooking at any time:
Pause cooking: Press 14. The remaining time stops and flashes. The cooking time is paused.
Resume cooking: Press 3 The time is counted down again.
Stop cooking: Press again. The time is shown in the display
Quick start 1
This feature allows you to immediately cook for 1 minute (or longer, up to 60 minutes) with 100P (700 W) power.
In standby mode: Press 13. Cooking begins.
Time setting (Defrost)
Time increments
less than 5 minutes 10-second increments
from 5 to 10 minutes 30-second increments
from 10 to 60 minutes 1-minute increments
Quick start 2
This function is mainly intended for heating drinks in cups (150 ml).
This feature allows you to start heating for 30, 60, or 90 seconds at 100P (700 W) power.
Press 900:30 is shown in the display 7.
Press 9 again if you want to amend the cooking time to 60 or 90 seconds.
Start the process: Press 13. Cooking begins. The time is counted down.
Setting the timer
Set the desired power level and cooking time (see previous chapters).
Press and hold for a few seconds. The current time is shown. The hour display is flashing.
Use/12 to set the hours.
Press 等 / 11 to confirm your selection.
The minute display is flashing. Use 12 to set the minutes.
Press 8 to confirm your selection.
The input is confirmed with a long beep. The time is shown in the display 7
NOTES:
Pre/11 The programmed start time is shown for a few seconds in the display 7.
If an automatic start time is set, the product can not be started manually.
Deactivate the timer
Pre8/14. The settings are deleted.
Multi-stage cooking
This function is useful for gentle thawing and subsequent cooking.
NOTE: This function is only available in the microwave mode ≈ 8
You can set up to 4 cooking stages, each with different power levels and different cooking times. The cooking stages are executed automatically one after another.
Set the desired power level and cooking time (see previous chapters). This is the first cooking stage.
Pre8 to save the current cooking stage and to set the next cooking stage.
If necessary repeat these steps (up to 4 times).
After setting the desired cooking stages: Press 13. The first cooking stage begins. The time of the first cooking stage is counted down.
When a cooking stage ends, a beep sounds and the next cooking stage starts. The time of the current cooking stage is counted down.
NOTE: During cooking, press 8. The currently activated power level is shown in the display 7 for a few seconds.
After the set time has elapsed: End is shown in the display 7.3 beeps sound.
Press or open the door The product switches to the standby mode. If you do nothing, there will be a further 3 beeps every 3 minutes.
Application example:
60P for 7 minutes, then 100P for 1 minute:
Pres 83 times.60P is shown in the display7
Use/12 to set the time to 07:00.
Pre8 once. 100P is shown in the display
Use/12 to set the time to 01:00.
Press 13 The first cooking stage (60P) begins.
Defrosting
Use this function to defrost food. You can set either a time or a weight.
Pre / 11 d.1 is shown in the display 7
Pre/11 again if you want to toggle to the d.2 or d.3 programme.
Programme Food
| d.1 | Meat |
| d.2 | Poultry |
| d.3 | Seafood |
Use/12 to set the weight of the food:
| Programme | Weight (kg) |
| d.1 | 0.1 to 2.0 |
| < 1 kg: in 0.1 kg increments | |
| > 1 kg: in 0.2 kg increments | |
| d.2 | 0.2 to 3.0 |
| in 0.2 kg increments | |
| d.3 | 0.1 to 0.9 |
| in 0.1 kg increments |
Start defrosting: Press 13. Defrosting begins. The time is counted down.
① NOTES:
The remaining time cannot be amended while the defrosting process is running.
While defrosting, press 8. The activated defrosting programme is shown for a few seconds in the display 7.
To ensure uniform defrosting, some foods should be mixed or turned after around two thirds of the cooking time. A dual beep sounds 3 times as a reminder.
Stop defrosting: Press / 14 The time stops running. Open the door 1 and mix/turn the food.
Resume defrosting: Press 13. The time continues to run.
After the set time has elapsed: End is shown in the display 7.3 beeps sound.
Press or open the door The product switches to the standby mode. If you do nothing, there will be a further 3 beeps every 3 minutes.
Automatic menu
It is not necessary to set the duration of the cooking process and the power level for foods that are prepared in the automatic menu mode. You only need to enter the type of food you wish to cook and its weight.
NOTE: The automatic programmes are designed for fresh foods (at approx. 20 to 25^ ). Frozen foods will not be adequately cooked with the times programmed into the product. If required, defrost frozen foods using the defrost function beforehand (see "Defrosting").
Press 10. a.1 is shown in the display 7.
Press 10 again if you want to select one of the programmes from a.2 to a.8.
Use/12 to set the food's weight:
| Programme Food/Mode Amount | Units | ||
| a.1 | Popcorn | 0.1 kg (100 g) | - |
| a.2 | Heat-up | 0.2 to 1.0 kg | 0.2 kg |
| a.3 | Beverages | 1 (150 ml) 2 or 3 cups | 1 cup |
| a.4 | Pizza | 1 or 2 slices | 1 slice |
| Potatoes | 0.45 or 0.65 kg | A or B | |
| a.5 | ① NOTE: Cut the potatoes into 2 to 3 cm large cubes. Distribute the potatoes over a large area on a large plate. Cover the plate to prevent the potato pieces from drying out. | ||
| a.6 | Vegetables | 0.1 to 0.5 kg | 0.1 kg |
| a.7 | Meat | 0.1 o 0.5 kg | 0.1 kg |
| a.8 | Fish | 0.1 to 0.5 kg | 0.1 kg |
Start cooking: Press Cooking starts. The time is counted down.
① NOTES:
The remaining time cannot be amended while the cooking process is running.
While cooking, press 8. The activated programme is shown for a few seconds in the display 7.
After the set time has elapsed: End is shown in the display 7.3 beeps sound.
Press or open the door. The product switches to the standby mode. If you do nothing, there will be a further 3 beeps every 3 minutes.
Application example 1:
Heat 2 cups of water:
Press 10 3 times. a.3 is shown in the display 7
Use 12 to set the amount to 2.
Press Cooking starts. The time is counted down.
Application example 2:
Prepare 300g of fish:
Press 108 times. a.8 is shown in the display 7
Use to set the amount to 0.3.
Press 13. Cooking starts. The time is counted down.
Cleaning and care
DANGER! Risk of electric shock! Before cleaning: Always disconnect the product from the wall outlet.

DANGER! Risk of burns! Do not clean the product right after operation. Let the product cool first.
WARNING! Do not immerse the product's electrical components in water or other liquids. Never hold the product under running water.
① NOTES:
Clean the product right after it has cooled. Once the food residues have dried, they are not easy to remove.
- Do not use cleaning sprays and other aggressive cleaning agents, as they can cause stains, smears or clouding on the surfaces.
Do not use abrasive cleaning agents.
Housing: Clean the product's housing with a damp cloth.
Cooking chamber: Always keep the cooking chamber 3 clean. If splashes of food or spilt liquids stick to the walls of the product, wipe them off with a damp cloth.
If required, use a mild washing-up liquid on the cloth. Afterwards, wipe with a cloth moistened only with clear water to remove any detergent residue.
Turntable: Clean the turntable 5 regularly with warm, soapy water.
Splashes and soiling: Use a damp cloth regularly to remove splashes and soiling from the following components:
- Door [1] (both sides)
Viewing window (both sides) - Door seals and adjacent components
Condensation: If condensation accumulates on or around the outside of the door, wipe it off with a soft cloth. This can happen if the product is operated in extremely humid conditions.
Odours: Remove odours regularly. Put a deep microwave bowl - filled with a cup of water, plus the juice and peel of a lemon - into the cooking chamber 3. Heat the mixture for 5 minutes. Wipe the cooking chamber thoroughly and rub dry with a soft cloth.
Problem Possible cause Possible solution
| There is nothing in the display 7. The power plug 6 is not inserted into a mains power socket. The mains power socket is defective. The display 7 is defective. | Check the power plug 6 Try another mains power socket. Contact the customer service department. | |
| The product does not respond to pressing the buttons. | The child safety lock is activated. Deactivate the child safety lock (see “Operation”). | |
| The product does not start cooking. | The door 1 is not properly closed. | Close the door 1 |
| The turntable 5 makes a loud noise when turning. | The turntable 5 is not correctly positioned on the turntable holder 4. The rollers 2 and/or the floor of the cooking chamber 3 are unclean. | Place the turntable 5 correctly in the cooking chamber 3. Clean the rollers 2 and the floor of the cooking chamber 3. |
The light inside the product is not working.
The luminary is defective. Contact the customer service department.
Disposal
The packaging is made entirely of recyclable materials, which you may dispose of at local recycling facilities.

Observe the marking of the packaging materials for waste separation, which are marked with abbreviations (a) and numbers (b) with following meaning: 1 - 7: plastics / 20 - 22: paper and fibreboard / 80 - 98: composite materials

The product and packaging materials are recyclable, dispose of it separately for better waste treatment. The Triman logo is valid in France only.

Contact your local refuse disposal authority for more details of how to dispose of your worn-out product.

To help protect the environment, please dispose of the product properly when it has reached the end of its useful life and not in the household waste. Information on collection points and their opening hours can be obtained from your local authority.
Warranty
The product has been manufactured to strict quality guidelines and meticulously examined before delivery. In the event of product defects you have legal rights against the retailer of this product. Your legal rights are not limited in any way by our warranty detailed below.
The warranty for this product is 3 years from the date of purchase. Should this product show any fault in materials or manufacture within 3 years from the date of purchase, we will repair or replace it - at our choice - free of charge to you.
The warranty period begins on the date of purchase. Please keep the original sales receipt in a safe location. This document is required as your proof of purchase. This warranty becomes void if the product has been damaged, or used or maintained improperly.
The warranty applies to defects in material or manufacture. This warranty does not cover product parts subject to normal wear, thus possibly considered consumables (e.g. batteries) or for damage to fragile parts, e.g. switches, rechargeable batteries or glass parts.

Volume du compartment
Intertek/certificé GS
Microgolffrequency: 2450 MHz
Intertek / GS-gecertificated
WAARSCHUWING! Brandgevaar!
WAARSCHUWING! Brandgevaar!
WAARSCHUWING! Brandgevaar!
DÔLEŽITÉ BEZPECNOSTNÉ POKNY
POZORNE SI ICH PREČITAJTE A ODLOZTE PRE DALSIE POUŽITIE
Presnyc as je teraz nastaveny.