TDS2110GB - Iron BOSCH - Free user manual and instructions
Find the device manual for free TDS2110GB BOSCH in PDF.

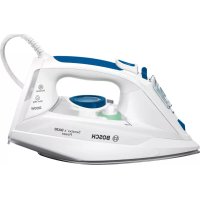
| Technical Features | Steam iron with a power of 2400 W |
|---|---|
| Tank Capacity | 330 ml water tank |
| Steam Function | Continuous steam of 40 g/min and vertical steam function |
| Soleplate | Ceramic soleplate for optimal gliding |
| Usage | Ideal for all types of fabrics, with temperature control |
| Maintenance | Anti-scale function to extend the appliance's lifespan |
| Safety | Automatic shut-off after 30 seconds in horizontal position |
| General Information | Lightweight for easy handling, 2-meter cord |
Frequently Asked Questions - TDS2110GB BOSCH
User questions about TDS2110GB BOSCH
0 question about this device. Answer the ones you know or ask your own.
Ask a new question about this device
Download the instructions for your Iron in PDF format for free! Find your manual TDS2110GB - BOSCH and take your electronic device back in hand. On this page are published all the documents necessary for the use of your device. TDS2110GB by BOSCH.
USER MANUAL TDS2110GB BOSCH
Register your new Bosch now: www.bosch-home.com/welcome
TDS21... Serie 12

BOSCH
General safety instructions
The appliance must not be left unattended while it is connected to the supply mains.
- Remove the plug from the socket before filling the appliance with water or before pouring out the remaining water after use.
The appliance must be used and placed on a stable surface.
- When placing the iron on its stand, make sure that the surface on which the stand is placed is stable.
The appliance should not be used if it has been dropped, if there are visible signs of damage or if it is leaking water. It must be checked by an authorised Technical Service Centre before it can be used again.
- With the aim of avoiding dangerous situations, any work or repair that the appliance may need, e.g. replacing a faulty mains cable, must only be carried out by qualified personnel from an Authorised Technical Service Centre.
This appliance can be used by children aged from 8 years and above and persons with reduced physical, sensory or mental capabilities or lack of experience and knowledge if they have been given supervision or instruction concerning use of the appliance in a safe way and understand the hazards involved. Children shall not play with the appliance. Cleaning and user maintenance shall not be made by children without supervision.
- Keep the appliance and its cord out of reach of children under 8 years of age when it is turned on or cooling down.
This appliance is designed only for household use up to 2000m above sea level.
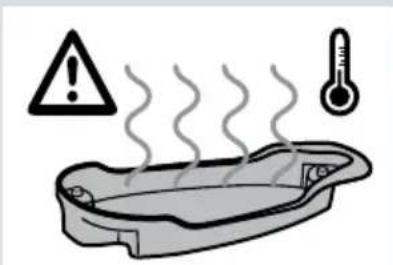
CAUTION. Hot surface.
Surface is liable to get hot during use.
Important notices
- Carefully read through the operating instructions for the appliance and safeguard them for future reference.
- This appliance has been designed exclusively for normal household use in home environment.
-
This appliance must be used only for the purposes for which it was designed, i.e. as an iron. Any other use will be considered improper and consequently dangerous. The manufacturer will not be held responsible for any damage arising from misuse or improper use.
-
This appliance is to be connected and used in accordance with the information stated on its characteristics plate.
- This appliance must be connected to an earthed socket. If it is absolutely necessary to use an extension cable, make sure that it is suitable for 16A and has a socket with an earth connection.
- The appliance must never be placed directly under the tap to fill the water tank.
- The electrical plug must not be removed from the socket by pulling the cable.
- Never immerse the iron in water or any other fluid.
- Do not leave the appliance exposed to weather conditions (rain, sun, frost, etc.)
- This appliance reaches high temperatures and produces steam during use, this could cause scalds or burns if not used properly.
- Do not allow the power cable to come into contact with the soleplate when it is hot.
Advice on disposal
Our goods come in optimised packaging. This basically consists in using noncontaminating materials which should be handed over to the local waste disposal service as secondary raw materials. Your local town council can give you information about how to dispose of obsolete appliances.
This appliance is labelled in accordance with European Directive 2012/19/EU concerning used electrical and electronic appliances (waste electrical and electronic equipment - WEEE).
The guideline determines the framework for the return and recycling of used appliances as applicable throughout the EU.
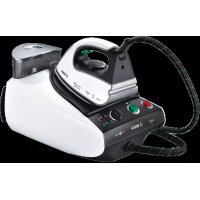
Description
- "Set" button
- "High steam" indicator light
- "Medium steam" indicator light
- "Eco" mode indicator light
- "on / off" power button
- "Calc'nClean" descending button
- "Calc'nClean" indicator light
- Water hose
- Mains cable
-
Mains cable and water hose storage compartments
-
Water tank
- Level mark for minimum filling
- Level mark for maximum filling
- Filling lid
- Iron pad
- Ironing programme selection knob
- Steam release button
- Soleplate
- "Calc'nClean" container
Using your appliance
1. Filling the water tank
This appliance has been designed to use normal tap water.
Important: Do not use additives! The addition of other liquids, such as perfume, vinegar, starch, condensation water from tumble dryers or air conditioning systems, or chemicals will damage the appliance. Any damage caused by the use of the aforementioned products will make the guarantee void!
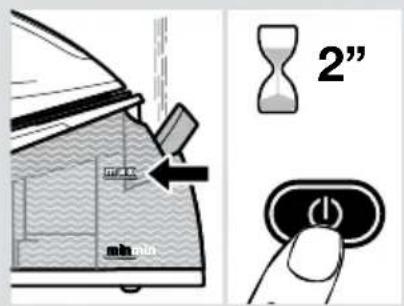
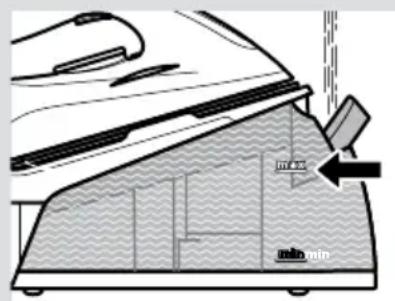
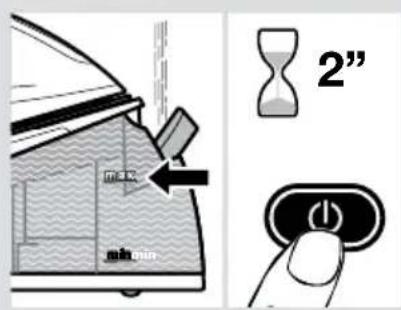
1 Open the filling lid (14).
2 Fill the water tank (11). Never fill beyond the level "max" (13) for maximum filling!
3 Close the filling lid.
Note: Keep the water level in the water tank above the level mark for minimum filling "min" (12).
Tip: To prolong the optimum steam function, you may mix tap water with distilled water 1:1. If the tap water in your area is very hard, mix tap water with distilled water 1:2.

2. Heating
1 Unwind the water hose (8) and the mains cable (9). Plug mains cable into an earthed socket.
Press "on/off" button (5) to switch the appliance on. "Medium steam" indicator light (3) will flash indicating that the appliance is heating up.
3 When the iron is ready to use, the "medium steam" indicator light (3) will remain permanently lit. Two beeps will be heard.
Important: During the first seconds of use the amount of steam will be lower and it will increase progressively.

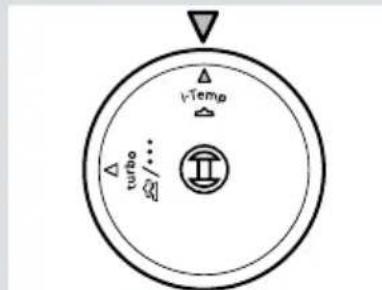
3. Ironing programmes
1 Select "i-Temp" mode to iron all your garments that can be ironed.
2 In case the result is not the desired one (when the type of garment allows it), iron these garments at the end using the "Turbo" mode.
Warning: Do not use "i-Temp" mode after using "Turbo" mode, as the soleplate on the iron is too hot and it could damage delicate garments.
| Mode Suitable for | |
| i-Temp | All fabrics that can be ironed |
| Turbo | Cotton and linen |
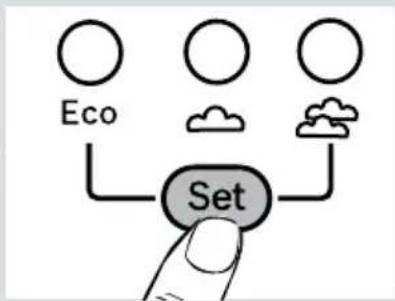
Select the steam mode by pressing "Set" button (1), depending on the ironing programme chosen, according to the following table:
| Mode Steam setting | |
| i-Temp “Medium steam” indicator light (3) | |
| Turbo | “High steam” indicator light (2) |

“i-Temp” programme
If this programme is selected, an appropriate temperature is set, which is suitable for all fabrics that can be ironed (symbols).
The "i-Temp" programme prevents clothes from being damaged due to an unsuitable temperature being selected.
The "i-Temp" programme does not apply to fabrics that cannot be ironed (symbol). Please check the garment care label for details or try ironing on a part of the cloth not visible normally.

"Turbo" programme
This programme is designed to iron those difficult garments which require high temperature (only the type of garment that allows it).
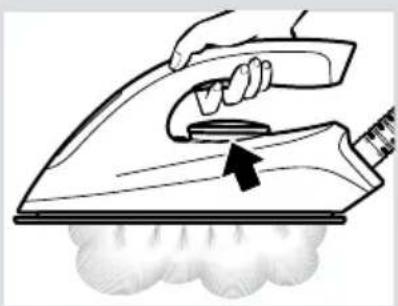
4. Ironing
1 Press the steam release button (17) for ironing with steam.
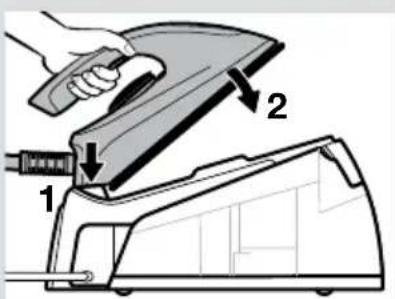
Important: When placing the iron on the pad (15), be sure to first insert the heel in the upper side of the control panel, as shown in the figure.
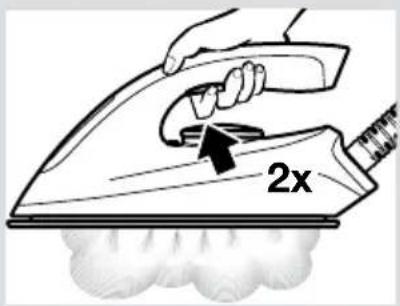

"PulseSteam" function
This appliance has a special function for tackling difficult creases.
1 Press the steam release button (17) two times in quick succession (double-click). Powerful shots of steam will be released.

Vertical steam
Can be used to remove creases from hanging clothes, curtains, etc.
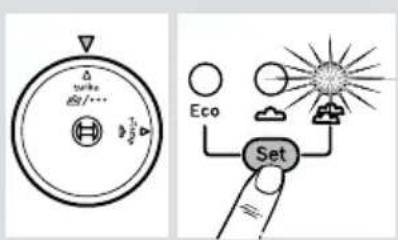
1 Select "Turbo" mode turning the ironing programme selection knob (16).
2 Activate "high steam" mode by pressing "Set" button (1).

Hold the iron in an upright position 15cm away from the garment to be steamed.
4 Press the steam release button (17) repeatedly with pauses of at least 5 seconds.
Warnings :
- Never point the steam jet at garments being worn, or at people or animals.
- Do not use "i-Temp" mode after using "Turbo" mode, as the soleplate on the iron is too hot and it could damage delicate garments.

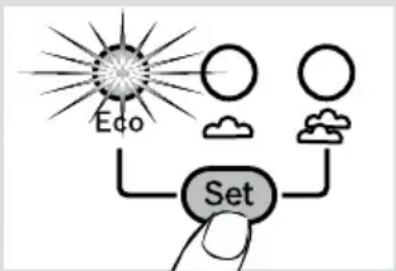
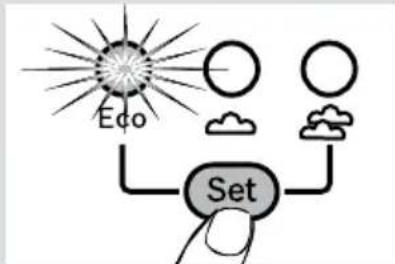
5. Energy saving
If the energy saving setting is selected, the appliance enters in the optimized "Eco" mode that generates "Continuous Pulse Steam". The steam is generated with strong short pulses, therefore you can save energy and water and still achieve good results when ironing most of your garments.
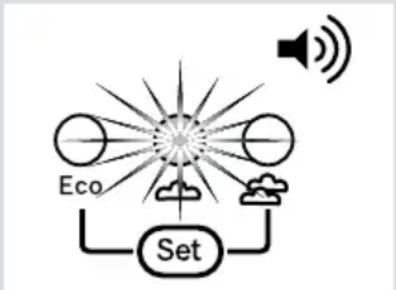
1 Press "Set" button (1) as many times as necessary until the "Eco" mode indicator light (4) lights up.
2 To switch to another steam mode press "Set" button (1).
Tips to help you save energy:
- If you tumble dry your fabrics before ironing them, set the tumble drier on the iron dry programme.
- Try to iron the fabrics while they are still damp and reduce the steam setting. Steam will be generated from the fabrics rather than the iron.

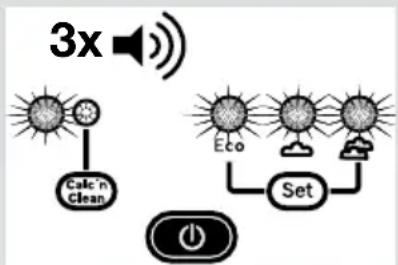
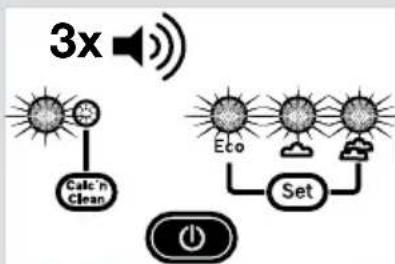
6. Auto switch off
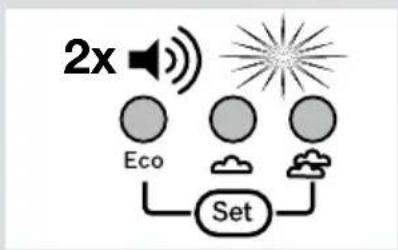
For your safety and to save energy, the appliance switches off automatically when it has not been used for 8 minutes.
Three beeps will be heard, and all indicator lights (2, 3, 4, 7) will flash.
1 To switch the steam station back on, press the steam release button (17) again.

1. Descaling process
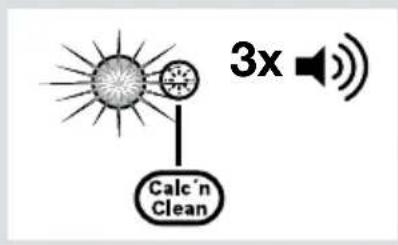
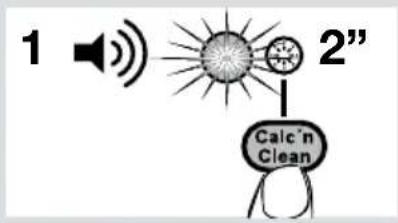
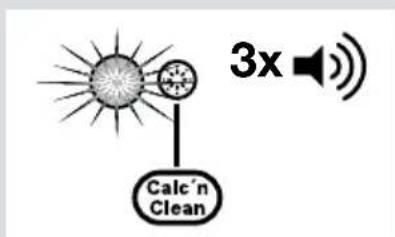
This appliance is equipped with an automatic clean warning indicator, which indicates that scale particles must be removed from inside the steam chamber.
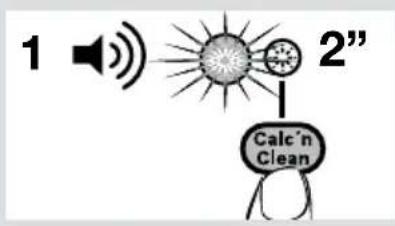
When activated, three beeps will be heard, and the "Calc'nClean" indicator light (7) will flash indicating that the process should be performed.
You may continue ironing for a time. Once this time has passed, you will only be able to dry iron (without steam).
To start steam ironing again, follow this descaling process:
1 Fill the tank (11) with tap water.
Plug in the mains cable (9) and press "on/off" button (5) to switch the appliance on.
3 Press the descending button (6) for 2 seconds. The "Calc'nClean" indicator light (7) will remain permanently lit and a beep will be heard.
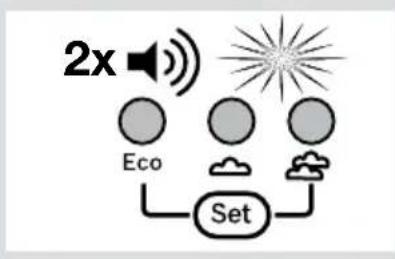
4 Wait until one of the indicator lights (2,3,4) stops flashing and remains lit permanently. Two beeps will be heard.
5 Place the iron on the "Calc'nClean" container (19). Make sure that the surface on which the container is placed is stable.
Warnings:
- Do not remove the iron from the container until the process has finished. Boiling water and steam will be released through the soleplate, removing limescale and/or deposits that may be inside.
- The container must only be used the to perform the descending process. It must not be used as a stand for the iron while ironing.
6 Press the steam release button (17) for 2 seconds. The descending process will start automatically. During this process, short beeps will be heard.
7 After approximately 3 minutes, the iron will stop releasing steam. A long beep will be heard, indicating that descending process has finished. The appliance will switch off automatically.
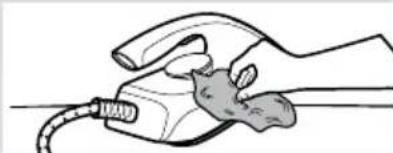
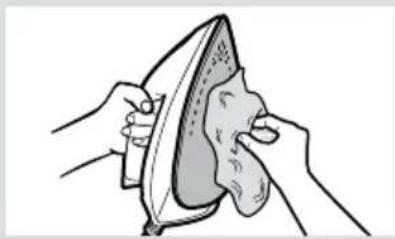
To clean the soleplate (18), immediately rub off any residue by running the hot iron over a wet cotton cloth. Wipe the housing of the iron with a cloth.
9 The container gets hot during the descending process. Let it cool down and then empty the container.
Note: You can perform the decalcification process even if the "Calc'nClean" indicator light (7) is not blinking. Go directly to point 1.

ENGLISH

2. Cleaning the appliance
Regularly clean your appliance for properly maintenance. Attention! Burn risk!
If the appliance is only slightly soiled, wipe it with a damp cotton cloth only, and then dry it.
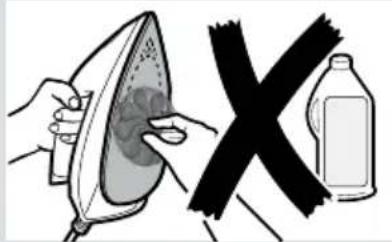
2 To keep the soleplate smooth, you should avoid contact with hard metal objects. Never use a scouring pad, or chemicals to clean the soleplate.


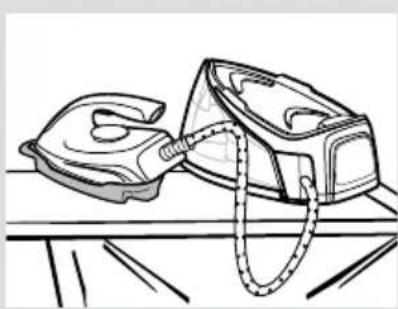
Storing the appliance
1 Unplug the appliance and let it cool down. Empty the water tank (11).
2 Place the iron on the steam station, standing on the pad (15).
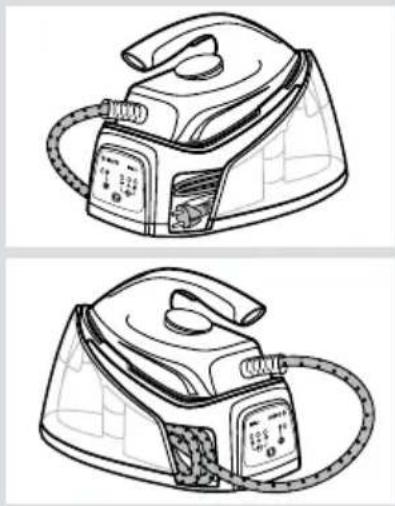
Store the water hose (8) and the mains cable (9) in the storage compartments (10).
| Problem Possible causes Solution | ||
| The iron begins to smoke when switched on. | 1. During first use: certain components on the appliance have been lightly greased at the factory and may produce a small amount of smoke when initially heated. | 1. This is completely normal and will stop after a short while. |
| The iron does not produce any steam. | 1. During first use, water has not filled the hose (8) completely. 2. The "Calc'nClean" indicator light (6) will flash. The descaling process has not been completed. | 1. Press and hold the steam release button (17) pressed until steam comes out. 2. Perform a cleaning cycle (see the "Dscaling process" section). |
| Dirt comes out through the soleplate. | 1. There is a build up of limescale or minerals in the iron. 2. Chemical products or additives have been used. | 1. Carry out a cleaning cycle (see the "Dscaling process" section). 2. Never add products to the water (see the "Filling the water tank" section). Clean the soleplate with a damp cloth. |
| The "Calc'nClean" indicator light (6) does not turn off. | 1. The iron descaling process has been stopped before being completed. | 1. Restart and complete the iron descaling process. |
| The appliance makes a pumping sound. | 1. Water is being pumped into the iron. 2. The water tank is empty. | 1. This is normal. 2. Fill the water tank. |
| The iron drips. 1. Ironing programme selection knob (16) is in "i-Temp" mode and the "high steam" indicator light (2) lights up permanently. | 1. When you iron in "i-Temp" mode, press "Set" button (1) until the "medium steam" indicator light (3) lights up. (See the "ironing programmes" section). | |
| The iron produces little steam. | 1. The iron has been switched on recently. | 1. It is normal, the iron produces steam gradually until it is stabilized. |
If the above tips do not solve the problem, get in touch with our customer service.
You can download this manual from the Bosch local homepages.
B 3TOM cnyuae Bby ycbluHTe TPN 3ByKObIX CnHaJa, a BCE CBETOBbie INdNKaTOpbI (2, 3, 4, 7) NaHyT MmraTb.
1 UTo6bI cHOba BkJIIOuHTb napOByIO CTaHcUHO, HaxMITE KhoNky BblNycka napa n3 noDoWBbl (17).