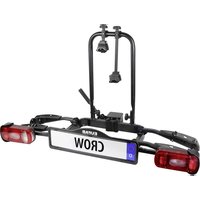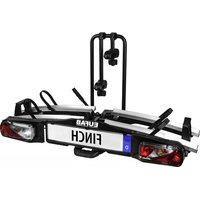
Jake White - Bike rack Eufab - Free user manual and instructions
Find the device manual for free Jake White Eufab in PDF.



User questions about Jake White Eufab
0 question about this device. Answer the ones you know or ask your own.
Ask a new question about this device
Download the instructions for your Bike rack in PDF format for free! Find your manual Jake White - Eufab and take your electronic device back in hand. On this page are published all the documents necessary for the use of your device. Jake White by Eufab.
USER MANUAL Jake White Eufab
Tow-bar mounted bicycle transport
Art no. 11510 JAKE, Art no. 11524 JAKE WHITE, Art no. 11525 JAKE BLACK
Maximum loading capacity of bike carrier JAKE: 60 Kg
- Suitable for almost all kinds of towbars
- With EG-BE (European operating licence)
No MOT demonstration necessary
No entry in documents necessary - Comfortable loading and unloading
- Admitted for empty runs
- For transport of 2 bicycles of all kinds
- Secure fastening at bicycle frame
- No problems with low passages, garages and parking garages
- Saves gasoline due to low aerodynamic resistance
Not suitable for aluminium towbars.
D-value minimum 5,0 KN
| Ball load | Dead weight | Payload |
| 50 kg | 17 kg | 33 kg |
| 60 kg | 17 kg | 43 kg |
| 75 kg | 17 kg | 58 kg |
| 90 kg | 17 kg | max. 60 kg |
Dear customer, the stamped pages are the European Operating Licence. When using the carrier it is vital to carry along this EG Operating Licence!
Towbar conditions
Not suitable for aluminium towbars
The bike carrier can be mounted on all kinds of towbars under the following conditions:
Check if towbar is suitable. The towbar must have a type approval.
The ball and the knee-joint bar have to be forged in one piece. The material of the knee-joint bar must have a quality of minimum St 52-3.
Note:
Normally casting material of knee-joint bars is St 52-3. For example GGG 40 is not suitable. (Valid from GGG 52 only). At the moment following knee-join bars are manufactured of GGG 40:
| Towbar Manufacturer | Mark of conformity | Suitable for vehicle types |
| F 4192 | Audi A4 | |
| Westfalia | F 3830 | Audi A6 |
| F 4112 | Audi A8 |
The rear carrier is of steel and powder coated, the cavities are also coated, which prevents oxidation of the metal. In case of any damage of the coatings (scratches, dents) make sure that the protection is repaired.
All screw threads should be treated with oil or grease to ensure a permanent smooth running
Assembly instructions
The bicycle rack can be mounted easily and is then ready for use.
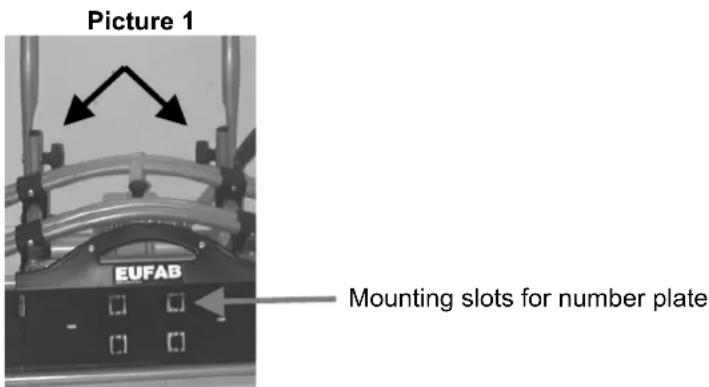
Screw the U-bracket in the provided sockets of the supporting frame using the M8 x 60 carriage bolts, washers and the M8 knurled nuts. Insert the carriage bolts from outside to inside. See picture 1.
Mount bicycle rack on tow-bar
The vehicle should be level, the engine off and the handbrake applied when mounting the rack. The trailer hitch must be undamaged, clean and free of grease.
The JAKE rack is put in position from above onto the trailer hitch and at the same time aligned by eye. Push down the quick lock lever (approx. 40kg ) as far as it will go (the lever will remain in horizontal position). Push the plastic locking mechanism to the left until the green marking on the handle is fully visible. Check again whether the rack is secure and tight on the trailer hitch (and can no longer be turned out of position). Adjust the quick-release lock if this is not the case by pushing the plastic locking mechanism to the right as far as possible so that you can pull the lever upward and remove the rack from the trailer hitch. Now turn the adjusting screw on the quick-release lock inward a little (first slacken the lock nut) and then retighten the lock nut.
Put the rack onto the trailer hitch again checking whether the rack is secure and tight on the trailer hitch. If necessary, repeat this work step until the rack is secure and tight. Caution: Always make sure that the locking nut on the adjusting screw has been correctly tightened! Lock the quick-release lock now and remove the key from the lock. The bicycle rack is now also secure against theft. Always take care that the quick-release lock has been correctly locked! The green marking on the handle should be completely visible and the red dot on the lock should be level with the lock and the lock symbol.
The keys for the locks should be kept safe.
Caution: The lock is an important safety feature and also acts as protection against theft. The rack may not be used without this safety feature.
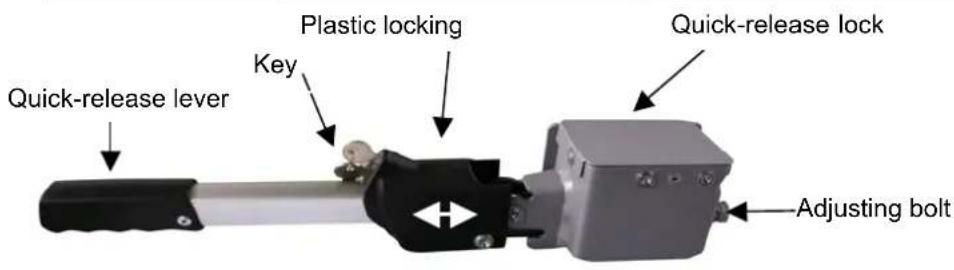
The quick-release lock
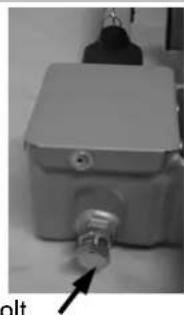
Adjusting bolt
Securing Bicycles on the Bicycle Rack
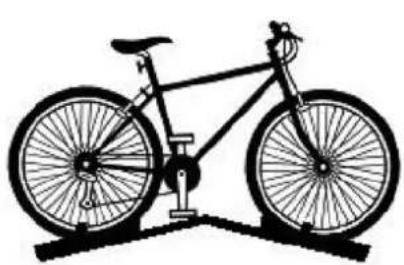
Picture 2
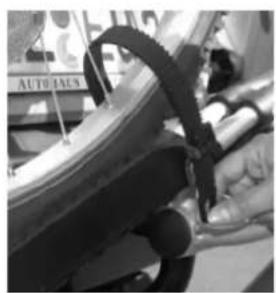
The first bicycle is to be placed centrally in the bicycle rail (nearest to the vehicle) and fixed to the U-bolt with the short frame holder. Fix the running wheels with the plastic strap provided. See figure 2. Start by screwing the frame holders onto the U-bolt. To do this, first unscrew the lockable finger nuts from the frame holders and remove the fixing clip with the spring. The spacer tube must also be removed. Take the U-bolt clip from the threaded rod and place it around the U-bolt. Finally, refit the frame holder in reverse order. Please note that the round side of the spacer disc must face toward the fixing clip.
The second bicycle is normally to be placed in the second rail in the opposite direction and fixed to the U-bolt with the long frame holder. To fix the label, first press out the fixing wedge. See figure 1.
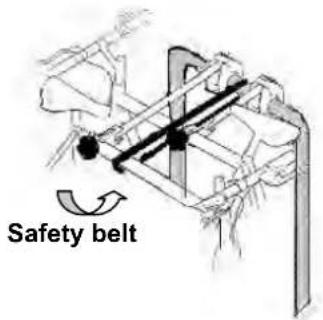
Fix the running wheels as described for the first wheel. It may be necessary to place the bicycles individually on the rear rack, rather than as described, so the frame holders can be fixed correctly. Now secure the bicycles using the long safety belt. For additional safety, run the safety belt through the bicycle frame and around the U-bolt and tighten firmly.
Attention: Never use the rack without the safety belt when loaded!
Folding down the cycle rack
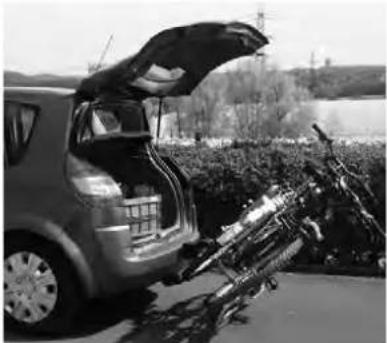
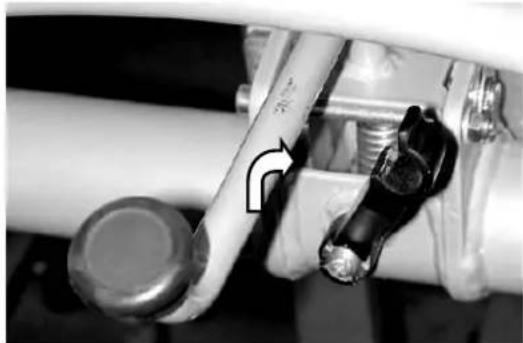
Loosen the security device from the tilt lever. Hold the U-bolt with one hand so that the rack cannot tilt abruptly and use the lever of tilt mechanism. Now lower the rack carefully. The supporting frame snaps back into operating position when lifted. Afterwards secure the lever with this additional protection.
Optionally available
Adapter for 3^rd bicycle.
With the adapter set Art. No. 11408 you can expand the bicycle rack to carry 3 bicycles.
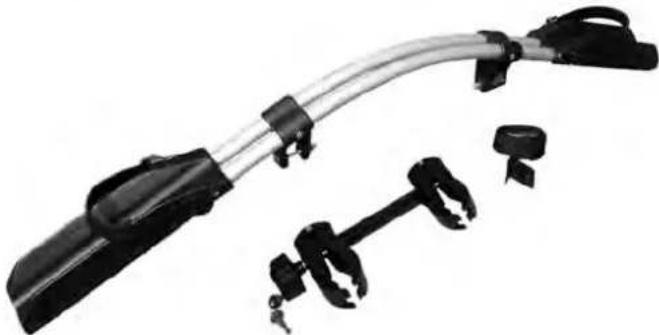
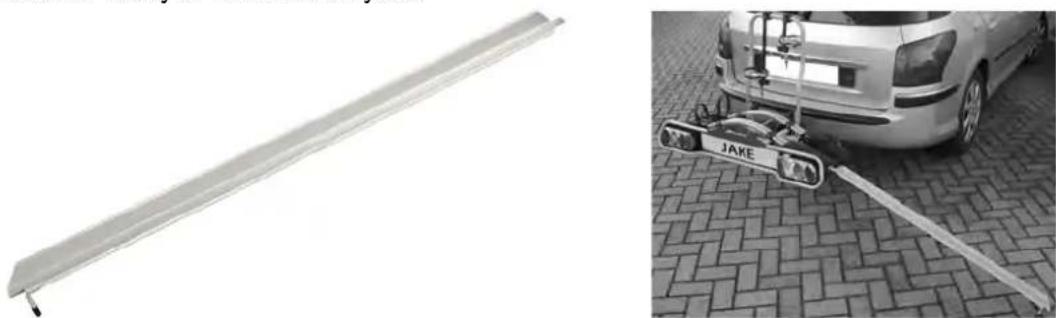
Art. No. 11513 loading rail
Saves lifting the bicycles onto the bicycle rack by simply running them up the rail. Ideal for heavy or motorised bicycles
Caution:
The safety instructions must be observed!
Before starting each journey and at regular intervals when travelling, check that the lighting system is working properly on your rear rack.
New hitches often have a thick black layer of paint on the tow ball. In order for your rear rack to gain the best possible grip, this layer of paint should be removed, using corrosive fluid, solvents etc.
Parts that may fall off, e.g. such as air pumps, baskets, bells etc must be removed before starting the journey.
Driving with a cycle rack affects the driving characteristics of a vehicle. You should therefore adjust your driving speed accordingly. Avoid sudden and jerky steering movements.
When reversing, note that the rack makes your vehicle longer than normal!
When not in use, the cycle rack should be removed.
Do not drive with the cycle rack mounted and in the folded position. All movable parts such as supporting frames, number plate holders and rear lights must be working fully at all times when driving.
The maximum permitted speed is 130km / h
Follow the fitting instructions precisely for a proper and safe fit. If in doubt when referring to these instructions, ask the retailer or the manufacturer directly for further information.
In accordance with § 23 of the German Highway Code and for your own safety you should regularly check the rack and its load, as you will be held liable in the event of damage.
The manufacturer and retailer are not liable for damage to property or injuries to people caused by incorrect fitting or improper use.
This product has been checked and tested under extreme conditions and has produced good results regarding safety and grip.
Therefore, fitting the rack correctly should exclude any faults from occurring.
Dear Customer,
you can use this bicycle rack to transport other goods or objects, if the maximum drawbar load and payload are observed as well as the applicable road traffic regulations. The goods or objects must also be securely fastened.
F
D-valore minimo 5,0 KN
| Carico supportato | Peso netto | Portata |
| 50 kg | 17 kg | 33 kg |
| 60 kg | 17 kg | 43 kg |
| 75 kg | 17 kg | 58 kg |
| 90 kg | 17 kg | max. 60 kg |