
WS 650115 - Electric grinder AEG - Free user manual and instructions
Find the device manual for free WS 650115 AEG in PDF.
| Product type | Angle grinder |
| Brand | AEG |
| Model | WS 650115 |
| Power consumption | 650 W |
| No-load speed | 2 700 - 10 000 min⁻¹ |
| Maximum disc diameter | 115 mm |
| Spindle thread | M14 |
| Weight | 1.5 kg |
| Power supply | 230 V ~ 50 Hz, single-phase alternating current |
| Noise level (intensity) | 85 dB(A) |
| Noise level (pressure) | 98 dB(A) |
| Measured vibration | 5 m/s² |
| Protection | Double insulation (DIN 57 740 / VDE 0740) |
| Soft start | Yes |
| Spindle lock | Yes |
| Adjustable protective guard | Yes, tool-free |
| Additional handle | Yes, removable |
| Quick-clamping system | FIXTEC nut (manual tightening only) |
| Functions | Cutting, grinding, sanding (with suitable accessories) |
| Maintenance | Regularly clean the cooling vents |
| Spare parts | Available from AEG after-sales service |
| Included accessories | Pin spanner, protective guard, additional handle |
Frequently Asked Questions - WS 650115 AEG
User questions about WS 650115 AEG
0 question about this device. Answer the ones you know or ask your own.
Ask a new question about this device
Download the instructions for your Electric grinder in PDF format for free! Find your manual WS 650115 - AEG and take your electronic device back in hand. On this page are published all the documents necessary for the use of your device. WS 650115 by AEG.
USER MANUAL WS 650115 AEG
natural_image
Line drawing of a mechanical power tool with a circular base and handle (no text or symbols)Instruction for use
Please read and save these instruction
Gebrauchsanleitung
| Introduction | You demand the best and buy quality - quality provided by Atlas Copco. We have built for you a reliable and lasting tool. Working effectively and without endangering your health is only possible if this instruction for use is read carefully before first using the tool. We want to satisfy our customers and would like you to buy again AEG Electric Power Tools from Atlas Copco. | ||||
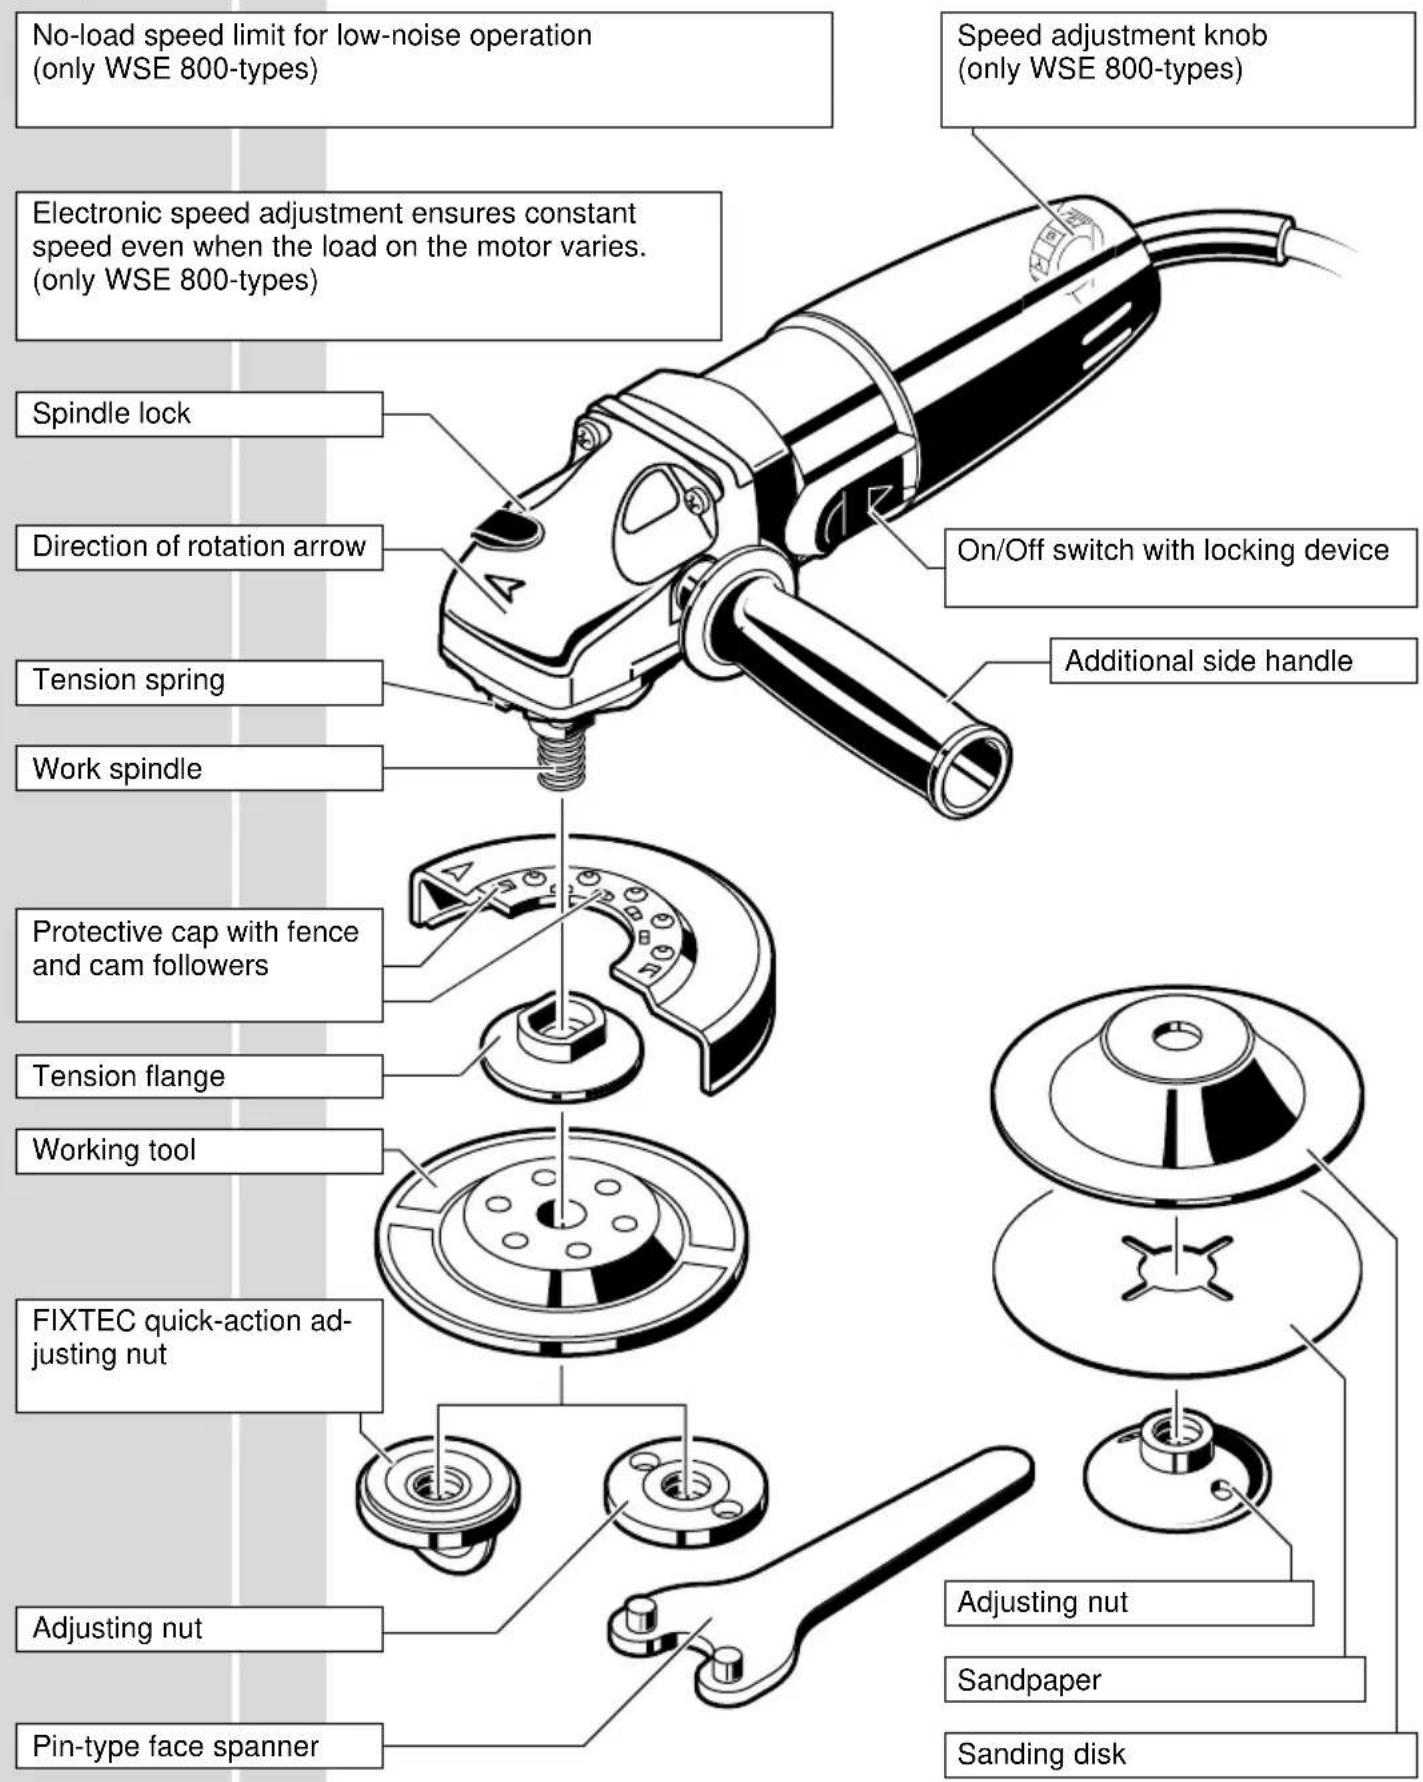
| Technical Data | Type WS 650- WS 715- WSE 800- Nominal power (W) 650 710 710 800 Min. no-load speed ( min^-1) 2700 Max. no-load speed ( min^-1) 10000 10000 10000 10000 10000 10000 10000 10000 10000 10000 10000 10000 10000 100 Grinding disk diameter (mm) Thread of work spindle Weight (kg) Speed control No-load speed limiter | 115 115 125 125 115 115 125 125 M14 1,5 1,5 | M14 1,5 1,5 | M14 ● ● | |
| Safety advice | ■ Please pay attention to the safety instructions in the attached leaflet! ■ Do not pierce the motor housing as this could damage the double insulation (use adhesives). ■ Always disconnect the plug from the socket before carrying out any work on the machine. ■ Only plug-in when machine is switched off. ■ Keep mains lead clear from working range of the machine. Always lead the cable away behind you. ■ Before use check machine, cable, and plug for any damages or material fatigue. Repairs should only be carried out by authorised service agents. ■ Allow the machine to come to a stop before putting down. ■ Dust that arises when working in stones with crystalline silicic acid can damage your health. Do not work on any material containing asbestos. Please note the safety regulations, VBG, of the employer's liability insurance association. ■ Never reach into the danger area of the machine when it is running. ■ Always wear safety goggles and ear protectors when working with this machine. It is further recommended to wear safety gloves, apron, as well as sturdy non-slipping shoes. ■ Always use the additional handle. ■ Always use the protecting cap when roughing-down and separating. ■ Only use tools whose permitted speed is at least as high as the highest no-load speed of the machine. ■ Check grinding tools before use. The grinding tool must be properly mounted and turn freely. Perform a test run for at least 30 seconds without load. Do not use damaged, out of round or vibrating grinding tools. ■ When grinding metal, flying sparks are produced. Take care that no persons are endangered. Because of the danger of fire, no combustible materials should be located in the vicinity (spark flight zone). Do not use dust extraction. ■ Due care should be taken that no sparks or sanding dust flying from the workpiece come into contact with you. ■ Pay attention to the dimensions of the grinding disc. The mounting hole diameter must fit the mounting flange without play. Do not use reducer pieces or adapters. ■ Never use a cutting disc for grinding. Do not subject cutting discs to side pressure. ■ When separating stone the guide shoe must be used! | ||||
ENGLISH
| Measured sound value | ■ The adjusting nut must be tightened before starting to work with the machine.■ Under extreme operating conditions (e. g. smoothing metals with the backing pad and vulcanised fibre-grinding disks) high contamination can build up inside the angle grinder. In such cases we recommend: the use of a stationary dust extraction device; cleaning the machine more regularly; and/or the use of an ELCB safety switch (earth leakage circuit breaker).Typically the A-weighted noise levels of the tool are:Sound pressure level = 85 dB (A).Sound power level = 98 dB (A).Wear ear protectors!Typically the weighted acceleration is 5 m/s^2 . | |
| Measured vibration value | ||
| Usage | This angle grinder can be used for separating and grinding many different materials, e.g. metal or stone. In case of doubt please read the manufacturers' instruction.Do not use this product in any other way as stated for normal use. | |
| Mains connection | Connect only to a single-phase AC current supply and only to the mains voltage specified on the rating plate. Connection to sockets without earth protection is possible as the appliance features protective insulation to DIN 57 740/ VDE 0740 and CEE 20. Radio suppression complies with the European standard EN 55014.When fitting the plug, make sure that the brown (live) wire of this appliance is connected to the plug terminal marked L or coloured red, and the blue (neutral) wire of this appliance is connected to the plug terminal marked N or coloured black. Under no circumstances must the wires of this appliance be connected to the earth terminal of the plug marked either E, with the earth symbol, or coloured green or green/yellow. | |
| Switching on and off | Switching on and off: Slide back the On/Off switch. To lock, depress the front part of the sliding switch. | 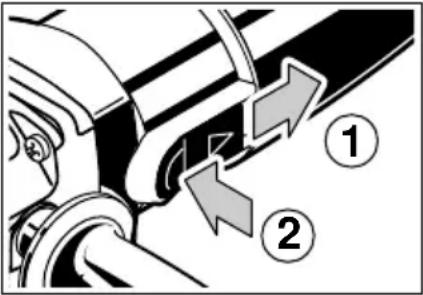 |
| Switching off: To unlock, depress the back part of the sliding switch. The switch will automatically move back to "O". | 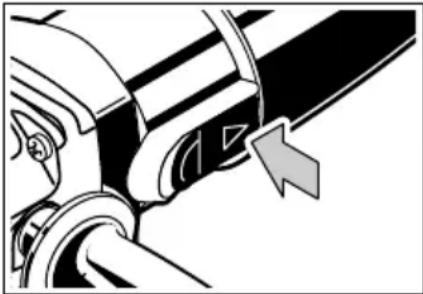 | |
| Smooth start | The electronic smooth start will prolong the life of both the motor and the gears. | |
| ENGLISH | 3 | WS 650-115, WS 715-115, WS 715-125, WSE 800-125 |
Usage
Mains connection
Switching on and off
Smooth start
ENGLISH
Brief description
Modifications: Text, diagrams and data are correct at the time of printing. In the interest of continuous improvement of our products, technical specifications are subject to alteration without prior notice.
EC DECLARATION OF CONFORMITY
We declare under our sole responsibility that this product is in conformity with the following standards or standardization documents: EN 50 144, EN 55 014, EN 55 014-2, EN 60 555, HD 400 according to the provisions of the regulations 73/23/EEC, 89/336/EEC, 89/392/EEC.
DEUTSCH DANSK


Brand : AEG
Model : WS 650115
Category : Electric grinder