Propus Lounge H - Heating SunRed - Free user manual and instructions
Find the device manual for free Propus Lounge H SunRed in PDF.
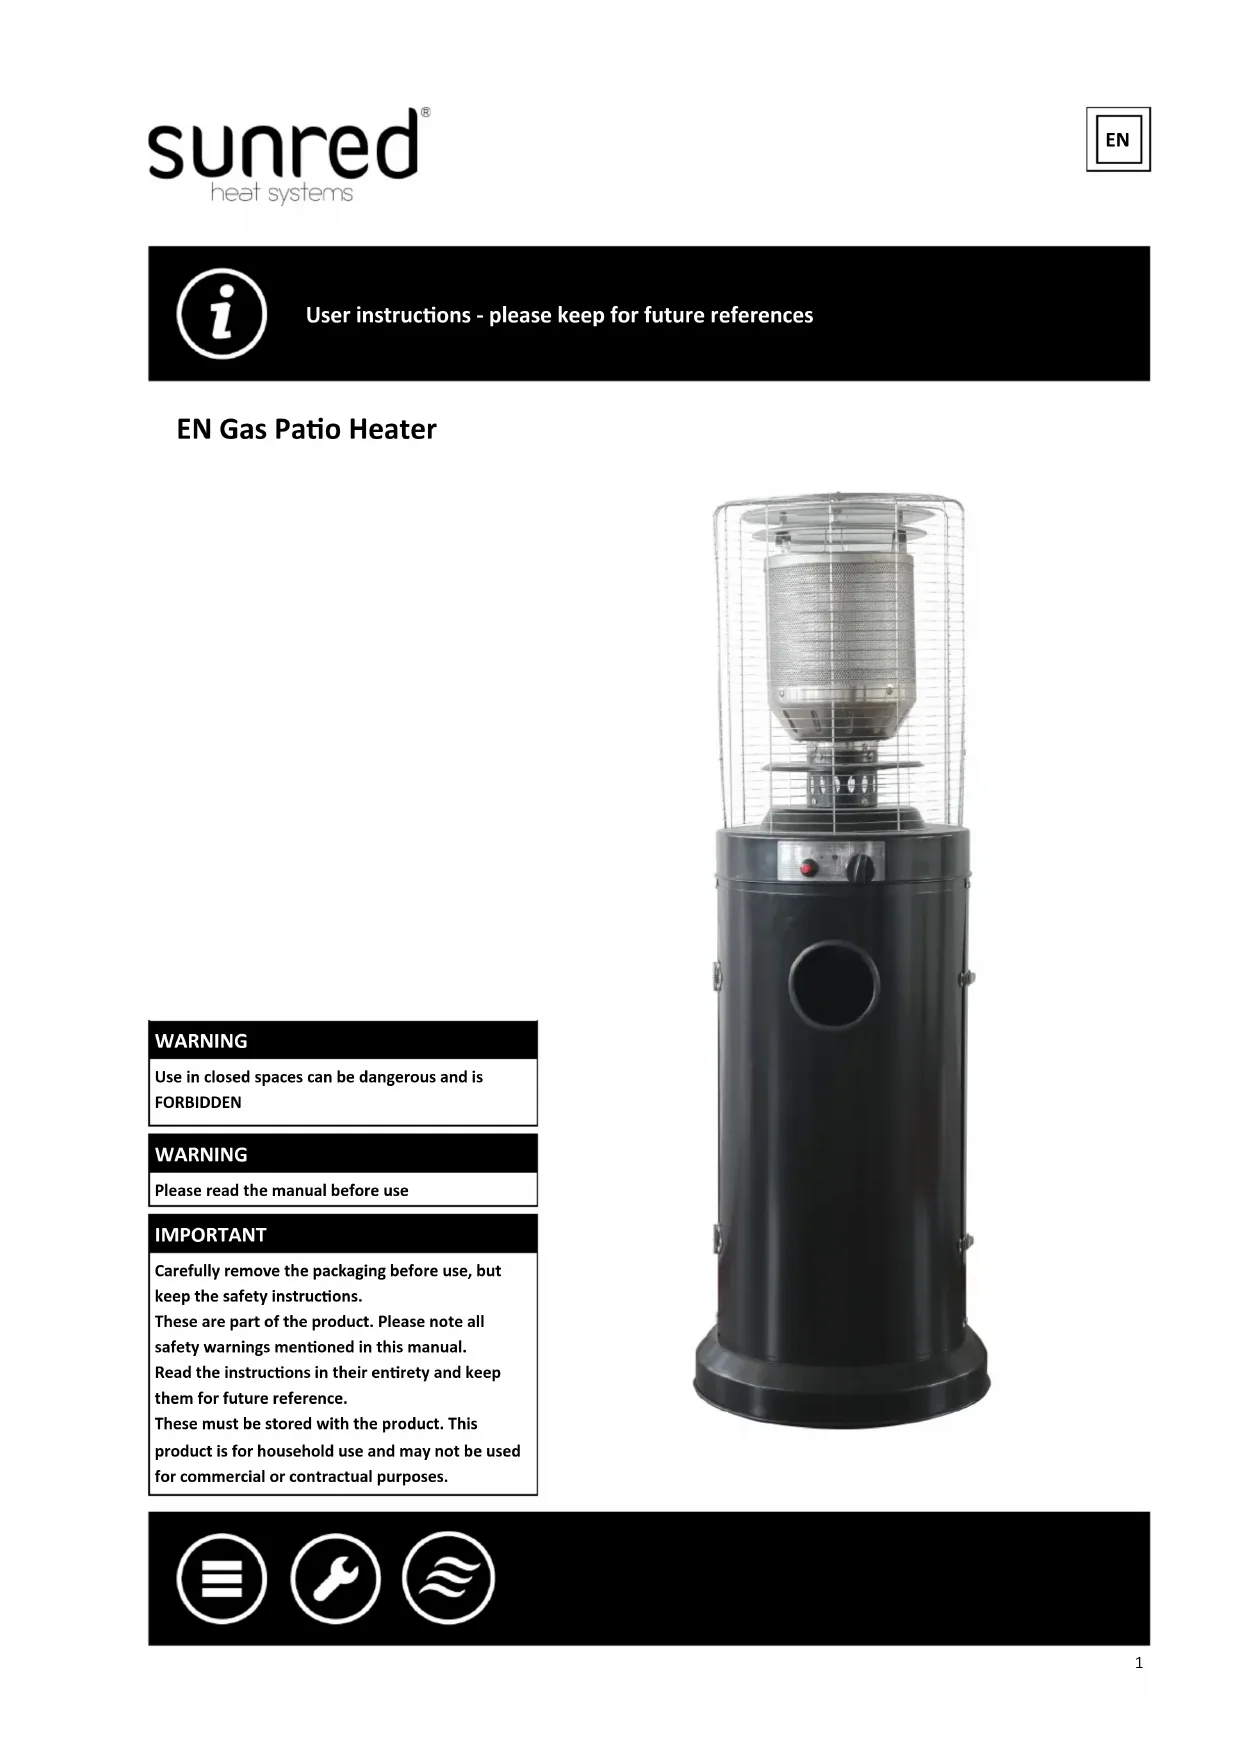
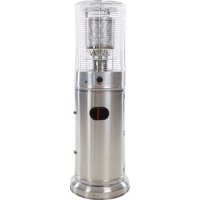
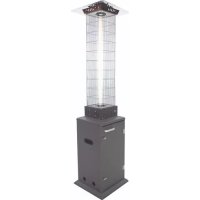
| Product type | Gas patio heater |
| Brand | SunRed |
| Model | Propus Lounge H |
| Power source | Propane or butane gas |
| Maximum power | 14,000 W |
| Minimum power | 5,000 W |
| Dimensions | 134 cm (height) x 46 cm (diameter) |
| Weight | Approximately 13.5 kg |
| Gas bottle capacity | Up to 23 kg (diameter 30.5 cm x height 57.1 cm) |
| Gas consumption | G30: 728 g/h; G31: 715 g/h |
| Usage | Outdoor only |
| Ignition | Piezoelectric (push button) |
| Heat adjustment | Hi (max) to Lo (min) via rotary knob |
| Housing material | Powder-coated steel or stainless steel |
| Safety features | Safety thermocouple, automatic shut-off if pilot light goes out |
| Leak test required | Before first use, then annually and after each bottle change |
| Maintenance | Clean burner regularly; check flexible hose monthly |
| Warranty | 2 years |
| Certification | CE 0063/21 |
| Safety distance from combustible materials | 100 cm on top and sides |
| Wind protection | Base fixation to the ground recommended |
| Storage | Gas bottle disconnected, appliance upright sheltered from weather |
Frequently Asked Questions - Propus Lounge H SunRed
User questions about Propus Lounge H SunRed
0 question about this device. Answer the ones you know or ask your own.
Ask a new question about this device
Download the instructions for your Heating in PDF format for free! Find your manual Propus Lounge H - SunRed and take your electronic device back in hand. On this page are published all the documents necessary for the use of your device. Propus Lounge H by SunRed.
USER MANUAL Propus Lounge H SunRed
User instructions - please keep for future references
EN Gas Patio Heater
WARNING
Use in closed spaces can be dangerous and is FORBIDDEN
WARNING
Please read the manual before use
IMPORTANT
Carefully remove the packaging before use, but keep the safety instructions.
These are part of the product. Please note all safety warnings mentioned in this manual.
Read the instructions in their entirety and keep them for future reference.
These must be stored with the product. This product is for household use and may not be used for commercial or contractual purposes.


1
Warning!
- Read these installation and operating instructions carefully before installing and using the appliance.
- The operating and installation instructions must be kept with the appliance. If the product is sold to a third party, these documents must be supplied.
- In case of improper use or failure to follow the safety instructions, each liability will be rejected, and the warranty does not apply.
- For assistance or additional information consult a qualified technician or the store where you purchased your product.
- Warning: Keep young children at a safe distance. Accessible parts may become very hot!
- The patio gas heater may only be used outdoors.
- The usage of the appliance and the storage of the gas cylinder must be in accordance with the regulations in force.
User and installation instructions
Contents of this document
- Caution
- Heater Stand and Location
- Gas Requirements
- Operation and Storage, Cleaning and Care
- Parts and Specifications
- Assembly Parts and Procedures
- Leakage Test
- Problems Check Test
- Disposal of the appliance and the packaging
Important safety instructions
While using the appliance these safety instructions should always be followed to reduce the risk of fire and other damage to people and property. Read these safety instructions carefully before the appliance is put into operation.

1
For your safety
General safety instructions
If you smell gas:
1). Shut off gas to the appliance.
2). Extinguish any open flame.
3). If odour continues, immediately call your gas supplier or your fire department.
Do not store or use gasoline or other flammable vapors and liquids in the vicinity of this or any other appliance.
An LP cylinder not connected for use shall not be stored in the vicinity of this or any other appliance.
Device-specific safety instructions
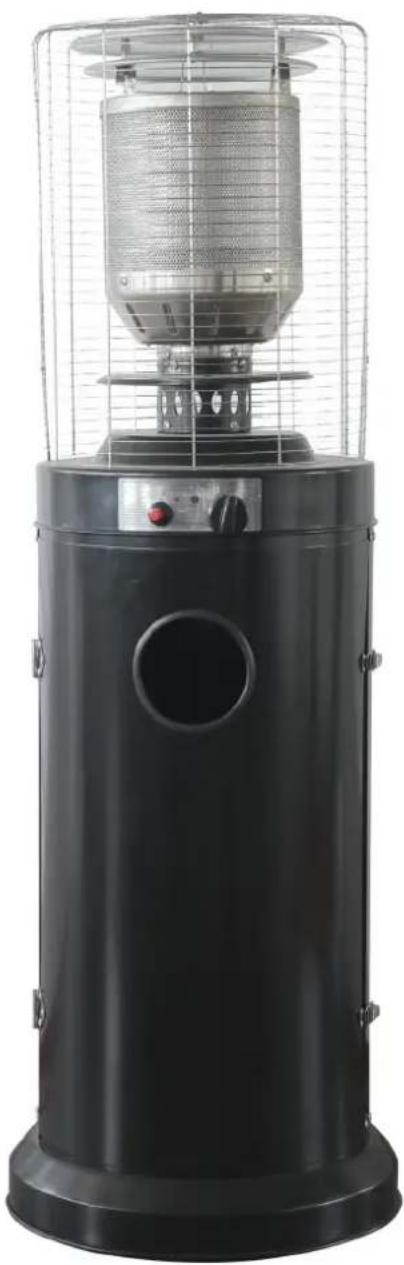
1). For use outdoors or in amply ventilated areas.
2). An amply ventilated area must have a minimum of 25% of the surface area open.
3). The surface area is the sum of the walls surface. (See figure 2)
Improper installation, adjustment, alteration, service or maintenance can cause injury or property damage. Read the installation, operating and maintenance instructions thoroughly before installing or servicing this equipment.
Fig. 2
This appliance must be installed and the gas cylinder stored in accordance with the regulations in force;
- Do not obstruct the ventilation holes of the cylinder housing;
- Do not move the appliance when in operation;
- Shut off the valve at the gas cylinder or the regulator before moving the appliance;
- The tubing or the flexible hose must be changed within the prescribed intervals;
- Use only the type of gas and the type of cylinder specified by the manufacturer;
- The LP tank used with your patio heater must meet the following requirements:
Purchase LP tanks only with these required measurements: (30.5cm) (diameter) x 57.1 cm) (tall) with 15kg capacity maximum.
- In case of violent wind particular attention must be taken against tilting of the appliance;

1
For your safety
General safety instructions
Do not use the patio heater for indoors, as it may cause personal injury or property damage.
This outdoor heater is not intended to be installed on recreational vehicles and/or boats. Installation and repair should be done by a qualified service person.
- Improper installation, adjustment or alteration can cause personal injury or property damage. Do not attempt to alter the unit in any manner.
- Never replace or substitute the regulator with any regulator other than the factory-suggested replacement.
- Do not store or use gasoline or other flammable vapors or liquids in the heater unit.
The whole gas system, hose, regulator, pilot or burner should be inspected for leaks or damage before use, and at least annually by a qualified service person.
All leak tests should be done with a soap solution. Never use an open flame to check for leaks. Do not use the heater until all connections have been leak tested.
- Turn off the gas valve immediately if smell of gas is detected. Turn Cylinder Valve OFF. If leak is at Hose/Regulator connection: tighten connection and perform another leak test. If bubbles continue appearing it should be returned to hose's place of purchase.
If leak is at Regulator/Cylinder Valve connection: Disconnect, reconnect, and perform another leak check. If you continue to see bubbles after several attempts, cylinder valve is defective and should be returned to cylinder's place of purchase.
- Do not transport heater while it's operating.
- Do not move the heater after it has been turned off until the temperature has cooled down. Keep the ventilation opening of the cylinder enclosure free and clear of debris.
- Do not paint the radiant screen, control panel or top canopy reflector.
Control compartment, burner and circulation air passageways of the heater must be kept clean. Frequent cleaning may be required as necessary.
The LP tank should be turned off when the heater is not in use. Check the heater immediately if any of the following occurs:
The heater does not reach temperature.
The burner makes popping noise during use (a slight noise is normal when the burner is extinguished).
Smell of gas in conjunction with extreme yellow tipping of the burner flames.
Warning!
The user assumes all risks of assembling and operating gas heater. Not heeding the warnings and instructions of this manual can result in severe bodily harm, death or material damage. If you don't read this user manual or if you cannot fully understand it, please ask your specialised dealer. The manufacturer or supplier assumes no liability for negligent user behaviour.
Warning!
When not heeding the instructions and information in this manual or in case of improper usage outside of the intended usage purposes, the manufacturer rejects any liability to product damages.

1
For your safety
General safety instructions
The LP regulator/hose assembly must be located out of pathways where people may trip over it or in area where the hose will not be subject to accidental damage.
Any guard or other protective device removed for servicing the heater must be replaced before operating the heater.
Adults and children should stay away from high temperature surface to avoid burns or clothing ignition.
Children should be carefully supervised when they are in the area of the heater.
Clothing or other flammable materials should not be hung on the heater or placed on or near the heater.
- Change the gas cylinder in a amply ventilated area, away from any ignition source (candle, cigarettes, other flame producing appliances, ...);
Check that the regulator seal is correctly fitted and able to fulfill its function showed as photo right;
- Do not obstruct the ventilation holes of the cylinder housing;
- Close the gas supply at the valve of the gas cylinder or the regulator after use;
In the event of gas leakage, the appliance shall not be used or if alight, the gas supply shall be shut off and the appliance shall be investigated and rectified before it is used again;
Check the hose at least once per month, each time the cylinder is changed, or each time before a long time of no use.
If hose shows signs of cracking, splitting or other deterioration it must be exchanged for new hose of the same length and of the equivalent quality;
The use of this appliance in enclosed areas can be dangerous and is PROHIBITED;
- Read the instructions before using this appliance. The appliance must be installed in accordance with the instructions and local regulations.


For your safety
Heater stand and location
- The heater is for outdoor use only. Always ensure that adequate fresh air ventilation is provided.
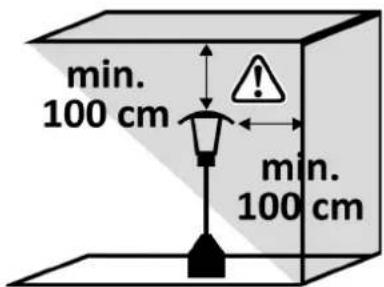
- Always maintain proper clearance to non protected combustible materials i.e. top 100 cm and sides 100 cm minimum.
- Heater must be placed on level firm ground.
- Never operate heater in an explosive atmosphere like in areas where flammable liquids or vapors are stored.
- To protect heater from strong wind, anchor the base securely to the ground with screws.
Gas requirements
- Use propane, butane or their mixtures gas only.
The pressure regulator and hose assembly to be used must conform to local standard codes.
The installation must conform to local codes, or in the absence of local codes, with the standard for the storage and handling of liquid petroleum gases.
A dented, rusted or damaged tank may be hazardous and should be checked by your tank supplier. Never use a tank with a damaged valve connection. - The tank must be arranged to provide for vapor withdrawal from the operating cylinder.
- Never connect an unregulated tank to the heater.
Leakage test
Gas connections on the heater are leak tested at the factory prior to shipment. A complete gas tightness check must be performed at the installation site due to possible mishandling in shipment or excessive pressure being applied to the heater.
Make a soap solution of one part liquid detergent and one part water. The soap solution can be applied with a spray bottle, brush or rag. Soap bubbles will appear in case of a leak.
The heater must be checked with a full cylinder.
Make sure the safety control valve is in the OFF position.
- Turn the gas supply ON.
In case of a leak, turn off the gas supply. Tighten any leaking fittings, then turn the gas supply on and re- check.
- Never leak test while smoking.
Warning!
Do not make any changes to the device in any way. Incorrect installation, improper use, changes or modifications to the device may damage or cause injury. Manufacturer and importer can not be held responsible.

3
For your safety
How to turn on the heater
- Turn on the valve on the gas supply cylinder completely.
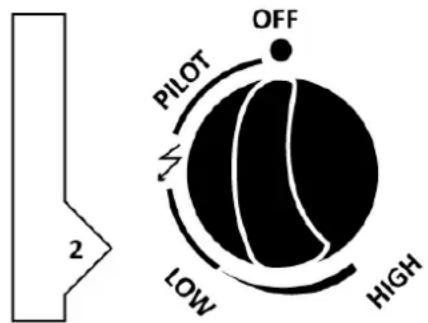
- Press and turn the variable control knob to PILOT position (counter-clockwise 90 degrees).
- Press down the variable control knob and hold for 60 seconds. While holding down the variable control knob, press the igniter button several times until the pilot flame lights. Release the variable control knob after the pilot flame lights.
- After the pilot flame lights, turn the variable control knob to maximum position and leave it there for 5 minutes or more before turning the knob to desired temperature position.
Control panel may differ slightly
Off: The heater is off
High: Maximum temperature position
Low: Minimum temperature position
Note:
If a new tank has just been connected, please allow at least one minute for the air I the gas pipeline to purge out through the hole.
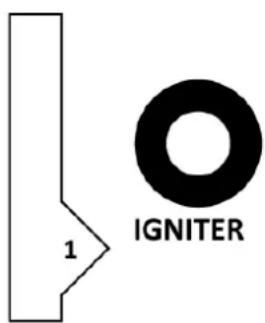
1). Igniter
2).Variable control knob
When lighting the pilot flame make sure the variable control knob is continuously pressed down while pressing the igniter button.
Variable control knob can be released after the pilot flame lights.
If the pilot flame does not light or it goes out, repeat step 3.
Note:
If the pilot light ignites but does not stay lit, turn heater control knob to OFF position, fully close propane gas valve, wait 5 minutes, then repeat steps 2-3. Now, using a lighter, ignite the pilot light through the ignition hole on the emitter screen. Once the pilot light is lit, depress control knob for 30 seconds.
How to turn the heater off
1). Turn the variable control knob to PILOT position.
2). Press and turn the variable control knob to OFF position.
Storage
1). Always close the gas valve of the gas cylinder after use or in case of a disturbance.
2). Remove the pressure regulator and the hose.
3). Check the tightness of the gas valve and if you suspect a damage, have it changed by your gas dealer.
4). Never store liquid gas cylinder in a sub-terrain, or at places without adequate air ventilation.

4
Cleaning and care
Wipe off powder coated surfaces with soft, moist rag. Do not clean heater with cleaners that are combustible or corrosive.
- Remove debris from the burner to keep it clean and safe for use.
Cover the burner unit with the optional protective cover when the heater is not in use.
During periods of extended inactivity or when transporting:
- Turn the control to "OFF" position.
- Disconnect LPG cylinder and move to a secure, well-ventilated location outdoors. DO NOT store in a location that will exceed 50 degrees C.
- Store heater upright in an area sheltered away from weather conditions (such as rain, sleet, hail, snow)
If desired, cover heater to protect exterior surfaces and to help prevent dust and debris collecting in air passages.
Warning!
- DO NOT touch or move heater for at least 45 minutes after use.
- Allow all burner elements to cool before touching.
Note:
In a salt-air environment (such as near an Ocean) corrosion occurs more quickly than normal.
- Frequently check for corroded areas and repair them promptly.
- Wait until heater is cooled down before covering
A. Construction and characteristics
- Transportable terrace/garden heater with tank housing.
- Casing in steel with powder-coating or in stainless steel.
Gas hose connections with metal clamp (screw caps for Germany). Heat emission from reflector.
B. Specifications
- Use propane, butane or their mixtures gas only.
Max. wattage: 10,000 watts
Min. wattage: 5000 watts - Consumption: →
C. Table of injector
The hose and regulator assembly must conform to local standard codes.
Regulator outlet pressure should meet the corresponding appliance category in B. Specification.
- The appliance requires approved hose in 1.4m length.
A regulator (complies with EN16129:2013 and the national regulation) of the correct pressure corresponding to the appliance category. Use 30mbar regulator for butane/propane under the category I3B/P(30). Use 30mbar regulator for butane under the category I3+(28-30/37). Use 37mbar regulator for propane under the category I3+(28-30/37). Use 50mbar regulator for butane/propane under the category I3B/P(50). It's recommended to use flexible hose that approved by EN16436: 2014.
See rating label on the next page

RATING LABEL
4
| Model | LH15B/LH15G/LH15S | MADE IN P.R.C. | ||||||||
| Type / Classification / Année de production / Production year | Classification A / 2021 | CE | 0063/21 | # | ||||||
| OutTrade code / number | LH15B/LH15G/LH15S | |||||||||
| Producent / Producteur | OutTrade BV, Meeleweg 76 7711 EP Nieuwleusen, The Netherlands | |||||||||
| Merk / Marque / Brand | Sunred | |||||||||
| Landcode / Code du Pays / Countrycode | DE-AT | BE-FR-GR-IE-ITLU-PT-ES-GB | DK-FI-NL-NO-SE-CH | |||||||
| (mbar) | G30 / G31 | G30 | G31 | G30 / G31 | ||||||
| Categorie / Catégorieie / Category | 50 mbar | 28-30 mbar | 37 mbar | 30 mbar | ||||||
| I3B/P(50) | I3+(28-30/37) | I3 B/P (30) | ||||||||
| Qn(Hs) / Qn(Hs) | 10 kW | 10 kW | 10 kW | |||||||
| X | ||||||||||
| Terrasverwarmer / Chauffage de terrasse / Patio heater | G30: 728 g/h; G31: 715 g/h | |||||||||
| PIN: 0063CU7710 | Report no.: 701710 | 将此次托盘装在每个特定区域内 | ||||||||
| Land van bestemming / Pays de destination / Country destination | UK | NL | BE | LU | DE | FR | ||||
| X | ||||||||||
| Warming! EN - Patto heater • Read instruction manual before using. For installation follow the instructions in the instruction manual. • This patto heater is only to be used outdoors. Do not use device at home or in a closed area / space. • Use of this device in closed holds and DANGEROUS and PROHIBITED. 1) For use outdoors or in well-ventilated areas. 2) A well-ventilated room must be at least 25% open (see Figure 2). 3) The anvil is the sum of the area of the wall. | • Always maintain adequate ventilation. • Keep combustible materials away from the heat. • To turn off the heater, turn the control knob to PILOT (PILOT). Press the button and then turn it on OFF (OFF). • Close the valve of the gas tank after use place the appliance in a well-ventilated room of which at least 25% the walls are open. • Replace the gas cylinder in a well-ventilated area away from ignition sources such as candles, cigarettes and other devices with flames. • Close the valve of the gas cylinder or the regulator after use. | |||||||||
| Waarschuing: NL - Terrasverwarmer • Lees de gebruksaanwijging door en begrip jezel • Voor montage volg de narwijingen in de instructiehandliebling • Deze terrasverwarmer allen geschicht voor gebruik buttermushuis. Gebruik het apparant aan het uis of een gestoden ruimte. • Het gebruik van dit apparant in afgelesten nuizen en GEVAAR/UK en VERBODEN. 1) Voor gebruik buttermushuis of In geord geventstelle ruimtes. 2) Ein god gewentelende ruimme moort minimal voor 25% open zijl (zie figur 2). 3) Het oppervliak is de som van de copervlokzte van de wonden. | • Zorg altd voor voldoende ventilatie. • Houd brandbare materielen ul de bourt van de verwormer. • Om de verwormer ut te reten, druit ou de bedlemingsnop near WAAVLM (PILOT). • Druk de knip in en drol henn naat UUT (OFF). • De toestel is geschikt voor gastype propaan / butaan. • Verwissel de gasfles (gascylnder) in een good gewentelde ruimte, verwijdert van ontsteksgbrennen roots koaren, sigaretten en andere apparaten met vlogenen. • Sluit de kran van de gasfles of die drutengelaar no gewruk. | |||||||||
| Warming: DE - Patto Heizung • Lesen Sie die Bedrieninganlageitung vor ingebrauchnahme durch. • Für die Installation folgen Sie den Anreizungen in der Bedrieninganlageitung. • Dieter Terrasstrahler nur im Freien verwenden. • Verwendung dieser Gerätes in geschlossenen Lederflumen und GÉFAHLICH und VERBOTEN. 1) Für den Einsatz im Freien oder in gut beliefenden Bereichen. 2) Ein gut beliefert der Raum muß zu mindestens 25% offen sein (siehe Abfalltagung 2). 3) Die Flüchtigkeit ist die Summe der Flüche der Wände. | • Halten Sie Immer ein ausrechtebeziehung. • Halten Sie frembare Materialien weg van der Hüte. • Zum Ausfalltagen der Heinzung, driven Sie den Druhinkap auf PILOT (PILOT). • Drucken Sie die Taste und schaffen Sie bin als (OFF). • Schreiben Sie das Ventil der Gasflüsse nach Gebraucht. • Ersenzen Sie die Gasflüsse (Gasflanche) im einem gut beliefalten Ortweg von Zindquellen wie Kerzen, Zigamenten und andere Geräten mit Plannen. • Schreiben Sie das Ventil der Gasflüsse oder des Reglers nach Gebraucht. | |||||||||
| Attention: FR - Chauflige de terrasse • Uses les instructions et comprehenes Iies! • Pour l'installation suivies les instructions dans le manuel d'instructions • Ce chafille-patio conduit uniquement pour une utilisation exterieuse. Nutilises pas Fappareel dans la maison ou dans un espace clos. • L'utilisation de cet apparéel dans les espaces clos est dangereux et interdits. 1) pour un usage extérieur ou dans des zones bien vertillées. 2) un spicieux bien ariet doit être d'ou moins 25% ouvert (voir Figure 2). 3) La surface correspond à la somme de la surface des murs. | • Pronet十几年oin sait d'une ventilation ajustable. • Temez les matériaux combustibles à l'ecart du radiateur. • Pour éindre l'airpèvre, coumzer le bouton de reglage à la voillée (PILOT). Appuyer sur la touche et énergiebezide. • Femandlez le robinet de la botcelle de gaz après utilisation. • Cet apparéel est aidépu pour le type de gaz propéré/butane. • Changée la botcelle de gaz dans un endroit bien ventilé, Joint de toute source d'allumage comme les bouygues, les cigarettes et les autres apparëels avec des flammes. • Femandlez le robinet de gaz sur la botcelle de gaz après utilisation. | |||||||||
| Fig. 2 | min. 100 cm m. 100 cm | |||||||||
| OutTrade BV Meeleweg 76 7711 EP Nieuwleussen The Netherlands Tel: +31 (O)525-482808 Fax: +31 (O)529-484910 E-mail: info@outtrade.eu www.outtrade.eu | ||||||||||

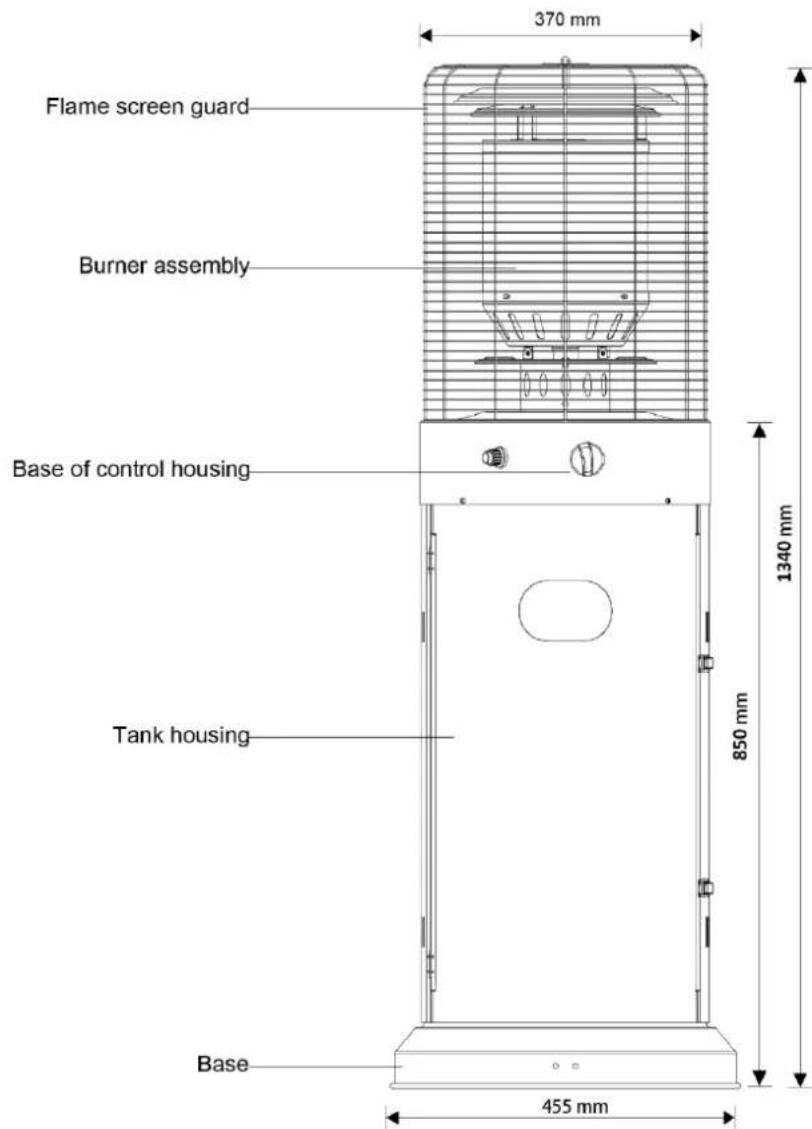
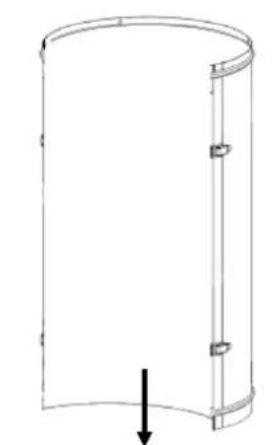
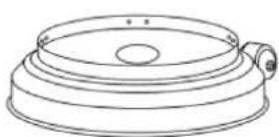
COMPONENT OVERVIEW
| A | name screen guard |
| B | turner assembly |
| C | linder Housing |
| D | ase |
| E | heel |

COMPONENT OVERVIEW
HARDWARE CONTENTS (shown actual size)
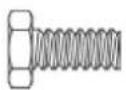
Bolt M8 X 16
Qty. 2

M8
Flange
nut
Qty. 2
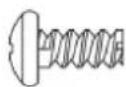
Screw M5 X 8
Qty.12

M5 Flange Nut
Qty.12
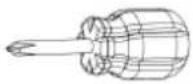
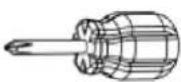
Philips
screwdriver
Qty. 1
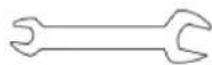
Wrench
Qty. 1

LEAK TEST
WARNING
Read the instructions before installation.
WARNING
The device may not be used in the event of a leak. When the unit is turned on, shut off the gas supply and check the unit before using
WARNING
The recommended frequency of tubing or flexible tubing testing (at least once a month and each time the cylinder is replaced) and the need for regular replacement, if indicated on the tubing or flexible tubing. If it shows signs of cracking, cracking or other damage, it must
WARNING
1) Read the instructions before installing;
2) Do not connect the gas cylinder directly to the unit without the regulator.
3) The hoses or the flexible hose must be replaced within the prescribed intervals.
WARNING
Do not connect the gas cylinder to the unit without a regulator.
WARNING
- When the ignition flame doesn't ignite or if it's extinguished, turn the control to "OFF". It needs to be in OFF position for at least 5 minutes before ignition can be attempted again. Ensure that the control is in OFF position before igniting the gas heater again.
- If a new gas bottle has been newly connected, let gas pipe air escape through ignition flame hole for at least one minute.
- When igniting the flame, ensure that the variable control is pressed the whole time while ignition button is pressed. The variable control can be released once ignition flame is burning.
- You can observe and control the ignition flame through the little round window with sliding cover situated at the bottom of the radiation shade. The ignition flame can also be lit with a match. Slide the sliding cover to the side in order to ignite the ignition flame through

ASSEMBLY
M8 Flange Nut
M8 x 16 mm Bolts x2
Wrench
2

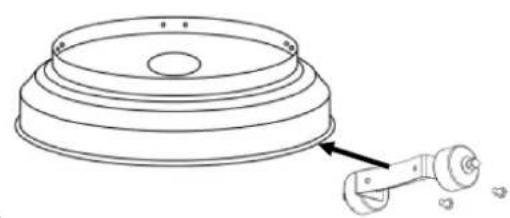
1

Screw M5 X 8

x6
Philips screwdriver
x1
M5 Flange Nut

x6
Screw M5 X 8

x6
Philips screwdriver
X1
M5 Flange Nut

x6

1 3

ASSEMBLY
4
WARNING
This product contains small batteries. Swallowed small batteries can cause CHOCKING HAZARD. Seek immediate medical attention if batteries are swallowed or inhaled. Keep children away from the small batteries
WARNING
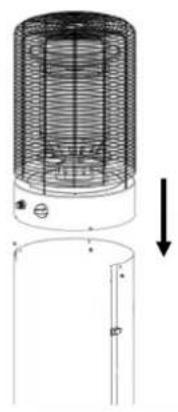
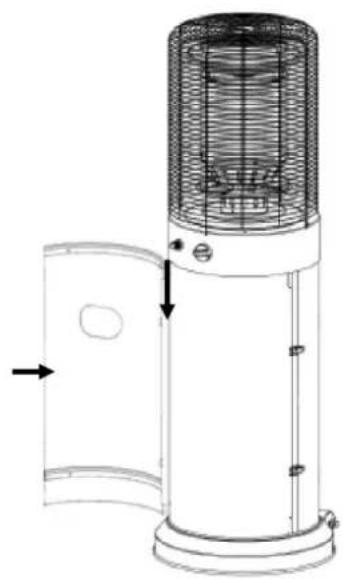
Ensure the hose does not contact any high temperature surfaces, or it may melt and leak causing a fire. After the cylinder is placed inside the heater, secure the cylinder with block belt tight.
5


7
Leak test
Warning!
Read the instructions before installation.
The device may not be used in the event of a leak. When the unit is turned on, shut off the gas supply and check the unit before using again.
The recommended frequency of tubing or flexible tubing testing at least once a month and each time the cylinder is replaced) and the need for regular replacement, if indicated on the tubing or flexible tubing. If it shows signs of cracking, cracking or other damage, it must be replaced with a new hose of equal length and quality
1). Read the instructions before installing;
2). Do not connect the gas cylinder directly to the unit without the regulator.
3). The hoses or the flexible hose must be replaced within the prescribed intervals.
4). Use only the gas type and bottle type specified in this manual.
Do not connect the gas cylinder to the unit without a regulator.
Use only the specified gas and bottle type.
Do not connect the gas cylinder to the unit without a regulator.
Use only the specified gas and bottle type.
When the ignition flame doesn't ignite or if it's extinguished, turn the control to "OFF". It needs to be in OFF position for at least 5 minutes before ignition can be attempted again. Ensure that the control is in OFF position before igniting the gas heater again.
If a new gas bottle has been newly connected, let gas pipe air escape through ignition flame hole for at least one minute.
When igniting the flame, ensure that the variable control is pressed the whole time while ignition button is pressed. The variable control can be released once ignition flame is burning.
You can observe and control the ignition flame through the little round window with sliding cover situated at the bottom of the radiation shade. The ignition flame can also be lit with a match. Slide the sliding cover to the side in order to ignite the ignition flame through the hole with a match.

Warning!
A leak test must be performed annually and each time a cylinder is hooked up or if a part of the gas system is replaced.
Never use an open flame to check for gas leaks. Be certain no sparks or open flames are in the area while you check for leaks. Sparks or open flames will result in a fire or explosion, damage to property, serious bodily injury, or death.
LEAK TESTING

1). This must be done before initial use, annually, and whenever any gas Components are replaced or serviced. Do not smoke while performing this test, and remove all sources of ignition. See Leak Testing Diagram for areas to check. Turn all burner controls to the off position. Turn gas supply valve on.
2). Brush a half-and-half solution of liquid soap and water onto all joints and connections of the regulator, hose, manifolds and valves.

3). If the leak cannot be stopped, immediately shut off the gas supply, disconnect it, and have the patio heater inspected by a certified gas installer or dealer. Do not use the patio heater until the leak has been corrected.

PROBLEMS CHECK LIST
| PROBLEM PROBABLE | CAUSE SOLUTION | |
| Pilot will not light Gas valve may | be OFF | Turn the gas valve ON |
| Tank fuel empty | Clean or replace opening | |
| Opening blocked | Refill LPG tank | |
| Air in supply system | Purge air from lines | |
| Loose connections | Check all fittings | |
| Pilot will not stay on Debris are | und pilot | Clean dirty area |
| Loose connections | Tighten connections | |
| Thermocouple bad | Replace thermocouple | |
| Gas leak in line | Check connections | |
| Lack of fuel pressure | Tank near empty. Refill LPG tank. | |
| Burner will not light Pressure is | low | Empty bottle. Fill |
| Opening blocked | Remove and clean | |
| Control not ON | Turn the switch | |
| Thermocouple bad | Replace the thermocouple | |
| Pilot light assembly bent | Position correctly | |
| Not in correct location | Position correctly and try again | |
| If the appliance is in case of any defaults or problems of assembly or use Please don’t try to modify it by yourself contact your supplier or distributor to solve it. | ||

9
Disposal of the appliance
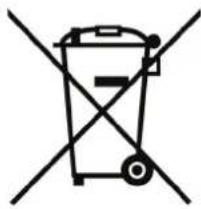
Appliances which are labelled with the adjacent symbol must not be disposed of in household waste. You must dispose of such old electrical and electronic equipment separately.
Through separate disposal you send old equipment for recycling or for other forms of re-use. You will thus help to avoid in some cases that damaging material gets into the environment.

For private households: Information on Disposal for Users of WEEE this symbol on the product(s) and / or accompanying documents means that used electrical and electronic equipment (WEEE) should not be mixed with general household waste. For proper treatment, recovery and recycling, please take this product(s) to designated collection points where it will be accepted free of charge.
Disposing of this product correctly will help save valuable resources and prevent any potential negative effects on human health and the environment, which could otherwise arise from inappropriate waste handling. Please contact your local authority for further details of your nearest designated collection point. Penalties may be applicable for incorrect disposal of this waste, in accordance with you national legislation.
For disposal in countries outside of the European Union This symbol is only valid in the European Union (EU). If you wish to discard this product please contact your local authorities or dealer and ask for the correct method of disposal.
Disposal of the packaging
The packaging consists of cardboard and correspondingly marked plastics that can be recycled.

Model LH15 (Classification A / 2021)
Propane or butane
Max. 10.000 Watt
134x46cm dia
App.13,5 kg
G30:728 g/h; G31:715 g/h
PIN:0063CU7710/Report number:701710
CE 0063/21
C

WARRANTY CARD

2 years limited warranty
Please complete this form and fax or e-mail to the numbers below. Please return with a receipt to your retailer if your products becomes faulty.
- Please add a scan/copy of the receipt.
Please add images/pictures and a description of the faulty or damaged product.
Your name:
Your address:
E-mail address:
Postcode:
Product name:
Model number:
Batch code:
located at rating label on the rear or side of the unit.)
Place of purchase:
Date of purchase: Year:
OutTrade B.V.
Meeleweg 76
7711 EP Nieuwleusen
The Netherlands
Tel:+31-529—482808
Fax:+31-529—484910
info@outtrade.eu
www.outtrade.eu
Please describe the fault:

| EU DECLARATION OF CONFORMITY | ||
| We, OutTrade B.V. | Meeleweg 767711 EP Nieuwleusen | |
| Declare under our sole responsibility that the product described below: | ||
| Brand and model name: Sunred LH15 | ||
| Equipment Classification Outdoor Patio Gas Heater | ||
| Is in comfority with the following Standards and Directives: | ||
| Standard With reference to GAR Regulation (EU) 2016/426EN 14543:2017CE 0063 | ||
| I hereby declare that the equipment named above has been designed to comply with the relevant sections of above referencedStandards and meets all essential requirements of the specified Directives. | ||
| Signed: R. Dijkman Signed for and on | behalf of: OutTradeB.V. | |
| Position: Managing Director | ||
| Location: Nieuwleusen, The Netherlands | Date of issue: | Nieuwleusen, 28/07/2021 |

OUT
TRADE
OutTrade BV
Off: The heater is off
High: Maximum temperature position
Low: Minimum temperature position
Kennisgeving
sans ventilation adequate.