
TVVR36300 - Digital Video Recorder ABUS - Free user manual and instructions
Find the device manual for free TVVR36300 ABUS in PDF.
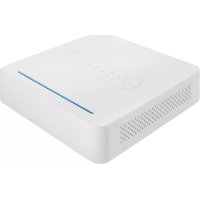
| Product type | 4-channel IP digital video recorder |
| Brand | Abus |
| Model | TVVR36300 |
| Power supply | 12 V DC (power supply included) |
| Number of channels | 4 |
| Recording resolution | Up to 5 MP (depending on cameras) |
| Recording methods | Continuous, motion detection |
| Storage | Internal hard drive (SATA) not included |
| Network connectivity | 1 Ethernet RJ45 port 10/100 Mbps |
| Remote access | Via DDNS, mobile app, CMS software |
| Supported protocols | IP, ONVIF (compatible) |
| Video output | HDMI, VGA |
| Alarm functions | Motion detection, alarm trigger |
| Included peripherals | Wireless USB mouse, 1 m network cable, hard drive cable, screws, CD |
| Security | Administrator password, camera activation password |
| Usage conditions | Avoid magnetic fields, liquids; ensure ventilation |
| Management software | ABUS CMS TVSW1001, ABUS IP Installer |
| Dimensions (approx.) | Approx. 230 x 200 x 45 mm |
| Weight (approx.) | Approx. 1.2 kg (without hard drive) |
Frequently Asked Questions - TVVR36300 ABUS
User questions about TVVR36300 ABUS
0 question about this device. Answer the ones you know or ask your own.
Ask a new question about this device
Download the instructions for your Digital Video Recorder in PDF format for free! Find your manual TVVR36300 - ABUS and take your electronic device back in hand. On this page are published all the documents necessary for the use of your device. TVVR36300 by ABUS.
USER MANUAL TVVR36300 ABUS
Security Tech Germany
ABUS


TVVR36300 / TVVR36700
QUICKGUIDE FÜR IP- REKORDER
Scope of delivery 24
Warnings 25
Connections 26
Tips for camera installation 28
Hardware installation 29
System activation 31
Software set-up 32
Instructions, software and app 38
Français
Security Tech Germany
Security Tech Germany


SYSTEMAKTIVIERUNG

Security Tech Germany
1

https://www.abus.com/product/TVVR36300
Soft ware:

Security Tech Germany
ABUS


TVVR36300 / TVVR36700
QUICK START GUIDE FOR IP RECODER
This quick-start guide describes the initial installation steps for your IP recorder. More detailed information can be found in the user guide.


Dear Customer,
Thank you for purchasing one of our products. This product complies with current domestic and European regulations.
Conformity has been proven, and all related certifications are available from the manufacturer on request: ABUS Security-Center GmbH & Co. KG, Linker Kreuthweg 5, 86444 Affing, GERMANY.
To ensure that this standard is maintained and that safe operation is guaranteed, you are obliged to observe the stipulations set out in this user guide. Read the entire user manual before putting the product into operation, and pay attention to all operating instructions and safety information.
All company names and product descriptions are trademarks of the corresponding owner. All rights reserved. If you have any questions, please contact your specialist dealer.
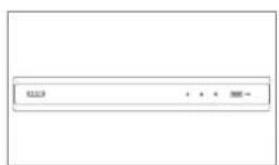
SCOPE OF DELIVERY
TVR36300:
- 4-channel recorder
- 12 V power supply unit
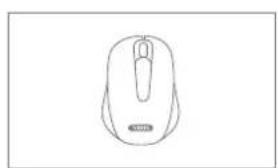
- Wireless USB mouse
- 1 m network cable
- Hard disk drive connection cable
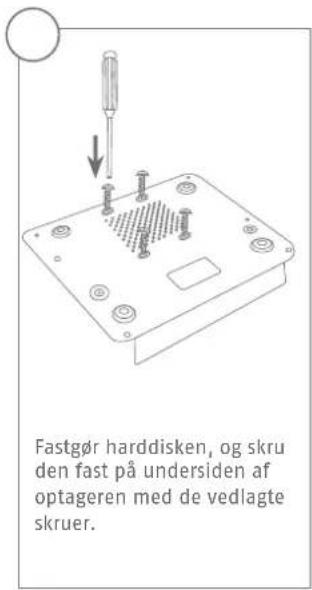
- Screws for hard disk drive
CD
Quick start guide
TVWR36700:
- 8-channel recorder
- 12 V power supply unit
- Wireless USB mouse
- 1 m network cable
- Hard disk drive connection cable
- Screws for hard disk drive
CD
Quick start guide


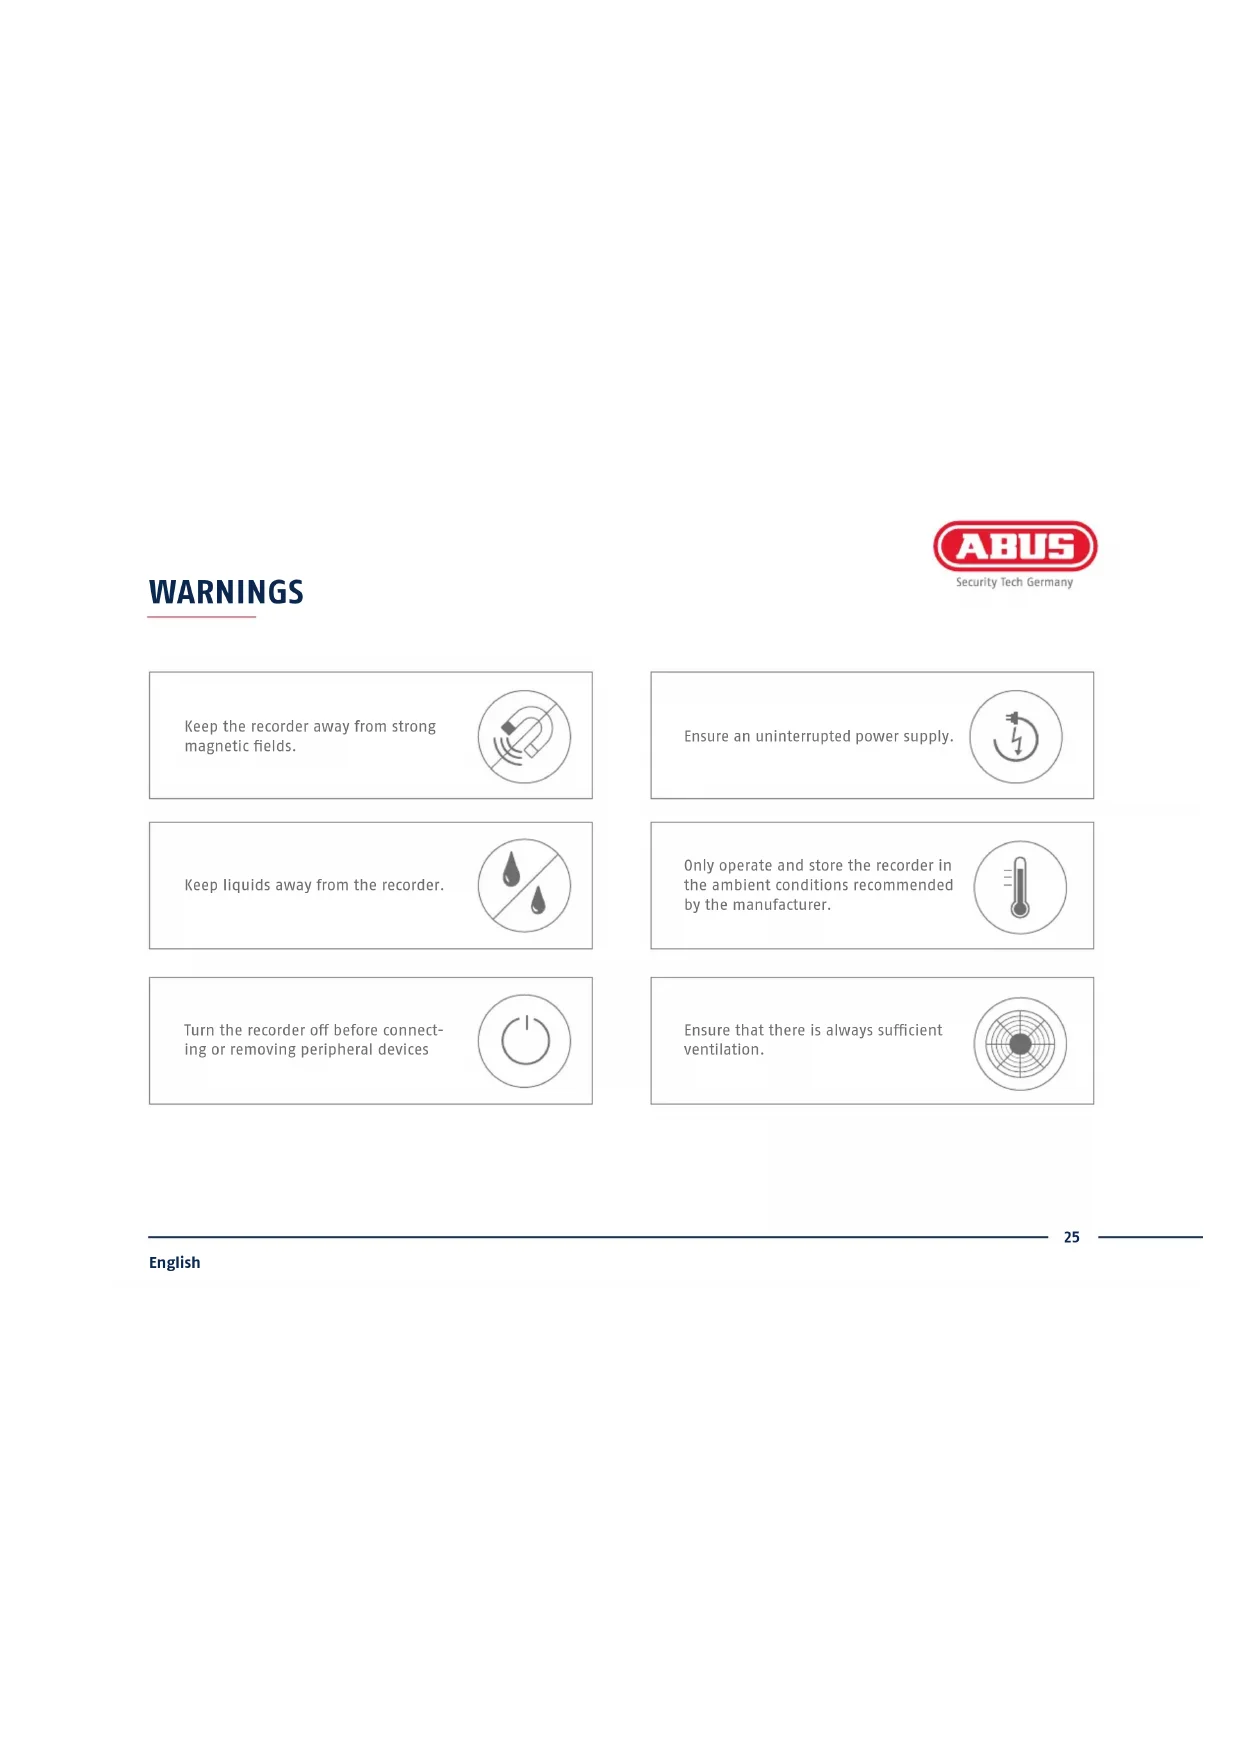
WARNING

Security Tech Germany
Keep the recorder away from strong magnetic fields.

Ensure an uninterrupted power supply.

Keep liquids away from the recorder.

Only operate and store the recorder in the ambient conditions recommended by the manufacturer.

Turn the recorder off before connecting or removing peripheral devices

Ensure that there is always sufficient ventilation.

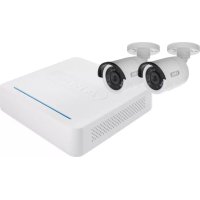
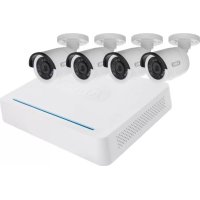
CONNECTIONS


TIPS FOR CAMERA INSTALLATION

Connect the recorder to the power supply. Connect the recorder to your home network via the network cable. Connect the power to the cameras and connect these to your home network too. You can then add the cameras in the software set-up.
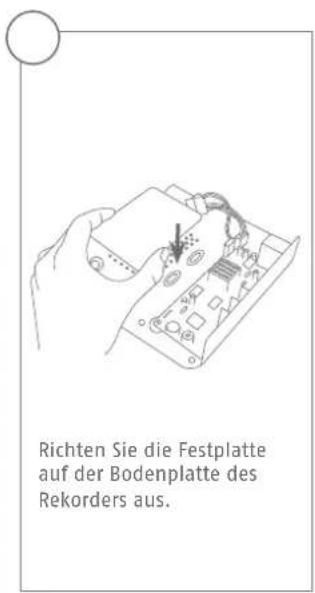
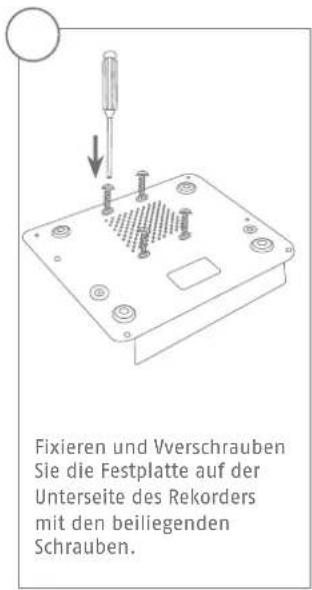
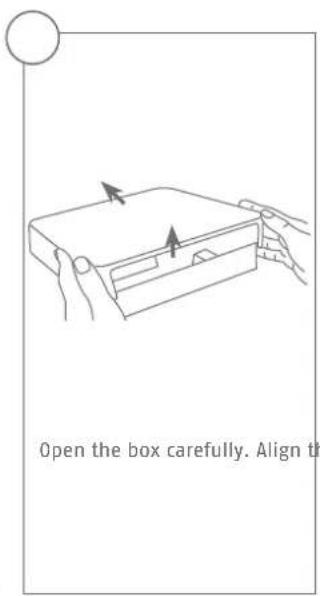
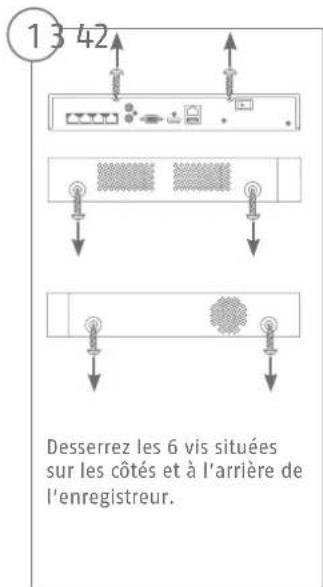
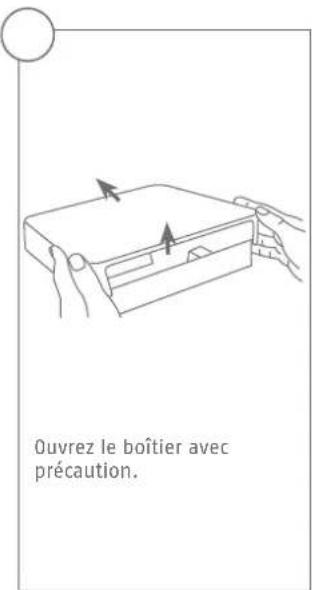
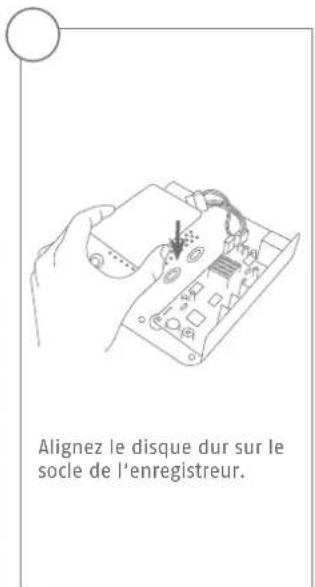
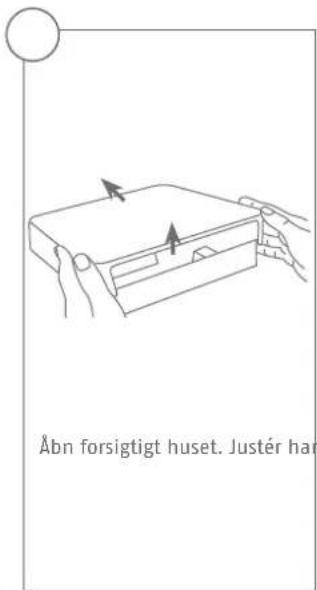
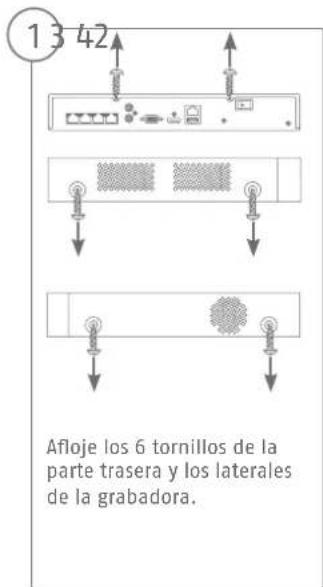
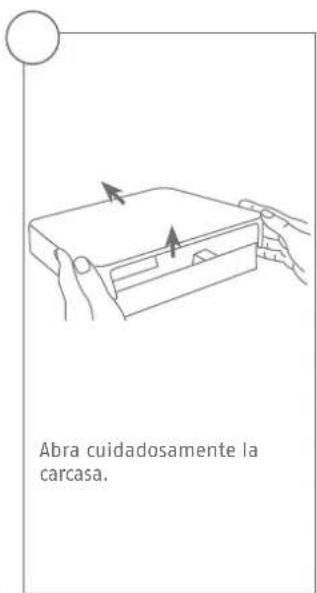
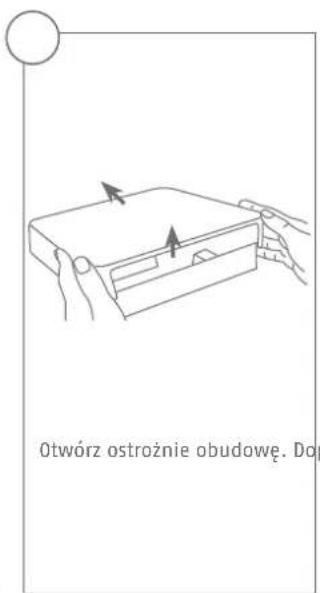
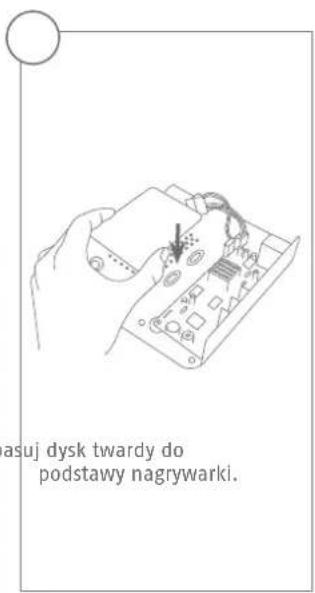
HARDWARE INSTALLATION

Security Tech Germany


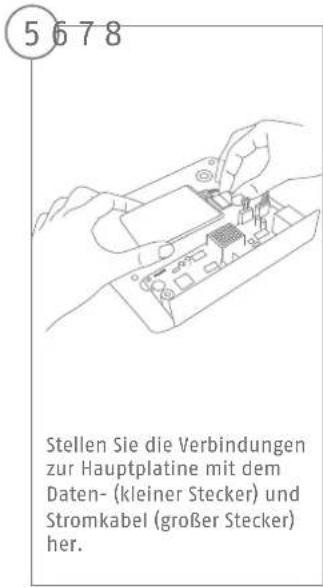
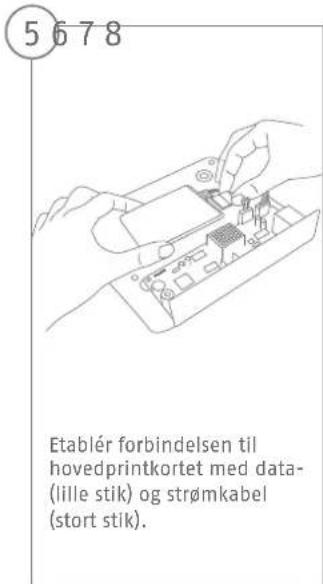
5678

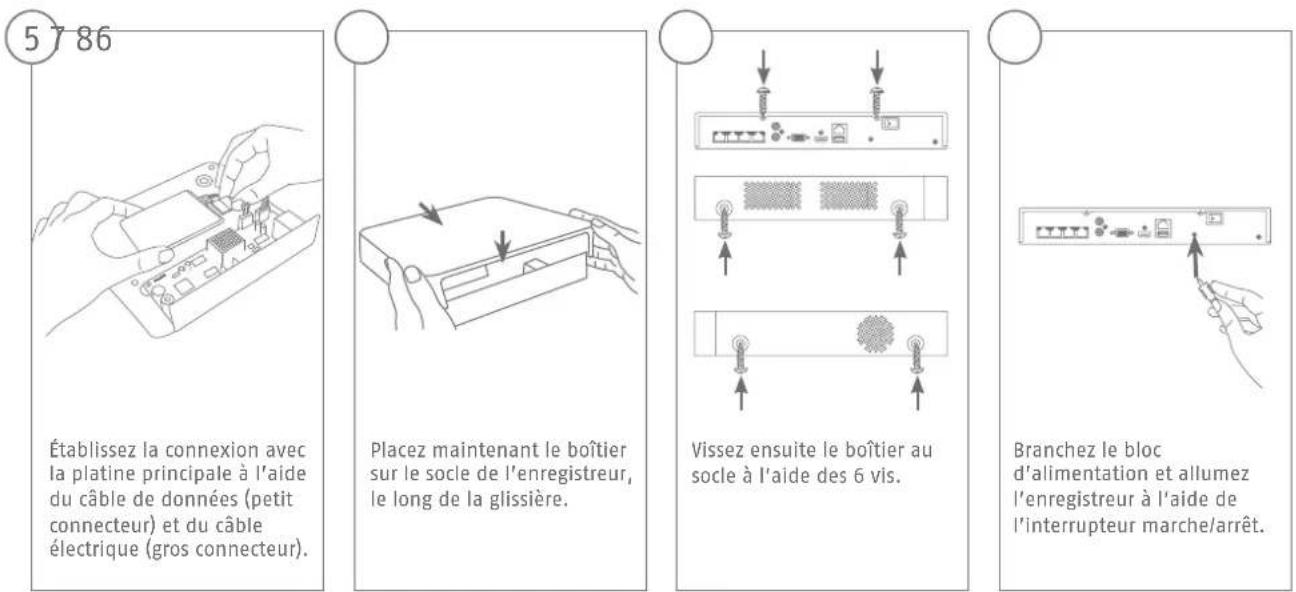
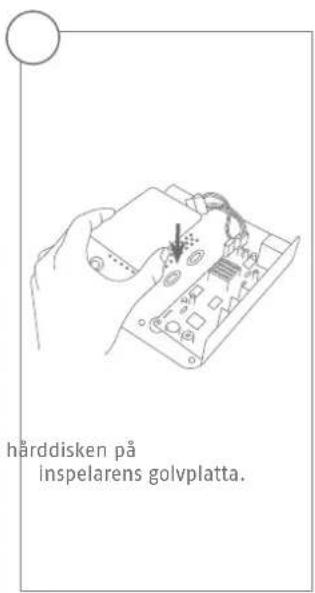
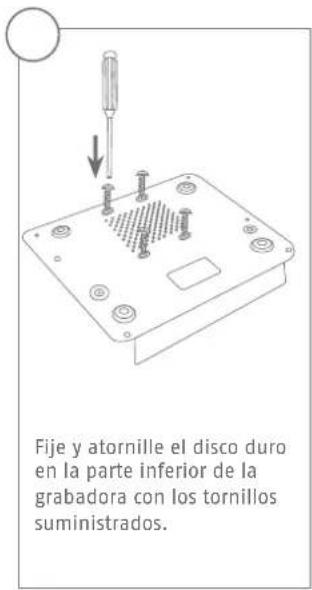
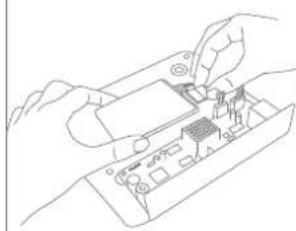
Connect the hard disk drive to the motherboard with the data cable (small connector) and the power cable (large connector).

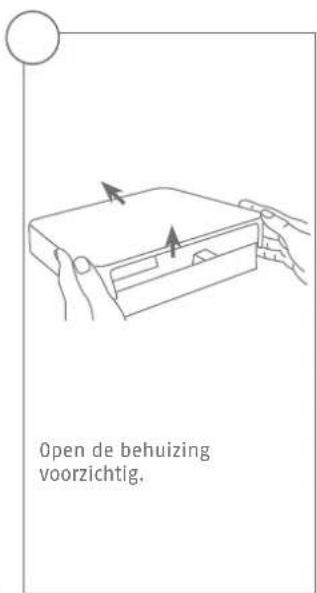
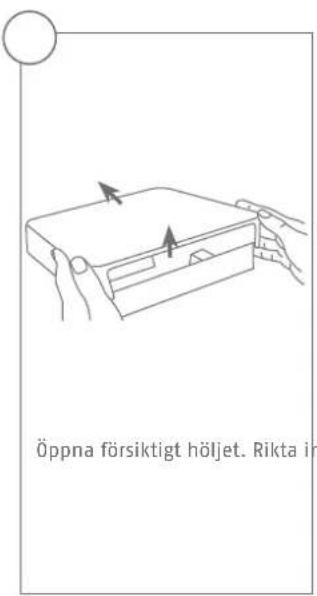
Now place the box along the guide rails over the base plate of the recorder.
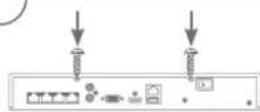

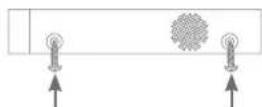
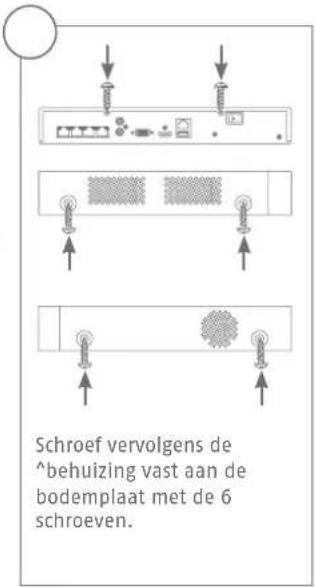
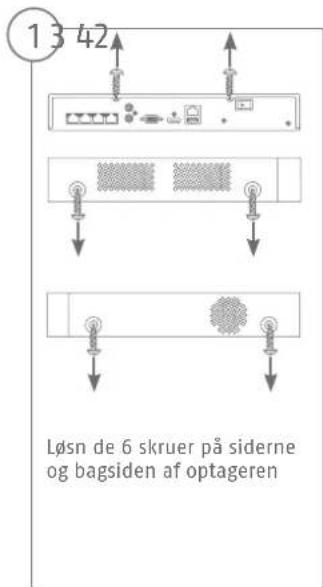
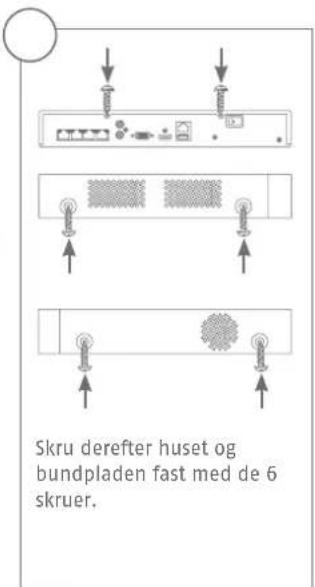
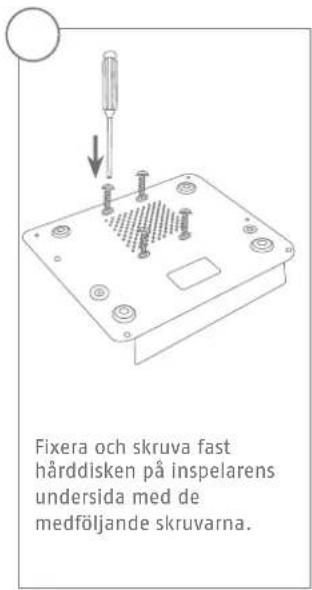
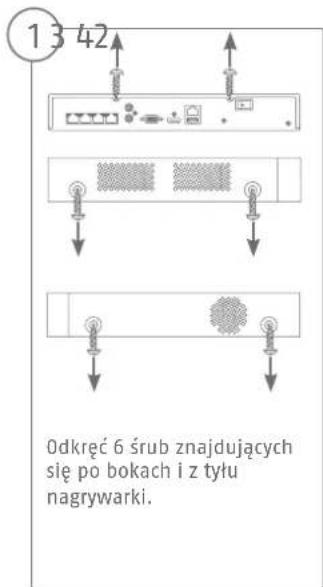
Then secure the box and the base plate with the six screws.
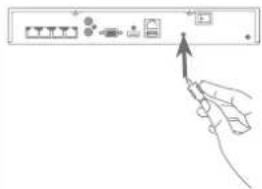
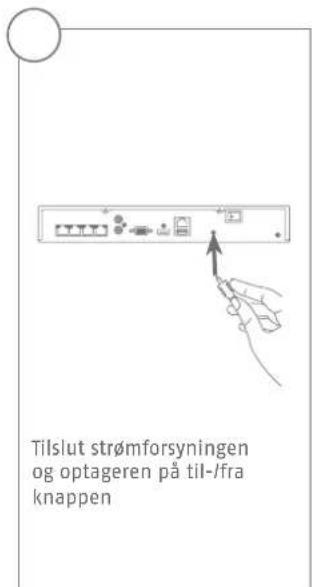
Connect the power supply unit and switch the recorder on using the on/off switch.
SYSTEM ACTIVATION

Security Tech Germany
1

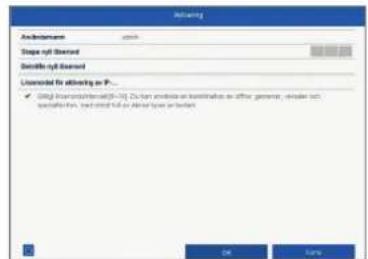
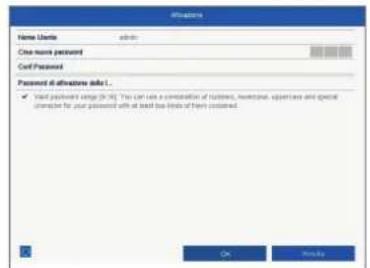
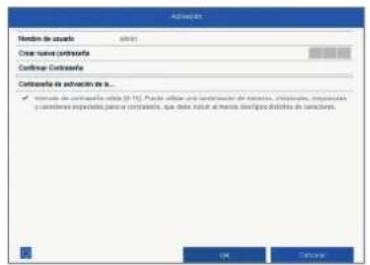
Enter a password for the admin user in the 'New password' field.
The password must meet the specified minimum requirements.
Recommendation: Use a password that is as complex as possible and is classified as "strong".
2
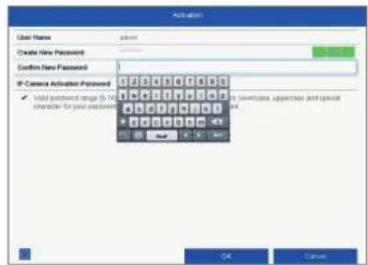
Re-enter the password to confirm it. Note down the new password and keep it in a secure location. The admin password can only be reset by ABUS technical support.
3
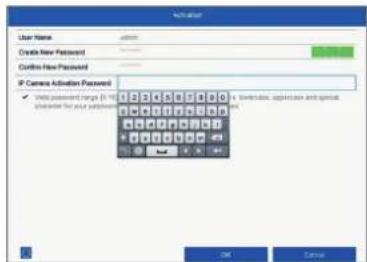
You should also enter the activation password for the cameras here. If you activate a camera via the recorder, the recorder uses this password for it. Then click on "OK". The device is now activated and all of its functions can be used.
Admin password:
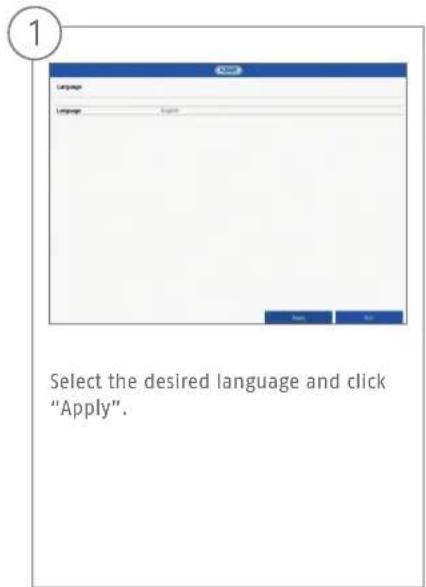
SOFTWARE SET-UP


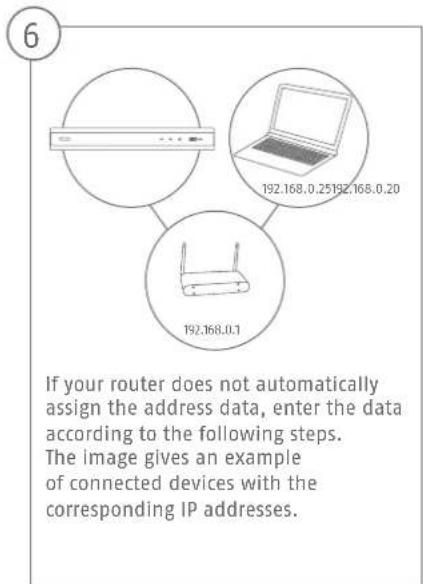
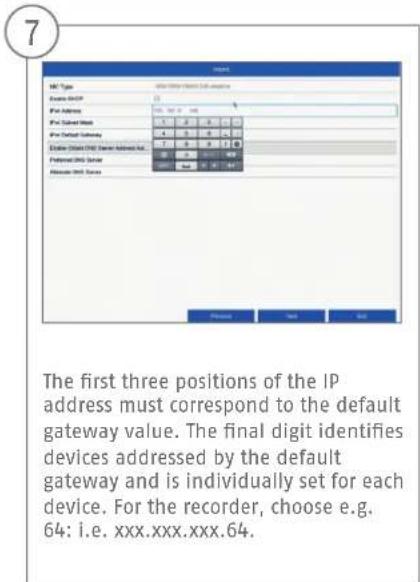

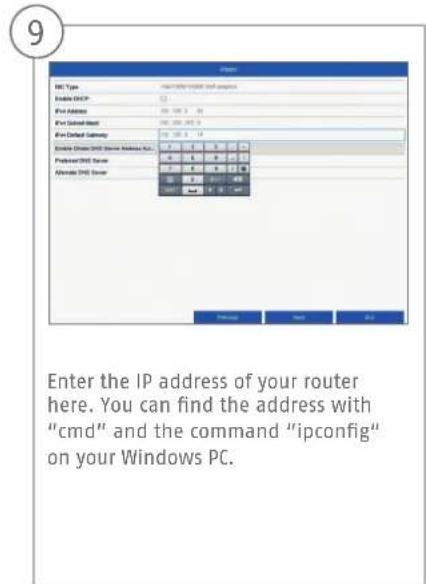

10

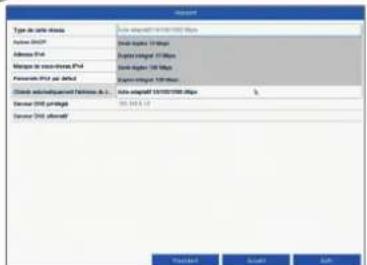
The DNS server "translates" an internet address into an IP address. Enter the value of the default gateway under "Preferred DNS server".
11

You can manage and, if necessary, edit your ports here. We recommend that the default values are maintained.
12

If you wish to set up remote access, tick the "Enable DDNS" checkbox. Then select your DDNS type using the entry field.
13
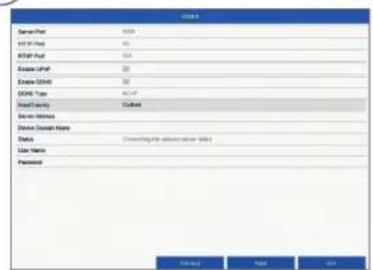
Next, save the server address and the Device Domain Name, user name and password. Go to the next screen with "Next".
14

Following installation, the hard disk drive must be initialised before use. Select the hard disk drive to be initialised.
15

Click on "Init" and confirm the successful initialisation by clicking on "OK". Go to the next screen with "Next".

16

Click on "Search" to look for available network cameras in the network.
17
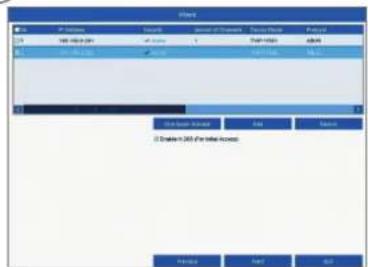
You will find all the compatible network cameras below. Tick the checkbox of the network cameras you wish to use and click on "Add". Go to the next screen with "Next".
18
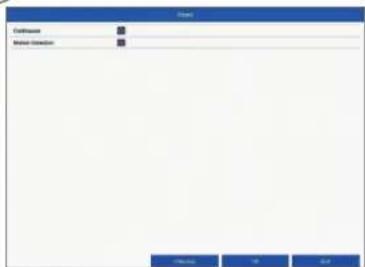
Select the recording type. You can choose between "Continuous" and "Motion detection". Close the set-up wizard by clicking "OK".
INSTRUCTIONS, SOFTWARE AND APP
Instructions:

instructions for operating the online and recorder interfaces can be found under the "Downloads"
tab at the following link:
https://www.abus.com/product/TVVR36300
Soft ware:

Q1 ABUS Central Monitor Station (CMS) allows you to monitor, control and manage the video
data from your ABUS recorder on your PC:
ABUS IP Installer to fi nd your recorder in the network, to check for and install fi rmware updates and to
download instruction manuals and quick start guides directly to your PC:
bu free, fast remote access to
your recorder:

Download on the
AppStore

GETITON
Google Play

Security Tech Germany
ABUS


TVVR36300 / TVVR36700
GUIDE DE DEMARRAGE RAPIDEPOUR ENREGISTREUR IP
Chere cliente, cher client,
Security Tech Germany
Security Tech Germany

ACTIVATION DU SYSTEME

Security Tech Germany
1

Security Tech Germany
4
MANUEL + LOGICIEL + APPLICATION
Manuels :

https://www.abus.com/product/TVVR36300
Logiciel:

Download on the App Store

GETITON GooglePlay

Security Tech Germany
ABUS


TVVR36300 / TVVR36700
QUICKGUIDE VOOR IP- REKORDER
Security Tech Germany
Security Tech Germany


ACTIVERING VAN HET SYSTEEM

Security Tech Germany
1

https://www.abus.com/product/TWR36300
Soft ware:

Security Tech Germany
ABUS


TVVR36300 / TVVR36700
KVIKGUIDE TIL IP-OPTAGER
Security Tech Germany
Security Tech Germany


SYSTEMAKTIVERING

Security Tech Germany
1

Download on the App Store

GETITON GooglePlay

Security Tech Germany
ABUS


TVVR36300 / TVVR36700
SNABBGUIDE FÖR IP-INSPELARE
Security Tech Germany
Security Tech Germany

Security Tech Germany
1
I faltet "Nytto losenord" anger du ett losenord for admin-anvandaren. Losenordet maste folja de minimikrav som stalls. Rekommendation: Skapa ettsa komplex tosenord du kan sa att det far markeringen "Starkt".
2

Anglosenordetigenforattbekrta det.Notera dessutomosenordet i snabbguiden och forvara detp en saker plats. Att asterstalla admin-losenordet gargendastattgora via ABUS teknska support.
(3)

Security Tech Germany
ABUS


TVVR36300 / TVVR36700
GUIDA RAPIDA PER
REGISTRATORE IP
Security Tech Germany
Security Tech Germany
1
https://www.abus.com/product/TVVR36300
Soft ware:

Download on the App Store

GET IT ON Google Play

Security Tech Germany
ABUS


TVVR36300 / TVVR36700
GUIA RAPIDA DE LA
GRABADORA IP
Security Tech Germany
Security Tech Germany

5678
Security Tech Germany
1
https://www.abus.com/product/TVVR36300
Soft ware:

Security Tech Germany
ABUS


TVVR36300 / TVVR36700
KROTKI PRZEWODNIK DONAGRYWARKI IP
Security Tech Germany
Security Tech Germany


5678
Security Tech Germany
1

https://www.abus.com/product/TVVR36300
Oprogramowanie:

- Français
- SYSTEMAKTIVIERUNG
- QUICK START GUIDE FOR IP RECODER
- SCOPE OF DELIVERY
- TVR36300:
- TVWR36700:
- WARNING
- CONNECTIONS
- TIPS FOR CAMERA INSTALLATION
- HARDWARE INSTALLATION
- SYSTEM ACTIVATION
- SOFTWARE SET-UP
- 10
- 11
- 12
- 13
- 14
- 15
- 16
- 17
- 18
- INSTRUCTIONS, SOFTWARE AND APP
- GUIDE DE DEMARRAGE RAPIDEPOUR ENREGISTREUR IP
- ACTIVATION DU SYSTEME
- 4
- MANUEL + LOGICIEL + APPLICATION
- QUICKGUIDE VOOR IP- REKORDER
- ACTIVERING VAN HET SYSTEEM
- KVIKGUIDE TIL IP-OPTAGER
- SYSTEMAKTIVERING
- SNABBGUIDE FÖR IP-INSPELARE
- GUIDA RAPIDA PER
- REGISTRATORE IP
- KROTKI PRZEWODNIK DONAGRYWARKI IP
Brand : ABUS
Model : TVVR36300
Category : Digital Video Recorder